Loading ...
Loading ...
Loading ...
- 11 -
05/2020
Copyright © 2020, Fast ČR, a.s.
4. An “M” will start flashing on the display A6, which means that the month (1 – 12)
needs to be set.
5. Repeatedly press the M A4 button until the required month appears on the display
A6.
6. Once the month is set, press the START/STOP A5 button to save the month in the
memory of the blood pressure monitor.
7. A“D” will start flashing on the display A6, which means that the day needs to be set.
8. Repeatedly press the M A4 button until the required day (1 - 30/31) appears on the
display.
9. Once the day is set, press the START/STOP A5 button to save the day in the
memory of the blood pressure monitor.
10. The numerical hour value will start flashing on the display A6.
11. Repeatedly press the M A4 button until the required hour (1 – 24) appears on the
display.
12. Once the hour is set, press the START/STOP A5 button to save the hour in the
memory of the blood pressure monitor.
13. The numerical minutes value will start flashing on the display A6.
14. Repeatedly press the M A4 button until the required minutes value (1 – 60) appears
on the display.
15. Once the minutes are set, press the START/STOP A5 button to save the minutes in
the memory of the blood pressure monitor.
16. The display will show “donE” (done) and the date and time are now correctly set.
The display A6 will turn off.
BEFORE STARTING MEASUREMENT
Basic instructions for achieving the most accurate measuring results
■ Always take measurements at the same time of day, ideally in the morning, at noon
and in the evening under the same conditions or according to the recommendations
of your doctor.
■ Do not perform measurement sooner than 30–45minutes after consuming coffee,
tea or smoking acigarette.
■ Wait at least 20 minutes after taking ahot shower or bath.
■ During measurement, sit calmly, relaxed and don’t talk. Do not move the arm to
which the cuff is attached.
■ Do not eat or drink approximately 1 hour prior to measurement.
■ Do not perform measurements in an excessively cold environment.
■ Do not perform measurements when you need to go to the toilet.
■ Wait approximately 4–5minutes before measuring again.
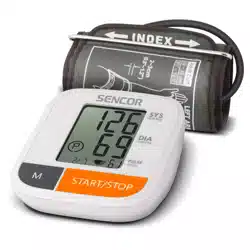
Attaching and securing the cuff
■ Remove all tight clothing from the arm before attaching the cuff.
■ Attach the cuff 2- 3cm above the elbow cavity – see figure C. Ensure that the air hose
is located above the brachial artery, as illustrated on the cuff label.
■ The cuff must not be too loose or too tight. Verify the correct tightness by easily
inserting one finger between the cuff and the arm.
■ Place the forearm on an even table surface
Note:
Blood pressure can be measured both on the left and the right arm.
However, the measurement results from the left and right arm
may differ, and for this reason it is necessary to perform repeated
measurements always on the same arm.
MEASURING BLOOD PRESSURE
■ While the display A6 is turned off, press the START/STOP A5 button and the display
A6 will be lit and all the icons will appear temporarily.
■ The device will automatically pressurise the cuff. While the cuff is being pressurised
the pulse rate is being detected. It is indicated by the flashing symbol
on the
LCD display.
■ Then the pressure in the cuff is continuously released and the values of the systolic
(SYS) and diastolic (DIA) pressure and pulse frequency are automatically determined.
■ To start the device, press the START/STOP A5 button. If you do not turn off the
device, it will turn itself off automatically within 1minute of the last measurement.
Remove the cuff from your arm after completing the measurement.
Note:
If the symbol appears on the display, the device has detected
cardiac arrhythmia.
VIEWING VALUES STORED IN MEMORY
■ While the device is turned off, press the M A4 button. The average values of the last
three measurements will be shown on the display A6. In the event that less than
three measurements were performed, the results of the last measurement will be
shown.
■ Press the M A4 button again and the last measured values will be shown. The date
and time will intermittently be shown on the display.
DELETING VALUES FROM MEMORY
■ If you did not get correct measurement results or if the measurement was
unsuccessful or conditions were poor, then you can delete all the measurement
results.
■ Hold down the M A4 button for approximately 3 seconds until “DEL ALL” (delete all)
appears on the display A6.
■ Hold down the START/STOP A5 button to confirm the deletion of the values from
memory. The message “dEL donE” (deletion done) will appear on the display A6.
Then the display A6 will turn off.
■ When button M A4 is pressed, no values will be shown on the display A6.
Note:
If you need to exit from the delete menu, press the START/STOP A5
button.
CLEANING AND MAINTENANCE
■ Keep the device clean. Wipe off dust using alightly damp cloth.
■ Do not wash device or the cuff under running water or submerge it in water.
■ Do not use abrasive cleaning products or petrol for cleaning. Otherwise the device
may be damaged.
Storage
■ If you will not be using the device for an extended period of time, remove the
batteries.
■ Protect the device against impacts and falls.
■ Store the device in aclean, dry place that is out of reach of children. Do not expose
the device to direct sunlight or extreme temperature changes.
CALIBRATION
Recommendation: To ensure accurate measurement results, we recommend the device
is calibrated after two years of operation. All costs associated with the calibration are
borne by the customer.
ELECTROMAGNETIC INTERFERENCE
■ To prevent measurement inaccuracies caused by electromagnetic interference, do
not use this device in the vicinity of mobile telephones or microwave ovens.
COMPLIANCE WITH NORMS
This device complies with European norms:
- Risk management: EN ISO 14971:2012 / ISO 14971:2007 Medical devices –
Application of risk management to medical devices.
- Designation: EN ISO 15223-1:2016 / ISO 15223-1:2016 Medical devices - Symbols
to be used with medical device labels, labelling and information to be supplied –
Part 1: General requirements.
- Instructions for use: EN 1041:2008 Information supplied by the manufacturer of
medical devices
- General safety requirements:
EN 60601-1:2006+A1:2003 / IEC 60601-1:2005+A1:2012 Medical electrical
equipment – Part 1: General basic safety and necessary performance
requirements
EN 60601-1-11:2015 / IEC 60601-1-11:2015 Medical electrical equipment – Part
1-11: General basic safety and necessary performance requirements – Group
norm: Requirements for medical electrical equipment and medical electrical
systems used in the home healthcare environment.
- Electromagnetic compatibility EN 60601-1-2:2015 / IEC 60601-1-2:2015 Medical
electrical equipment- Part 1-2: General basic safety and necessary performance
requirements – Group norm: Electromagnetic interference – Requirements and
tests
- Performance requirements:
EN ISO 81060-1:2012 Non-invasive blood pressure monitors - Part 1: Requirements
and test methods for non-automated measurement type
EN 1060-3:1997 + A2:2009 Non-invasive blood pressure monitors - Part 3: Specific
requirements for electromechanical systems for the measurement of blood
pressure
IEC 80601-2-30:2009 + A1:2013 Medical electrical devices- Part 2-30: Particular
requirements for the basic safety and essential performance of automated type
non-invasive sphygmomanometers
- Clinical examination:
EN 1060-4:2004 Non-invasive blood pressure monitors - Part 4: Testing procedures
for determining the overall accuracy of automatic non-invasive blood pressure
monitor systems.
ISO 81060-2:2013 Non-invasive blood pressure monitors - Part 2: Clinical
investigation of automated measurement type
- Applications
EN 60601-1-6:2010 + A1:2015 / IEC 60601-1-6:2010 + A1:2013 Medical electrical
equipment- Part 1-6: Particular basic safety and necessary performance
requirements - Group norm: Applications
IEC 62366-1:2015 Medical devices – Part 1: Application of usability engineering to
medical devices.
- Software life-cycle processes: EN 62304:2006 / AC :2008 / IEC 62304:2006 +
A1:2015 Medical device software - Software life-cycle processes
- Biological compatibility
ISO 10993-1:2009 Biological evaluation of medical devices - Part 1: Evaluation
and testing within arisk management process
ISO 10993-5:2009 Biological evaluation of medical devices - Part 5: Tests for in
vitro cytotoxicity
ISO 10993-10:2010 Biological evaluation of medical devices - Part 10: Tests for
irritation and skin sensitization
Loading ...
Loading ...