Loading ...
Loading ...
INTRODUCTION
This Wet/Dry Vac is intended for either commercial or
household use.
IMPORTANT NOTE
Please Read Carefully
Static Shocks Are Common-In dry areas or when the
relative humidity of the air is low. To reduce the frequency of
static shocks in your home the best remedy is to add moisture
to the air with a console humidifier.
OWNER'S MANUAL CONTENTS
Item Page
Warranty Information ................................................................... 2
Safety Instructions ....................................................................... 2
Introduction .................................................................................. 3
Unpacking and Checking Carton Contents ................................ 3
Assembly ..................................................................................... 3
Operation ..................................................................................... 5
Maintenance ................................................................................ 6
Repair Parts ................................................................................. 7
Unpacking and Checking
Carton Contents
Remove entire contents of carton. Check each item against the
Carton Contents List. Notify your Sears Store immediately if
any parts are damaged or missing.
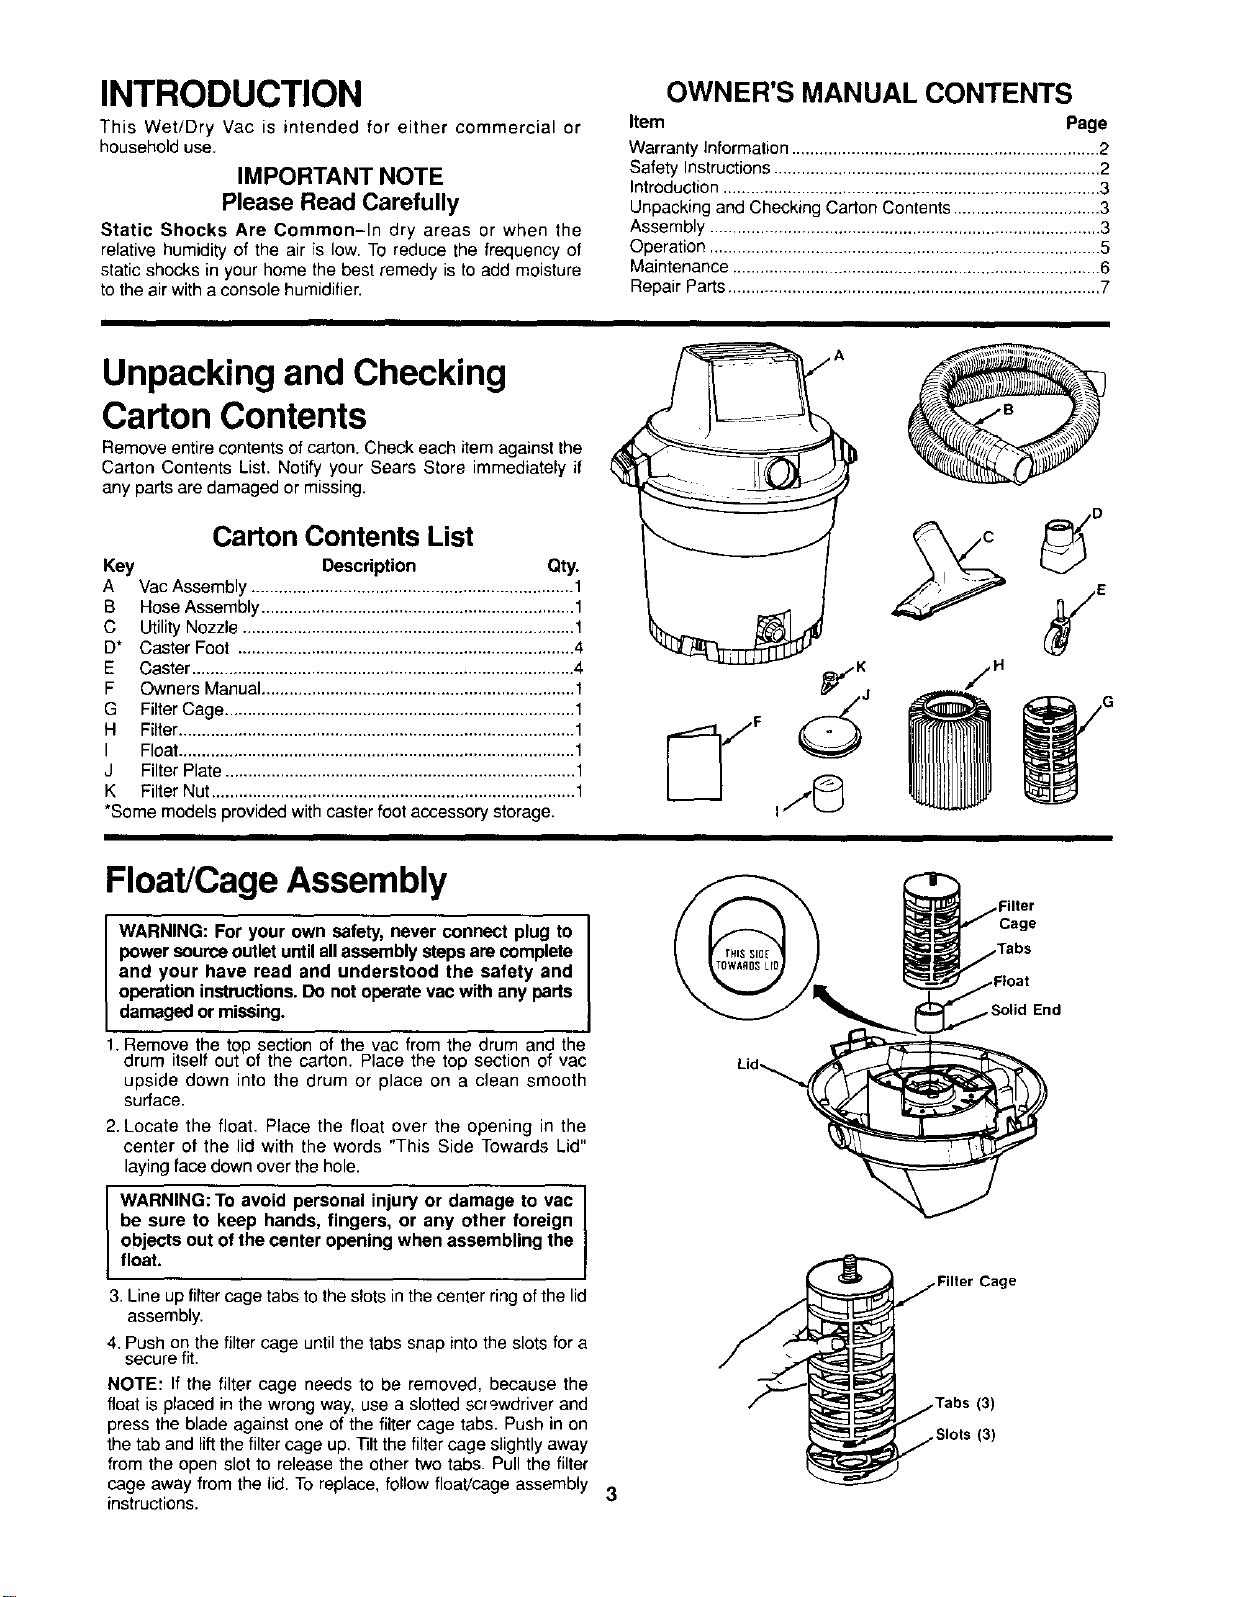
Carton Contents List
Key Description Qty.
A Vac Assembly ...................................................................... 1
B Hose Assembly .................................................................... 1
C Utility Nozzle ........................................................................ 1
D* Caster Foot ......................................................................... 4
E Caster ................................................................................... 4
F Owners Manual.................................................................... 1
G FilterCage ............................................................................ 1
H Filter...................................................................................... 1
I Float...................................................................................... 1
J FilterPlate ............................................................................ 1
K FilterNut ............................................................................... 1
*Some models providedwith caster foot accessory storage.
Float/CageAssembly
WARNING: For your own safety, never connect plug to
power source outlet until all assembly steps are complete
and your have read and understood the safety and
operation instructions. Do not operate vac with any parts
damaged or missing.
1. Remove the top section of the vac from the drum and the
drum itself out of the carton. Place the top section of vac
upside down into the drum or place on a clean smooth
surface.
2. Locate the float. Place the float over the opening in the
center of the lid with the words "This Side Towards Lid"
laying face down over the hole.
WARNING: To avoid personal injury or damage to vac
be sure to keep hands, fingers, or any other foreign
objects out of the center opening when assembling the
float.
3. Line up filter cage tabsto the slots in the center ring of the lid
assembly.
4. Push on the filter cage until the tabs snap intothe slots for a
secure fit.
NOTE: If the filter cage needs to be removed, because the
float is placed in the wrong way, use a slotted scrgwdriver and
press the blade against one of the filter cage tabs. Push in on
the tab and lift the filter cage up. ]31tthe filter cage slightly away
from the open slot to release the other two tabs. Pull the filter
cage away from the lid. To replace, follow float/cage assembly 3
instructions.
Filter
Cage
Tabs
Cage
Loading ...
Loading ...
Loading ...