
Alarm warning of the system
Normal: The data of all 4 tyres scrolls
circularly.
Air leak
Fast leak
Slow leak
High pressure
High temperature
Low battery
Sensor failure
Sensor battery replacement
Sensor programming
Troubleshooting
1. After sensor installation, the tyres are
leaking air?
1)The tyre valves are not the standard
type, please replace the standard valve.
2. After installation, there is no tyre
information on the display?
1) Check the cigarette plug socket.
2) Reprogram all sensors.
3) Check ACC is ON.
3.Sensor is lost.
1) Please buy a new sensor from your
local distributor.
4.Sensor battery is low.
1) Please replace the battery.
5.Tyre locations are changed.
1) If the tyre locations are changed, please
reprogram the sensors.
Note:
1.TPMS(tyre pressure monitoring system)
is designed to help the driver to monitor
tyre irregularities. It is the driver's
responsibility to maintain tyres regularly.
2. Driver should react promptly to alerts from
this unit.
3.Steelmate and its distributor do not
guarantee or assume liability for the loss
of sensors.
4.The sensors in this unit have been
individually pre-set for each tyre in the
factory.
5.Each time a tyre position is changed,the
sensors must be changed to the corre-
sponding tyres.
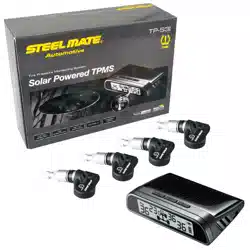
Technical specifications
Sensor:
Operating frequency: 433.92MHz
Battery voltage: 3V
Operating temperature: -20
o
C~+60
o
C
Pressure range: 0~3.5 Bar/0~50 Psi
High pressure value: 3.3 Bar/47 Psi
Low pressure value: 1.7 Bar/25 Psi
Display:
Working frequency: 433.92MHz
Operating voltage:
12 3V
Working temperature: -40
o
C~+85
o
C
Air pressure unit:
1 Bar = 14.5 Psi = 100K Pa = 1.02 Kgf/cm
2
Warranty information
Dear custormer:
Thank you for choosing a Steelmate
product. This product comes with our
standard 12 month warranty.
Our 12 month warranty only covers
parts.
Steelmate are not liable and will not
pay any labour costs incurred during
the removal and or re-installation of
warranted equipment or parts.
All warranty claims should be
processed as per the instructions on
our website under the warranty
section and proof of purchase must
be provided.
Our warranty department is open from
09:00-17:30 Mon-Fri and can be
contacted by telephone on 01582475677
or by email ([email protected].
uk) should you require and further
assistance.
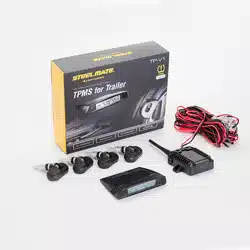
Manual
Display installation
Remove the cigarette lighter or
cover.
ACC ON.
Plug in the display.
Display turns on.
Press "SET" button to select
the correct tyre 01 - 04.
Press "SET" button once, to
go to the next sensor location.
The display will show the tyre
data, the tyre indicator will stop
flashing.
Press and hold "SET" button for
10 seconds, the display beeps
once and enters program mode.
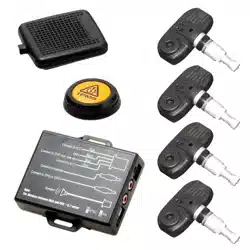
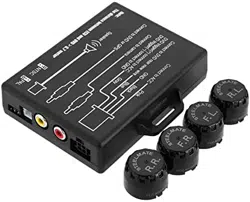
Sensor cover
Battery
Sensor
Brief look at display & sensor
Washer
Nut
Tyre indicator
LED indicator
Tyre pressure
Set button
Sensor installation
Unscrew the valve cap .
Screw on the nut.
Screw on the sensor.
Function test after installation
KM H
Display will refresh tyre data
automatically when the speed is
over 20 km/h (approx 14.5 MPH).
Tighten up the nut to the sensor
using the nut spanner.
Put in the washer.
The data from all 4 tyres
scrolls circularly meaning the
installation is successful.
Check for air leak using soapy
water.
L F
L F
L F
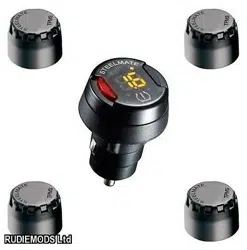
Display
Sensor
Washers
Nut
Sensor tool
1.Spanner
Packing list
(Please keep it in car for use when necessary)
(1 spare)
2.Valve core tool
1
2
(1 spare)
L F
Unscrew the nut. Unscrew the sensor
Unscrew the sensor cover
using the sensor tool.
Replace the battery
Remove the washer.
Repeat these steps in reverse
order to refit sensor.
L F
Screw the new sensor to the
corresponding tyre valve and
secure it with the nut.
R F
6
Press and hold "SET" button for 10
seconds, the display beeps twice
saves and exits program mode.
54
LF RF
LR RR
Warranty Card
User's information:
registration
Thank you for choosing this product,
Please fill the form below and retain it.
Tyre Pressure Monitoring System