Loading ...
Loading ...
Loading ...
TURNING ON THE POWER
5 En
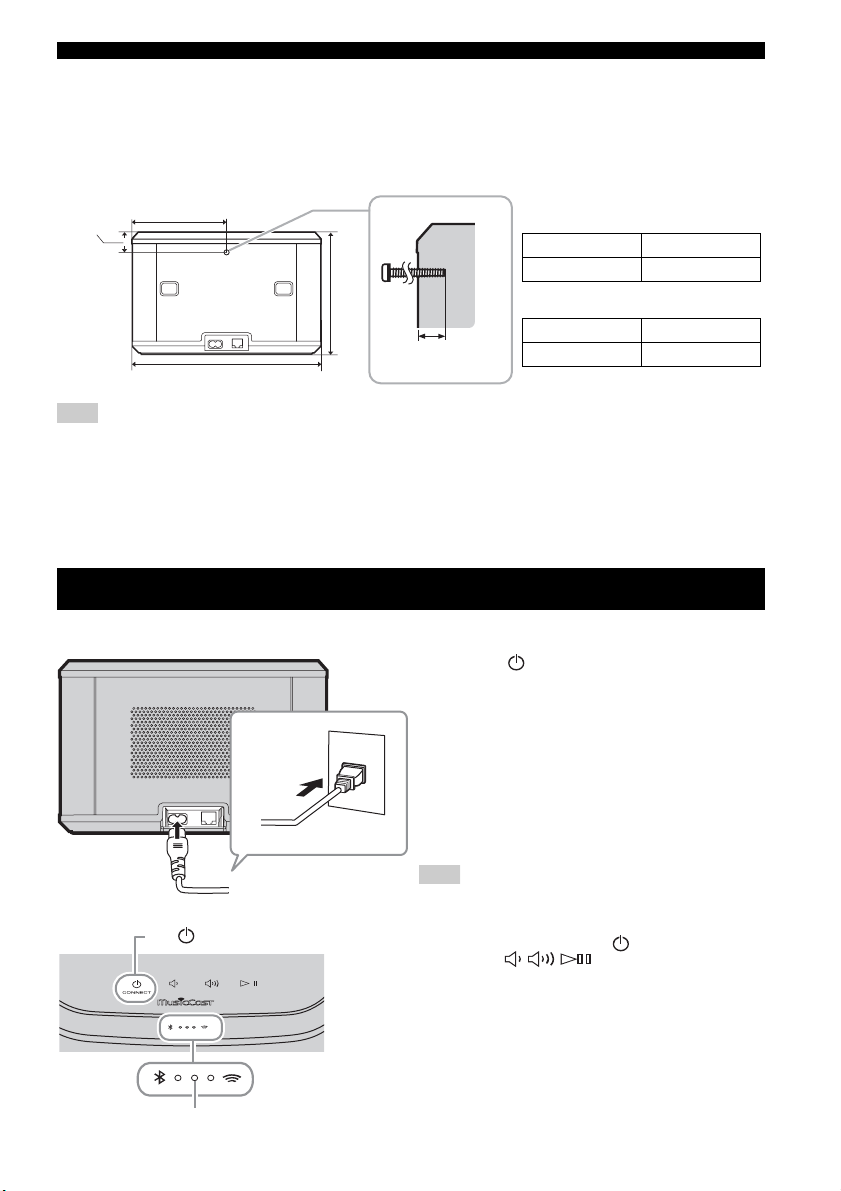
■ To mount the unit to a wall mount hanger
The unit can be mounted to the wall using a commerciallyavailable wall mount hanger. Use the wall mount hanger hole on the
rear panel to mount.
y
Use a wall mount hanger that is compatible for a unified coarse screw, such as those used for the tripod stand of a camera.
• If using a wall mount hanger, use the one compatible for this unit.
• Use the wall mount hanger whose withstand load capacity is over 4.5 kg (10 lbs.).
• Follow the instructions in the owner’s manual of the wall mount hanger and mount the unit correctly.
• If you mount the unit incorrectly or use a wall mount hanger that is not compatible for the unit, the unit may fall and cause
injury.
• Check the safety after mounting the unit. Yamaha is not responsible for any accidents which may be caused due to an
incorrect installation position or incorrect installation methods, or for any malfunction of the wall mount hanger. If you are
worried about the safety, ask a professional to install.
Rear panel
243 mm (9-5/8")
121.5 mm (4-3/4")
26 mm
(1")
WX-030
2.2 kg (4.9 lbs.)
156.5 mm (6-1/8")
Minimum
5 mm (1/4")
Specification of mounting screw:
UNC 1/4-20
Specifications of the screw hole
Diameter 6.35 mm (1/4")
Screw thread 20 (per 1")
Diameter 6.35 mm (1/4")
Depth 9 mm (3/8")
WX-030
Note
TURNING ON THE POWER
A Plug the power cable into the wall outlet
and tap (power)/CONNECT.
The unit turns on and the power indicator lights. If
you tap again, the unit turns off (standby mode)
and the power indicator turns off.
y
Auto Standby
Auto Standby is a mode in which the unit
automatically enters standby mode if about
20 minutes have elapsed with no playback and no
operation. You can enable/disable this mode with
the MusicCast CONTROLLER app (
☞
P.7).
• After the power plug is inserted to the wall outlet, it takes
about 10 seconds for the unit to start up internally. The
unit cannot play back during this time.
• Do not touch the touch sensors ( (power)/
CONNECT// / ) for about 10 seconds after
the unit starts up, since the unit is adjusting sensor
sensitivity. If your finger touches the touch sensors during
this time, they may not function properly after the unit
starts up.
Power cable
Rear pannel
Top pannel
Power indicator
Tap (power)/CONNECT.
Note
Loading ...
Loading ...
Loading ...