Loading ...
Loading ...
Loading ...
BEVEL CUTT(NG
See Figures 22 - 24.
To make the best possib(e cut, fo(!ow these he(pfu( h(nts:
[] Al(gn the (ine of cut w(th the inner Made guide notch on
the base when making 45° bevel cuts.
[] Make a tr(a} cut in scrap mateda( along a guideline to
determine how much you shou(d offset the guideline
on the cutting material
[] Adjust the angle of the cut to any desired setting be-
tween zero and 51.5 °. Refer to "To Adjust Beve(
Setting" next.
NOTE: When making bevel cuts, you may need to
re-adjust (aser (See "Adjusting the Laser.")
TO ADJUST BEVEL SETT(NG
See Figure 23
Fo((ow these direct(ons to adjust the bevel sett(ng:
[] Remove battery pack from your trim saw.
,_ WARN)NG: Failure to remove battery pack from
the too( cou(d resu(t (n acc(denta( starting caus(ng
sedous (njury.
[] Loosen beve( adjustment knob.
[] Raise motor housing end of saw until you reach de-
s(red ang(e sett(ng on bevel scale.
[] Tighten bevel adjustment knob securely.
WAF{N)NG: Attempting a bevel cut w(thout having
the bevel adjustment knob securely tightened can
resu(t in ser(ous injury.
TO BEVEL OUT
See Figure 24.
Follow these directions to bevel cut:
[] Hold the saw firmly w(th both hands as shown.
[] Rest the front edge of the base on the workpiece.
[] Start the saw and (et the Made reach full speed.
[] Guide the saw into the workpiece and make the cut.
[] Re(ease the trigger and allow the Made to come to a
complete stop.
[] Lift the saw from the workp(ece.
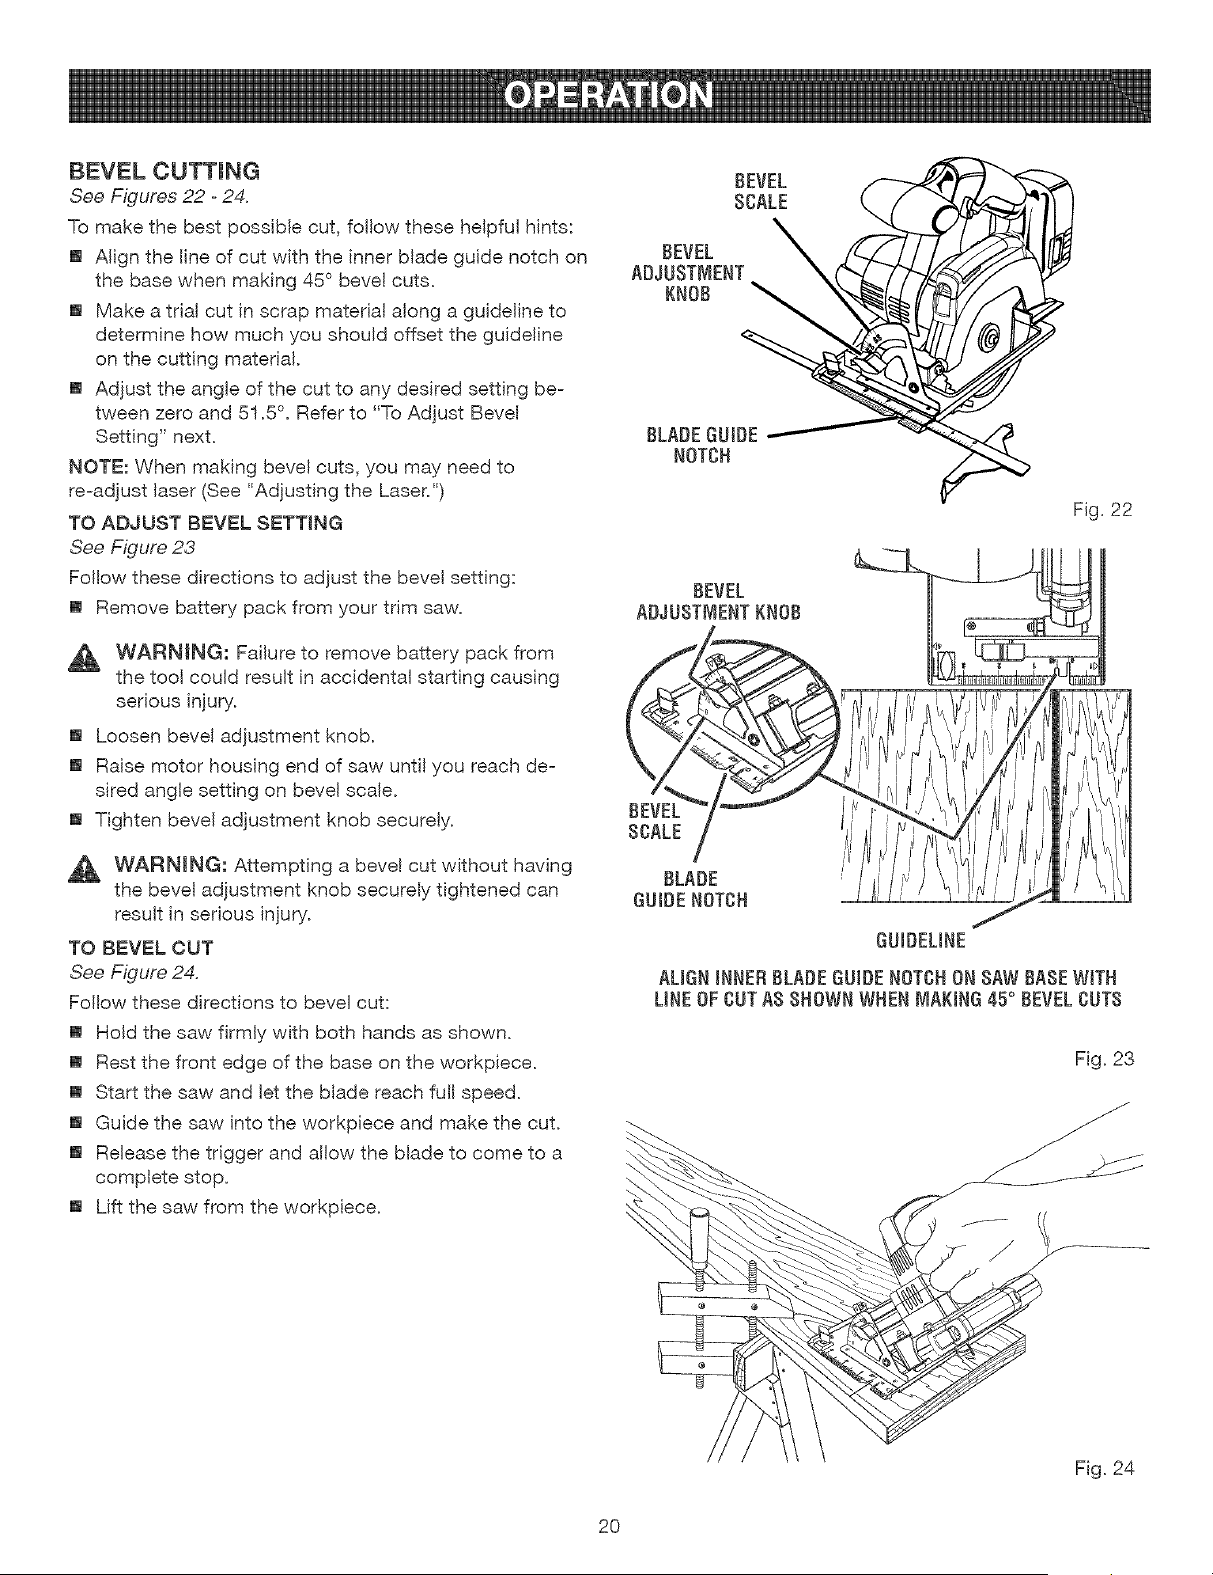
BEVEL
BLADEGUIDE
NOTCH
F(g. 22
BEVEL
ADJUBTMENT KNOB
BEVEL _
SCALE
/
BLADE
GUIDE NOTCH
J
GUIDELINE
ALIGNiNNER BLADEGUIDENOTCHONSAW BABEW(TH
LINEOF CUTA8 SHOWNWHEN[VIAK(NG45° BEVELCUTS
F(g. 23
2O
Loading ...
Loading ...
Loading ...