Gas - Easy Touch Control 500
ge
Important Safety Instructions ......................... 1-4
@
@
Surface Cooking ................................................ 5-6
Controls
Sealed Gas Burners
Oven Cooking .................................................. 7-14
Baking
Cook & Hold
Delay
Keep Warm
Broiling
Oven Racks
:Care & Cleaning ............................................ 15-18
Self-Clean Oven
Cleaning Procedures
Maintenance .................................................. 19-20
Oven Window & Light
Removal of Gas Appliance
Troubleshooting ............................................ 21-22
Warranty & Service .............................................. 23
Guide d'utilisation et d'entretien ...................... 24
Guia de Uso y Cuidado ....................................... 52
Form No A/01/06 Part No 8113P553-60
8t 13p553.pdf I Imported from Cleveland on 1/t7/2007
_2006 Maytag Appliances Sales Co Litho U.SA
clan. Do not attempt to adjust, repair, service, or replace
any part of your appliance unless it is specifically recom-
mended in this guide. All other servicing should be
referred to a qualified servicer. Have the installer show
you the location of the gas shut off valve and how to
shut it off in an emergency.
Always disconnect power to appliance before servicing.
ImportnntSnfety
Instructions
Warning and Important Safety Instructions appearing in
this guide are not meant to cover all possible conditions
and situations that may occur. Common sense, caution,
and care must be exercised when installing, maintaining,
or operating the appliance.
Always contact your dealer, distributor, service agent, or
manufacturer about problems or conditions you do not
understand.
Recognize Safety Symbols, Words, Labels
General Instructions
Read and follow all instructions before using this
appliance to prevent the potential risk of fire, electric
shock, personal injury or damage to the appliance as a
result of improper usage of the appliance. Use appliance
only for its intended purpose as described in this guide.
To ensure proper and safe operation: Appliance must
be properly installed and grounded by a qualified techni-
8t 13p553.pdf I Imported from Cleveland on 1/t7/2007
ImportnntSnfetyInstructions
To check if device is properly installed, look underneath
range with a flashlight to make sure one of the rear
leveling legs is properly engaged in the bracket slot. The
anti-tip device secures the rear leveling leg to the floor
when properly engaged. You should check this anytime
the range has been moved.
Do not use water on grease fires. Use baking soda, a
dry chemical or foam-type extinguisher to smother fire
or flame.
Child Safety
To Prevent Fire or Smoke
Damage
Be sure all packing materials are removed from the
appliance before operating it.
Keep area around appliance clear and free from cort_-
bustible materials, gasoline, and other flammable vapors
and materials.
If appliance is installed near a window, proper precau-
tions should be taken to prevent curtains from blowing
over burners.
NEVER leave any items on the cooktop. The hot air from
the vent may ignite flammable items and may increase
pressure in closed containers which may cause them to
burst.
Many aerosol-type spray cans are EXPLOSIVE when
exposed to heat and may be highly flammable. Avoid
their use or storage near an appliance.
Many plastics are vulnerable to heat. Keep plastics away
from parts of the appliance that may become warm or
hot. Do not leave plastic items on the cooktop as they
may melt or soften if left too close to the vent or a
lighted surface burner.
To eliminate the hazard of reaching over hot surface
burners, cabinet storage should not be provided directly
above a unit. If storage is provided, it should be limited
to items which are used infrequently and which are
safely stored in an area subjected to heat from an
appliance. Temperatures may be unsafe for some items,
such as volatile liquids, cleaners or aerosol sprays.
NEVER leave children alone or unsupervised near the
apl)liance wherl it is in use or is still hot.
NEVER allow children to sit or stand on any part of the
appliance as they could be injured or burned.
Children must be taught that the appliance and utensils
in it can be hot. Let hot utensils cool in a safe place, out
of reach of small children. Children should be taught
that an appliance is not a toy. Children should not be
allowed to play with controls or other parts of the unit.
About Your Appliance
In Case of Fire
Turn off appliance and ventilating hood to avoid spread-
ing the flame. Extinguish flame then turn on hood to
remove smoke and odor.
• Cooktop: Smother fire or flame in a pan with a lid or
cookie sheet.
NEVER pick up or move a flaming pan.
• Oven: Smother fire or flame by closing the oven door.
8t 13p553.pdf I Imported from Cleveland on 1/t7/2007
2
The oven vent is located at the base of the backguard.
Avoid touching oven vent area while oven is on and for
several minutes after oven is turned off. Some parts of
the vent and surrounding area become hot enough to
ImportnntSnfetyInstructions
cause burns. After oven is turned off, do not touch the
oven vent or surrounding areas until they have had
sufficient time to cool.
Other potentially hot surfaces include cooktop, areas
facing the cooktop, oven vent, surface near the vent
opening, oven door, area around the oven door and
oven window.
Do not touch a hot oven light bulb with a damp cloth as
the bulb could break. Should the bulb break, disconnect
power to the appliance before removing bulb to avoid
electrical shock.
Do not use the cooktop or oven as a storage area for food
or cooking utensils.
Cooking Safety
Always place a pan on a surface burner before turning it
on. Be sure you know which knob controls which
surface burner. Make sure the correct burner is turned
on and that the burner has ignited. When cooking is
corr]pleted, turn burner off before removing pan to
prevent exposure to burner flame.
Always adjust surface burner flame so that it does not
extend beyond the bottom edge of the pan. An exces-
sive flame is hazardous, wastes energy and may damage
the appliance, pan or cabinets above the appliance.
NEVER leave a surface cooking operation unattended
especially when using a high heat setting or when deep
fat frying. Boilovers cause smoking and greasy spillovers
may ignite. Clean up greasy spills as soon as possible.
Do not use high heat for extended cooking operations.
NEVER heat an unopened container on the surface
burner or in the oven. Pressure build-up may cause
container to burst resulting in serious personal injury or
damage to the appliance.
Use dry, sturdy potholders. Damp potholders may cause
burns from steam. Dish towels or other substitutes
should never be used as potholders because they can
trail across hot surface burners and ignite or get caught
on appliance parts.
Always let quantities of hot fat used for deep fat frying
cool before attempting to move or handle.
Do not let cooking grease or other flammable materials
accumulate in or near the appliance, hood or vent fan.
Clean hood frequently to prevent grease from accumu-
lating on hood or filter. When flaming foods under the
hood turn the fan on.
NEVER wear garments made of flammable material or
loose fitting or long-sleeved apparel while cooking.
Clothing may ignite or catch utensil handles.
Always place oven racks in the desired positions while
oven is cool. Slide oven rack out to add or remove food,
using dry, sturdy potholders. Always avoid reaching into
the oven to add or remove food. If a rack must be
moved while hot, use a dry potholder. Always turn the
oven off at the end of cooking.
Use care when opening the oven door. Let hot air or
steam escape before moving or replacing food.
PREPARED FOOD WARNING: Follow food
manufacturer's instructions. If a plastic frozen food
container and/or its cover distorts, warps, or is otherwise
damaged during cooking, irrm_ediately discard the food
and its container. The food could be contaminated.
NEVER use aluminum foil to cover oven racks or oven
bottom. This could result in risk of electric shock, fire, or
damage to the appliance. Use foil only as directed in this
guide.
Utensil Safety
Use pans with flat bottoms and handles that are easily
grasped and stay cool. Avoid using unstable, warped,
easily tipped or loose-handled pans. Also avoid using
pans, especially small pans, with heavy handles as they
could be unstable and easily tip. Pans that are heavy to
move when filled with food may also be hazardous.
Be sure utensil is large enough to properly contain food
and avoid boilovers. Pan size is particularly irr_portant in
deep fat frying. Be sure pan will accommodate the
volume of food that is to be added as well as the bubble
action of fat.
To minimize burns, ignition of flammable materials and
spillage due to unintentional contact with the utensil, do
not extend handles over adjacent surface burners.
Always turn pan handles toward the side or back of the
appliance, not out into the room where they are easily
hit or reached by small children.
Never let a pan boil dry as this could damage the utensil
and the appliance.
Follow the manufacturer's directions when using oven
cooking bags.
3
8t 13p553.pdf I Imported from Cleveland on 1/t7/2007
ImportnntSnfetyInstructions
Only certain types of glass, glass/ceramic, ceramic or
glazed utensils are suitable for cooktop or oven usage
without breaking due to the sudden change in tempera-
ture. Follow manufacturer's instructions when using
glass.
This appliance has been tested for safe performance
using conventional cookware. Do not use any devices or
accessories that are not specifically recommended in
this guide. Do not use eyelid covers for the surface
units, stovetop grills, or add-on oven convection sys-
tems. The use of devices or accessories that are not
expressly recommended in this manual can create
serious safety hazards, result in performance problems,
and reduce the life of the components of the appliance.
Cleaning Safety
Turn off all controls and wait for appliance parts to cool
before touching or cleaning them. Do not touch the
burner grates or surrounding areas until they have had
sufficient time to cool.
Clean appliance with caution. Use care to avoid steam
burns if a wet sponge or cloth is used to wipe spills on a
hot surface. Some cleaners can produce noxious fumes
if applied to a hot surface.
Self-Clean Oven
Clean only pars listed in this guide. Do not clean door
gasket. The door gasket is essential for a good seal.
Care should be taken not to rub, damage, or move the
gasket. Do not use oven cleaners of any kind in or
around any part of the self-clean oven.
It is normal for the cooktop of the range to become hot
during a self-clean cycle. Therefore, touching the
cooktop during a clean cycle should be avoided.
Important Safety Notice and
Warning
The California Safe Drinking Water and Toxic Enforce-
ment Act of ] 986 f:Proposition 65) requires the Governor
of California to publish a list of substances known to the
State of California to cause cancer or reproductive harm,
and requires businesses to warn customers of potential
exposures to such substances.
Users of this appliance are hereby warned that the
burning of gas can result in low-level exposure to some
of the listed substances, including benzene, formalde-
hyde and soot, due primarily to the incomplete combus-
tion of natural gas or liquid petroleum (LP_ fuels. Prop-
erly adjusted burners will minimize incomplete combus-
tion. Exposure to these substances can also be mini-
mized by properly venting the burners to the outdoors.
Users of this appliance are hereby warned that when
the oven is engaged in the self-clean cycle, there may
be some low-level exposure to some of the listed
substances, including carbon monoxide. Exposure to
these substances can be minimized by properly venting
the oven to the outdoors by opening the windows and/
or door in the room where the appliance is located
during the self-clean cycle.
IMPORTANT NOTICE REGARDING PET BIRDS:
Never keep pet birds in the kitchen or in rooms where
the fumes from the kitchen could reach. Birds have a
very sensitive respiratory system. Fumes released during
an oven self-cleaning cycle may be harmful or fatal to
birds. Fumes released due to overheated cooking oil, fat,
margarine and overheated non-stick cookware may be
equally harmful.
Save These Instructions for Future Reference
4
8t 13p553.pdf I Imported from Cleveland on 1/t7/2007
SurfuceCooking
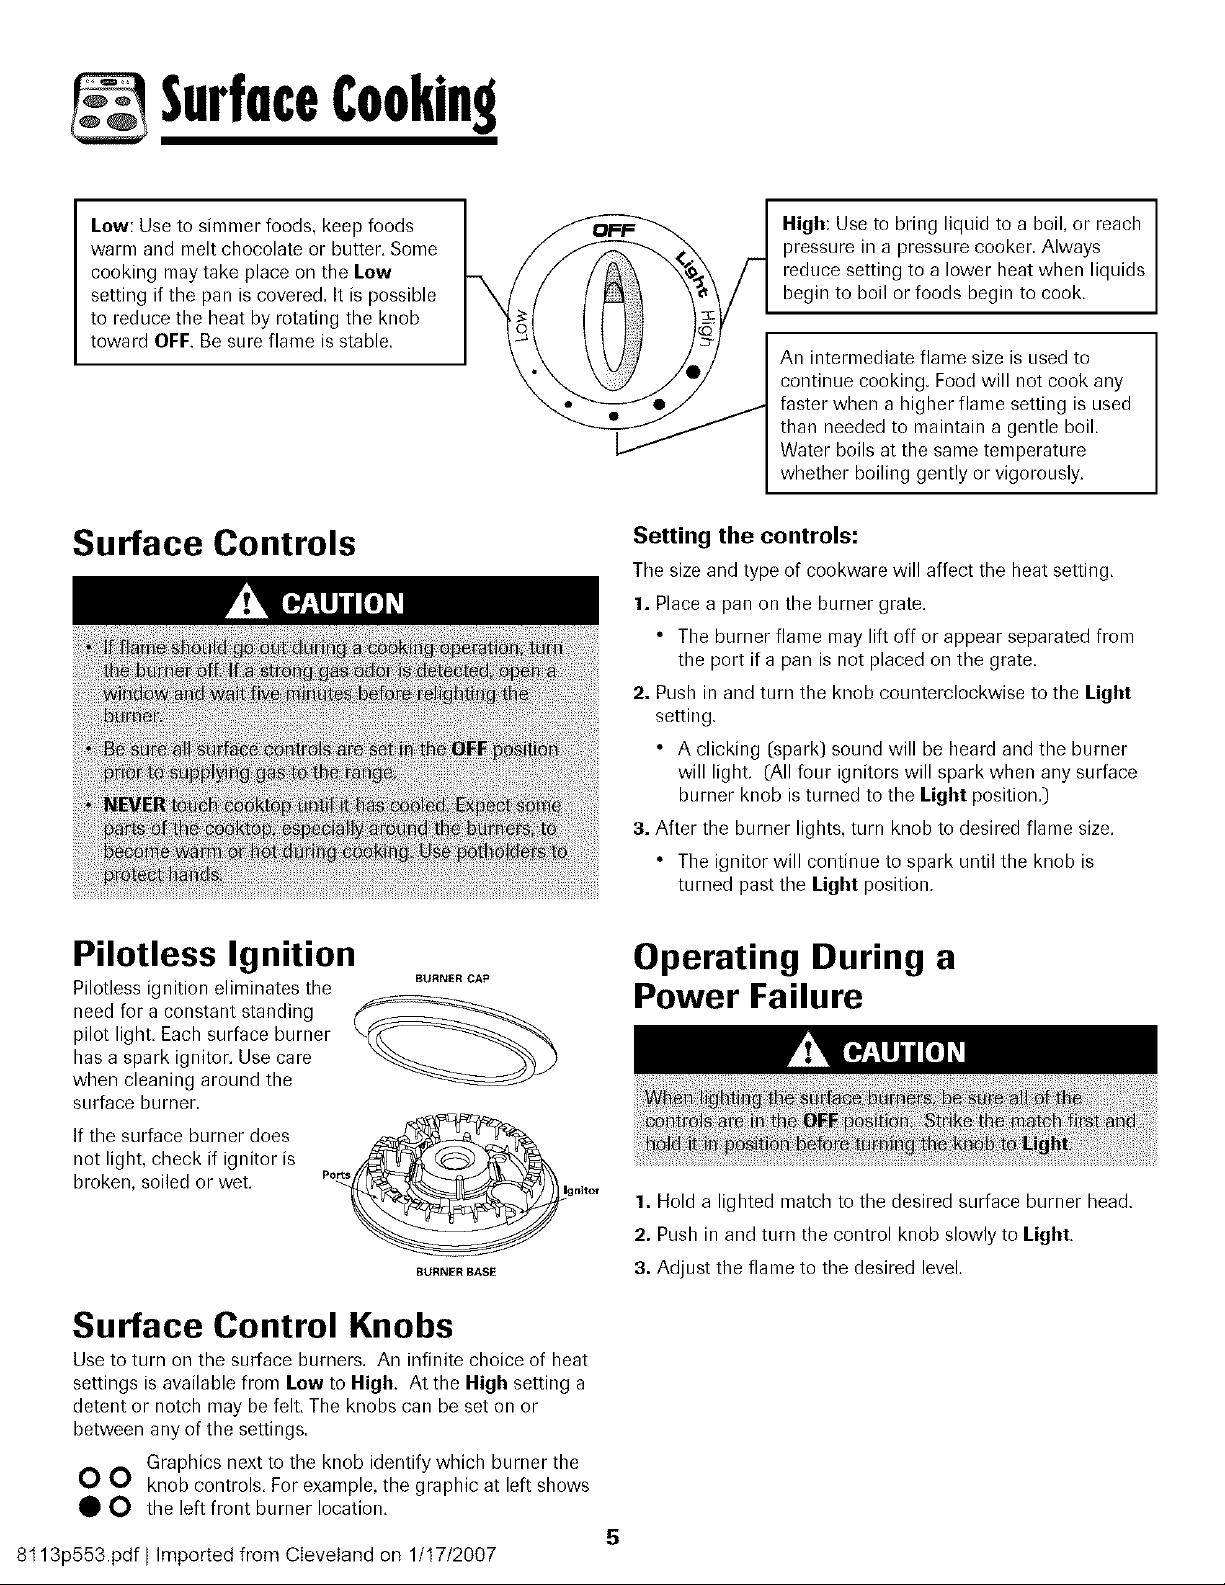
Law: Use to simmer foods, keep foods
warm and melt chocolate or butter. Some
cooking may take place on the Low
setting if the pan is covered. It is possible
to reduce the heat by rotating the knob
toward OFF. Be sure flame is stable.
High: Use to bring liquid to a boil, or reach
pressure in a pressure cooker. Always
reduce setting to a lower heat when liquids
begin to boil or foods begin to cook.
An intermediate flame size is used to
continue cooking. Food will not cook any
faster when a higher flame setting is used
than needed to maintain a gentle boil.
Water boils at the same temperature
whether boiling gently or vigorously.
Surface Controls
Setting the controls:
Tile size and type of cookware will affect the heat setting.
1. Place a pan on the burner grate.
• The burner flame may lift off or appear separated from
the port if a pan is not placed on the grate.
2. Push in and turn the knob counterclockwise to the Light
setting.
• A clicking (spark) sound will be heard and the burner
will light. (All four ignitors will spark when any surface
burner knob is turned to the Light position.)
3. After the burner lights, turn knob to desired flame size.
• The ignitor will continue to spark until the knob is
turned past the Light position.
Pilotless Ignition
Pilotless ignition eliminates tile
need for a constant standing
pilot light. Each surface burner
has a spark ignitor. Use care
when cleaning around the
surface burner.
If the surface burner does
not light, check if ignitor is
broken, soiled or wet.
BURNER CAP
P°_g nit°r
BURNERBASE
Surface Control Knobs
Use to turn on the surface burners. An infinite choice of heat
settings is available from Low to High. At the High setting a
detent or notch may be felt. The knobs car/be set on or
between any of the settings.
Graphics next to the knob identify which burner the
O O knob controls. For example, the graphic at left shows
O O the left front burner location.
8t 13p553.pdf I Imported from Cleveland on 1/t7/2007
Operating During a
Power Failure
1. Hold a lighted match to the desired surface burner head.
2. Push in and turn the control knob slowly to Light.
3. Adjust the flame to the desired level.
5
SurfaceC00kin9
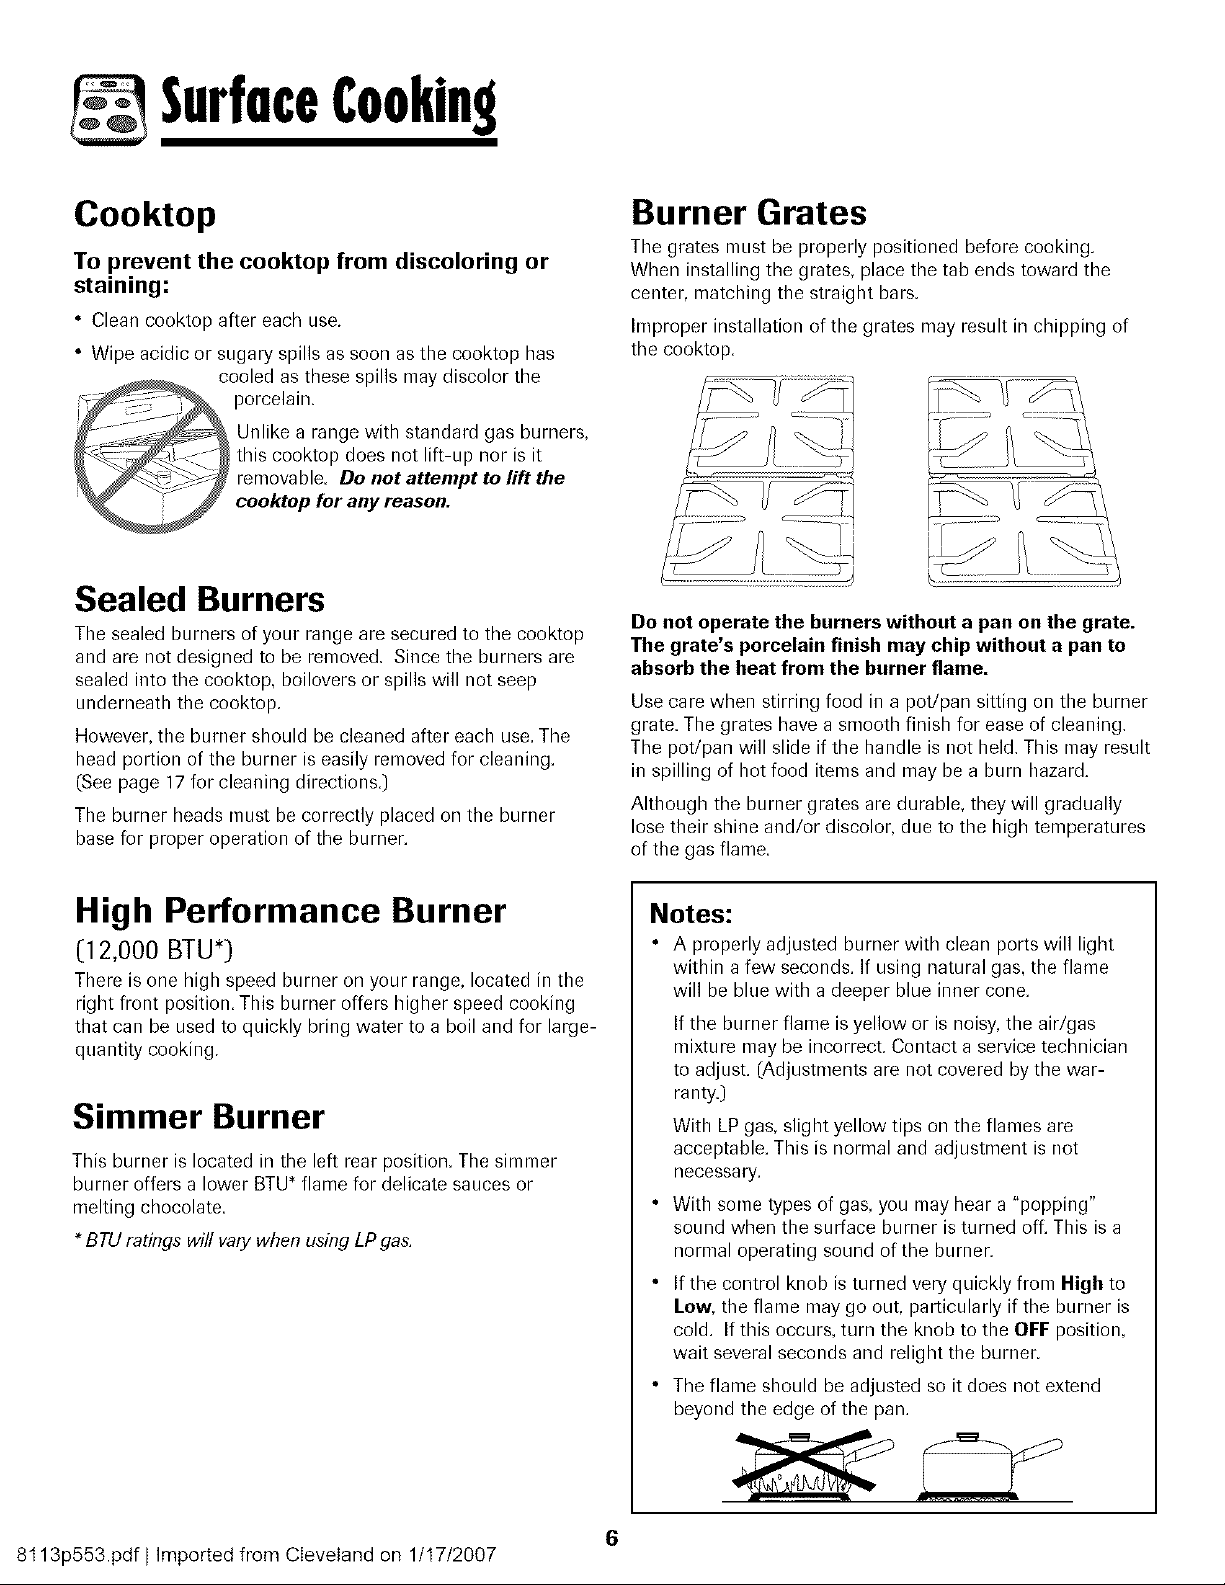
Cooktop
To prevent the cooktop from discoloring or
staining:
• Clean cooktop after each use.
• Wipe acidic or sugary spills as soon as the cooktop has
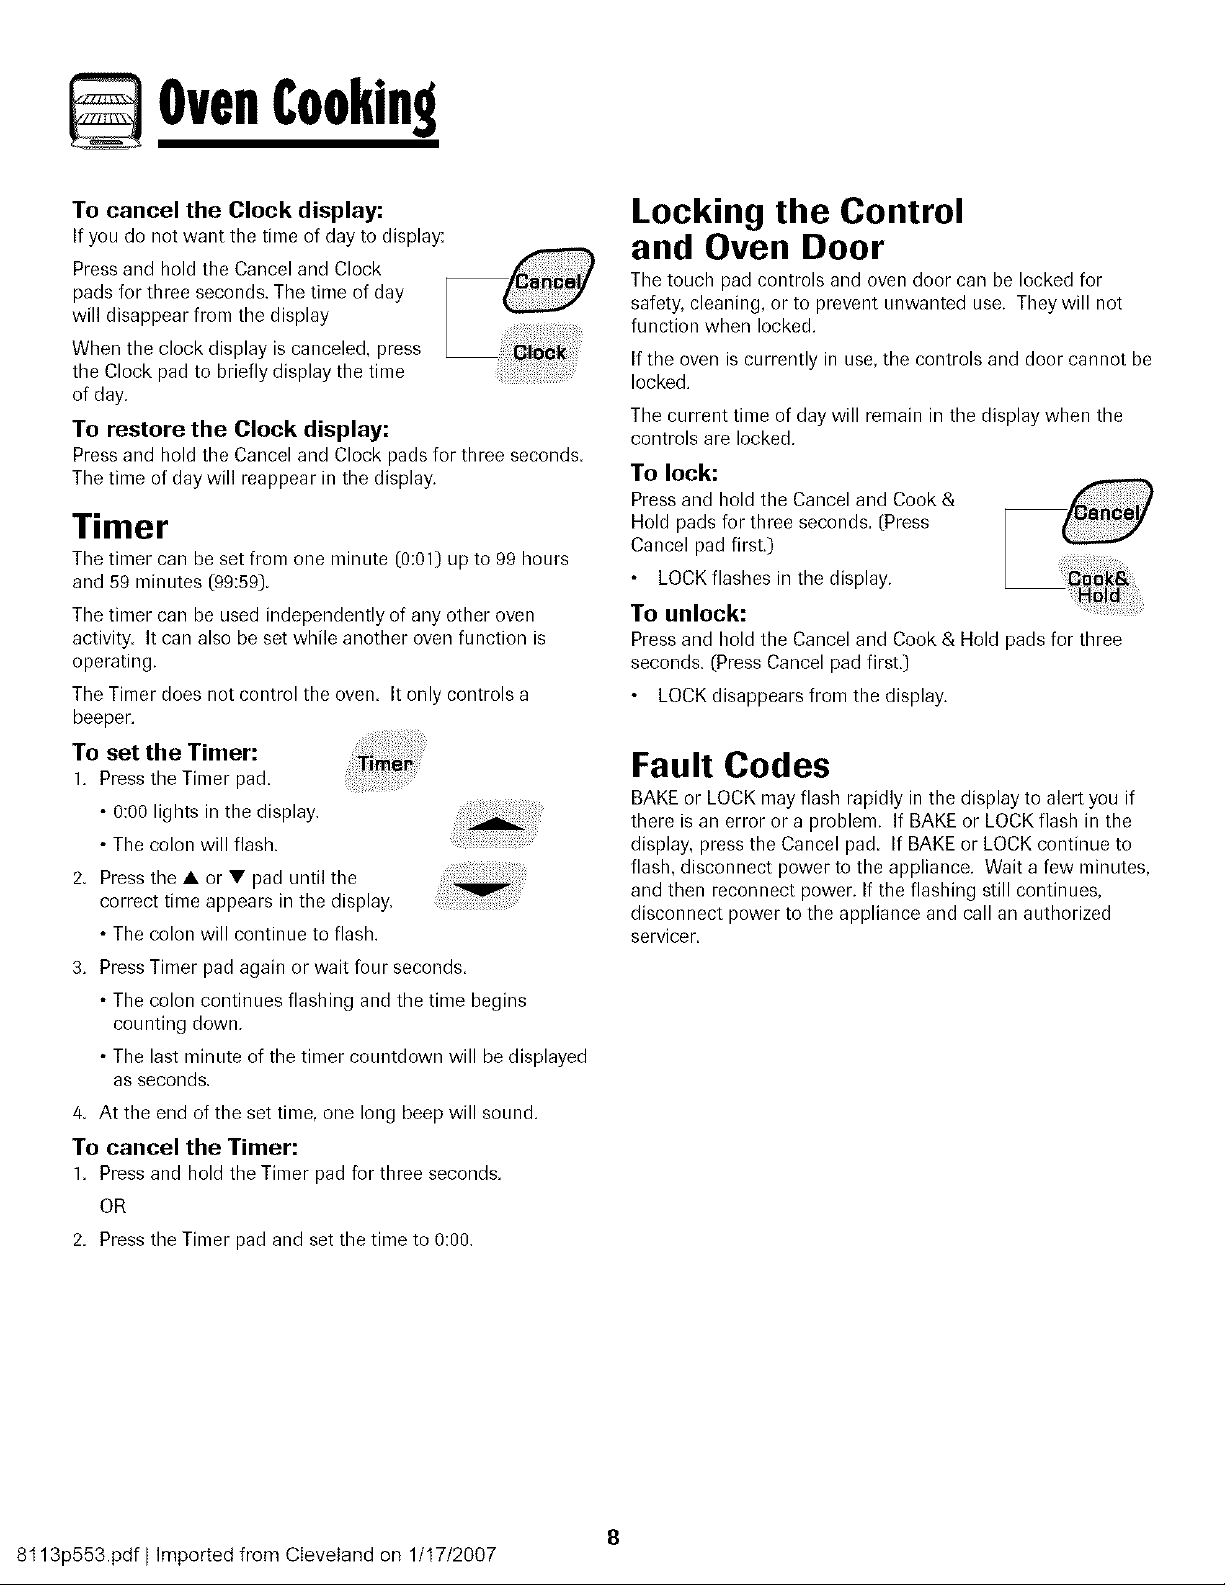
Burner Grates
The grates must be properly positioned before cooking.
When installing the grates, place the tab ends toward the
center, matching the straight bars.
Improper installation of the grates may result in chipping of
the cooktop.
Sealed Burners
The sealed burners of your range are secured to the cooktop
and are not designed to be removed. Since the burners are
sealed into the cooktop, boilovers or spills will not seep
underneath the cooktop.
However, the burner should be cleaned after each use. The
head portion of the burner is easily removed for cleaning.
(See page 17 for cleaning directions.)
The burner heads must be correctly placed on the burner
base for proper operation of tile burner.
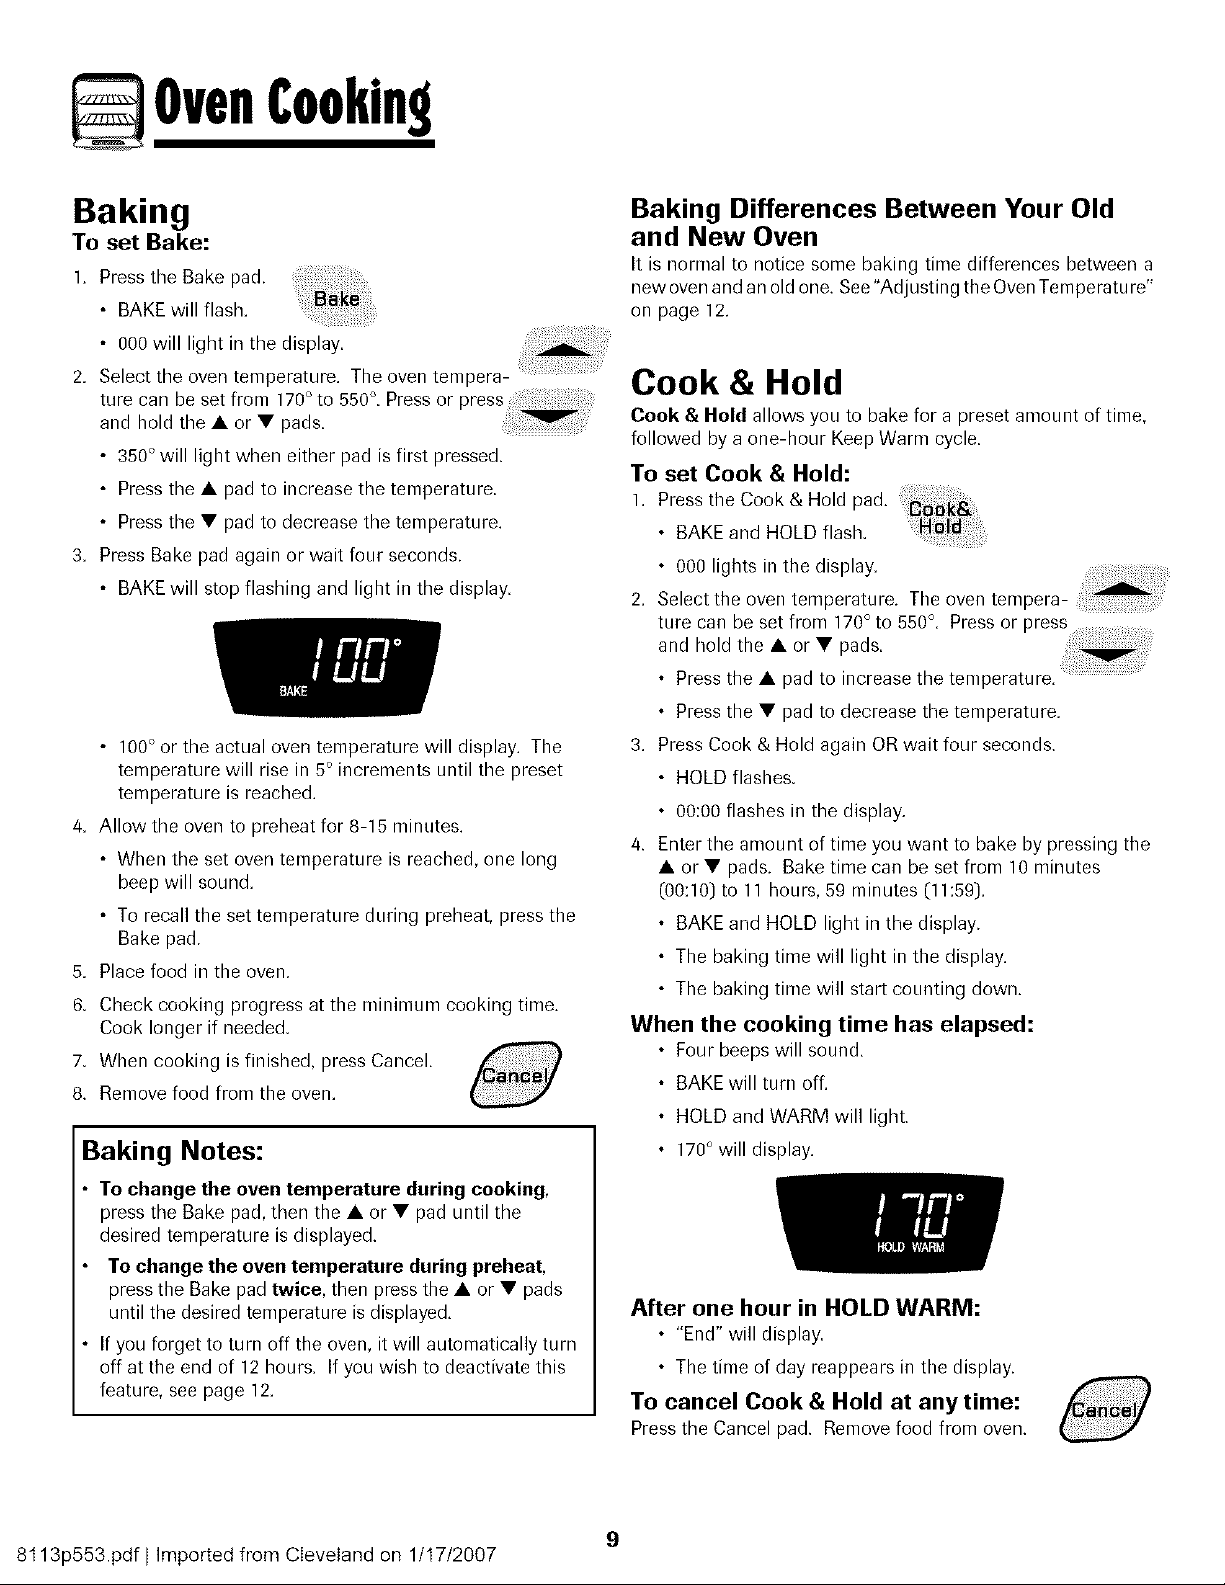
Do not operate the burners without a pan on the grate.
The grate's porcelain finish may chip without a pan to
absorb the heat from the burner flame.
Use care when stirring food in a pot/pan sitting on the burner
grate. The grates have a smooth finish for ease of cleaning.
The pot/pan will slide if the handle is not held. This may result
in spilling of hot food items and may be a burn hazard.
Although the burner grates are durable, they will gradually
lose their shine and/or discolor, due to the high temperatures
of the gas flame.
High Performance Burner
[12,000 BTU*)
There is one high speed burner on your range, located in the
right front position. This burner offers higher speed cooking
that can be used to quickly bring water to a boil and for large-
quantity cooking.
Simmer Burner
This burner is located in the left rear position. The simrner
burner offers a lower BTU* flame for delicate sauces or
melting chocolate.
BTU ratings will vary when using LPgas.
Notes:
• A properly adjusted burner with clean ports will light
within a few seconds. If using natural gas, the flame
will be blue with a deeper blue inner cone.
If the burner flame is yellow or is noisy, the air/gas
mixture may be incorrect. Contact a service technician
to adjust. (Adjustments are not covered by the war-
ranty.]
With LP gas, slight yellow tips on the flames are
acceptable. This is normal and adjustment is not
necessary.
• With some types of gas, you may hear a "popping"
sound when the surface burner is turned off. This is a
normal operating sound of the burner.
If the control knob is turned very quickly from High to
Low, the flame may go out, particularly if the burner is
cold. If this occurs, turn the knob to the OFF position,
wait several seconds and relight the burner.
• The flame should be adjusted so it does not extend
beyond the edge of the pan.
6
8t 13p553.pdf I Imported from Cleveland on 1/t7/2007

OvenCooking
Control Panel
A B C D
\
\
\
\
\
\
\
\
\
\
\
E F G H I J
The control panel isdesigned for ease ill prog ramming. The displaywindow oil the control shows time of day,timer and oven functions.
Control panel shown includes model specific features. (Styling may vary depending on model.]
ii!i_!ii!ii
iiiiiF!i!!i!i
ii!i_iii!ili!¸
Broil
Bake
More (•) or
Less (•)
Timer
Cook & Hold
Clean
Delay
Clock
Keep Warm
Cancel
Use for broiling and top browning.
Use for baking and roasting.
Enters or changes time, oven
temperature. Sets HI or LO broil.
Sets Timer.
Bakes for a preset time, then holds food
warm for ] hour.
Use to set self-clean cycle.
Programs the oven to start baking at
a later time.
Use to set time of day clock.
Use to keep cooked food warm in oven.
Cancels all operations except Timer
and Clock.
Using the Touchpads
• Press the desired pad.
• Press the • or • to enter time or temperature.
• A beep will sound when any pad is touched.
• A double beep will sound if a programngng error occurs.
Note: Four seconds after pressing the • or • pads, the
time or temperature will automatically be entered. If more
than 30 seconds elapse between touching a function pad
and the • or • pads, the function will be canceled and
the display will return to the previous display.
Clock
The clock can be set to display time in a 12-hour or 24-hour
format, The clock is set at the factory for the 12-hour format,
To change the clock to
24-hour format:
1. Press and hold the Cancel and Delay
pads for three seconds.
2. Press • or • to select 12 or 24 hour.
3. Set the time of day following the
directions below.
To set the Clock:
]. Pressthe Clock pad.
• Colon flashes in the display.
2. Press • or • to set the time of day.
• Colon continues flashing.
3. Press the Clock pad again or wait four
seconds. The colon stops flashing.
When electrical power is supplied or after a power interrup-
tion, the last clock time before power was interrupted will
flash.
To recall the time of day when another time function is
showing, press the Clock pad.
Clock time cannot be changed when the oven has been
programmed for cook or clean Delay or Cook & Hold.
cont.
7
8t 13p553 pdf I Imported from Cleveland on 1/t7/2007
OvenCooking
To cancel the Clock display:
If you do not want the time of day to display:
Press and hold the Cancel and Clock
pads for three seconds. The time of day
will disappear from the display
When the clock display is canceled, press
the Clock pad to briefly display the time
of day.
To restore the Clock display:
Press and hold tile Cancel and Clock pads for three seconds
Tile time of day will reappear in tile display.
Timer
The timer carl be set from one minute (0:01) up to 99 hours
and 59 minutes (99:59).
The timer can be used independently of any other oven
activity. It can also be set while another oven function is
operating.
The Timer does not control the oven. It only controls a
beeper.
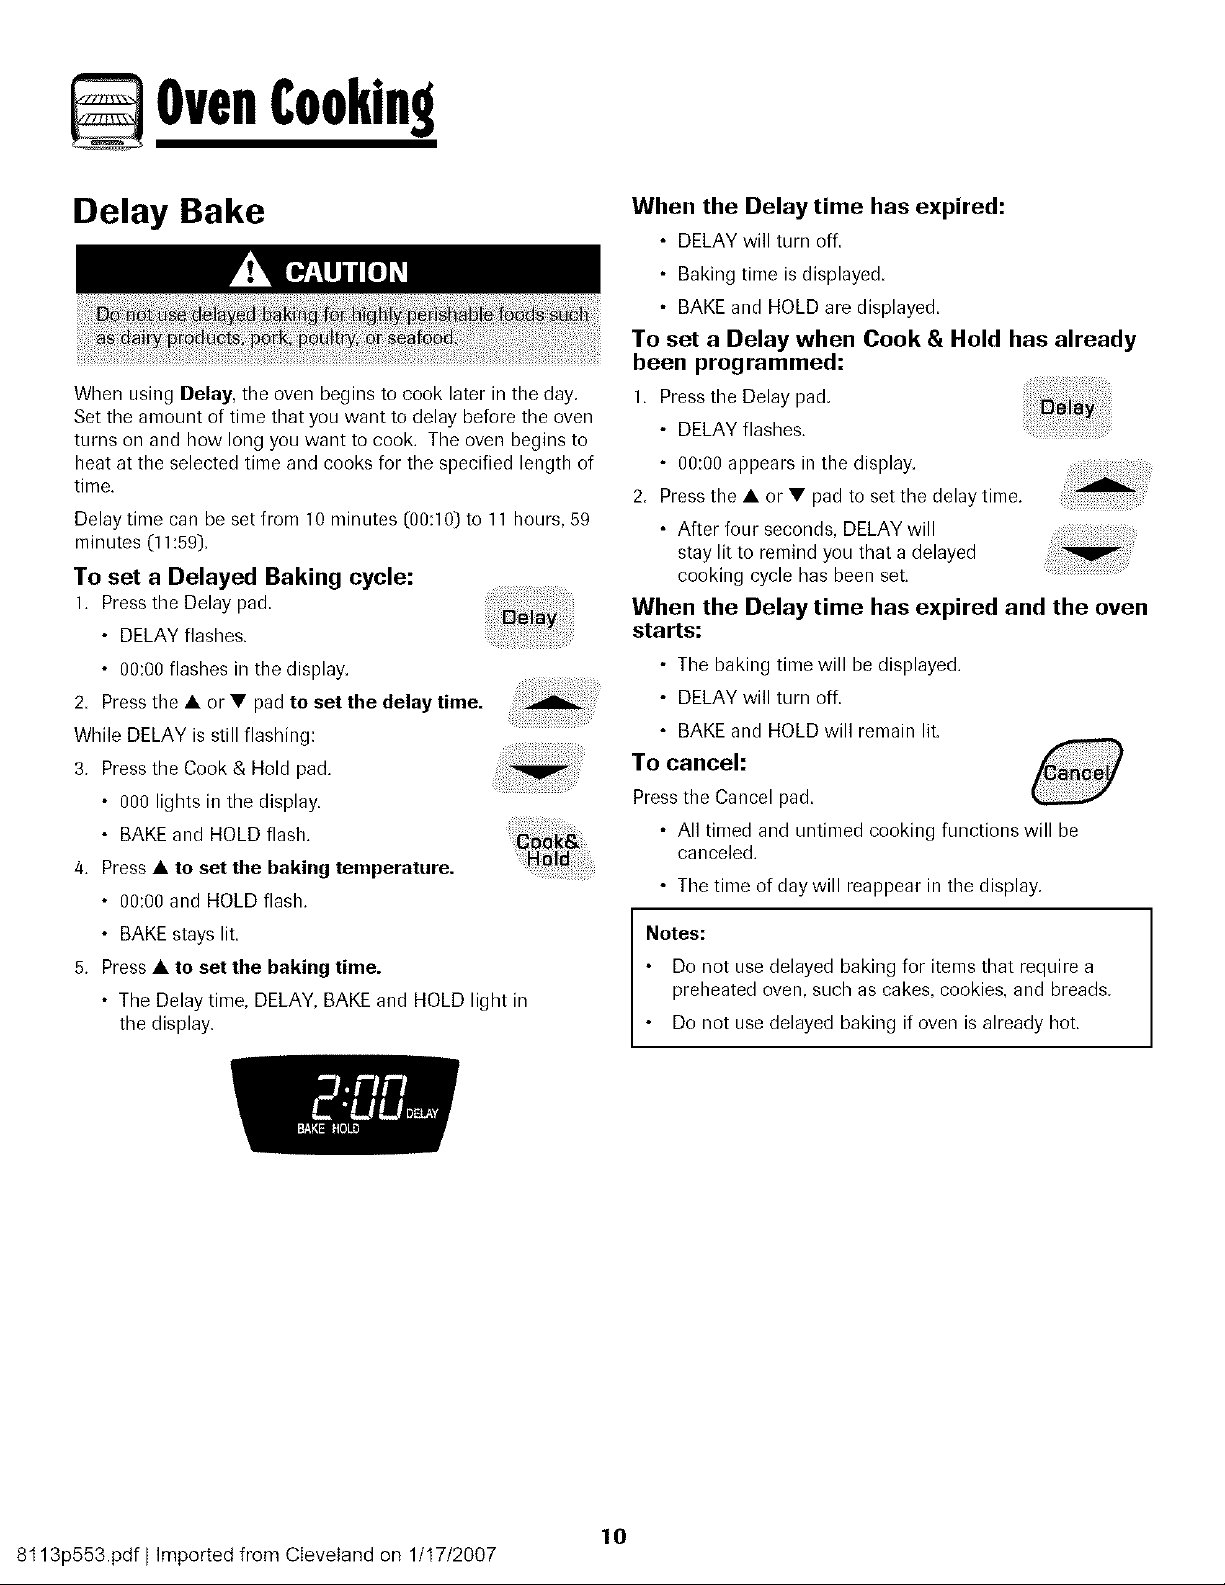
To set the Timer:
1. Press the Timer pad
• 0:00 lights in the display.
• The colon will flash.
2. Press the • or • pad until the
correct time appears in the display.
• The colon will continue to flash.
3. Press Timer pad again or wait four seconds.
• The colon continues flashing and the time begins
counting down.
• The last minute of the timer countdown will be displayed
as seconds.
4. At the end of the set time, one long beep will sound.
To cancel the Timer:
1. Press and hold the Timer pad for three seconds.
OR
2. Press the Timer pad and set the time to 0:00.
Locking the Control
and Oven Door
The touch pad controls and oven door can be locked for
safety, cleaning, or to prevent unwanted use. They will not
function when locked.
If the oven is currently in use, the controls and door cannot be
locked.
The current time of day will remain in the display when the
controls are locked.
To lock:
Press and hold the Cancel and Cook &
Hold pads for three seconds. (Press
Cancel pad first.)
LOCK flashes in the display.
To unlock:
Press and hold the Cancel and Cook & Hold pads for three
seconds. (Press Cancel pad first.)
LOCK disappears from the display.
Fault Codes
BAKE or LOCK may flash rapidly in the display to alert you if
there is an error or a problem. If BAKE or LOCK flash in the
display, press the Cancel pad. If BAKE or LOCK continue to
flash, disconnect power to the appliance. Wait a few minutes,
and then reconnect power. If the flashing still continues,
disconnect power to the appliance and call an authorized
servicer.
8
8t 13p553.pdf I Imported from Cleveland on 1/t7/2007
OvenCooking
Baking
To set Bake:
1. Press the Bake pad.
• BAKE will flash.
• 000 will light in the display. : :
2. Select the oven temperature. The oven tempera-
ture can be set from 170° to 550°. Press or press
and hold the • or • pads.
• 350° will light when either pad is first pressed.
• Press the • pad to increase the temperature.
• Press the • pad to decrease the temperature.
3. Press Bake pad again or wait four seconds.
• BAKE will stop flashing and light in the display.
• 100° or the actual oven temperature will display. The
temperature will rise in 5° increments until the preset
temperature is reached.
4. Allow the oven to preheat for 8-15 minutes.
• When the set oven temperature is reached, one long
beep will sound.
• To recall the set temperature during preheat, press the
Bake pad.
5. Place food in the oven.
6. Check cooking progress at the minimum cooking time.
Cook longer if needed.
7. When cooking is finished, press Cancel.
8. Remove food from the oven.
Baking Notes:
• To change the oven temperature during cooking,
press the Bake pad, then the • or • pad until the
desired temperature is displayed.
• To change the oven temperature during preheat,
press the Bake pad twice, then press tile • or • pads
until the desired temperature is displayed.
• If you forget to turn off the oven, it will automatically turn
off at the end of 12 hours. If you wish to deactivate this
feature, see page 12.
Baking Differences Between Your Old
and New Oven
It is normal to notice some baking time differences between a
new oven and an old one. See "Adjusting the OvenTemperatu re"
on page 12.
Cook & Hold
Cook & Hold allows you to bake for a preset amount of time,
followed by a one-hour Keep Warm cycle.
To set Cook & Hold:
1. Pressthe Cook & Hold pad.
• BAKE and HOLD flash.
• 000 lights in the display.
2. Select the oven temperature. The oven tempera-
ture can be set from 170° to 550°. Press or press ...............................
and hold the • or • pads.
• Press the • pad to increase the temperature.
• Press the • pad to decrease the temperature.
3. Press Cook & Hold again OR wait four seconds.
• HOLD flashes.
• 00:00 flashes in the display.
4. Enter the amount of time you want to bake by pressing the
• or • pads. Bake time can be set from 10 minutes
(00:10] to 11 hours, 59 minutes (11:59].
• BAKE and HOLD light in the display.
• The baking time will light in the display.
• The baking time will start coLmting down.
When the cooking time has elapsed:
• Four beeps will sound.
• BAKEwill turn off.
• HOLD and WARM will light.
• 170° will display.
After one hour in HOLD WARM:
• "End" will display
• The time of day reappears in the display.
To cancel Cook & Hold at any time:
Press the Cancel pad. Remove food from oven.
9
8t 13p553.pdf I Imported from Cleveland on 1/t7/2007
OvenCooking
Delay Bake
When using Delay, the oven begins to cook later in the day.
Set the amount of time that you want to delay before the oven
turns on and how long you want to cook. The oven begins to
heat at the selected time and cooks for the specified length of
time.
Delay time can be set from 10 minutes (00:10) to 11 hours, 59
minutes (11:59].
To set a Delayed Baking cycle:
1. Pressthe Delay pad
• DELAY flashes.
• 00:00 flashes in the display.
2. Pressthe • or • pad to set the delay time.
While DELAY is still flashing:
3. Press the Cook & Hold pad.
• 000 lights in the display
• BAKE and HOLD flash.
4. Press • to set the baking temperature.
• 00:00 and HOLD flash.
• BAKE stays lit.
5. Press • to set the baking time.
• The Delay time, DELAY, BAKE and HOLD light in
the display.
When the Delay time has expired:
• DELAY will turn off
• Baking time is displayed.
• BAKE and HOLD are displayed.
To set a Delay when Cook & Hold has already
been programmed:
1. Pressthe Delay pad
• DELAY flashes.
• 00:00 appears in the display.
2. Press the • or • pad to set the delay time.
• After four seconds, DELAY will
stay lit to remind you that a delayed
cooking cycle has been set.
When the Delay time has expired and the oven
starts:
• Tile baking time will be displayed.
• DELAY will turn off.
• BAKE and HOLD will remain lit.
To cancel:
Press the Cancel pad
• All timed and untimed cooking functions will be
canceled.
• The time of day will reappear in the display.
Notes:
Do not use delayed baking for items that require a
preheated oven, such as cakes, cookies, and breads.
Do not use delayed baking if oven is already hot.
10
8t 13p553.pdf I Imported from Cleveland on 1/t7/2007
OvenCooking
Keep Warm
For safely keeping foods warm or for warming breads and
plates.
To set Keep Warm:
1. Press the Keep Warm pad
• WARM flashes.
• 000 appears in the display.
2. Select the Keep Warm temperature. The
Keep Warm temperature can be set from
145° to 190°. Press or press and hold the
• or • pads.
• 170° will light when either pad is first pressed.
• Press the • pad to increase the temperature.
• Press the • pad to decrease the temperature.
WARM and the temperature will be displayed while Keep
Warm is active.
Keep Warm Notes:
• For optimal food quality, oven cooked foods should be kept
warm for no longer than 1 to 2 hours.
• To keep foods from drying, cover loosely with foil or a lid.
• To warm dinner rolls:
- cover rolls loosely with foil and place in oven.
- press Keep Warm and • pads to set 170° F.
- warm for 12-15 minutes.
• To warm plates:
- place 2 stacks of up to four plates each in tile oven.
- press Keep Warm and • pads to set 170° F.
- warm for five minutes, turn off the oven and leave plates
in the oven for 15 minutes more.
- use only oven-safe plates, check with the manufacturer.
- do not set warm dishes on a cold surface as rapid
temperature changes could cause crazing or breakage.
To cancel Keep Warm:
1. Press the Cancel pad.
2. Remove food from the oven.
Changing Temp °F/°C
1. The factory default setting for temperature is Fahrenheit.
2. To change the setting, press and hold the CANCEL and Bake
pads at the same time for three seconds.
3. A single beep will sound and the current setting will be
displayed C°For °C). (If no change is made, the range will
return to the existing setting after 30 seconds.)
4. To change the setting, press the • or • pad. Press again to
return to existing setting. Wait five seconds and the setting
will be complete.
11
8t 13p553.pdf I Imported from Cleveland on 1/t7/2007
OvenCooking
Automatic Shut-Off/Sabbath
Mode
The oven will automatically turn off after 12 hours if you
accidentally leave it on. This safety feature can be turned off.
To cancel the 12-hour shut-off and run the
oven continuously for 72 hours:
1. Set the oven to bake (see page 9].
2. Press and hold the Clock pad for five seconds.
• SAb will be displayed and flash for five seconds.
• SAb will then be displayed continuously until turned off
or until the 72-hour time limit is reached.
• BAKE will also be displayed if a bake cycle is in use
while the oven is in Sabbath Mode.
All other functions EXCEPTBAKE (Timer, Keep Warm,
Clean, etc.) are locked out during the Sabbath Mode.
To cancel Bake when in Sabbath Mode:
Press Cancel.
• BAKE will turn off in the display.
• No beepswill sound.
To cancel the Sabbath Mode:
1. Press the Clock pad for five seconds.
OR
2. After 72 hours, the Sabbath Mode will end.
• SAb will flash for 5 seconds.
• The time of day will return to the display.
Adjusting the Oven Temperature
Oven temperatures are carefully tested for accuracy at the
factory. It is normal to notice some baking or browning
differences between a new oven and an old one. As ranges
get older, the oven temperature can shift.
You may adjust the oven temperature if you think the oven is
not baking or browning correctly. To decide how much to
change the temperature, set the temperature 25° higher or
lower than your recipe recommends, then bake. The results
of the "test" should give you an idea of how much to adjust
the temperature.
To adjust the oven temperature:
1. Press Bake.
2.
3.
Enter 550° by pressing the • pad.
Press and hold the Bake pad for several
seconds or until 0° appears in the display.
If the oven temperature was previously adjusted, the
change will be displayed. For example, if the oven tem-
perature was reduced by 15° the display will show "-15 °''.
4. Press the • or • pad to adjust the temperature.
Each time a pad is pressed, the temperature changes by
5°. The oven temperature can be increased or decreased
by 5° to 35°.
5. The time of day will automatically reappear in the display.
You do not need to readjust the oven temperature if there
is a power failure or interruption. Broiling and cleaning
temperatures cannot be adjusted.
Sabbath Mode Notes:
• Sabbath Mode can be turned on at any time with or
without the oven on.
• Sabbath Mode cannot be turned on if the touchpads are
locked out or when the door is locked.
• If the oven is baking when Sabbath Mode is set, BAKE
will go out at the end of the baking cycle. There will be
no audible beeps.
• If the oven light is desired while in Sabbath Mode, it
must be turned on before the Sabbath Mode is started.
• When the Sabbath Mode is started, no preheat beep will
sound.
• All prompts, messages and beeps are deactivated when
Sabbath Mode is active.
• The automatic door lock does not operate during the
Sabbath Mode.
• Pressing Cancel will cancel a bake cycle, however the
control will stay in the Sabbath Mode.
• If power fails, the oven will power Lip in Sabbath Mode with
72 hours remaining and no cycle active.
12
8t 13p553.pdf I Imported from Cleveland on 1/t7/2007
OvenCooking
Broiling
To set Broil:
1, Press the Broil pad.
• BROIL flashes,
• SEt is displayed,
2, Press the • pad to set HI broil or press the • pad to set
LO broil.
• HI or LO will be displayed.
• Select HI broil (550° F) for normal broiling. Select
LO broil (450° F) for low-temperature broiling of longer
cooking foods such as poultry.
3. After four seconds, the oven will start.
• BROIL will remain lit.
4. For optimum browning, preheat for 2-3 minutes before
adding food.
5_
6.
7.
Place food in the oven. Close the oven door.
Turn meat once about halfway through cooking.
When food is cooked, press the Cancel pad.
Remove food and broiler pan from the oven.
• The time of day will reappear in the display.
Broil Notes:
• For best results when broiling, use a pan designed for
broiling.
• HI is used for most broiling. Use LO broil when broiling
longer cooking foods. The lower temperature allows
food to cook to the well done stage without excessive
browning.
• To change the oven temperature during broiling,
press tile Broil pad, then tile • or • pad to switch
between LO and HI broil.
• Broil times may be longer when the lower broiling temp-
erature is selected.
• Most foods should be turned halfway through broiling
time.
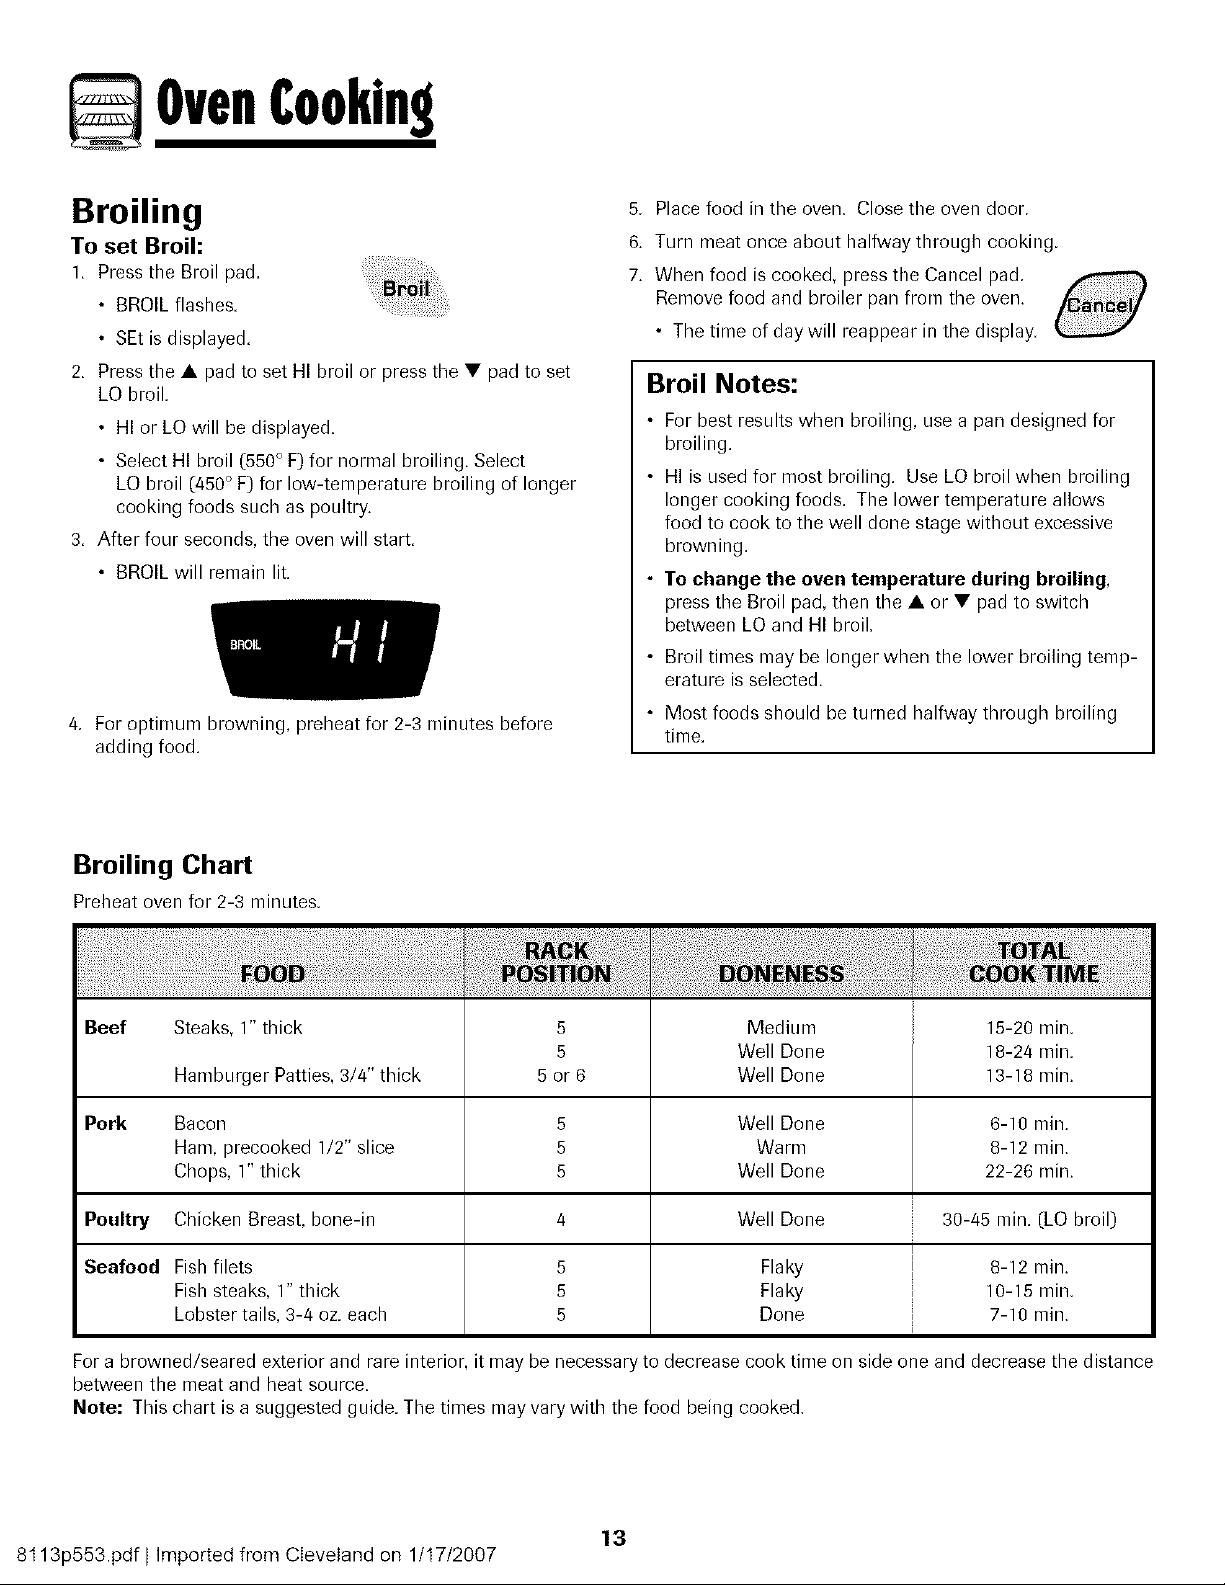
Broiling Chart
Prebeat oven for 2-3 minutes.
Beef 5 Medium 15-20 min.
5 Well Done 18-24 min.
5 or 6 Well Done 13-18 rain.
Pork 5 Well Done 6-10 rain.
5 Warm 8-12 rain.
5 Well Done 22-26 min.
Poultry 4 Well Done 30-45 min. (LO broil)
Seafood
Steaks, 1" thick
Hamburger Patties, 3/4" thick
Bacon
Ham, precooked 1/2" slice
Chops, 1" thick
Chicken Breast, bone-in
Fish filets
Fish steaks, 1" thick
Lobster tails, 3-4 oz. each
5
5
5
Flaky
Flaky
Done
8-12 min.
10-15 min.
7-10 rain.
For a browned/seared exterior and rare interior, it may be necessary to decrease cook time on side one and decrease the distance
between the meat and heat source.
Note: This chart is a suggested guide. The times mayvarywith the food being cooked.
13
8t 13p553.pdf I Imported from Cleveland on 1/t7/2007
OvenCooking
Pilotless Ignition
Your range is equipped with pilotless ignition. With this type of
ignition system, the gas automatically shuts off and the oven will
not operate during a power failure.
A lighted match will not light the oven burner. No attempt
should be made to operate the oven during a power failure.
Oven Vent
When the oven is in use the area near the vent may become
hot enough to cause burns. Never block the vent opening.
The oven vent is located below tbe backguard vent shield
on your range.
OVENVENT
_ o not place
plastics near the
vent opening as
heat from the vent
could distort or
melt the plastic.
Oven Light
Press the oven light pad to turn the oven light on
and off. The oven light is only activated by this
switch.
Oven Bottom
Oven
Light
Protect oven bottom against spillovers, especially acidic or
sugary spills, as they may discolor tile porcelain enamel. Use
the correct pan size to avoid spillovers and boilovers. Do not
place utensils or aluminum foil directly on the oven
bottom.
Oven Racks
2. Lift up on the front of the rack and pull out.
To replace:
1. Place rack on the rack support in the oven.
2. Tilt the front end Lipslightly. Slide rack back Lmtil it clears
the lock-stop position.
3. Lower front and slide back into the oven.
Never cover an entire rack with aluminum foil or place
foil on the oven bottom. Baking results will be affected
and damage may occur to the oven bottom.
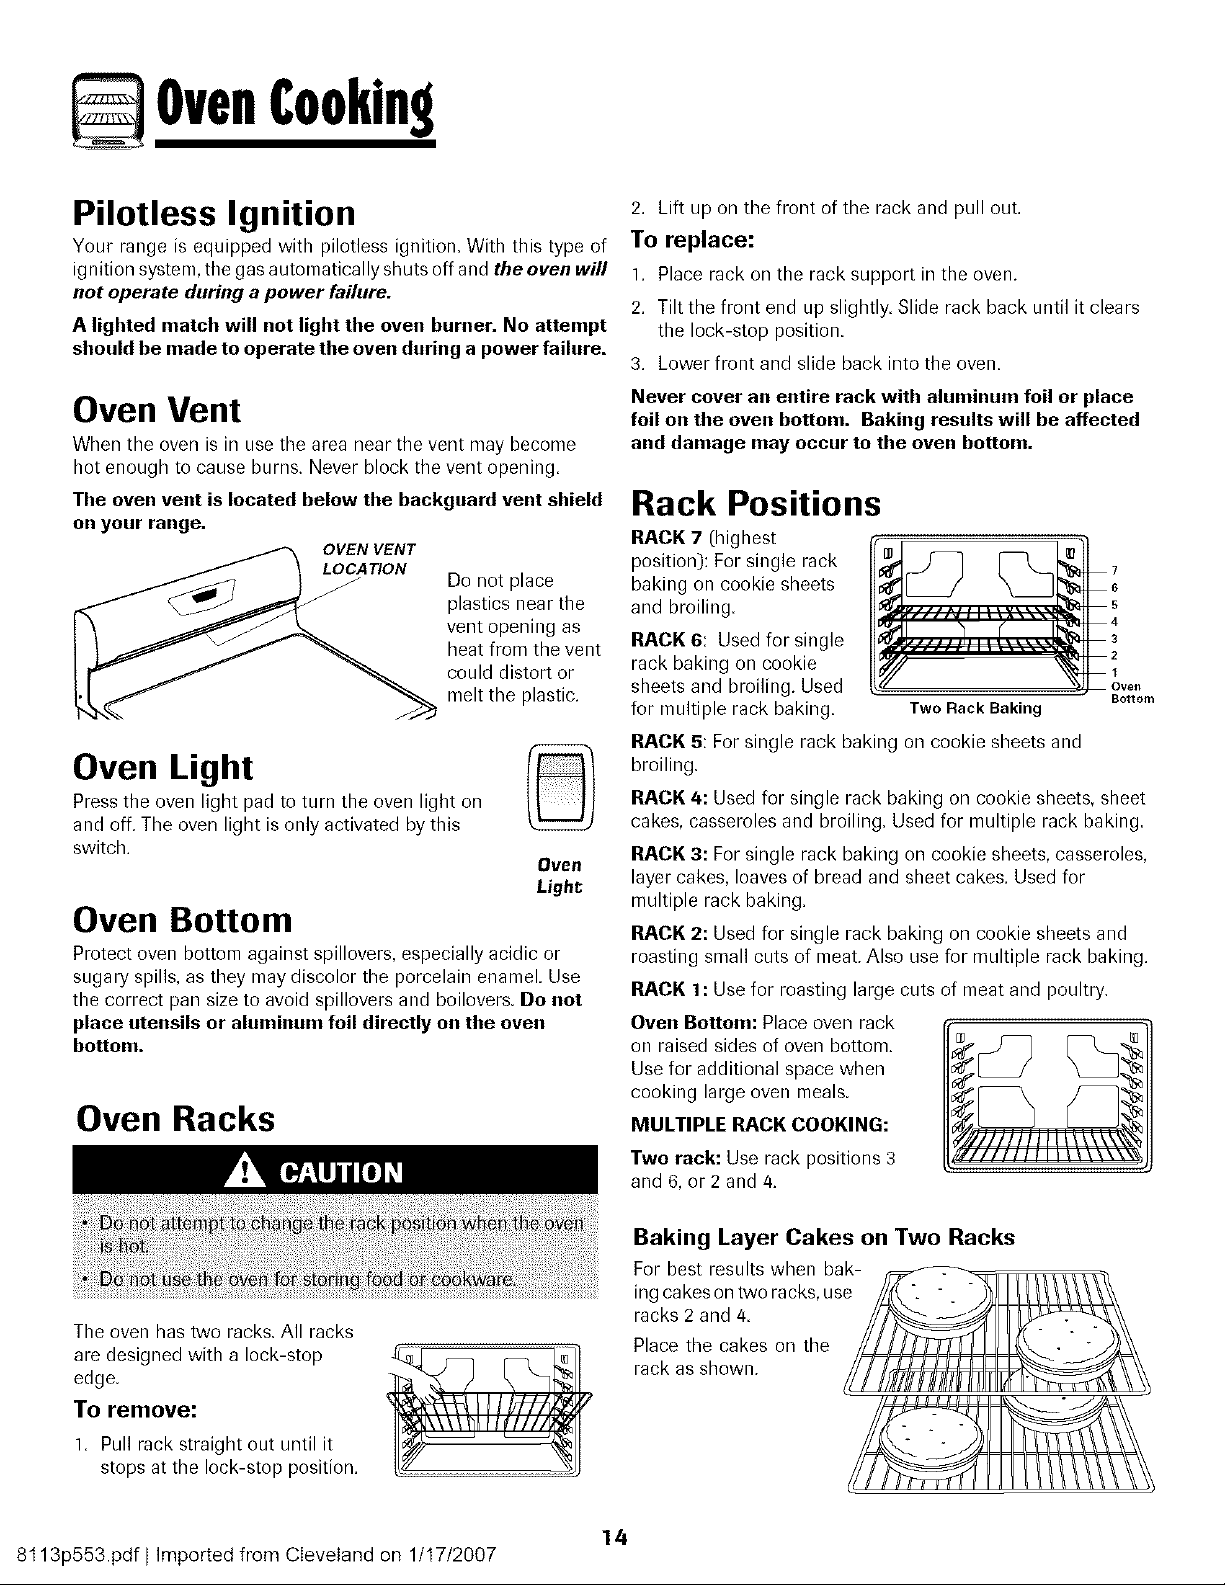
Rack Positions
RACK 7 (highest
position): Forsingle rack
baking on cookie sheets
and broiling.
RACK 6: Used for single
rack baking on cookie
sheets and broiling. Used
for multiple rack baking.
Two Rack Baking
RACK 5: For single rack baking on cookie sheets and
broiling.
7
6
5
4
3
2
1
Oven
BoSom
RACK 4: Used for single rack baking on cookie sheets, sheet
cakes, casseroles and broiling. Used for multiple rack baking.
RACK 3: For single rack baking on cookie sheets, casseroles,
layer cakes, loaves of bread and sheet cakes. Used for
multiple rack baking.
RACK 2: Used for single rack baking on cookie sheets and
roasting small cuts of meat. Also use for multiple rack baking.
RACK 1: Use for roasting large cuts of meat and poultry.
Oven Bottom: Place oven rack
on raised sides of oven bottom.
Use for additional space when
cooking large oven meals.
MULTIPLE RACK COOKING:
Two rack: Use rack positions 3
and 6, or 2 and 4.
Baking Layer Cakes on Two Racks
The oven has two racks. All racks
are designed with a lock-stop
edge.
To remove:
1. Pull rack straight out until it
stops at the lock-stop position.
14
8t 13p553.pdf I Imported from Cleveland on 1/t7/2007
& (;leaning
Self-Clean Oven
The self-clean cycle uses above-normal cooking temperatures
to aLitomatically clean the oven interior.
The oven shoLiId be cleaned regularly by wiping Lipspillovers
to prevent excessive smoke and flare-ups. Do not allow a
heavy build-up of soil to accumulate in the oven.
Daring the cleaning process, the kitchen should be well
ventilated to get rid of normal odors associated with cleaning.
Before Self-Cleaning
1 Turn off tile oven light before cleaning. Tile light may burn
out during the clean cycle.
2. Remove broiler pan, all pans, and oven racks from the
oven. The oven racks will discolor and may not slide easily
after a self-clean cycle if they are not removed.
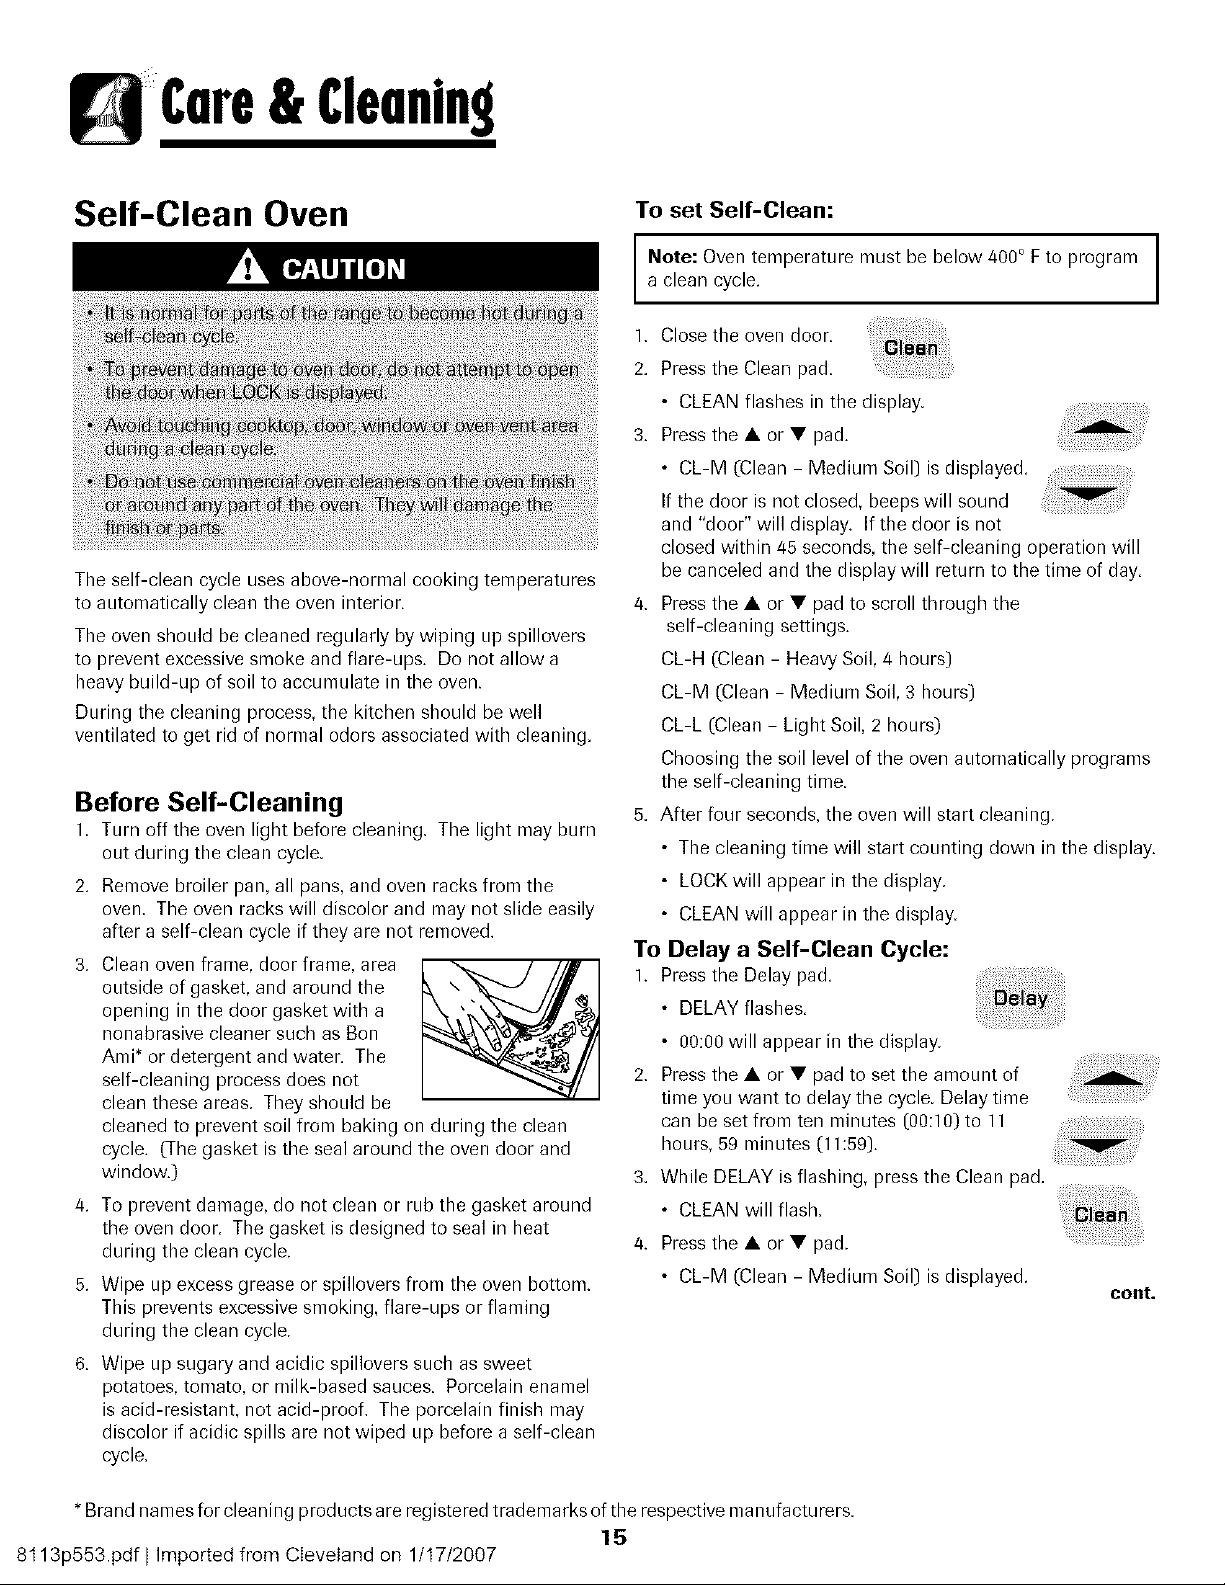
3.
Clean]oven frame, door frame, area
oLitside of gasket, and around the
opening in the door gasket with a
nonabrasive cleaner such as Bon
Ami _ or detergent and water. The
self-cleaning process does not
clean these areas. They shoLiId be
cleaned to prevent soil from baking on during the clean
cycle. (The gasket is the seal around the oven door and
window.)
4. To prevent damage, do not clean or rLIbthe gasket around
the oven door. The gasket is designed to seal in heat
during the clean cycle.
5. Wipe Lipexcess grease or spillovers from the oven bottom.
This prevents excessive smoking, flare-ups or flaming
during the clean cycle.
6,
Wipe up sugary and acidic spillovers such as sweet
potatoes, tomato, or milk-based sauces. Porcelain enamel
is acid-resistant, not acid-proof. The porcelain finish inlay
discolor if acidic spills are not wiped Lipbefore a self-clean
cycle.
To set Self-Clean:
Note: Oven tenrperature nrust be below 400° F to program
a clean cycle.
1. Close the oven door.
2. Press tile Clean pad.
• CLEAN flashes in the display.
3. Press the • or • pad.
• CL-M (Clean - Medium Soil) is displayed.
If the door is not closed, beeps will sound
and "door" will display. If the door is not
closed within/45 seconds, the self-cleaning operation will
be canceled and the display will return to the time of day.
4. Press the • or • pad to scroll through the
self-cleaning settings.
CL-H (Clean - Heavy Soil, 4 hours)
CL-M (Clean - Medium Soil, 3 hours)
CL-L (Clean - Light Soil, 2 hoLirs)
Choosing the soil level of the oven aLitomatically programs
the self-cleaning time.
5. After four seconds, the oven will start cleaning.
• The cleaning time will start COLintingdown in the display.
• LOCK will appear in the display.
• CLEAN will appear in the display.
To Delay a Self-Clean Cycle:
1. Press the Delay pad.
• DELAY flashes.
• 00:00 will appear in the display.
2. Press the • or • pad to set the amoLint of
time yoLIwant to delay the cycle. Delay time
can be set from ten minutes (00:10) to 11
hours, 59 minutes (11:59).
3. While DELAY is flashing, press the Clean pad.
• CLEAN will flash.
4. Press the • or • pad.
• CL-M (Clean - Medium Soil) is displayed.
cont.
Brand names for cleaning products are registered trademarks of the respective manufacturers.
15
8t 13p553.pdf I Imported from Cleveland on 1/t 7/2007
& Cleaning
5. Press tile • or • pad to scroll through the self-cleaning
settings.
CL-H (Clean - Heavy Soil, 4 hours)
CL-M (Clean - Medium Soil, 3 hours)
CL-L (Clean - Light Soil, 2 hours)
Choosing the soil level of the oven automatically programs
the self-cleaning time.
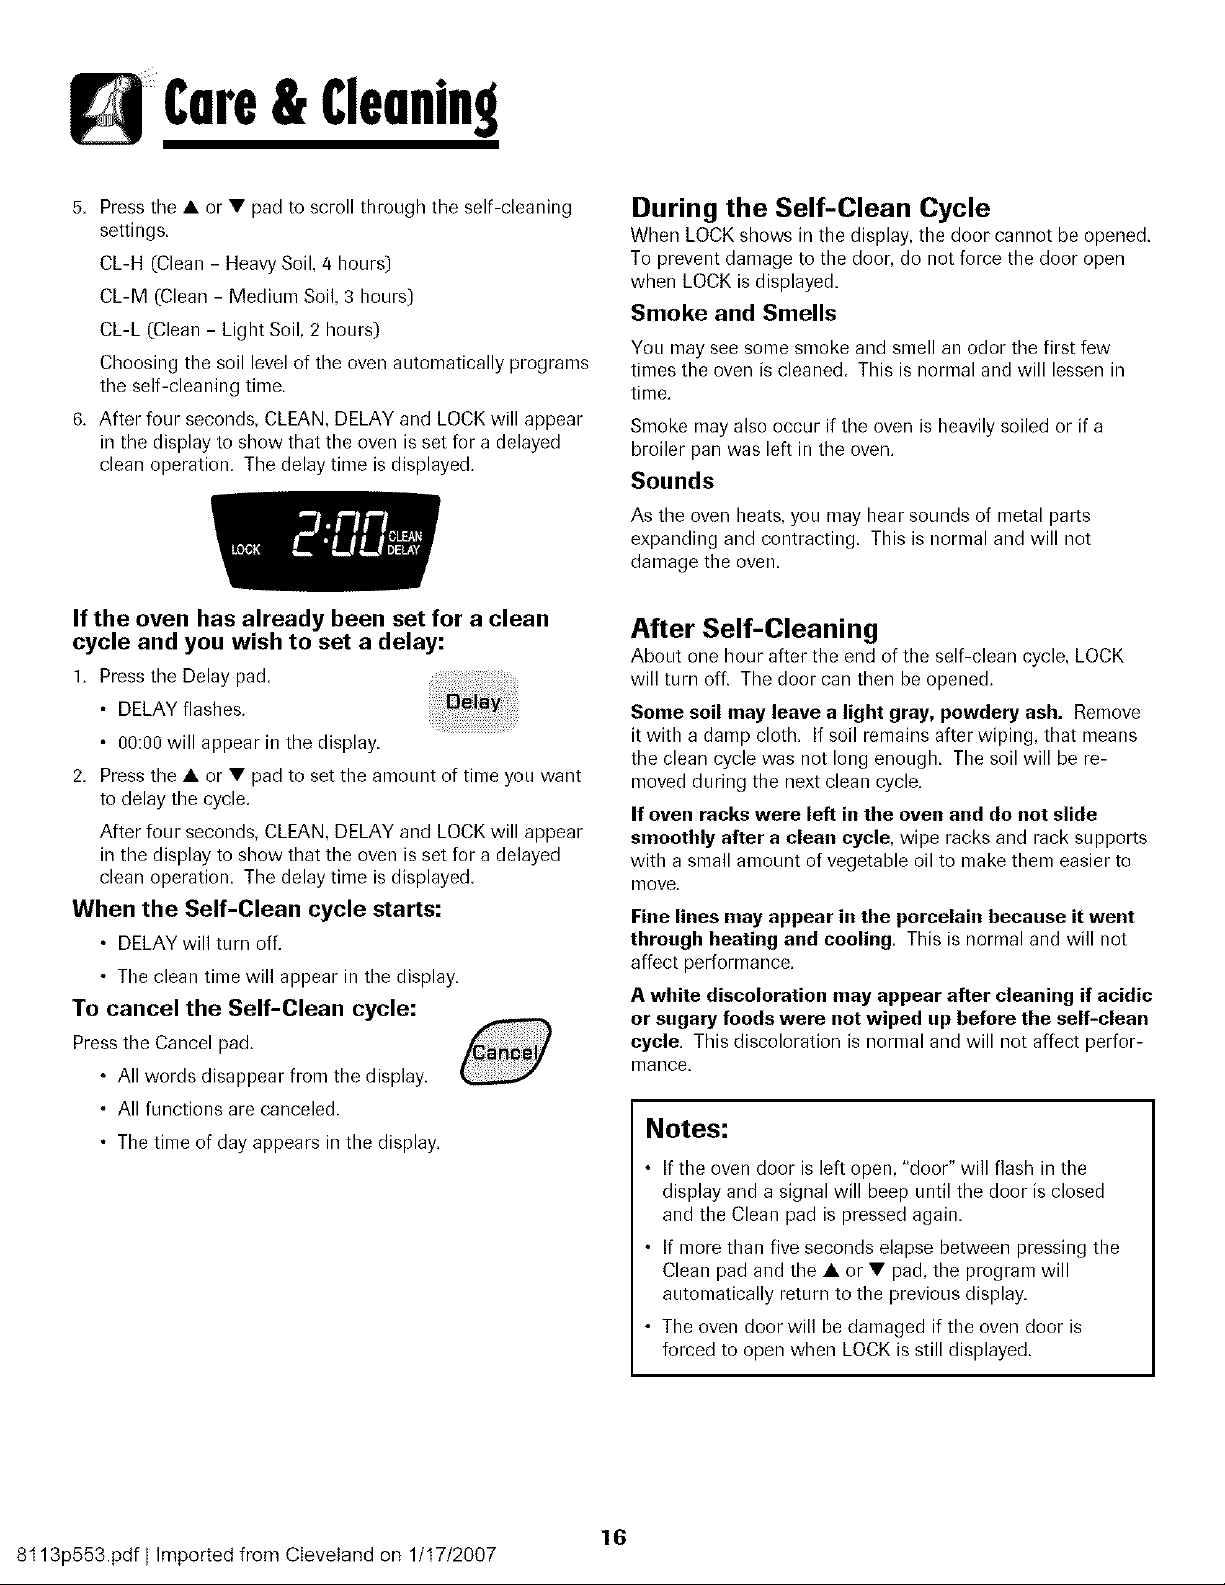
6. After four seconds, CLEAN, DELAY and LOCK will appear
in the display to show that the oven is set for a delayed
clean operation. The delay time is displayed.
During the Self-Clean Cycle
When LOCK shows in the display, the door cannot be opened.
To prevent damage to the door, do not force the door open
when LOCK is displayed.
Smoke and Smells
YOLImay see some smoke and smell an odor the first few
times the oven is cleaned This is normal and will lessen in
time,
Smoke may also occur if the oven is heavily soiled or if a
broiler pan was left in the oven.
Sounds
As the oven heats, you may hear sounds of metal parts
expanding and contracting. This is normal and will not
damage the oven.
If the oven has already been set for a clean
cycle and you wish to set a delay:
1. Press the Delay pad
• DELAY flashes.
• 00:00 will appear in the display.
2. Press the • or • pad to set the amount of time you want
to delay the cycle.
After four seconds, CLEAN, DELAY and LOCK will appear
in the display to show that the oven is set for a delayed
clean operation. The delay time is displayed.
When the Self-Clean cycle starts:
• DELAY will turn off.
• The clean time will appear in the display.
To cancel the Self-Clean cycle:
Press tile Cancel pad.
• All words disappear from the display.
• All functions are canceled.
• The time of day appears in the display.
After Self-Cleaning
About one hour after the end of the self-clean cycle, LOCK
will turn off. The door can then be opened.
Some soil may leave a light gray, powdery ash. Remove
it with a damp cloth. If soil remains after wiping, that means
the clean cycle was not long enough. The soil will be re-
moved during the next clean cycle.
If oven racks were left in the oven and do not slide
smoothly after a clean cycle, wipe racks and rack supports
with a small amount of vegetable oil to make them easier to
move.
Fine lines may appear in the porcelain because it went
through heating and cooling This is normal and will not
affect performance.
A white discoloration may appear after cleaning if acidic
or sugary foods were not wiped up before the self-clean
cycle. This discoloration is normal and will not affect perfor-
mance.
Notes:
• If the oven door is left open, "door" will flash in the
display and a signal will beep until the door is closed
and the Clean pad is pressed again.
• If more than five seconds elapse between pressing the
Clean pad and the • or• pad, the program will
automatically return to the previous display.
• The oven door will be damaged if the oven door is
forced to open when LOCK is still displayed.
16
8t 13p553.pdf I Imported from Cleveland on 1/t7/2007
& Cleaning
Cleaning Procedures
* Brand names are registered trademarks ofthe
_spective manufactumrs.
** To ordercalll-877-232-6771 USA and
1-800-688-8408 Canada.
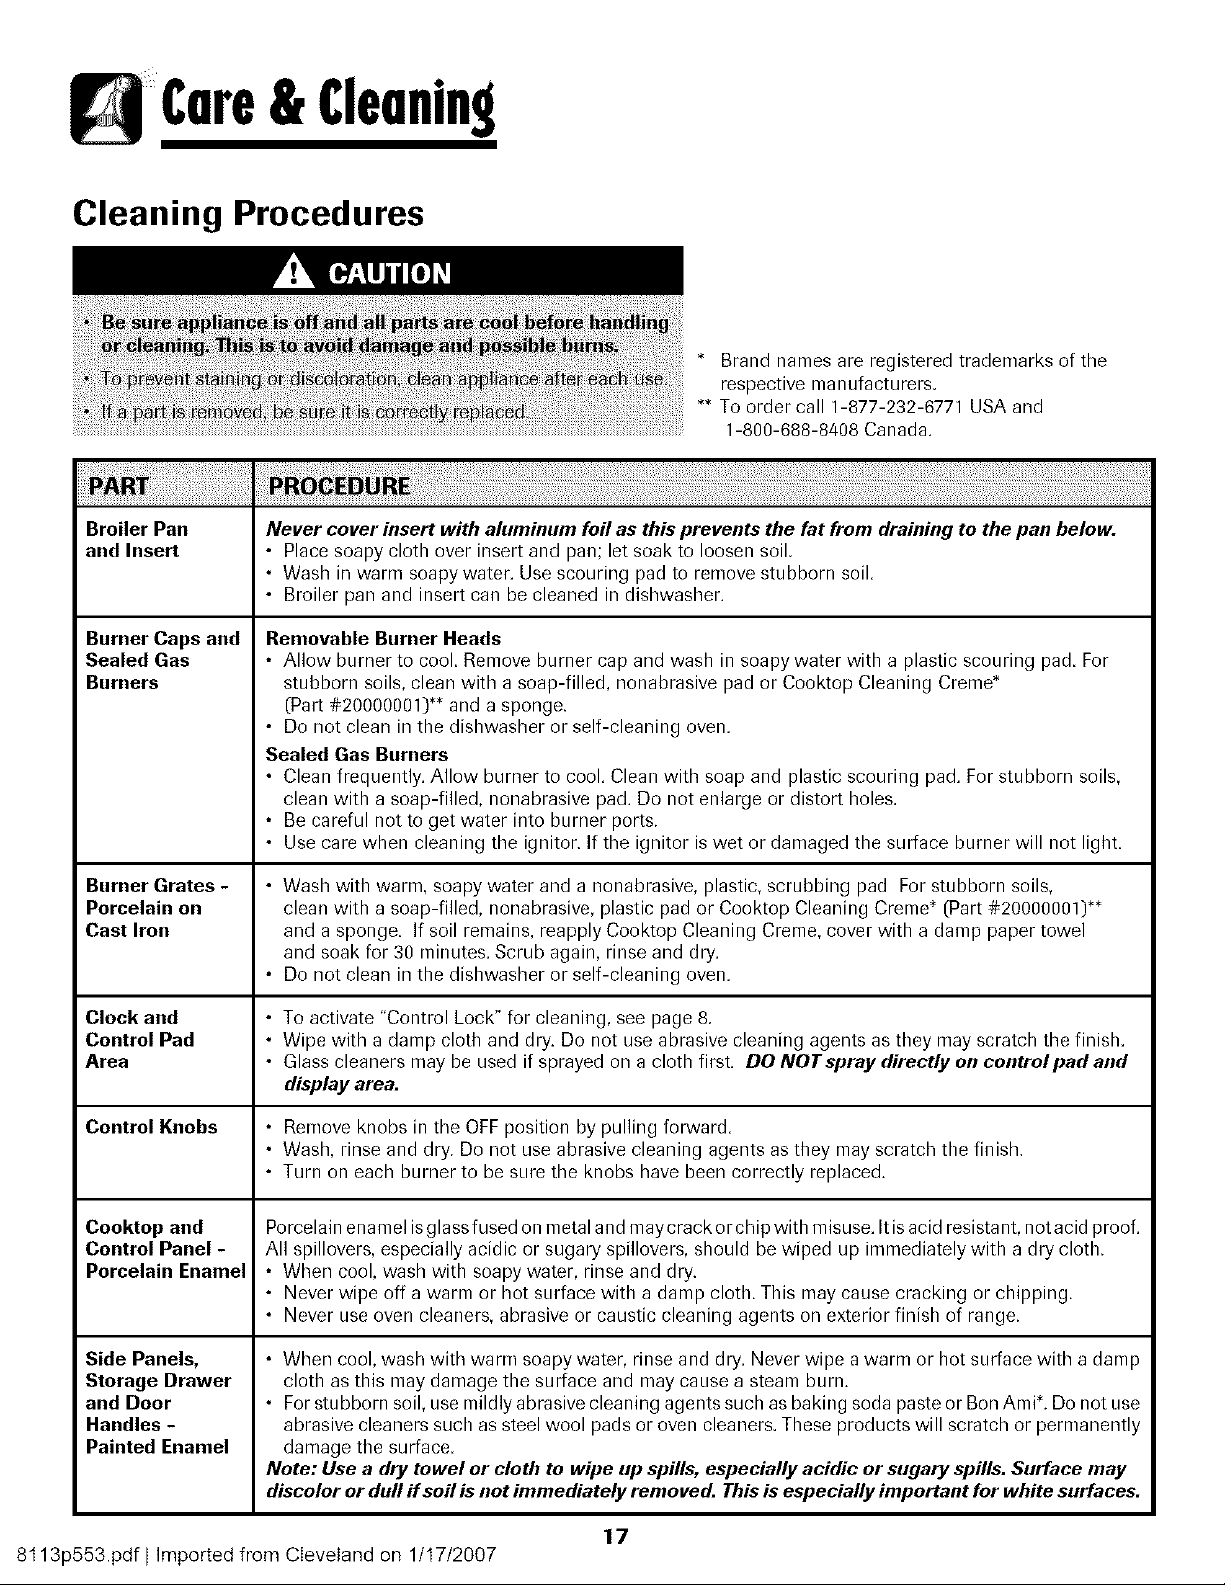
Broiler Pan Never cover insert with aluminum foil as this prevents the fat from draining to the pan below.
and Insert • Place soapy cloth over insert and pan; let soak to loosen soil.
• Wash in warm soapywater. Use scouring pad to remove stubborn soil.
• Broiler pan and insert can be cleaned in dishwasher.
Burner Caps and
Sealed Gas
Burners
Burner Grates -
Porcelain on
Cast Iron
Clock and
ControlPad
Area
Control Knobs
Cooktop and
Control Panel -
Porcelain Enamel
Side Panels,
Storage Drawer
and Door
Handles -
Painted Enamel
Removable Burner Heads
• Allow burner to cool. Remove burner cap and wash in soapy water with a plastic scouring pad. For
stubborn soils, clean with a soap-filled, nonabrasive pad or Cooktop Cleaning Creme*
(Part #20000001)** and a sponge.
• Do not clean in the dishwasher or self-cleaning oven.
Sealed Gas Burners
• Clean frequently. Allow burner to cool. Clean with soap and plastic scouring pad. Forstubborn soils,
clean with a soap-filled, nonabrasive pad. Do not enlarge or distort holes.
• Be careful not to get water into burner ports.
• Use care when cleaning the ignitor. If the ignitor is wet or damaged the surface burner will not light.
• Wash with warm, soapy water and a nonabrasive, plastic, scrubbing pad For stubborn soils,
clean with a soap-filled, nonabrasive, plastic pad or Cooktop Cleaning Creme* (Part #20000001) *_
and a sponge. If soil remains, reapply Cooktop Cleaning Creme, cover with a damp paper towel
and soak for 30 minutes. Scrub again, rinse and dry.
• Do not clean in the dishwasher or self-cleaning oven.
• To activate "Control Lock" for cleaning, see page 8.
• Wipe with a damp cloth and dry. Do not use abrasive cleaning agents as they may scratch the finish.
• Glass cleaners may be used if sprayed on a cloth first. DO NOTspray directly on control pad and
display area.
• Remove knobs in the OFF position by pulling forward.
• Wash, rinse and dry. Do not use abrasive cleaning agents as they may scratch the finish.
• Turn on each burner to be sure the knobs have been correctly replaced.
Porcelain enamel is glass fused on metal and maycrackor chip with misuse. It isacid resistant, not acid proof.
All spillovers, especially acidic or sugary spillovers, should be wiped up immediately with a dry cloth.
• When cool, wash with soapy water, rinse and dry.
• Never wipe off a warm or hot surface with a damp cloth. This may cause cracking or chipping.
• Never use oven cleaners, abrasive or caustic cleaning agents on exterior finish of range.
• When cool, wash with warm soapy water, rinse and dry. Never wipe a warm or hot surface with a damp
cloth as this may damage the surface and may cause a steam burn.
• For stubborn soil, use mildly abrasive cleaning agents such as baking soda paste or Bon Ami *. Do not use
abrasive cleaners such as steel wool pads or oven cleaners. These products will scratch or permanently
damage the surface.
Note: Use a dry towel or cloth to wipe up spills, especially acidic or sugary spills. Surface may
discolor or dull if soil is not immediately removed. This is especially important for white surfaces.
17
8t 13p553.pdf I Imported from Cleveland on 1/t7/2007
& Cleaning
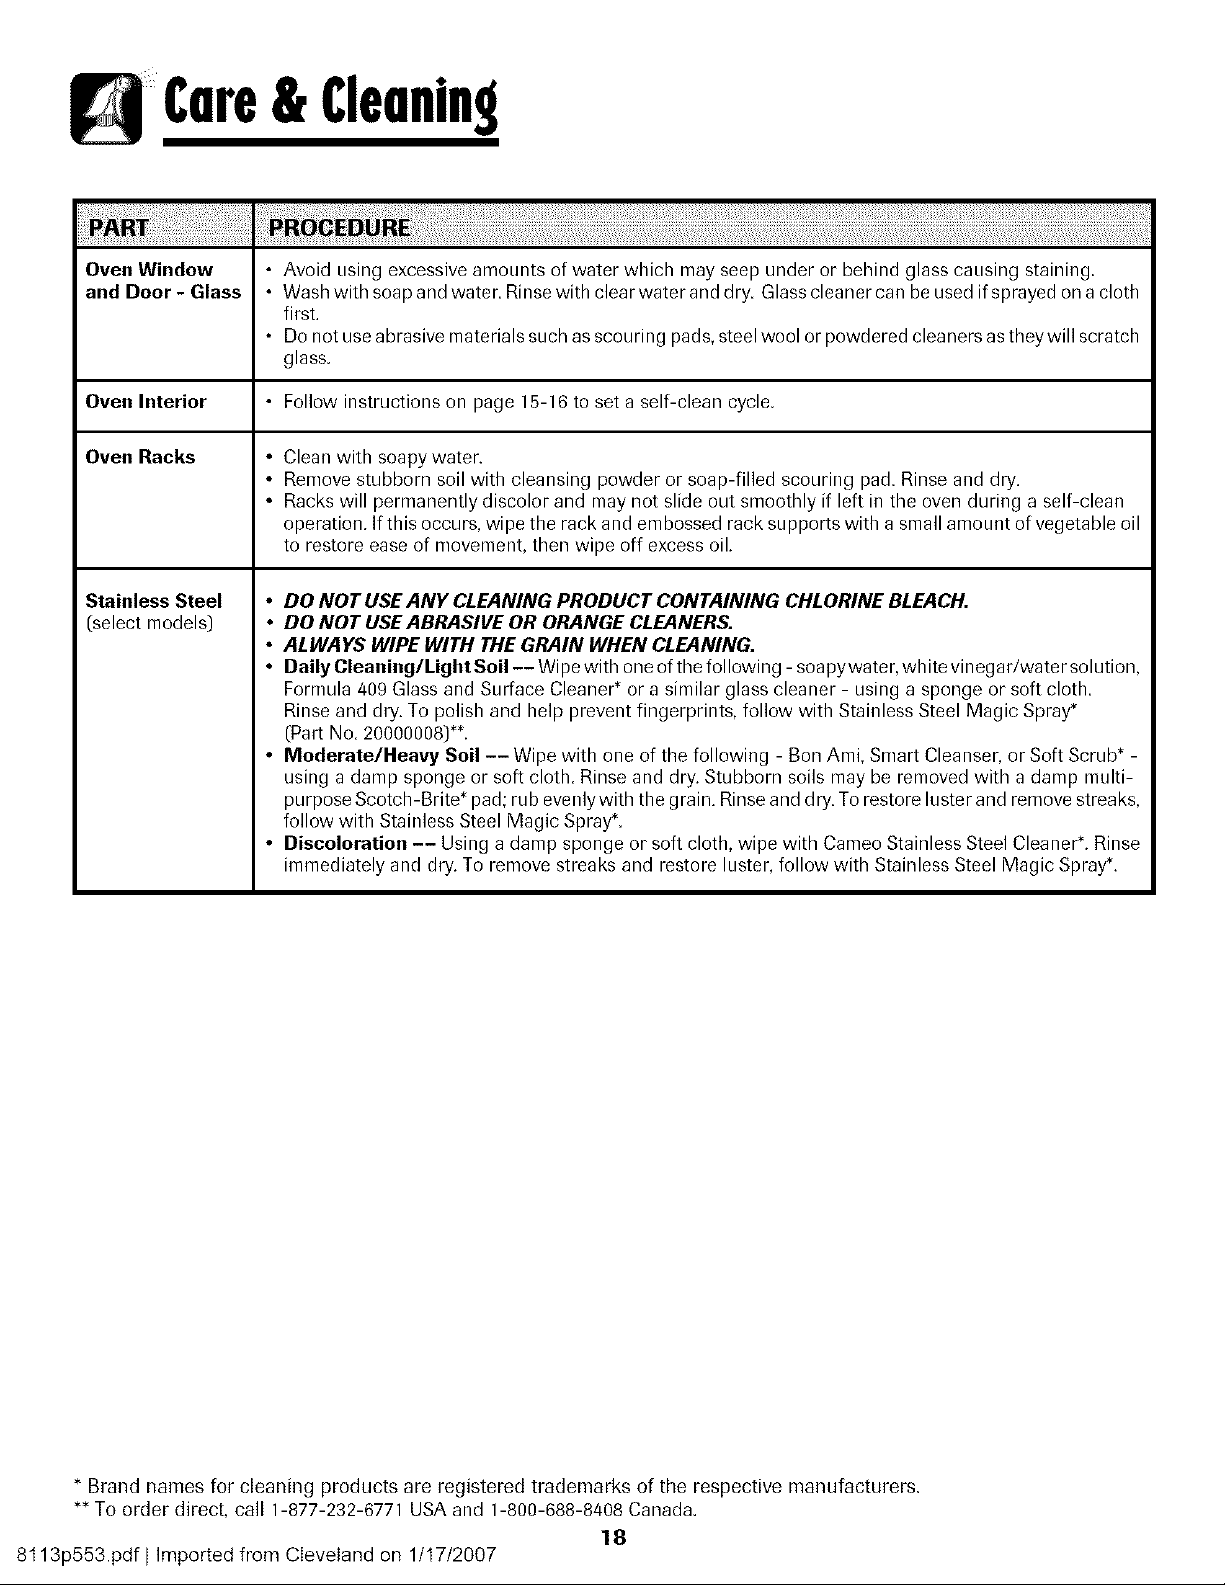
Oven Window • Avoid using excessive amounts of water which may seep under or behind glass causing staining.
and Door- Glass • washwiths_apandwater_Rinsewithc_earwateranddry_G_assc_eanercanbeusedifsprayed_nac__th
first.
• Do not use abrasive materials such as scouring pads, steel wool or powdered cleaners as theywill scratch
glass.
Oven Interior • Follow instructions on page 15-16 to set a self-clean cycle.
Oven Racks • Clean with soapywater.
• Remove stubborn soil with cleansing powder or soap-filled scouring pad. Rinse and dry.
• Racks will permanently discolor and may not slide out smoothly if left in tile oven during a self-clean
operation. If this occurs, wipe the rack and embossed rack supports with a small amoLmt of vegetable oil
to restore ease of movement, then wipe off excess oil.
Stainless Steel
(select models)
• DO NOT USE ANY CLEANING PRODUCT CONTAINING CHLORINE BLEACH.
• DO NOT USE ABRASIVE OR ORANGE CLEANERS.
• ALWAYS WIPE WITH THE GRAIN WHEN CLEANING.
• Daily Cleaning/l_ight Soil -- Wipe with one of the followhlg - soapywater, white vhlegariwater solution,
Formula 409 Glass and Surface Cleaner_or a similar glass cleaner - using a sponge or soft cloth
Rinse and dry. To polish and help prevent fingerprints, follow with Stainless Steel Magic Spray*
(Part No. 20000008)**.
• Moderate/Heavy Soil -- Wipe with one of the following - Bon Ami, Smart Cleanser, or Soft Scrub * -
using a damp sponge or soft cloth. Rinse and dry. Stubborn soils may be removed with a damp multi-
purpose Scotch-Brite* pad; rub evenly with the grain. Rinseand dry. To restore luster and remove streaks,
follow with Stainless Steel Magic Spray*.
• Discoloration -- Using a damp sponge or soft cloth, wipe with Cameo Stainless Steel Cleaner*. Rinse
immediately and dry. To remove streaks and restore luster, follow with Stainless Steel Magic Spray*.
* Brand names for cleaning products are registered trademarks of the respective manufacturers,
** To order direct, call 1-877-232-6771 USA and 1-800-688-8408 Canada.
18
8t 13p553.pdf I Imported from Cleveland on 1/t 7/2007
Maintenance
Oven Door
Note: The oven door on a new range may feel "spongy"
when it is closed. This is normal and will decrease with LlSe.
Oven Window
To protect the oven door window:
I Do not use abrasive cleaning agents sLmhas steel wool
scouring pads or powdered cleansers as they may scratch
the glass.
2. Do not hit the glass with pots, pans, furniture, toys, or other
objects.
3. Do not close the oven door until the oven racks are in
place.
Scratching, hitting, jarring or stressing the glass may weaken
its strLmture causing an increased risk of breakage at a later
date.
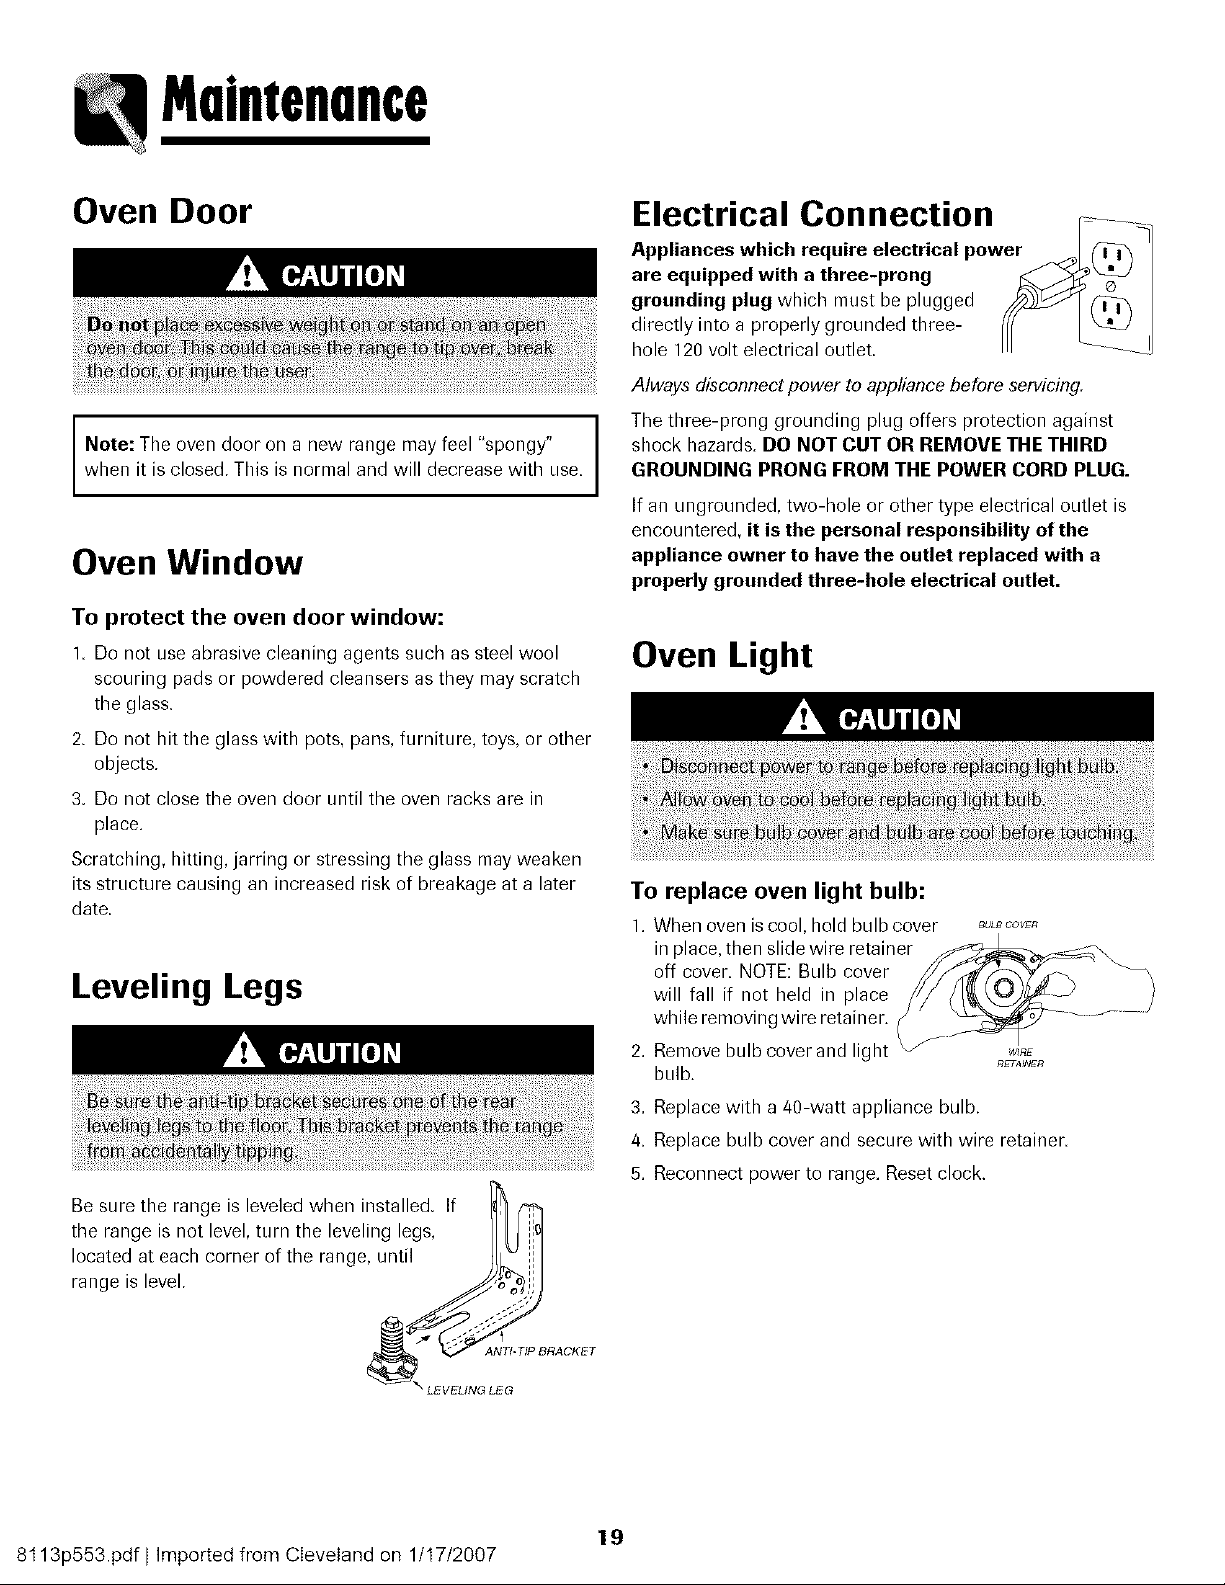
Leveling Legs
Be sure the range is leveled when installed. If
the range is not level, turn the leveling legs, I 7
located at each corner of the range, until
range is level. _,,1
ANTI_BRACKET
LEVELING LEG
Electrical Connection .......
Appliances which require electrical pow__ ]
are equipped with a three-prong
grounding plug which must be plugged
directly into a properly grounded three-
hole 120 volt electrical outlet. L ]
Always disconnect power to appliance before servicing.
Tile three-prong grounding plug offers protection against
shock hazards. DO NOT CUT OR REMOVE THE THIRD
GROUNDING PRONG FROM THE POWER CORD PLUG.
If an ungrounded, two-hole or other type electrical outlet is
encountered, it is the personal responsibility of the
appliance owner to have the outlet replaced with a
properly grounded three-hole electrical outlet.
Oven Light
To replace oven light bulb:
1. When oven is cool, hold bulb cover
in place, then slide wire retainer
off cover. NOTE: Bulb cover
will fall if not held in place
while removing wire retainer.
2. Remove bulb cover and light
bulb.
BULB COVER
RE, A_NER
3. Replace with a 40-watt appliance bulb.
4. Replace bulb cover and secure with wire retainer.
5. Reconnect power to range. Reset clock.
19
8t 13p553.pdf I Imported from Cleveland on 1/t7/2007
Maintenance
Removal of Gas Appliance
Gas appliance connectors used to connect this appliance to
the gas supply are not designed for continuous movement.
Once installed, DO NOT repeatedly move this gas appliance
for cleaning or to relocate. If this appliance has to be moved
and!or removed for servicing, follow the procedure described
in the installation instructions. For information, contact
Amana Customer Assistance at 1-800-843-0304 USA or
1-866-587-2002 Canada.
To prevent range from accidentally tipping, range must be
secured to the floor by sliding rear leveling leg into the anti-
tip bracket.
Storage Drawer
The storage drawer can be removed to allow you to clean
under the range.
To remove:
1. Empty drawer and pull out to the first stop position.
2. Lift up the front of the drawer.
3. Pull out to the second stop position.
4. Grasp sides and lift drawer up and out.
To replace:
1. Fit the ends of the drawer glides into the rails in the range.
2. Lift up the front of the drawer and gently push in to the
first stop position.
3. Lift drawer up again and push until drawer is closed.
Oven Bottom
Protect oven bottom against spillovers, especially acidic or
sugary spills, as they may discolor the porcelain enamel. Use
the correct pan size to avoid spillovers and boilovers.
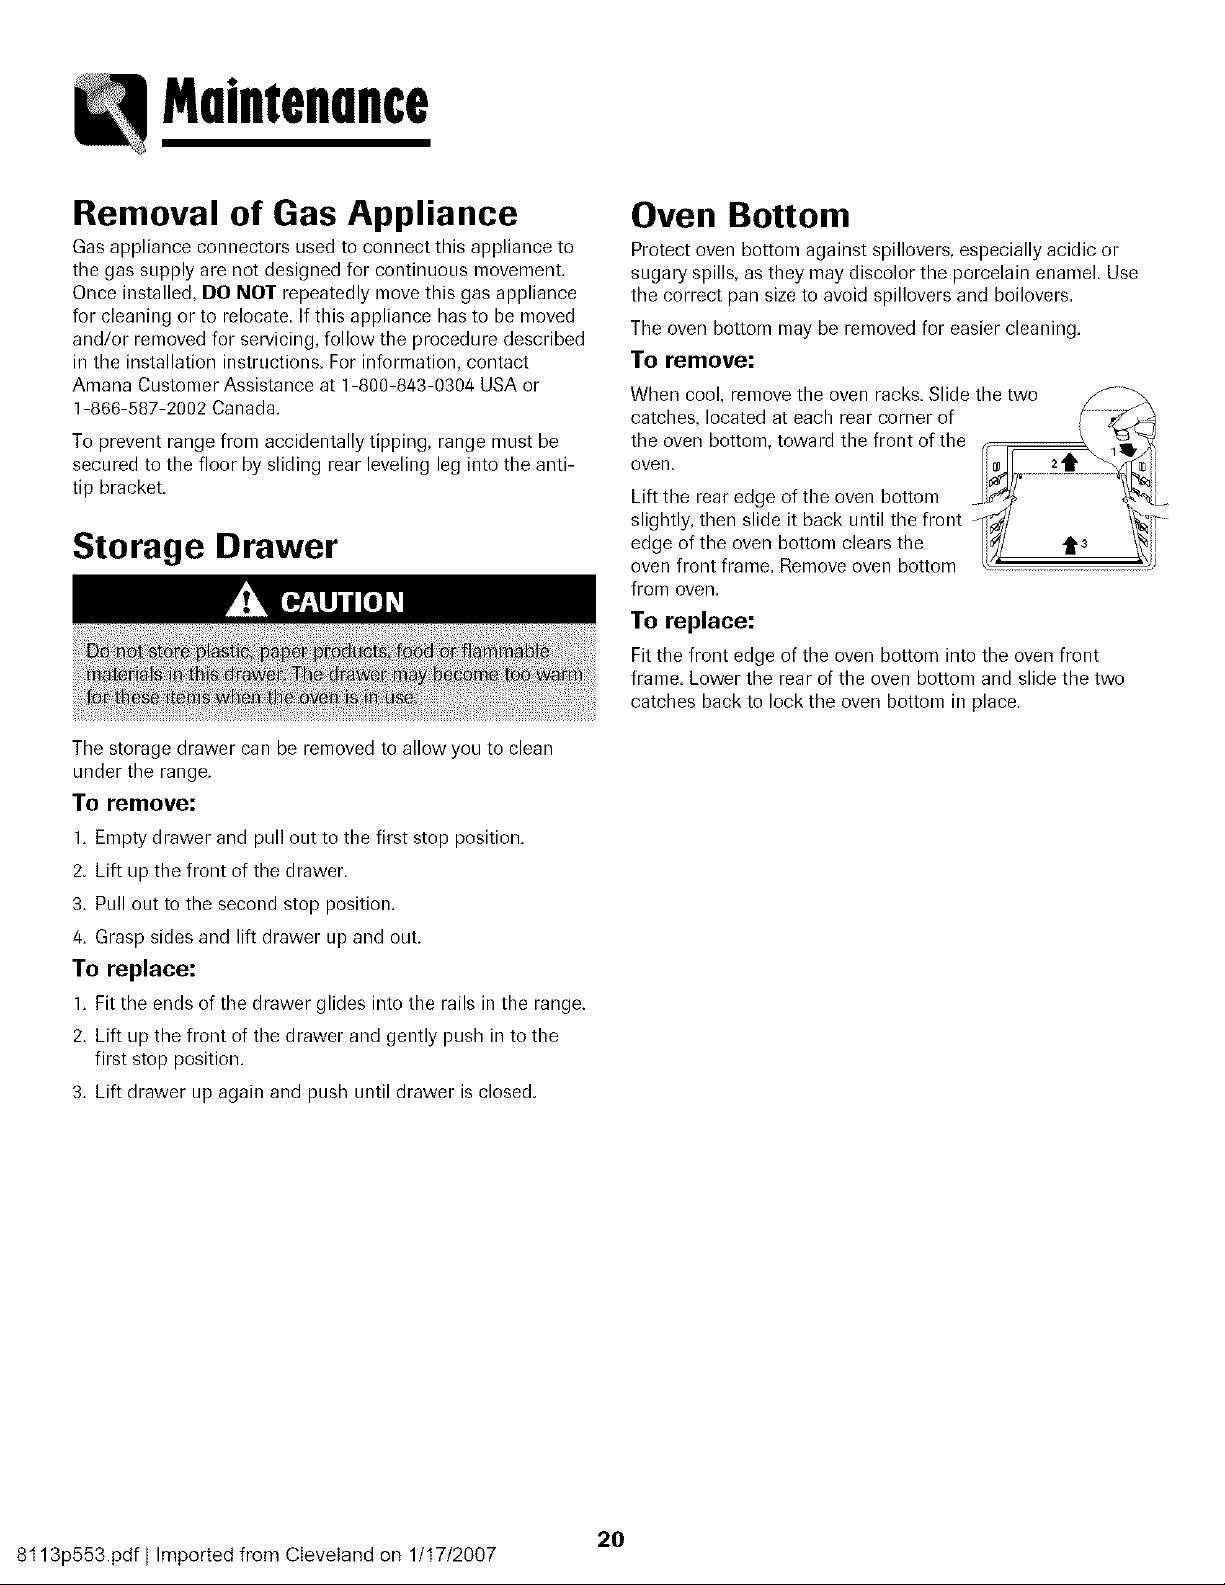
Tile oven bottom may be removed for easier cleaning.
To remove:
When cool, remove the oven racks Slide tile two _-_
catches, located at each rear corner of I--_-_
the oven bottom, toward the front of the _ 1_,_
oven. =
Lift the rear edge of the oven bottom
slightly, then slide it back until the front _/ \_-
edge of the oven bottom clears the Ii_/ i,3 /_llll
oven front frame. Remove oven bottom L{t_....... _....... _J
from oven.
To replace:
Fit the front edge of the oven bottom into the oven front
frame. Lower the rear of the oven bottom and slide the two
catches back to lock the oven bottom in place.
20
8t 13p553.pdf I Imported from Cleveland on 1/t 7/2007
Troubleshooting
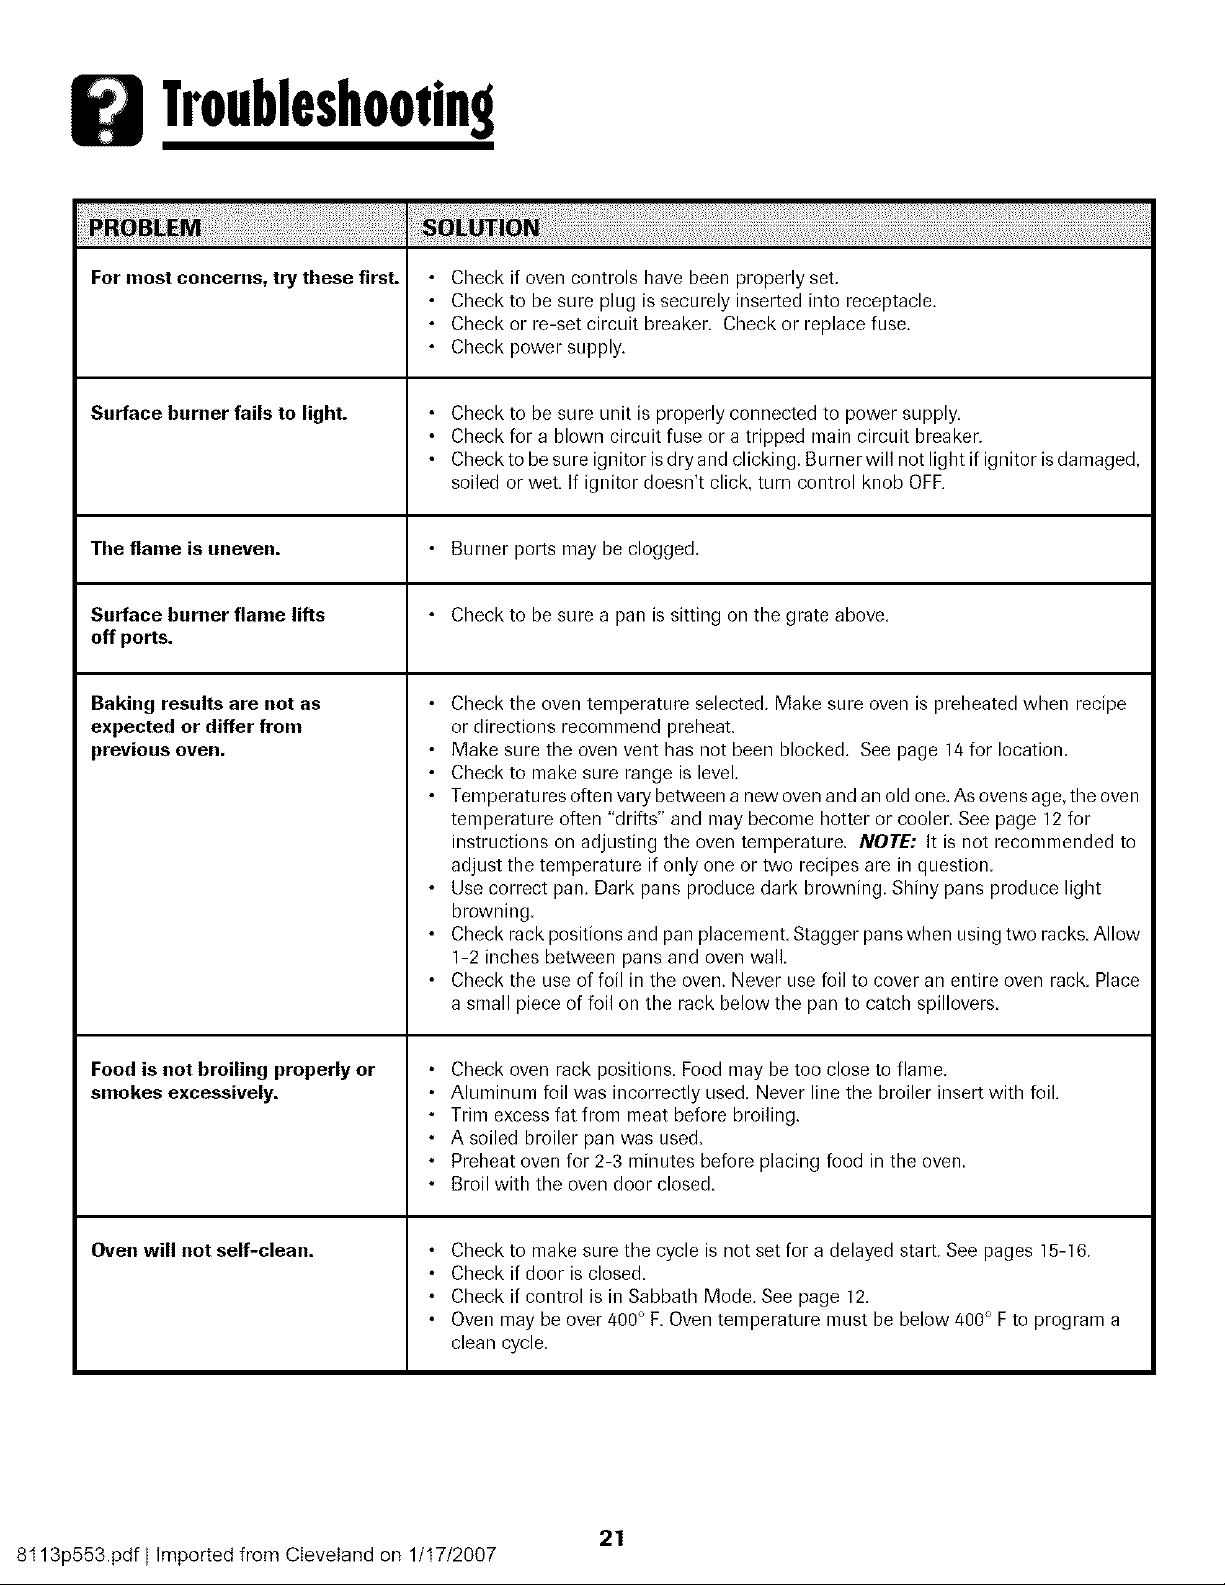
For most concerns, try these first. •
Surface burner fails to light.
The flame is uneven.
Surface burner flame lifts
off ports.
Baking results are not as
expected or differ from
previous oven.
Food is not broiling properly or
smokes excessively.
Oven will not self-clean.
Check if oven controls have been properly set.
Check to be sure plug is securely inserted into receptacle.
Check or re-set circuit breaker. Check or replace fuse.
Check power supply.
Check to be sure unit is properly connected to power supply.
Check for a blown circuit fuse or a tripped main circuit breaker.
Check to be sure ignitor is dry and clicking. Burner will not light if ignitor is damaged,
soiled or wet. If ignitor doesn't click, turn control knob OFF.
• Burner ports may be clogged.
• Check to be sure a pan is sitting on the grate above.
Check the oven temperature selected. Make sure oven is preheated when recipe
or directions recommend preheat.
Make sure the oven vent has not been blocked. See page 14 for location.
Check to make sure range is level.
Temperatures often vary between a new oven and an old one. As ovens age, the oven
temperature often "drifts" and may become hotter or cooler. See page 12 for
instructions on adjusting the oven temperature. NOTE: It is not recommended to
adjust the temperature if only one or two recipes are in question.
Use correct pan. Dark pans produce dark browning. Shiny pans produce light
browning.
Check rack positions and pan placement. Stagger pans when using two racks. Allow
1-2 inches between pans and oven wall.
Check the use of foil in the oven. Never use foil to cover an entire oven rack. Place
a small piece of foil on the rack below the pan to catch spillovers.
Check oven rack positions. Food may be too close to flame.
Aluminum foil was incorrectly used. Never line the broiler insert with foil.
Trim excess fat from meat before broiling.
A soiled broiler pan was used.
Preheat oven for 2-3 minutes before placing food in the oven.
Broil with the oven door closed.
Check to make sure the cycle is not set for a delayed start. See pages 15-16.
Check if door is closed.
Check if control is in Sabbath Mode. See page 12.
Oven may be over 400° F. Oven temperature must be below 400° F to program a
clean cycle.
21
8t 13p553.pdf I Imported from Cleveland on 1/t7/2007
Troubleshooting
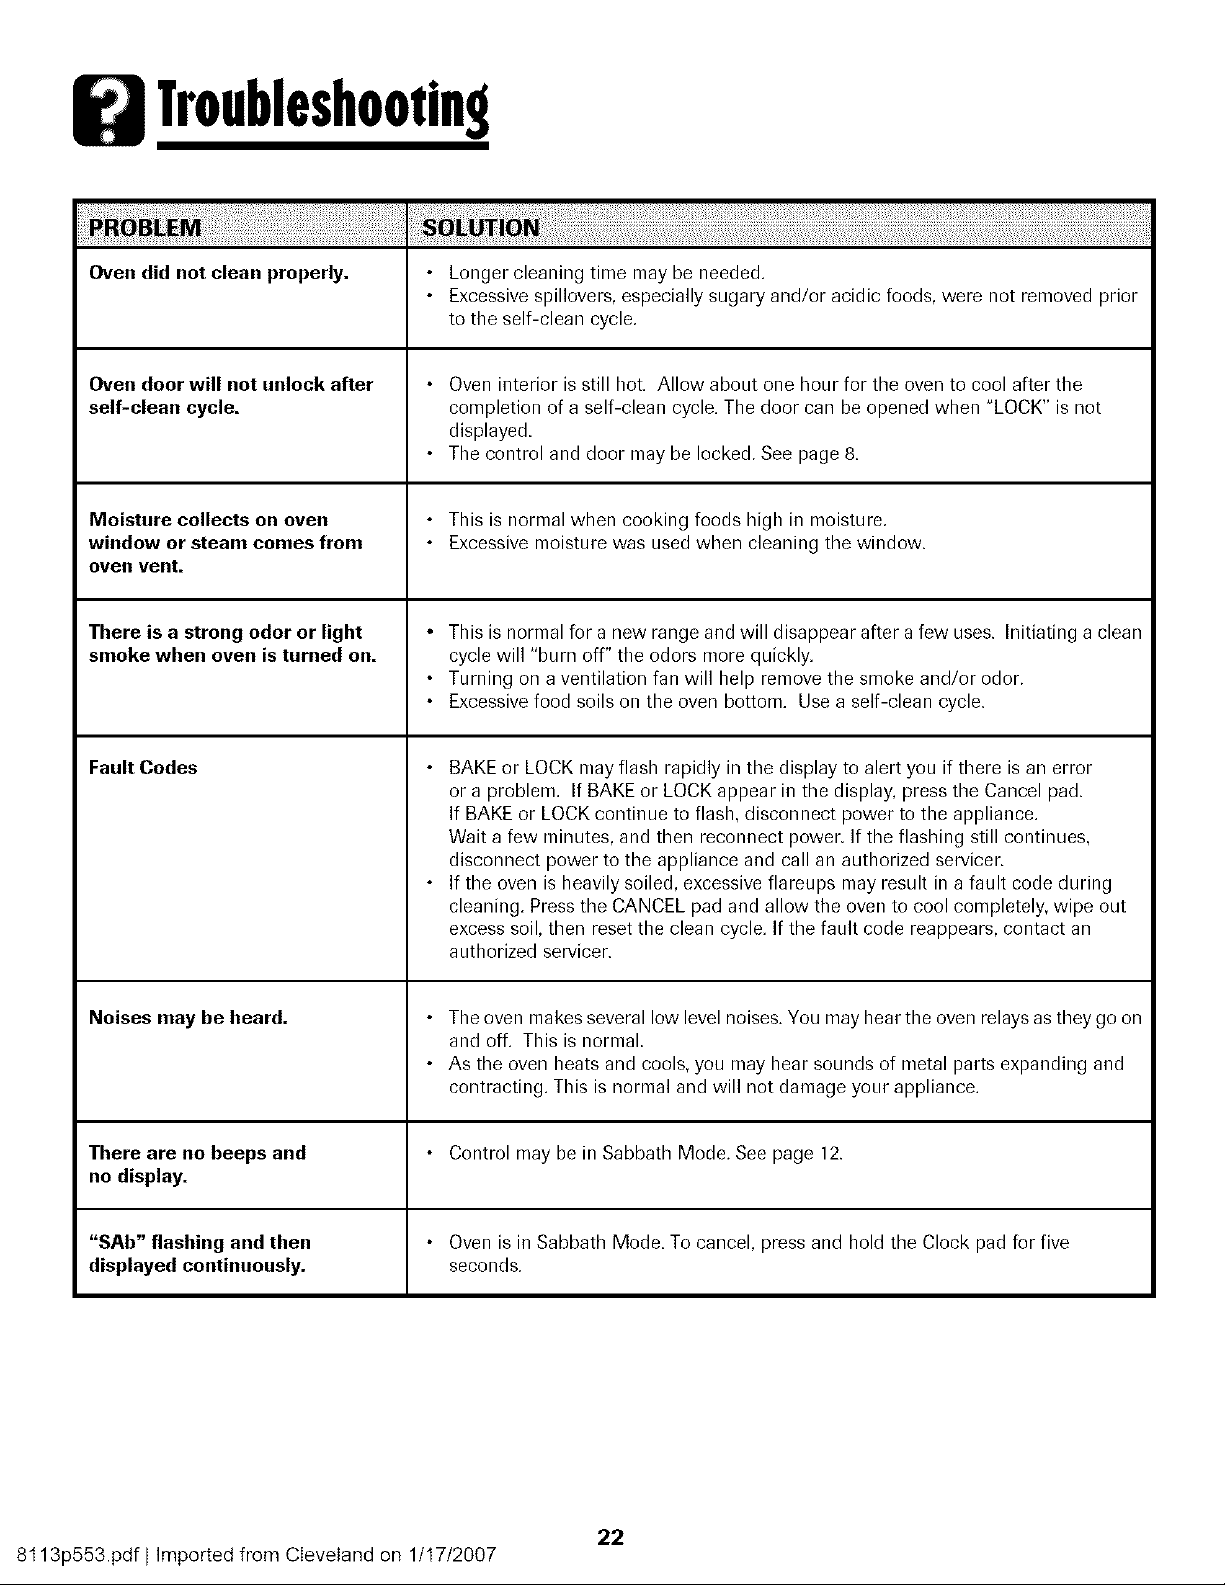
Oven did not clean properly. Longer cleaning time may be needed.
Excessive spillovers, especially sugary and/or acidic foods, were not removed prior
to the self-clean cycle.
Oven door will not unlock after Oven interior is still hot. Allow about one hour for the oven to cool after the
self-clean cycle, completion of a self-clean cycle. The door can be opened when "LOCK" is not
displayed.
• The control and door may be locked. See page 8.
Moisture collects on oven • This is normal when cooking foods high in moisture.
window or steam comes from Excessive moisture was used when cleaning the window.
oven vent.
There is a strong odor or light • This is normal for a new range and will disappear after a few uses. Initiating a clean
smoke when oven is turned on. cycle will "burn off" the odors more quickly.
• Turning on a ventilation fan will help remove the smoke and/or odor.
Excessive food soils on the oven bottom, Use a self-clean cycle.
Fault Codes
Noises may be heard.
BAKE or LOCK may flash rapidly in the display to alert you if there is an error
or a problem. If BAKE or LOCK appear in the display, press the Cancel pad.
If BAKE or LOCK continue to flash, disconnect power to the appliance.
Wait a few minutes, and then reconnect power. If the flashing still continues,
disconnect power to the appliance and call an authorized servicer.
If the oven is heavily soiled, excessive flareups may result in a fault code during
cleaning. Press the CANCEL pad and allow the oven to cool completely, wipe out
excess soil, then reset the clean cycle. If the fault code reappears, contact an
authorized servicer.
• The oven makes several low level noises. You may hear the oven relays as they go on
and off. This is normal.
• As the oven heats and cools, you may hear sounds of metal parts expanding and
contracting. This is normal and will not damage your appliance.
There are no beeps and Control may be in Sabbath Mode. See page 12.
no display.
"SAb" flashing and then
displayed continuously.
Oven is in Sabbath Mode. To cancel, press and hold the Clock pad for five
seconds.
22
8t 13p553.pdf I Imported from Cleveland on 1/t7/2007
Warranty& Service
CUSTOMER'SSOLEAND EXCLUSIVE
REMEDY UNDER THIS LIMITED
WARRANTY SHALL BE PRODUCT REPAIR
AS PROVIDEDHEREIN. IMPLIED
WARRANTIES, INCLUDING WARRANTIES
OF MERCHANTABILITY OR FITNESSFOR A
PARTICULAR PURPOSE,ARE LIMITED TO
ONE YEAR OR THE SHORTESTPERIOD
ALLOWED BY LAW. MAYTAG
CORPORATIONSHALL NOT BE LIABLE
FORINCIDENTAL OR CONSEQUENTIAL
DAMAGES. SOME STATESAND
PROVINCESDO NOT ALLOW THE
EXCLUSION OR LIMITATION OF
INCIDENTAL OR CONSEQUENTIAL
DAMAGES, OR LIMITATIONS ON THE
DURATION OF IMPLIED WARRANTIES OF
MERCHANTABILITY OR FITNESS,SO
THESEEXCLUSIONSOR LIMITATIONS
MAY NOT APPLY TO YOU. THIS
WARRANTY GIVESYOU SPECIFICLEGAL
RIGHTSAND YOU MAY ALSO HAVE
OTHER RIGHTS,WHICH VARY STATETO
STATE OR PROVINCETO PROVINCE.
What is Not Covered By These Warranties
1. Conditions and damages resulting from any of the following:
a. Improper installation, delivery, or maintenance.
b. Any repair, modification, alteration, or adjustment not authorized by the
manufacturer or an authorized servicer.
c. Misuse, abuse, accidents, or unreasonable use, or acts of God.
d. Incorrect electric current, voltage, electrical and! or gas supply.
e. Improper setting of any control.
2 Warranties are void if the original serial numbers have been removed, altered,
or cannot be readily determined.
3. Light bulbs, water filters and air filters.
4. Products purchased for commercial or industrial use.
5. The cost of service or service call to:
a. Correct installation errors. For prodLmtSrequiring ventilation, rigid metal
ducting must be used.
b. InstrLmtthe user on the proper use of the product.
c. Transport the appliance to and from the servicer.
6. Any food loss due to refrigerator or freezer product failures.
7. Expenses for travel and transportation for product service in remote locations.
8. Outside of the United States and Canada this warranty does not apply.
Contact your dealer to determine if another warranty applies.
9. Consequential or incidental damages sustained by any person as a result of
any breach of these warranties. Some states do not allow the exclusion or
limitation of consequential or incidental damages, so the above exclusion may
not apply.
If You Need Service
First see the Troubleshooting section in your Use and Care Guide or call the
dealer from whom your appliance was purchased or call Maytag Services, LLC,
Customer Assistance at 1-800-688-9900 USA and 1-800-688-2002 Canada to
locate an authorized servicer.
• Be sure to retain proof of purchase to verify warranty status. Refer to
WARRANTY for further information on owner's responsibilities for warranty
service.
• If the dealer or service company cannot resolve the problem, write to Maytag
Services, LLC, Attn: CAIR Center, P.O. Box 2370, Cleveland, TN 37320-2370, or
call 1-800-688-9900 USA and 1-800-688-2002 Canada. U.S. customers
using TTY for deaf, hearing impaired or speech impaired, call 1-800-688-2080.
• User's guides, service manuals and parts information are available from Maytag
Services, LLC, Customer Assistance.
Notes: When writing or calling about a service problem, please include:
a. Your name, address and telephone number;
b. Model number and serial number;
c. Name and address of your dealer or servicer;
d. A clear description of the problem you are having;
e. Proof of purchase (sales receipt).
23
8t 13p553.pdf I Imported from Cleveland on 1/t 7/2007
Cuisinibre _ gaz _ commandes Easy Touch 500
Culslnl re
d°entretien
Instructions de sbcuritb
importantes ............................................................. 25-29
Cuisson sur la surface .......................................... 30-31
Commandes de la surface de cuisson
BrQleurs scelles
Cuisson dans le four ............................................. 32-41
Cuisson courante
Cuisson et maintien
Cuisson differee
Maintien au chaud
Cuisson au gril
Grilles du four
Nettoyage ................................................................ 42-45
Four autonettoyant
M6thodes de nettoyage
Entretien ................................................................... 46-47
Hublot et lampe du four
D6placement d'un appareil _ gaz
Recherche des pannes .......................................... 48-49
Garantie et service apr_s-vente ................................ 51
Guia de Uso y Cuidado ................................................ 52
8t 13p553.pdf I Imported from Cleveland on 1/t7/2007
Lire toutes les instructions avant d'utiliser cet appareil;
observer toutes les instructions pour eliminer les risques
d'incendie, choc electrique, dommages materiels et corporels
que pourrait susciter une utilisation incorrecte de rappareil.
Utiliser I'appareil uniquement pour les fonctions prevues,
decrites dans ce guide.
Pour une utilisation adequate et en s_curit_, il faut que
rappareil soit convenablement installe par un technicien
qualifie, et relie a la terre. Ne pas r6gler, r6parer ni remplacer
un composant, a moins que cela ne soit sp6cifiquement
recommande dans ce guide. Toute autre reparation dolt etre
effectuee par un technicien qualifi& Demander _ I'installateur
de montrer ou se trouve le robinet d'arr6t de gazet comment
le fermer en cas d'urgence.
Toujours debrancher rappareil avant d'y faire de rentretien.
Instructionsde
securit6importnntes
Les instructions de securite importantes et les paragraphes
<<avertissement >}de ce guide ne sont pas destin6s a couvrir
toutes les conditions et situations qui pourraient se presenter.
II faut faire preuve de bon sens, de prudence et de soin lots de
I'installation, de rentretien ou du fonctionnement de I'appareil.
Toujours prendre contact avec le detaillant, le distributeur,
I'agent de service apres-vente ou le fabricant dans le cas de
problemes ou de conditions qui ne seraient pas comprises.
Reconnaitre les etiquettes, paragmphes et
symboles sur la securite
25
8t 13p553.pdf I Imported from Cleveland on 1/t 7/2007
Instructionsdesecurit6importnntes
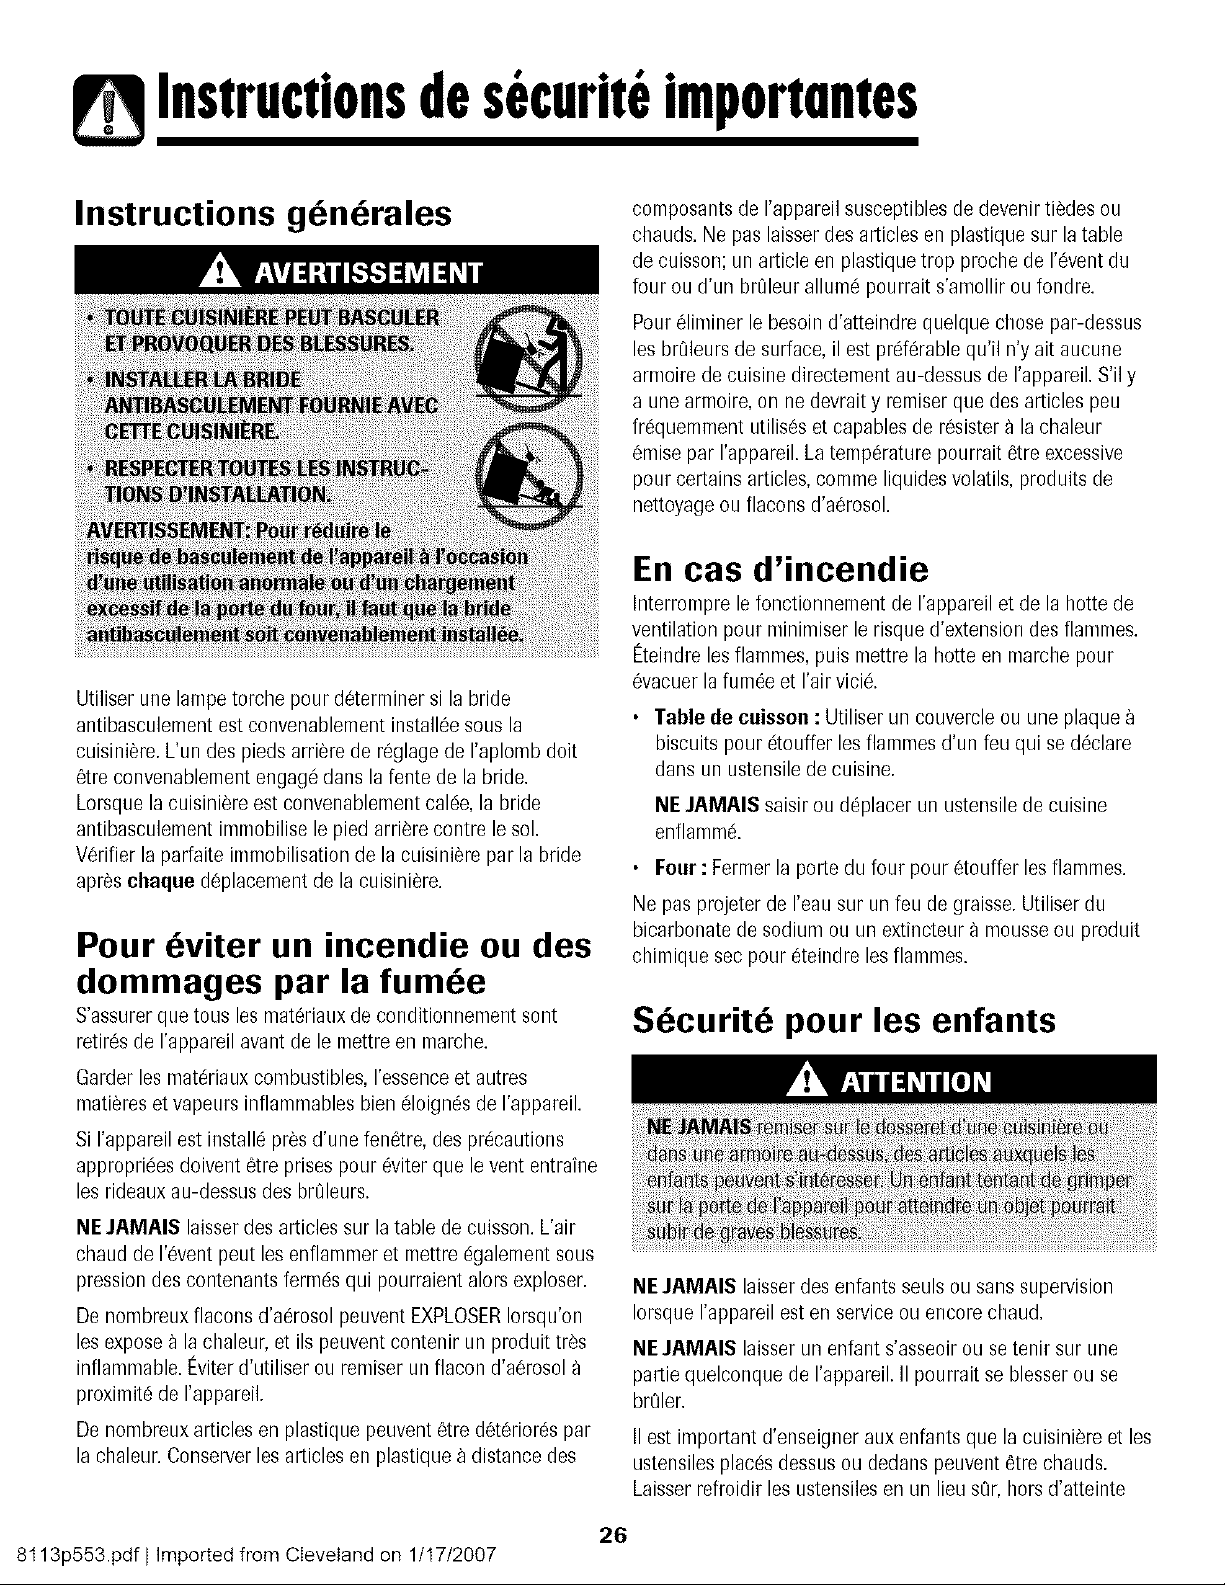
Instructions gbnbrales
Utiliser une lampe torche pour determiner si la bride
antibasculement est convenablement installee sous la
cuisini_re. L'un des pieds arriere de reglage de I'aplomb dolt
_tre convenablement engag# dans la fente de la bride.
Lorsque la cuisini_re est convenablement calve, la bride
antibasculement immobilise le pied arriere contre le sol.
V6rifier la parfaite immobilisation de la cuisini_re par la bride
apr_s chaque d@lacement de la cuisini_re.
Pour bviter un incendie ou des
dommages par la fumbe
S'assurer que tousles mat_riaux de conditionnement sont
retires de I'appareil avant de le mettre en marche.
Garder les mat_riaux combustibles, I'essence et autres
mati_res et vapeurs inflammables bien 61oign_sde I'appareil.
Si I'appareil est installe pros d'une fen_tre, des precautions
appropri6es doivent 6tre prises pour _viter que le vent entrafne
les rideaux au-dessus des brtileurs.
NE JAMAIS laisser des articles sur la table de cuisson. L'air
chaud de 1'6vent peut les enflammer et mettre _galement sous
pression des contenants ferm_s qui pourraient alors exploser.
De nombreux flacons d'aerosol peuvent EXPLOSERIorsqu'on
les expose _ la chaleur, et ils peuvent contenir un produit tres
inflammable. I_viter d'utiliser ou remiser un flacon d'a6rosol
proximit_ de I'appareil.
De nombreux articles en plastique peuvent _tre d_t6rior_s par
la chaleur. Conserver les articles en plastique a distance des
composants de I'appareil susceptibles de devenir tildes ou
chauds. Ne pas laisser des articles en plastique sur la table
de cuisson; un article en plastique trop proche de 1'6vent du
four ou d'un br01eurallum_ pourrait s'amollir ou fondre.
Pour 61iminer le besoin d'atteindre quelque chose par-dessus
les brOleurs de surface, il est preferable qu'il n'y ait aucune
armoire de cuisine directement au-dessus de I'appareil. S'il y
a une armoire, on ne devrait y remiser que des articles peu
fr_quemment utilis6s et capables de r6sister a la chaleur
_mise par I'appareil. La temperature pourrait 6tre excessive
pour certains articles, comme liquides volatils, produits de
nettoyage ou flacons d'a_rosol.
En cas d'incendie
Interrompre le fonctionnement de I'appareil et de la hotte de
ventilation pour minimiser le risque d'extension des flammes.
Eteindre les flammes, puis mettre la hotte en marche pour
evacuer la fum_e et I'air vici&
• Table de cuisson : Utiliser un couvercle ou une plaque
biscuits pour _touffer les flammes d'un feu qui se d6clare
dans un ustensile de cuisine.
NE JAMAIS saisir ou d@lacer un ustensile de cuisine
enflamm&
• Four : Fermer la porte du four pour 6touffer les flammes.
Ne pas projeter de I'eau sur un feu de graisse. Utiliser du
bicarbonate de sodium ou un extincteur 9 mousse ou produit
chimique sec pour eteindre les flammes.
Sbcuritb pour les enfants
NE JAMAIS laisser des enfants seuls ou sans supervision
Iorsque I'appareil est en service ou encore chaud.
NE JAMAIS laisser un enfant s'asseoir ou se tenir sur Line
pattie quelconque de I'appareil. II pourrait se blesser ou se
brOler.
II est important d'enseigner aux enfants que la cuisiniere et les
ustensiles places dessus ou dedans peuvent 6tre chauds.
Laisser refroidir les ustensiles en un lieu sQr,hors d'atteinte
26
8t 13p553.pdf I Imported from Cleveland on 1/t 7/2007
Instructionsdesecurit6importnntes
des enfants. II est important d'enseigner aux enfants qu'un
appareil m6nager n'est pas un jouet, et qu'ils ne doivent
toucher aucune commande ou autre cornposant de I'appareil.
Familiarisation avec I'appareil
L'_ventde four est situ_ia la base du dosseret.
Evitez de toucher le voisinage de I'_vent de four Iorsque le four
est utilis6 et pendant plusieurs minutes apr_s I'arret du four.
Certains composants de I'event et la zone voisine peuvent
devenir suffisamment chauds pour provoquer des brQlures.
Apr_s I'arret du four, ne touchez pas I'event de four ou la zone
voisine avant que ces composants aient pu se refroidir
suffisamment.
Autres surfaces potentiellement chaudes : table de cuisson,
zones faisant face _ la table de cuisson, 6vent de four, zone
voisine de revent, porte de four et zone voisine de porte et de
hublot.
Ne touchez pas I'ampoule chaude du four avec un linge
humide; le choc thermique pourrait la briser. Si tel est le cas,
d6branchez I'appareil avant de retirer rampoule pour eviter
une d6charge 61ectrique.
Ne remisez pas des aliments ou ustensiles de cuisine sur la
table de cuisson ou dans le four.
Cuisson et securite
Placer toujours un ustensile sur un brt_leur de surface avant de
I'allumer. Veiller _ bien cennaftre la correspondance entre les
boutons de commande et les brtileurs. Veiller a allumer le
brOleur correct et v6rifier que le br_leur s'allume
effectivement. A la fin de la periode de cuisson, 6teindre le
brQleur avant de retirer rustensile, pour eviter une exposition
aux flammes du brt_leur.
Veiller a toujours ajuster correctement la taille des flammes
pour qu'elles ne d@assent pas sur la peripherie de I'ustensile.
Des flammes de trop grande taille sur un hrSleur sont
dangereuses, elles entrainent un gaspillage d'_nergie et elles
peuvent faire subir des dommages a I'ustensile, a I'appareil ou
rarmoire situee au-dessus.
NE JAMAIS laisser un brt_leur de surface allume sans
surveillance, particulierement avec une puissance de
chauffage 6levee ou Iors d'une operation de friture. Un
d6bordement pourrait provoquer la formation de fum6e et des
produits gras pourraient s enflan mer. Clio iner des que
possible les produits gras renverses. Ne pas utiliser une
puissance de chauffage 6levee pendant une periode
prolongee.
NE JAMAIS faire chauffer un recipient non ouvert dans le
four ou sur un brt_leur de surface; raccumulation de pression
dans le r6cipient pourrait provoquer son 6clatement et de
graves dommages materiels ou corporels.
Utiliser des maniques robustes et seches. Des maniques
humides peuvent provoquer la formation de vapeur brt_lante.
Ne jamais utiliser un torchon b vaisselle ou autre article textile
la place de maniques; un tel article pourrait trainer sur un
brQleur et s'enflammer, ou accrocher un ustensile ou un
composant de rappareil.
Laisser toujours refroidir un recipient d'huile de friture chaude
avant de tenter de le d@lacer et le manipuler.
Ne pas laisser la graisse de cuisson ou autre mat6riau inflam-
mable s'accumuler dans ou pr6s de I'appareil, de la hotte ou
du ventilateur de 1'6vent.Nettoyer frequemment la hotte pour
empecher toute accumulation sur la hotte elle-meme ou sur le
filtre. Lors du flambage d'aliments sous la hotte, mettre le
ventilateur en marche.
NE JAMAIS porter, Iors de rutilisation de I'appareil, des
vetements faits d'un materiau inflammable, ou amples, ou
Iongues manches. De tels vetements peuvent s'enflammer ou
accrocher la poign6e d'un ustensile.
27
8t 13p553.pdf I Imported from Cleveland on 1/t 7/2007
Instructionsdesecurit6importnntes
Placer toujours les grilles a la position appropri_e dans le four
Iorsque le four est froid. Faire coulisser la grille vers I'ext@ieur
avant d'ajouter OLIenlever un plat; utiliser pour cela une
manique robuste et s6che, t_viterd'introduire la main dans le
four pour y placer ou retirer un plat. S'il est necessaire de
d@lacer une grille Iorsqu'elle est chaude, utiliser une manique
seche. Veiller a toujours arrOter le four a la fin d'une periode
de cuisson.
Ouvrir toujours la porte du four tr_s prudemment. Laisser I'air
chaud ou la vapeur s'Ochapper avant de retirer/introduire un
plat.
AVERTISSEMENT : Mets prepares : Respecter les instruc-
tions du fabricant. Si le contenant ou le couvercle en plastique
d'un mets surgel_ se d_iforme ou est endommag_ durant la
cuisson, jeter imm_diatement le r_cipient et son contenu. Les
aliments pourraient 6tre contamin_s.
NE JAMAIS garnir la sole ou une grille du four avec de la
feuille d'aluminium. Ceci pourrait susciter un risque de choc
electrique ou d'incendie, ou une autre d_t_rioration de
I'appareil. Utiliser de la feuille d'aluminium uniquement selon
les instructions de ce guide.
Ustensiles et sbcuritb
Utiliser des ustensiles a fond plat comportant une poignee
qu'on peut facilement saisir et qui reste froide. Eviter d'utiliser
un ustensile instable ou ddormO, qui pourrait facilement
basculer, ou dont la poignde est real fix_e. Eviter 6galement
d'utiliser des ustensiles de petite taille comportant une
poign_e Iourde; ces ustensiles sont gen@alement instables et
peuvent facilement basculer. Un ustensile Iourd Iorsqu'il est
rempli peut egalement _tre dangereux Iors des manipulations.
Veiller _ utiliser un ustensile de taille suffisante pour que le
contenu ne risque pas de d_border. Ceci est particuli_rement
important pour un ustensile rempli d'huile de friture. V_rifier
que la taille de I'ustensile est suffisante pour qu'il puisse
recevoir les produits alimentaires a cuire, et absorber
I'augmentation de volume suscitOe par I'_bullition de la
graisse.
Pour minimiser les risques de brOlure, d'inflammation de
matieres et de renversement par contact non intentionnel avec
un ustensile, ne pas orienter la poign_e d'un ustensile vers un
brQleur adjacent; orienter toujours la poignee d'un ustensile
vers le cOt_ ou I'arriere de I'appareil; ne pas laisser non plus la
poign_e d'un ustensile d_border _ I'avant de I'appareil, o_1un
jeune enfant pourrait facilement la saisin
Veiller b nejamais laisser le contenu liquide d'un ustensile
s'Ovaporer compl_tement; I'ustensile et I'appareil pourraient
subir des dommages.
Appliquer les instructions du fabricant lots de I'emploi d'un
sachet pour cuisson au four.
Seuls certains mat@iaux en verre, vitrocOramique, c@amique,
ou certains ustensiles vitrifiOs/_maill_s peuvent _tre utilis_s sur
la table de cuisson ou darts le four sans risque de bris sous
I'effet du choc thermique. Observer les instructions du
fabricant Iors de I'utilisation d'un ustensile en verre.
La s_curite de fonctionnement de cet appareil a et_ testee 9
I'aide d'ustensiles de cuisine conventionnels. Ne pas utiliser un
ustensile ou accessoire qui n'est pas specifiquement
recommande dans ce guide. Ne pas utiliser de couvre-br_'deur,
gril place sur la table de cuisson ou systeme de convection
additionnel. L'utilisation d'un dispositif ou accessoire qui n'est
pas expressOment recommand6 dans ce guide peut dOgrader
la s_curit6 de rappareil ou sa performance, ou r_duire la
Iong@itd des composants.
Nettoyage et sbcuritb
ArrOter toutes les commandes et attendre le refroidissement
de tousles composants avant de les toucher ou d'entre-
prendre le nettoyage. Ne pas toucher la grille d'un brt_leur ou
la zone voisine avant que ces cornposants aient pu suffisam-
ment refroidir.
Exercer une grande prudence Iors du nettoyage de I'appareil.
Travailler prudemment pour eviter des brt31urespar la vapeur
en cas d'utilisation d'un chiffon ou d'une @onge humide lots
de I'_limination d'un produit renvers_ sur une surface chaude.
Certains produits de nettoyage peuvent gen_rer des vapeurs
nocives Iorsqu'on les applique sur une surface chaude.
Four autonettoyant
Nettoyer uniquement les pi_ces mentionn_es dans ce guide.
Ne pas nettoyer le joint de porte; le joint joue un role essentiel
quanta I'_tanch_it& Ne pas frotter, endommager ou d@lacer
le joint. Ne pas utiliser de produit de nettoyage du four dans
le four autonettoyant ou sur les zones voisines.
28
8t 13p553.pdf I Imported from Cleveland on 1/t 7/2007
Instructionsdesecurit6importnntes
Avant d'exdcuter une op6ration d'autonettoyage, retirer la
I_chefrite, les grilles du four et les autres ustensiles, et _liminer
par essuyage tout exc_s de r_sidus renvers6s pour 6viter la
formation de fum_e ou rinflammation de ces r6sidus.
II est normal que la surface de cuisson devienne chaude
durant une operation d'autonettoyage; par consequent, 6viter
de toucher la surface de cuisson durant rautonettoyage.
Avertissement et avis
important pour la s curit
La Ioi californienne <{Safe Drinking Water and Toxic Enforce-
ment Act >7de 1986 (proposition 65) stipule la publication par
le geuverneur de la Californie d'une liste de substances que
I'_tat de Californie consid_re comme canc6rig_nes ou
dangereuses pour le syst_me reproducteur, et impose aux
entreprises commerciales I'obligation de signaler a leurs
clients les risques d'exposition a de telles substances.
Les utilisateurs de cet appareil peuvent etre expos6s a une
faible concentration de certaines substances figurant dans la
liste mentionn6e ci-dessus, dont benz_ne, formaldehyde et
suie, du fait de la combustion incomplete du gaz naturel ou du
gaz de petrole liqudi_. Pour minimiser la combustion
incomplete, veiller 9 ce que les brtileurs soient parfaitement
regl6s. Pour minimiser I'exposition 9 ces substances, veiller 9
bien evacuer les gaz de combustion a I'ext6rieur.
Nous informons les utilisateurs de cet appareil que Iors d'une
operation d'autonettoyage, ils peuvent _tre exposes 9 Line
faible concentration de certaines substances figurant dans la
liste mentionn_e ci-dessus, dont le monoxyde de carbone.
Pour minimiser rexposition, veiller 9 ce que la piece ot] se
trouve le four soit convenablement aerie durant une operation
d'autonettoyage par rouverture d'une fen_tre ou d'une porte.
AVIS IMPORTANT - OISEAUX FAMILIERS : Les oiseaux ont
tin syst_me respiratoire tr_s sensible. Ne pas garder un oiseau
familier dans la cuisine ou dans une piece ot] il pourrait _tre
expos_ aux futures. Les futures _mises durant une operation
d'autonettoyage peuvent 6tre dangereuses ou mortelles pour
un oiseau, de m6me que les fumees _mises Iors du chauffage
excessif de graisse, huile, margarine, et du chauffage excessif
dans un ustensile a revetement antiadh_siL
Conserver ces instructions pour consultation ult rieure
29
8t 13p553.pdf I Imported from Cleveland on 1/t7/2007
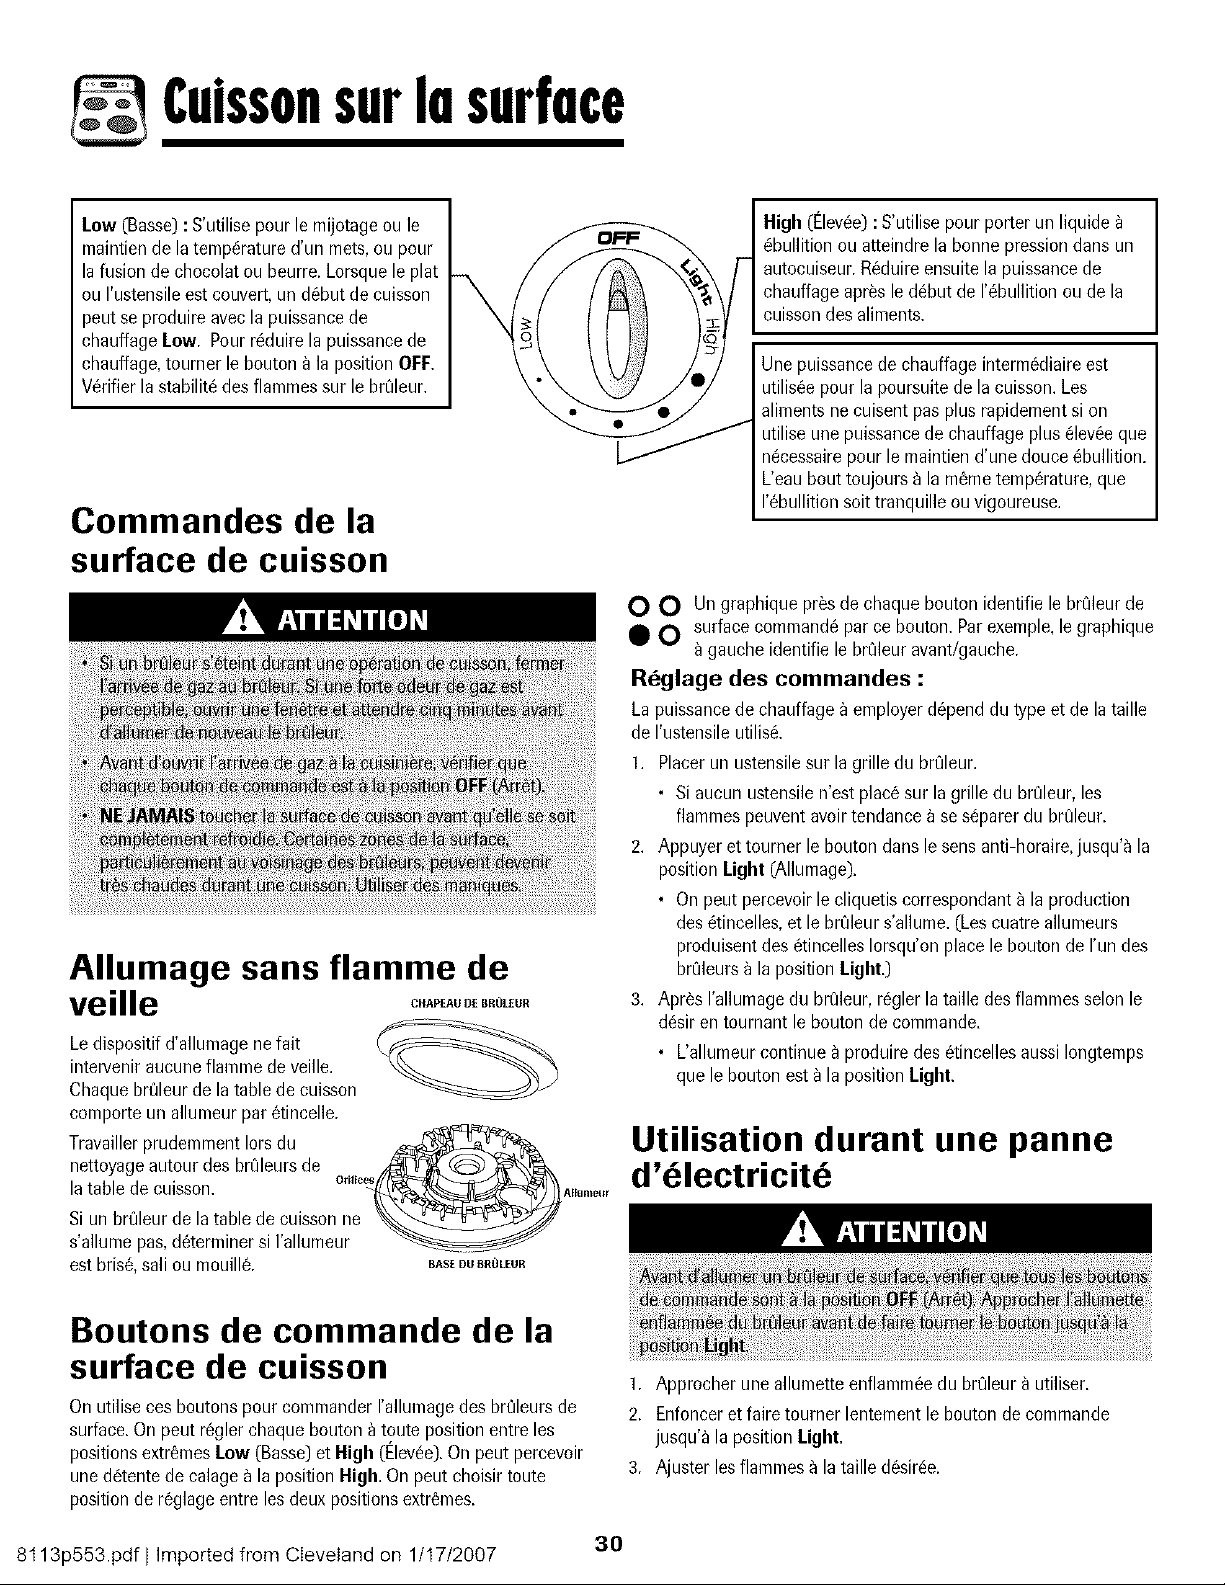
Cuissonsurlusurf(ice
Low (Basse): S'utilisepour le mijotage ou le
maintiende latemperaturedun mets,ou pour
lafusion de chocolatou beurre. Lorsquele plat
ou I'ustensileest couvert,un debut de cuisson
peut se produireavec la puissancede
chauffageLow. Pour reduirela puissancede
chauffage,tourner le bouton _ la position OFF.
Verifier la stabilitedes flammessur le br_leur.
Commandes de la
surface de cuisson
Allumage sans flamme de
veille o,A,,Aooe00OLEoo
Ledispositifd'allumagenefait
interveniraucuneflamme de veille.
Chaquebr_Jleurde la tablede cuisson
comporte un allumeurpar etincelle.
TravaillerprudemmentIorsdu
nettoyageautour des brQleursde ,,,_ _ _
latable de cuisson. °'i_e_(__A,
Si un brt21eurde latable de cuisson ne _._j_'/
s allume pas,determinersi I allumeur
est brise,sail ou mouill& easeoil81_0LEUR
High ([levee) :S'utilise pour porter un liquide
ebullition ou atteindre la bonne pressiondans un
autocuiseur.Reduireensuitela puissancede
chauffageapres le debut de [ebullition oude la
cuissondes aliments.
Une puissancede chauffage intermediaireest
utilisee pourla poursuitede la cuisson.Les
aliments ne cuisent pas plus rapidementsi on
utilise unepuissancede chauffage plus eleveeque
necessairepour le maintiend'une douce ebullition.
L'eau bout toujours _ la memetemperature,que
[ebullition soit tranquille ou vigoureuse.
O O Un graphiquepresde chaque bouton identifie le brQleurde
• O surfacecommandepar ce bouton.Parexemple,le graphique
gauche identifie le brQleuravant/gauche.
R_glage des commandes :
La puissancede chauffage_ employerdependdu typeet de la taille
de I'ustensileutilis&
1. Placerun ustensilesur lagrille du brt_leur.
• Si aucun ustensilen'est placesur la grille du brgleur, les
fiammespeuventavoirtendance_ se separerdu brt_leur.
2. Appuyer et tourner le bouton dansle sens anti-horaire,jusqu'_ la
positionLight (Allumage).
• On peut percevoirlecliquetis correspondant_ la production
desetincelles,et le bn21eurs'allume.(Lescuatre allumeurs
produisentdes etincellesIorsqu'onplace le bouton de I'un des
bn21eurs_ la position Light.)
3. Apres I'allumagedu bn21eur,regler la taille des flammesselon le
desiren tournant le bouton de commande.
• L'allumeurcontinue _ produiredes etincellesaussiIongtemps
quele bouton est _ la positionLight.
Utilisation durant une panne
d'electricite
Boutons de commande de la
surface de cuisson
On utilise cesboutonspour commanderI'allumagedes brCJleursde
surface.On peut reglerchaquebouton _ toute positionentre les
positionsextremesLow (Basse)et High (t--levee).On peut percevoir
unedetentede calage_ la positionHigh. On peut choisirtoute
positionde reglageentre lesdeux positionsextremes.
1. Approcher une allumetteenflammeedu brt_leur_ utiliser.
2. Enfonceret faire toumer lentementle bouton de commande
jusqu'_ la position Light.
3. Ajuster lesflammes _ la taille desiree.
30
8t 13p553.pdf I Imported from Cleveland on 1/t 7/2007
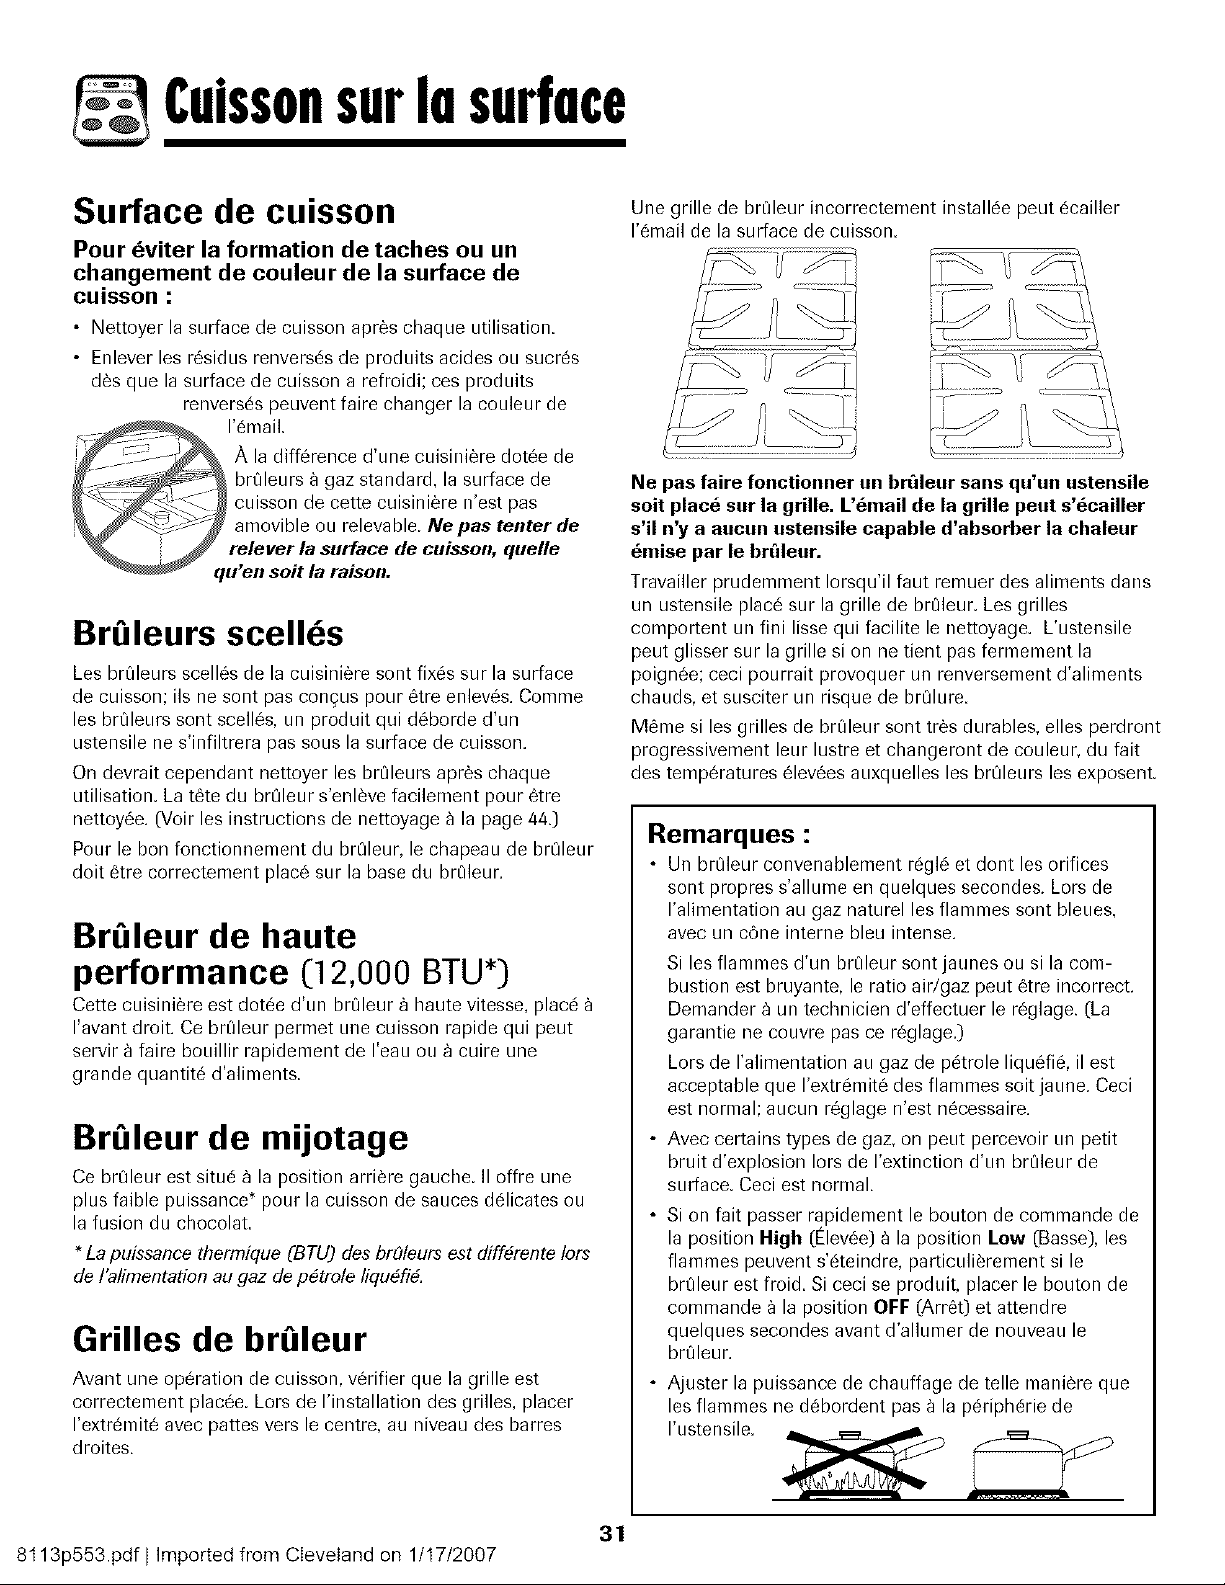
Cuissonsurla surface
Surface de cuisson
Pour _viter la formation de taches ou un
changement de couleur de la surface de
cuisson :
• Nettoyer la surface de cuisson apres chaque utilisation.
• Enlever les residus renverses de produits acides ou sucres
d_s que la surface de cuisson a refroidi; ces produits
renverses peuvent faire changer la couleur de
Une grille de br['fleur incorrectement installee peut ecailler
I'email de la surface de cuisson.
BrSleurs scell s
Les brOleurs scell_s de la cuisini_re sent fixes sur la surface
de cuisson; ils ne sent pas congus pour 6tre enleves. Comme
les brOleurs sont scelles, un produit qui deborde d'un
ustensile ne s'infiltrera pas sous la surface de cuisson.
On devrait cependant nettoyer les br01eurs apr_s chaque
utilisation. La tete du brOleur s'enleve facilement pour 6tre
nettoyee. (Voir les instructions de nettoyage 8 la page 44.)
Pour le bon fonctionnement du brOleur, le chapeau de brOleur
dolt etre correctement place sur la base du brt'fleur.
BrSleur de haute
performance ([12,000 BTU*)
Cette cLiisiniere est dotee d'un br_leur L1haute vitesse, place
I'avant droit. Ce brL_fleurpermet une cuisson rapide qui peut
servir _ faire bouillir rapidement de I'eau ou _ cuire une
grande quantite d'aliments
BrSleur de mijotage
Ce br01eur est situe b la position arriere gauche. II offre une
plus faible puissance * pour la cuisson de sauces delicates ou
la fusion du chocolat.
* La puissance thermique (BTU) des brSleura est differente/ors
de I'alimentation au gaz de petrole liquefi&
Grilles de brSleur
Avant une operation de cuisson, verifier que la grille est
correctement placee. Lors de I'installation des grilles, placer
I'extremit6 avec pattes vers le centre, au niveau des barres
droites.
Ne pas faire fonctionner un br_leur sans qu'un ustensile
soit plac_ sur la grille. L'_rnail de la grille peut s'ecailler
s'il n'y a aucun ustensile capable d'absorber la chaleur
_mise par le br_leur.
Travailler prudemment Iorsqu'il faut remuer des aliments dans
un ustensile place sur la grille de br01eur. Les grilles
comportent un fini lisse qui facilite le nettoyage. L'ustensile
peut glisser sur la grille si on ne tient pas fermement la
poignee; ceci pourrait provoquer un renversement d'aliments
chauds, et susciter un risque de br01ure.
Meme si les grilles de brt_leur sont tr_s durables, elles perdront
progressivement leur lustre et changeront de couleur, du fait
des temperatures 6levees auxquelles les brOleurs les exposent.
Remarques :
• Un brt_leur convenablement regl6 et dont les orifices
sont propres s'allume en quelques secondes. Lors de
I'alimentation au gaz naturel les flammes sont bleues,
avec un c6ne interne bleu intense.
Si les flammes d'un br01eursontjaunes ou si la com-
bustion est bruyante, le ratio air/gaz peut 6tre incorrect.
Demander _ un technicien d'effectuer le reglage. (La
garantie ne couvre pas ce reglage.)
Lors de I'alimentation aLlgaz de petrole liqu_fie, il est
acceptable que I'extremit6 des flammes soit jaLme.Ceci
est normal; aLmun reglage n'est necessaire.
• Avec certains types de gaz, on peut percevoir LInpetit
bruit d'explosion Iors de I'extinction d'Lm brt'fleur de
surface. Ceci est normal.
Si on fait passer rapidement le bouton de commande de
la position High (Elev_e) _ la position Lew (Basse), les
flammes peuvent s'eteindre, particLflierement si le
brQleur est froid. Si ceci se produit, placer le bouton de
commande _ la position OFF (Arret) et attendre
quelques secondes avant d'allumer de nouveau le
brQleur.
• Ajuster la puissance de chauffage de telle maniere que
les flammes ne debordent pas _ la periph@ie de
I'ustensile.
31
8t 13p553.pdf I Imported from Cleveland on 1/t7/2007
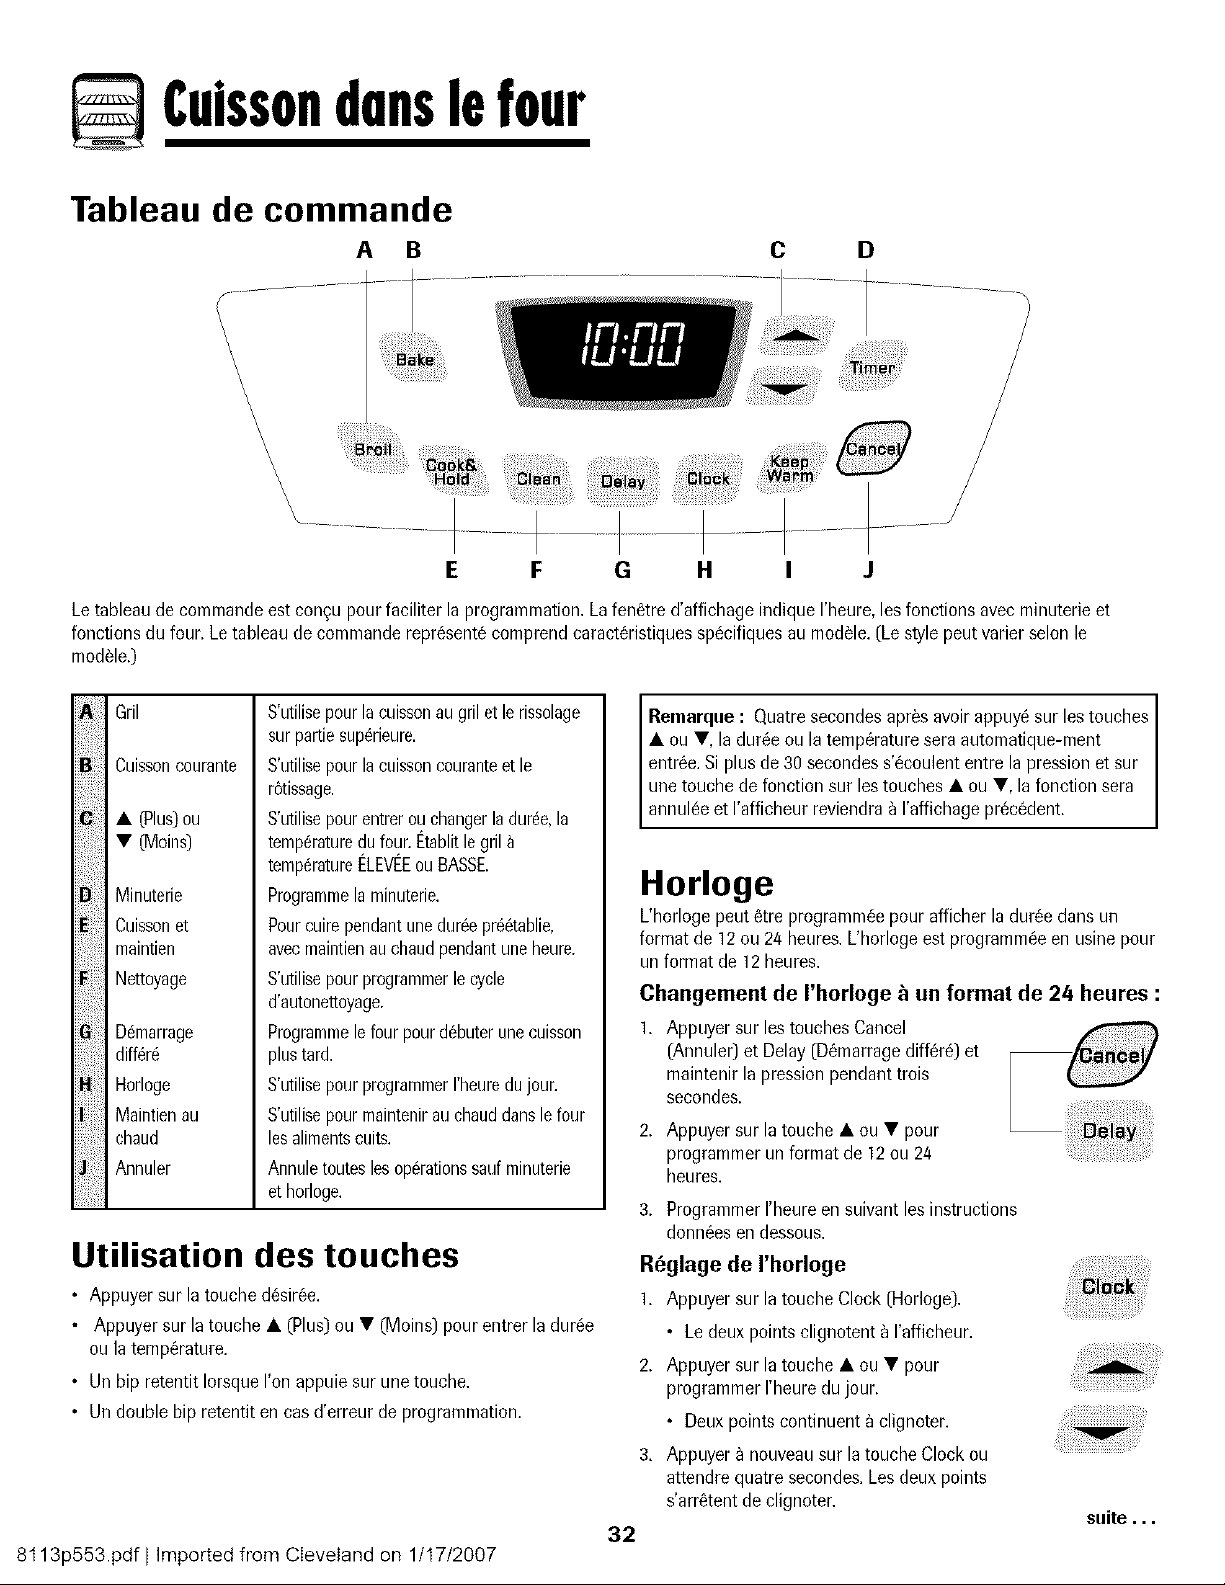
Cuissondunslefour
Tableau de commande
C D
Letableaude commandeest con£u pourfaciliter la programmation.Lafenetre d'affichageindique rheure,les fonctionaavecminuterie et
fonctionadu four. Letableau de cemmanderepresent6comprendcaracteristiquesspecifiquesau modele.(Le style peut varier selon le
modele.)
Gril
Cuissoncoarante
• (Plus)ou
• (Moins)
Minuterie
Cuissonet
maintien
Nettoyage
D6marrage
diff6r6
Horloge
Maintienat]
chaud
Annuler
S'utilisepourlacuissonaugril et le rissolage
surpartiesuperieure.
S'utiliaepourlacaissoncouranteet le
r6tissage.
S'utilisepourentrerouchangerladur6e,la
temp@aturedufour.t_tablitle gril
temp6raturet_LEVt_EouBASSE.
Programmelaminuterie.
Pourcuirependantunedur6epre6tablie,
avecmaintienau chaudpendantuneheure.
S'utilisepourprogrammerle cycle
d'autonettoyage.
Programmelefourpourd6buterunecuisson
plustar&
S'utilisepourprogrammerI'heuredujour.
S'utilisepourmaintenirat] chauddanslefour
lesalimentscults.
Annulerouteslesop@ationssaufminuterie
et horloge.
Utilisation des touches
• Appuyer sur la touchedesiree.
• Appuyer sur la touche • (Plus)ou • (Meins)pour entrer la duree
ou la temperature.
• Un bip retentit IorsqueI'onappuie sur unetouche.
• Undouble bip retentit en casd'erreur de programmation.
8t 13p553.pdf I Imported from Cleveland on 1/t7/2007
Remarque: Quatre secondesapresavoir appuy6sur lestouches
• ou •, laduree ou latempera!uresera automatique-ment
entree.Si plusde 30 secondess 6coulententre la pressionet sur
unetouchede fonctien sur les touches• ou •, la fonction sera
annu6eet affc leur revendra_ aff chage precedent.
Horloge
L'horloge peut 6tre programmee pour afficher la duree dans un
format de 12 ou 24 heures. L'horloge est programmee en usine pour
un format de 12 heures.
Changement de I'horloge _ un format de 24 heures :
Appuyersur les touchesCancel
(Annuler)et Delay(Demarragediffere) et
maintenirla pressienpendant trois
secondes.
2. Appuyersur la touche • ou • pour
programmerun format de 12 ou 24
heures.
3. ProgrammerI'heureen suivantles instructions
denneesen dessous.
R6glage de I'horloge
1. Appuyersur la touche Clock (Horloge).
• Le deux points clignotent _ I'afficheur.
2. Appuyersur la touche • ou • pour
programmerI'heuredujour.
• Deux pointscontinuent _ clignoter.
3. Appuyer_ nouveausur la toucheClock ou
attendrequatresecondes.Lesdeux points
s'arretentde clignoter.
32
suite...

Cuissondunslefour
Lorsquele courant61ectriquearriveou apres une interruptionde
courant,la derni_reheureavantI'interruptionde courantva
clignoter.
PourrappelerI'heuredujour Iorsqu'uneautrefonction de dur6e
s'affiche,appuyersur la toucheClock.
L'heurede I'horlogene peut _tre chang6eIorsquele four a 6t6
programmepour une cuissonou un nettoyagediff6r6 ou pourla
fonction de cuissonet maintien.
Annulation de raffichage de I'heure :
SiI'on ne desire pasI'affichagede I'heuredu jour :
Appuyersur lestouchesCancel(Annuler)et
Clock (Horloge)et lesmaintenir ainsipendant
trois secondes.L'heuredu jour disparaitde
I'afficheur.
LorsqueI'affichagede I'heureest annul6,
appuyersur la touche Clock pour afficher
brievementI'heuredu jour.
Rbaffichage de I'heure :
Appuyersur lestouchesCancelet Clocket les maintenir ainsi
pendanttrois secondes.L'heure du jour r6apparait_ I'afficheur.
Minuterie
La nrinuteriepeut 6tre progranrnreede uneminute (0:01)jusqu'_
99 heureset 59 minutes(99:59).
La minuteriepeut 6tre utilis6e ind@endammentde toute autre
activitY,du four. Ellepeut 6tre aussi programm6ealors qu'une autre
fonction du four est en coursd'utilisation.
La minuterienecommandepas lefour. Ellene sert qu'_ _mettre
des hips.
Programmation de la minuterie :
]. Appuyer sur latouche Timer (Minuterie).
• 0:00s'allumea I'afficheur.
• Lesdeux pointsclignotent.
2. Appuyer sur la touche • ou • jusqu'_ ce que
I'heurejuste paraisse_ I'afficheur.
• Lesdeux pointscontinuent _ clignoter.
3. Appuyer _ nouveausur la toucheTimerou attendrequatre
secondes.
• Lesdeux pointscontinuent _ clignoteret le d6comptede la
dur6ecommence.
• La derni_reminutedu d6compteseraafficheesousforme de
secondes.
4. A la fin de la dur6e programm6e,un hip long retentit
Annulation de la minuterie :
1. Appuyer sur la toucheTimer et la maintenir ainsi pendanttrois
secondes.
OU
2. Appuyer sur la toucheTimeret r6glerI'heurea 0:00.
Verrouillage des commandes
et de la porte du four
La porte du four et les touches peuvent_.treverrouill6espourdes
raisonsde s_,curite,nettoyageou pour emp6chertoute utilisation
non souhaitee.Ellesne pourrontCtreutilis6essi ellessont
verrouill6es.
Sile four esten cours d'utilisation, les commandeset la porte ne
peuvent6treverrouill6es.
L'heure actuelledujour restera_ I'afficheur Iorsque lescommandes
serontverrouill6es.
Verrouillage :
Appuyersur lestouchesCancelet Cook &
Hold (Cuissonet maintien)et les maintenir
ainsi pendanttrois secondes.(Appuyer
d'abord sur latouche CANCEL.)
• Le mot LOCK(VERROU]LLAGE)
clignote _ I'afficheur.
D_verrouillage :
Appuyersur lestouchesCancelet Cook& Hold et les maintenirainsi
pendanttrois secondes.(Appuyerd'abord sur la toucheCANCEL.)
• Le mot LOCKdispara'itde I'afficheur.
Codes d'anomalie
Les roots BAKE(CUISSONCOURANTE)ou LOCK(VERROUlLLAGE
peuventclignoterrapidement_ I'afficheur pour preveniren cas
d'erreur ou de probleme.Sitel est lecas,appuyersur la touche
Cancel.Siles mots BAKEou LOCKcontinuent _ clignoter,
d6brancherI'appareil.Attendre quelques minutes,puis rebrancher
I'appareil.Si I'un des mots continue_ clignoter,d6brancherI'appareil
et prendrecontactavecun r@arateur autoris&
33
8t 13p553.pdf I Imported from Cleveland on 1/t7/2007
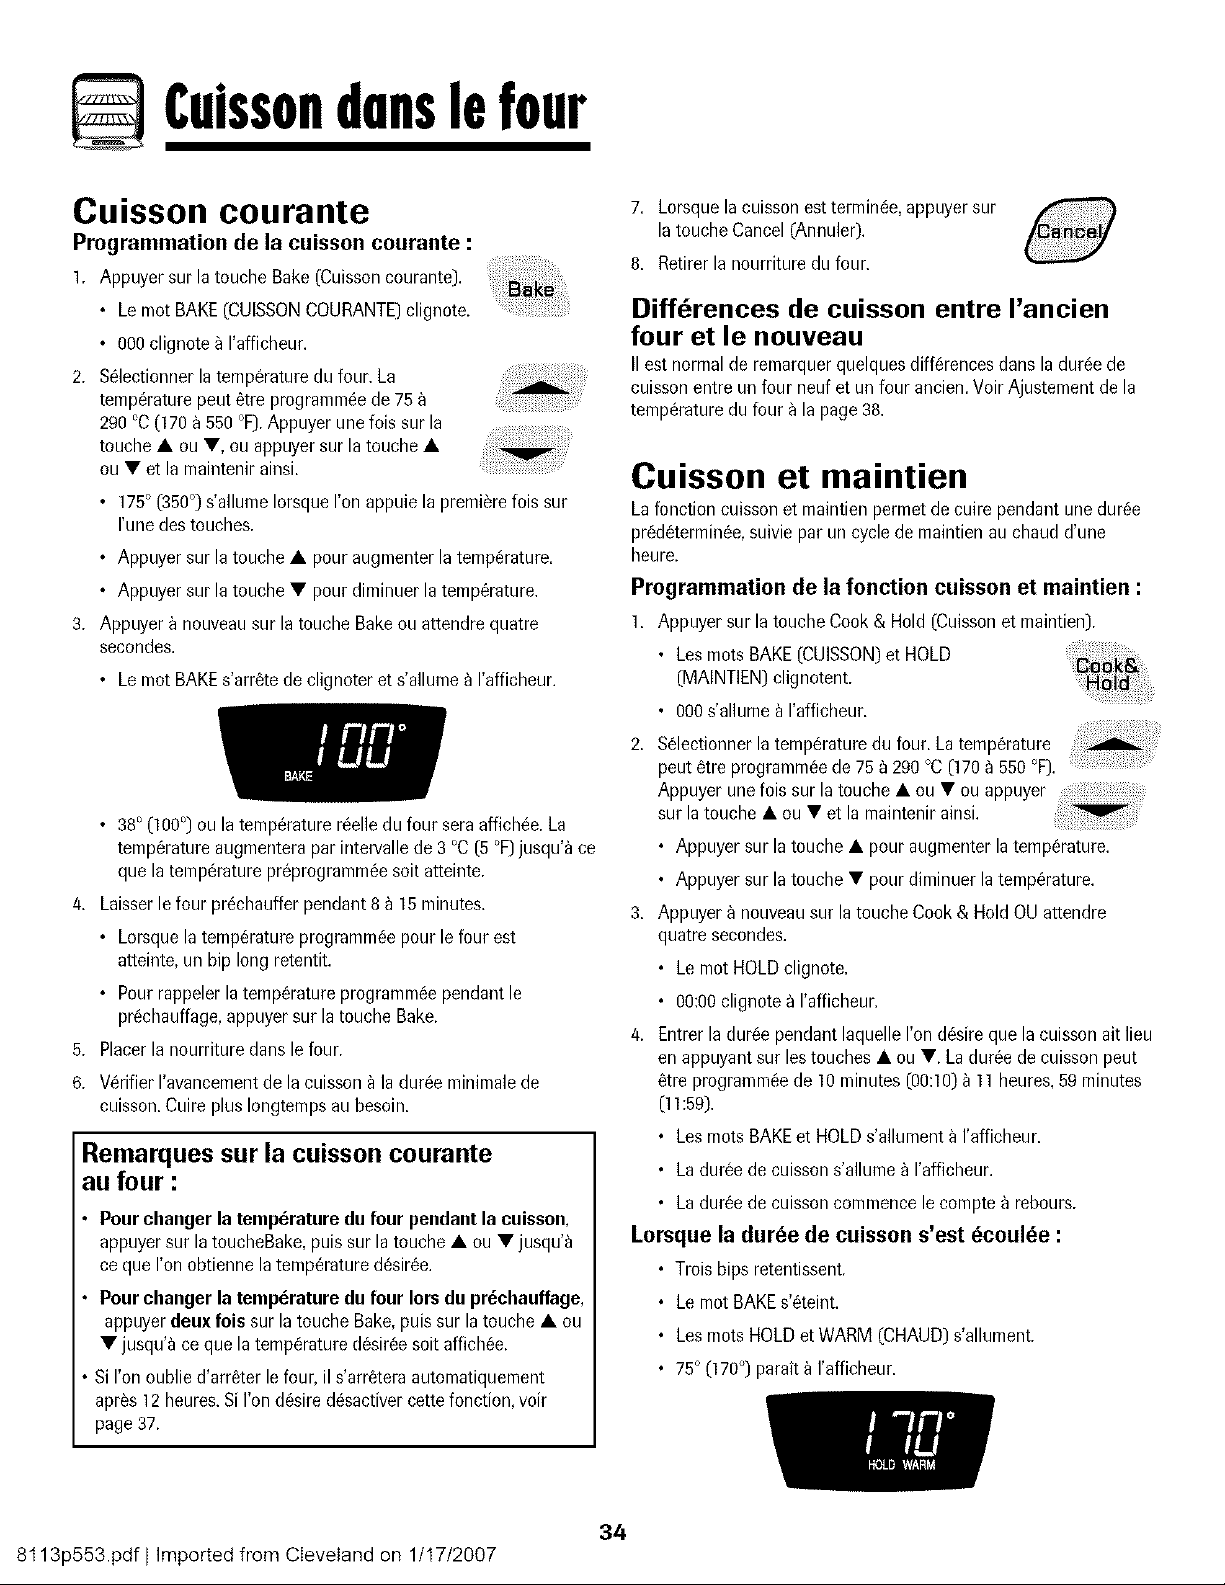
Cuissondunslefour
Cuisson cogrante
Programmation de la cuisson courante :
1. Appuyer sur la touche Bake(Cuissoncourante).
• Le mot BAKE(CUISSONCOURANTE)clignote.
• 000clignote _ I'afficheur.
2. Selectionnerla temperaturedu four. La
temperaturepeut etre programmeede 75
290'C (170 a550 °F).Appuyer une fois sur la
touche • ou •, ou appuyersur la touche •
ou • et la maintenirainsi.
• 175° (350°) s'allume Iorsque I'onappuie la premierefois sur
I'unedes touches.
• Appuyer sur la touche• pour augmenterla temperature.
• Appuyer sur la touche• pour diminuer latemperature.
3. Appuyer _ nouveausur la toucheBakeou attendrequatre
secondes.
• Le mot BAKEs'arretede clignoter et s'allume_ I'afficheur.
• 38° (]00 °) ou la temperaturereelledu four seraaffichee.La
temperatureaugmenterapar intervallede 3 °C (5°F)jusqu'_ ce
quela temperaturepreprogrammeesoit atteinte.
4. Laisserle four prechaufferpendant 8 _ 15 minutes.
5.
6.
• Lorsquela temperatureprogrammeepour lefour est
atteinte,un bip long retentit.
• Pour rappelerlatemperatureprogrammeependantle
prechauffage,appuyersur la touche Bake.
Placerla nourriture dans le four.
Verifier I'avancementde la cuisson_ la dureeminimalede
cuisson.Cuire plus Iongtempsau hesoin.
Remarques sur la cuisson courante
au four :
Pourchanger la temperature du four pendantla cuisson,
appuyersur latoucheBake,puis sur la touche • ou • jusqu'_
ce que I'onobtienne latemperaturedesiree.
Pourchanger la temperature da four Iors du prechauffage,
appuyerdeuxfois sur la touche Bake,puis sur la touche • ou
• jusqu'_ ce que la temperaturedesireesoit affichee.
Si I'on oublie d'arreter lefour, il s'arreteraautomatiquement
apres ] 2 heures.SiI'on desire desactivercette fonction,voir
page 37.
7. Lorsquela cuissonest terminee,appuyer sur
latouche Cancel(Annuler).
8. Retirerla nourriture du four.
Differences de cuisson entre I'ancien
four et le nouveau
II est normal de remarquer quelques differences dans la duree de
cuisson entre un four neuf et un four ancien. Voir Ajustement de la
temperature du four _ la page 38.
Cuisson et maintien
Lafonction cuissonet maintienpermetde cuire pendant uneduree
predeterminee,suiviepar un cycle de maintienau chaud d'une
heure.
Programmation de la fonction cuisson et maintien :
1. Appuyer sur la toucheCook& Hold (Cuissonet maintien).
• Learoots BAKE(CUISSON)et HOLD
[MAINTEN) clignotent.
• 000s'allume _ I'afficheur.
2. Selectionnerla temperatureatl four. Latemperature
peut etre programmeede 75 '_290°C(170_ 550°F).
Appuyer une fois sur latouche • ou • ou appuyer
sur atouche • ou • eta ma ntenr a s
• Appuyer sur la touche • pour augmenterla temperature.
• Appuyer sur la touche • pourdiminuer la temperature.
3. Appuyer _ nouveausur la touche Cook & Hold OU attendre
quatre secondes.
• Le mot HOLDclignote.
• 00:00clignotea I'afficheur.
4. Entrerla duree pendantlaquelle I'on desireque la cuissonait lieu
en appuyantsur les touches • ou •. Laduree decuisson peut
etre programmeede 10 minutes(00:10)) 11 heures,59minutes
0 1:59).
• Lesmots BAKEet HOLDs'allumenta I'afficheur.
• La dureede cuissons'allume _ I'afficheur.
• La dureede cuissoncommencele compte _ rebours.
Lorsque la dur_e de cuisson s'est _coul_e :
• Troisbips retentissent
• Le mot BAKEs'eteint.
• Lesmots HOLDet WARM (CHAUD)s'allument
• 75° (170°) parait) I'afficheur.
34
8t 13p553.pdf I Imported from Cleveland on 1/t 7/2007
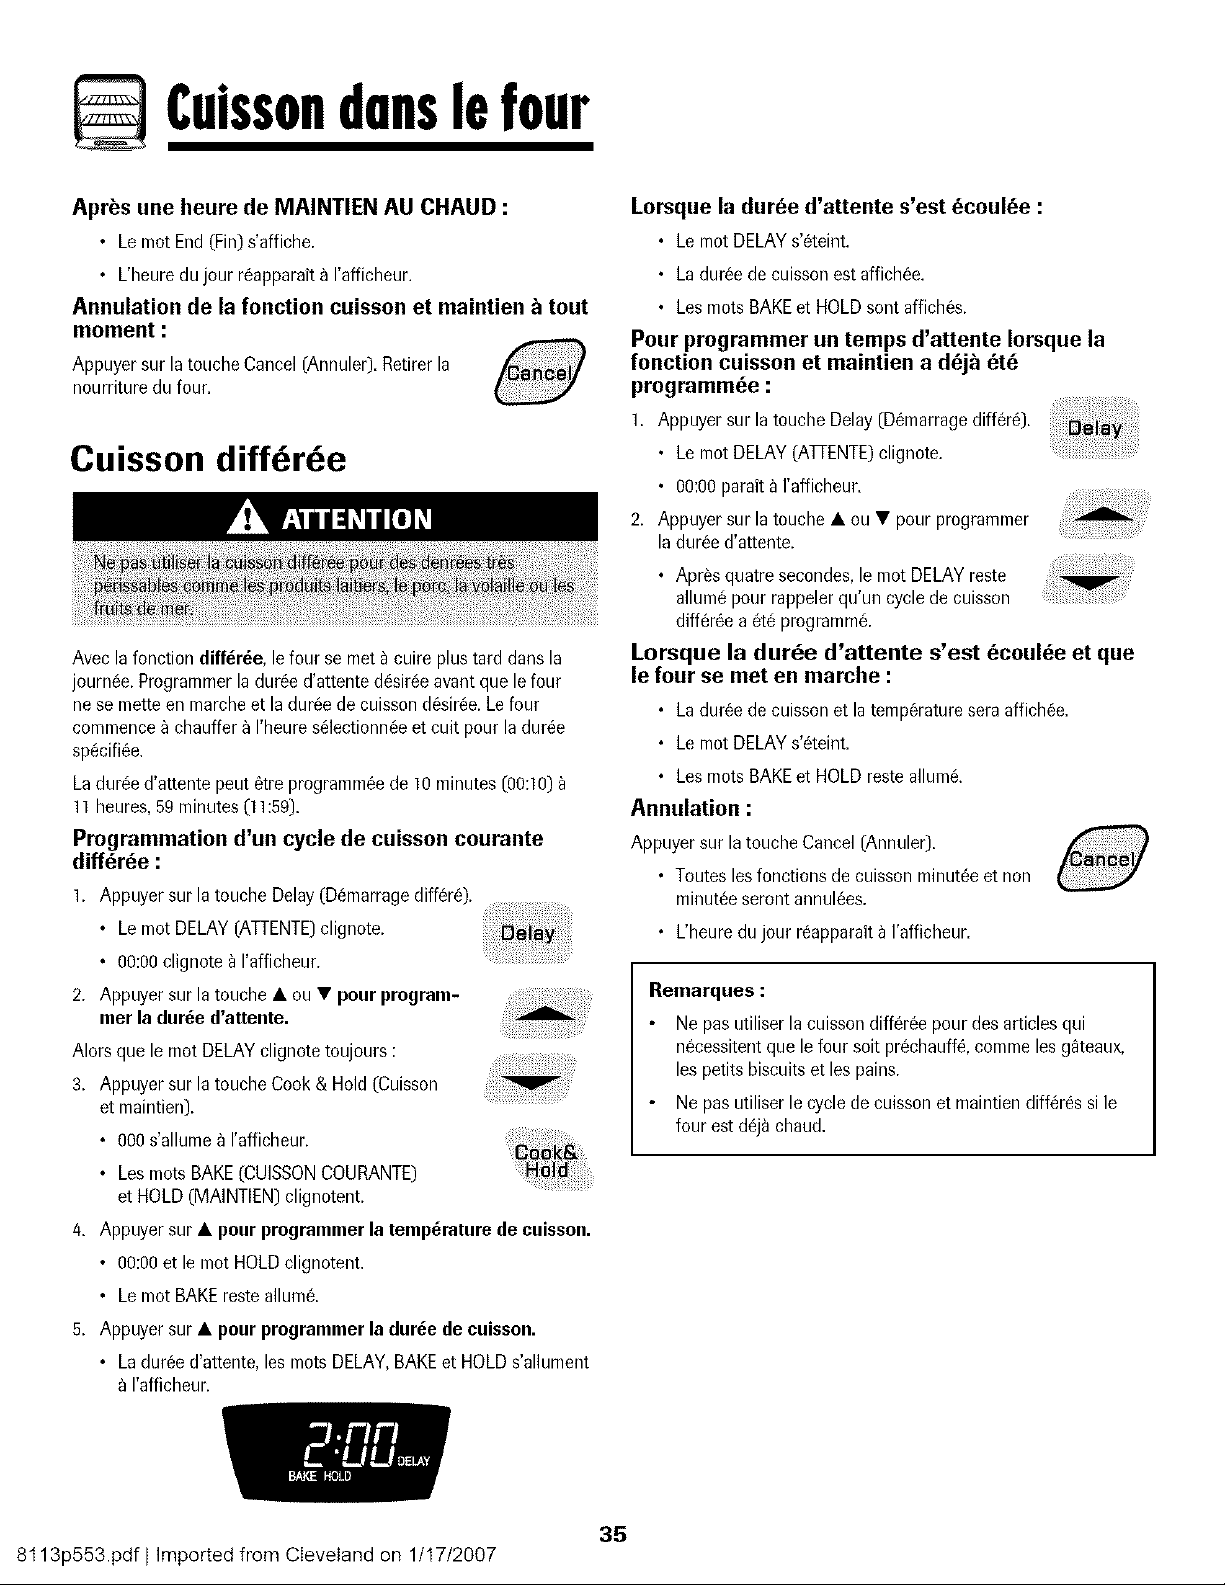
Cuissondunslefour
Aprbs une heure de MAINTIEN AU CHAUD :
• Le rnot End (Fin)s'affiche.
• L'heuredujour r6apparait_ I'afficheur.
Annulation de la fonction cuisson et maintien _ tout
moment :
Appuyersur latouche Cancel(Annule0. Retirerla
nourriture du four,
Cuisson diffbrbe
Avecla fonction diff_r_e, lefour se met _cuire plus tard darts la
journ_,e.Programmerla dur6e d'attented6sir6eavantque le four
ne se metteen marcheet la dur6e de cuissond6sir_,e.Lefour
commence_ chauffer_ I'heures61ectionn6eet cult pour ladur6e
sp6cifi6e.
Ladur6e d'attente peut _tre programm6ede 10 minutes(00;10)
11heures,59minutes (11:59).
Programmation d'un cycle de cuisson courante
diff_r_e :
1. Appuyer sur la touche Delay(D_marragediff6r6).
• Le mot DELAY(ATTENTE)clignote.
• 00:00clignote _I'afficheur.
2. Appuyer sur la touche • ou • pour program-
mer la dur_e d'attente.
Alors que le mot DELAYclignote toujours :
3. Appuyer sur la toucheCook& Hold (Cuisson
et maintien).
• 000s'allume _ I'afficheur.
• Lesroots BAKE(CUISSONCOURANTE)
et HOLD (MAINTIEN)clignotent.
4, Appuyer sur • pourprogrammerla temperature de cuisson.
• 00:00et le rnot HOLDclignotent.
• Le mot BAKEresteallure&
5. Appuyer sur • pourprogrammerla dur_e de cuisson.
• La dur6ed'attente, lesmots DELAY,BAKEet HOLDs'allument
I'afficheur.
Lorsque la durbe d'attente s'est _coul_e :
• Lemot DELAYs'6teint.
• La dur6ede cuissonest affich6e.
• Lesmots BAKEet HOLDsontaffich6s.
Pour programmer un temps d'attente Iorsque la
fonction cuisson et maintien a dej_ _t_
programm_e :
1. Appuyer sur la touche Delay(D6marragediff6r_).
• Le mot DELAY(ATFENTE)clignote.
• 00:00parait _ I'afficheur.
2. Appuyer sur la touche • ou • pour programmer
ladur6ed'attente.
• Apres quatre secondes,le mot DELAYreste
allum6pour rappelerqu'un cycle de cuisson
diff@6ea6t6 programm&
Lorsque la dur_e d'attente s'est bcoul_e et que
le four se met en marche :
• Ladur6e de cuissonet latemp@atureseraaffich6e.
• Le mot DELAYs'6teint.
• Lesmots BAKEet HOLDresteallum&
Annulation :
Appuyersur latouche Cancel(Annuler).
• Toutesles fonctionsde cuissonminut6e et non
minut6eserentannul_es.
• L'heuredu jour r6apparaita I'afficheur.
Remarques :
Ne pas utiliserla cuissondiff6r6e pour des articlesqui
n_cessitentquele four soit pr6,chauff_!,cemmeles g_teaux,
les petits biscuitset les pains.
Ne pas utiliserle cyclede cuisson et maintiendiff_res si le
four est d6j_chaud.
35
8t 13p553.pdf I Imported from Cleveland on 1/t 7/2007
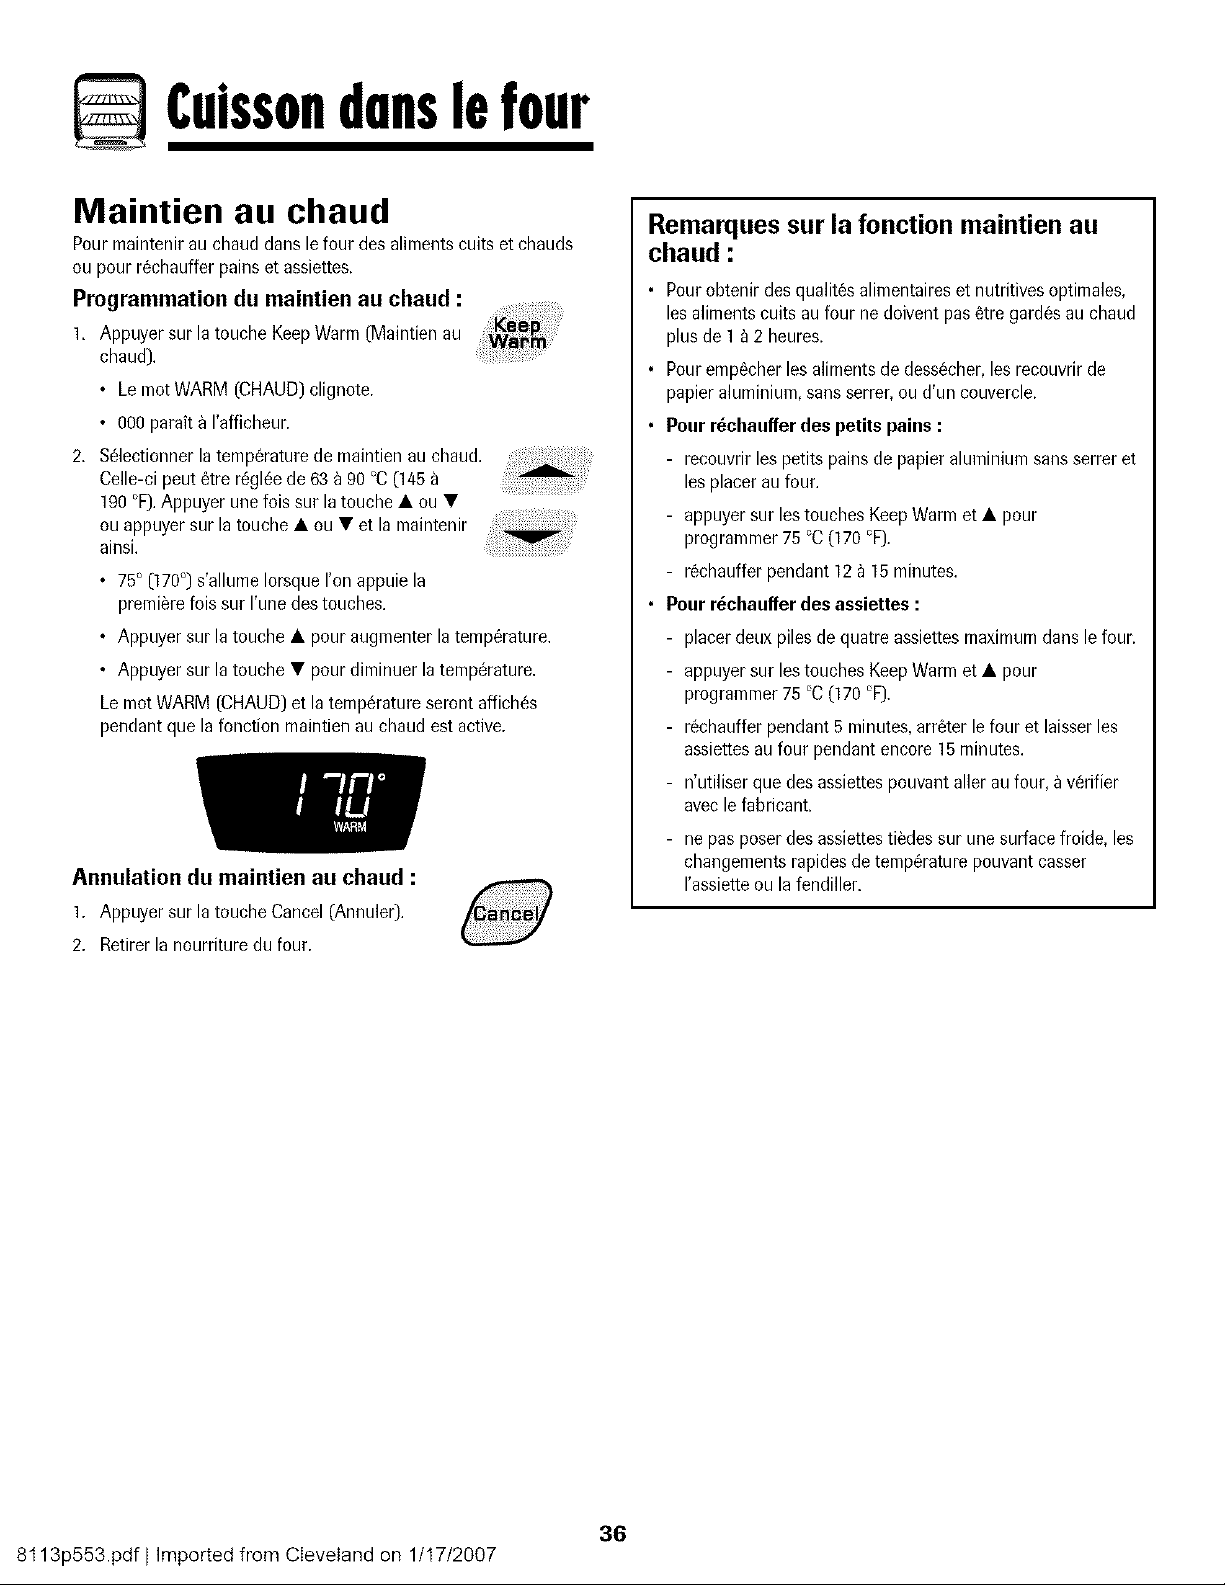
Cuissondunslefour
Maintien au chaud
Pourmaintenirau chaud dartslefour des alimentscults et chauds
ou pour rechaufferpains et assiettes.
Programmation du maintien au chaud :
1. Appuyer sur la touche KeepWarm(Maintien au
chaud).
• Le mot WARM (CHAUD)clignote.
• 000 parait _ I'afficheur.
2. Selectionnerla temperaturede maintiea au chaud.
Celle-cipeut etre reglee de 63 _ g0 °C(145
190°F).Appuyer unefois sur latouche• ou •
ouappuyer sur la touche • ou • et la maintenir
ainsi.
• 75° (170°) s'allume IorsqueI'on appuiela
premierelois sur I'unedestouches.
• Appuyer sur la touche • pour augmenterla temperature.
• Appuyer sur la touche • pourdiminuer la temperature.
Lemot WARM (CHAUD)et la temperatureseront affiches
pendantque la fonction maintien au chaud est active.
Annulation du maintien au chaud :
1. Appuyer sur la toucheCancel (Annuler).
2. Retirerla nourriture du four.
Remarques sur la fonction maintien au
chaud :
• Pourobtenir des qualitesalimentaireset nutritivesoptimales,
lesalimentscults aufour ne doiventpas etre gardesau chaud
plus de 1 _2 heures.
• Pourempecher les alimentsde dessecher,lesrecouvrirde
papieraluminium,sans serrer,ou d'un couvercle.
• Pourr_chauffer des petits pains :
- recouvrirlespetits painsde papieraluminiumsans serreret
lesplacer au four.
- appuyersur lestouches KeepWarmet • pour
programmer75 'C (170'F).
- rechaufferpendant 12 _ 15minutes.
• Pourr_chauffer des assiettes :
- placerdeux pilesde quatre assiettesmaximumdans le four.
- appuyersur lestouches KeepWarmet • pour
programmer75 'C (170'F).
- rechaufferpendant5 minutes,arreter le four et laisserles
assiettesau four pendantencore 15minutes.
- n'utiliser quedes assiettespouvantaller aufour, a verifier
avecle fabricant.
- nepas poserdes assiettestiedes sur unesurfacefroide, les
changementsrapidesde temperaturepouvantcasser
I'assietteou lafendiller.
36
8t 13p553.pdf I Imported from Cleveland on 1/t 7/2007
Cuissondunslefour
Arr t automatique/Mode
sabbat
Lefour s'arr_te automatiquementapr_s ]2 heuress'il a6t6
accidentellementlaisseen marche.Cettecaracteristiquede securite
peut 6tre arr6t6e.
Pour annuler I'arr_t 12 heures et faire fonctionner le
four en continu pendant 72 heures :
]. Programmerle four pour une cuissoncourante(voir page 34).
2. Appuyer sur la toucheClock (Horloge)et la
maintenirainsi pendant5 secondes.
• SAb seraaffich6 et clignotera pendant5 secondes.
• SAb seraensuite affiche en continu jusqu'_ ce qu'on I'arreteou
jusqu'_ ce que la dureelimite de 72 heuressoit atteinte.
• Le mot BAKE(CUISSONCOURANTE)seraaussi affiche si un
cyclede cuissoncouranteesten cours alorsque le four est en
modesabbat
Toutesles autresfonctions (Minuterie,Maintien au chaud, Nettoyage,
etc.) sont verrouill_es,sauf BAKE,pendant le modesabbat.
Annulation de la cuisson courante alors que le four
est en mode sabbat :
Appuyersur latouche Cancel(Annuler).
• Le mot BAKEs'6teint_ I'afficheur.
• Aucun hip sonorene retentit.
Annulation du mode sabbat :
1. Appuyer sur la toucheClock pendant 5 secondes.
OU
2. Apr6s 72 heures,le modesabbatsetermine.
• SAb clignote pendant5 secondes.
• L'heuredujour revient_ rafficheur.
Remarques sur le mode sabbat :
• Le modesabbat peut 6tre mis en marche_ tout moment,que
lefour soit en marcheou non.
Le modesabbatne peut pas 6tre misen marchesi les
commandessont verrouill6esou la porteverrouill_e.
Si le four esten mode cuissonIorsquele modesabbatest
programm&le mot BAKE(CUISSONCOURANTE)s'6teint '_la
fin du cycle de cuisson.11n'y aura aucunsignal sonore audible.
Si 1'6clairagedu four est souhaite pendantle mode sabbat,la
lampedevra6tre allum_eavantque le modesabbatned6bute.
Lorsquele modesabbata d_marr& aucun bip de pr_chauffage
ne retentit.
Tousles messageset les bips sontd_sactiv6sIorsque le mode
sabbatestactif.
Leverrouillageautomatiquede la porte nefonctionne pas
pendant le modesabbat.
SiI'on appuie sur latouche Cancel,un cycle de cuisson
couranteau four sera annul& Cependant,le programmateur
resteraen mode sabbat.
Apr_s unepannede courant,le four revienten modesabbat
avec72heuresrestanteset aucun cycleactif.
37
8t 13p553.pdf I Imported from Cleveland on 1/t7/2007

!;uissondunslefour
Ajustement de la temperature
du four
La precision des temperatures du four a ete soigneusement verifiee
I'usine. II est normal de remarquer quelques differences dana la
cuisson entre un four neuf et un four ancien. Au fur et _ mesure que
les cuisinieres sont moins neuves, la temperature du four peut varlet.
II estpossibled'ajusterla temperaturedu four si I'on penseque le
four necult pasou ne rissolepas correctement Pour deciderde
I'ajustement_ apporter, regler le four _ unetemperaturede ] 5 °C
(25 'F) pluseleveeou plus basseque la temperatureindiqueedans
la recette,puis faire cuire la preparation.Les resultatsdu <<test >>de
cuissondoiventdonner uneNee du nombrede degresduquella
temperaturedolt etre ajustee.
Ajustement de la temperature du four :
]. Appuyer sur la touche Bake(Cuissoncourante).
2. Entrer285 °C (550 °F)en appuyant sur la touche •.
3. Appuyer sur la touche Bakeet la maintenirainsi
pendantplusieurssecondesoujusqu'a ce que 0°
paraissea I'afficheur.
Si la temperature du four a ete precedemment ajustee, le
changement sera affich& Par exemple, si la temperature du four
a ete reduite de 8 °C (15 °F), I'afficheur indiquera -8 ° (-] 5°).
4. Appuyer sur la touche • ou • pour ajuster la temperature.
A chaque fois que I'on appuie sur une touche, la temperature
change de 3 °C (5 OF).La temperature du four peut etre
augmentee ou diminuee de 3 a 20 °C (5 _ 35 °F).
5. L'heuredu jour reapparaitautomatiquement_ I'afficheur.
II n'est pas necessaire de reajuster la temperature du four en cas
de panne ou d'interruption de courant. Les temperatures de
cuisson au gril et de nettoyage ne peuvent etre ajustees.
Changement de la
temperature °F/°C
1. Le reglage pardefaut de I'usine pour latemperatureesten
Fahrenheit.
2. Pour modifier ce reglage, appuyer sur les touches CANCEL et
Bake simultanement et maintener-les enfoncees pendant trois
secondes.
3,
4,
Un bip retentit et le reglagecourant (°Fou °C)parait '_I'afficheur.
(Sivous nefaites pasde changement la cuisiniereretoumeau
reglageexistantapres30secondes.)
Pourmodifier le reglage,appuyersur latouche • ou T.
Appuyer _ nouveausur latouche pour retournerau reglage
existant.Attender cinq secondeset le reglageseraeffectu&
38
8t 13p553.pdf I Imported from Cleveland on 1/t7/2007
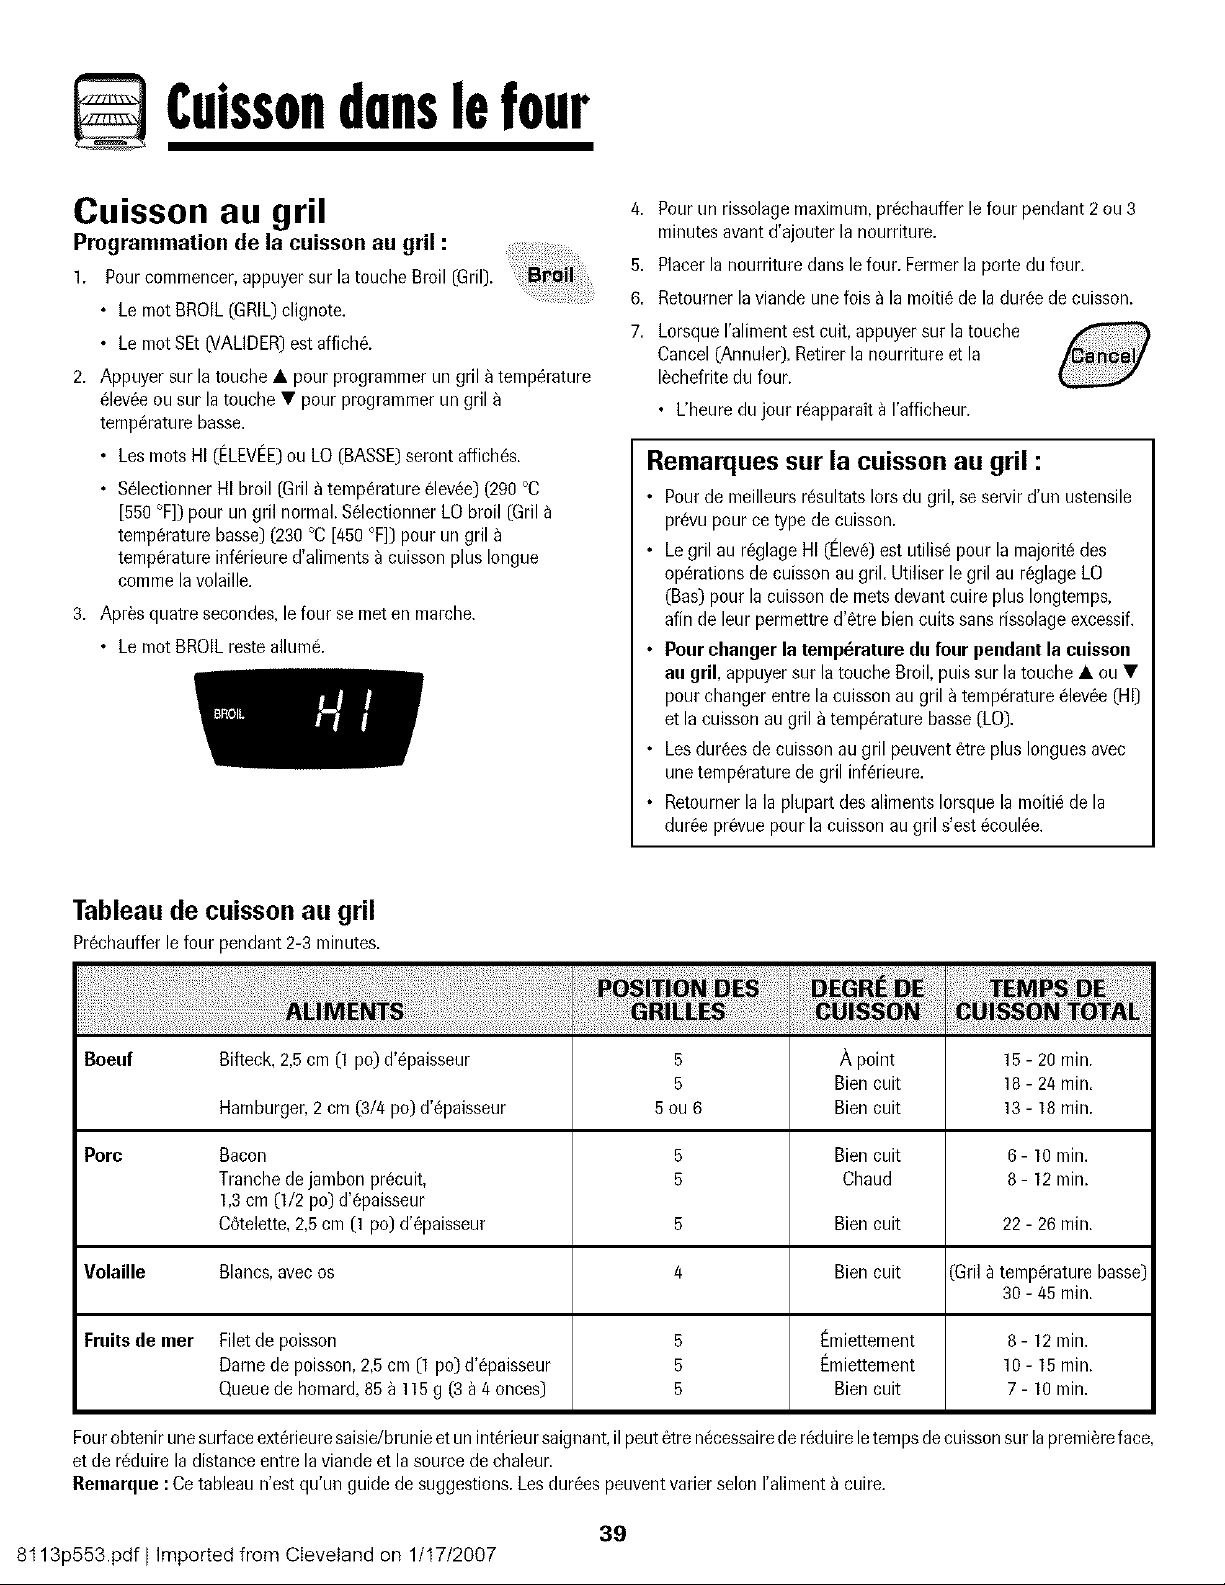
@ !:uissondunslefour
Cuisson au gril
Programmation de la cuisson ag gril :
1. Pourcommencer,appuyersur la toucheBroil (Gril).
• Le mot BROIL(GRIL)clignote.
• Le motSEt(VALIDER)est affich&
2. Appuyersur la touche • pour programmerun gril _ temperature
eleveeou sur latouche • pour programmerun gril
temperaturebasso.
• Losmots HI (I'--LEVEE)ou LO (BASSE)serontaffiches.
• SelectionnerHI broil (Gril _ temperatureelevee)(290°C
[550 °F]) pour un gril normal.S61ectionnerLO broil (Gril
temperaturebasso)(230°C[450 °F]) pour un gril
temperatureinferieured'aliments_ cuissonplus Iongue
commelavolaille.
3. Apresquatre secondes,le four se met en marche.
• Le mot BROILresteallure&
4. Pourun rissolagemaximum,prechaufferlefour pendant 2 ou 3
minutesavantd'ajouterla nourriture.
5. Placerla nourriture darts lefour. Formerla porte du four.
6. Retournerla viande unefois _ la moitie de ladureede cuisson.
7. Lorsqueraliment est cult, appuyersur latouche
Cancel(Annuler).Retirerla nourritureet la
lechefritedu four.
• L'heuredu jour reapparait_ I'afficheur.
Remarques sur la cuisson au gril :
Pourde meilleursresultatsIors du gril, se servird'un ustensile
prevu pour ce typede cuisson.
Legril au reglageHI ((--love)est utilise pourla majoritedes
operationsde cuissonau gril. Utiliser le gril au reglage LO
(Bas)pour la cuissonde metsdevantcuire plus Iongtemps,
afin de leur permettred'etre bien cults sansrissolageexcessif.
Pourchanger la temperature du four pendant la cuisson
au gril, appuyersur latouche Broil, puis sur la touche • ou•
pour changerentre la cuissonau gril _ temperatureelevee(HI)
et lacuissonau gril _ temperaturebasso(LO).
Losdureesde cuissonau gril peuventetre plus Ionguesavec
unetemperaturede gril inferieure.
Retournerla la plupart des alimentsIorsquela moitie de la
dureeprevuepour la cuissonau gril s'estecoulee.
Tableau de cuisson au gril
Prechaufferlefour pendant 2-3 minutes.
Boeuf Bifteck, 2,5cm (1 po)d'@aisseur 5 A point 15- 20 min.
5 Biencult 18- 24 min.
Hamburger,2 cm (3/4 po)d'@aisseur 5 ou 6 Biencult 13- 18min.
Pore Bacon 5 Biencult 6- 10 min.
Tranchedejambon precuit, 5 Chaud 8 - 12 min.
1,3cm (1/2 po) d'@aisseur
Cetelette,2,5cm (1 po)d'epaisseur 5 Biencult 22- 26 min.
Volaille Blanc&avecos 4 Biencult (Gril a temperaturebasso)
30- 45 min.
Fruitsde mer
Filetde poisson
Dame de poisson,2,5cm (1po) d'@aisseur
Queuede homard,85a 115g (3 _4 onces)
5
5
5
t_miettement
t_miettement
BJencuJt
8 - 12 rain.
10 - 15 min.
7 - 10 min.
Four obtenir une surface exterieure saisidbrunie et un i nterieu r saignant, il pout etre necessaire de reduire letemps de cuisson sur la premiere face,
et de reduire la distance entre la viande et la source de chaleur.
Remarque : Ce tableau n'est qu'un guide de suggestions. Los durees peuvent varier solon I'aliment a cuire.
39
8t 13p553.pdf I Imported from Cleveland on 1/t7/2007
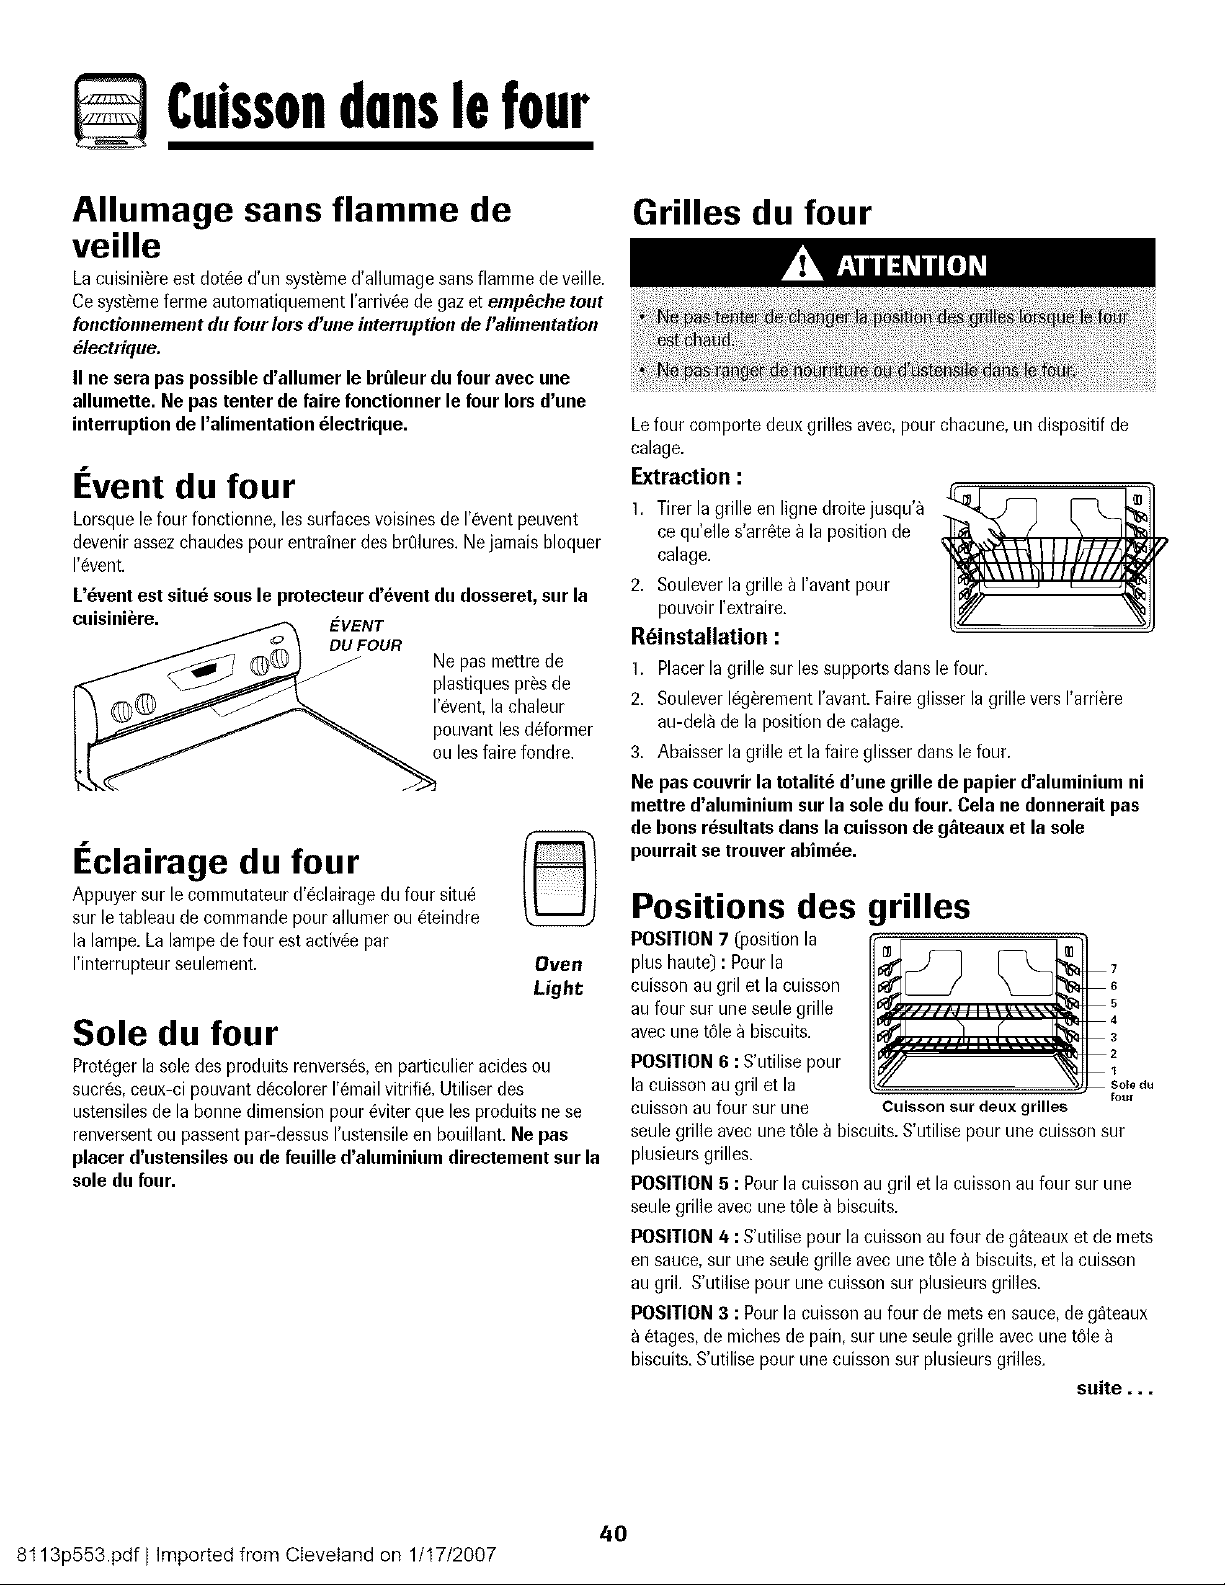
Cuissondunslefour
Allumage sans flamme de
veille
La cuisini_re est dot6e d'un systeme d'allumage sans flamme de veille.
Ce syst_me ferme automatiquement I'arriv6e de gaz et empecbe tout
fonctionnement du four Iors dune interruption de I'alimentation
_leetrique.
II ne sera pas possibled'allumer le breleur du four avec une
allumette. Ne pas tenter de fake fonctionner le four Iors d'une
interruptionde I'alimentation _lectrique.
I vent du four
Lorsquele four fonctionne,les surfacesvoisinesde 1'6ventpeuvent
devenirassezchaudespour entrainerdes br01ures.Ne jamais bloquer
I'event.
L'_ventest situ_ sousle protecteur d'_vent du dosseret,sur la
cuisini6re. E-VENT
DU FOUR
.o a ottre0o
_ \__ plastiquesprosde
[ _ @@i/i l event la chaleur
I _ / % pouvantles ddormer
L_ "_ou les faire fondre.
I clairage du four
Appuyersur lecommutateurd'6clairagedu four situ_
sur le tableau de commandepourallumer ou 6teindre
la lampe.Lalampede four est activ6e par
I'interrupteurseulement
@
_ven
Light
Sole du four
Prot_gerlasole des produits renvers_s,en particulier acidesou
sucres,ceux-ci pouvant d_,colorer1'6mailvitrifi& Utiliser des
ustensilesde la bonne dimensionpour 6viterque les produitsne se
renversentou passentpar-dessusI'ustensileen bouillant.Ne pas
placer d'ustensilesou de feuille d'aluminium directement sur la
sole du four.
Grilles du four
Lefour comportedeux grilles avec,pour chacune,un dispositif de
calage.
Extraction :
1. Tirer la grille en lignedroite jusqu'_
ce qu'elle s'arr6tea la position de
calage.
2. Souleverla grille a I'avantpour
pouvoirI'extraire.
R_installation :
1. Placer la grille sur les supports dans le four.
2. Soulever16g_rementI'avant Faireglisser la grille vers I'arriere
au-dela de la positionde calage.
3. Abaisserla grille et la faire glisser dans lefour.
Ne pas couvrir la totalit_ d'une grille de papier d'aluminium ni
mettre d'aluminium sur la soledu four. Cela ne donneraitpas
de bons resultats dansla cuissonde g&teauxet la sole
pourraitse trouverabim_e.
Positions des grilles
POSITION7 (position la
plus haute) : Pour la
cuissonau gril et la cuisson
aufour sur uneseulegrille
avecunet61ea biscuits.
POSITION6 :S'utilise pour
la cuissonau gril et la
cuisson au four sur une
Cuisson sur deux grilles
fottT
seulegrille avecunet61ea biscuits.S'utilisepour une cuissonsur
plusieursgrilles.
POSITION5 :Pour la cuissonau gril et la cuissonau four sur une
seulegrille avecunet61e_ biscuits.
POSITION/4 : S'utilise pour lacuissonau four de g_teauxet de mets
ensauce,sur une seulegrille avecune t61e_ biscuits,et lacuisson
augill. S'utilise pour unecuissonsur plusieursgrilles.
POSITION3 : Pourla cuissonau four de metsen sauce,de g_teaux
6tages,de michesde pain,sur uneseule grille avecunet61e
biscuits.S'utilisepour une cuissonsur plusieursgrilles.
suite...
40
8t 13p553.pdf I Imported from Cleveland on 1/t7/2007

Cuissondunslefour
POSITION2 :S'utilise pour la cuissonau four de ggteauxsur une
seulegrille avecunet61e9 biscuits,et pour le r6tissagede petites
piecesdeviande.S'utilise pour unecuissonsur plusieursgrilles.
POSITION 1 : Pourle retissagede grossespiecesde viandeet la
volaille.
Sole du four : Placerlagrille sur les
c6tes relevesde la sole. Donneune
place supplementairepour lacuisson
de grandesquantites.
CUISSONSUR PLUSIEURS
GRILLES:
Deux grilles : Utiliser les positions 3 et 6, ou 2 et/4.
Cuisson de g_teaux _ _tages sur deux grilles
Pourde meilleursresultatspour la cuissonde g_teaux sur deux
grilles,utiliser les positions2 et/4.
Placerlesggteauxsur la grille, commeil est indiqu&
41
8t 13p553.pdf I Imported from Cleveland on 1/t7/2007
#ettoyage
Four autonettoyant
6. Essuyerles r6sidussucr6set acides,comme les patatesdeuces,
latomate ou les sauces_ basede bit La porcelainevitrifiee
possedeune certaine resistanceaux composesacides,maisqui
n'est pas limitee.Elle peut sedecolorer si les residus acidesou
sucres ne sont pasenlevesavantde commencerI'autonettoyage.
Lecycle d'autonettoyageutilisedes temperaturessuperieures9 la
normalepour assurerle nettoyageautomatiquede la totalite du four.
Lefour dolt etre nettoyeregulierement.Leseclaboussuresdoivent
etre essuyeespour eviter une productionexcessivede fumeeou
I'apparitionde flammes.Ne laissezpasde residuss'accumulerdans
lefour.
Durantle processusd'autonettoyage,il convientde bien aererla
cuisinepour eliminerles odeurs normalementemisesdurant le
nettoyage.
Avant I'autonettoyage
1. Eteindrela lampedu four avantle nettoyage.Ellerisqueraitsinon,
de griller.
2. Enleverla lechefrite,tousles plats et les grilles du four. Lesgrilles
risquentde se decoloreret de ne plusglisser aussibien apresun
cycle d'autonettoyagesi on ne les enlevepas.
3. Nettoyerle cadre dufour, le cadre de la porte,la zone a I'ext@ieur
du joint et autour de I'ouverturedans le
joint de la porte,_ I'aided'un produit
de nettoyagenonabrasifcomme Bon
Ami* ou d'eau additionneede
detergent.Le processus
d'autonettoyagene nettoie pasces
zones.Ellesdoiventetre nettoyeespour
empecherlasaletede s'incrusterpendant le cycle de nettoyage.
(Lejoint assureI'etancheiteautour de la porteet du hublot du
four.)
4. Pour empScher tout dommage, ne pas nettoyer ni trotter le joint
qui se trouve autour de la porte du four. Ce joint est con_:u pour
6viter les pertes de chaleur pendant le cycle d'autonettoyage.
5. Eliminer les residus de graisse ou de produits renverses sur la
sole avant le nettoyage. Ceci empeche la formation de flammes
ou de fumee durant le nettoyage.
Programmation de rautonettoyage :
Remarque :Latemperaturedu four dolt etre situee endessous I
de 205°C(400°F)pour programmerun cycled'autonettoyage.
I
1. Fermerla porte du four.
2. Appuyersur la touche Clean(Nettoyage).
• Le mot CLEAN(NETTOYAGE)clignote _I'afficheur.
3. Appuyersur la touche • ou •.
• CL-M (Nettoyage- salete moyenne)est affich&
Si la porte n'est pasfermee,des bips retentissent
et le mot 'door' (porte) parait a I'afficheur.Si la
porte n'est pasfermeedans les 45 secondes,
I'operationd'autonettoyageest annuleeet I'afficheur
revient_ I'heuredujour.
4. Appuyersur la touche • ou • pourvoir defiler les differents
reglagesde I'autonettoyage.
CL-H (Nettoyage- saleteimportante,4 heures)
CL-M (Nettoyage- saletemoyenne,3 heures)
CL-L (Nettoyage- salete legere,2 heures)
Lechoix du niveaude saletedu four programme
automatiquementla dureedu cycle d'autonettoyage.
5. Apresquatre secondes,lefour commencele nettoyage.
• La duree de nettoyagecommencele decompte_ I'afficheur.
• Le mot LOCK(VERROUILLAGE)para'it_ I'afficheur.
• Le mot CLEANparaita I'afficheur.
D_marrage differ_ d'un cycle d'autenettoyage :
1. Appuyersur la touche Delay(Dernarragediffere).
• Le mot DELAY(ATrENTE)clignote.
• 00:00parait _ I'afficheur.
2. Appuyersur la touche • ou • pour programmer
la dureed'attente avantque ne commencele
cycle.Ladureed'attente peut etre reglee,de dix
minutes (00:10)_ onzeheures,cinquante-neuf
minutes (11;59).
3. Alors que le mot DELAYclignote,appuyersur
la toucheClean (Nettoyage).
• Le mot CLEANva clignoter.
suite...
%es noms de marquedes produits de nettoyagesontdes marquesdeposeesdes ditferentsfabricants.
42
8t 13p553.pdf I Imported from Cleveland on 1/t7/2007
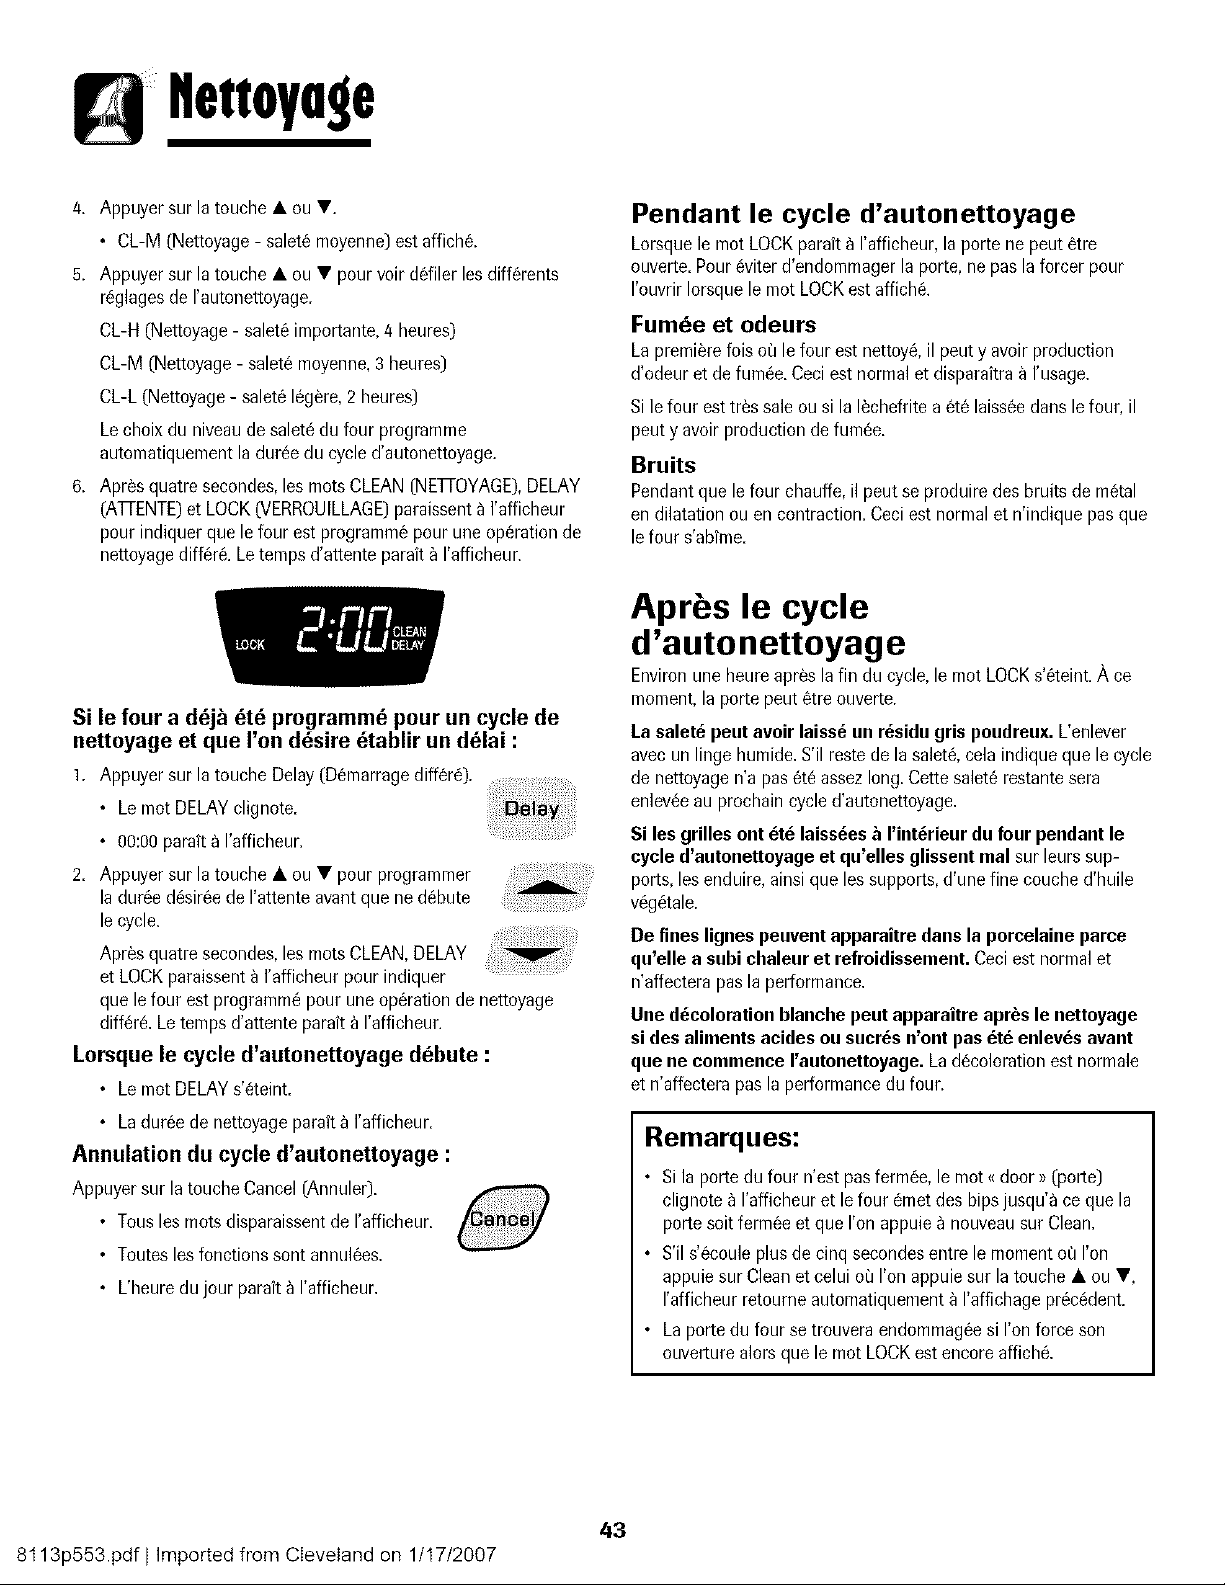
#ettoyage
4. Appuyer sur la touche • ou T.
• CL-M (Nettoyage- salet6 moyenne)est affich&
5. Appuyer sur la touche • ou T pour voir driller lesdiff6rents
reglagesde I'autonettoyage.
CL-H(Nettoyage- saleteimportante,4 heures)
CL-M (Nettoyage- saletemoyenne,3 heures)
CL-L (Nettoyage- salete legere,2 heures)
Lechoixdu niveaude saletedu four programme
automatiquementladuree du cycled'autonettoyage.
6. Apres quatre secondes,les rootsCLEAN(NE]q-OYAGE),DELAY
(ATrENTE)et LOCK(VERROUILLAGE)paraissent_ I'afficheur
pour indiquerque lefour est programmepour une operationde
nettoyagediffer& Letemps d'attenteparait _ I'afficheur.
Si le four a d_j& _t_ programmb pour un cycle de
nettoyage et que run d_sire _tablir un dblai :
1. Appuyer sur la touche Delay(Dernarragediffere).
• Le mot DELAYclignote.
• 00:00parait a I'afficheur.
2. Appuyer sur la touche • ou • pour programmer
la dureedesireedeI'attente avantque ne debute
lecycle.
Apres quatre secondes,les motsCLEAN,DELAY
et LOCKparaissenta I'afficheur pourindiquer
quele four estprogramme pour une operationde nettoyage
differ& Le tempsd'attente paraft_ I'afficheur.
Lorsque le cycle d'autonettoyage dbbute :
• Le rnot DELAYs'eteint.
• La dureede nettoyageparaita I'afficheur.
Annulation du cycle d'autonettoyage :
Appuyersur latouche Cancel(Annuler).
• Tousles mots disparaissentde I'afficheur.
• Toutesles fonctionssont annulees.
• L'heuredu jour parait_ I'afficheur.
Pendant le cycle d'autonettoyage
Lorsquele mot LOCKparait _ I'afficheur,la porte ne peut etre
ouverte.Poureviterd'endommagerla porte, ne pasla forcer pour
I'ouvrir Iorsquele motLOCKest affich&
Fumbe et odeurs
La premierelois o_ le four est nettoy& il peut y avoir production
d'odeur et defumee.Ceciest normalet disparaitra_ I'usage.
Sile four esttres saleou si la lechefritea ete laisseedans lefour, il
peut y avoir productionde fumee.
Bruits
Pendantque lefour chauffe,il peut se produire desbruits de metal
en dilatationou en contraction.Ceciest normalet n'indique pas que
le four s'abime.
Aprbs le cycle
d'autonettoyage
Environuneheureapres lafin du cycle,le mot LOCKs'eteint.,_ ce
moment,la portepeut etreouverte.
La salet_ peut avoir laiss_ un r_sida gris poudreux. L'enlever
avecun linge hunride.S'il restede lasalete,cela indique que le cycle
de nettoyagen'a pas ere assezlong.Cette saleterestantesera
enleveeau prochain cycled'autonettoyage.
Si les grilles ont btb laiss_es& I'int_rieur du four pendant le
cycle d'aatonettoyage et qu'elles glissent mal sur leurssup-
ports, lesenduire,ainsi que les supports,d'une fine couched'huile
vegetale.
De fines lignes peavent apparaitre dans la porcelaine parce
qa'elle a subichalear et refroidissement.Oecieat normalet
n'affectera pasla performance.
Une d_colorationblanche peut apparaitre apr6sle nettoyage
si des aliments acidesou sucres n'ont pas _t_ enlevbs avant
qae ne commence raatonettoyage. Ladecolorationest normale
et n'affecterapas la performancedu four.
Remarques:
• Si la porte du four n'est pas fermee,le mot{{door >>(porte)
clignote_ I'afficheur et lefour emetdes bips jusqu'a ce que la
porte soit fermeeet que I'onappuie a nouveausur Clean.
• S'il s'ecoule plusde cinq secondesentre le momentoQI'on
appuiesur Cleanet celui d] I'on appuiesur la touche • ou T,
I'afficheur retoumeautomatiquementa I'affichageprecedent.
• La portedu four se trouveraendommageesi I'on forceson
ouverturealors que le mot LOCKestencoreaffich&
43
8t 13p553.pdf I Imported from Cleveland on 1/t7/2007
#ettoyage
M thodes de nettoyage
* Lesnomsde marquesent des marques
d6pos6esdes differentsfabricants.
** Pour commander directement,
composer le 1-877-232-677] t_.-U,ou
1-800-688-8408 Canada.
L_chefrite et Ne jamais couvrir /a grille de papier d'a/uminium; cela emp_che la graisse de couler dans la I_cheftite.
sa grille • Recouvrir la lechefrite et sa grille d'un linge savonneux; laisser agir pour detacher les residus.
• Laver avec de I'eau savonneuse tiede. Utiliser un tampon _ recurer pour eliminer les souillures tenaces.
• On peut placer les deux composants de la lechefrite dans un lave-vaisselle.
Chapeauxde
br_lear et
br_lears & gaz
Grilles des
br_leurs -
porcelaine
sar fonte
T_tes de br_leur amovibles
• Laisserle brOleurrefroidir.Enleverlechapeaude brQleurpour le laverdans de I'eausavonneuseavecun tampon
recureren plastique.Pourles souillurestenaces,nettoyeravecun tamponnon abrasif,savonneux,ou avec une
@onge et la creme de nettoyagepour table de cuissonCooktopCleaningCreme*(produit n° 2000000])**.
• Ne pas effectuer le nettoyageau lave-vaisselleou dans le four autonettoyant.
Br_leurs & gaz scell_s
• Nettoyerfrequemment.Laisserle brt_leurrefroidir. Nettoyeravecdu savonet un tampon _ recureren plastique.Pour
les souillurestenaces,nettoyeravec un tampon savonneuxet non abrasifl Ne pasagrandirou ddormer lestrous.
• Veiller _ ne pas introduired'eau dans les orificesdu brOleur.
• Travailler prudemmentIorsdu nettoyagede I'allumeur.SiI'allumeur est endommageou mouill& les brOleursde la
table de cuisson ne pourront pass'allumer.
• Laver les grilles avec de I'eau savonneuse tiede et un tampon _ recurer en plastique non abrasif. Pour les souillures
tenaces, nettoyer avec un tampon en plastique non abrasif, savonneux, ou avec une @onge et la creme de nettoyage
pour table de cuisson Cooktop Cleaning Creme* (produit n' 20000001)**. S'il reste des souillures, appliquer de
nouveau la creme pour table de cuisson, recouvrir avec un essuie-tout humide, et laisser tremper pendant 30 minutes.
Frotter de nouveau, rincer et faire secher.
• Ne pas effectuer le nettoyage au lave-vaisselle ou darts le four autonettoyant
Zone de la • Pourutiliser lafonction Verrouillagedes commandespour le nettoyage,voir page 33.
console de • Laver,rincer et faire secher.Ne pasutiliser un agentde nettoyageabrasif susceptiblede rayer lafinition.
eommande et • On peut utiliser un produit de nettoyagedu verre,pulverised'abord sur un chiffon. NE PAS projeter le produit
horloge directementsurles tuuchesde cemmande uusur rafficheur.
Boatonsde • Placerchaquebouton _ la positiond'ARRET,et retirer chaquebouton en le tirant.
commande • Laver,rincer et faire secher.Ne pasutiliser un agentde nettoyageabrasif susceptiblede rayer lafinition.
• Fairefonctionner brievementchaquebrOleurpourverifier que le bouton aete correctementreinstall&
Table de caisson
et tableau de
commande -
_mail vitrifi_
L'email vitrifie est du verre lie au metal par fusion. II peut se fissurer ou s'ecailler en cas de mauvaise utilisation. II est
resistant aux acides, mais pas totalement inattaquable par les acides. Tousles produits renverses, en particulier acides
ou sucres, doivent etre essuyes immediatement avec un linge sec.
• Une fois refroidi, laver avec de I'eau savonneuse, rincer et secher.
• Ne jamais essuyer une surface tiede ou chaude avec un linge humide. Ceci pourrait la fissurer ou I'ecailler.
• Ne jamais utiliser de nettoyants pour four, d'agents de nettoyage caustiques ou abrasifs sur le fini exterieur de la
cuisiniere.
suite...
44
8t 13p553.pdf I Imported from Cleveland on 1/t7/2007
flettoyage
Pauueaux
lat_raux, tiroir
de remisage
et poign_es
de porte -
_mail peint
Hublot et porte
du four en verre
• Unefois lespiecesrefroidies,les laver_ I'eausavonneusetiede,rincer et secher.Ne jamaisessuyerune surface
tiede ou chaudeavec un linge humide,ceci pouvantendommagerlasurface et entrainer une brQlurepar lavapeur.
• Pourlestaches rebelles,utiliserdes agentsde nettoyageI_gerementabrasifscommela pate au bicarbonatede
soudeou BonAmi*. Ne pas utiliser de nettoyantsabrasifs,caustiquesou energiquescomme les nettoyantspour
four ou lestamponsen laine d'acier. Cesproduitsraieraientou endommageraientde fa_on permanentelasurface.
Remarque : Utiliser un tinge ou uotorchon secpour essuyer les produits renvers_s,surtout s'ils sootacides
ou sucres.La surfacepourrait se d_eolorerou se ternir si la salet_ n'_tait pas imm_diatement enlev_e. Ceei
est particulibrementimportantdansle cas de surfacesblanches.
• l_viterd'utiliser trop d'eau,qui risqueraitde s'infiltrer sousou derriere le verre et de tacher.
• Laver_ I'eauet ausavon.Rinceravecde reau propreet secher.Un produit de nettoyagedu verrepeut etre utiliseen
levaporisantd'abord sur un linge.
• Ne pas utiliser de produits abrasifscommetampons _ recurer,lained'acier ou produit de nettoyageen poudre qui
risqueraientde rayer le verre.
Int_rieur dufour • Executerles instructionspr_senteesaux pages42-43pour rautonettoyagedu four.
Grilles dufour • Nettoyeravecde I'eausavonneuse.
• t_liminerlessouillurestenacesavecune poudre de nettoyageou un tampon_ r_curersavonneux.Rincer et faire
secher.
• Siles grilles sont laiss_esdartsle four pendant le cycle d'autonettoyage,ellesse decolorentet peuventne plus tres
bienglisser.Si cecise produit,appliquer paressuyageun peu d'huile vegetalesur la grille et sessupportsen relief
pourfaciliter le mouvement,et enleverI'excesd'huile.
Acier inoxydable
(certainsmodeles)
• NE PA$ UTILISERDE PRODUITSDE NETTOYAGECONTENANTBU JAVELLISANT
• NE PAS UTILISERDE NETTOYANT$_ ORANGE_ OU ABRASIFS.
• TOUJOURSESSUYERBANS LE SENSDE LA TEXTUREDEL"ACIERLORSDU NETTOYAGE.
• Nettoyagejournalier/salet_ I_g_re - Essuyeravec run des produits suivants:eausavonneuse,vinaigre blandeau,
produit de nettoyagepour verre et surface Formula409* ou un produit semblablepourverre - avecun lingesouple
et une@onge. Rinceret secher.Pourpolir et enleverles marquesde doigts,faire suivre par unevaporisationde
Magic Spray*pour acier inoxydable(produit n° 20000008)**.
• Salete mod_r_e/epaisse - EssuyeravecI'un des produits suivants:Bon Ami*,SmartCleanser*ouSoft Scrub*-
I'aided'un linge soupleou d'une @onge humide.Rinceret secher.Lestaches rebellespeuventetre enleveesavec
un tamponmulti-usagesScotch-Brite*humidifi& Frotteruniformementdartslesens du metal.Rinceret secher.
Pourredonnerdu lustre et retirer les rayures,faire suivrepar unevaporisationde Magic Spray*pour acier
inoxydable.
• D_coloration - A raide d'une eponge humidifleeou d'un linge souple,essuyer_ raide du nettoyantCameo*pour
acier inoxydable.Rincerimm_diatementet secher.Pourenleverles marqueset redonnerdu lustre,faire suivre par
unevaporisationde Magic Spray* pour acier inoxydable.
Lesnomsde marquesont des marquesd_pos6esdesdifferents fabricants.
** Pourcommanderdirectement,composerle 1-877-232-6771E.-U.ou 1-800-688-8408Canada.
45
8t 13p553.pdf I Imported from Cleveland on 1/t7/2007
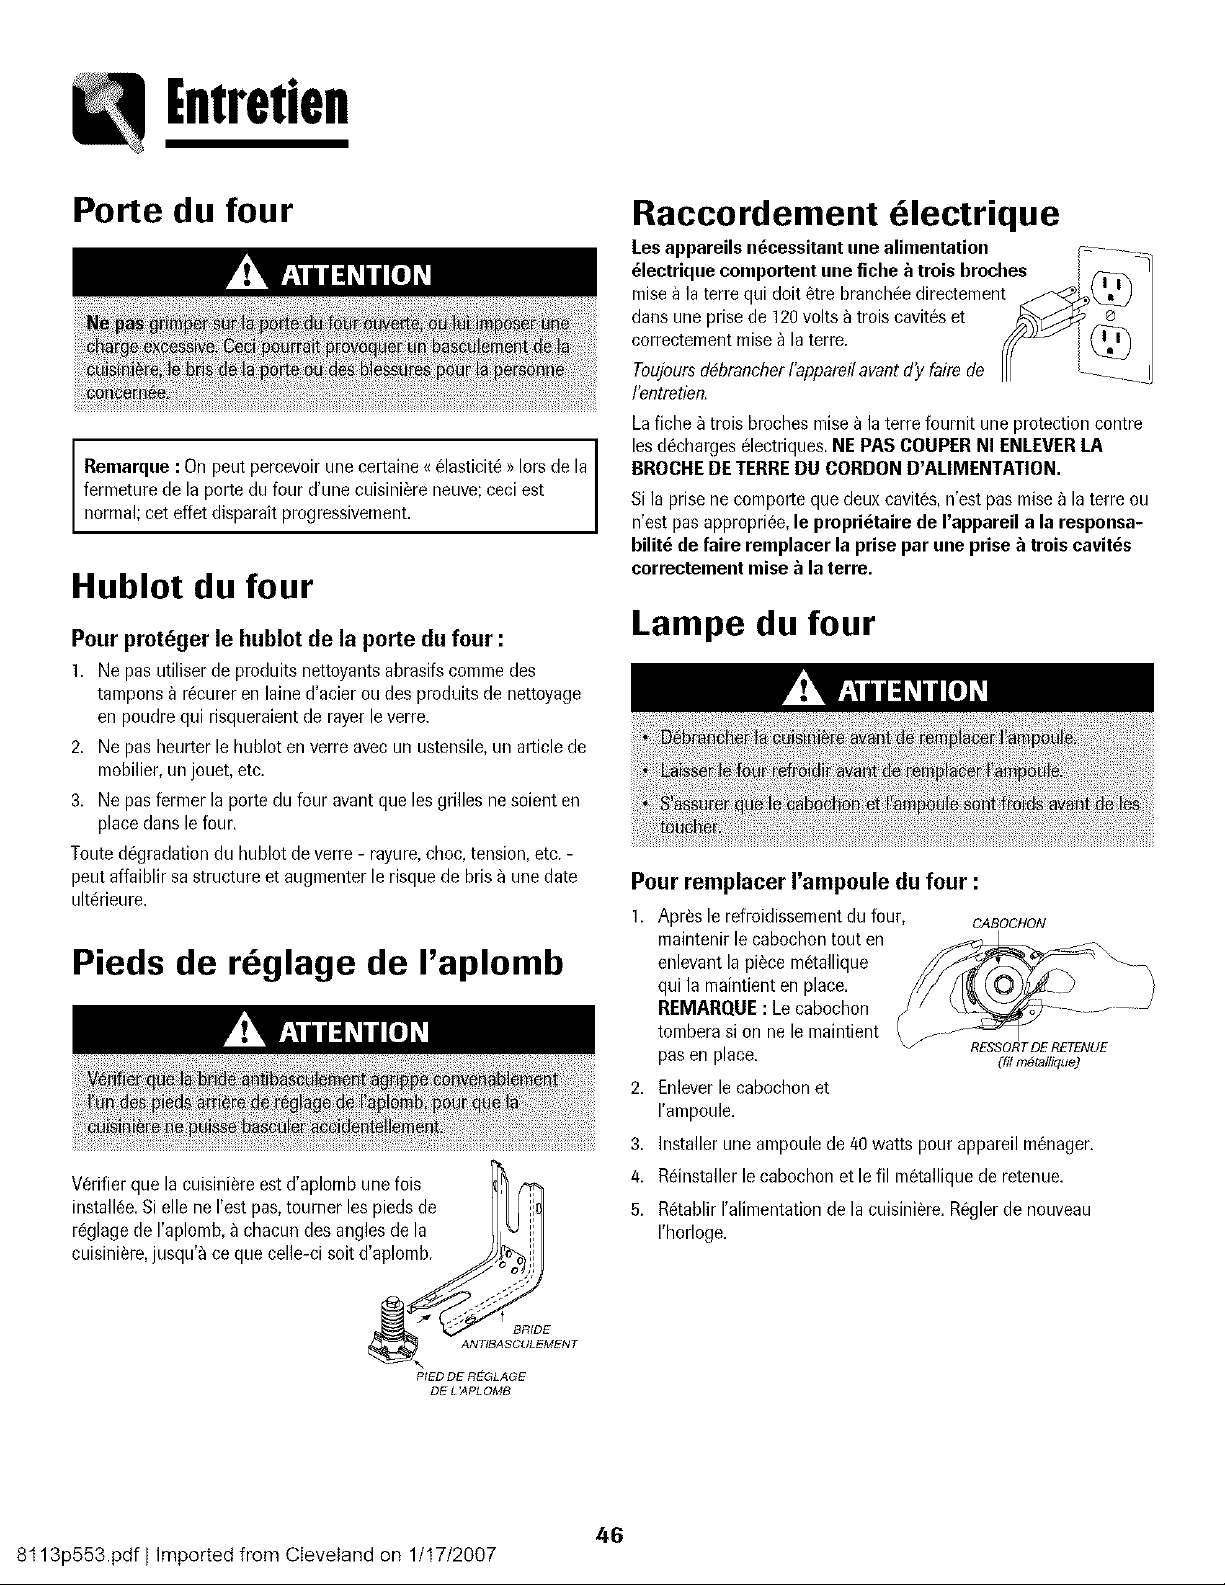
intreflen
Porte du four
Remarque : On peut percevoir une certaine <<61asticit6 >>Iors de la
fermeture de la porte du four d'une cuisiniSre neuve; ceci est
normal; cet effet disparait progressivement.
Hublot du four
Pour prot6ger le hublot de la porte du four :
1. Ne pas utiliserde produits nettoyantsabrasifscommedes
tampons _ r6cureren laine d'acier ou des produitsde nettoyage
en poudrequi risqueraientde rayer leverre.
2. Ne pas heurter le hublot enverre avecun ustensile,un articlede
mobilier,un jouet,etc.
3. Ne pasfermer la porte du four avantqueles grilles nesoienten
placedans le four.
Touted6gradationdu hublot deverre - rayure,choc, tension,etc.-
peut affaiblir sa structure et augmenterle risque de bris _ unedate
ult6rieure.
Pieds de reglage de I'aplomb
V6rifier que la cuisi[)i_reest d'aplombunefois _ f_
install6e.Sielle ne Iest pas,toumer les piedsde I
r6glagede I aplo,mb,_ chacundes anglesde la I[ _J
cuisini_re,jusqu _ce quecelle-ci soit d aplomb. //./y_e ,,_
_fY .-:-'-IY
7,,.. ANTIBASCULEMENT
PIED DE R_-GLAGE
DE L 'APL OMB
Raccordement 61ectrique
Les appareils n6cessitant une alimentation ;_-- --____
61ectrique comportent une fiche _ trois broches _ _ _
mise a la terre qui dolt 6tre branch6e directement /'<_ _L_ /
dans une prise de 120 volts _ trois cavit6s et _'-K'_:g _ @ /
correctenrent nrise _ la terre. , /_ i} {_) /
Toujours d4brancher l appareil avant dy faire de L__. _ j
l'entretien.
Lafiche _trois brochesmise) la terre fournit une protectioncontre
lesd6charges61ectriques.NEPAS COUPERNI ENLEVERLA
BROCHEDETERREDU CORDON D'ALIMENTATION.
Si la prise ne comporte que deux cavit6s, n'est pas mise _ la terre ou
n'est pas appropri6e, le propri6taire de I'appareil a la responsa-
hilit_ de faire remplacer la prise par une prise & trois cavit6s
correctement raise & la terre.
Lampe du four
Pour remplacer I'ampoule du four :
].
Apres le refroidissementdu four,
maintenirlecabochontout en
enlevantla piScem6tallique
qui la maintienten place.
REMARQUE: Le cabochon
tomberasi on ne le maintient
pasen place.
2. Enleverlecabochonet
I'ampoule.
CABOCHON
RESSORT DE RETENUE
(ril m6_allique)
3. Installerune ampoulede 40watts pourappareil m6nager.
4. R6installerlecabochonet lefil m6talliquede retenue.
5. R6tablirI alimentatio de lacuisiniere.R6glerde nouveau
I'horloge.
46
8t 13p553.pdf I Imported from Cleveland on 1/t 7/2007
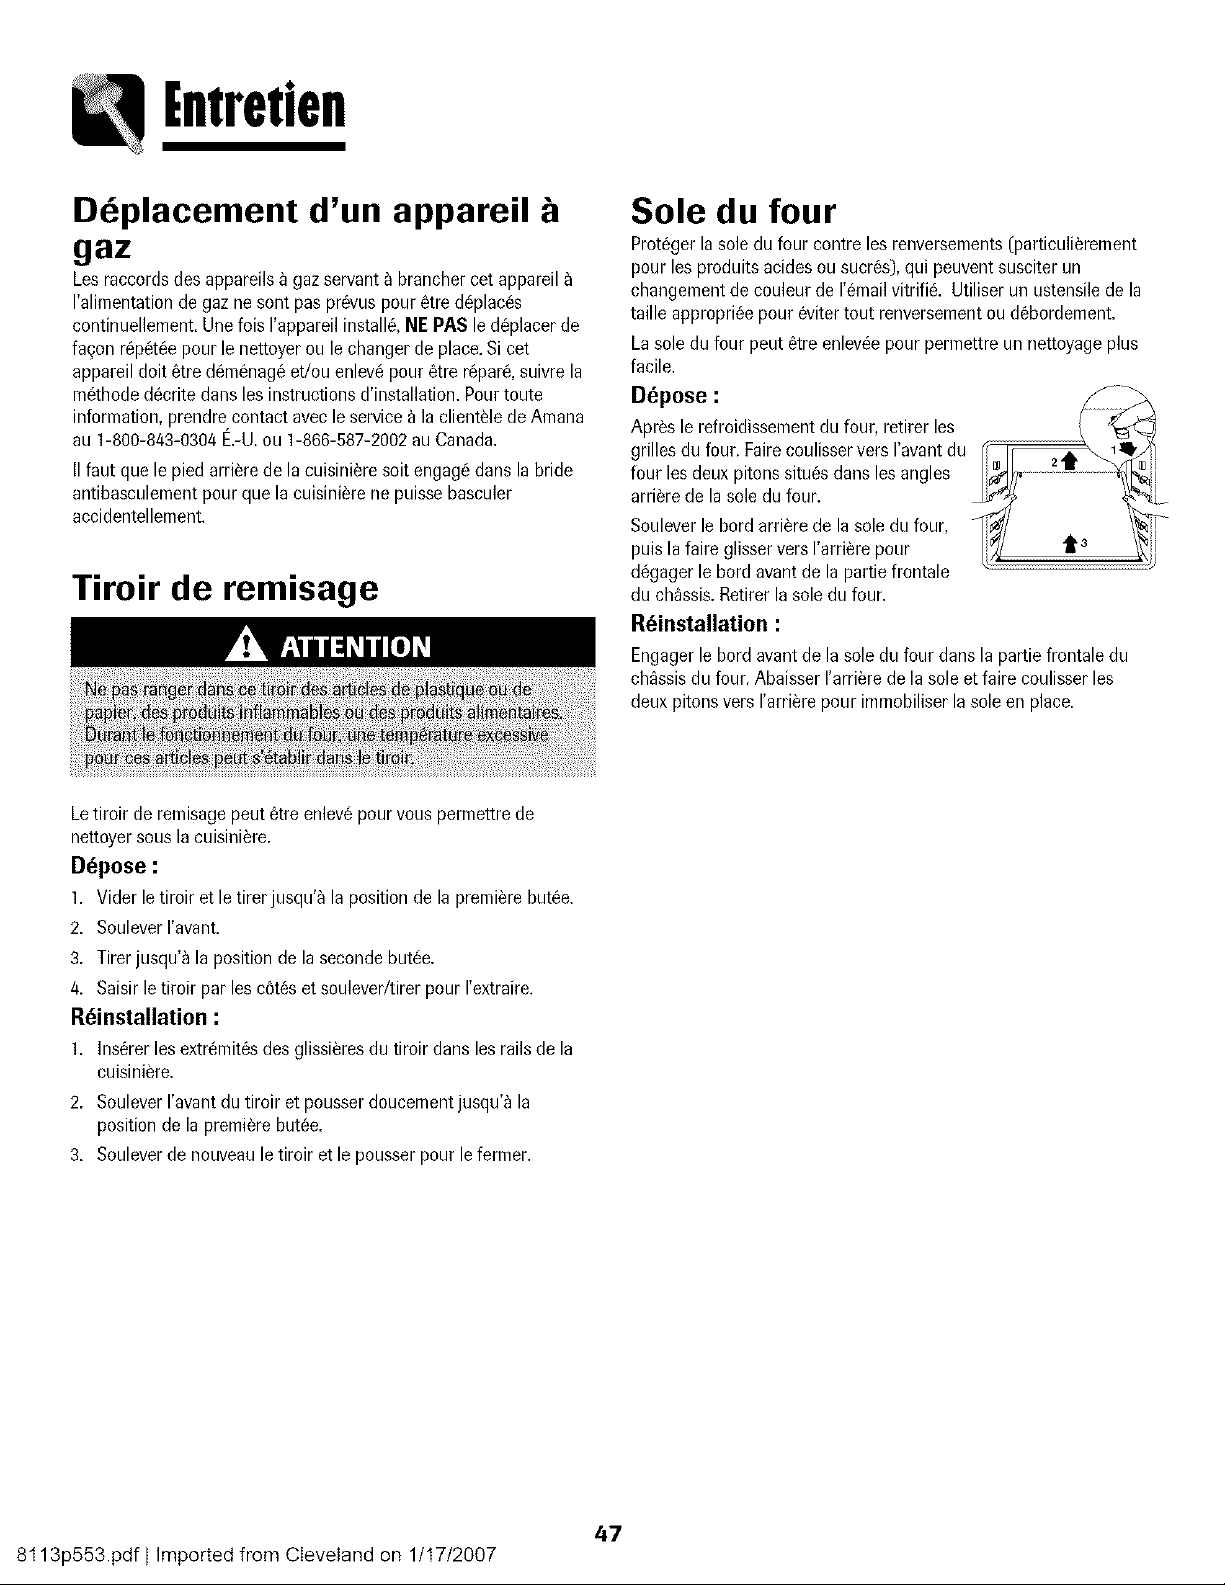
intretien
Dbplacement d'un appareil
gaz
Lesraccordsdes appareilsa gaz servant_ branchercet appareil
I'alimentationde gaz nesont pas prevuspour 6tre d@laces
continuellement.Unefois I'appareilinstall& NE P/IS le d@lacer de
fa£on r@etee pourle nettoyerou le changer de place.Sicet
appareildolt etre demenageet/ou enlevepour etre r@are,suivre la
methodedecritedartsles instructionsd'installation.Pourroute
information,prendrecontact avecleservice_ la clientele de Amana
au 1-800-843-0304E.-U.ou 1-866-587-2002au Canada.
IIfaut que le piedarriere de la cuisiniere soitengagedans la bride
antibasculemeetpourque la cuisiniere ne puissebasculer
accidentellement.
Tiroir de remisage
Sole du four
Protegerlasole du four contre les renversements(particulierement
pour les produits acidesou sucres),qui peuventsusciter un
changementde couleur de I'emailvitrifi& Utiliser un ustensilede la
taille appropriee pourevitertout renversementou debordement.
Lasole du four peut 8tre enleveepour permettreun nettoyageplus
facile.
Dbpose :
Apres le refroidissementdu four, retirer les
grilles du four. FairecoulisserversI'avantdu
four lesdeux pitons situesdarts les angles
arrierede la soledu four.
Souleverle bord arrierede la sole du four,
puis la faire glisser vers I'arrierepour
degagerle bordavantde la partie frontale
du chassis.Retirerla soledu four.
R_installation :
Engagerle bord avantde la sole du four dansla partie frontale du
chassisdu four.AbaisserI'arrierede lasole et faire coulisserles
deux pitons versI'arrierepour immobiliserla sole en place.
Letiroir de remisagepeut etre enlevepour vous permettrede
nettoyersousla cuisiniere.
D_pose :
1. Vider letiroir et le tirer jusqu'_ la position de la premierebutee.
2. SouleverI'avaet.
3. Tirerjusqu'_ la positionde laseconde butee.
4. Saisir letiroir par les c6teset soulever/tirerpour I'extraire.
R_installation :
1. Insererles extremitesdes glissieresdu tiroir dans les railsde la
cuisiniere.
2. SouleverI'avantdu tiroir et pousserdoucementjusqu'_ la
position de la premierebutee.
3. Souleverde nouveauletiroir et le pousser pour le fermer.
47
8t 13p553.pdf I Imported from Cleveland on 1/t7/2007
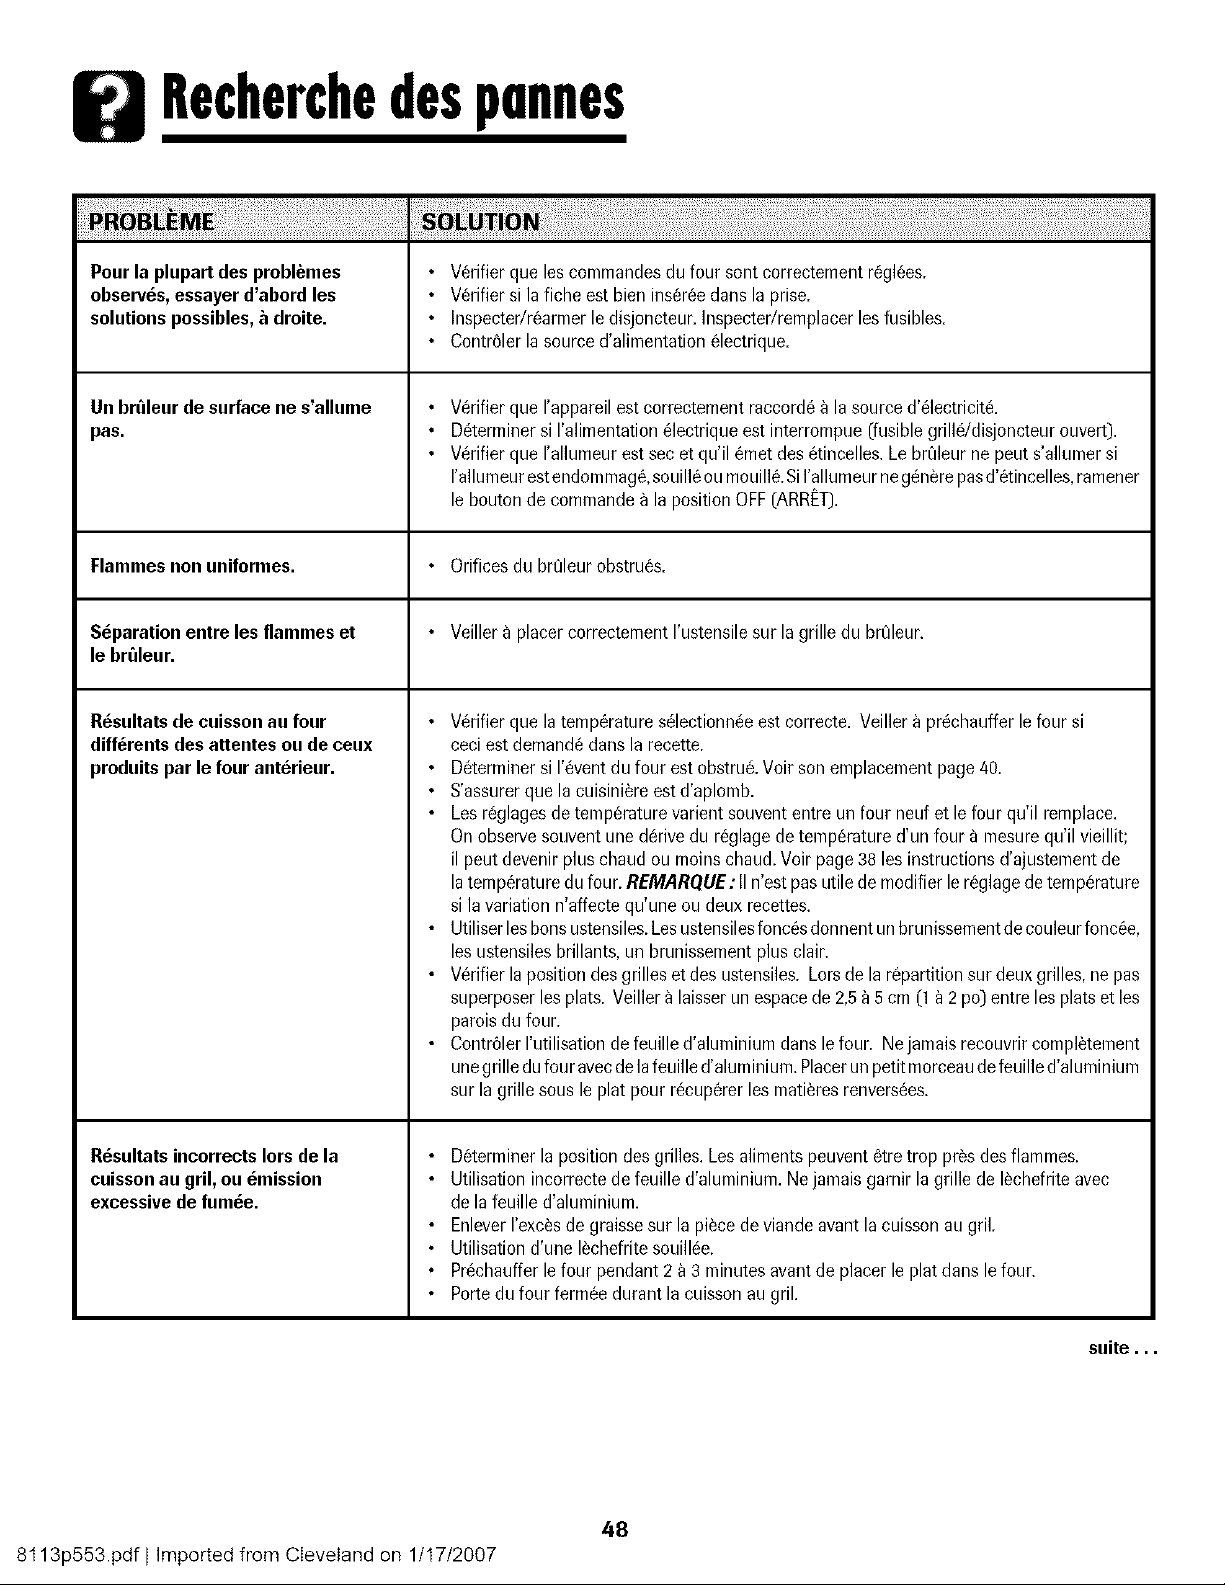
Recherchedespunnes
Pour la plupart des probl_mes • Verifierque les commandesdu four sentcorrectementreglees.
observes,essayer d'abord les • Verifiersi lafiche estbien ins@eeduns la prise.
solutions possibles,_ droite. • Inspecter/rearmerle disjoncteur.Inspecter/remplacerlesfusibles.
• Contr61erla source d'alimentationelectrique.
Un br_leur de surface ne s'allume • Verifierque I'appareilestcorrectementraccordea la sourced'electricit&
pus. • Determinersi I'alimentationelectriqueestinterrompue(fusiblegrillddisjoncteur ouvert).
• V@ifierque I'allumeurest secet qu'il emet desetincelles.LebrQleurne peut s'allumersi
I'allumeurestendommage,souilleoumouill&Si I'allumeurnegenere pusd'etincelles,ramener
le bouton de commandea la positionOFF(ARR_:T).
Rammes non uniformes. • Orificesdu brQleurobstrues.
Separationentrelesflammeset • Veiller_ placercorrectementI'ustensilesur la grille du br01eur.
le breleur.
Resultatsde cuissou au four
diff_rentsdes attentes ou de ceux
produitspar le four anterieur. •
Resultatsincorrects Iors de la
cuissonau gril, ou emission
excessivede fumee.
Verifierque la temperatureselectionneeest correcte. Veillera prechauffer le four si
ceciest demandedartsla recette.
Determinersi [event du four est obstru&Voir son emplacementpage/40.
• S'assurerque la cuisiniere estd'aplomb.
• Les reglagesde temperaturevarient souvententre un four neuf et le four qu'il remplace.
Onobservesouventune derivedu reglagedetemperatured'un four _ mesurequ'il vieillit;
il peutdevenir plus chaud ou moinschaud.Voir page38 les instructionsd'ajustementde
latemperaturedu four. REMARQIJE: II n'est pasutile de modifier lereglagede temperature
si la variationn'affecte qu'une ou deux recettes.
• Utiliserlesbonsustensiles.Lesustensilesfoncesdonnentunbrunissementdecouleurfoncee,
les ustensilesbrillants,un brunissementplus clair.
• Verifierla position desgrilles et des ustensiles. Lorsde la repartition sur deux grilles,nepus
superposerlesplats. Veiller_ laisserunespacede 2,5_ 5cm (1 _ 2 po) entreles plats et les
pareisdu four.
• ContrelerI'utilisationde feuille d'aluminiumdans le four. Nejamaisrecouvrircompletement
unegrille dufour avecde lafeuille d'aluminium.Placerunpetitmorceaudefeuille d'aluminium
sur la grille sousle plat pour recupererles matieresrenversees.
• Determinerla position desgrilles. Lesalimentspeuventetretrop presdes flammes.
• Utilisationincerrectede feuille d'aluminium.Nejamais gamir la grille de lechefriteavec
de lafeuille d'aluminium.
• EnleverI'excesde graissesur la piecede viandeavant la cuissenau gril.
• Utilisationd'une lechefritesouillee.
• Prechaufferle four pendant2 _ 3 minutesavantde placer le plat dans le four.
• Portedu four fermee durant la cuissonau gril,
suite...
48
8t 13p553.pdf I Imported from Cleveland on 1/t7/2007
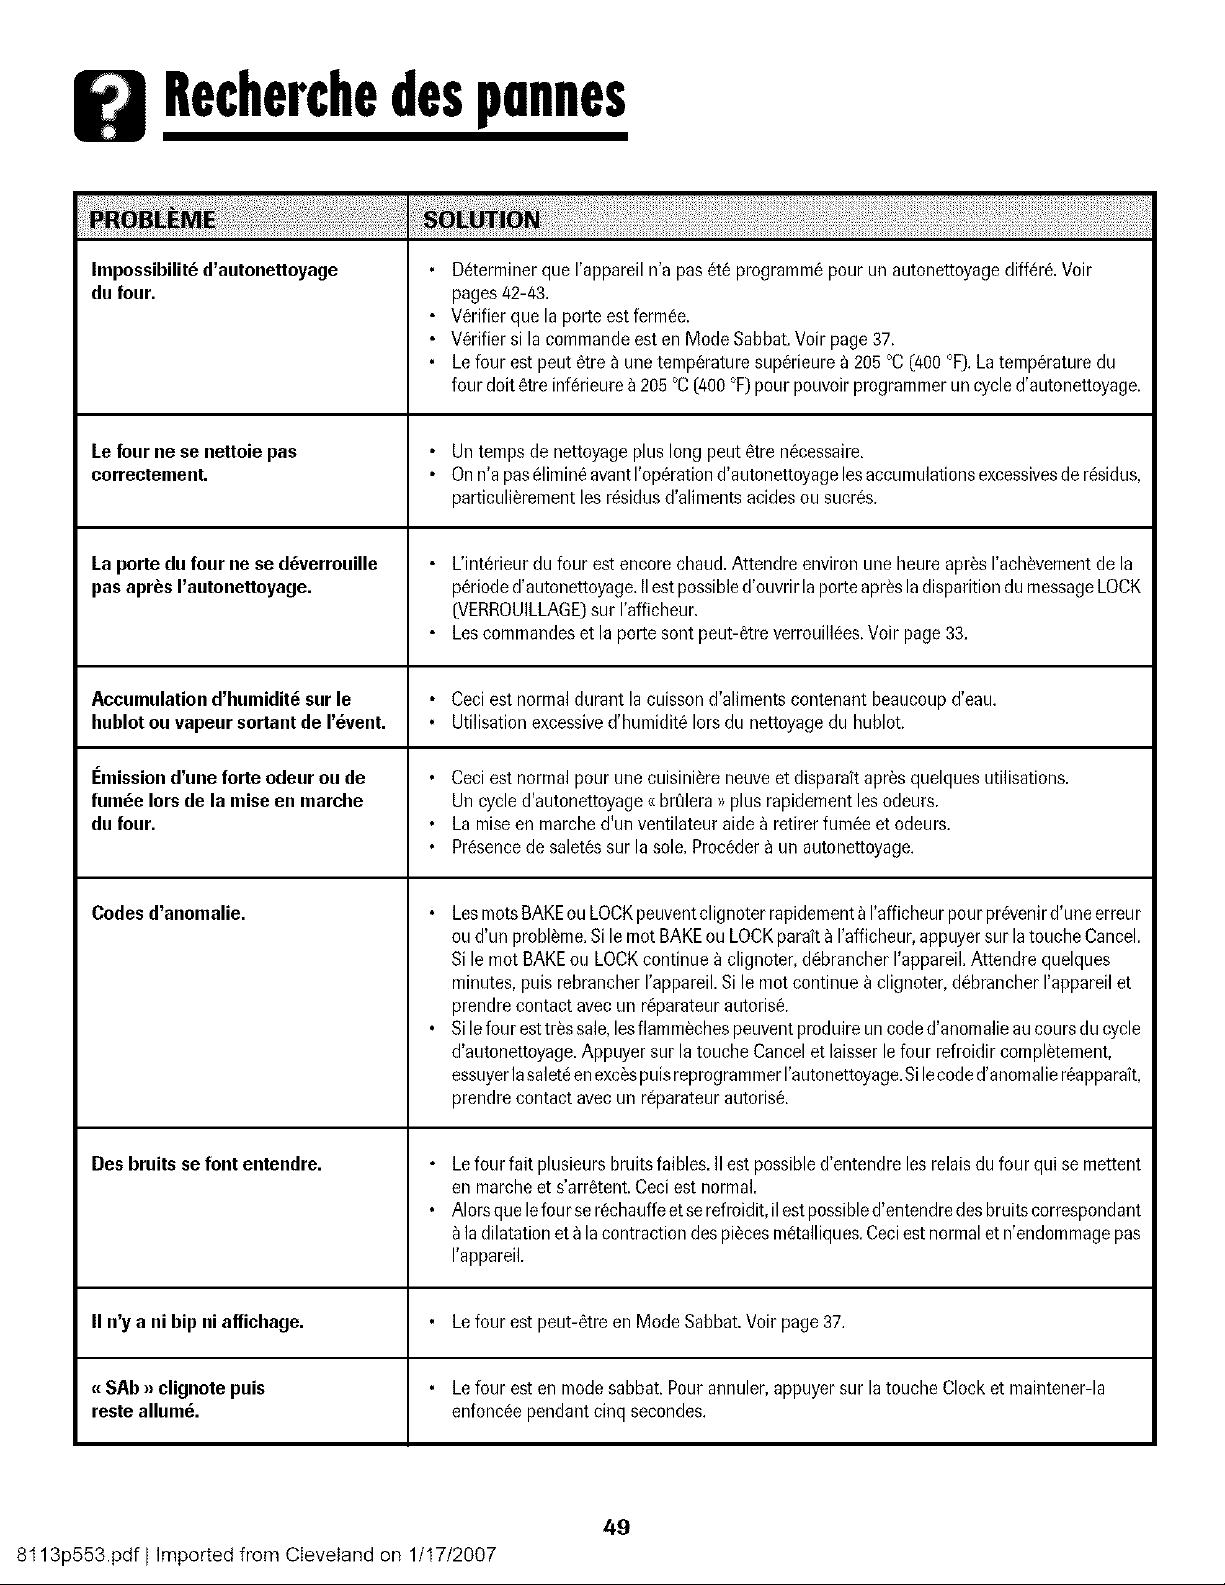
llecherchedespunnes
Impossibilit_d'autonettoyage
du four.
Le four ne se nettoie pas
correctement.
La porte du four ne se d_verrouille
pas aprbsI'autonettoyage.
Determinerque I'appareiln'a pasete programmepour un autonettoyagediffer& Voir
pages/42-43.
Verifier que la porte est fermee.
Verifier si la commandeesten Mode Sabbat.Voir page37.
Lefour est peut etre _ une temperaturesuperieure_ 205°C (400°F).Latemperaturedu
four dolt etre inf@ieure_ 205°C(400°F)pourpouvoirprogrammeruncycled'autonettoyage.
• Un tempsde nettoyageplus long peut etre necessaire.
• Onn'a paselimineavantI'operationd'autonettoyagelesaccumulationsexcessivesde residus,
particulierementles residusd'alimentsacidesou sucres.
Accumulationd'humidit_ sur le • Ceci est normaldurant la cuissond'alimentscontenantbeaucoupd'eau.
hublotou vapeur sortant de I'_vent. • Utilisationexcessived'humidite Iors du nettoyagedu hublot.
I_missiond'une forte odeur ou de • Ceciest normal pour une cuisini_re neuveet disparaftapres quelquesutilisations.
fum_e Iors de la mise en marche Un cycleCautonettoyage<_brt_lera_ plus rapidementles odeurs.
du four. • Lamise en marche d'un ventilateur aide a retirer fumee et odeurs.
• Presencede saletessur la sole.Proceder_ un autonettoyage.
Codesd'anomalie.
Des bruits se font entendre.
L'int@ieurdu four est encore chaud.Attendre environune heureapresI'achevementde la
perioded'autonettoyage.IIest possibled'ouvrir laporteapresla disparitiondu messageLOCK
(VERROUILLAGE)sur I'afficheur.
Lescommandeset la porte sont peut-etreverrouillees.Voir page 33.
LesmotsBAKEouLOCKpeuventclignoter rapidement_ I'afficheurpourprevenird'une erreur
ou d'un probl_me.Sile motBAKEou LOCKparait_ I'afficheur,appuyersur la touche Cancel.
Si le mot BAKEou LOCKcontinue_ clignoter,debrancherI'appareil.Attendre quelques
minutes,puis rebrancherI'appareil.Si le mot continue) clignoter,debrancherI'appareilet
prendrecontact avecun r@arateurautoris&
Silefour esttressale,lesflamm_chespeuventproduireuncoded'anomalieaucoursducycle
d'autonettoyage.Appuyer sur la toucheCancelet laisserlefour refroidircompletement,
essuyerlasaleteenexc_spuisreprogrammerI'autonettoyage.Silecoded'anomalier@pparait,
prendrecontact avecun r@arateurautoris&
Lefour fait plusieursbruitsfaibles. IIestpossibled'entendreles relaisdufour qui se mettent
en marcheet s'arr_tent.Ceci est normal.
Alorsquelefourse rechauffeetserefroidit,ilestpossibled'entendredesbruitscorrespondant
ladilatationet _lacontractiondespi_cesmetalliques.Ceciestnormalet n'endommagepas
I'appareil.
II n'y a ni hip niaffichage. • Lefour est peut-etre en Mode Sabbat.Voir page 37.
_{SAb _ clignote puis
reste allum&
• Le f°ur est en m°de sabbat"P°ur annuler' appuyersur lat°uche Cl°ck et maintener-la
enfonceependantcinq secondes.
8t 13p553.pdf I Imported from Cleveland on 1/t7/2007
49

Remorques
50
8t 13p553.pdf I Imported from Cleveland on 1/t7/2007
Garantieetserviceopres-vente
LESEULETUNIQUERECOURSDUCLIENTEN
VERTUDECETrEGARANTIELIMITt_EESTLA
REPARATIONDU PRODUITCOMMEDECRITE
PRECI'DEMMENT.LESGARANTIESIMPLICITES,
Y COMPRISLESGARANTIESDEQUALITE
MARCHANDEOU D'ADAPTATIONA UN USAGE
PARTICULIER,SONTLIMITEESA UN AN OUA
LA Pt:-RIODELA PLUSCOURTEPERMISEPARLA
LOI.MAYTAGCORPORATIONNE SERAPAS
TENUERESPONSABLEDESDOMMAGES
DIRECTSOU INDIRECTS.CERTAINSI_TATSET
CERTAINESPROVINCESINTERDISENT
L'EXCLUSIONETLA LIMITATIONDES
DOMMAGESDIRECTSOU INDIRECTSAINSI
QUELESLIMITATIONSSUR LA DUREEDES
GARANTIESIMPLICITESDEQUALITI_
MARCHANDEOU D'ADAPTATIONA UN USAGE
PARTICULIER.IL ESTDONCPOSSIBLEQUECES
LIMITATIONSNES'APPLIQUENTPASA VOUS.
CETTEGARANTIEVOUSCONFEREDESDROITS
JURIDIQUESSPt:-CIFIQUESETIL SEPEUTQUE
VOUSAYIEZD'AUTRESDROITS,QUI VARIENT
D'UN I_TATA L'AUTREOU D'UNEPROVINCEA
L'AUTRE.
Ne sent pas couverts par ces garanties
1. Les problemes et dommages resultant des situations suivantes :
a. Mise en service, livraison ou entretien effectues incorrectement.
b. Toute reparation, modification, alteration et tout reglage non autorises par le
fabricant ou par un prestataire de service apres-vente agree.
c. Mauvais emploi, emploi abusif, accidents, usage non raisonnable, ou catastrophe
naturelle.
d. Courant electrique, tension, alimentation electrique ou en gaz incorrects.
e. Reglage incorrect d'une commande.
2. Lesgarantiesne peuventetre honoreessi les numerosde seried'origine ont ete
enleves,modifies ou ne sont pas facJlementlisibles.
3. Ampoules,filtres a eauet filtres _ air.
4. Lesproduits achetes_ des fins commercialesou industrielles.
5. Lesfrais de d@annageou de visite pour :
a. Correctiond'erreursde miseen service.Pour les produits necessitantune
ventilation,un conduit metalliquerigidedolt 6tre utilis&
b. Initiation de I'utilisateur_ I'emploide I'appareil.
c.Transportde I'appareilchezle r@arateuret retour de I'appareilchez I'utilisateur.
6. Tout aliment perduen raisonde pannesdu rdrigerateur ou du congelateur.
7. D@ensesde d@lacementet detransport pour lareparationdu produit dansdes
endroits61oignes.
8. Cettegarantie n'est panvalide _ I'exterieurdes Etats-Uniset du Canada.Communiquez
avecvotredetaillant pour savoirsi uneautre garanties'applique.
9. Dommagesindirects ou accessoiressubispar toute personne_ la suite d'une
quelconqueviolationdes garanties.Certainst_tatsou provincesne permettentpas
I'exclusionou la limitationde responsabilit6en ce qui concerne les dommagesdirects
ou indirects.L'exclusionci-dessuspeut en consequencene pass'appliquer_ votrecas.
Si vous avez besoin d'aide
Consultezd'abord lasection sur le d@annagedans le manueld'utilisation et d'entretien,
puis appelezle detaillant de qui vousavezachet6votre appareilou le service_la clientele
de MaytagServices,LLC au 1-800-688-9900aux Etats-Uniset au 1-800-688-2002au
Canadapoursavoirofftrouver un r@arateurautoris&
• Veillez_ conserverla factured'achat pour justifier de lavalidit6de lagarantie. Pour
d'autres renseignementsconcernant les responsabilitesdu proprietaire_1'6garddu
servicesousgarantie,voir le texte de laGARANTIE.
• Si le detaillantou I'agencede serviceapres-ventene peut resoudrele probleme,ecrivez
MaytagServices,LLC _ I'adressesuivante: CAIR®Center,P.O.Box 2370,Cleveland,TN
37320-2370t_tats-Unis,ou appelezau 1-800-688-9900 aux I_tats-Unis ou au
1-800-688-2002 au Canada.
•Les guides d'utilisation, les manuelsde serviceet les renseignementssur les piecessont
disponiblesaupresdu service_ la clientelede Maytag Services,LLC.
Remarques : Veillez_ foumir I'informationsuivanteIorsquevous communiquez
avecnous au sujet d'un probleme :
a. Vos nom, adresse et numero de telephone;
b. Numero de modele et numero de serie de I'appareil;
c. Nom et adresse de votre detaillant ou de votre agence de service;
d. Description detaillee du probleme observe;
e. Preuve d'achat (facture de vente).
51
8t 13p553.pdf I Imported from Cleveland on 1/t7/2007

Estufa a Gas con Control 'Easy Touch' 500
Estufa
@
Instrucciones Importantes
sobre Seguridad .....................................................53-57
Cocinando en la Estufa ......................................... 58-59
Controles
Quemadores de Gas Sellados
Cocinando en el Homo ......................................... 60-69
Horneado
'Cook & Hold'
'Cook & Hold' Diferido
Mantener Caliente
Asar a la Parrilla
Parrillas del Homo
Cuidado y Limpieza ............................................... 70-73
Horno Autolimpiante
Procedimientos de Limpieza
Mantenimiento ....................................................... 74-75
Ventana y Luz del Horno
Retiro de la Estufa a Gas
Localizaci6n y Soluci6n
de Aver/as ................................................................76-77
Garantla y Servicio ....................................................... 79
8t 13p553.pdf I Imported from Cleveland on 1/t 7/2007
Lea y siga todas las instrucciones antes de usar este
electrodom_stico para evitar el riesgo potencial de incendio,
choque el_ctrico, lesi6n personal o dafio al electrodom_stico
como resultado de su uso inapropiado. Utilice este
electrodorn_stico solamente para el prop0sito que ha sido
destinado seg_n se describe en esta guia.
Para asegurar funcioeamiento correcto y seguro: El
electrodom_stico debe ser instalado debidamente y puesto a
tierra pot un t_cnico calificado. No intente ajustar, reparar,
prestar servicio o reemplazar ninguna pieza de este electro-
dom6stico a menos que sea especfficamente recomendado en
esta guia. Todas las reparaciones deben ser realizadas pot un
t6cnico calificado. Pida al instalador que le indique la
ubicaci6n de la v41vulade cierre del gas y como cerrarla en
caso de uTla emergencia.
Siempre desencbufe el electrodom_istico antes de efectuar
alguna reparaci6n.
Instrucdones
Importnntessobre
Seguridnd
Las advertencias e instrucciones importantes sobre seguridad
que aparecen en esta gala no estSn destinadas a cubrir todas
las posibles circunstancias y situaciones que puedan ocurrir.
Se debe ejercer sentido comt_n, precauci6n y cuidado cuando
instale, realice mantenimiento o haga funcionar el artefacto.
Siempre p6ngase en contacto con su distribuidor, agente de
servicio o fabricante si surgen problemas o situaciones que
usted no comprenda.
Reconozca los simbolos, advertencias,
etiquetas de seguridad
53
8t 13p553.pdf I Imported from Cleveland on 1/t7/2007
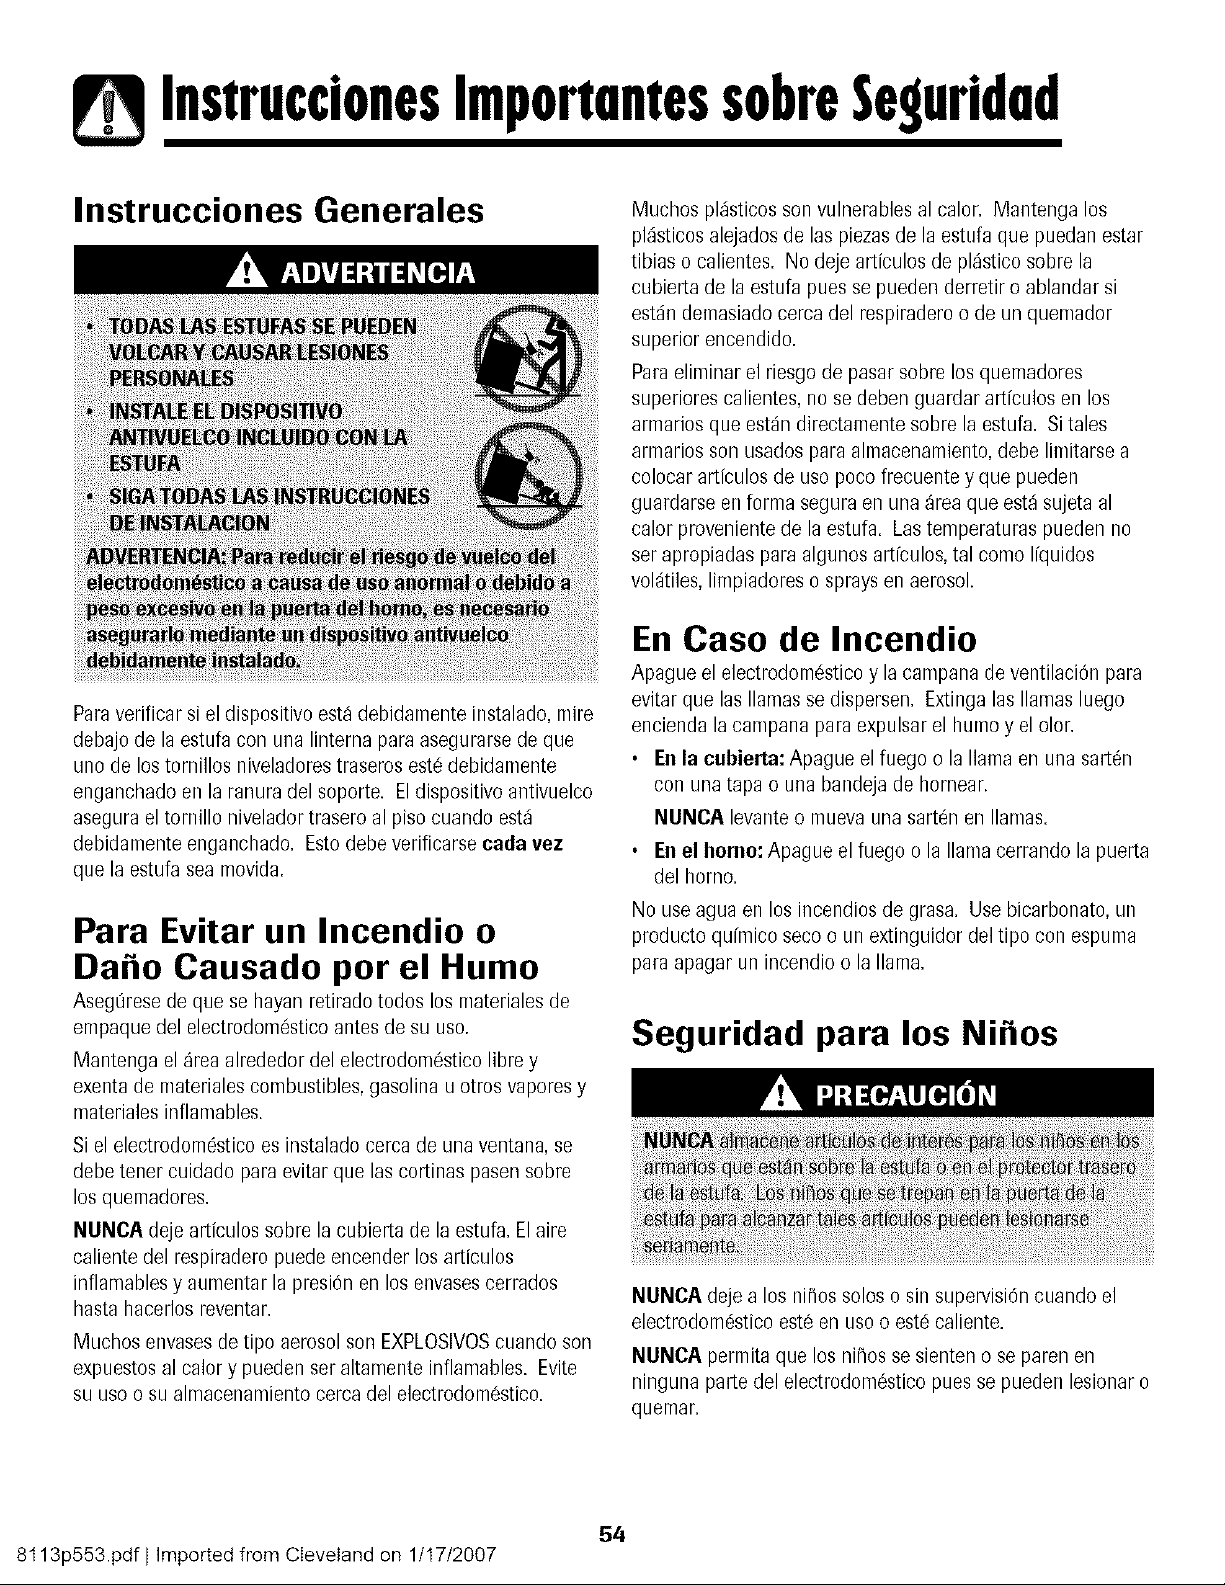
InstruccionesImportamessobreSeguridad
Instrucciones Generales
Paraverificar si el dispositivo est_ debidamente instalado, mire
debajo de la estufa con una linterna para asegurarse de que
uno de los tornillos niveladores traseros est_ debidamente
enganchado en la ranura del soporte. El dispositivo antivuelco
asegura el tomillo nivelador trasero al piso cuando est_
debidamente enganchado. Estodebe verificarse cada vez
que la estufa sea movida.
Para Evitar un Incendio o
Da o Causado per el Humo
Asegtirese de que se hayan retirado todos los materiales de
ernpaque del electrodom6stico antes de su uso.
Mantenga el _rea alrededer del electrodom6stico libre y
exenta de rnateriales combustibles, gasolina u otros vapores y
materiales inflamables.
Si el electrodom_stico es instalado cerca de una ventana, se
debe tener cuidado para evitar que las cortinas pasen sobre
los quemadores.
NUNOA deje articulos sobre la cubierta de la estufa. Elaire
caliente del respiradero puede encender los articulos
inflamables y aumentar la presiOn en los envases cerrados
hasta hacerlos reventar.
Muchos envases de tipo aerosol son EXPLOSIVOScuando son
expuestos al calory pueden ser altamente inflamables. Evite
su use o su almacenamiento cerca del electrodom6stico.
Muchos pl_sticos son vulnerables al calor. Mantenga los
pl_sticos alejados de las piezas de la estufa que puedan estar
tibias o calientes. No deje articulos de pl_stico sobre la
cubierta de la estufa pues se pueden derretir o ablandar si
est4n demasiado cerca del respiradero o de un quemador
superior encendido.
Paraeliminar el riesgo de pasar sobre los quenladores
superiores calientes, no se deben guardar articulos en los
armarios que est4n directamente sobre la estufa. Si tales
armarios son usados para almacenamiento, debe limitarse a
colocar articulos de uso poco frecuente y que pueden
guardarse en forma segura en una _rea que est_ sujeta al
calor proveniente de la estufa. Las temperaturas pueden no
ser apropiadas para algunos articulos, tal como Ifquidos
vol4tiles, limpiadores o sprays en aerosol.
En Caso de Incendio
Apague el electrodom_stico y la campana de ventilaci6n para
evitar que las llamas se dispersen. Extinga las llamas luego
encienda la campana para expulsar el humo y el olor.
• E. la cabierta: Apague el fuego o la llama en una sarten
con unatapa o una bandeja de hornear.
NUNOA levante o mueva una sart_n en llamas.
• En el homo: Apague el fuego o la llama cerrando la puer[a
del homo.
No use agua en los incendios de grasa. Use bicarbonato, un
producto qufmico seco o un extinguidor del tipo con espuma
para apagar un incendio o la llama.
Seguridad para los Ni os
NUNCA deje a los niiios solos o sin supervisidn cuando el
electrodom_stico este en uso o est_ caliente.
NUNCA permita que los nifios se sienten o se paren en
ninguna parle del electrodom6stico pues se pueden lesionar o
quemar.
54
8t 13p553.pdf I Imported from Cleveland on 1/t7/2007
InstruccionesImportontessobreSeguridod
Se les debe ense_ar a los niiios que el electrodom_stico y
los utensilios que estdn en _1o sobre _1pueden estar
calientes. Deje enfriar los utensilios calientes en un lugar
seguro, fuera del alcance de los niiios pequeiios. Se les
debe ensenar a los ni_os que un electrodom_stico no es un
juguete. No se debe permitir que los ni_os jueguen con los
controles u otras piezas de la estufa.
Generalidades
El respiradero del horno se encuentra debajo del protector
trasero.
Evite tocar el _rea del respiradero mientras el horno est_
encendido y durante varios minutos despuOs de haberlo
apagado. Algunas partes del respiradero y del drea que Io
rodea se calientan Io suficiente como para causar
quemaduras. Despu_s de apagar el homo, no toque el
respiradero o el area que Io rodea hasta que haya tenido
suficiente tiempo para enfriarse.
Otras superficies que pueden estar calientes incluyen la
cubierta, las superficies que estdn dirigidas hacia la cubierta,
el respiradero del homo, la superficie cercanas a la abertura
del respiradero, la puerta del homo y la area que la rodea, y la
ventanilla del homo.
No toque un foco de horno caliente coil un pai]o htimedo ya
que se puede romper. Si el foco se rompe, desconecte el
suministro el_ctrico al electrodom_stico antes de retirar el foco
para evitar un choque el_ctrico.
No utilice la cubierta o el homo como areas de
alolacenamiento para alimentos o utensilios de cocina.
Seguridad Para Cocinar
Siempre coloque un utensilio en un quemador superior antes
de encenderlo. Asegt_rese de usar la perilla correcta que
controla cada quemador superior. Asegt_rese de encender el
quemador correcto y comprobar de queen efecto el
quemador haya sido encendido. Cuando haya terminado de
cocinar, apague el quemador antes de retirar el utensilio para
evitar exposiciOn a la llama del quemador.
Siempre ajuste la llama del quemador superior de modo que
no se extienda m_s all_ del borde inferior del utensilio. Una
llama excesiva es peligrosa, desperdicia energia y puede
da_ar la estufa, el utensilio o los armarios que est_n sobre la
estufa.
NUNCA deje sin supervision la cubierta de la estufa cuando
est6 cocinando, especialmente cuando Lisaun ajuste de calor
alto o cuando est_ usando una freidora. Los reboses pueden
producir humo y los derrames de grasa pueden inflamarse.
Limpie los derrames grasosos tan pronto como sea posible.
No use calor alto durante periodos de cocciOn prolongados.
NUNCA caliente un envase cerrado en el quemador superior
o en el horno. La acumulaciOn de presiOn puede hacer
explotar el envase causando una lesion personal grave o da_o
a la estufa.
Use tomaollas secos y gruesos. Los tomaollas htimedos
pueden causar quemaduras a causa del vapor. Las toallas u
otros sustitutos no deben ser usados como tomaollas porque
ellos pueden quedar colgando a traves de los quemadores
superiores y encenderse o enredarse en las piezas de la
estufa.
Siempre deje enfriar la grasa caliente que se ha usado en la
freidora antes de intentar mover o manipularla.
No permita que se acumule grasa u otros materiales
inflamables en la estufa o cerca de ella, en la campana o en el
ventilador aspirador. Limpie la campana extractora con
frecuencia para evitar que la grasa u otros materiales
inflamables se acumulen en la campana o en el filtro.
Encienda el ventilador cuando cocine alimentos flameados
debajo la campana.
NUNCA use vestimentas de materiales inflamables, ropa
suelta o de mangas largas cuando est_ cocinando. La
vestimenta se puede encender o enganchar en los mangos de
los utensilios.
55
8t 13p553.pdf I Imported from Cleveland on 1/t7/2007
InstruccionesImportontessobreSeguridod
Siempre coloque las parrillas del horno en la posici6n deseada
cuando el homo est_ ffio. Deslice la parrilla del horno hacia
afuera para agregar o retirar alimento, usando tomaollas secos
y resistentes. Siempre evite alcanzar dentro del horno para
agregar o retirar alimentos. Si una parrilla debe ser sacada
cuando est_ todavfa caliente, use un tomaollas seco. Siempre
apague el homo despu0s de haber terminado de cocinar.
Tenga cuidado cuando abra la puerta del homo. Deje que
escape el aire o el vapor caliente antes de sacar o volver
colocar el alimento.
ADVERTENCIA SOBRE LOS ALIMENTOS PREPARADOS:
Siga las instrucciones del fabricante de los alimentos. Si un
envase de pl_stico de alimento congelado y/o su tapa se
deform& se comba o se daiia de alguna otra manera durante
la cocciOn, descarte inmediatamente el alimento y su envase.
El alimento puede estar contaminado.
NUNCA use papel de aluminio para cubrir una parrilla del
homo o la parle inferior del homo. El uso incorrecto puede
resultar en un riesgo de cheque el6ctrico, incendio o da[io al
electrodomOstico. Use papel de aluminio solamente coino se
indica en esta guia.
Utensilios Apropiados
Use sartenes con rondos pianos y mangos que sean f_ciles de
tomar y que permanezcan fries. Evite usar sartenes u ollas
inestables, combadas que se pueden volcar f_cilmente u ollas
cuyos mangos est_n sueltos. Adem_s evite usar utensilios
especialmente pequeiios o sartenes con mangos pesados
pues ellos pueden set inestables y volcarse f_cilmente. Los
utensilios que son pesados de mover cuando est_n Ilenos con
alimento pueden tambi_n ser un peligro.
Asegt3rese de que el utensilio sea Io suficientemente grande
como para contener en forma debida los alimentos y evitar
derrames. El tamale es particularmente importante cuando
se utilizan freidoras. Asegt_rese de que el utensilio tiene
capacidad para el volumen de alimentos que se va a agregar
al igual que para la formaci6n de burbujas de la grasa.
Para reducir a un minimo las quemaduras y que los materiales
inflamables y los derrames se enciendan debidos a contacto
no intencional con el utensilio, los mangos no deben
extenderse sobre el quemador superior adyacente. Siempre
gire los mangos de los utensilios hacia el lade o hacia la parle
trasera de la estufa, no hacia la habitaci6n donde puede ser
f_icilmente golpeados o alcanzados por los ni_os peque_os.
Nunca deje que un utensilio hierva hasta quedar seco pues
esto puede da[iar el utensilio y la estufa.
Siga las instrucciones del fabricante cuando use bolsas para
cocinar en el homo.
Solamente ciertos tipos de utensilios de vidrio cer_mico, de
cer_mica o glaseados son convenientes para uso en la
cubierta de la estufa o en el homo sin quebrarse debido al
cambio repentino de temperatura. Siga las instrucciones del
fabricante cuando use utensilios de vidrio.
Esteelectrodom_stico ha sido probado respecto a su
rendimiento seguro usando utensilios de cocina
convencionales. No use ning0n dispositivo o accesorio que no
haya sido especificamente recomendado en esta guia. No use
tapas para cubrir los quemadores superiores, rejillas para la
cubierta de la estufa ni agregue sistemas de convecci6n para
hornos. El use de dispositivos o accesorios que no son
expresamente recomendados en esta guia, puede crear series
peligros de seguridad, resultar en problemas de rendimiento y
reducir la vida titil de los componentes de la estufa.
Seguridad de la Limpieza
Apague todos los controles y espere que se enfrfen las piezas
de la estufa antes de tocarlas o limpiarlas. No toque las
rejillas de los quemadores o las _reas circundantes hasta que
elias no hayan tenido tiempo suficiente de enfriarse.
Limpie la estufa con cuidado. Tenga cuidado para evitar
quemaduras de vapor si se usa una esponja o un pa[io mojado
para limpiar los derrames en una superficie caliente. Algunos
limpiadores pueden producir vapores nocivos cuando se
apliean a una superficie caliente.
Homo Autolimpiante
Limpie solamente las piezas que se indican en esta guia. No
limpie la junta de la puerta. La junta es esencial para un
sellado hermOtico. No restriegue, da_e, ni mueva la junta de
la puerta. No use limpiadores de homo de ninguna clase en el
homo ni alrededor de cualquier parte del homo autolimpiante.
56
8t 13p553.pdf I Imported from Cleveland on 1/t 7/2007
InstruccionesImponontessobreSeguridod
Antes de la autolimpieza del homo, saque la asadera, las
parrillas del horno y otros utensilios y limpie los derrames
excesivos para evitar que se produzca demasiado humo,
Ilamaradas o llamas.
Es normal que la cubierta de la estufa se caliente durante el
ciclo de autolimpieza. Pot Io tanto, se debe evitar tocar la
cubierta durante un ciclo de autolimpieza.
Aviso y Advertencia
Importante Sobre Seguridad
La Propuesta 65 de la Ley de 1986 del Estado de California
Sobre Seguridad y Contaminaci6n del Agua Potable (California
Safe Drinking Water and Toxic Enforcement Act of 1986] exige
que el Gobernador de California publique una lista de las
sustancias que segtin el estado de California causan c_ncer o
daiio al sistema reproductivo y exige que las empresas
adviertan a sus clientes sobre la exposiciOn potencial a tales
sustancias.
Se advierte a los usuarios de esta estufa que la combustion
del gas puede resultar en exposici6n de bajo nivel a algunas
de las sustancias publicadas en la list& incluyendo benceno,
formaldehfdo y hollfn, debido principalmente a la combusti6n
incompleta del gas natural o de los combustibles de petrOleo
licuado. Los quemadores ajustados en forma debida
reduciran la combusti6n incompleta. La exposiciOn a estas
sustancias puede tambi_n ser reducida a un minimo
ventilando los quemadores al exterior en forma adecuada.
Se advierte a los usuarios de este electrodomestico que
cuando el horno estd funcionando en el ciclo de autolimpieza,
puede haber exposici6n de bajo nivel a algunas de las
sustancias indicadas en la lista, incluyendo monOxido de
carbono. La exposici6n a estas sustancias puede ser reducida
a un minimo ventilando el homo al exterior en forma
adecuada, abriendo las ventanas y/o la puerta en la habitaci6n
en donde est_ ubicado el electrodom_stico durante el ciclo de
autolimpieza.
AVISO IMPORTANTE RESPECTO A LOS PAJAROS
DOMESTICOS:
Nunca mantenga los p_jaros en la cocina o en las
habitaciones donde puedan Ilegar los humos de la cocina. Los
p_jaros tienen un sistema respiratorio muy sensitivo. Los
humos producidos durante el ciclo de autolimpieza del homo
pueden ser perjudiciales o mortales para los p_jaros. Los
humos que despide el aceite de cocina recalentado, la grasa,
margarina y los utensilios antiadherentes recalentados pueden
tambi_n ser perjudiciales.
Conserve estas Instrucciones para Referencia Futura
57
8t 13p553.pdf I Imported from Cleveland on 1/t 7/2007

Cocinandoenla|stufa
'Low' (Bajo):Se usaparacalentar alimentosa
fuego lento, mantenerlos alimentoscalientesy
derretir chocolateo mantequilla. Se puede
cocinaren el ajuste'Low' siempreque el
utensilioest6tapado. Esposible reducirel calor
girandola perilla a la posici6n'OFF'(Apagado).
Asegt3resede que la llamasea estable.
Controles Superiores
I
'High' (Alto): Seusa parahacer hervir un
Ifquidoo alcanzarla presi6nadecuadaen una
olla a presiOn.Siemprereduzca el ajuste a un
calor m_sbajocuando los Ifquidoscomiencena
herviro cuando los alimentoscomiencena
cocinarse.
Se usauna llamade tamar_ointermediopara
continuarcocinando. Elalimentono se cocinard
mdsr_pidocuando se usa unajuste de llama
rodsalto que el necesarioparamantenerun
hervorsuave. Elaguahiervea la misma
temperaturasi estdhirviendosuaveo
vigorosamente.
Encendido Sin Piloto
Elencendidosin piloto elimina la
necesidadde unaluz piloto
constantepermanente.Cada
unode losquemadores
superiorestiene un encendedorde
chispa.Tengacuidado cuando
TAPA DEL QUEMABOR
O O Lasilustracionescercade la perillaidentifican cual es el
quemadorque controlausa perilla. Porejemplo, la
• O ilustraci6na izquierdamuestrala ubicaci6ndelquemador
delanteroizquierdo.
Programaci6n de los Controles:
Eltama_oy el tipo de utensilioafectar_nel ajustede calor.
1. Coloqueun utensiliosobrela rejilla del quemador.
• La llamadel quemadorpuede levantarseo parecerseparada
delorificio si no se colocaun utensilioen la rejilla.
2. Optimay gire la perilla a la izquierdaal ajuste'Light'
(Eneendido).
• Seoir_ un chasquido(chispa)y el quemadorse encender&
(Loscuatro quemadoresproducir_n chispacuandose colocala
perillade cualquierade los quemadoresen la posici6n 'Light'.)
3. Despu6squeel quemadorse haencendido,gire la perillaal
tama_ode llama deseado.
• El encendedorcontinuar_produciendochispashastaque la
perillaseagirada m_sall_ de la posici6n 'Light'.
Funcionamiento durante una
BASEDELQUEMADOR
Perillas de Control de los
Elementos Superiores
Seutilizanparaencenderlos quemadoressuperiores.Se disponede
una selecci6ninfinitade ajustesde calor desde'Low' a 'High' (Bajo
a Alto). Enel ajuste'High' se puedesentir un tope o una muesca.
Las perillaspueden ser ajustadasexactamenteen los ajustes
correspondienteso entre cualquierade ellos.
I. Acerque un f6sforoencendido a lacabezadel quemadorsuperior
deseado.
2. Optimay gire la perillade control lentamentea la posici6n'Light'.
3. Ajuste la llama al niveldeseado.
58
8t 13p553.pdf I Imported from Cleveland on 1/t7/2007
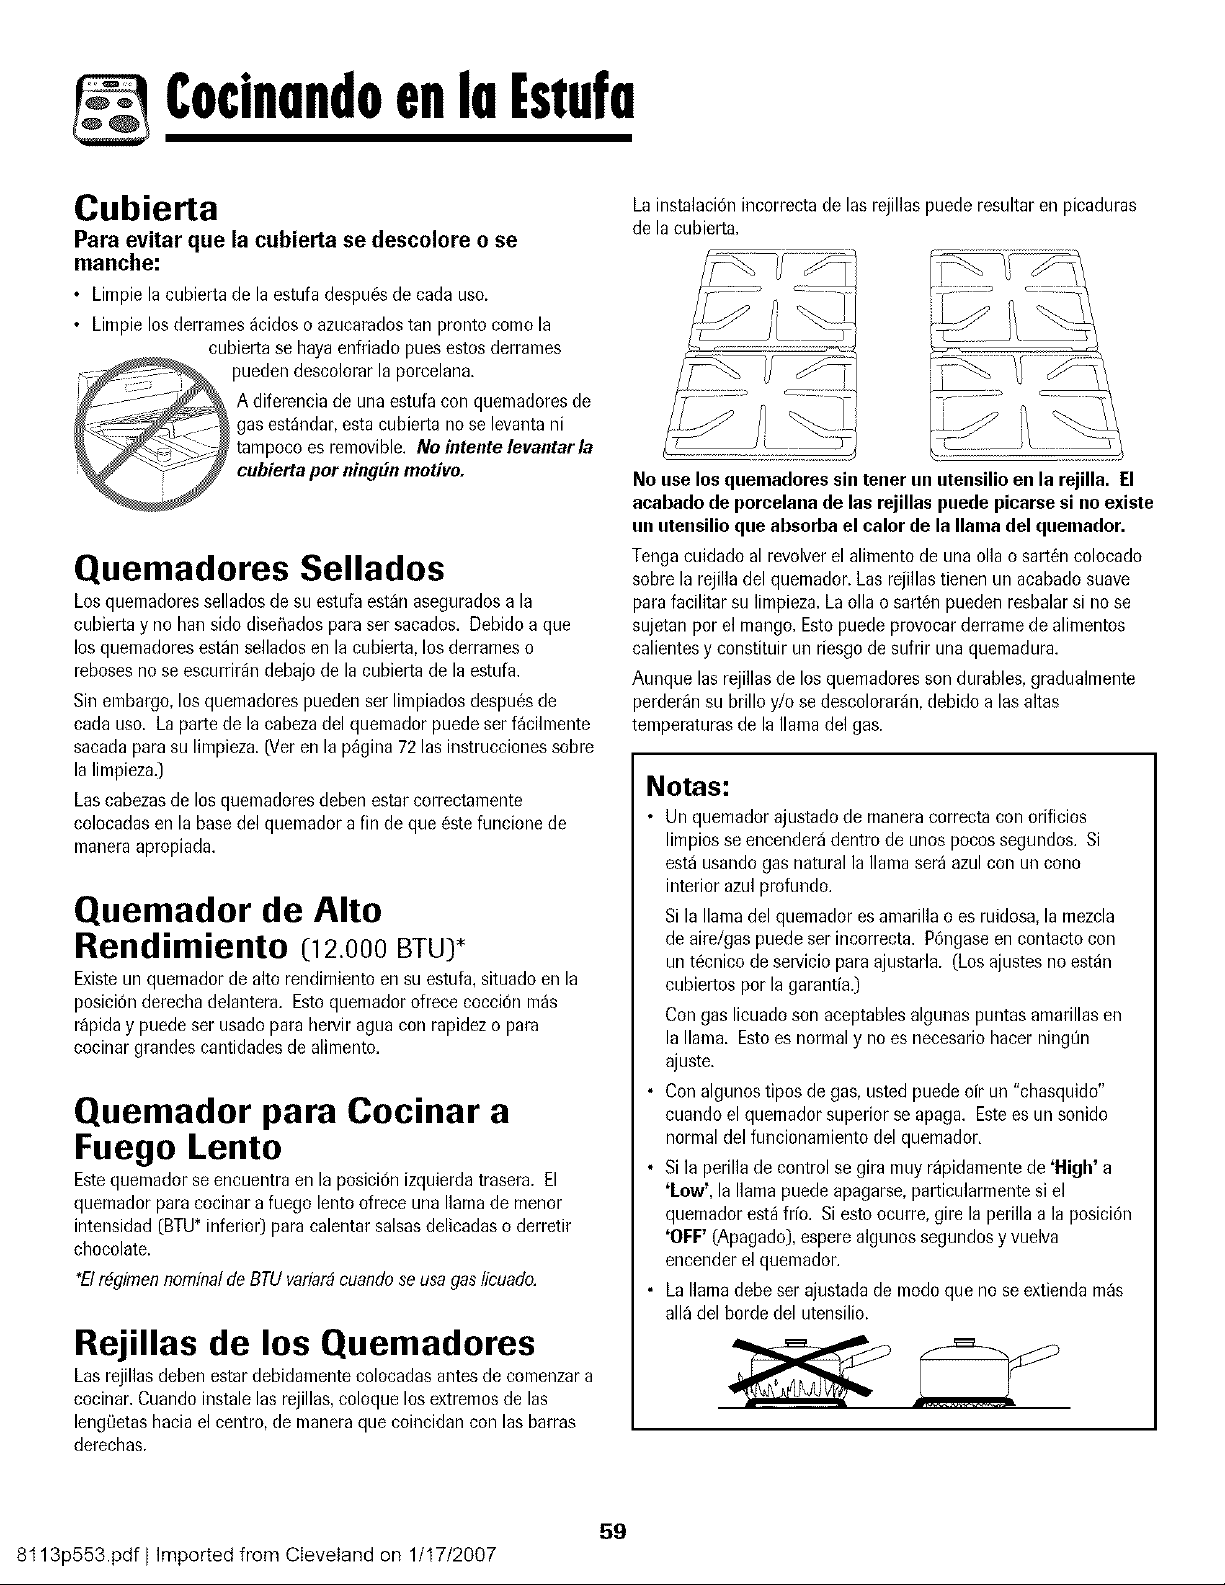
Co¢innndoenIn|stufn
Cubierta
Para evitar que la cubierta se descolore o se
manche:
• Limpiela cubierta de laestufa despu6sde cadauso.
• Limpielosderrames_cidos o azucaradostan pronto como la
cubiertase hayaenfriado puesestos derrames
puedendescolorarla porcelana.
A diferenciade unaestufa con quemadoresde
gasest_ndar,estacubiertano se levantani
tampocoes removible. Neintentelevantarla
cubierta per ningbn motive.
Quemadores Sellados
Losquemadoressellados desu estufaest_naseguradosa la
cubiertay no hart sido dise_adosparasersacados. Debido a que
los quemadoresest_n selladosen la cubierta,los derrameso
rebosesnose escurrir4ndebajode la cubiertade la estufa.
Sin embargo,los quemadorespueden ser limpiadosdespu_.sde
cadauso. La parte de la cabezadel quemador puedeser f_cilmente
sacadaparasu limpieza.(Veren la p_gina72las instruccionessobre
la limpieza.)
Lascabezasde los quemadoresdeben estar correctamente
colocadasen la basedel quemadora fin de que 6stefuncionede
maneraapropiada.
Quemador de Alto
Rendimiento (12.000 BTU)*
Existeun quemadorde alto rendimientoensu estufa,situadoen la
posici6nderechadelantera. Estoquemadorofrececocci6n m_s
r_piday puedeser usado para hervir aguacon rapidezo para
cocinargrandes cantidadesde alimento.
Quemador para Cocinar a
Fuego Lento
Estequemadorseencuentraen la posici6nizquierdatrasera. El
quemadorparacocinara fuego lento ofrece una llamade menor
intensidad[BTU_inferior) paracalentarsalsasdelicadaso derretir
chocolate.
"Elr_gimennominaldeBTUvariar#cuandoseusa gaslicuado.
Rejillas de los Quemadores
Lasrejillas deben estardebidamentecolocadasantes de comenzara
cocinar.Cuandoinstalelas rejillas,coloquelos extremosde las
lengQetashaciael centro, de maneraque coincidancon las barras
derechas.
Lainstalaci6nincorrectade lasrejillas puederesultaren picaduras
dela cubierta.
No use los quemadores sin tener un utensilioen la rejilla. El
acabado de porcelana de las rejillas puede picarse si noexiste
un utensilioqueabsorba el calor de la llama del quemador.
Tengacuidado al revolverel alimento de unaolla o sart_ncolocado
sobrela rejilla del quemador.Lasrejillastienen un acabadosuave
parafacilitar su limpieza.La olla o sart6n puedenresbalarsi nose
sujetanpor el mango.Estopuedeprovocarderramedealimentos
calientesy constituir un riesgode sufrir unaquemadura.
Aunque las rejillasde los quemadoresson durables,gradualmente
perder_nsu brillo y/o se descolorar_n,debidoalas altas
temperaturasde la llama del gas.
Notas:
Un quemadorajustado de maneracorrectacon orificios
limpiosse encender_dentro de unos pocossegundos. Si
est_ usandogas natural la llama ser4azul con un cono
interior azulprofundo.
Si la llamadel quemadores amarillao es ruidosa, la mezcla
de aire/gaspuedeser incorrecta. P6ngaseen contactocon
unt6cnico de servicioparaajustarla. (Los ajustesno est_n
cubiertos por la garantfa.)
Con gas licuadoson aceptablesalgunaapuntasamarillasen
la llama. Estoes normaly noes necesariohacerningtin
ajuste.
• Con algunostipos de gas,usted puede o[r un "chasquido"
cuando el quemadorsuperior se apaga. Estees un sonido
normaldel funcionamientodel quemador.
Si la perillade controlse gira muy r_pidamentede 'High' a
'Low', la llama puedeapagarse,particularmentesi el
quemadorest_fifo. Si estoocurre,gire la perilla a la posici6n
'OFF' (Apagado),espere algunossegundosy vuelva
encenderel quemador.
• Lallamadebe ser ajustadade modoque no se extiendam_s
all_ del hordedel utensilio.
59
8t 13p553.pdf I Imported from Cleveland on 1/t7/2007
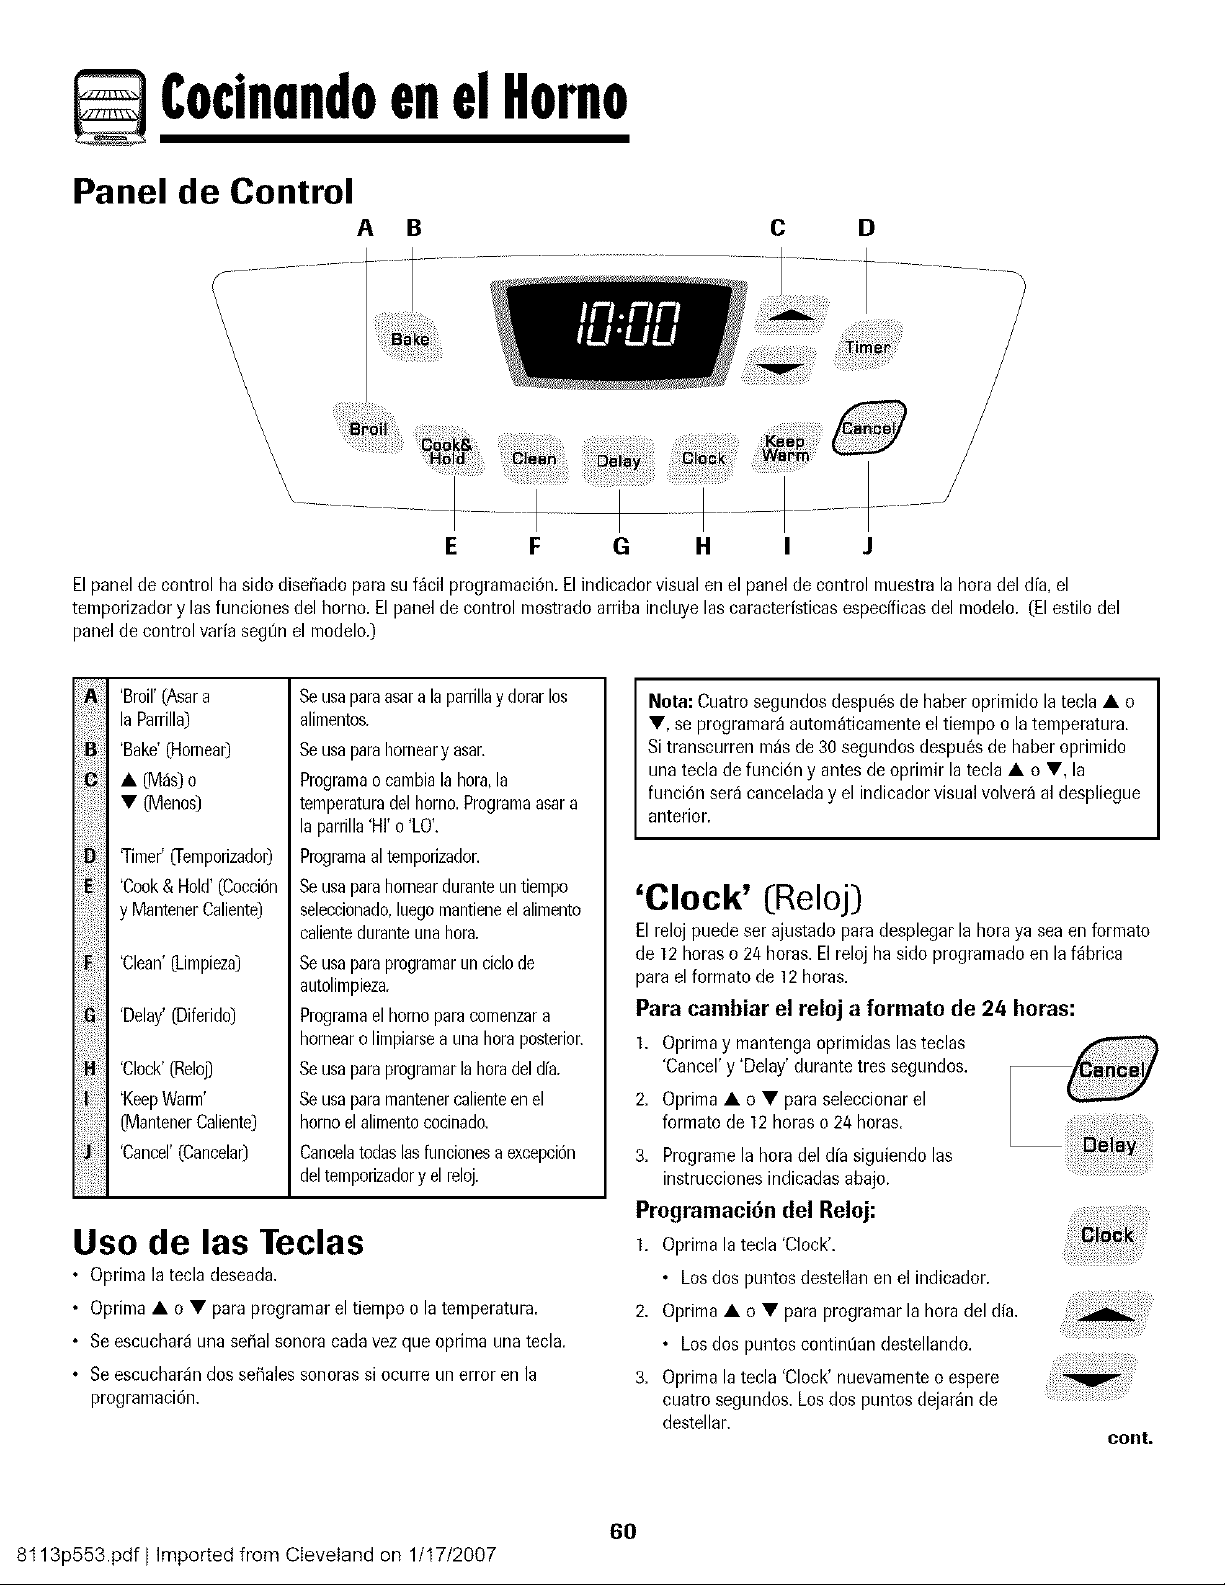
CocinandoenelHorno
Panel de Control
A B C D
\
\
\
\
\
\
\
\
\
\
\
E F G H J
Elpanelde control ha side diserado parasu f_cil programaci6nrEl indicadorvisual enel panel decontrol muestrala hera del dia, el
temporizadory lasfuncionesdel homo. Elpanel de control mostradoarriba incluyelas caracteristicasespedficasdel modelo. (Elestilo del
panelde control•aria segt3nel modelo.)
iiil]i!iii!iiiii
'Broil'(Asara
laParrilla)
'Bake'(Hornea0
• (M_s)o
• (Menos)
q-irner'(Ternporizador)
'Cook& Hold'(Coccbn
y MantenerCaliente)
'Clean'(Lirnpieza)
'Delay'(Diferido)
'Clock'(ReloJ3
'KeepWarm'
(Mantener Caliente)
'Cancel' (Cancelar)
Seusaparaasara laparrillay dorarlos
alimentos.
Seusaparahorneary asar.
Programaocarnbialahora,la
temperaturadelhomo.Programaasara
laparrilla'HI'o 'LO'.
Programaal ternporizador.
Seusaparahornearduranteun tiempo
seleceionado,laegomantieneel alirnento
calienteduranteunahora.
Seusaparaprogramarun ciclode
autolirnpieza.
Prograrnaelhornoparacomenzara
hornearo lirnpiarsea unahoraposterior.
Seusaparaprograrnarla horadel dfa.
Seusapararnantenercalienteen el
hornoel alirnentococinado.
Caneelatodaslasflrncionesaexcepcbn
delternporizadory elreloj.
Use de las Teclas
• Oprima la tecla deseada,
• Oprima • o • para programar el tiempo o la temperatura.
• Se escuchar_ una serial sonora cada vez que oprima una tecla.
• Se escuchar_n dos serales sonoras si ocurre un error en la
programaci6n.
Nora: Cuatrosegundosdespuesde haberoprimido la tecla• o
• , se programar_autorn_ticamenteel tiempoo latemperatura.
Si transcurrenm_sde30 segundosdespuesde haberoprimido
unatecla defunci6n y antesde oprimir la tecla • o •, la
funci6nser_canceladay el indicadorvisualvolver_al despliegue
anterior.
'Clock' (Reloj)
Elreloj puedeser ajustadoparadesplegarla horaya seaen formato
de 12horaso 24 horas.Elreloj ha sido programadoen laf_brica
parael formato de 12horas.
Para cambiar el reloj a formato de 24 horas:
1. Oprimay nrantengaoprimidaslas teclas
'Cancel'y 'Delay'durante tressegundos.
2. Oprima• o • para seleccionarel
formate de 12 horaso 24 horas.
3. Programela horadel dfa siguiendolas
instruccionesindicadasabajo.
Programaci6n del Reloj:
1, Oprimala tecla 'Clock'.
• Losdos puntosdestellan en el indicador.
2. Oprima• o • para programarla horadel dia.
• Losdos puntoscontintian destellando.
3. Oprimala tecla 'Clock' nuevamentee espere
cuatrosegundos.Los dos puntos dejar_nde
destellar.
cont.
60
8t 13p553.pdf I Imported from Cleveland on 1/t 7/2007
CocinundoenelHorno
Cuandose conectaenergfael6ctricaal homo o despu_sde una
interrupci6nde la energfael6ctrica,la t31timahoradel reloj previaa
la interrupci6ndestellar_en el indicador.
Paradesplegarla horadel dia cuando el indicadorest_mostrando
otra funci6n de tiempo,oprima latecla 'Clock'.
La horadel reloj no puedesercambiada cuandoel homo ha sido
programatic para 'DelayCook','Clean' o 'Cook& Hold'.
Para cancelar el despliegue del reloj:
Si nodeseaque el indicadorvisualmuestre la horadel d[a:
Oprimay mantengaoprimida lasteclas
'Cancel'y 'Clock' duranteties segundos.La
horadel d[a desaparecer_en el indicador.
Cuandose cancelael desplieguedel reloj,
oprima la tecla 'Clock' paradesplegar
brevementela horadel d[a.
Para restaurar el despliegue del reloj:
Oprimay mantengaoprimida lasteclas 'Cancel'y 'Clock' durante
tressegundos.La hora del dia reaparecer_en el indicador.
'Timer' (Temporizador)
Eltemporizadorpuede ser programadode un minuto (0:01)hasta99
horasy 59minutos (99:59).
Eltemporizadorpuede ser usado independientementedecualquier
otra actividaddel horno.Adem_s puedeser programadocuando otra
funci6ndel homo est6en funcionamiento.
Eltemporizadorno controla el horno. Solamentecontrola unaserial
sonora.
Para programar el temporizador:
] r Oprinralatecla 'Timer' [Temporizador).
• '0:00'destellaen el indicadorvisual.
• Losdos puntosdestellar_n.
2. Oprimala tecla • o • hastaque el tiempo
correctoaparezcaen el indicadorvisual.
• Losdos puntoscontintian destellando.
3. Oprimanuevamentela tecla 'Timer'o esperecuatrosegundos.
• Losdos puntoscontintian destellandoy comienzala cuenta
regresivadel tiempo.
• El tiltimo minutode lacuenta regresivadel temporizadorse
desplegar_en segundos.
4. AI final del tiempo programado,se escuchar_una sepalsonora
larga.
Para cancelar el temporizador:
1r Oprimay mantengaoprimida la tecla 'Timer' durantetres
segundos.
U
2. Oprima latecla 'Timer'y coloque lahora a 0:00.
Bloqueo de los Controles y de
la Puerta del Horno
Eltecladoy la puertadel homo puedenser bloqueadospara
seguridad,limpiezao evitarel uso noautorizado.No funcionar_n
cuandoest6n bloqueados.
Siel homo est_en uso, los controlesni la puerta puedenbloquearse.
La horaactualdel dfa permanecer_en el indicador cuando los
controlesest6nbloqueados.
Para bloquear:
Oprimay mantengaoprimidaslasteclas
'Cancel'y 'Cook & Hold'durante tres
segundos.(Oprimaprimero latecla 'CAN-
CEL').
• 'LOCK'destellaen el indicadorvisual.
Para desbloquear:
Oprimay mantengaoprimidaslasteclas 'Cancel'y 'Cook & Hold'
durantetres segundos.(Oprimaprimero la tecla'CANCEL').
• 'LOCK'desaparecedel indicadorvisual.
C6digos de Errores
'BAKE' o 'LOCK' pueden destellar r@idamente para advertirle que
hay un error o un problema. Si 'BAKE' o 'LOCK' destellan en el
indicador visual, oprima la tecla 'Cancel'. Si 'BAKE' o 'LOCK'
contintian destellando, desconecte la corriente el6ctrica hacia el
artefacto. Espere unos pocos minutos y vuelva a conectar la
corriente el6ctrica. Si las palabras aLin contint3an destellando,
desconecte la corriente el6ctrica hacia el artefacto y Ilame a un
tecnico de servicio autorizado.
61
8t 13p553.pdf I Imported from Cleveland on 1/t 7/2007
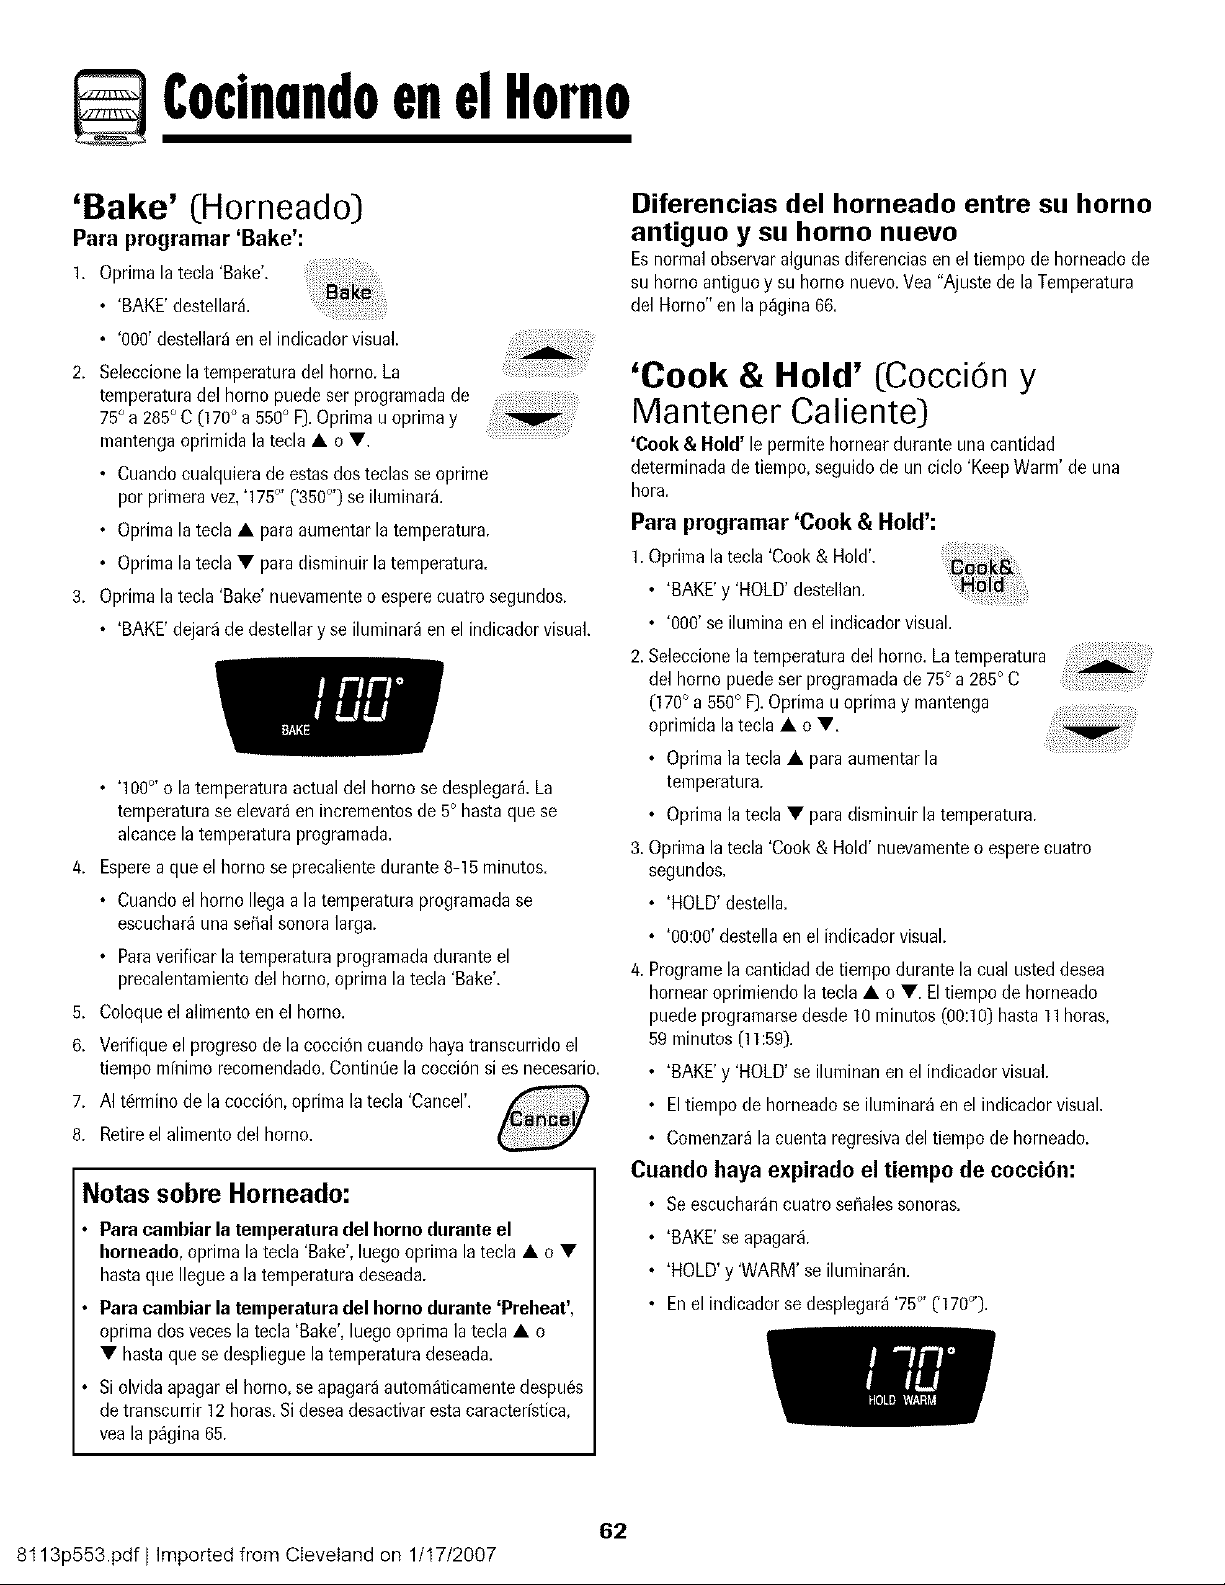
CocinundoenelHorno
'Bake' (Horneado)
Para programar 'Bake':
1. Oprimala tecla 'Bake'.
• 'BAKE'destellar&
• '000'destellar_en el indicadorvisual.
2. Seleccionela temperaturadel horno. La
temperaturadel homo puedeser programadade
75° a 285° C (170° a 550° F).Optima uoptima y
mantengaoprimida la tecla • o V
• Cuandocualquierade estasdos teclas seoprime
por primeravez,'175°' ('350°') se iluminar&
• Optima latecla • para aumentarla temperatura.
• Optima latecla • para disminuirla temperatura.
3. Optima la tecla 'Bake' nuevamenteo esperecuatrosegundos.
• 'BAKE'dejar_de destellary se iluminar_en el indicadorvisual.
/4.
5.
6.
7.
8.
• '100°' o latemperaturaactualdel homo se desplegar&La
temperaturase elevar_en incrementosde 5° hasta que se
alcancela temperaturaprogramada.
Espereaque el homo se precalientedurante8-15 minutos.
• Cuandoel homo Ilega ala temperaturaprogramadase
escuchar_unase_lalsonora larga.
• Paraverificar la temperaturaprogramadadurante el
precalentamientodel horno,optima la tecla 'Bake'.
Coloqueel alimentoen el horno.
Verifique el progresode la cocci6n cuando hayatranscurridoel
tiempo mfnimo recomendado.Contint]e la cocci6n es necesario.
AI t6rminode la cocci6n,oprima la tecla 'Cancel'.
Retireel alimentodel horno.
Notas sobre Horneado:
Para cambiar la temperatura del horno durante el
horneado,oprima la tecla 'Bake',luegooprima la tecla • o •
hastaque Ileguea latemperaturadeseada.
Para cambiar la temperatura del horno durante 'Preheat',
oprima dos veces la tecla 'Bake', luego oprima la tecla • o
• hasta que se despliegue la temperatura deseada,
Siolvidaapagarel homo,se apagar_autom_ticamentedespues
detranscurrir 12 horas.Sideseadesactivaresta caracterfstica,
vea la p_gina 65.
Diferencias del horneado entre su homo
antiguo y su homo nuevo
Esnormalobservaralgunasdiferenciasen el tiempo de horneadode
su homo antiguoy su homo nuevo.Vea"Ajustede laTemperatura
del Homo" en la p_gina 66.
'Cook & Hold' (CocciOn y
Mantener Caliente)
'Cook & Hold' le permitehornear durante unacantidad
determinadadetiempo, seguidode un ciclo 'KeepWarm' de una
hora.
Para programar 'Cook & Hold':
1. Oprimala tecla 'Cook& Hold'.
• 'BAKE'y 'HOLD'destellan.
• '000' se iluminaen el indicadorvisual.
2. Seleccionela temperaturadel horno.La temperatura
del homo puedeser programadade75° a 285° C
(170° a 550° F).Oprimau optima y mantenga
oprimida la tecla • o •.
• Oprimala tecla • paraaumentar la
temperatura.
• Oprimala tecla • paradisminuir la temperatura.
3. Oprimala tecla 'Cook& Hold' nuevamenteo esperecuatro
segundos.
• 'HOLD'destella.
• '00:00'destellaen el indicadorvisual.
4. Programela cantidadde tiempodurante la cual usteddesea
hornearoprimiendola tecla • o •. Eltiempo de horneado
puedeprogramarsedesde 10 minutos (00:10)hasta 11horas,
59 minutos (11:59).
• 'BAKE'y 'HOLD'se iluminan en el indicadorvisual.
• Eltiempode horneadoseiluminar_ en el indicadorvisual.
• Cemenzar_la cuenta regresivadeltiempo de horneado.
Cuande haya expirado el tiempo de cocci6n:
• Se escuchar_ncuatrosel_alessonoras.
• 'BAKE'se apagar&
• 'HOLD'y 'WARM'se iluminar_n.
• En el indicader sedesplegar_'75°' ('170_).
62
8t 13p553.pdf I Imported from Cleveland on 1/t 7/2007
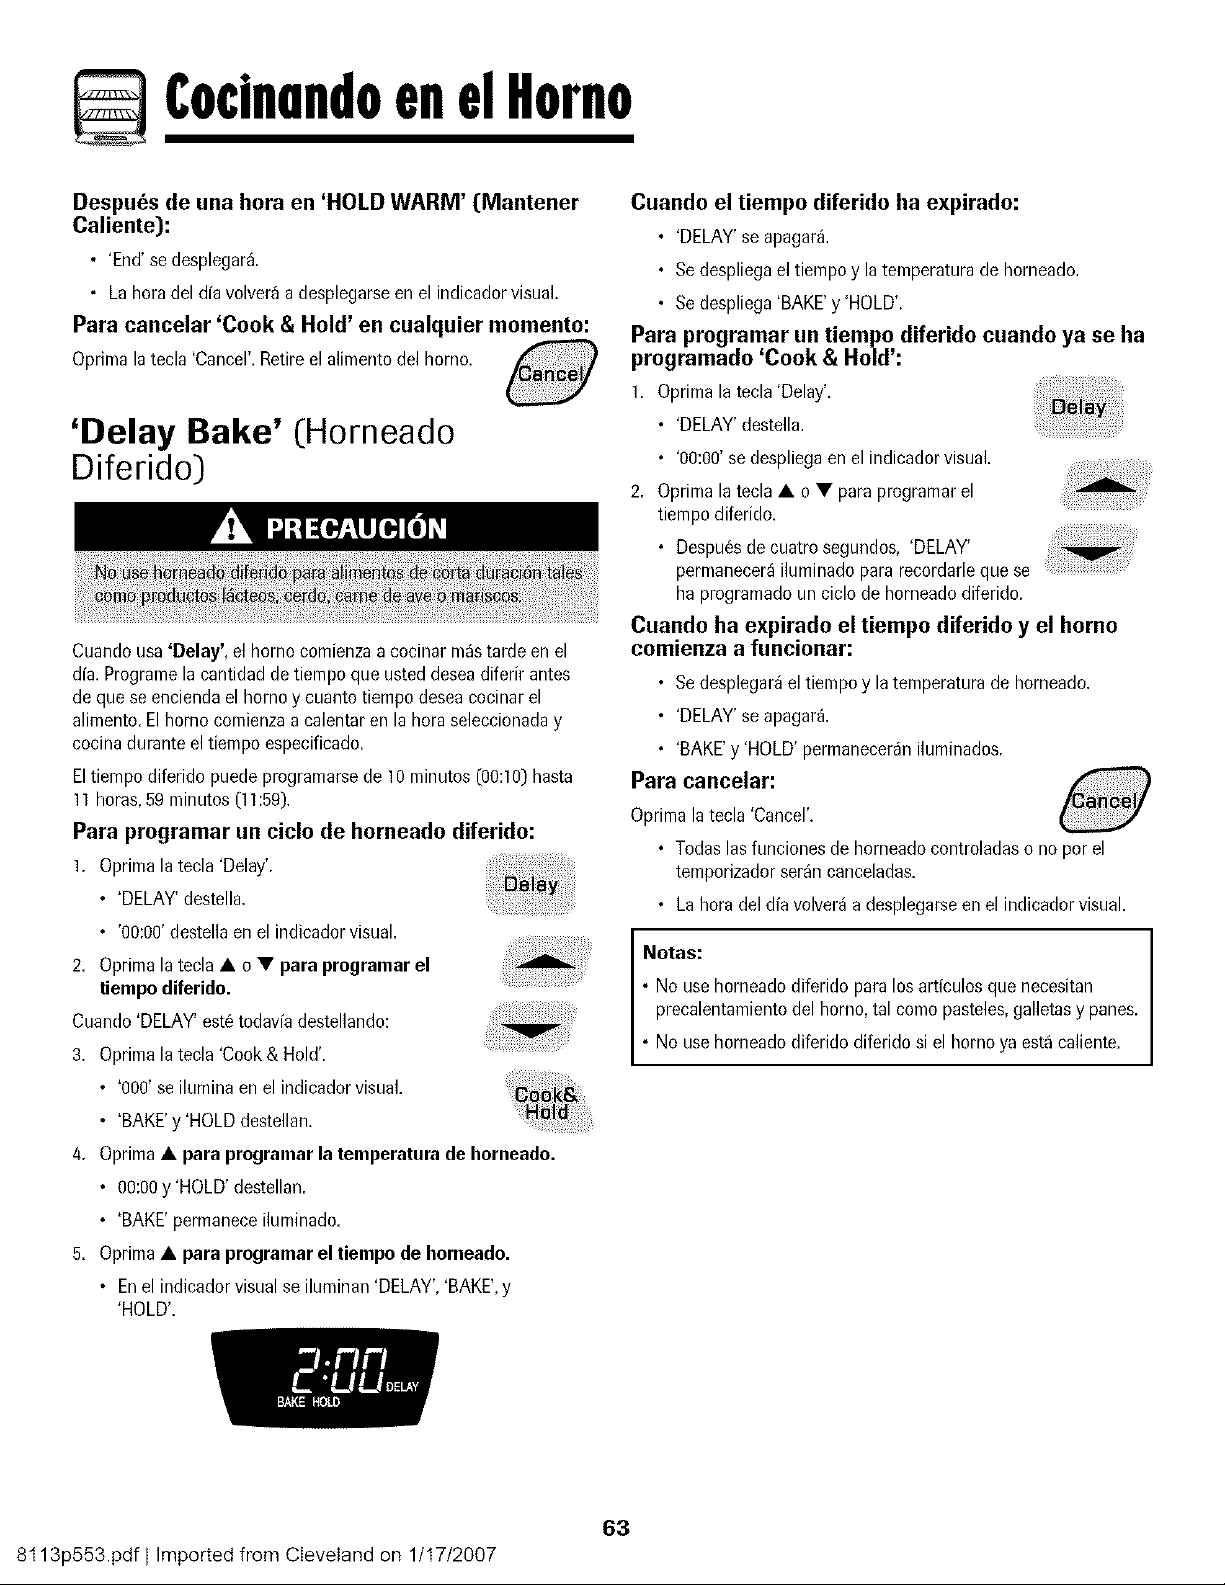
CocinundoenelHorno
Despu_s de una hera en 'HOLD WARM' (Mantener
Caliente):
• 'End'se desplegar&
• La hera del dfavolver_ a desplegarseen el indicadorvisual.
Pare canceler 'Cook & Hold' en cualquier memento:
Oprimala tecla 'Cancel'.Retireel alimentodel horno.
'Belay Bake' (Horneado
Diferido)
Cuandousa'Delay', el horno comienzaa cocinar m_starde en el
dfa.Programela cantidad de tiempo que usteddeseadiferir antes
de quese enciendael homo y cuanto tiempodeseacocinarel
alimente.El home comienzaa calentar en la hora seleccionaday
cocinadurante el tiempoespecificado.
Eltiempodiferide puedeprograrnarsede 10 minutes(00;10)hasta
11horas,59minutos (11;59).
Pare programar un cielo de horneado diferido:
l r Oprimalatecla 'Delay'.
• 'DELAY'destella,
• '00:00'destella en el indicadorvisual,
2. Oprimala tecla • o • para programar el
tiempo diferido.
Cuando'DELAY'est6todada destellando:
3. Oprimala tecla 'Cook& Hold'.
• '000'se ilumina en el indicadorvisual,
• 'BAKE'y 'HOLD destellan.
4r Oprima• pare programar la temperature de horneado.
• 00:00y 'HOLD' destellan.
• 'BAKE'perrnaneceiluminado.
5. Oprima• para programarel tiempo de horneado.
• Enel indicadorvisual se ilurninan 'DELAY','BAKE',y
'HOLD'.
Cuando el tiempo diferido ha expirado:
• 'DELAY'se apagar&
• Sedespliegael tiempo y la temperaturade horneado.
• Sedespliega'BAKE'y 'HOLD'.
Pare programar un tiempo diferido cuando ya se ha
programatic 'Cook & Hold':
1. Oprima la tecla 'Delay'.
• 'DELAY'destella.
• '00:00'se despliegaen el indicadorvisual.
2. Oprima latecla • o • para pregramarel
tiempo diferido.
• Despuesde cuatro segundos, 'DELAY'
permanecer_ilurninadopara recordarleque se
haprograrnadoun ciclo de horneadodiferido.
Cuando ha expirado el tiempo diferido y el homo
comienza a funcionar:
• Sedesplegar_el tiernpoy la ternperaturade horneado,
• 'DELAY'se apagar&
• 'BAKE'y 'HOLD' permanecer_niluminados.
Pare canceler:
Oprimala tecla 'Cancel'.
• Todaslas funcienesde horneadocontroladaso no por el
temporizadorser_n canceladas.
• La hora deldia volver_a desplegarseen el indicadorvisual.
Notes:
• No use horneadodiferido para los artfculosque necesitan
precalentamientodel homo, tal como pasteles,galletasy panes.
• No use horneadodiferido diferido si el homo ya est_caliente.
8t 13p553.pdf I Imported from Cleveland on 1/t7/2007
63
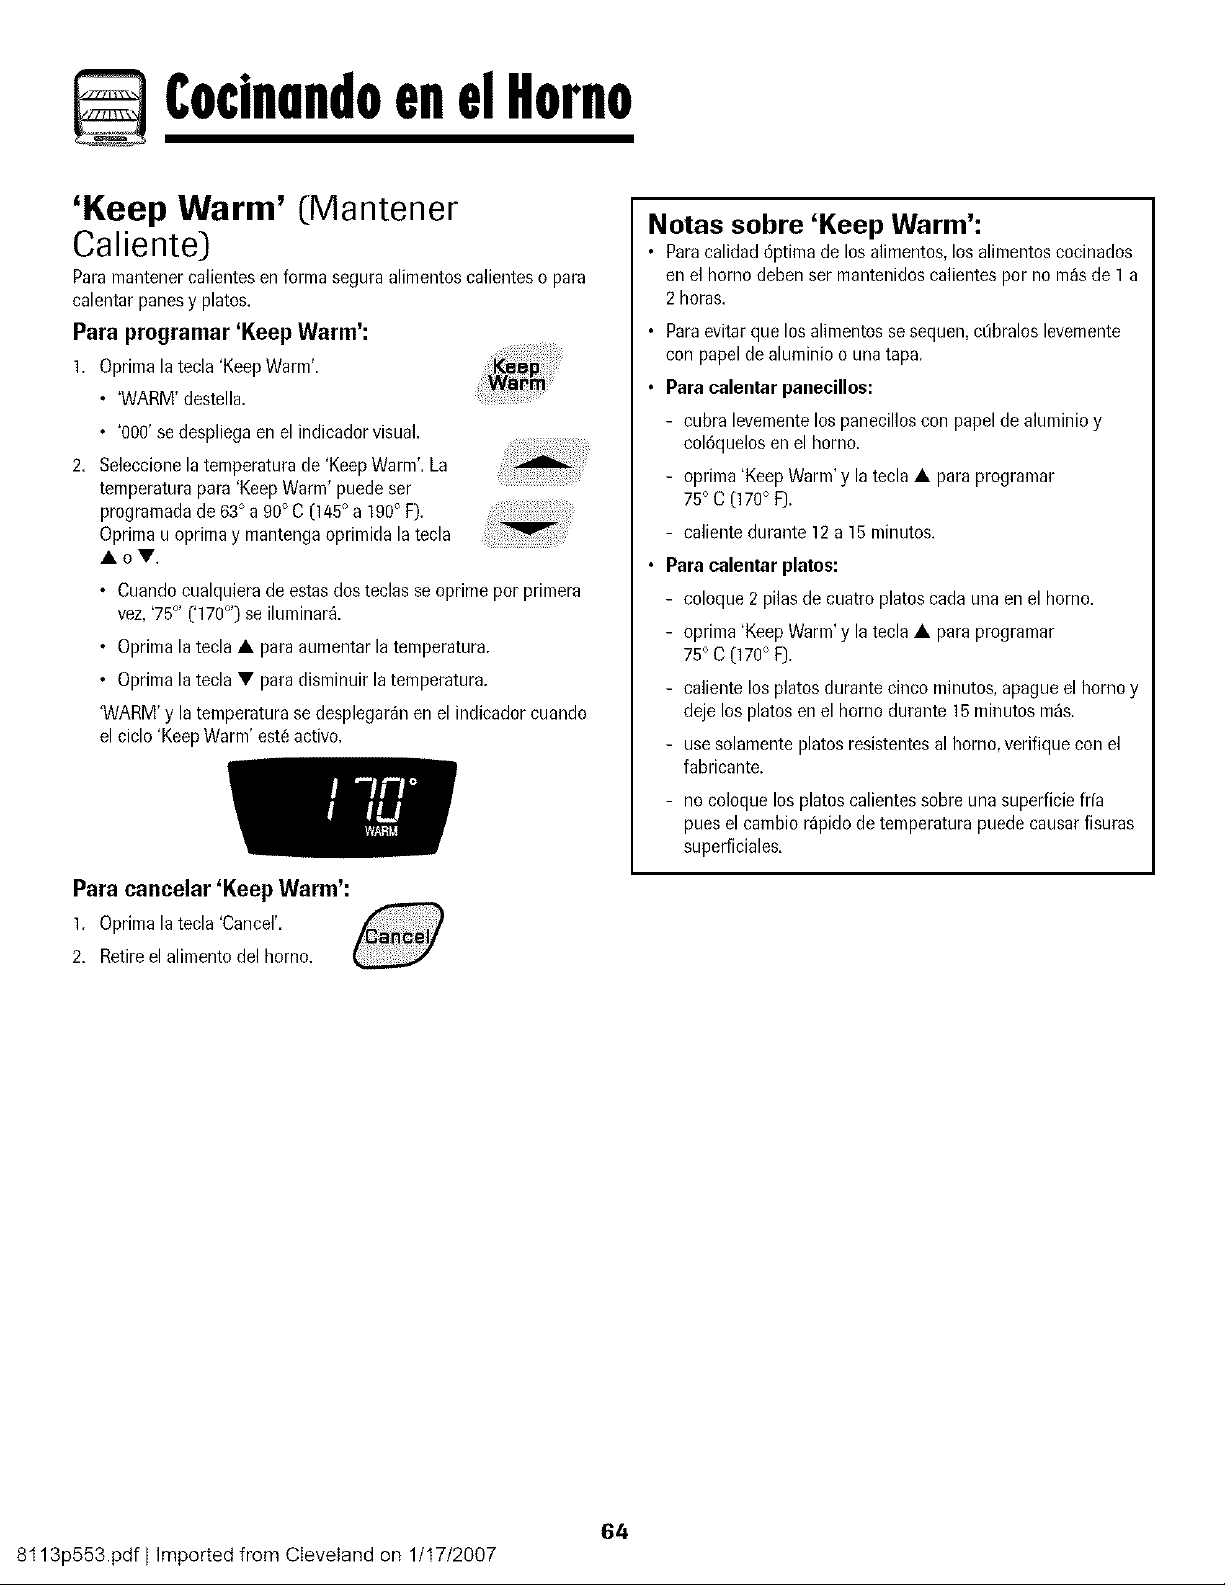
CocinundoenelHorno
'Keep Warm' (Mantener
Caliente)
Paramaetenercalieetesen forma segura alimentoscalieeteso para
calentarpanesy platos.
Para programar 'Keep Warm':
1. Oprireala teela 'KeepWarm'.
• 'WARM'destella.
2,
• '000'se despliegaen el indicadorvisual.
Seleccionela temperaturade 'KeepWarm',La
temperaturapara 'KeepWarm' puedeser
programadade 63° a 90° C 045 ° a 190° F).
Oprimau oprimay mantengaoprimida la tecla
•o•.
• Cuandocualquierade estasdos teclas seoprime por primera
vez,'75°' ('170°') se iluminar&
• Oprimala tecla • para aumentarla temperatura.
• Oprimala teela • paradisminuirla temperatura.
'WARM'y la temperaturase desplegar_een el indicadorcuando
el ciclo'KeepWarm' est,,active.
Para cancelar 'Keep Warm':
] r Oprimalatecla 'Carmel'.
2. Retireel alimento del horno.
Notas sobre 'Keep Warm':
• Paracalidad6ptima de losalireentos,los alirnentoscocinados
en el homo debenser maetenidoscalientespor no m_sde 1 a
2horas.
Paraevitarque los alimentosse sequen,ctibralos levemente
con papelde aluminioo ueatapa.
Para calentar panecillos:
- cubra levementelos panecilloscon papelde alurninioy
col6quelosen el horno.
- oprima 'KeepWarm' y latecla • paraprogramar
75° C (170° F).
- calienteduraete 12a 15minutos.
Para calentar platos:
- coloque 2 pilas de cuatro platos cada unaen el borne.
- oprima 'KeepWarm' y latecla • paraprogramar
75° C (170° F).
- caliente los platosdurante cieco minutos,apagueel homo y
deje los platos en el homo duraete 15 minutosm_s.
- usesolamenteplatos resistentesal homo,verifique con el
fabricante.
- no coloque los platoscalientessobreuna superficiefrfa
puesel cambio rdpidode temperaturapuedecausarfisuras
superficiales.
64
8t 13p553.pdf I Imported from Cleveland on 1/t 7/2007
CocinandoenelHorno
Cierre Autom ttico/Modo
Sab tico
Elhomo se apagar_autom_ticamentedespu6sde 12horassi usted Io
dejaaccidentalmenteencendido. Estacaractefisticade seguridad
puedeser desactivada.
Para eancelar el eierre autom_tieo de 12 horas y
dejar que el homo funcione continuamente durante
72 horas:
] r Programeel horno para hornear (verp_gina 62).
2. Optimay mantengaoprimida la tecla'Clock'
durantecinco segundos.
• 'SAb'se desplegar_y destellar_durantecinco segundos.
• 'SAb'se desplegar_continuamentehastaque sedesactiveo
hastaque transcurrael Ifmite de 72 horas.
• 'BAKE'tambi6nse desplegar_si se est_ usandoun ciclo de
horneadocuandoel horno est_en modo sab_tico.
Todaslasotrasfunciones EXCEPTO'BAKE'('Timer','KeepWarm',
'Clean',etc.) est_nbloqueadasdurante el Modo Sab_tico.
Para cancelar 'Bake' euando el Mode Sab_ttieo
estb active:
Oprimala tecla 'Cancel'.
• 'BAKE'se apagar_en el indicadorvisual.
• No se oir_ ningunaserialsonora.
Para cancelar el Mode Sab_tice:
1. Oprimala tecla 'CLOCK'durantecinco segundos.
0
2. Despu6sde72 horas,el Modo Sab_ticoterminar&
• 'SAb'destellar_durante 5 segundos.
• La hora del dfa reaparecer_en el indicadorvisual
Notas Sobre el Mode Sab tico:
• El Modo Sab_tico puedeser activadoen cualquier memento,
est6o no el homo encendido.
ElModo Sab_ticono puedeser activadosi lasteclas est_n
bloqueadaso cuando la puertaest_ bloqueada.
Si el homo est_horneandocuandoel Modo Sab_ticoes
programado, 'BAKE'se apagar_al final del ciclo de horneado.
No se emitir_nse_alessonoras.
Si se deseala luz del homo durante el Mode Sab_tico,6sta
debeser encendidaantes de que comienceel Modo Sab_tico.
Cuandocomienzael Modo Sab_tico,no se emitir_ la sepal
sonorade precalentamiento.
La mayorfade las advertenciasy mensajesy todas las se_ales
sonorasest_ndesactivadascuandoel Modo Sab_ticoest_
activo.
Elciclo de autolimpiezay bloqueoautom_ticode la puerta no
funcionar_duranteel ModoSab_tico.
Si oprime la tecla'Cancel'se cancelar_unciclo 'Bake',sin
embargoel control permanecer_en Modo Sab_tico.
Si falla lacorrienteel6ctrica, cuandovuelva la energfael horno
se activar_en Modo Sab_ticocon 72 horasrestantesy ningt3n
ciclo activo.
65
8t 13p553.pdf I Imported from Cleveland on 1/t 7/2007
CocinundoenelHorno
Ajuste de la temperatura del
horno
Laexactitudde las temperaturasdel hornoes cuidadosamente
probadaen laf_brica. Es normalnotar algunadiferencia entre la
temperaturade horneado, entre un homo nuevoy un homo antiguo.
Con el correrdel tiempo, la temperaturadel homo puede cambiar.
Usted puede ajustarlatemperaturadel homo,si consideraquesu
homo noest_ horneandoo dorandoenforma correcta. Paradecidir
cuantodebecambiar la temperatura,programela temperaturadel
homo a 15° C (25° F) m4s altao m_s bajaque la temperatura
indicadaen sus recetas,luego hornee. Los resultadosde la
"prueba" puedendarle una ideade cuantoajustarla temperatura.
Ajuste de la temperatura del homo:
] r Optimala tecla 'Bake'.
2. Programe 280° (550') oprimiendo la tecla A
3. Oprimay mantengaoprimida la tecla 'Bake'
durantevarios segundoso hastaque 0°
aparezcaen el indicadorvisual.
Si la temperaturadel homo ha sido previamenteajustada,el
cambioaparecer_en el indicadorvisual. Porejemplo,si la
temperaturadel homo fue reducidaen 8° C 05° F) el indicador
mostrar_'- 8°' ('-15_).
_r Oprimalatecla • o • paraajustarlatemperatura.
5.
Cadavezque se oprimeuna tecla, latemperaturacambiaen
3' C (5° F). Latemperaturadel homo puedeser aumentadao
disminuidaen 3° a 20' C (5° a 35° F).
Lahora del dfa reaparecer_autom_ticamenteen el indicador
visual.
No necesitareajustarla temperaturadel homo si hay unafalla o
interrupci6nde energfael6ctrica. Lastemperaturasde asara la
parrillay limpiezano puedenser ajustadas.
Cambio de la temperatura
de °F/°C
1. El ajustede f_brica de la medidadetemperaturaes Fahrenheit.
2. Paracambiarel ajuste,oprimay mantengaoprimidas lasteclas
'CANCEL'(Anular)y 'Bake' (Hornear)al mismotiempo durante
tres segundos.
3. Escuchar_una serialsonoray el ajusteactual (°Fo °C)se
desplegar4en la pantalla.(Si no se realizaningt3ncambio, la
estufa regresar_al ajusteactualdespu6sde 30 segundos).
/4. Paracambiarel ajuste,oprima la tecla • o •. Oprfmala
nuevamentepararegresaral ajuste anterior.Esperecinco
segundosy el ajustese guardar&
66
8t 13p553.pdf I Imported from Cleveland on 1/t 7/2007
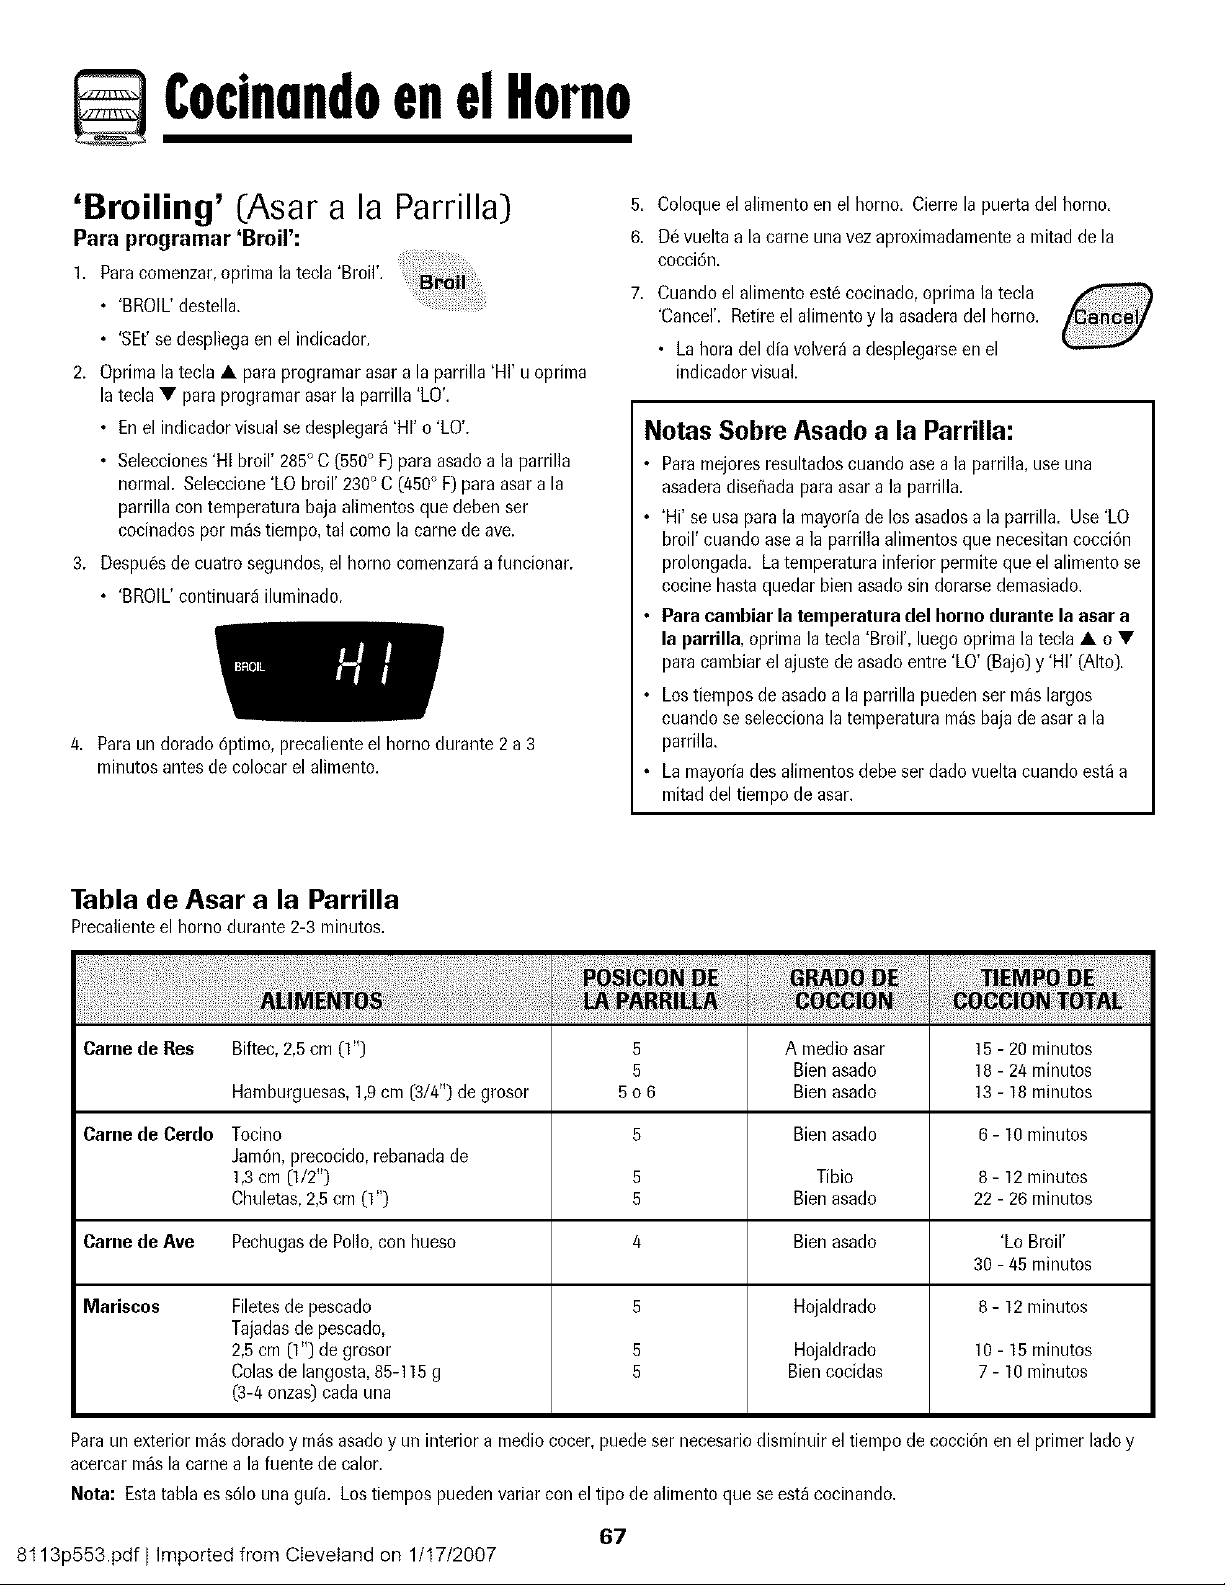
CocinandoenelHorno
'Broiling' (Asar a la Parrilla)
Para programar 'Broil':
1. Paracomenzar,oprima latecla'Broil'.
• =BROIL'destella.
• 'SEt'se despliegaen elindicador.
2. Oprimala tecla • paraprogramarasar a la parrilla'HI' u oprima
la tecla• paraprogramarasar la parrilla'LO'.
• En el indicadorvisual se desplegar_'HI' o 'LO'.
• Selecciones'HI broil' 285° C (550° F) paraasadoa la parrilla
normal. Seleccione'LO broil' 230° C (450° F)para asara la
parrillacon temperaturabaja alimentesque debenser
cocinadospor m_stiempo,tal como la came de ave.
3. Despu6sde cuatrosegundos,el homo comenzar_a funcionar.
• 'BROIL'continuar_iluminado.
4. Paraun dorado6ptimo, precalienteel homo durante 2 a 3
minutos antes decolocar el alimento.
5. Coloqueel alimentoen el horno. Cierrela puertadel horno.
6. D_vuelta a la came unavezaproximadamentea mitadde la
cocci6n.
7. Cuandoel alimentoest_ cocinado,oprimala tecla
'Cancel'. Retireel alimentoy la asaderadel horno.
• Lahora del db volver_a desplegarseen el
indicadorvisual.
Notas Sobre Asado a la Parrilla:
• Paramejoresresultadoscuando asea la parrilla,use una
asaderadise_adapara asara la parrilla.
'Hi' se usaparala mayofia de los asadosa la parrilla. Use'LO
broil' cuando asea la parrillaalimentosque necesitancocci6n
prolongada. La temperatura inferior permitequeel alimento se
cocine hastaquedar bienasadosin dorarsedemasiado.
• Para cambiar la temperatura del homo durante la asar a
la parrilla, oprima la tecla 'Broil', luegooprima latecla • o •
paracambiarel ajustede asadoentre 'LO' (Bajo)y 'HI' (Alto).
• Lostiemposde asadoa la parrilla puedenser m_slargos
cuando se seleccionala temperaturam_s baja de asara la
parrilla.
• Lamayorfades alimentosdebeser dadovueltacuando est_a
mitaddeltiempo de asar.
Tabla de Asar a la Parrilla
Precalienteel horno durante 2-3 minutos.
Came de Res Biftec,2,5cm (1") 5 A medioasar
5 Bienasado
Hamburguesas,1,9cm (3/4") de grosor 5 o 6 Bienasado
Came de Cerdo Tocino 5 Bienasado
Jam6n,precocido,rebanadade
1,3cm (1/2") 5 Tibio
Chuletas,2,5cm (I") 5 Bienasado
Carriede Ave Pechugasde Polio,con hueso 4 Bienasado
Mariscos
Filetesde pescado
Tajadasde pescado,
2,5 cm (I") de grosor
Colasde langosta,85-115g
(3-4onzas)cada una
5
5
5
Hojaldrado
Hojaldrado
Biencocidas
15- 20 minutes
18- 24 minutos
13- 18 minutos
6 -10 minutos
8- 12 minutos
22 - 26 minutos
'Lo Broil'
30- 45 minutos
8- 12 minutos
10-15 minutos
7- 10 minutos
Paraunexterior m_s dorado y m_sasadoy un interior a mediococer,puede ser necesariodisminuir el tiempode cocci6n enel primer ladoy
acercarm_sla came a la fuente de calor.
Nota: Estatabla es s61ounagala. Lostiempos puedenvariar con el tipo de alimento que seest_ cocinando.
67
8t 13p553.pdf I Imported from Cleveland on 1/t 7/2007
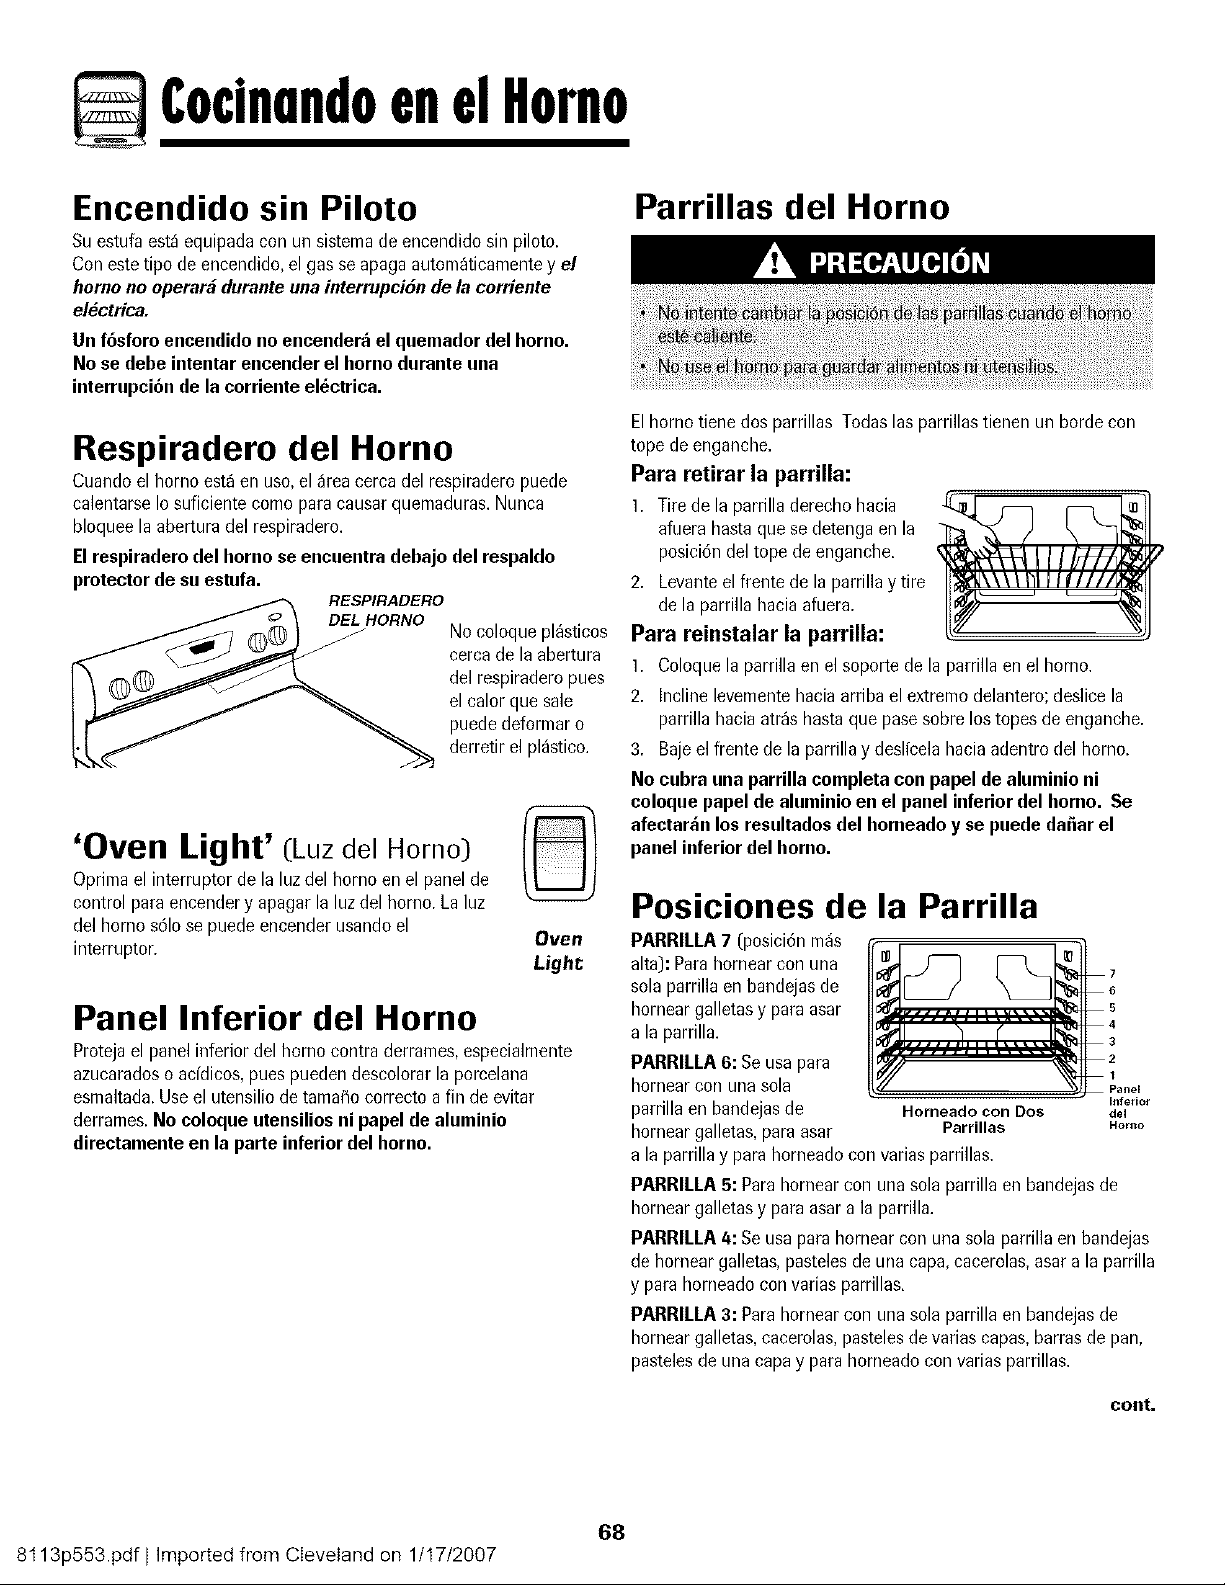
CocinundoenelHorno
Encendido sin Piloto
Suestufa est_equipadacon un sistemadeencendido sin piloto.
Con estetipo de encendido,el gas se apagaautom_ticamentey el
borne nooperar_ duranteuna interrupciSode la corriente
el_ctriea.
Un f6sforo encendidono encender_el quemador del borne.
No se debe intentar encender el bornedurante una
interrupci6nde la corriente el6ctrica.
Respiradero del Horno
Cuandoel homo est_en uso,el _rea cerca del respiraderopuede
calentarseIosuficiente como paracausarquemaduras.Nunca
bloqueela aberturadel respiradero.
El respiraderodel borne se encuentra debajo del respaldo
protector de su estufa.
RESPIRADERO
Nocoloque pl_sticos
cercade la abertura
del respiraderopues
el calor que sale
puededeformaro
derretir el pl_stico.
'Oven Light' (Luz del Homo)
Oprimael interrupterde la luzdel homo en el panelde
control paraencendery apagarla luzdel borne. Laluz
del horno s61ose puedeencender usandoel
interrupter.
©
Oven
Light
Panel Inferior del Homo
Protejael panelinferior del homo contraderrames,especialmente
azucaradoso addicos, pues puedendescolorar la porcelana
esmaltada.Use el utensiliode tamaflo correcto a fin de evitar
derrames.No coloque utensiliosni papel de aluminio
directamente en la parte inferiordel borne.
Parrillas del Homo
Elhomo tiene dos parrillas Todas las parrillastienen un hordecon
tope de enganche.
Para retirar la parrilla:
1r Tire de la parrilla derecho hacia
afuerahasta quese detengaen la
posici6ndel tope deenganche.
2. Levanteel frente de la parrilla y tire
dela parrilla hacia afuera.
Para reinstalar la parrilla:
1. Coloquela parrillaen el soportede la parrilla en el horno.
2. Incline levementehacia arriba el extremodelantero;deslice la
parrillahacia atr_shastaque pasesobre los topesde enganche.
3. Bajeel frente de la parrilla y deslfcelahacia adentrodel horno.
No cubra una parrillacompleta con papel de aluminio ni
coloque papel de aluminio en el panel inferior del homo. Se
afectar_n los resultadosdel horneado y se puede dai_arel
panel inferior del homo.
Posiciones de la Parrilla
PARRILLA7 (posici6nm_s
alta): Parahornearcon una
sola parrilla en bandejasde
horneargalletasy paraasar
a la parrilla.
PARRILLA6: Se usa para
hornearcon una sola
parrillaen bandejasde Homeadocon Dos
horneargalletas,para asar Parrillas
a la parrillay parahorneadocon variasparrillas.
Inferior
de1
Hortto
PARRILLA5: Parahornearcon unasola parrillaen bandejasde
horneargalletasy paraasar ala parrilla.
PARRILLA4: Se usa parahornearcon una sola parrillaen bandejas
de horneargalletas,pastelesde una cap& cacerolas,asar a la parrilla
y parahorneadocon variasparrillas.
PARRILLA3: Parahornearcon una sola parrillaen bandejasde
horneargalletas,cacerolas,pastelesde varias capas,barrasde pan,
pastelesde una capay parahorneadocon variasparrillas.
cont.
68
8t 13p553.pdf I Imported from Cleveland on 1/t7/2007

CocinundoenelHorno
PARRILLA2: Se usa parahornearcon una sola parrillaen bandejas
de horneargalletas,para asar cortesde carne pequef_osy para
horneadocon varias parrillas.
PARRILLA 1: Se usa para asar cortes de came grandes y came de
ave.
Panel Inferior del Homo: Coloquela
parrilladel homo en los sopertesen
relievedel panelinferior del horno.
Useparadisponerde espacio
adicionalcuando cocinecomidas
grandesen el homo.
HORNEADOCON PARRILLASMULTIPLES:
Dos parrillas:Use la posici6n3 y 6o 2y 4.
Horneado de Pasteles de Capas en Dos
Parrillas
Paraobtener rnejoresresultadoscuando horneapastelesen dos
parrillas,use la posici6n 2y 4.
Coloquelos pastelesen las parrillascomose muestra.
69
8t 13p553.pdf I Imported from Cleveland on 1/t 7/2007
CuidadoVtimpieza
Horno Autolimpiante
Elciclo de autolimpiezausa temperaturasde cocci6n superioresalas
normalesparalimpiar automdticamentetodo el interior del homo.
Limpie el homo con frecuencia removiendolosderrames paraevitar
humo excesivoy Ilamaradas.No permita que se acumule demasiado
sucioen el horno.
Duranteel procesode limpieza,la cocina debe estarbienventilada
paraeliminar los olores normalesasociadoscon la limpieza.
Antes de la Autolimpieza
1. Apague la luz del homo antes de la limpieza.La luzdel horno
puedefundirse duranteel ciclo de limpieza.
2. Retirela asadera,todos los utensiliosy las parrillasdel horno. Las
parrillasdel homo se descolorar_ny no se deslizardnfdcilmente
despu6sde un ciclo de autolimpiezasi noson retiradasdel horno.
Limpieel marcodel homo, el marcode
la puerta,el_reafueradelajuntadela __/_
puertay alrededorde la aberturaen la
junta de la puerta,con un agentede
limpiezanoabrasivotaleomo'Bon
AmP o con detergentey agua.El
procesode autolimpiezano limpia
estas_reas. Eliasdebenser limpiadas
paraevitarque la suciedadse horneeduranteel ciclo de
autolimpieza.(Lajunta es el sello alrededorde la puertay
ventanadel homo.)
4. Paraevitardafio no limpie ni frote lajunta situadaalrededorde la
puertadel homo. La junta est_disefiadapara sellar
herm6ticamenteel calor durante el ciclo de limpieza.
5. Limpieel excesode grasa o derramesde la parte inferior del
horno. Estoevita humo excesivoo Ilamaradasduranteel ciclo de
limpieza.
Limpie losderramesazucaradoso _cidostales como papadulce
(camote),tomates o salsasa base de leche.La porcelana
esmaltadaes resistenteal _cido pero no a pruebade _cidos. El
acabadode porcelanapuededescolorarsesi los derrames_cidos
o azucaradosno son limpiados antesde un ciclode autolimpieza.
Para programar 'Self-Clean' (Autolimpieza):
Nora: La temperaturadel homo debeser inferior a 205° C
(400° F) para programarun ciclo de limpieza.
1. Cierrela puertadel horno.
2. Optima la tecla'Clean'.
• 'CLEAN'destellaen el indicadorvisual.
3. Oprimala tecla • o •.
• Sedespliega'CL-M (Limpieza- Suciedad
Mediana).
Si la puerta no se cierra,se oir_n sefiales
sonorasy la palabra 'door' se desplegar_en
el indicadorvisual. Sila puerta no se cierradentro de 45
segundos,laoperaci6nde autolimpiezaser_ canceladay el
indicadorvolver_a desplegarla hora del dfa.
4. Oprimala tecla • o • para desplazarlos
ajustesde autolimpieza.
'CL-H' (Limpieza- SuciedadIntensa,4 horas)
'CL-M' (Limpieza- SuciedadMedian& 3 horas)
'CL- L' (Limpieza- SuciedadLeve,2 horas)
AI seleccionarel nivel de suciedaddel homo se programa
autom_ticamenteel tiempo de limpieza.
5. Despu_sdecuatro segundos,el homo comenzar_a limpiar.
• El tiempode limpiezacomenzar_la cuentaregresivaen el
indicador.
• 'LOCK'se desplegar_en el indicadorvisual.
• 'CLEAN'se desplegar_en el indicadorvisual.
Para diferir un ciclo de autolimpieza:
1. Oprimala tecla'Delay'.
• 'DELAY'destella.
• '00:00'se desplegar_en el indicadorvisual.
2. Oprimala tecla • o • para programarla
cantidaddetiempo que usteddeseadiferir el
ciclo. Eltiempo diferido puedeser programado
de 10minutos (00:10)a 11 horas,59minutos
01:5g).
3. CuandoDELAYest6 destellando,optima latecla
'Clean'.
• 'CLEAN'destellar&
4. Oprimala tecla • o •.
• 'CL-M' (Limpieza- SuciedadMediana)se
despliegaen el indicador.
cont.
*Losnombresde los productosson marcasregistradasde sus respectivosfabricantes.
70
8t 13p553.pdf I Imported from Cleveland on 1/t 7/2007
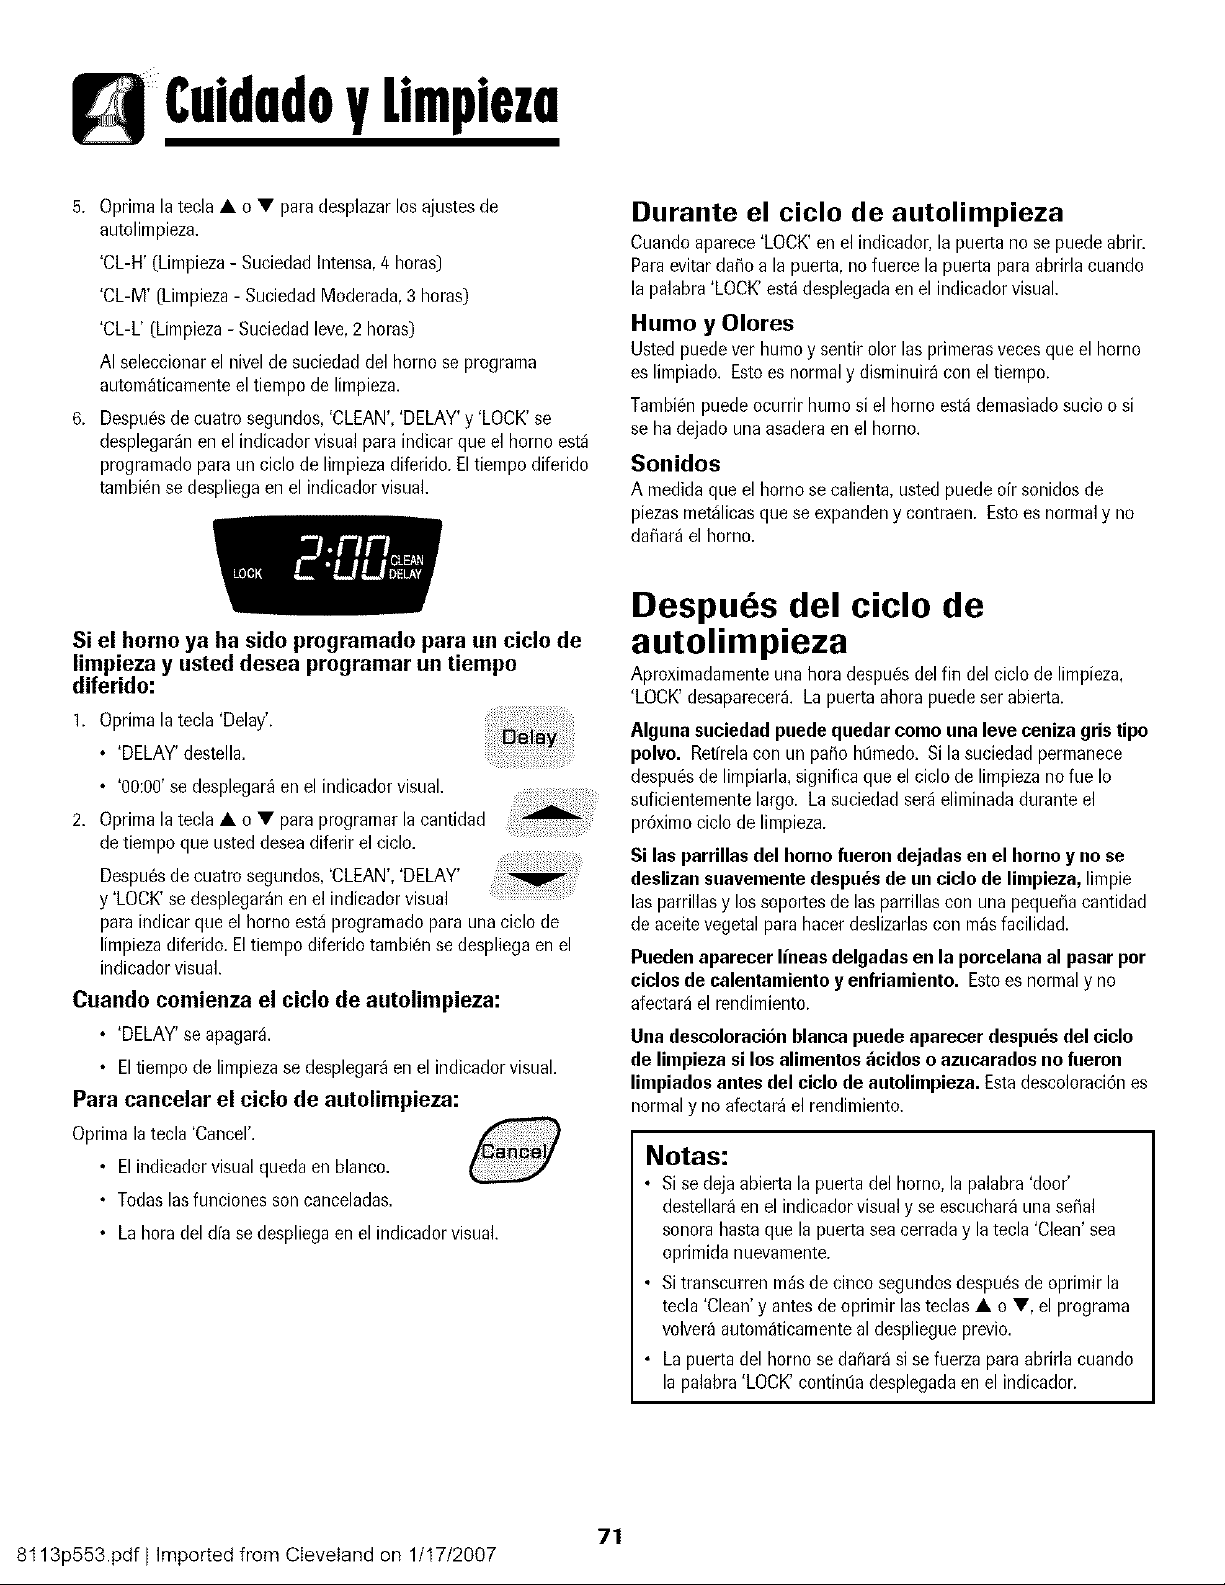
YLimpieza
5. Oprimala tecla • o • paradesplazarlosajustesde
autolimpieza.
'CL-H' (Limpieza- SuciedadIntensa,4 horas)
'CL-M' (Limpieza- SuciedadModerada,3 horas)
'CL-L' [Limpieza- Suciedadleve,2 horas)
AI seleccionarel nivel de suciedaddel horno se programa
autom_ticamenteel tiempo de limpieza.
6. Despu6sdecuatro segundos,'CLEAN','DELAY'y 'LOCK'se
desplegar_nenel indicadorvisual para indicar que el homo est_
programadopara unciclo de limpiezadiferido. Eltiempo diferido
tambi_nse despliegaen el indicadorvisual.
Durante el ciclo de autolimpieza
Cuandoaparece'LOCK'en el indicador,la puerta rlo se puedeabrir.
Paraevitarda_o a la puerta,no fuerce la puerta paraabrirla cuando
la palabra'LOCK'est_ desplegadaen el indicadorvisual.
Humo y Olores
Usted puedever hurnoy sentir olor las primerasvecesque el horno
es limpiado. Estoes normaly disminuir_con el tiempo.
Tambienpuedeocurrir humo si el hornoest_demasiadosucio o si
se ha dejado unaasaderaenel horno.
Sonidos
A medidaque el horno se calienta,usted puededr sonidosde
piezasmet_licasque se expandeny contraen. Estoes normaly no
da_ar_el horno.
Si el homo ya ha side programado para un ¢i¢1o de
limpieza y usted desea programar un tiempo
diferido:
1. Oprinralatecla 'Delay'.
• 'DELAY'deatella.
• '00:00'ae desplegar_enel indicadorvisual.
2. Oprimala tecla • o • paraprogramarla cantidad
detiempo queusteddeaeadiferir el ciclo.
Despuesde cuatro segundos,'CLEAN','DELAY'
y 'LOCK'se desplegar_nenel indicadorvisual
paraindicar que el homo est_ programadopara una ciclo de
limpiezadiferido.Eltiempodiferido tambiense despliegaen el
indicadorvisual.
Cuando comienza el ciclo de autolimpieza:
• 'DELAY'se apagar&
• El tiempode limpiezase desplegar_en el indicadorvisual.
Para cancelar el ciclo de autolimpieza:
Oprimala tecla 'Cancel'.
• El indicadorvisual queda en blanco.
• Todaslasfunciones soncanceladas.
• La hora del dfase despliegaenel indicadorvisual.
Despubs del ciclo de
autolimpieza
Aproximadamenteuna hora despu_sdel fin del ciclo de limpieza,
'LOCK'desaparecer& La puertaahora puedeser abierta.
Alguna suciedad puede quedar come una leve ceniza gristipo
polvo. Retfrelacon un paffoh[irnedo. Si la suciedadperrnanece
despu_ade limpiarla,signifieaque el ciclo de limpiezano fue Io
suficientementelargo. La sueiedadser_ eliminadaduranteel
pr6ximoeiclode limpieza.
Si las parrillasdel homo fueron dejadas en el homo y no se
deslizan suavemente despu_sde un ciclo de limpieza,lirnpie
las parrillasy los soportesde las parrillascon una peque_acantidad
de aceitevegetalpara hacerdeslizarlascon m_sfacilidad.
Pueden aparecer lineas delgadas en la porcelana al pasar por
ciclos de calentamiento y enfriamiento. Estoes nom/aly no
afectar_el rendimiento.
Una descoloraci6n blanca puede aparecer despu6s del ciclo
de limpieza si los alimentos _cidos o azucaradosno fueron
limpiadosantes del ciclo de autolimpieza. Estadescoloraci6nes
normaly no afectar_el rendimiento.
Notas:
• Si se deja abierta la puerta del horno,la palabra 'door'
destellar_enel indicadorvisualy se escuchar_una seSal
sonorahastaque la puerta sea cerraday la tecla 'Clean' sea
oprimidanuevamente.
• Si transcurrenm_s de cincosegundosdespuesde oprimir la
tecla'Clean'y antesde oprimir lasteclas • o •, el programa
volver_autom_ticamenteal despliegueprevio.
• La puertadel homo se daSar_si se fuerzaparaabrirla cuando
la palabra'LOCK'contintJadesplegadaen el indicador.
71
8t 13p553.pdf I Imported from Cleveland on 1/t7/2007
YLimpieza
Procedimientos de Limpieza
* Losnombresde los productosson marcasregistradas
de susrespectivosfabricantes.
** Parahacerpedidos, Ilameal 1-877-232-6771EEUU.o
al 1-800-688-8408Canad&
Asadera e Nunca cubra el inserto con papel de a/uminiopues esto evita que /a grasa se escurra a la bandeja inferior.
Inserto • Coloqueun paso enjabonadosobre el insertoy la bandeja;dejeremojar parasoltar la suciedad.
• Laveen aguajabonosatibia. Useuna esponjade fregar para quitar la suciedadpersistente.
• La bandejade asary el insertopueden ser lavadosen el lavavajillas.
Tapasde
Qaemadoresy
Qaemadores de
GasSellados
Rejillasde los
Qaemadores -
porcelana sobre
hierro forjado
Cabezas de QuemadoresRemovibles
• Dejeenfriarel quemador.Retirelatapayl_velaen aguajabonosacon unaesponjade restregarde pl_stico.Parasuciedad
diffcil,limpiecon unaesponjano abrasivarellenacon jab6no con crernapara limpiezade cubiertas'CooktopCleaning
Creme'*(Pieza#20000001)**y una esponja.
• No las laveen el lavavajillasni en un homo autolimpiante.
Qaemadores de Gas Sellados
• Lfmpieloscon frecuencia.Dejeenfriar el quernador.Limpie conjab6n y una esponjade restregarde pl_stico.Para
suciedaddiffcil, limpie con una esponjano abrasivarellenacon jabOn.No agrandeni modifiquelos agujeros.
• Tenga cuidadode que no entre aguaen los orificiosde los quemadores.
• Tenga cuidadocuando limpie el encendedor.Si el encendedorest_ ht3medoo dafiado, el quemadorsuperior no
encender&
• L_velasconaguatibia jabonosay unaesponjadepl_sticono abrasiva.Paramanchasrebeldes,limpiecon unaesponja
de pl_sticorellenaconjab6n, noabrasivao con 'CooktopCleaningCreme'*(CremaparaLimpiezadeCubiertas)(Pieza
20000001)_*y unaesponja.Sila suciedadpersiste,vuelvaa aplicar'CooktopCleaningCreme',cubra con unatoallade
papelht3meday dejeremojardurante 30 minutos.Restrieguenuevamente,enjuaguey seque.
• No las laveen el lavavajillasni en un homo autolimpiante.
Area del Reloj y • Paraactivar 'Control Lock' (Bloqueodelos controles) para la limpieza,ver p_gina 61.
de las "l'eclas • Lave,enjuaguey seque. No use agentesde limpiezaabrasivospues pueden rayarel acabado.
de Control • Sepuedeusar limpiavidriossi se rodan en el paso primero. NO rocie directamenteen el panel.
Perillasde • Retire las perillascuandoest6n en la posici6n'OFF'tir_ndolas hacia adelante.
Control • Lave,enjuaguey seque. No useagentesde limpiezaabrasivospues puedenrayarel acabado.
• Enciendacada quemadorparaasegurarsede que lasperillas hansido correctamentereinstaladas.
Cubierta y Panel
de Control -
Esmalte de
Porcelana
Laporcelanaesmaltadaesvidrio fundido en metaly puede agrietarseo picaBe si nose usacorrectamente.Esresistente
a los _cidos,no a prueba de _cidos.Todoslos derrames,especialmentelos derramesazucaradosoaddicos deben ser
limpiadosinmediatamentecon un patio seco.
• Cuandose enfrfe,lavecon aguajabonosa,enjuaguey seque.
• Nuncalimpie una superfieietibia o caliente con unpatio htimedo.Esto puedecausaragrietamientoo picaduras.
• Nuncause limpiadoresde homo,agentesde limpiezaabrasivoso c_usticosen el acabadoexterior de la estufa.
8t 13p553.pdf I Imported from Cleveland on 1/t7/2007
72
CuidadoVLimpieza
PanelesLaterales,
Gavetade
Almacenamiento
y Manijas de las
Puertas- Esmalte
Pintado
• Cuandoest_ frfa, lave con agua tibia jabonosa,enjuaguey seque.Nunca limpie unasuperficietibia o caliente
con un pa_o ht3medo pues esto puede da_ar la superficie y causar una quemadura a causa del vapor.
• Para manchas rebeldes, use agentes de limpieza levemente abrasives tal come pasta de bicarbonate o 'Ben Ami'*.
No use limpiadores abrasives, c_usticos o _speros tal come esponjas de lana de acero o limpiadores de hornos. Estos
productos pueden rayar o da_ar permanentemente la superficie.
Neta: Use una tealla e un pa_e seco para limpiar los derrames, especiaheente los derrames aeidicos e
azucarades. La superficie se puede descelerar e perder el brille si el derrame no se limpia inmediatameete.
Este es espeeialmente impettante ee las superficies blaneas.
Ventana y Puerta • Eviteusar cantidadesexcesivasde aguapues puedeescurrirsedebajo o detr_s del vidrio causando manchas.
del Homo - Vidrio • Lavecon agua y jab6n. Enjuaguecon agua limpiay seque. El limpiadorde vidrio puedeusarsesi se roc[a en un
pa_oprimero.
• No use materialesabrasivestalescome esponjasde restregar,limpiadoresen polvoo esponjasde lana de acero
pues pueden rayarel vidrio.
Interior del Homo • Sigalas instruccionesen las p_ginas70-71 para programar un ciclo de autolimpieza.
Parrillasdel • Limpiarcon aguacon jab6n.
Homo • Sacarlasmanchasdificiles con polvo de limpiezao unaesponjaIlenacon jab6n. Enjuaguey seque.
• Lasparrillassedescolorar_npermanentementey puedenno deslizarseconsuavidadsisondejadasenel borne durante
unciclode autolimpieza.Si estosucede,limpie la parrillay lossoportesenrelievecon unapeque_acantidadde aceite
vegetal pararestaurarla facilidadde movimiento,luego limpie el excesode aceite.
Aeero Inoxidable • NO USENINGUN PRODI.ICTODE LIMPIEZA QUECONTENGABLANQUEADORA BASEDE CLOR&
(modelosselectos) • NO USELIMPIADORES "ORANGE" M LIMPIADORESABRASIVOS.
• SIEMPRELIMPIE LAS SUPERFICIESDE ACEROA FAVORDELGRANO.
• Limpieza Diaria/Suciedad Leve - Linrpiecon uno de lossiguientes- agua con jab6n,Lmasoluci6nde vinagre
blancocon agua,limpiador parasuperficiesy vidrio 'Formula409'* o un limpiavidriossimilar - usandounaesponja
o un pa_osuave. Enjuaguey seque. Parapulir y evitar marcasde los dedos,useel producto 'StainlessSteel
Magic Spray'*(PiezaNo. 20000008)*%
• Suciedad Moderada/Intensa - Limpiecon unode lossiguientes- 'Ben Ami'*, 'SmartCleanser'*o 'Soft Scrub'*-
usandouna esponjaht_medao un pa_o suave. Enjuaguey seque. Lasmanchasdificiles puedenser quitadascon
unaesponja multi-use 'Scotch-Brite'*ht3meda;frote a favor del grano. Enjuaguey seque. Para restaurarel
lustrey sacarlasvetas,aplique'StainlessSteelMagic Spray'*.
• Descoloraci6n - Use una esponjamojadao un pa_osuave,limpie con limpiador de acero'CameoStainlessSteel
Cleaner'*.Enjuagueinmediatamentey seque.Paraeliminar lasestrfasy restaurarel lustre, usedespu_.srociador
paraacero inoxidable'StainlessSteelMagic Spray'*.
*Losnombresde los productosson marcasregistradasde sus respectivosfabricantes.
** Parahacer pedidos,Ilame al 1-877-232-6771EE.UU.o al 1-800-688-8/408Canad&
73
8t 13p553.pdf I Imported from Cleveland on 1/t 7/2007

Mantenimiento
Puerta del Horno
Nota: Lapuerta del homo en una estufa nuevapuedesentirse
"esponjosa"cuando se cierra. Estoes normal y disminuir_con el
USO,
Ventana del Horno
Para proteger la ventana de la puerta del homo:
1. No use agentesde limpiezaabrasivostalescomoesponjasde
restregarde lanade aceroo limpiadoresen polvopuesellos
puedenrayarelvidrio.
2. No golpeeel vidrio con ollas, sartenes,muebles,juguetes u otros
objetos.
3. No cierre la puerta del homo hastaque las parrillasdel homo no
est6nen su lugar.
AI golpear,rayar, hacervibrar o esforzarel vidrio puede debilitarsu
estructuracausandoun mayorriesgode rotura en unafecha
posterior.
Conexi6n Electrica
Loselectrodom_sticosque requieren energia
electrica est_n equipados con un enchufe de
tres clavijascon conexi6n a tierra, el oual
debeser enchufado directanrenteen un
tomacorrienteelectrico de tres agujeros,para
120voltios debidamenteconectado atierra.
Siempredesenchufeel electrodom6stieoantesdeefectuar
reparaciones.
Elenchufedetres clavijascon conexi6natierra ofrece protecci6n
contrapeligrosde choqueselectricos.NO CORTENI ELIMINE LA
TERCERACLAVIJADECONEXION A TERRA DEL ENCHUFE
DELCORDONELECTRICO.
SJsolamentese disponede un tomacorrientesin conexJ6natierra,
dedos agujeros u otro tipo de tomacorrienteel6ctrico,el
propietariodel electrodom6stico es personalmente
responsablede reemplazar el tomacorriente con un
tomacorrienteel_ctrico de tres agujerosdebidamente puesto
a tierra.
Luz del Homo
Tornillos Niveladores
Verifique si la estufa est_niveladacuando se instala. [_/]f'_
Si la estufa noest_ nivelada,gire los tornillos I
niveladoresubicadosen cada esquinade la estufa I[ _J
hastaque quedenivelada. ._._..,_,
_\ ANTIVUEL CO
TORNILLO NIVELADOR
Para reemplazar el foco del homo:
],
Cuando el horno est_ frb, sujete la tapa de la bombilla en
su lugar, luego deslice el ret6n de alambre fuera de la
cubierta. NOTA: La cubierta de la
CUBIERTA DE
bombilla se caer_ si no es LABOMBILLA
sujeta en su lugar cuando
est_ sacando el reten de
alambre.
2. Saque la cubierta del foco
y el foco.
3. Coloque un foco de 40
watts para
electrodomesticos.
RETEN DE ALAMBRE
4. Vuelva a colocar la cubierta de la bombilla y asegt3rela con
el reten de alambre.
5. Vuelva a enchufar la estufa. Vuelva a colocar la hora
correct&
74
8t 13p553.pdf I Imported from Cleveland on 1/t7/2007
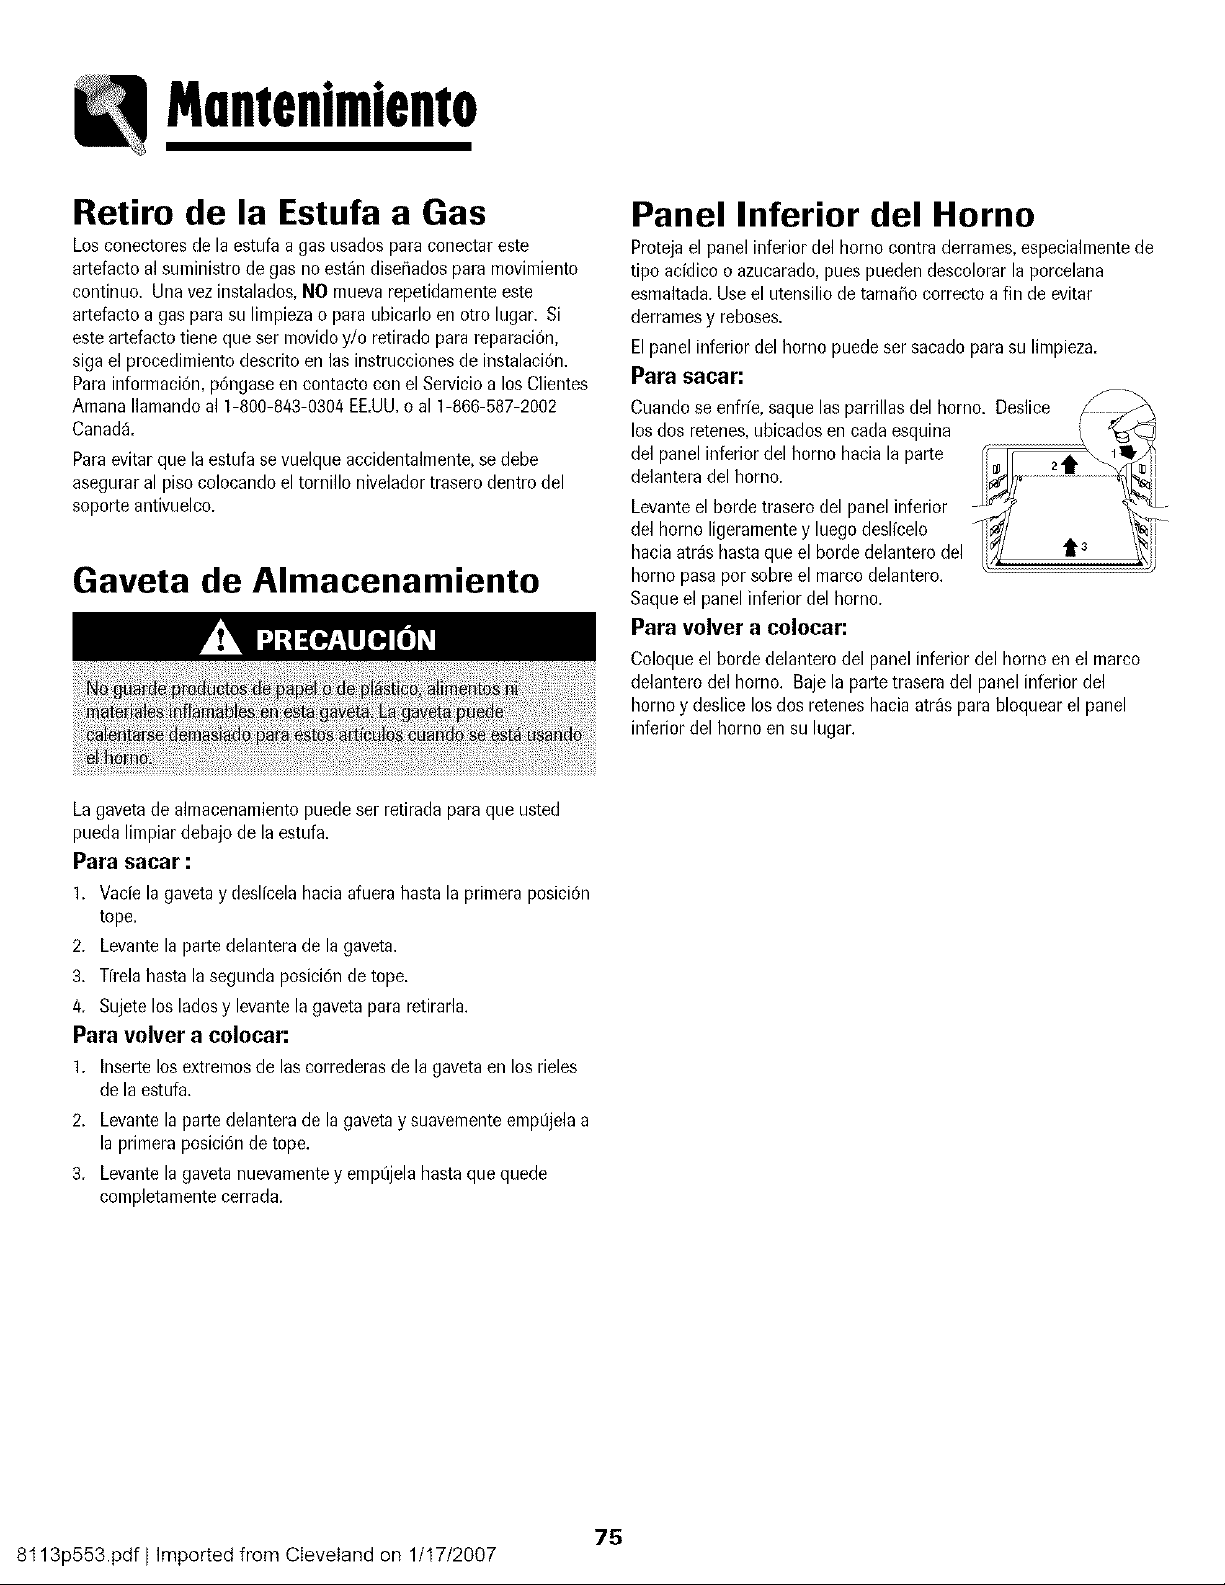
Mantenimiento
Retire de la Estufa a Gas
Los conectores de la estufa a gas usados para conectar este
artefacto al suministro de gas no est_n diae_ados para movimiento
continuo. Una vez instalados, NO mueva repetidamente este
artefacto a gas para su limpieza o para ubicarlo en otro lugar. Si
este artefacto tiene que ser movido y/o retirado para reparaci6n,
siga el procedimiento descrito en las instrucciones de instalaci6n.
Para informaci6n, p6ngase en contacto con el Servicio a los Clientes
Amana Ilamando al 1-800-843-0304 EE.UU.o al 1-866-587-2002
Canad&
Para evitar que la estufa se vuelque accidentalmente, se debe
asegurar al piso colocando el tornillo nivelador trasero dentro del
soporte antivuelco.
Gaveta de Almacenamiento
Panel Inferior del Homo
Protejael panel inferior del homo contra derrames,especialmentede
tipo acfdico o azucarado,puespueden descolorarla porcelana
esmaltada.Use el utensiliodetama_ocorrecto a fin de evitar
derramesy reboses.
Elpanel inferiordel homo puedeser sacadopara su limpieza.
Para sacar:
Cuandose enfrfe,saquelas parrillasdel horno. Deslice /.
los dos retenes,ubicados en cadaesquina z
del panelinferior del homo hacia la parte d_
delanteradel horno, l_ -_
Levanteel hordetraserodel panelinferior
del homo ligeramentey luego deslicelo - )_/
hacia atr_s hastaque el borde delanterodel /_/ "t 3
homo pasaper sobreel marco delantero.
Saqueel panelinferior del horno.
Para velvet a colocar:
Coloqueel borde delanterodel panel inferior del borneen el marco
delanterodel horno. Baje la partetrasera del panelinferior del
homo y deslice los dos reteneshacia atr_sparabloquearel panel
inferior del homo en su lugar.
Lagavetade almacenamientopuedeser retiradaparaque usted
puedalimpiar debajode la estufa.
Para saoar :
l. Vacfela gavetay deslfcelahaciaafuera hastala primeraposici6n
tope.
2. Levantela parte delanterade la gaveta.
3. Tfrelahastalasegunda posici6nde tope.
4. Sujetelos ladesy levantela gavetapara retirarla.
Para volver a colocar:
1. Insertelos extremosde lascorrederasde la gavetaen los rieles
dela estufa.
2. Levantela parte delanterade la gavetay suavementeemp_jelaa
la primeraposici6nde tope.
3. Levantela gavetanuevamentey emptijela hasta que quede
completamentecerrada.
75
8t 13p553.pdf ) Imported from Cleveland on 1/t7/2007
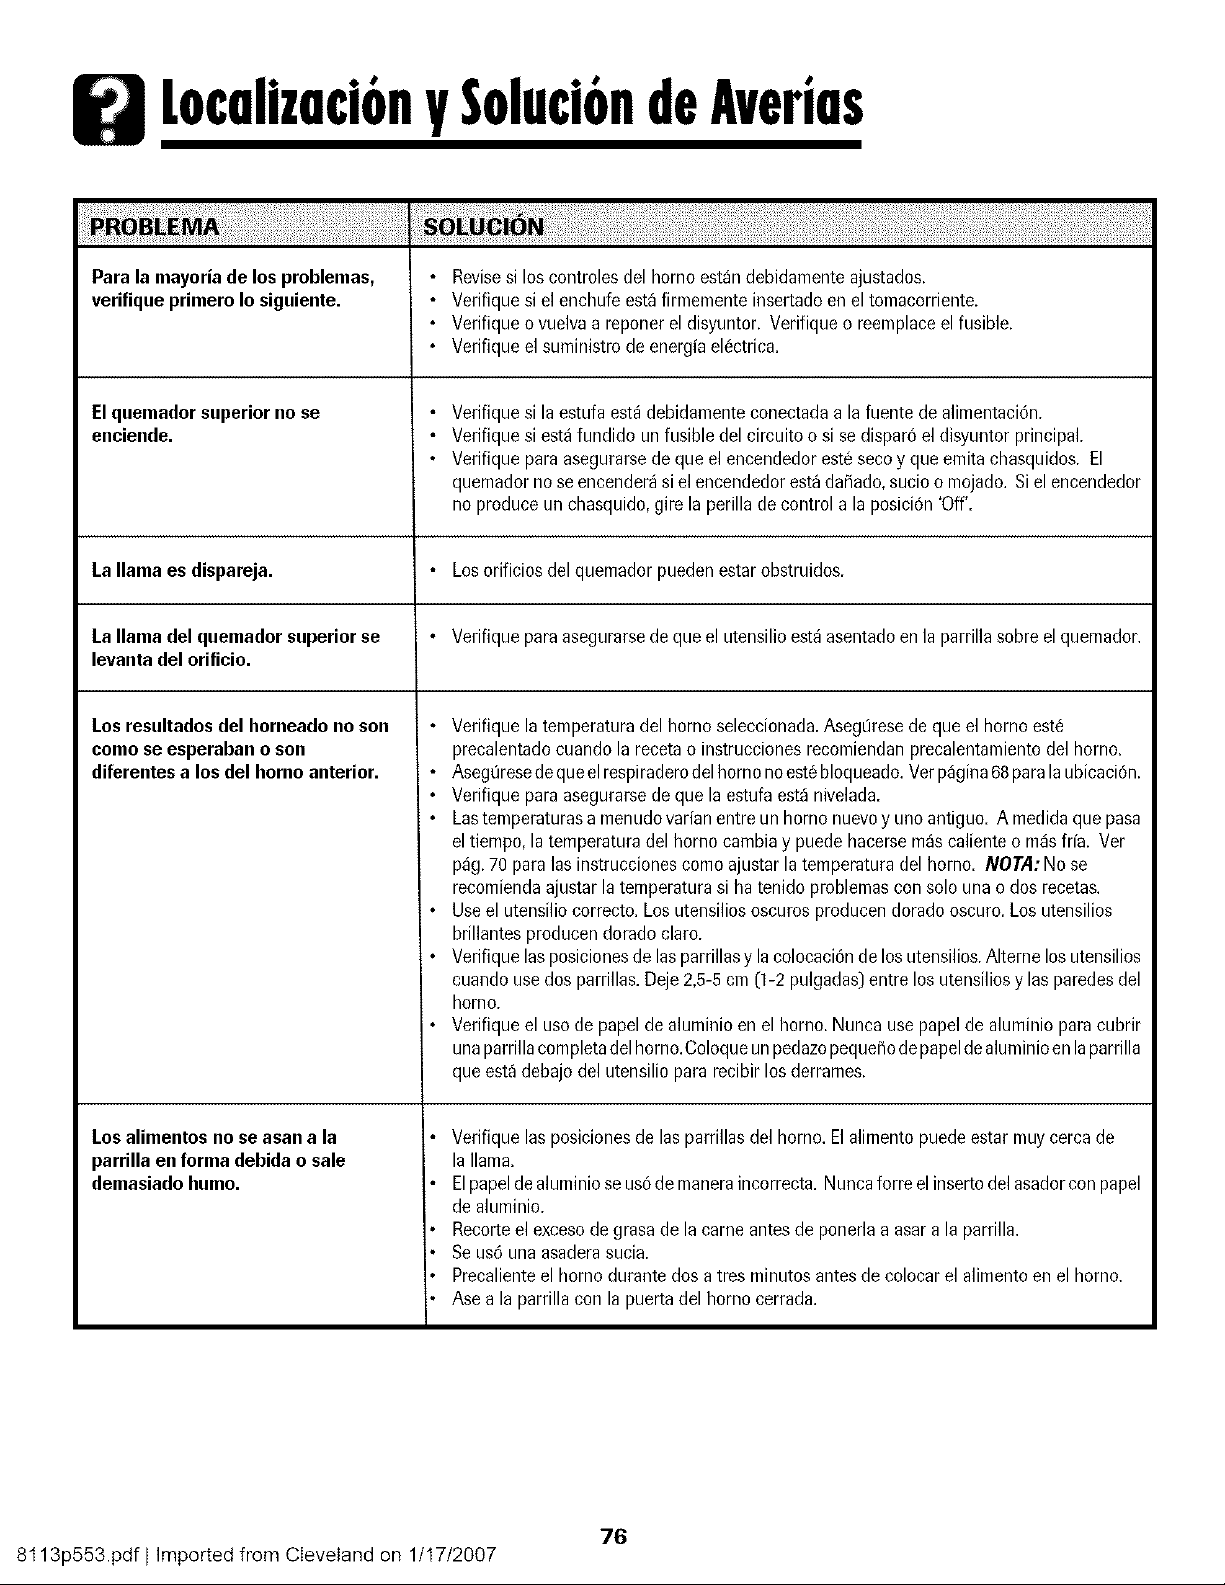
[ocalizaci6nySoluci6ndeAverias
i!iiii i i ! iiiiiiiiiiii ilJiii
Para la mayoria de losproblemas,
verifique primero Io siguiente.
Elquemador superior no se
enciende.
La llama es dispamja.
La llama del quemador superiorse
levantadel oriflcio.
Los resultadosdel horneado no son •
comose esperabano son
diferentesa los del homo anterior. •
Los alimentosno se asan a la •
parrillaen forma debidao sale
demasiadohumo. •
• Revisesi los controlesdel homo est_ndebidamenteajustados.
• Verifique si el enchufeest_firmementeinsertadoen el tomacorriente.
• Verifique ovuelva a reponer el disyuntor. Verifique o reemplaceel fusible.
• Verifique el suministrode energfael6ctrica.
Verifique si la estufaest4debidamenteconectadaa la fuente de alimentaci6n.
Verifique si est4fundido un fusible del circuito o si se dispar6el disyuntor principal.
Verifique para asegurarsede que el encendedoreste secoy que emitachasquidos. El
quemadorno seencender_si el encendedorest_da_ado,sucio o mojado. Siel encendedor
no produceun chasquido,gire la perillade control a la posici6n 'Off'.
Losorificios del quemadorpuedenestar obstruidos.
Verifique paraasegurarsede que el utensilioest_asentadoen la parrillasobre elquemador.
Verifique la temperaturadel homo seleccionada.AsegtJresede que el homo est_
precalentadocuando la recetao instruccionesrecomiendanprecalentamientodel homo.
AsegtJresedequeelrespiraderodelhomo noest6bloqueado.Verp4gina68paralaubicaci6n.
Verifique para asegurarsede que la estufa est_nivelada.
Lastemperaturasa menudovarianentre un homo nuevoy unoantiguo. A medidaque pasa
eltiempo, latemperaturadel homo cambiay puede hacersem_scalienteo m4sfrfa. Ver
p_g.70 para las instruccionescomoajustar latemperaturadel homo. NOT/I: No se
recomiendaajustar la temperaturasi ha tenido problemascon solo una o dos recetas.
Useel utensiliocorrecto.Los utensiliososcurosproducendoradooscuro.Los utensilios
brillantesproducendoradoclaro.
Verifique lasposicionesdelas parrillasy lacolocaci6nde los utensilios.Alterne losutensilios
cuandouse dos parrillas.Deje2,5-5cm (1-2 pulgadas)entre los utensiliosy las paredesdel
horno.
Verifique el usode papel de aluminioen el horno. Nuncause papelde aluminio paracubrir
unaparrillacornpletadel horno.Coloqueunpedazopeque_odepapeldealuminioenlaparrilla
queest_debajodel utensilio para recibir los derrames.
Verifique las posicionesde las parrillasdel horno. Elalimentopuedeestar muycerca de
la llama.
Elpapeldealuminioseus6demaneraincorrect& Nunca forreel insertodel asadorcon papel
dealuminio.
Recorteel excesode grasade la came antesde ponerlaa asara la parrilla.
Seus6 unaasaderasucia.
Precalienteel horno durante dos a tres minutosantesde colocarel alimentoen el horno.
Ase a la parrillacon la puerta del homo cerrada.
76
8t 13p553.pdf I Imported from Cleveland on 1/t7/2007
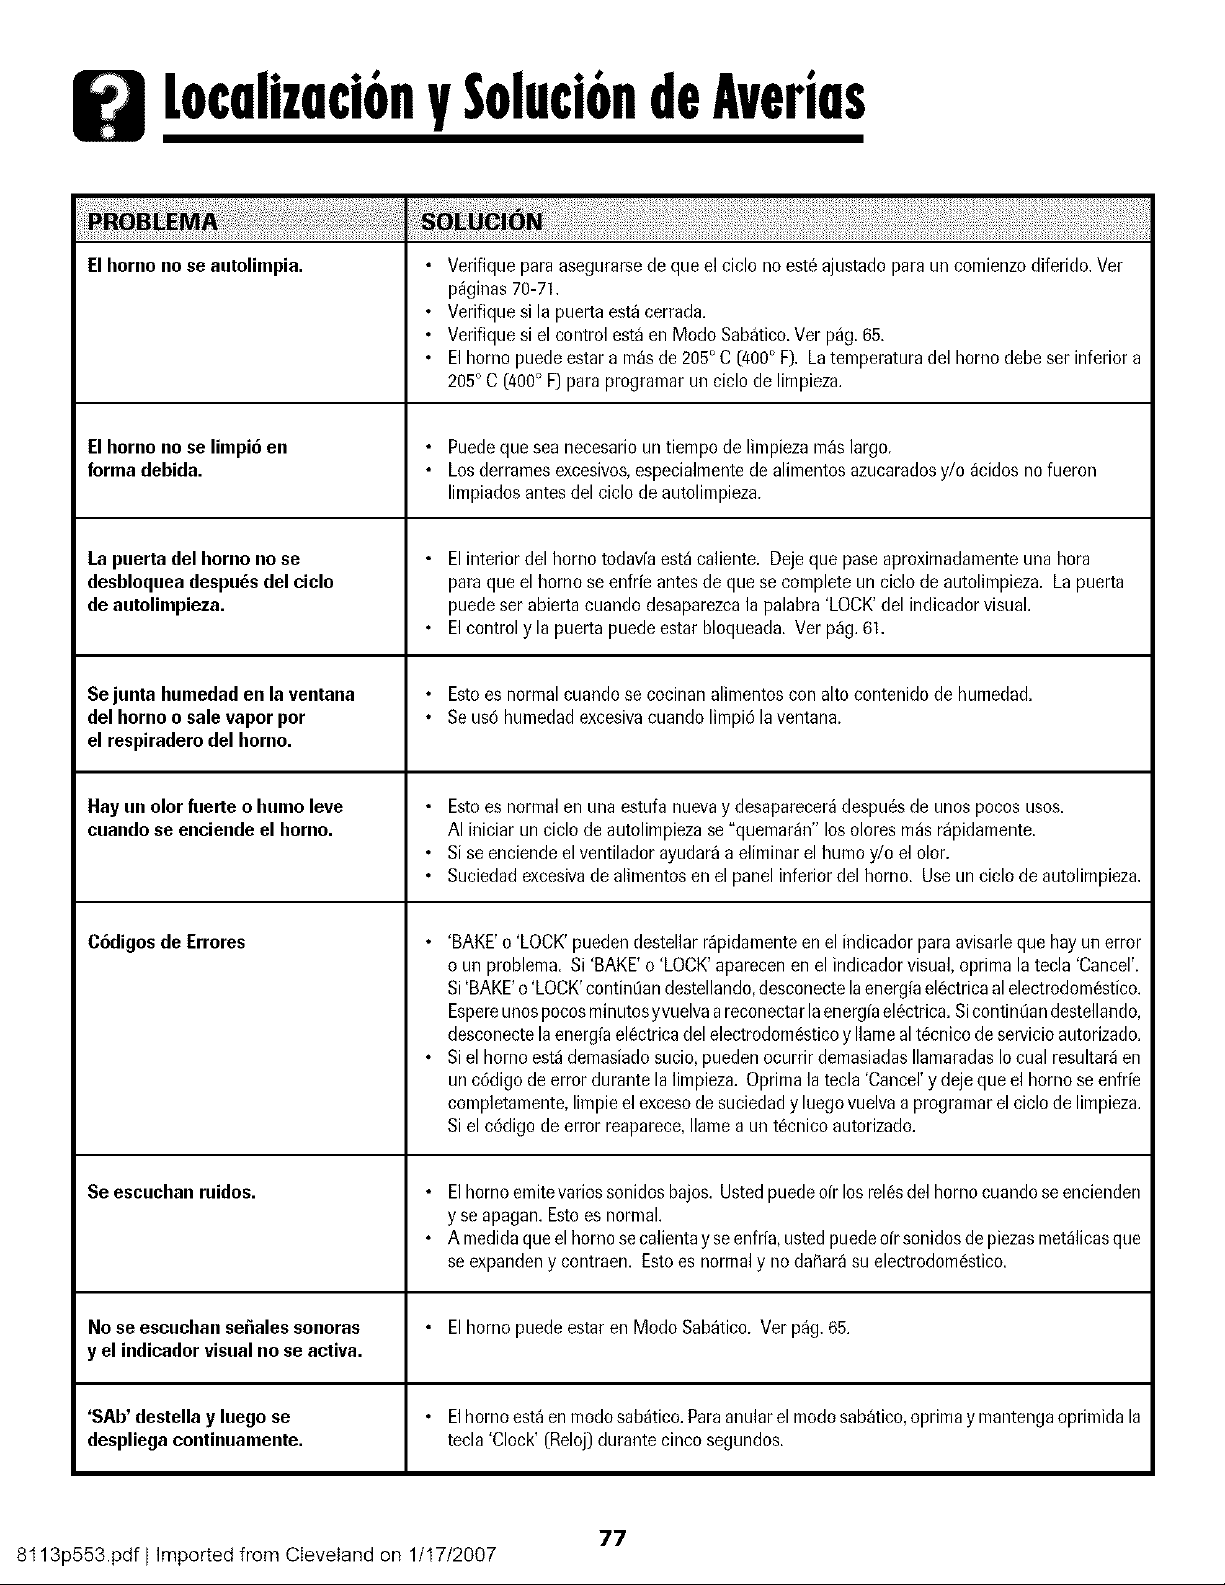
[ocalizaci6nySoluci6ndeAverias
El hornono se autolimpia. • Verifique paraasegurarsede queel ciclo no est,. ajustadoparaun comienzodiferido.Ver
p_ginas70-71.
• Verifiquesi la puerta est;_cerrada.
• Verifiquesi el control est_en Modo Sab_tico.Ver p_g. 65.
• El horoo puedeestara m;_sde205° C (400° F). Latemperaturadel homo debeser inferiora
205° C (400° F) para programarun ciclo de limpieza.
El horno no se limpi6 en • Puedeque sea necesariountiempo de limpiezam_slargo.
forma debida. • Losderramesexcesivos,especialmentede alimentosazucaradosy/o _cidosno fueron
limpiadosantesdel ciclode autolimpieza.
La puerta del horno no se • El interior del homo todavfaest_ caliente. Deje que paseapreximadamenteuna hora
desbloqueadespu_sdel ciclo paraqueel homo se enfrie antesdeque se complete un ciclo de autolimpieza. Lapuerta
de aatolimpieza, puedeser abierta cuandodesaparezcala palabra'LOCK'del indicadorvisual.
• Elcontrol y la puerta puedeestar bloqueada. Verpdg. 61.
Se junta humedaden la ventana • Estoes normalcuando se cocinan alimentoscon alto contenidode humedad.
del hornoo sale vapor por • Seus6 humedadexcesivacuando limpi6 la ventana.
el respiraderodel horno.
Hay un olorfuerte o humo leve • Estoes normalen una estufa nuevay desaparecer_despu_sde unos pocos usos.
cuando se enciendeel homo. AI iniciar un ciclo de autolimpiezase "quemar_n"losolores m_sr_pidamente.
• Si se enciendeel ventilador ayudar_a eliminarel humo y/o el olor.
• Suciedadexcesivade alimentosen el panelinferiordel homo. Use un ciclo deautolimpieza.
C6digos de Errores • 'BAKE'o 'LOCK'puedendestellarr_pidamenteen el indicadorparaavisarleque hay unerror
o un problem& Si 'BAKE'o 'LOCK'aparecenen el indicadorvisual,oprima latecla 'Cancel'.
Si'BAKE'e 'LOCK'contin[ian destellando,desconectelaenergfael_ctricaal electredom_.stico.
Espereunospocosminutosyvuelvaareconectarlaenergfael_ctrica.Sicontint3andestellande,
descenectelaenergfael_ctricadelelectrodom6sticoy Ilameal t_cnico deservicioautorizado.
• Siel horno est_demasiadosucio, puedenocurrir demasiadasIlamaradasIocual resultar_en
uncSdigode errordurante lalimpieza. Oprima la tecla 'Cancel'y dejequeel homose enfrfe
cempletamente,limpieel excesodesuciedady luegovuelvaaprogramarel ciclo de limpieza.
Si el c6digo deerror reaparece,Ilame a un t6cnico autorizado.
Seescuchanraidos. • Elhornoemitevariossonidosbajos. Ustedpuedeofrlosrel6sdelhornocuandoseencienden
y se apagan.Estees normal.
• A medidaque elhoroosecalientay seenfrb, ustedpuedeofr sonidosdepiezasmet_licasque
se expandeny contraen. Estoes normaly no daSar_su electrodom6stico.
Nose escuchan se_ales sonoras • El homo puede estar en Modo Sab_tico. Ver p_g. 65.
y el indicador visualno se activa.
'SAb' destella y laego se • Elborne est_en medosab_tico.Paraanular el modosab_tico,oprimay mantengaoprimida la
despliega continuamente, teela 'Clock' (Reloj)durante cineo segundos.
77
8t 13p553.pdf I Imported from Cleveland on 1/t7/2007

notas
78
8t 13p553.pdf I Imported from Cleveland on 1/t7/2007
Guruntiuy$ervicio
LA 0NICA Y EXCLUSIVASOLUCIONPARAEL
CLIENTEBAJOESTAGARANTIALIMITADAES
LA REPARACIONDELPRODUCTOSEGUNSE
INDICAAQUJ.LASGARANTJASIMPLiCITAS,
INCLUYENDOLASGARANTJASDE
COMERCIALIZACIONO DEAPTITUDPARAUN
PROPOSITOENPARTICULARESTA,N
LIMITADASA UNANO OAL PERiODODE
TEMPOMINIMO PERMITIDOPORLA LEY.
MAYTAGCORPORATIONNO SERA,
RESPONSABLEDEDANOSINCIDENTALESO
CONSECUENTES.ALGUNOSESTADOSY
PROVINCIASNOPERMITENLA EXCLUSIONO
LIMITACIONDE DANOSINCIDENTALESO
CONSECUENTESO LA LIMITACIONDELA
DURACIONDELASGARANTiASIMPLJCITASDE
COMERCIALIZACIONO APTITUD,PORLOQUE
ESTASEXCLUSIONESO LIMITACIONES
PUEDENNO APLICARSEENSUCASO.ESTA
GARANTiALEOTORGADERECHOSLEGALES
ESPECIFICOS.USTEDTAMBIt_NPUEDETENER
OTROSDERECHOSQUEVARIANDEUN
ESTADOA OTROO DEUNA PROVINCIAA
OTRA.
Lo que no cubren estas garantias
I. Situacionesy da_os resultantesdecualquiera de lassiguientessituaciones:
a. InstalaciCn,entregao mantenimientoinapropiados.
b. CualquierreparaciCn,modificaci6n,alteraci6no ajuste no autorizadospor el
fabricante o taller de servicioautorizado.
c. Mal uso,abuso,accidentes,uso no razenableo hechosfortuitos.
d. Corriente,voltaje,suministro elCctriceesuministrode gas incorrectos.
e.Ajuste inadecuadode cualquiercontrol.
2. Lasgarant[asquedan nulas si los nt3merosde serieoriginales hansido retirados,
alteradoso no se pueden determinarf_cilmente.
3. Bombillas,filtros de aguay filtros de aire.
4. Losproductescompradosparause cemercialo industrial.
5. El costodel servicioo Ilamadade serviciopara:
a. Corregirerroresde instalacidn.Paralos productosque requieranventilacidn,se
debenusarconductosde metalrfgido.
b. Instruiral usuarioen el uso adecuadodel producto.
c.Transportedel electrodomCsticeal establecimientode servicioy de regreso.
6. Cualquierperdidade alimentosdebido a fallasdel refrigeradoro congelador,
7, Costos de viaje y transporte de servicio en 4teas remoras.
8. Estagarantfano se aplica fuera de los EstadosUnidesy Canad& P6ngaseen contacto
con su distribuidor paradeterminarsi se aplicacualquier otra garantfa.
9. Losda_os consecuenteso incidentalessufridospor cualquier personacomo resultado
del incumplimientode estagarantia.Enalgunosestadosno se permitela exclusiCno
limitaciCnde dacca consecuenteso incidentales,por Io tanto la limitaci6no exclusi6n
anterior puede noaplicarseen su caso.
Si necesita servicio
Primerorevisela secci6nde Iocalizaci6ny soluci6n de averfasen su guia de usoy cuidado
o Ilameal distribuiderdonde adquiri6 el electrodemC.stico.TambienpuedeIlamara Maytag
Services,LLC,AtenciCnal cliente, al 1-800-688-9900en EEUU.y al 1-800-688-2002en
Canadapara ubicar a un agentede serviciocalificado.
• AsegLiresede conservarel comprobantede compraparaverificarel estado de la
garantia.Consultela secciCnsobre la GARANTiApara mayorinformaci6nsobre las
responsabilidadesdel propietariopara obtenerservicio bajo lagarantfa.
• Si el distribuidor o la compa_[ade serviciono puedenresolverel problem&escribaa
Maytag Services,LLC, Attn: CAIR Center,P.O.Box 2370,Cleveland,TN37320-2370o
Ilameal 1-800-688-9900 en EE.UU.y al 1-800-688-2002 en Canad&
• Laagu[asdel propietario,manualesde servicioe informaci6nsobre las piezaspueden
solicitarsea Maytag Services,LLC,Atenci6n al cliente.
Notas: CuandoIlame o escribaacercade un problemade servicio,por favor
incluyala siguienteinformaci6n:
a. Su nombre,direcci6ny nt3merode teldono;
b. Nt3merode modeloy nt3merode serie;
c. Nombrey direcci6nde su distribuidoro tCcnicode servicio;
d. Una descripci6nclara del problemaque est_experimentando;
e. Comprobantedecompra (recibode compra).
Form No A/01/06 Part No 8113P553-60
8t 13p553.pdf I Imported from Cleveland on 1/t7/2007
@2006 Maytag Appliances Sales Co
Litho U.SA