Loading ...
Loading ...
Loading ...
MULTIMEDIA 145
Radio Operation
Pushing the top of the switch will Seek Up for the
next available station and pushing the bottom of
the switch will Seek Down for the next available
station.
The button located in the center of the left-hand
control will tune to the next preset station that you
have programmed in the radio presets.
Media Mode
Pushing the top of the switch skips to the next
track on the selected media (AUX/USB/
Bluetooth®). Pushing the switch up twice will go
forward two tracks. Pushing the bottom switch
goes to the beginning of the current track, or the
beginning of the previous track if it is within eight
seconds after the current track begins to play.
Double pressing the bottom button switch will skip
to the previous track if it is after eight seconds into
the current track.
RADIO MODE
Radio Controls
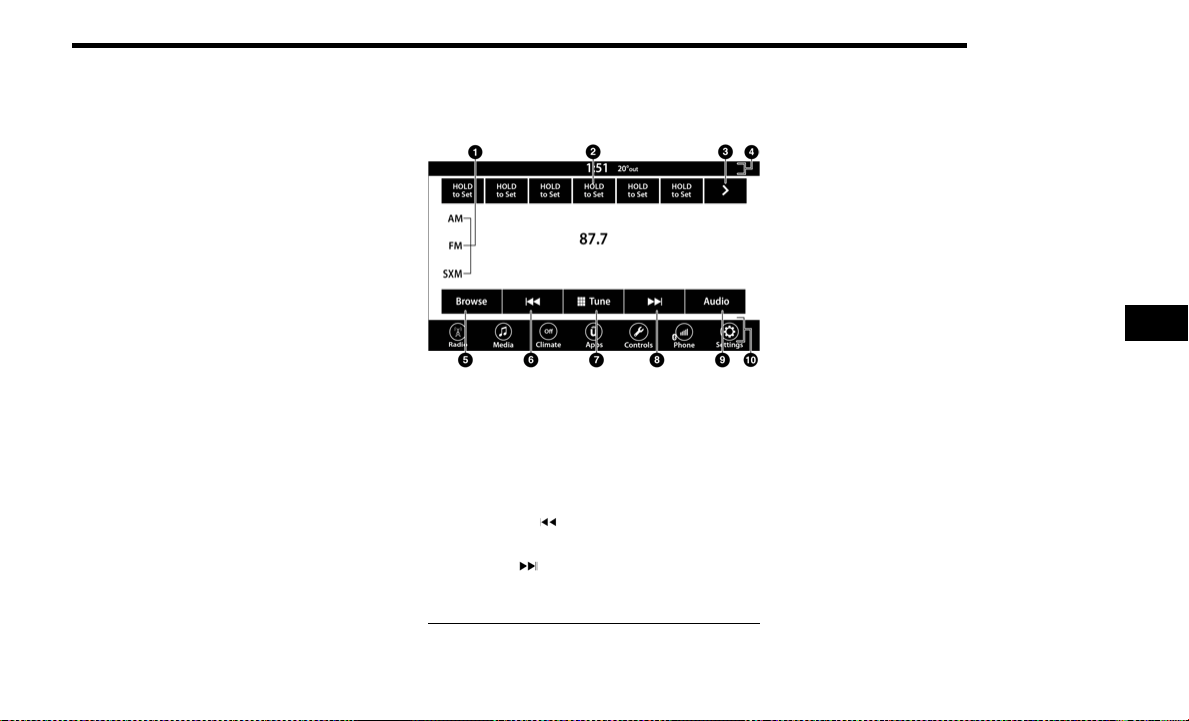
Uconnect 4 With 7-inch Display
The radio is equipped with the following modes:
AM
FM
SiriusXM® Satellite Radio (if equipped)
Press the Radio button on the touchscreen to enter
the Radio Mode. The different tuner modes, AM,
FM, and SXM, can then be selected by pressing the
corresponding button in Radio Mode.
Volume & On/Off Control
Push the Volume & On/Off control knob to turn on
and off the Uconnect system.
The electronic volume control turns continuously
(360 degrees) in either direction, without stopping.
Turning the Volume & On/Off control knob
clockwise increases the volume, and
counterclockwise decreases it.
When the audio system is turned on, the sound will
be set at the same volume level as last played.
Mute Button
Push the Mute button to mute or unmute the
system.
Tune/Scroll Control
Turn the rotary Tune/Scroll control knob clockwise
to increase or counterclockwise to decrease the
radio station frequency. Push the Enter/Browse
button to choose a selection.
1 — Radio Bands
2 — Preset Radio Stations
3 — View Next Preset Radio Stations
4 — Status Bar
5 — Browse Button
6 — Seek Down
7 — Tune Button
8 — Seek Up
9 — Audio Settings
10 — Bottom Menu Bar
5
22_LA_OM_EN_USC_t.book Page 145
Loading ...
Loading ...
Loading ...