Loading ...
Loading ...
Loading ...
• • Secure the ropeto thetop center ofthe hopper bag
frame as shown in figure 21.
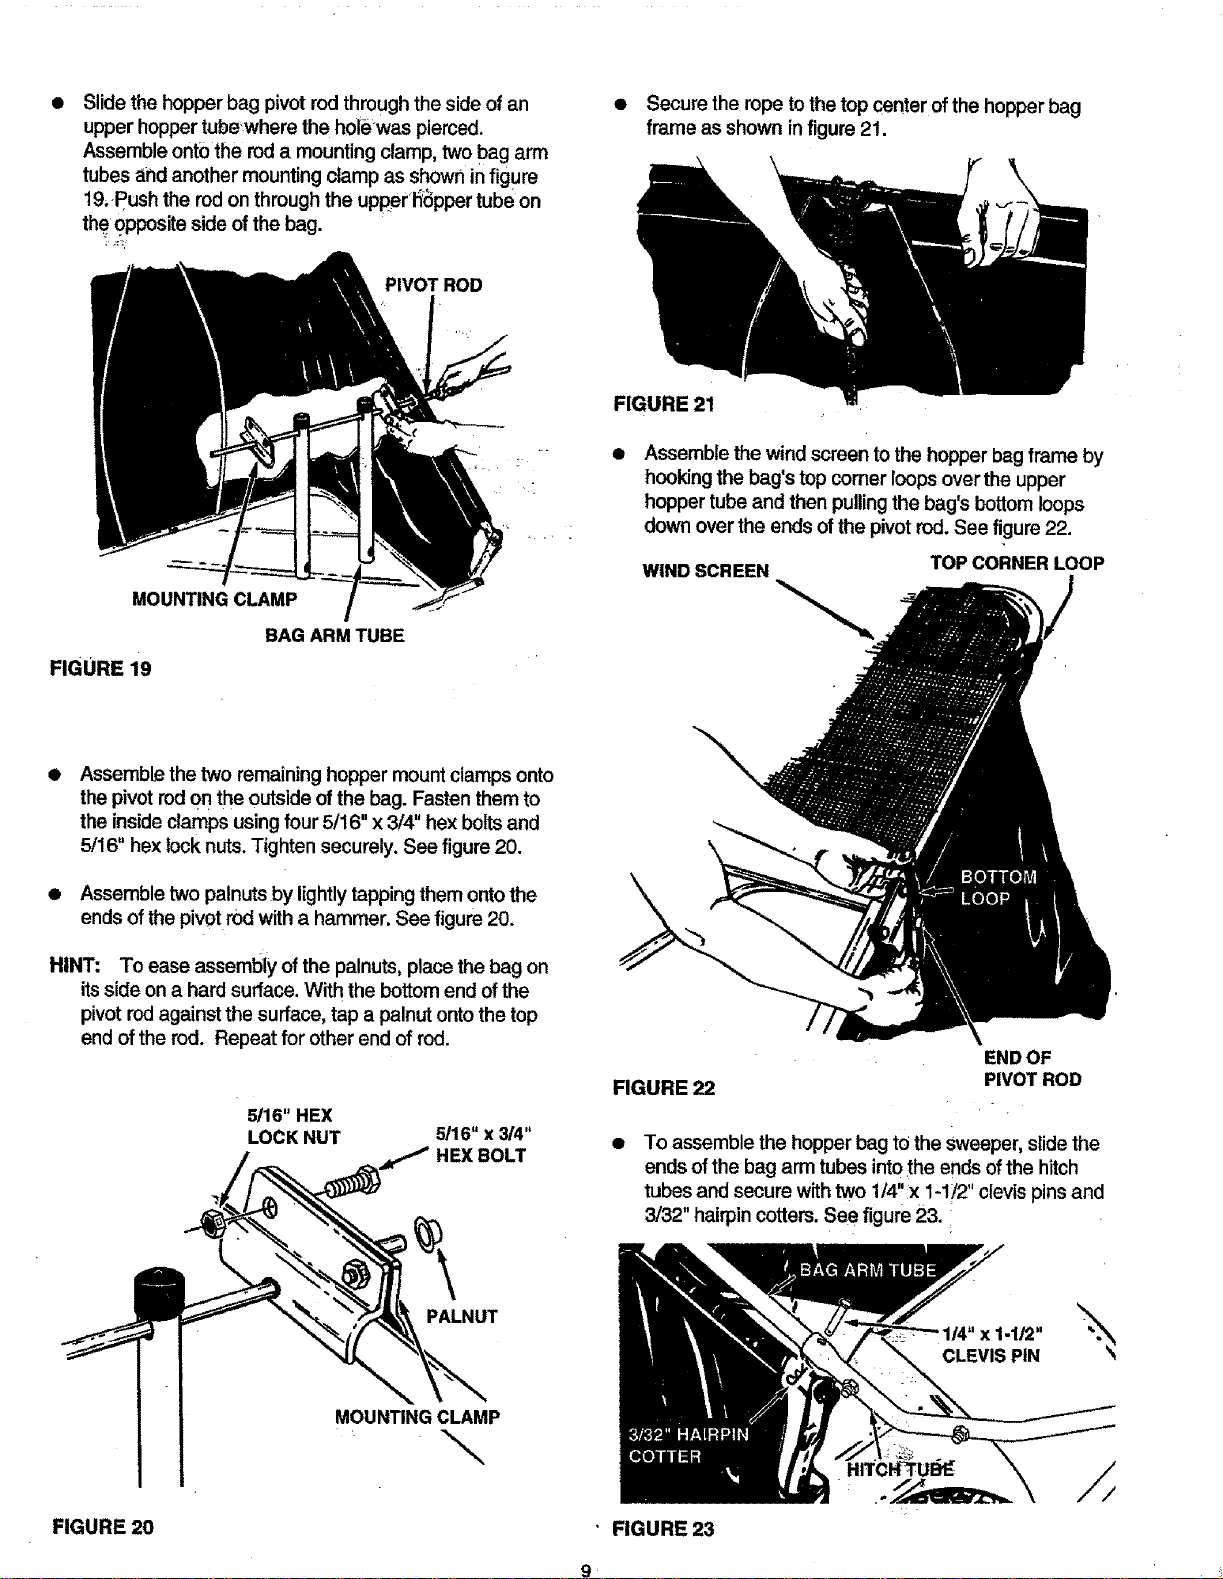
Slide the hopper bag pivot rodthrough the side of an
upper hopper tubewhere the holewas pierced.
Assemble onto the rod a mounting clamp, two bag arm
tubes and another mounting clamp as shown in figure
19,-push the rod on through the upppr I_pper tube on
the opposite side of the bag.
PIVOT ROD
MOUNTINGCLAMP
BAG ARM TUBE
FIGURE 19
FIGURE 21
Assemble the wind screen to the hopper bag frame by
hookingthe bag's top comer loops over the upper
hopper tube and then pulling the bag's bottom loops
down over the ends of the pivot rod. See figure 22.
WIND SCREEN
TOP CORNERLOOP
Assemblethe two remaining hopper mountctamps onto
the pivotrodon the outside of the bag. Fasten them to
the insideclamps usingfour 5/16" x 3/4" hex bolts and
5/16" hexlock nuts.Tighten securely. See figure 20.
• Assemble two palnuts by lightlytapping them ontothe
ends of the pivot rod witha hammer. See figure 20.
HINT: To ease assembly of the palnuts, place the bag on
itsside on a hard surface.With the bottom end ofthe
pivotrodagainstthe surface, tap a palnut ontothe top
end ofthe rod. Repeat for other end of rod.
5116" HEX
LOCK NUT 5116"x 3/4"
FIGURE 22
ENDOF
PIVOTROD
To assemble the hopperbag to the Sweeper,slide the
ends of the bag arm tubes intothe ends of the hitch
tubes and secure with two 1/4" x 1-1/2" clevis pins and
3/32" hairpin cotters. See figure 23.
FIGURE 20
PALNUT
MOUNTING CLAMP
\
' FIGURE 23
CLEVIS PIN
/
9 ¸
Loading ...
Loading ...
Loading ...