Loading ...
Loading ...
Loading ...
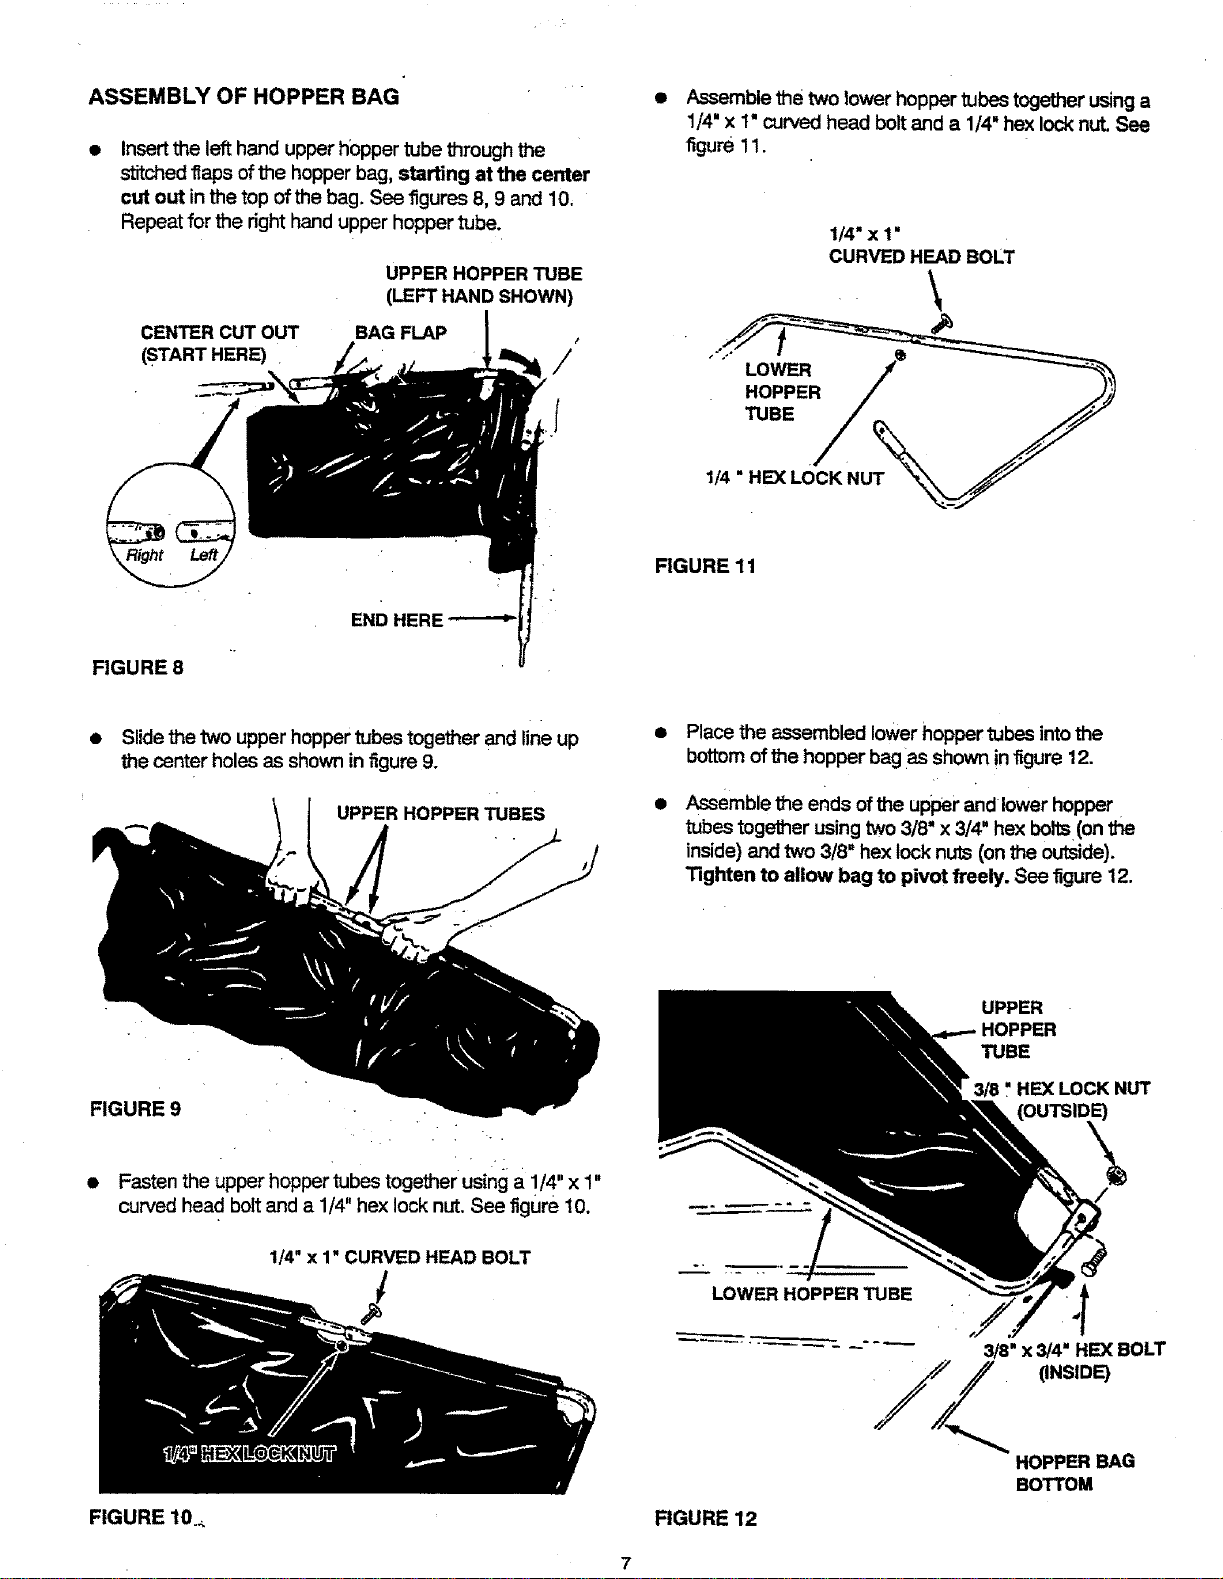
ASSEMBLY OF HOPPER BAG
Insertthe left hand upper hopper tube throughthe
stitchedflaps ofthe hopper bag, starting at the center
cut out inthe top ofthe bag. See figures 8, 9 and 10,
Repeat for the righthand upper hoppertube.
CENTER CUT OUT
(START HERE)
UPPER HOPPER TUBE
(LEFTHAND SHOWN)
BAG FLAP
/
/
• Assemble the two lower hopper tubes together usinga
1/4" x 1" curvedhead bolt and a 1/4" hex lock nut. See
figure 11.
1/4" X 1"
CURVED HEAD BOLT
. \
FIGURE 11
FIGURE 8
END HERE
Slidethe two upper hopper tubes together and line up
the center holes as shownin figure 9.
UPPER HOPPERTUBES
FIGURE 9
• Fasten the upper hoppertubes together using a 1/4"x 1"
curved head boltand a 1/4" hex lock nut. See figure 10,
1/4" x 1" CURVED HEAD BOLT
Place the assembled lower hopper tubes into the
bottomof the hopper bagas shown in figure 12.
Assemble the ends ofthe upper and lower hopper
tubes together using two 3/8" x 3/4" hex boils (on _e
inside) and two 3/8" hex lock nuts (on the outside).
Tighten to allow bag to pivot freely. See figure 12.
UPPER
HOPPER
TUBE
=3/8"HEXLOCK NUT
LOWER HOPPERTUBE
3/8" x 3/4" HID( BOLT
(INSIDE)
FIGURE 10._ FIGURE 12
HOPPER BAG
BOTTOM
Loading ...
Loading ...
Loading ...