Loading ...
Loading ...
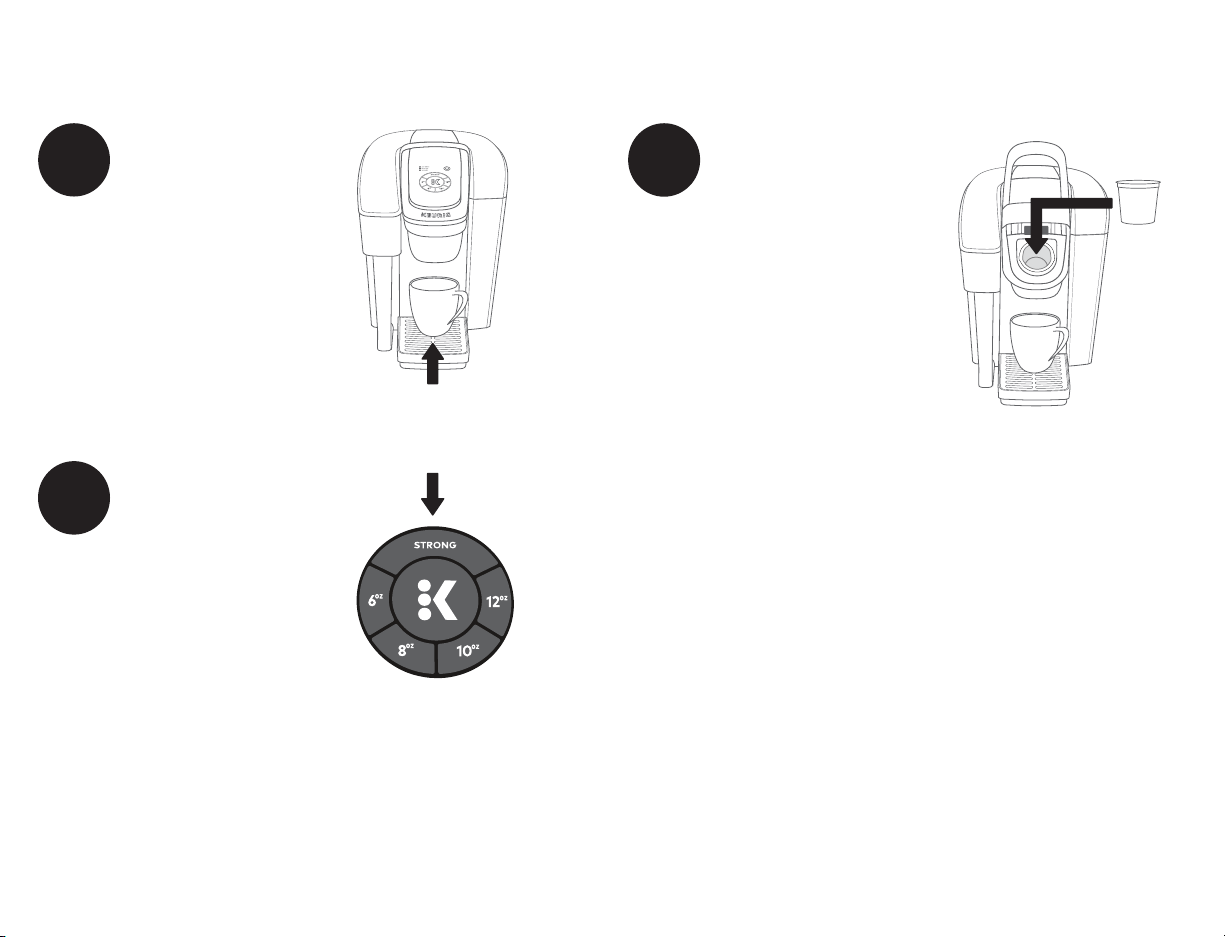
Lift the handle and place
a K-Cup
®
pod in the K-Cup
®
pod holder. Lower the handle
completely to close the lid. Do
not remove the foil lid on the
K-Cup
®
pod.
6
Lift & Insert
Brew Your First Cup
Place a mug on the drip tray
plate. If using a travel mug,
remove the drip tray and
place the mug on the drip
tray base.
NOTE: Between brew cycles, the brewer may take
about a minute to reheat.
5
Place Mug
High Altitude Brewing:
When brewing in higher altitudes
(5,000 feet), please follow these
brewing instructions and enable
the High Altitude Brewing Mode
on your brewer.
High Altitude Brewing Instructions
1. Power the brewer off while it is plugged in.
2. Press and hold the STRONG and 8oz buttons for 3 seconds – both
lights will blink 3 times to confirm that the High Altitude Brewing Mode
has been enabled.
3. While holding the brewer bail up, push down slowly on the K-Cup® pod
in the pod holder until the bottom of the K-Cup® pod is punctured by
the exit needle.
Disable High Altitude Brewing:
1. Power the brewer off while it is plugged in.
2. Press and hold the STRONG and 8oz buttons until the lights are
no longer illuminated.
Select your brew size — for bolder
coffee, press the STRONG button
first. After selecting your brew
size the BREW button will flash.
Press the brew button to begin
brewing your beverage. The brew
size, brew button, and STRONG
button, if selected, will remain illuminated while brewing
— about 1 minute. The brewer will be ready to brew
another cup in about a minute.
CAUTION: While brewing, there is extremely hot water in the K-Cup
®
pod holder. To avoid injury,
do not lift the handle during the brewing process.
7
Brew & Enjoy!
Loading ...
Loading ...
Loading ...