Loading ...
2 31-2000879 Rev. 0
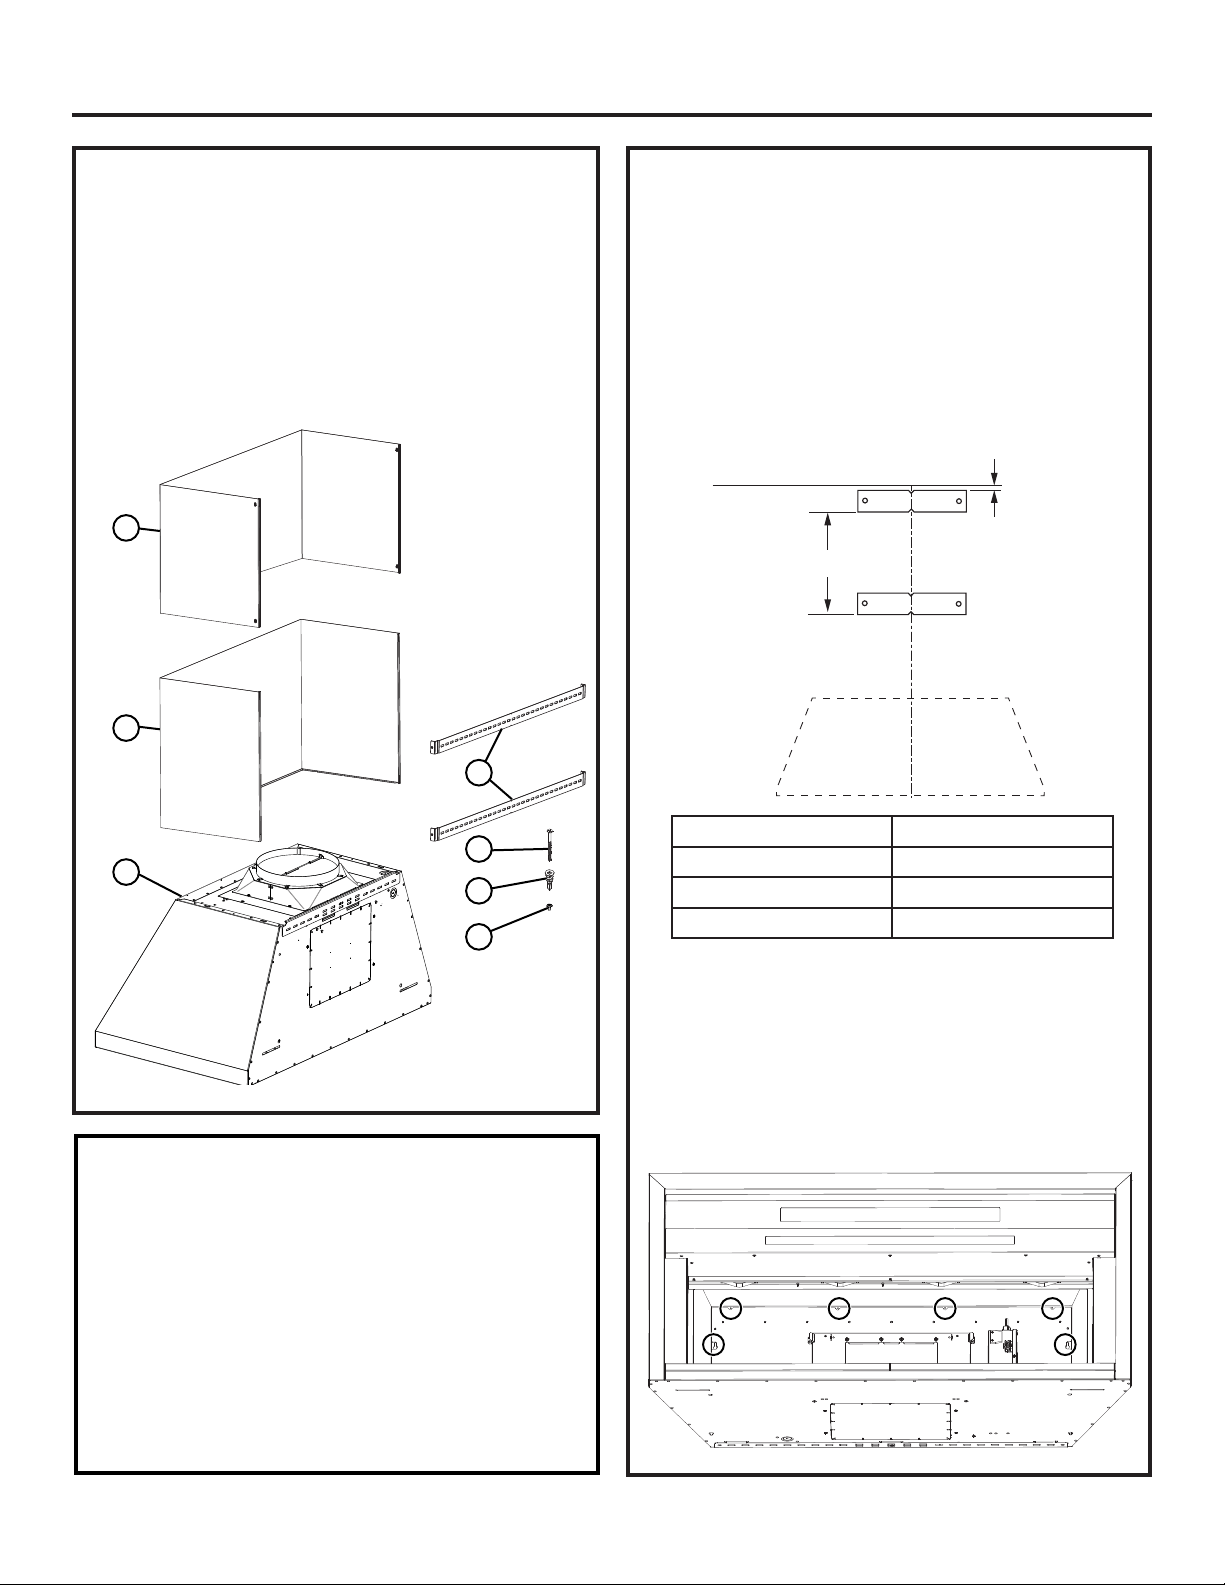
HOOD COMPONENTS
A-RangeHood
B - Screws 3.1x9.5P013 (10)
C-LowerDuctCover(1)
D-UpperDuctCover(1)
E-WallAnchors(4)
F - Wall Bracket (2)
G-Screws4.2x44PZ1(4)
INSTALLATION OF DUCT COVER KIT
(CONT.)
3. Measure straight down a distance (X) from the
bottom of the first wall bracket and make a
horizontalmark.Placethesecondwallbracket(F)
above this mark and align the center of the bracket
with the centerline of the hood. Mark bracket holes.
Remove the bracket and drill 2 clearance holes
forwallanchorswith1/16”drillbit.Installthewall
anchors(E)andsecuresecondwallbrackettothe
wallusingscrews(G).
4.Securetheupperductcovertothewallbracket
using4screws(B).Refertotheinstallationheight
tables to verify available ceiling heights.
5.Placethelowerductcoverontopofthehood.
Slightly spread the sides of the cover apart and
snap to the upper duct cover. Secure the lower
duct cover to the hood body from inside the hood
using6screws(B)atlocationsshownbelow.
Installation
C
L
1/16"
Ceiling
x
A
C
D
F
G
E
B
INSTALLATION OF DUCT COVER KIT
1. Finish hood installation as per the hood install
instructions.
2.Placewallbracket(F)againstthebackwallsothat
thetopedgeis1/16”fromtheceilingandlevel.
Align the center of the bracket with the center
line of the hood and mark bracket holes. Usethe
outermost bracket holes to secure to wall. Remove
the bracket and drill 2 clearance holes for wall
anchorswith1/16”drillbit.Installthewallanchors
(E)andsecurethebrackettothewallusingscrews
(G).
Duct Cover Kit “X”
8’ Kit 3”
10’ Kit 15-1/2”
12”Kit 25-1/2”
Loading ...
Loading ...
Loading ...