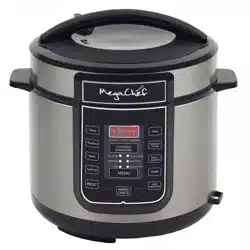

6-Quart Digital Pressure Cooker | Model MCPR100A | 1
The PRESSURE COOKER
by
6-QUART DIGITAL PRESSURE COOKER
MCPR100A
OWNER’S MANUAL
SAVE THESE INSTRUCTIONS. FOR HOUSEHOLD USE ONLY.
2 | 6-Quart Digital Pressure Cooker | Model MCPR100A
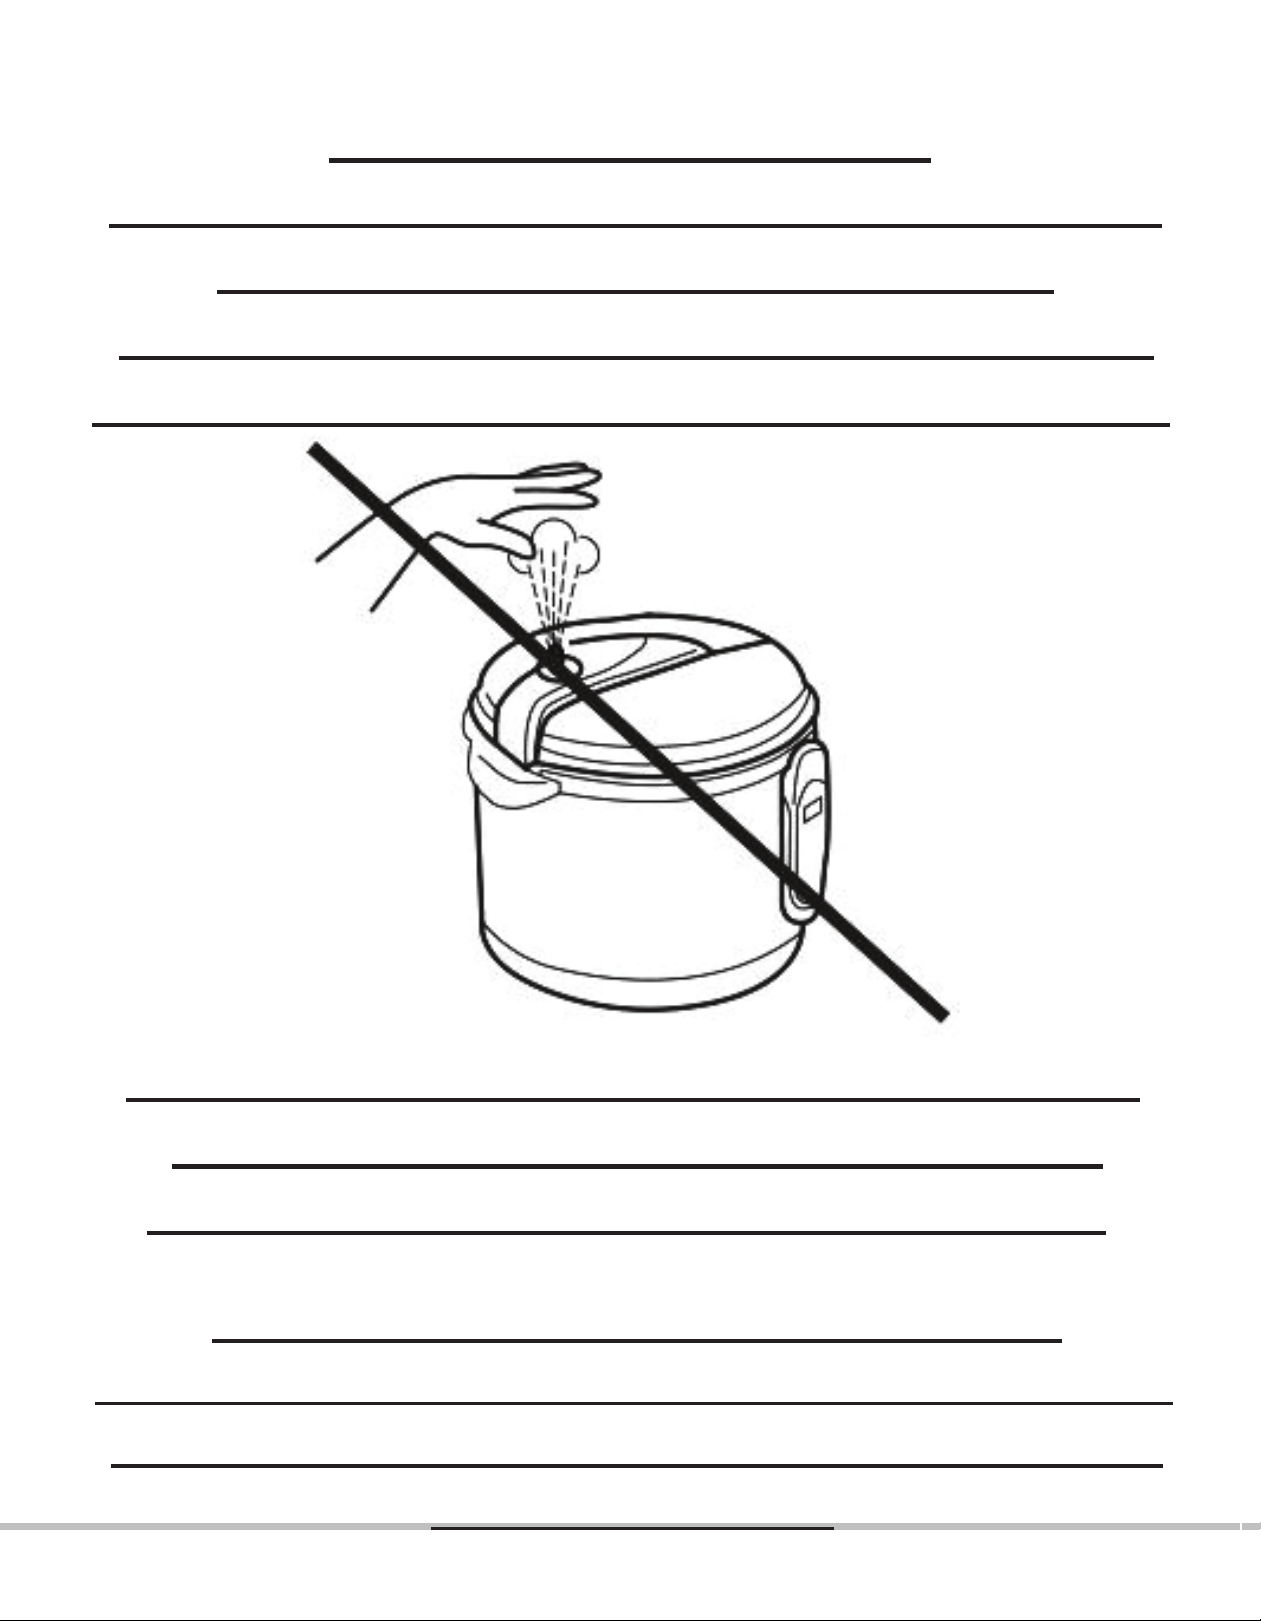
CAUTION HOT STEAM
RISK OF SCALDING: USE TONGS OR LONG UTENSIL
TO TURN THE PRESSURE LIMITING VALVE.
KEEP HANDS AND FACE AWAY FROM PRESSURE
LIMITING VALVE WHILE IN THE EXHAUST POSITION.
FAILURE TO COMPLY MAY CAUSE SERIOUS INJURY.
DO NOT RELEASE PRESSURE UNDER HANGING
CABINETS WHICH CAN BE DAMAGED BY STEAM.
Always use an oven mitt to reduce risk of injury.
To avoid liquid splatter, do not manually release the pressure
from the valve for foods with a high volume of liquid (stews,
soups, porridges, etc.).

6-Quart Digital Pressure Cooker | Model MCPR100A | 3
DO NOT ALLOW
CHILDREN TO
OPERATE UNDER ANY
CIRCUMSTANCES
CLOSE SUPERVISION IS
MANDATORY WHEN THE PRESSURE
COOKER IS USED NEAR CHILDREN.

4 | 6-Quart Digital Pressure Cooker | Model MCPR100A
Thank you for purchasing our product.
Make sure you have read the manual before using
this product.
Please use the appliance in accordance with the
instructions.
Please save these instructions. This item is intended
for household use only.
IMPORTANT:
Do not use this pressure cooker until you have read
this entire manual thoroughly!

6-Quart Digital Pressure Cooker | Model MCPR100A | 5
CONTENTS
• IMPORTANT SAFEGUARDS 6
• SAFETY WARNING/ADDITIONAL SAFETY TIPS 8
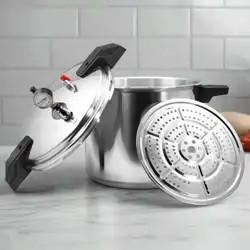
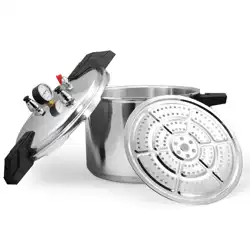
• ABOUT YOUR PRESSURE COOKER 9
• PARTS IDENTIFICATION 10
• BEFORE FIRST USE 11
• PREPARING YOUR PRESSURE COOKER 13
• OPERATING INSTRUCTIONS 14
• CLEANING INSTRUCTIONS 21
• HELPFUL TIPS 22

6 | 6-Quart Digital Pressure Cooker | Model MCPR100A
IMPORTANT SAFEGUARDS
When using pressure cooker, basic safety precautions should always be followed:
1. Read all instructions before operation.
2. DO NOT touch hot surfaces. Use handles and a potholder.
3. This appliance should not be used near children, or individuals with certain disabilities.
4. DO NOT ALLOW CHILDREN TO OPERATE UNDER ANY CIRCUMSTANCE.
5. NEVER ATTEMPT TO OPEN LID WHILE THE UNIT IS OPERATING. Do not open the pressure cooker
until the unit has cooled and all internal pressure has been released. If the lid is difcult to
rotate, this indicates that the cooker is still pressurized. Do not force it to open. Any pressure in
the cooker can be hazardous.
6. DO NOT place the pressure cooker on or near a hot gas, electric burner, stove-top or in a
heated oven.
7. Extreme caution must be used when moving a pressure cooker containing hot liquids.
8. DO NOT use pressure cooker for other than intended use.
9. This appliance cooks under pressure. IMPROPER USE MAY RESULT IN SCALDING INJURY.
10. Ensure that the unit is properly closed before operating (See “BEFORE FIRST USE” section, page ).
11. To protect against electrical shock, do not immerse cord, plugs, or outer vessel in water or other
liquids.
12. Do not ll the unit over 4/5 full. When cooking foods that expand during cooking such as rice,
legumes, beans or dried vegetables, do not exceed the 3/5 full mark. Overlling may result in
clogging of the pressure limiting valve and excess pressure.
13. Please note that certain foods (such as applesauce, cranberries, pearl barley, oatmeal or other
cereals, split peas, noodles, macaroni, rhubarb, or spaghetti) can foam, froth, and sputter, and
clog the pressure release valve and the lter. These foods should not be cooked in a pressure
cooker.
14. Always check the pressure release valve and the lter for clogging before use.
15. DO NOT use this pressure cooker for pressure frying of oil.

6-Quart Digital Pressure Cooker | Model MCPR100A | 7
17. Clean the lter regularly to keep the cooker clean.
18. DO NOT tamper with the sealing ring in the lid using any tools or external forces. If the sealing
ring is damaged, please stop using immediately and replace the lid.
19. Never use additional weight on the pressure limiting valve or replace it with any other object.
20. The surface of contact between the inner pot and the electronic heater should always be clean.
DO NOT use the inner pot with other heating sources. DO NOT replace the inner pot with a container
other than what is recommended by the manufacturer.
21. The inner pot is made out of stainless steel .
22. Unplug from outlet when not in use and before cleaning. Allow to cool before putting on or
removing parts.
23. Do not operate this appliance with a damaged cord or plug, or after it malfunctions or has been
damaged in any manner. Return the appliance to the retailer or contact us directly at 1-800-788-7618 .
24. Always attach plug to appliance rst, then plug the cord into the wall outlet. To disconnect,
press the “WARM/CANCEL” button, then unplug from wall outlet.
25. Do not use outdoors.
26. Some counter-top and table surfaces, such as Corian®, wood and / or laminates, are not
designed to withstand prolonged heat generated by certain appliances. It is recommended
by counter-top manufacturers that a hot pad or trivet be placed under your appliance to
prevent possible damage to the surface.
27. Do not use under hanging or wall cabinets; steam from the pressure release may cause damage.
28. DO NOT disassemble the product, or replace parts with parts not intended for this unit.
29. Do NOT operate your appliance in a garage. To avoid a risk of re, always unplug the unit from
the electrical outlet when storing in a garage.
30. Any servicing should be performed by an authorized service representative.
31. The use of accessories or attachments may cause injuries and is strictly prohibited by the
appliance manufacturer.

8 | 6-Quart Digital Pressure Cooker | Model MCPR100A
SAFETY
SAFETY WARNINGS
• There is a potential risk of re, electric shock or injury to persons if the product is not used
as instructed. Protection against electric shock is assured only if the main power cord is
connected to a properly grounded 120V|60Hz power receptacle.
• This product is to be used indoors, in a dry environment only and is not intended for
commercial use.
• All parts and accessories for this appliance must be used properly according to the
instructions. All parts and accessories must be the original provided from manufacturer. All
other parts or accessories that is not intended for use with this appliance is strictly prohibited.
• The use of an extension cord, power adapter or other electric devices is not recommended.
LED ERROR INDICATOR
Indicator Code Problem / Cause
E1
E2
E3
E4
Open circuit of the sensor
Short circuit of the sensor
Overheating
Signal Switch Malfunction

6-Quart Digital Pressure Cooker | Model MCPR100A | 9
Multiple functions for cooking, stewing, braising and simmering.
Cooking will be done automatically by selecting the different menu choices on the unit.
The pressure cooker also has its own memory; in case of interruptions, such as a power failure,
the unit will automatically resume the cooking cycle where it was left off.
RAPID COOKING; TIME & POWER SAVING
By using high pressure and high temperature, food will be cooked much faster.
This will reduce the cooking time and consumption of power. For example: when cooking
rice, this pressure cooker will save up to 20% of the electricity and up to 15% of the time when
compared to a conventional rice cooker. When cooking stew, soups or braising meats, this
cooker will save more than 40% of time and more than 45% of power as compared to a
conventional slow cooker. Cooking can also be done at high altitudes.
PRESERVES NUTRIENTS & PROMOTES HEALTHY EATING
Airtight cooking methods preserve nutrients and original avor of food.
This digitally controlled and automatic pressure cooker uses advanced technology so you
and your family can enjoy the benets of better, faster and healthier cooking.
Your Megachef Pressure Cooker seals in steam to cook hotter and faster, while maintaining
important nutrients for healthier meals. Cooking fast and with less water saves vital natural
resources and energy!
The unit features easy touch-button settings, a countdown timer, and a cooking pot big
enough for family gatherings! This pressure cooker is simple to use, makes meals quick and
easy, and saves you money!
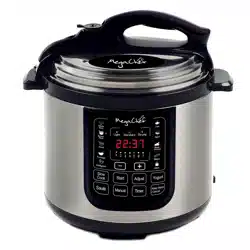
PRESSURE COOKER WITH MULTIPLE FUNCTIONS
ABOUT YOUR PRESSURE COOKER
Working pressure Psi
Maximum Pressure
Keep Warm Temperature
0-70KPa 12 Psi 90KPa 140°F - 175°F
SPECIFICATIONS
10 | 6-Quart Digital Pressure Cooker | Model MCPR100A
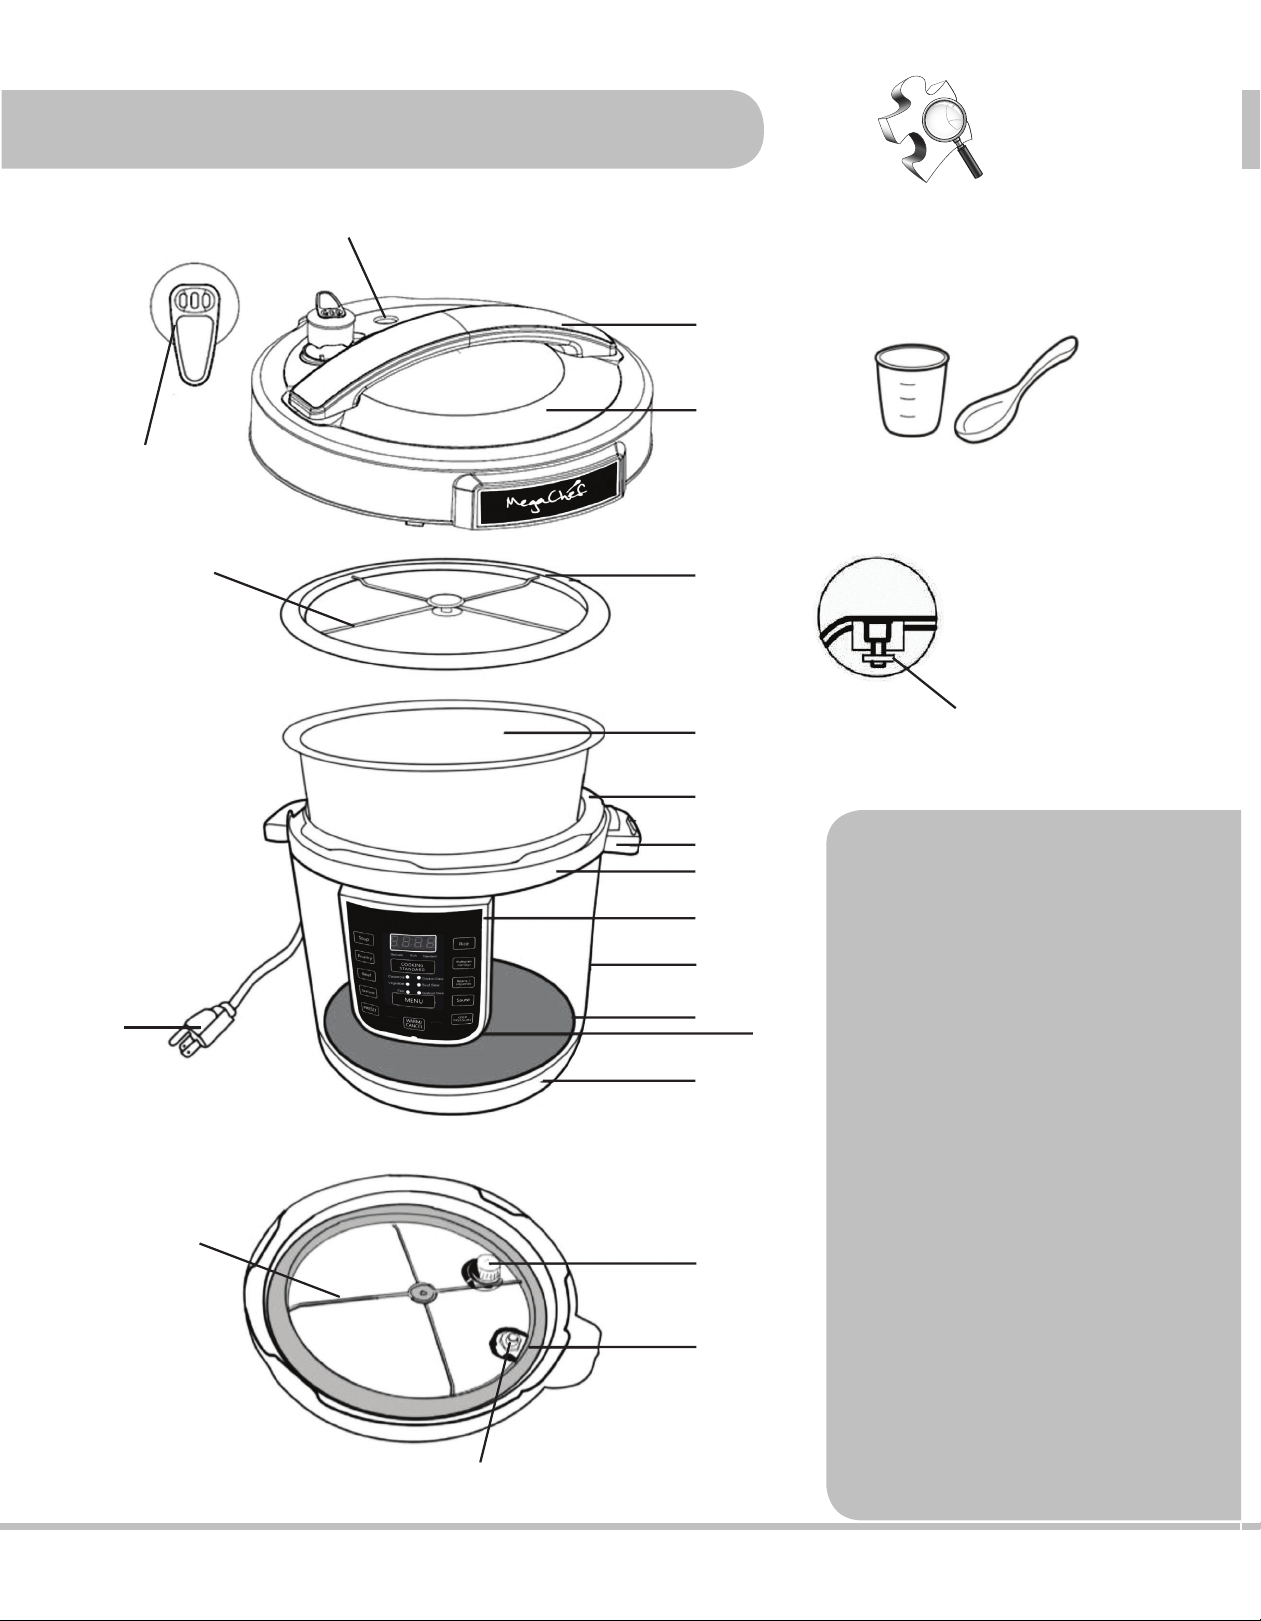
PARTS IDENTIFICATION
1. Lid Handle
2. Lid
3. Pressure Limiting Valve
4. Float Valve (external view)
5. Float Calve (internal view)
6. Stainless Steel Inner Pot
7. Outer Pot
8. Side Handles
9. Upper Ring
10. Control Panel
11. Power Cable
12. Main Outer Body
13. Heating Plate
14. Bottom Ring
15. Float Valve Seal Ring
16. Filter
17. Rubber Sealing Ring
18. Y-Shaped Metal Ring
19. Sensor
ACCESSORIES
Measuring Cup Spoon
1
2
1718
18
6
7
8
9
10
12
13
19
14
16
17
5
3
4
15
11
6-Quart Digital Pressure Cooker | Model MCPR100A | 11
1. Remove packaging materials such as cardboard, plastics or Styrofoam and discard
appropriately.
2. Clean all the parts by wiping with a soft damp cloth or sponge and dry thoroughly.
3. Thoroughly clean the cooking pot in the dishwasher or with warm soapy water. Rinse,
towel or air-dry, and place in the pressure cooker.
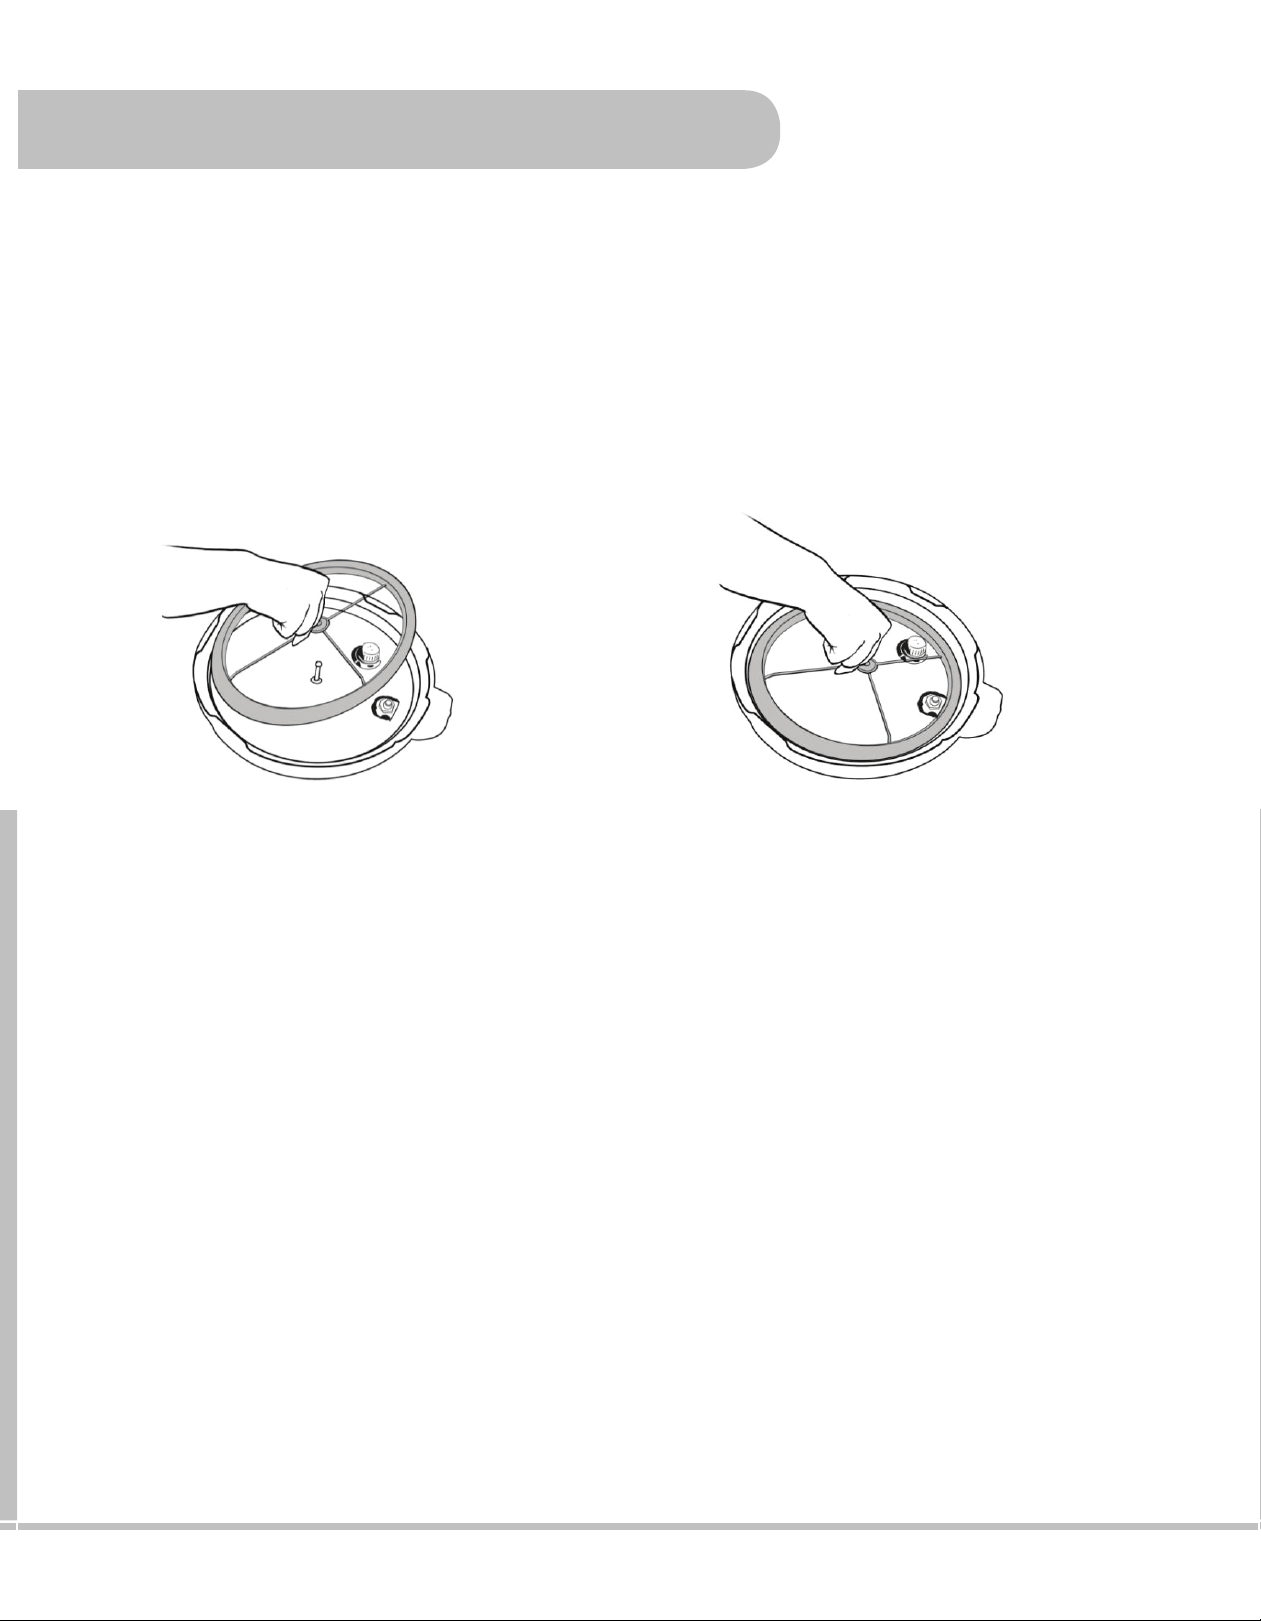
RUBBER SEALING RING ASSEMBLY
PRESSURE LIMITING VALVE
BEFORE FIRST USE
1. Lid Handle
2. Lid
3. Pressure Limiting Valve
4. Float Valve (external view)
5. Float Calve (internal view)
6. Stainless Steel Inner Pot
7. Outer Pot
8. Side Handles
9. Upper Ring
10. Control Panel
11. Power Cable
12. Main Outer Body
13. Heating Plate
14. Bottom Ring
15. Float Valve Seal Ring
16. Filter
17. Rubber Sealing Ring
18. Y-Shaped Metal Ring
19. Sensor
Always ensure the rubber sealing ring is securely tted onto the Y-shaped metal ring. Make sure
the crease in the rubber sealing ring meets with the outside of the Y-ring all the way around.
Then place the Y-ring and rubber seal ring back into the lid making sure the hole in the center
of the Y-ring’s cross-section is lined up with the metal pin in the center of the lid. Press down
rmly until the Y-ring is secured onto the lid (gures 1-2).
Adjust the pressure limiting valve (3) to the airtight position by moving it side to side until it seals
properly. To release pressure, move the pressure limiting valve side to side until the pressure can
escape from the unit.
Fig 1. Fig 2.
12 | 6-Quart Digital Pressure Cooker | Model MCPR100A
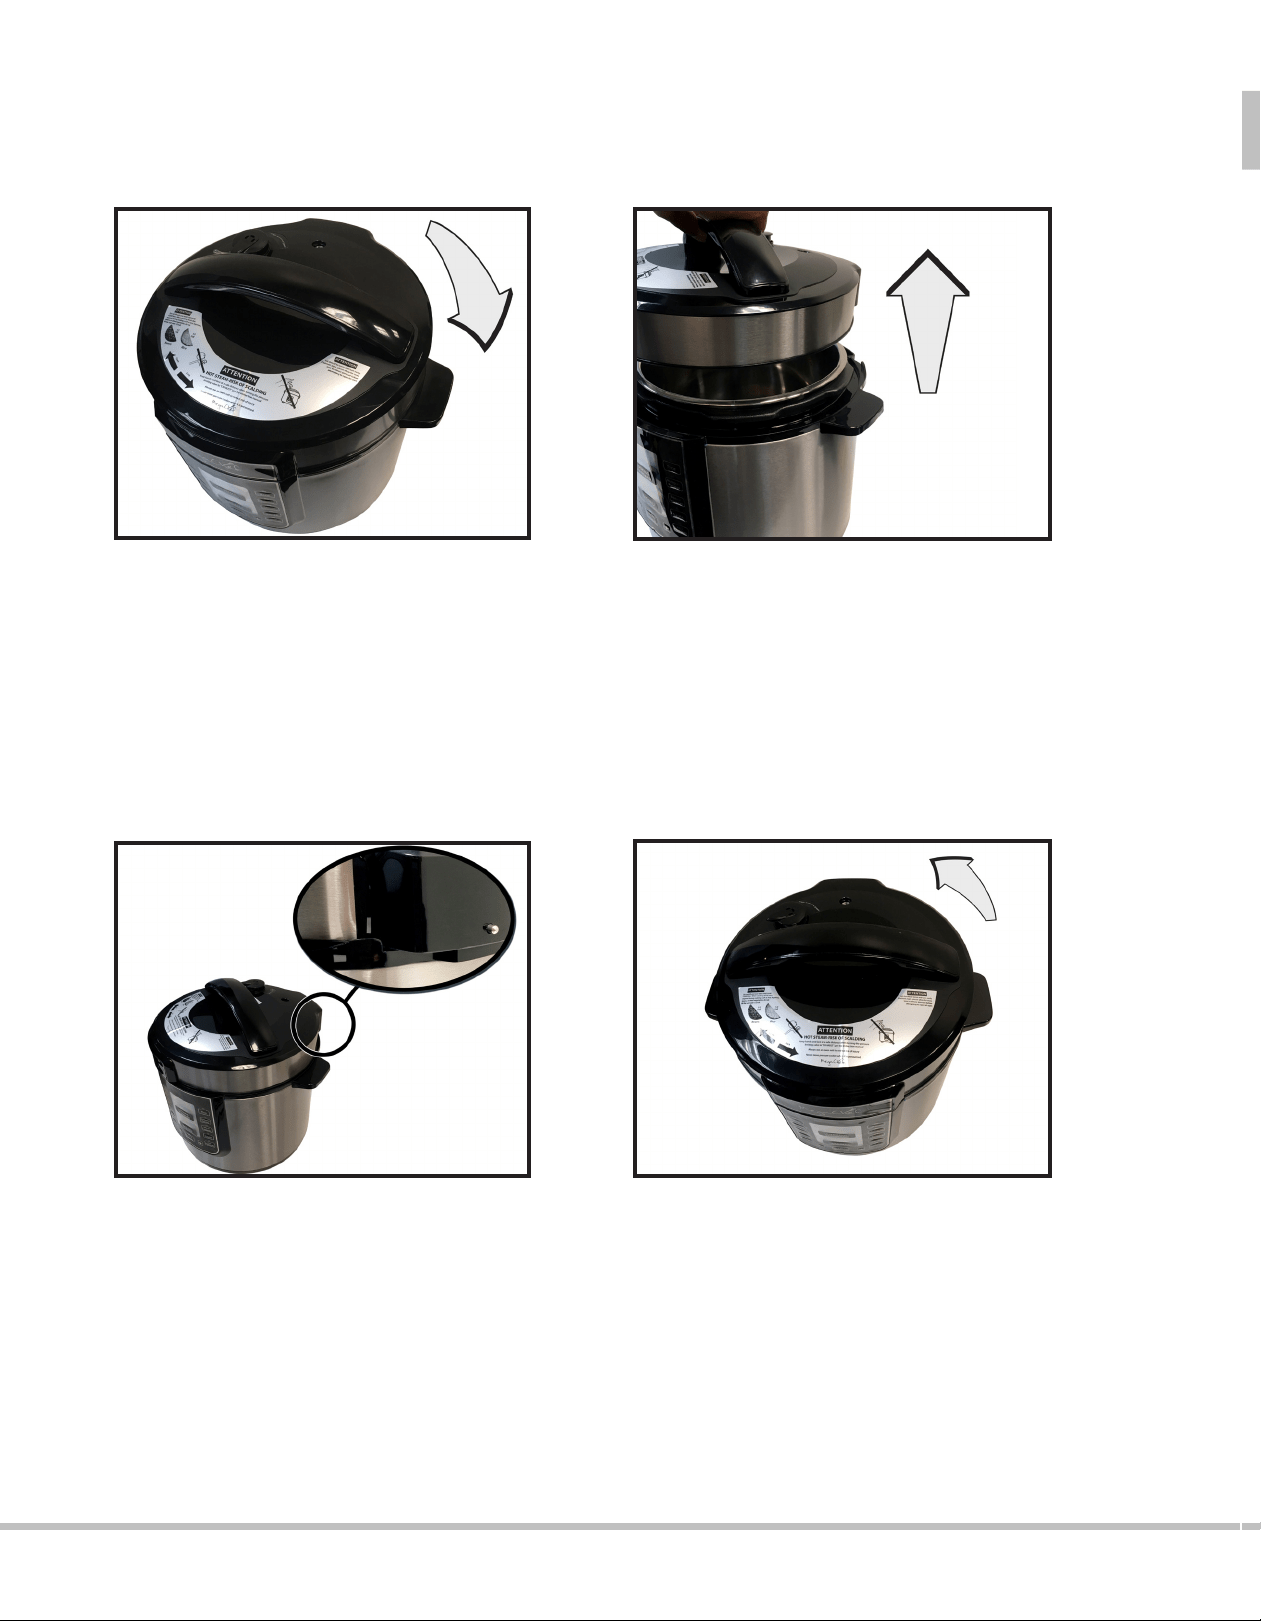
CLOSING LID
1. When facing the unit, locate the bulge sticking up behind the right handle.
2. Align the edge of the lid to the edge of the bulge, then turn counter-clockwise. A click
will indicate that the unit is now locked.
OPENING LID
Hold the handle (1) rmly, turn the lid (2) clockwise until it loosens and lift vertically.

6-Quart Digital Pressure Cooker | Model MCPR100A | 13
PREPARING YOUR PRESSURE COOKER
For the rst use, to ensure correct assembly of the rubber sealing ring, it is recommended to ll
the inner pot, with water to the 2/5 line and program to pressure cook for 30 minutes. (Refer to
“OPERATING INSTRUCTIONS” section page 14 for how to start the unit.)
Once completed, pour out the water. Rinse and towel dry the inner pot . The pressure cooker
is now ready for use.
MAKE SURE TO WAIT 60 MINUTES FOR THE POT TO COOL BEFORE USAGE
NOTE: The total volume of food and liquid must not exceed 4/5 of the capacity of the stainless
steel cooking pot.
For foods such as dried vegetables and beans, or rice and grains, the total volume must not
exceed 3/5 the capacity. Overlling may clog the pressure limiting valve, which can cause
excess pressure. Always use at least ½ cup liquid when pressure cooking.
WARNING: To avoid a serious burn injury when cooking foods other than rice, the combined
volume of liquids and solids should never exceed the 4/5 mark.
Ensure that the inner receptacle, where the heating plate is located, is clean and dry before
inserting the inner pot into the pressure cooker. If necessary, adjust the pot left and right to ensure
optimal contact between the inner pot and the heating plate.
Move the pressure valve side to side to adjust it until it seals properly and is airtight.
14 | 6-Quart Digital Pressure Cooker | Model MCPR100A
OPERATING INSTRUCTIONS
1. Prepare desired food and place it into the inner cooking pot. (The food should be more
than 3 pounds, or more than 6 cups.)
2. Secure the lid onto the unit and turn it counter clockwise to lock it in place.
3. Move the pressure limiting valve side to side until it locks and is airtight.
4. Plug the power cord into a 120V outlet. The LED screen will display 0000
USING PRE-PROGRAMMED SETTINGS
SOUP, RICE, POULTRY, MULTIGRAIN PORRIDGE, BEEF, BEANS/LEGUMES, SEAFOOD and SAUTÉ
are accessible directly from the front display panel.
CASSEROLE, VEGETABLE, FISH, CHICKEN STEW, BEEF STEW and SEAFOOD STEW can be accessed
by pressing the “MENU” button; a red light will appear next to the selected preset, indicating
which setting has been chosen.
5. Choose a pre-programmed setting from the front panel or through the “MENU” button.
Once a pre-programmed setting has been selected the LED display will blink to alert the
user that additional adjustments can be made.
The MCPR100A comes with 14 pre-programmed settings for convenient and easy cooking;
each one of these settings has default times preset for quick cooking, and is programmed to
detect the weight of the food being cooked, and the volume of liquid inside the pot during the
cooking process. When using one of the pre-programmed setting, the unit will automatically
build up the pressure, cook the food, and then switch to “WARM/CANCEL” to keep the food
warm once cooking is complete.
6-Quart Digital Pressure Cooker | Model MCPR100A | 15
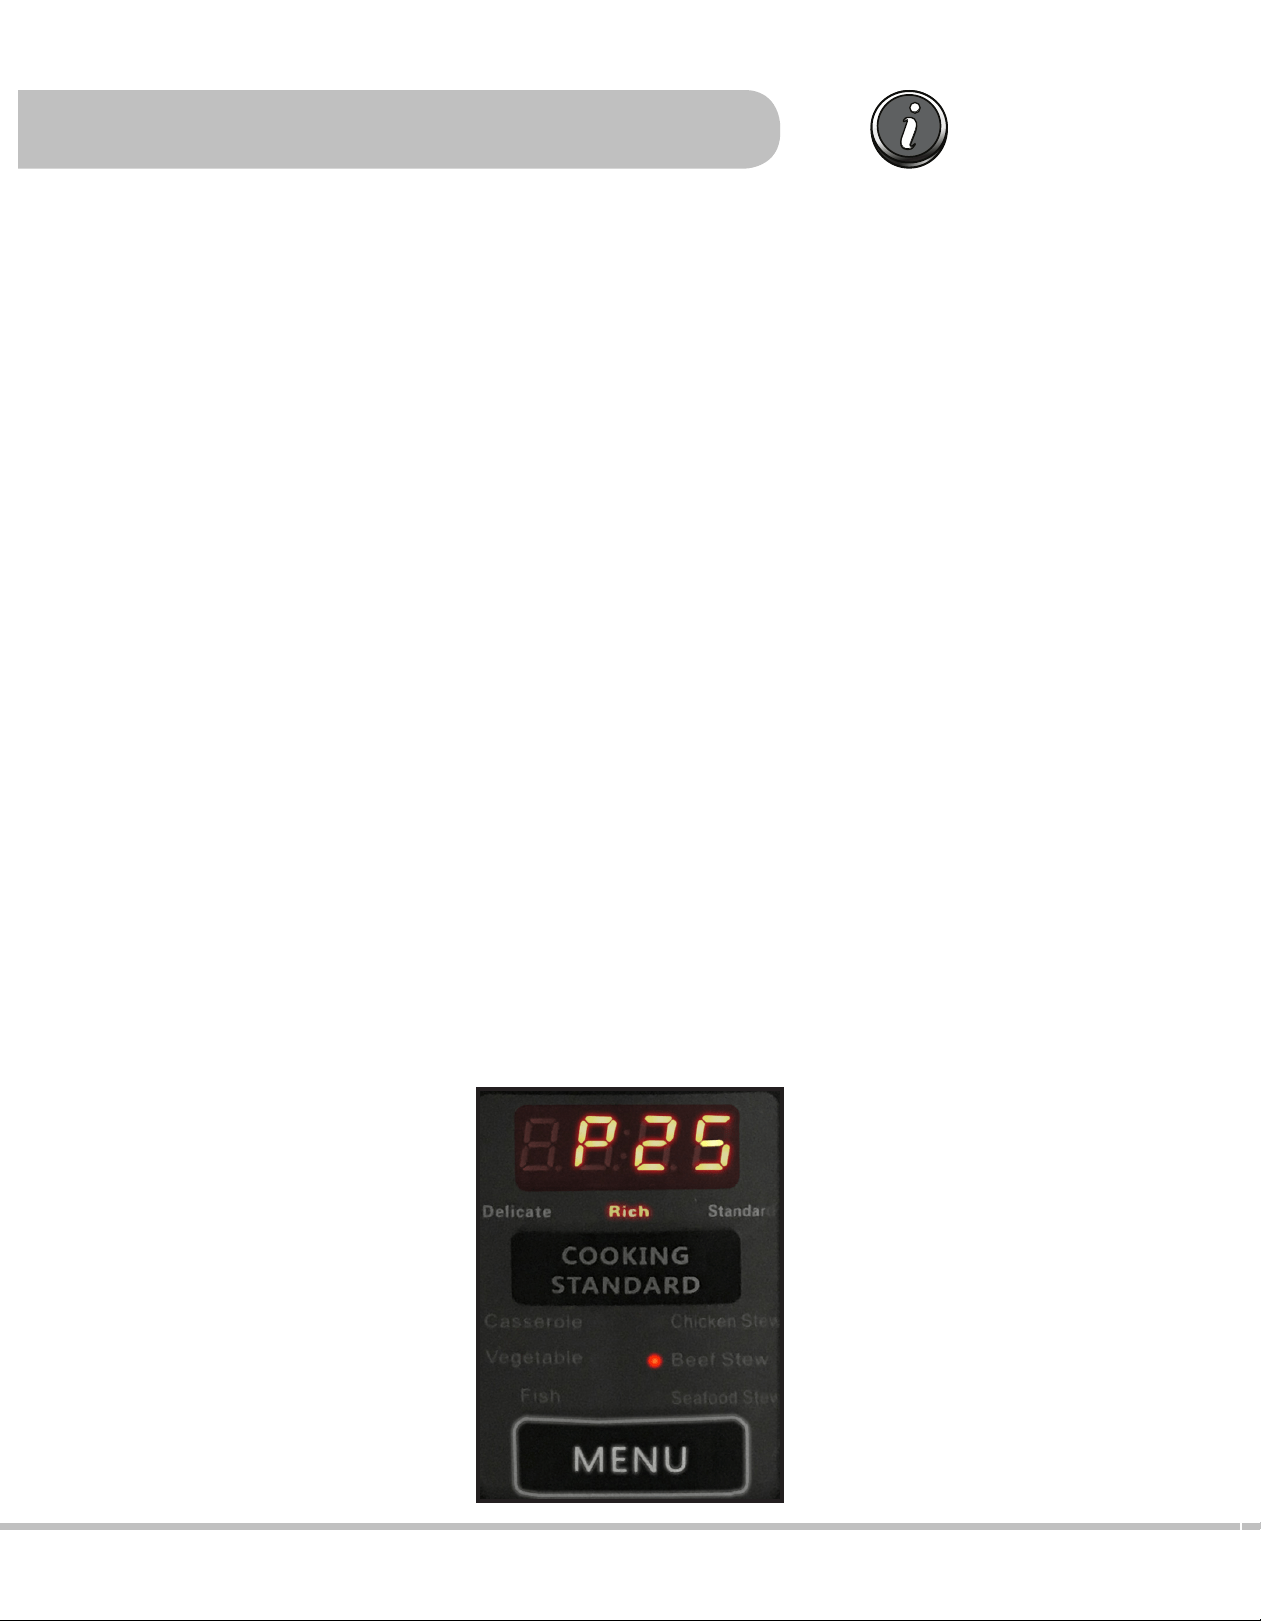
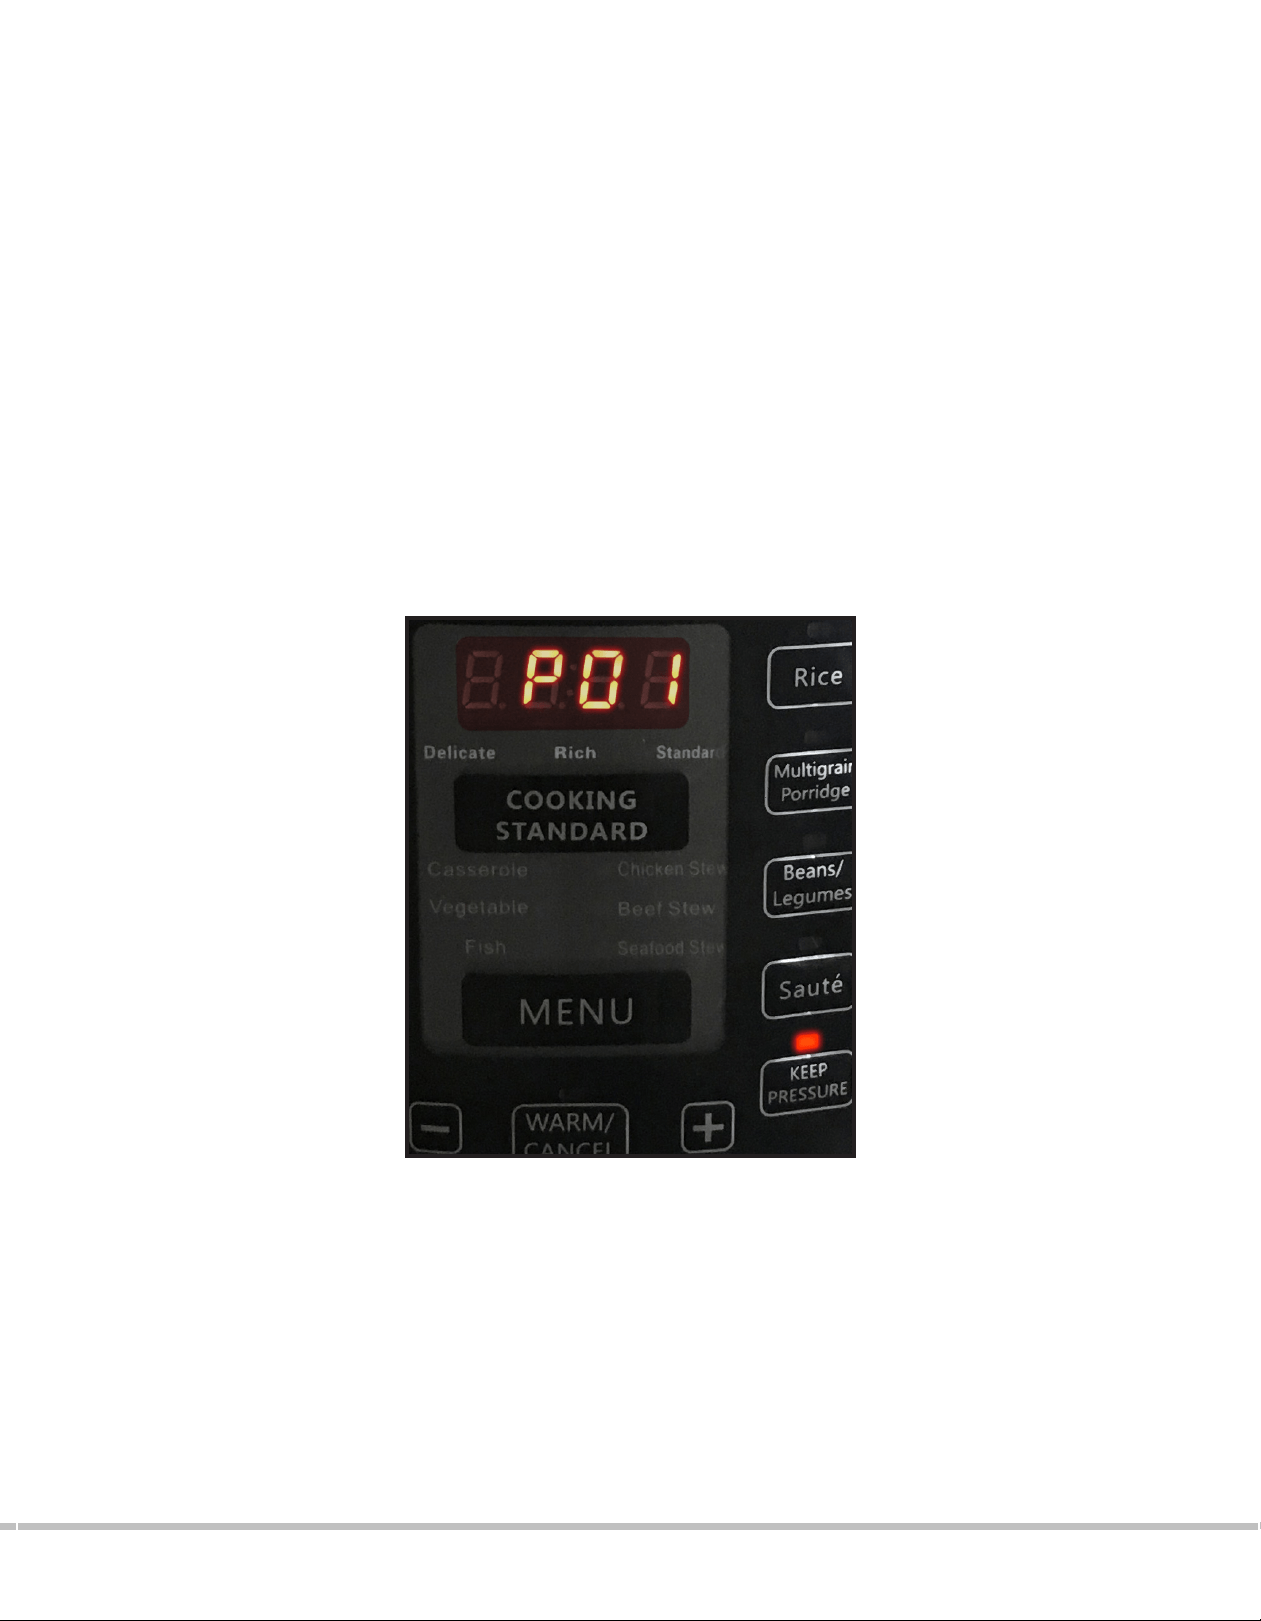
→ Pressing the “+” or “-” buttons will adjusts the default cooking time to your preference.
* Please note: When choosing a setting, the LED will display a letter P followed by numbers.
This represents the amount of time in minutes during which the food will be cooking.
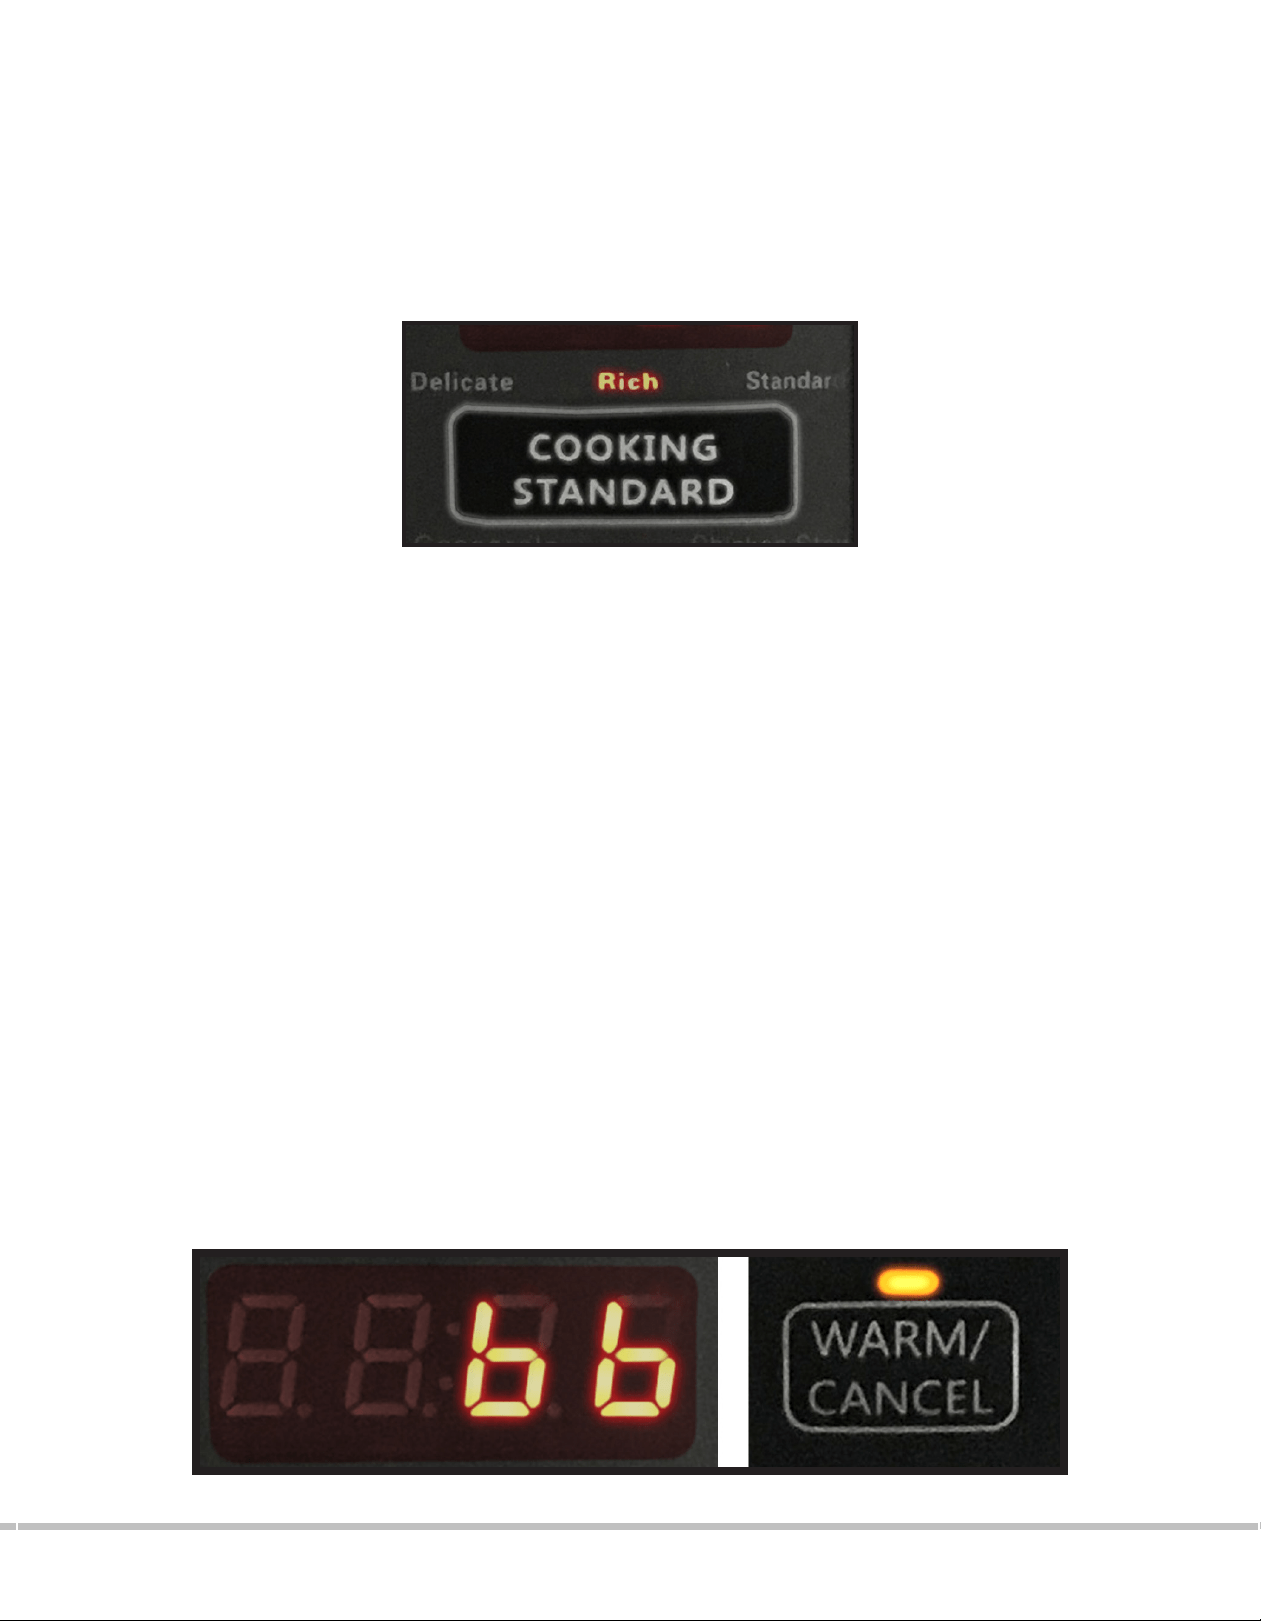
→ Pressing the COOKING STANDARD button will allow you to choose the consistency
and texture of the food. Each pre-programmed setting is defaulted to “RICH” for
a thicker/fuller consistency of the food. To change this setting, simply press the
COOKING STANDARD button until the desired setting is lit up (DELICATE for a lighter
texture, and STANDARD for normal consistency). The default time will be adjusted
according to the chosen setting .
6. Once the desired adjustments have been made (if any necessary), the display will blink
5 times until the cooking process starts automatically. The unit will start pressurizing, and
once it has reached the right amount of pressure, the timer will start counting down on
the display.
7. When cooking is completed, the pressure cooker will beep 3 times before automatically
switching to “WARM/CANCEL”. The display will show “bb” and the “ WARM/CANCEL “
button will illuminate to indicate that the cooking is completed and that the unit is now
only keeping the food warm.
* You may hear hissing or sizzling sounds during the cooking process.
* It is not recommended to stay on the “keep warm” food mode for more than 4 hours.

16 | 6-Quart Digital Pressure Cooker | Model MCPR100A
8. At this point, you may release the pressure before opening the lid by moving the pressure
limiting valve side to side until it releases the pressure. Once the pressure has released,
the lid should open easily. If the lid feels tight, do not force it open and allow additional
time for pressure to fully release.
9. Press the “WARM/CANCEL” to end operation and remove food to serve immediately.
The light indicator will go off and the display will show 0000 to indicate that the unit
is no longer warming up the food.
CAUTION HOT STEAM RISK OF SCALDING: USE TONGS OR LONG UTENSIL TO TURN THE VALVE. KEEP
HANDS AND FACE AWAY FROM PRESSURE LIMITING VALVE (3) WHILE IN THE EXHAUST POSITION.
ALWAYS MAKE SURE THAT THE PRESSURE IS COMPLETELY RELEASED BEFORE UNLOCKING AND
OPENING THE LID.
You can refer to the below chart for cooking time ranges for each preset.
SOUP
PRESET
25 mins
DEFAULT COOKING TIME
15-45 mins
COOKING TIME RANGE
12 mins 8-20 mins
BEEF 25 mins 15-60 mins
5 mins
20 mins
3-10 mins
10-40 mins
CASSEROLE
BEEF STEW
SEAFOOD
SAUTÉ
15 mins 5-35 mins
15 mins 5-30 mins
POULTRY
FISH
RICE
15 mins 10-30 mins
10 mins 5-30 mins
BEANS/LEGUMES 40 mins 20-60 mins
5 mins 3-10 mins
18 mins 10-30 mins
VEGETABLE
SEAFOOD STEW
20 mins
25 mins
10-35 mins
20-65 mins
MULTIGRAIN/PORRIDGE
CHICKEN STEW
6-Quart Digital Pressure Cooker | Model MCPR100A | 17
MANUALLY SETTING COOKING TIME
1. Prepare desired food and place it into the inner cooking pot. (The food should be
more than 3 pounds, or more than 6 cups.)
2. Secure the lid onto the unit and turn it counter clockwise to lock it in place.
3. Move the pressure limiting valve side to side until it locks and is airtight.
4. Plug the power cord into a 120V outlet. The LED screen will display 0000
5. Press the “KEEP PRESSURE” button
6. Press the “+” or “-” in order to set the timer. The LED will display a letter P followed
by numbers. This represents the amount of time in minutes during which the food
will be cooking.
7. The timer will increase or decrease by 1 minute with each press of the “+” or “-”
button. Hold down the “+” and “-” buttons for faster increase/decrease of cooking
time. The timer can be set to up to 99 minutes.
8. The display will blink 5 times until the cooking process starts automatically. The unit
will start pressurizing, and once it has reached the right amount of pressure, the
timer will start counting down on the display.
* You may hear hissing or sizzling sounds during the cooking process.

18 | 6-Quart Digital Pressure Cooker | Model MCPR100A
9. When cooking is completed, the pressure cooker will beep 3 times before automatically
switching to “WARM/CANCEL”. The display will show “bb” and the “ WARM/CANCEL “
button will illuminate to indicate that the cooking is completed and that the unit is now
only keeping the food warm.
* It is not recommended to stay on the ”keep warm” food mode for more than 4 hours.
10. At this point, you may release the pressure before opening the lid by moving the pressure
limiting valve side to side until it releases the pressure. Once the pressure has released,
the lid should open easily. If the lid feels tight, do not force it open and allow additional
time for pressure to fully release.
CAUTION HOT STEAM RISK OF SCALDING: USE TONGS OR LONG UTENSIL TO TURN THE
VALVE. KEEP HANDS AND FACE AWAY FROM PRESSURE LIMITING VALVE (3) WHILE IN THE
EXHAUST POSITION.
ALWAYS MAKE SURE THAT THE PRESSURE IS COMPLETELY RELEASED BEFORE UNLOCKING
AND OPENING THE LID.
11. Press the “WARM/CANCEL” to end operation and remove food to serve immediately.
The light indicator will go off and the display will show 0000 to indicate that the unit is no
longer warming up the food.
6-Quart Digital Pressure Cooker | Model MCPR100A | 19
SETTING DELAY TIMER
The delay timer is available to you if you wish to program your pressure cooker to automati-
cally start at a later time. The delay timer can be set to delay cooking for up to 24-hours.
The delay timer is available to you if you wish to program your pressure cooker to
automatically start at a later time. The delay timer can be set to delay cooking for up to
24-hours. It can be used in combination with the pre-programmed settings or with the
manual setting.
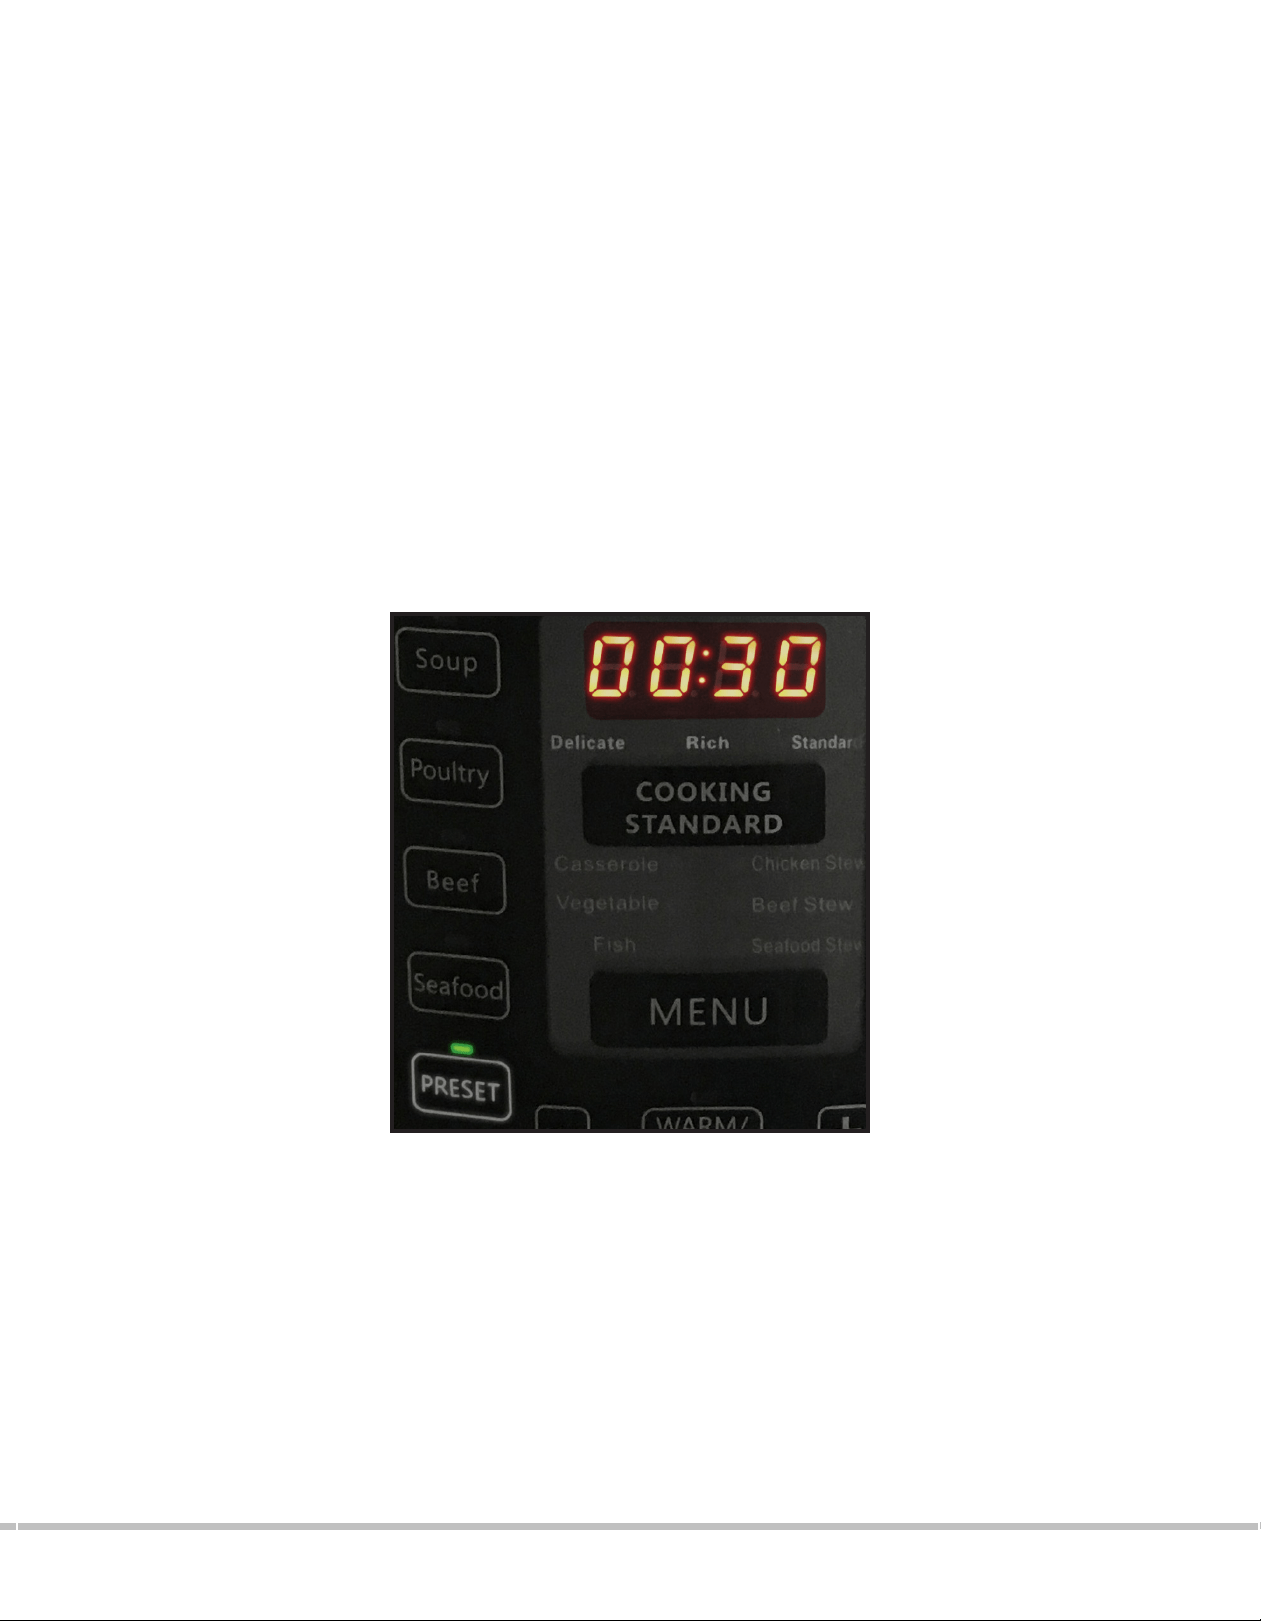
1. Press the “PRESET” button. A green light will indicate that this mode has been selected.
2. The timer will appear on the display; the minimum for delay timer is 30 minutes.
3. Use the “+” and “-” button to adjust the delayed time by 30 minutes increments.
4. Follow steps 5 to 9 of the “
USING PRE-PROGRAMMED SETTINGS” section
1. Press the “PRESET” button. A green light will indicate that this mode has been selected.
2. The timer will appear on the display; the minimum for delay timer is 30 minutes.
3. Use the “+” and “-” button to adjust the delayed time by 30 minutes increments.
4. Follow steps 5 to 11 of the “
MANUALLY SETTING COOKING TIME” section
DELAY TIMER WITH PRE-PROGRAMMED SETTINGS
DELAY TIMER WITH MANUAL SETTING

20 | 6-Quart Digital Pressure Cooker | Model MCPR100A
HOW TO SAUTÉ WITH YOUR PRESSURE COOKER
COOKING FROZEN FOODS
Before Pressure Cooking, most recipes will benet from the golden color, richer avors and
moist results gained from Browning/Sautéing.
To sauté your meats or vegetables prior to pressure cooking:
1. Remove the lid and plug in the pressure cooker.
2. Press the “SAUTÉ” button.
3. Press the “+” or “-” buttons to adjust the timer. There is no need to press any other
button as the unit will automatically start after a few seconds.
4. Add oil or butter as directed in your recipe and then place food into the inner pot.
5. Stir or turn food as needed until desired color and consistency is reached.
6. Press the “WARM/CANCEL” button if you want to cancel the SAUTÉ function before the
timer nishes counting down.
7. If you would like to pressure cook the sautéed food, add the desired amount of liquid,
place and close the lid before selecting desired program/cook time.
Cooking frozen food inside a pressure cooker is quick and easy, but has certain restrictions.
Only cook individual cuts of frozen meats that are up to 1 inch thick, the cooking time does
not need to be altered.
* Please note that the pressure point may take longer to be reached when cooking frozen
foods
It is not recommended to pressure cook larger cuts of frozen meats such as a whole roast, a
block of frozen ground meat or a whole chicken. Larger cuts will require increased cooking
times of up to one third more, and the results may vary from meats that were completely or
partially thawed and browned before cooking.
6-Quart Digital Pressure Cooker | Model MCPR100A | 21
CLEANING INSTRUCTIONS
1. Always make sure the Pressure Cooker is unplugged, depressurized and completely
cooled down before dismantling.
2. Use a non-abrasive sponge or damp wash cloth to clean the exterior of the outer body
and the exterior surface of the pressure cooker. NEVER immerse the pressure cooker in
any liquids.
3. Clean the upper ring with a damp sponge or wash cloth.
4. Remove the lter (17) by pulling it vertically. To re-attach, simply align it to the protrusions
and push it down.
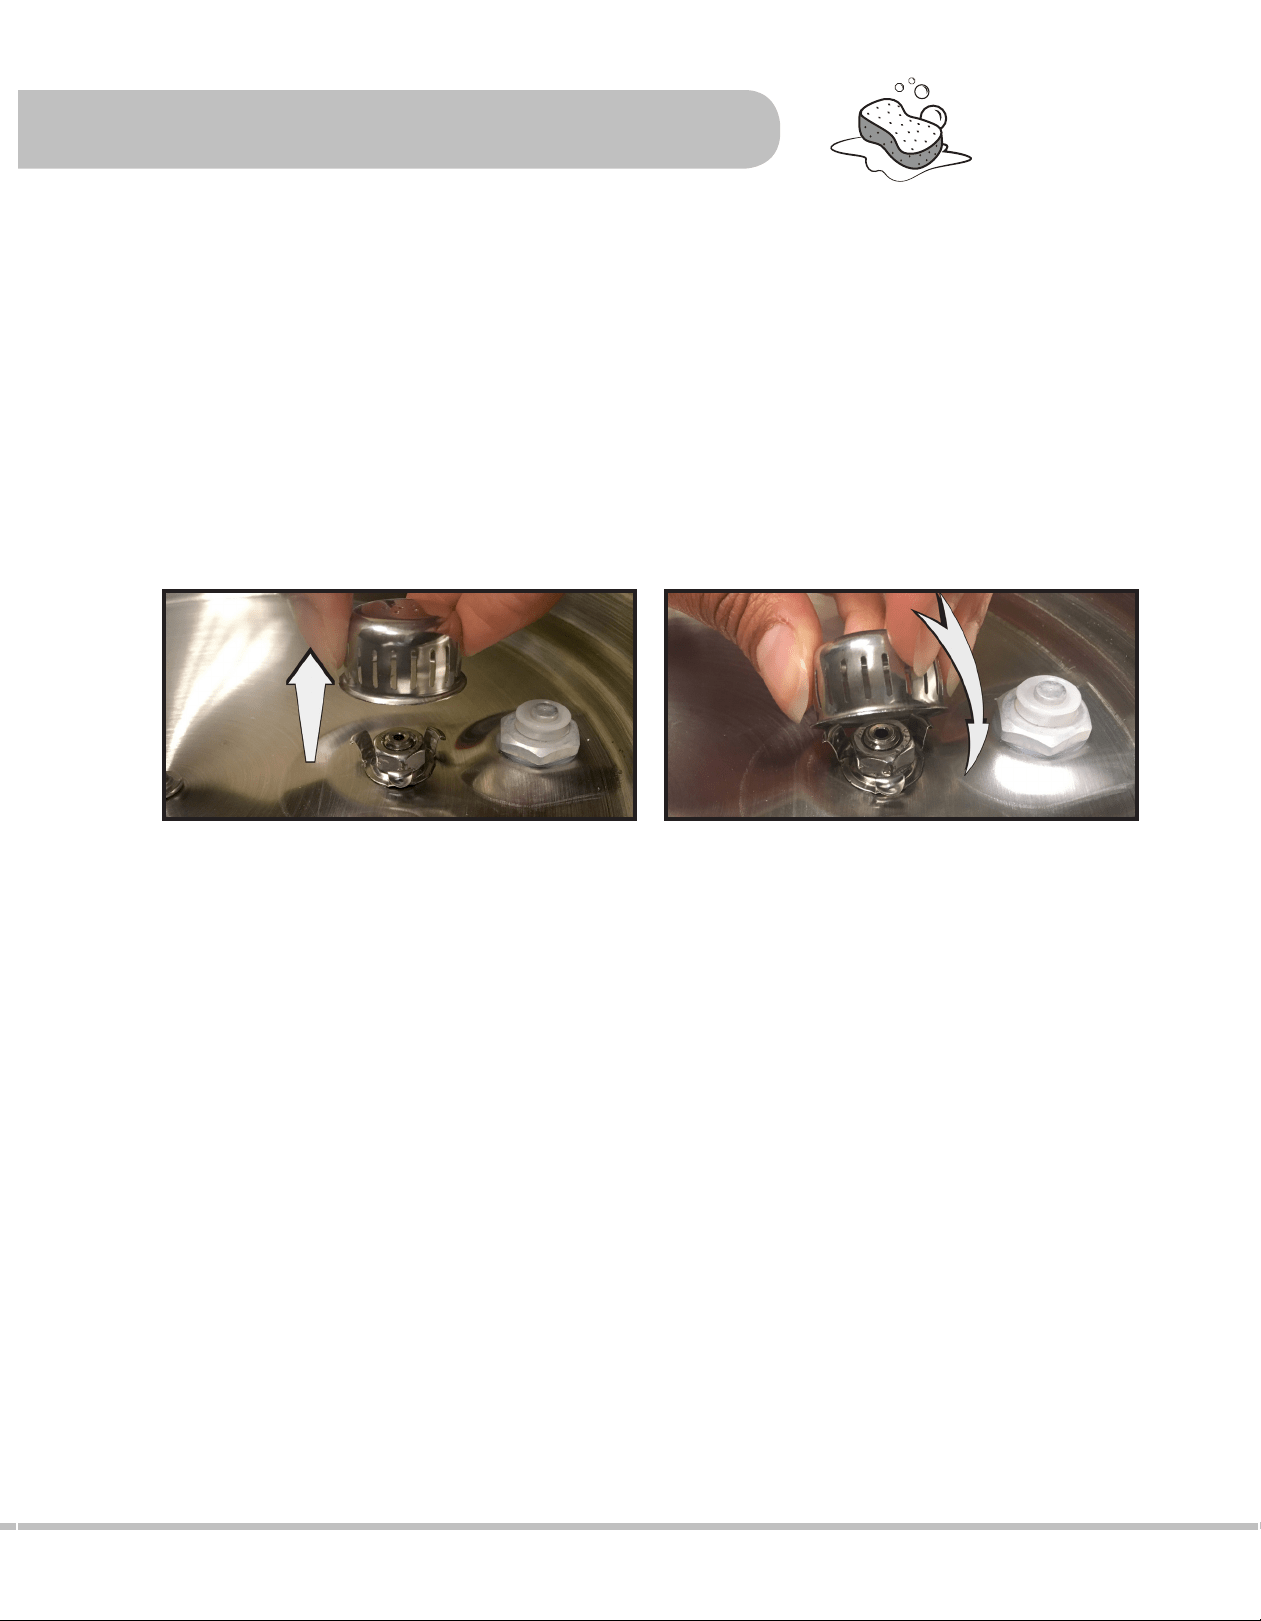
5. The pressure limiting valve pops off easily by gently pulling it up. Be careful not to
damage the thin wire spring under it.
6. Clean the lid with warm soapy water, including the rubber seal ring, pressure limiting
valve, lter, oat valve and let dry thoroughly. Clean the pressure limiting valve and the
holes with a small brush to ensure smooth ow of steam during the release cycle
7. Let parts dry completely before reassembling.
8. Wash the inner pot with a non-abrasive sponge and allow to air dry or use a towel.
9. It is not recommended to use any type of scouring pad that can scratch the surface of
the inner pot.
10. Store the inner pot inside of the pressure cooker. Store the pressure cooker in a cool,
dry location.
NOTE: Any servicing required shall be performed by an authorized service representative or
from the original manufacturer or distributer.

22 | 6-Quart Digital Pressure Cooker | Model MCPR100A
HELPFUL TIPS
● Read this manual thoroughly and follow all instructions.
● Be familiar with the recipe and have all ingredients prepped before you begin.
● Be sure the lid is secured and locked properly before beginning.
● You may wish to brown some meats before cooking with other ingredients.
● Cut foods into equal-sized pieces to promote even cooking. In recipes that call for multiple
ingredients, cut those that cook more quickly into larger pieces and those that take longer
to cook into smaller pieces.
● A large variety of liquids can be used for pressure cooking, such as wine, beer, bouillon, fruit
juices, water, broth and more.
● After becoming familiar with your pressure cooker, you can adapt conventional recipes to
be used with it. In general, cut cooking times by two thirds. The amount of liquid used may
also have to be reduced because there is very little evaporation in the pressure cooker.
Remember, however, there must always be some liquid in the pressure cooker to produce
the necessary steam. As a rule of thumb, add 1 cup of liquid for the rst 15 minutes of
pressure cooking then 1/3 cup of liquid for each subsequent 15 minutes This rule may vary
depending on the type and amount of food cooked.
● In the event that the unit is unable to build pressure, simply add more liquid until it can
pressurize.
● Since pressure cooking enhances avors, we recommend reducing the amounts of herbs
and seasonings when adapting conventional recipes.
● The use of fresh herbs is recommended as they will have a more intense avor than dried
herbs.
● In general, pressure cookers cook foods in about 1/3 of the time of conventional cooking
method.
● Increase cooking times by about 10% when cooking in high altitudes of over 3,500 feet.
● If you wish to cook food in less time than the pre-programmed timer default setting, observe
the timer and press CANCEL when you would like to stop the cooking process before the
timer has reached 0.