Loading ...
Loading ...
Loading ...
Care and Maintenance
IMPORTANT
1. Be sure to unplug the unit before cleaning or servicing.
2. Do not use gasoline, paint thinner or other chemicals to clean the
unit.
3. Do not wash the unit directly under a tap or using a hose. It may
cause electrical damage.
4. If the power cord is damaged, contact the service depot immediately.
AIR FILTER
UNIT ENCLOSURE
Use a lint-free cloth soaked with neutral detergent to clean the unit enclosure,
be sure to wring the cloth of excess water. Finish by wiping with a clean dry
cloth.
LONG-TERM STORAGE
• Remove the rubber plug at the back of the unit and attach a hose to the drain
outlet. Place the open end of the hose directly over the drain area in your base-
ment fl oor.
• Remove the plug from the bottom drain outlet, this means that all the water in
the bottom drain tray will drain out.
• Keep the appliance running on FAN mode for half a day in a warm room to dry
the appliance inside and prevent mold formation.
• Turn off the appliance and unplug it, wrap the cord and bundle it with tape.
• Remove the batteries from the remote controller.
• Clean the air fi lter and reinstall it.
Clean the air fi lter at least once every two weeks. Accumulation of dust will hinder fan
operation.
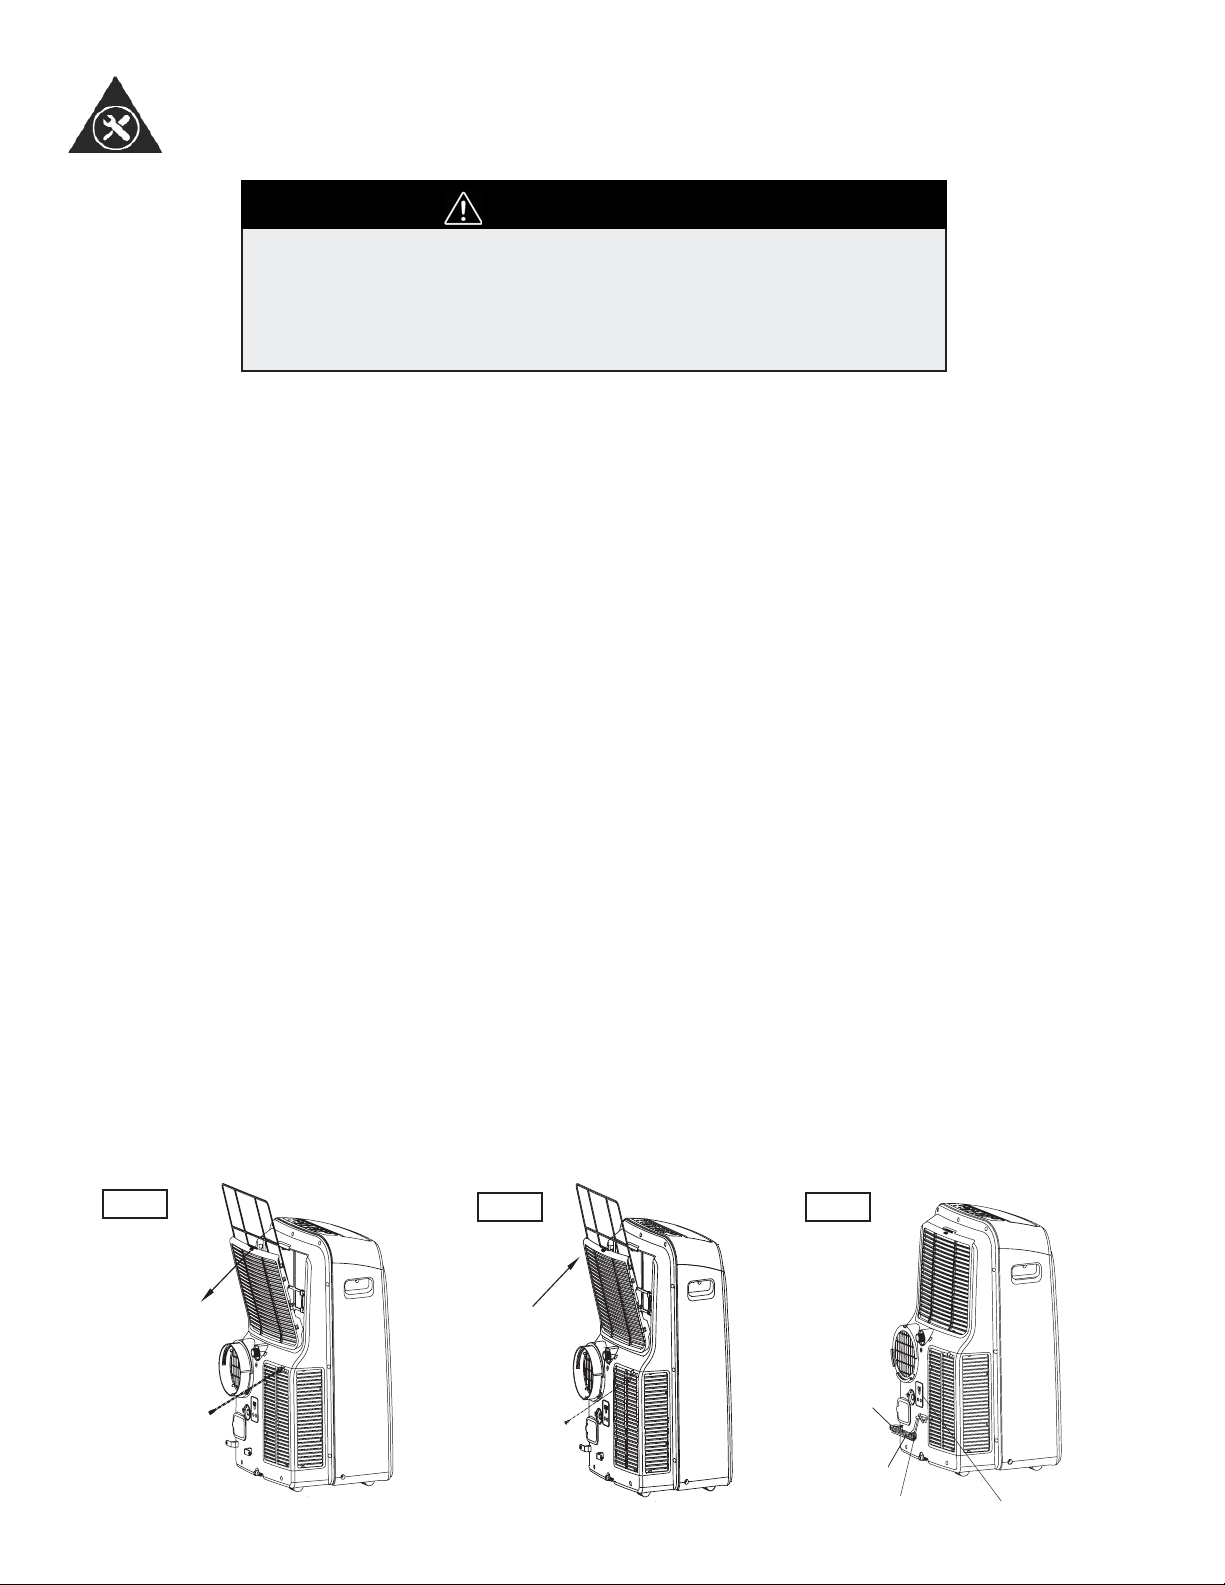
REMOVAL
This unit has two fi lters. Lift the upper fl iter out in the direction of the arrow (Fig. 25),
then down. Remove the lower fi lter by loosening the screw and lifi ng out the fi lter as
shown in Fig. 25.
CLEANING
1. Wash the air fi lter by submerging it gently in warm water (about 40°C / 104° F)
with a neutral detergent.
2. Rinse the fi lter and let it dry.
REINSTALL
Install the upper air fi lter after cleaning, and install the lower fi lter after, using the screw
(see Fig. 26). *Filters should dry before installing*
Fig.25
Fig.26 Fig.27
Upper filter
(Take out)
Remove the
screw ,then
take the lower
filter out.
Upper filter
(Install)
Install the
lower filter
by using
the screw.
Buckle
Power
cord
Power plug
Power plug socket
14
Loading ...
Loading ...
Loading ...