Loading ...
Loading ...
Loading ...
Connection to the gas supply
There are two ways to make the connection to the main gas line:
A. The hotplate can be connected with rigid pipe as specified in
AS5601 table 3.1.
B. The hotplate can be connected with a Flexible Hose, which
complies with AS/NZS 1869 (AGA Approved), 10mm ID, class B
or D, no more than 1.2m long and in accordance with AS5601.
WARNING: Ensure that the hose assembly is restrained from
accidental contact with the flue or flue outlet of an underbench
oven and it does not contact the hot surfaces of the hotplate,
oven, dishwasher or other separate appliance that may be
installed underneath or next to the hotplate. The hose should not
be subjected to abrasion, kinking or permanent deformation and
should be able to be inspected along its entire length. Unions
compatible with the hose fittings must be used and connections
tested for gas leaks.
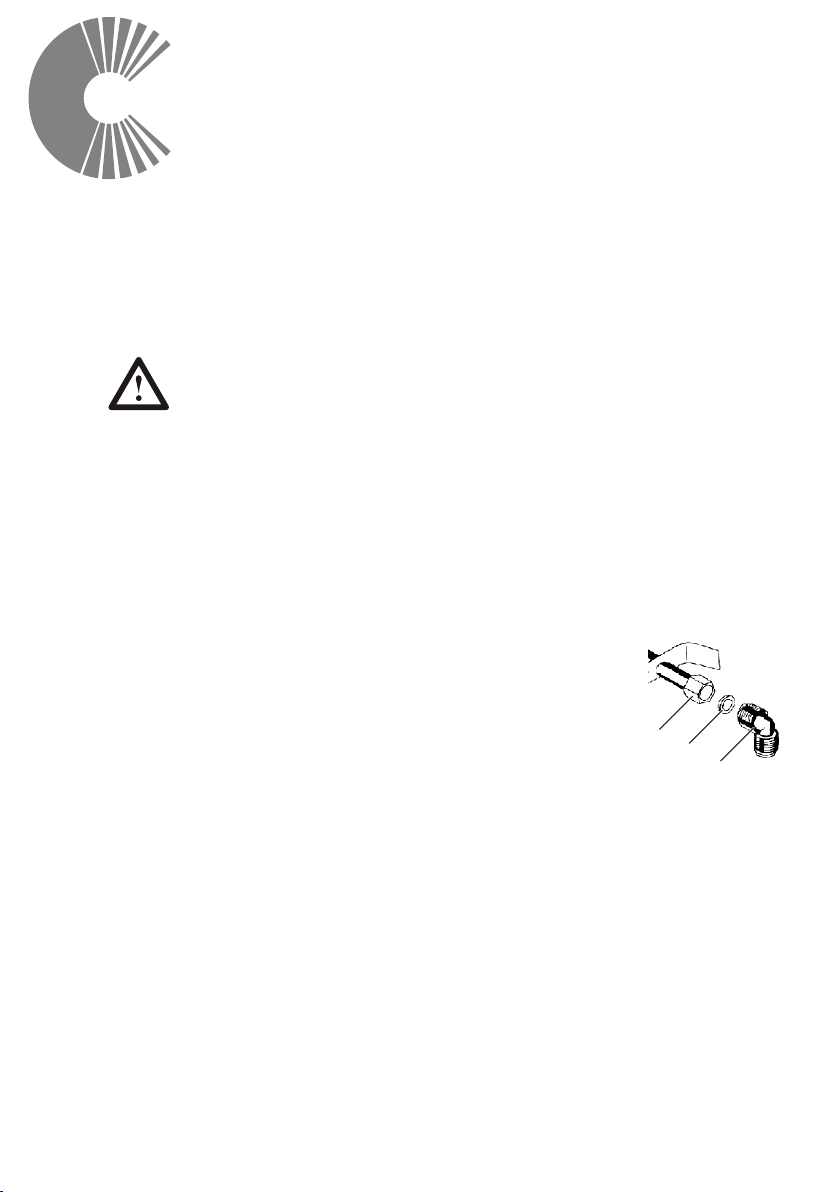
The supply connection point must be accessible with the
appliance installed. Fit the supplied elbow and gasket as shown in
the illustration right. The gas inlet connection
has a 1/2" BSP male thread. When making
the connection, take care not to apply
excessive stress by counterbalancing
tightening force. Ensure that the available
gas supply is the same as the gas type label
affixed to the base of the hob. If not, contact
Technika for a Gas Conversion Kit. The gas
supply pressure must be adjusted in
accordance with the data label for the gas
type. Adjust the test point pressure with the
largest burner operating at maximum.
Electrical connection
This appliance is designed to operate on a power supply voltage
of 220-240V, single phase and is fitted with a 10A, 3 pin plug.
Before making the connection, make sure that:
1) The electrical system is able to withstand the load of the
appliance (see data label).
2) The power supply system has an earth connection in good
working order in accordance with the regulations in force.
Installation
A
B
C
A - Manifold Nut
B - Gasket
C - Elbow
14
Loading ...
Loading ...