Loading ...
Loading ...
Loading ...
INTRODUCTION
Intended Use
Optimal use and maintenance are described in these instructions. This product is not intended for industrial use.
Additional assistance, by region, may be found on the web at www.singer.com.
Machine Overview
00 01 02 03 04 05 06 07 08 09 10 11 12 13 14 15 16 17 18 19
20 21 22 23 24 25 26 27 28 29 30 31 32 33 34 35 36 37 38 39
40 41 42 43 44 45 46 47 48 49 50 51 52 53 54 55 56 57 58 59
60 61 62 63 64 65 66 67 68 69 70 71 72 73 74 75 76 77 78 79
80 81 82 83 84 85 86 87 88 89 90 91 92 93 94 95 96 97 98 99
3
1
5
6
9
87
4
11
10
2
12
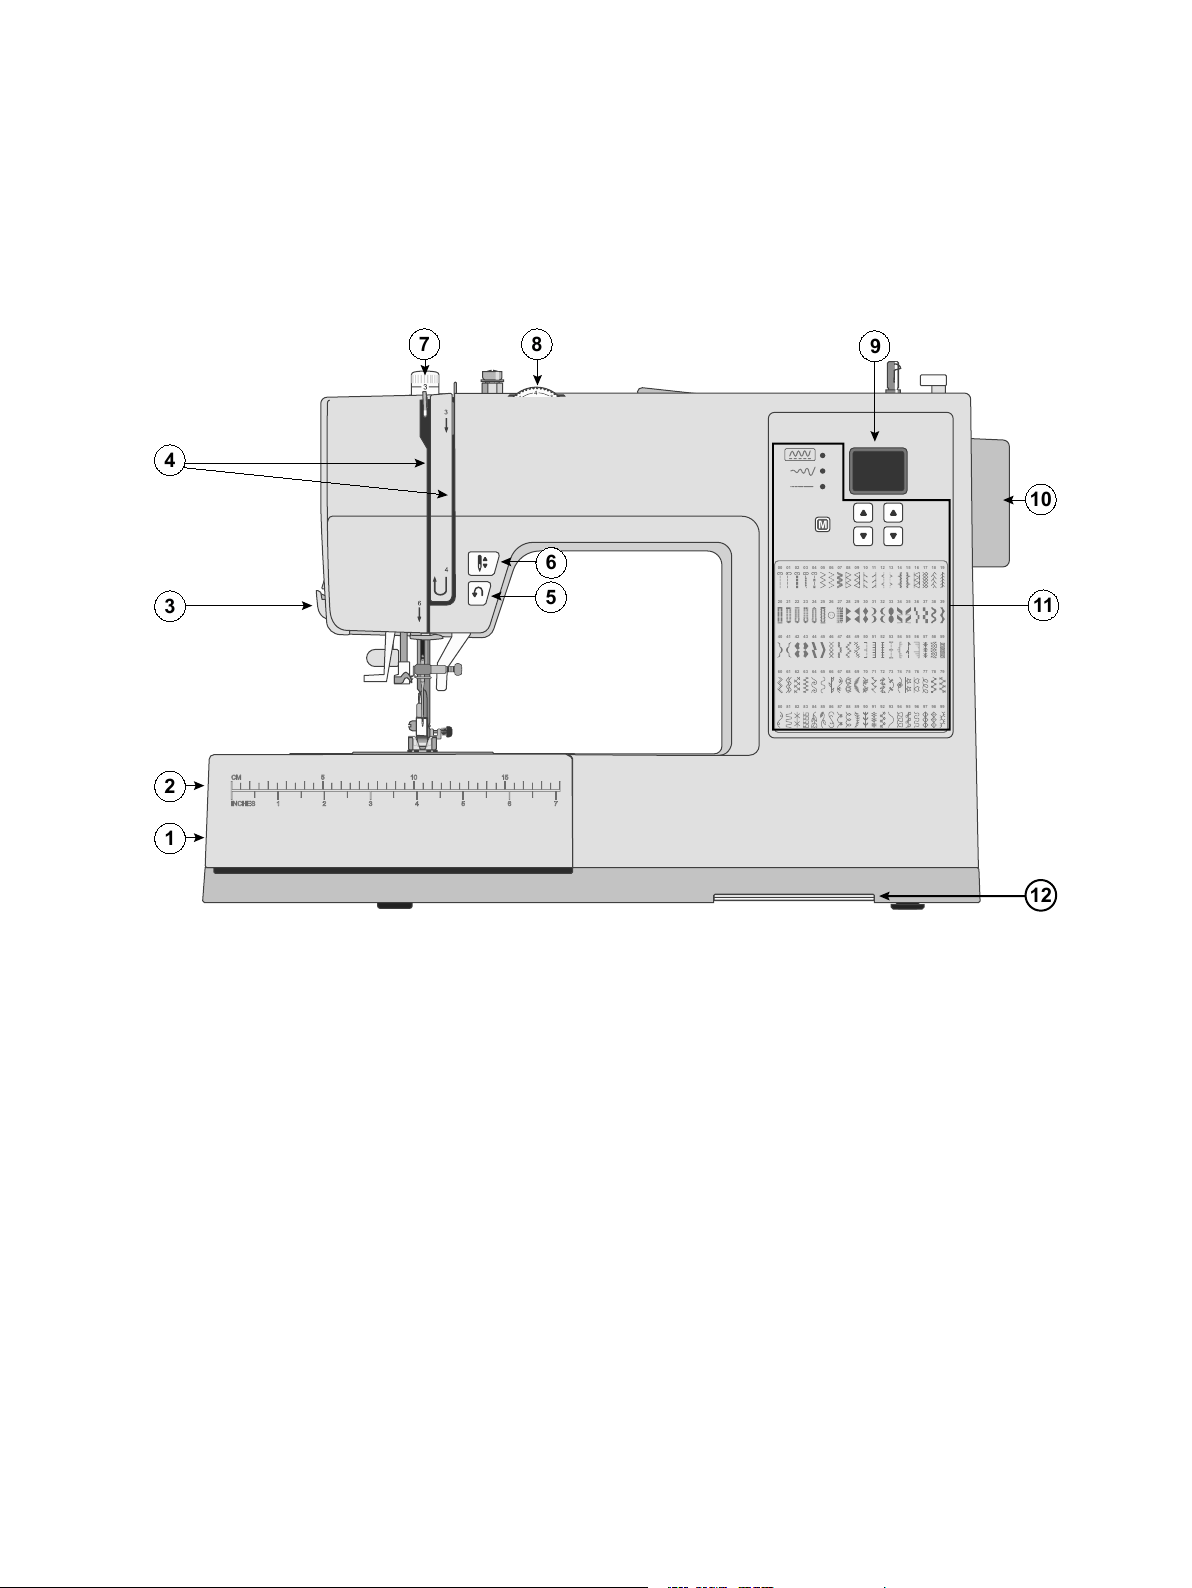
1. Feed Teeth Lever — move from side to side to engage or
disengage the feed teeth. Positioned at the back of the free
arm.
2. Accessory Tray / Free Arm — provides a flat surface
when sewing and allows storage for your accessories.
Remove the accessory tray to use the free arm which
makes it easier to sew, e.g., trouser hems and sleeves.
3. Thread Knife — for trimming thread ends at the end of
sewing.
4. Threading Slots — thread paths with tension discs and
take up lever.
5. Reverse Button — Press and hold to sew in reverse, e.g.,
when securing the beginning or ending of a seam.
6. Needle Up/Down Button — Press to raise and/or lower
the needle.
7. Presser Foot Pressure — controls the pressure the presser
foot exerts onto the fabric.
8. Thread Tension Dial — set the right tension for your
stitch, thread and fabric.
9. Display — Current stitch and settings are displayed.
10. Hand Wheel — used to manually control the movement of
the needle and the thread take-up lever.
11. Stitch Control Panel — Choose menu, select stitch and
adjust your stitch settings with these buttons (see page 16
—page 17).
12. Presser Foot Recommendation —Slide forward to see
what presser foot that is recommended for your selected
stitch.
Introduction – 1
English
Loading ...
Loading ...
Loading ...