Loading ...
Loading ...
Loading ...
Navigation Arrows
Press the up and down arrows to select stitch and/or to adjust the stitch settings.
The left set of arrows change the left number on the display and the right arrows changes the right number.
Note: Make sure that the correct menu is selected before using the selection arrows. A light next to the menu is lit
when a menu is active.
Utility and Decorative Stitches
Select this menu for sewing. The stitches included in your machine are pictured on the machine. Next to each
stitch is a number, this is the number used to select the stitch.
Stitch Width / Needle Position
Select this menu to adjust the stitch width of the selected stitch.
When you select a stitch, your machine automatically sets the best stitch width. The default setting is indicated on
the display. The stitch width can be adjusted between 0–7mm. Some stitches have a limited stitch width. Increase
the stitch width by pressing “up”, decrease it by pressing “down”.
When a straight stitch or a reinforced straight stitch is selected, the Stitch Width button is used to adjust the
needle position. When pressing “up”, the needle position is moved to the right. When pressing “down”, the
needle moves to the left. Center needle position is set when the stitch width is 3.5.
Stitch Length
Select this menu to adjust the stitch length of the selected stitch.
When you select a stitch, your machine automatically sets the best stitch length. The default setting is indicated
on the display. The stitch length can be adjusted between 0–4.5mm. Some stitches have a limited stitch length.
Increase the stitch length by pressing “up”, decrease it by pressing “down”.
Select Stitch
B
A
C
D
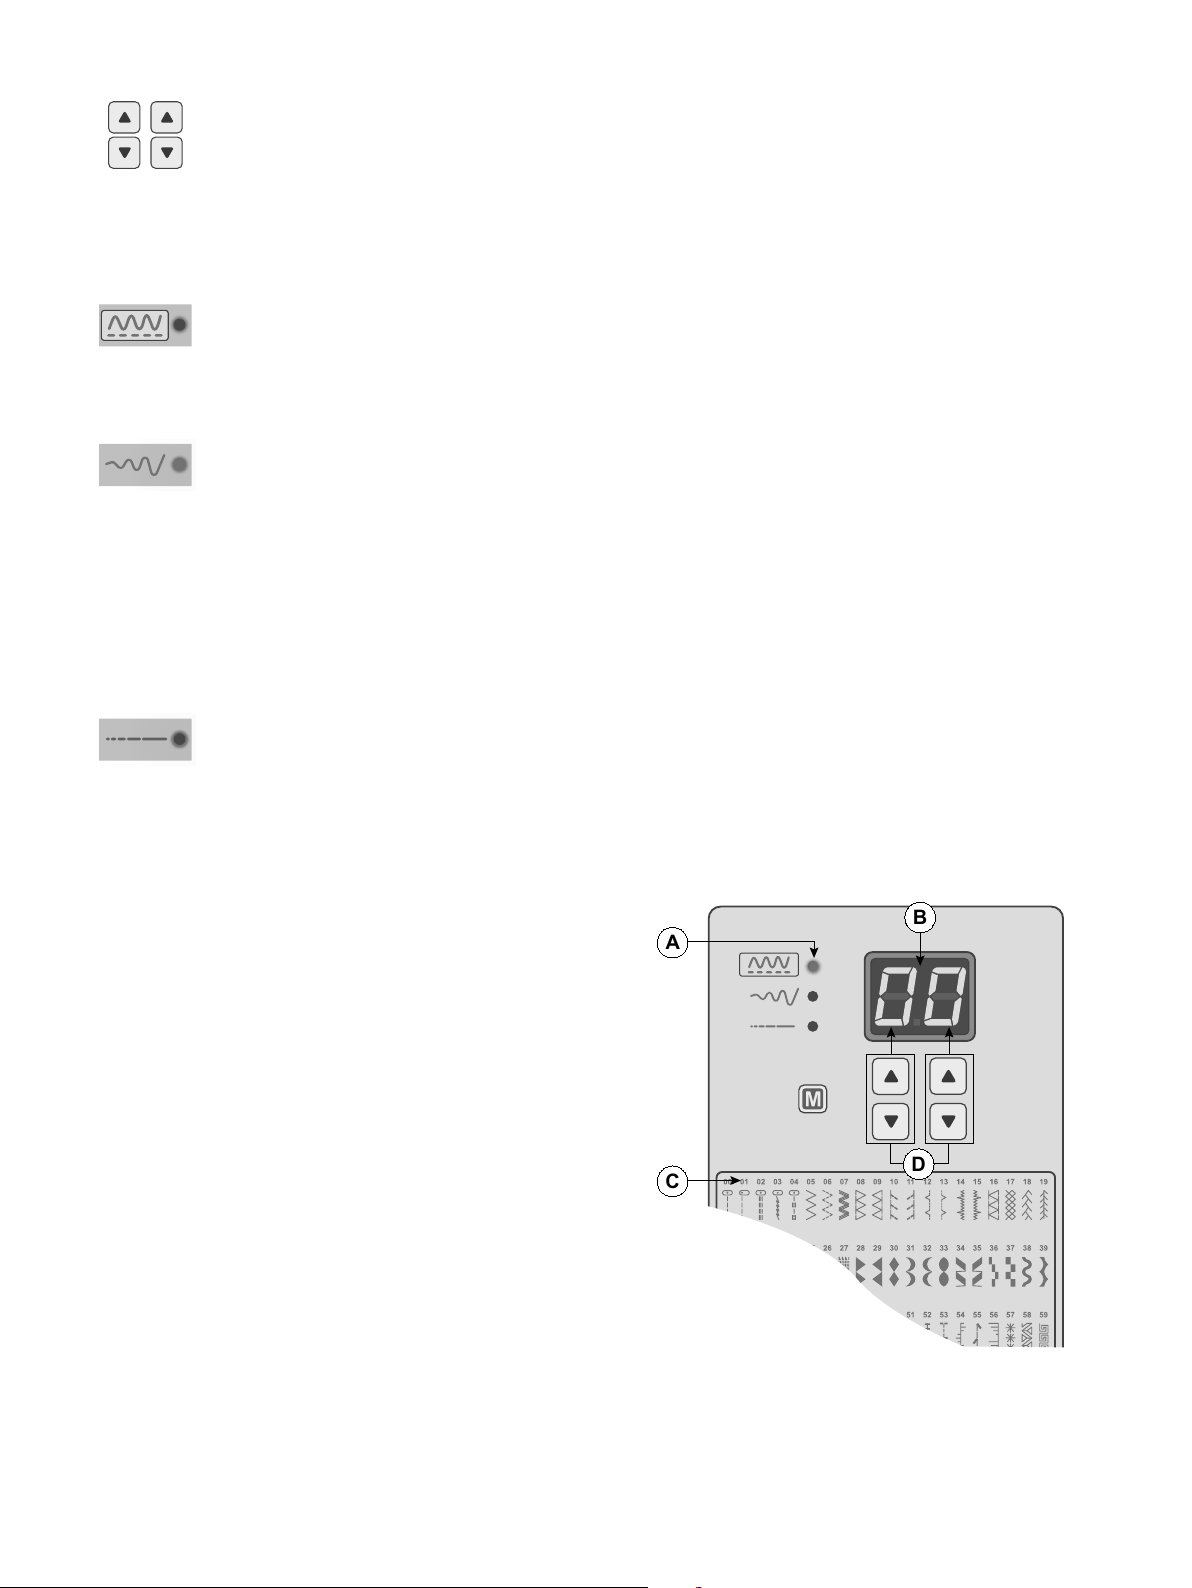
When you turn on your machine, the Utility and Decorative
Stitch Menu is active. This is indicated by the light, next to the
menu icon (A). Straight stitch (stitch no.00) (B) is selected by
default.
The stitches are printed on the machine. The Stitch Number is
printed above the picture of respective stitch (C).
Press the up and down arrows to select stitch. The left set of
arrows change the left number on the display and the right
arrows changes the right number (D).
Each stitch has a pre-set stitch length and width. At the bottom
right of the machine, you can slide forward a chart showing
what presser foot that is recommended for each stitch.
Preparations – 17
English
Loading ...
Loading ...
Loading ...