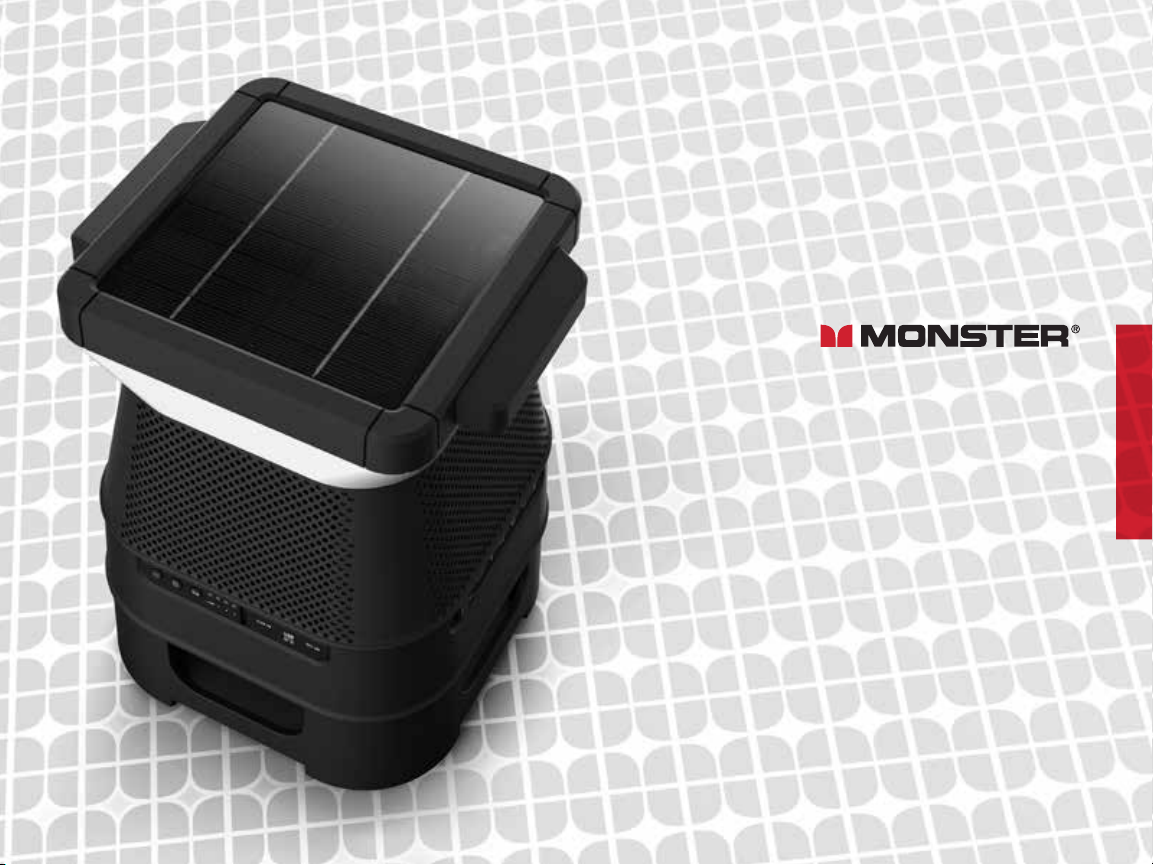
SOLARA
INDOOR/OUTDOOR WIRELESS
SOLAR POWERED SPEAKER
USER MANUAL
VER. 4.2
MODEL: MNSOLANZ-BLK
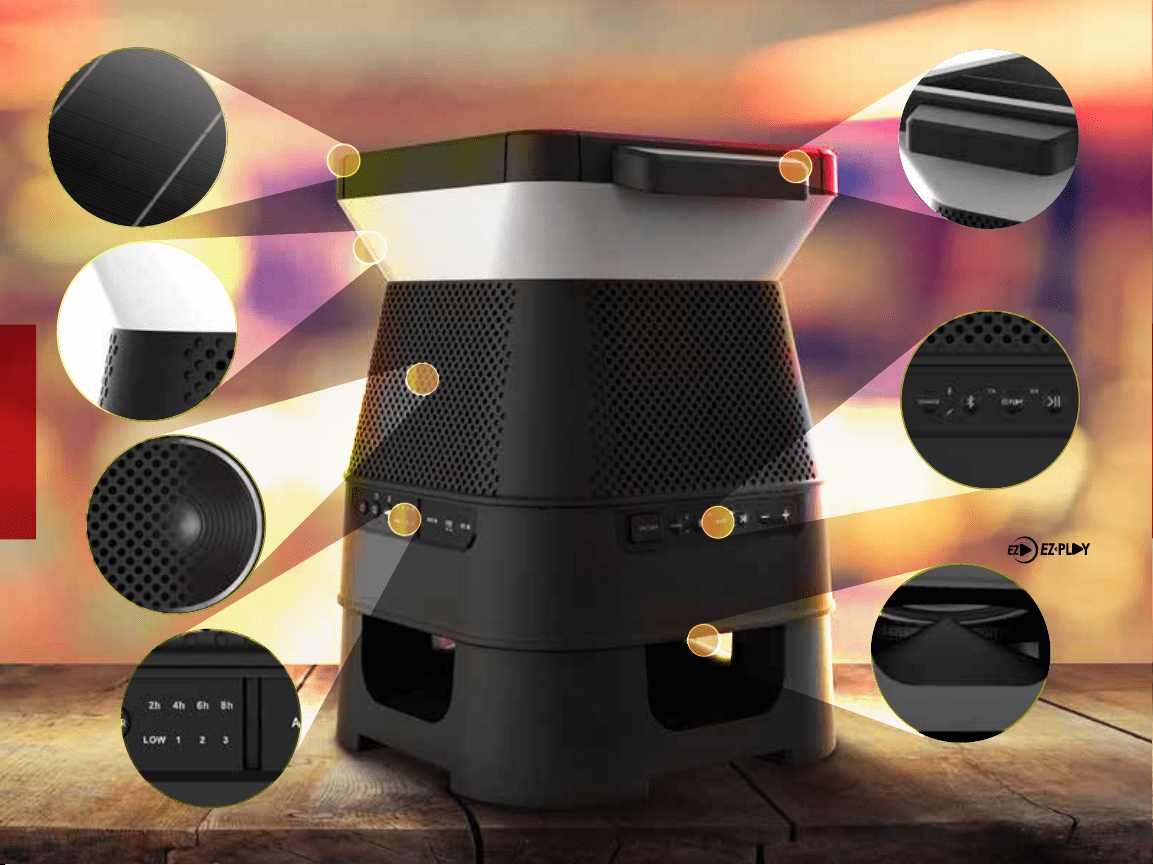
SOLARA HIGHLIGHTS
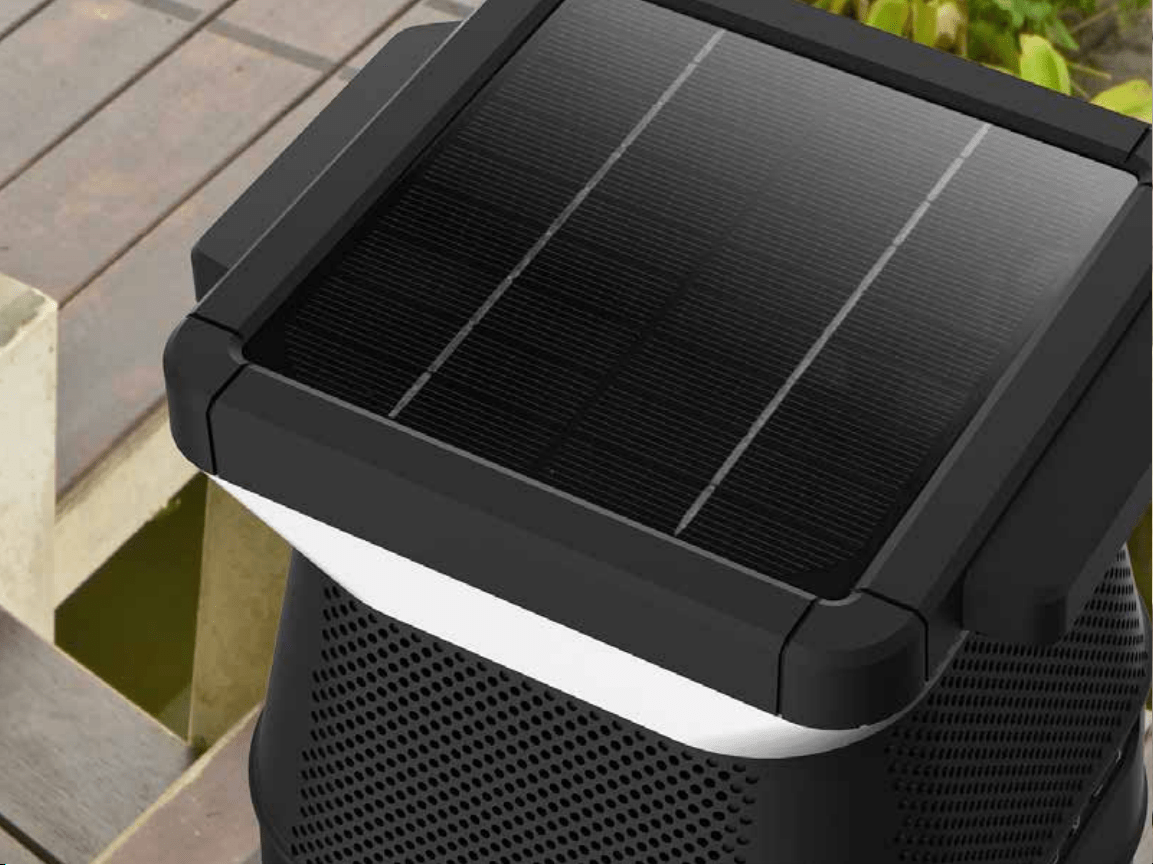
SOLAR
PANEL
360˚
LIGHT
360˚
SOUND
LIGHT
TIMER
CARRYING
HANDLE
SUB-WOOFER
CONNECT 8
SPEAKERS
2
TABLE OF CONTENTS
FOR QUESTIONS OR TECHNICAL SUPPORT PLEASE CALL: 1300-792-219
OR EMAIL: monster.produc[email protected]om
Please do not return this product to the store. www.MonsterProducts.com.au
Package Contents 4
Controls & Connections 5
LED Indicators 6
Getting Started - Charging The Speaker 7
LED Color Functions 9
3.5 mm Aux Input 10
Bluetooth Connection 11
EZ-PLAY Wireless Connection 12-13
Specifications 16
Important Safety Instructions 17-18
Help & Troubleshooting 19
Limited Warranty 22
3
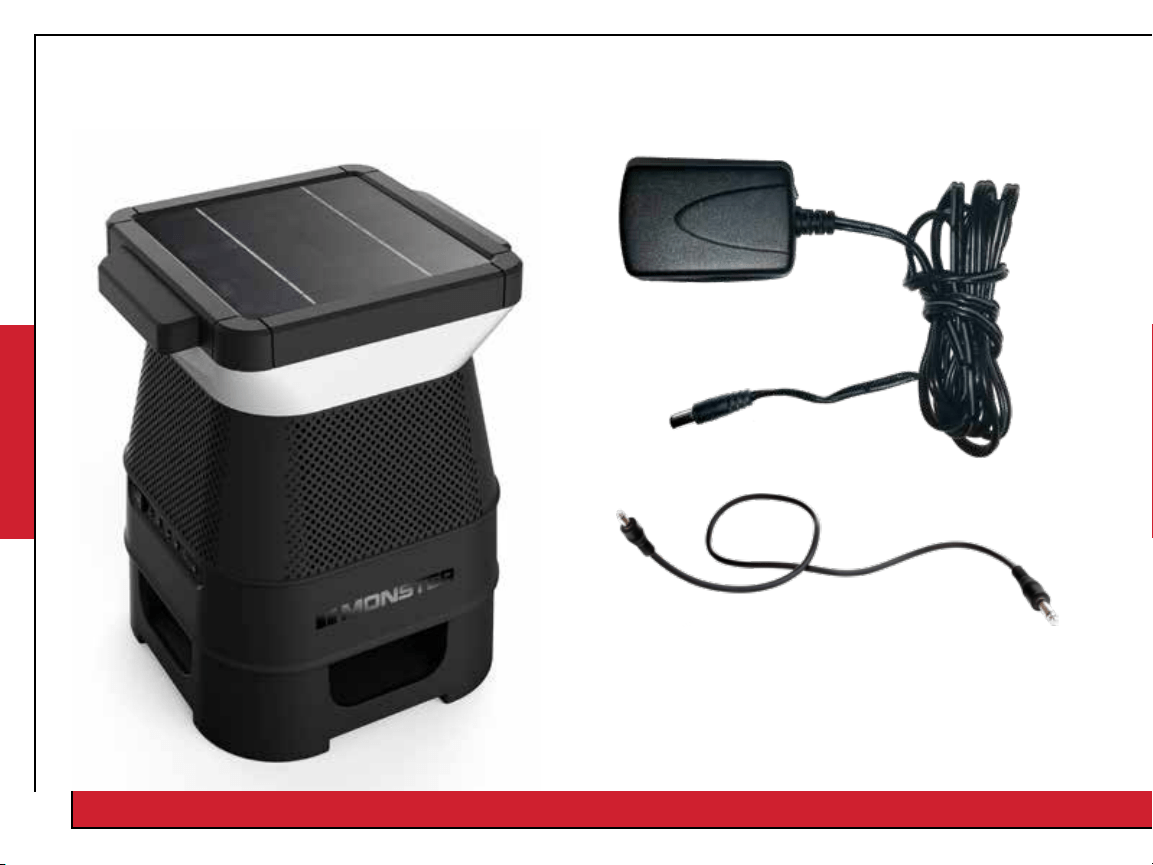
PACKAGE CONTENTS
1. MONSTER SOLARA: Wireless Solar Speaker 2. Power Adapter (5.5V/2.6A DC Adapter)
3. Aux Cable
4. User Manual
(incl. Limited Warranty Statement)
5. Quick Start Guide
(Not To Scale)
(Not To Scale)
If any items are missing, contact our customer service team at 1300-792-219.
4
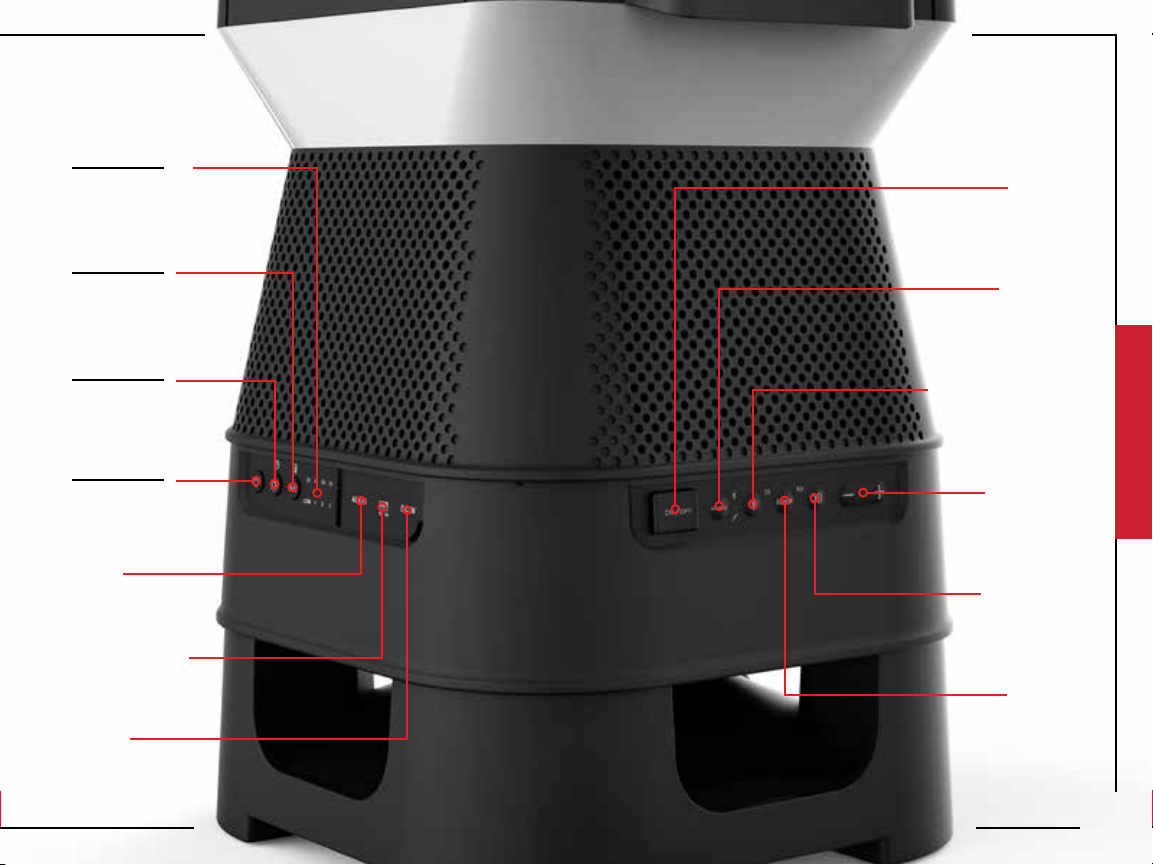
CONTROLS & CONNECTIONS
Short Press
Color
Short Press
Brightness
Short Press
Wake
Long Press
Battery Life
Long Press
Light Timer
Long Press
Stadby Mode
Light Timer
Battery Level
Indicator
AUX
Input
USB Charging
Port
Power
Input
Power
Switch
Bluetooth Pairing
(When in Bluetooth mode)
EZ-Play
Pairing
Source
Selection
Play/Pause
Volume
DOWN/UP
5
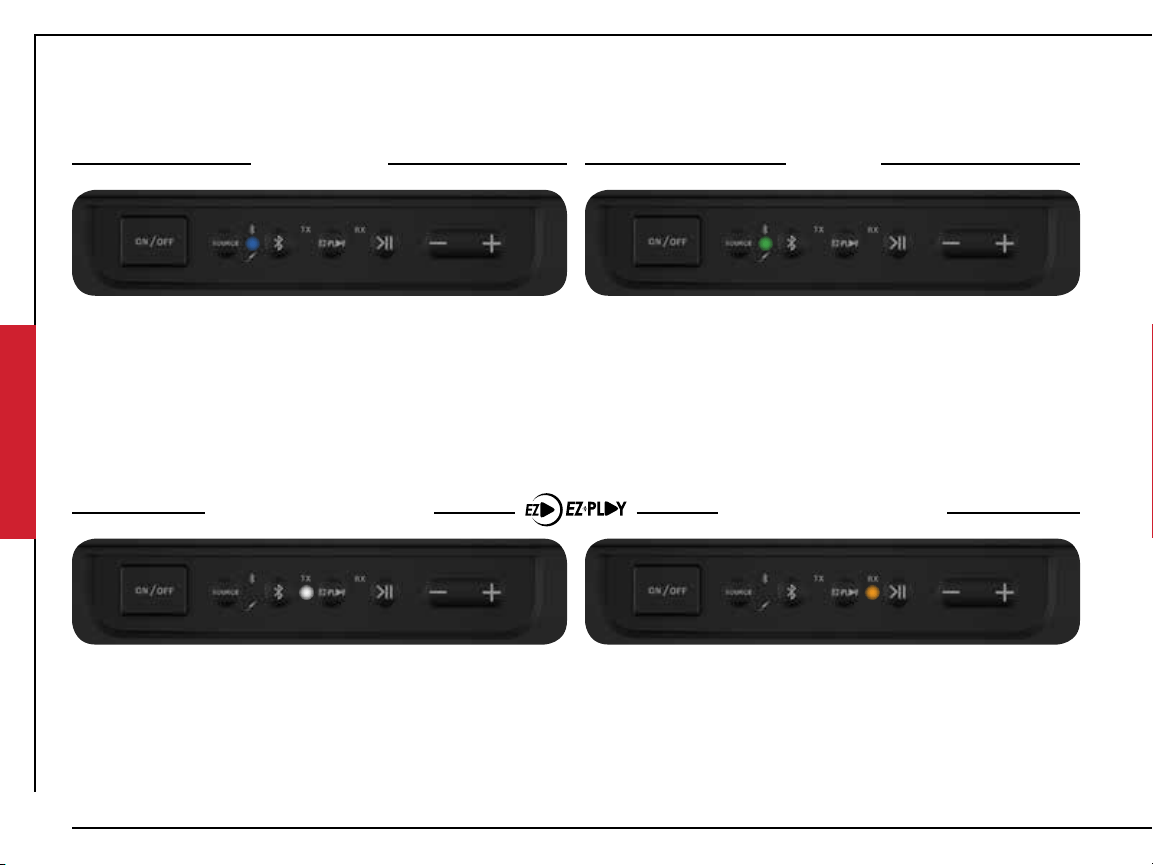
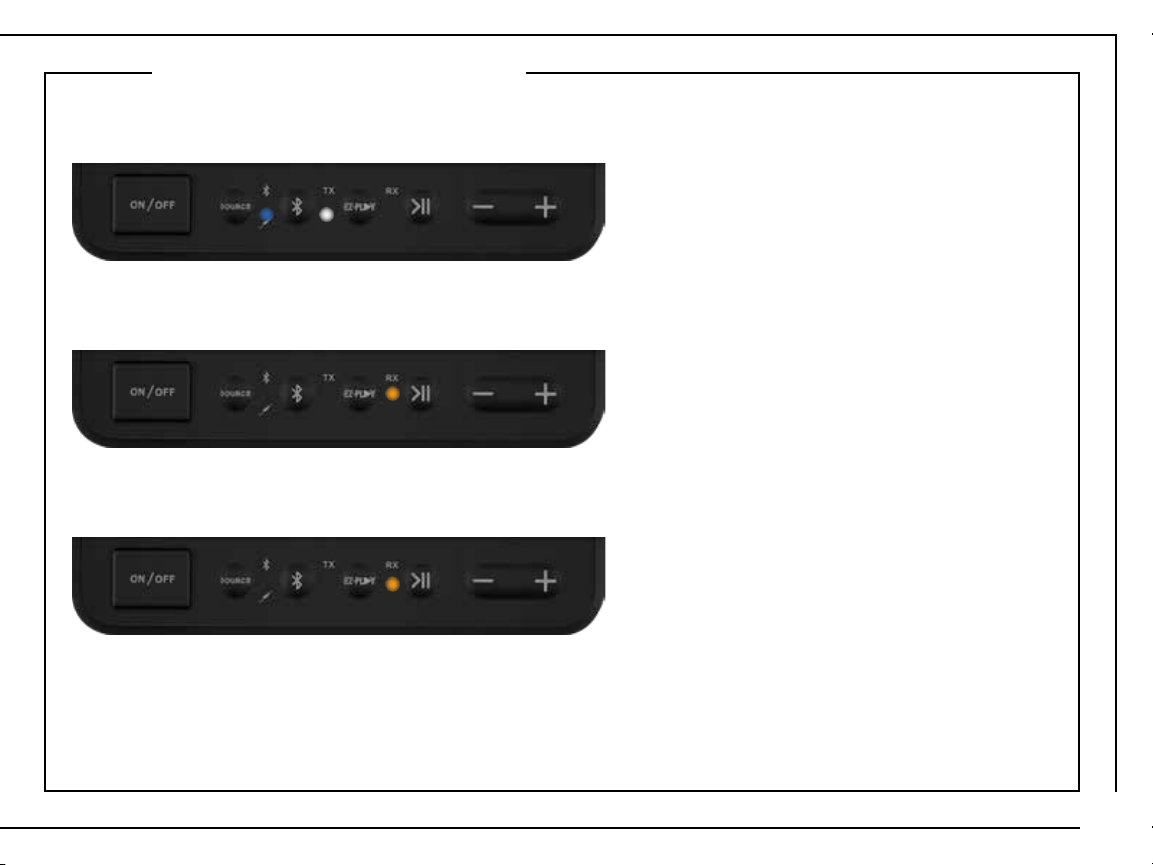
LED INDICATORS
TX Mode (Transmit) RX Mode (Receive)
Fast Flash
Transmit Mode
Searching
Solid
Transmit Mode
Connected
Fast Flash
Receive Mode
Searching
Solid
Receive Mode
Connected
Bluetooth AUX
Slow Flash
Bluetooth On
Standby
Slow Flash
Receive Mode
Standby
Slow Flash
Transmit Mode
Standby
Fast Flash
Bluetooth
Pairing mode
Solid
AUX
Connected
Solid
Bluetooth
Connected
6
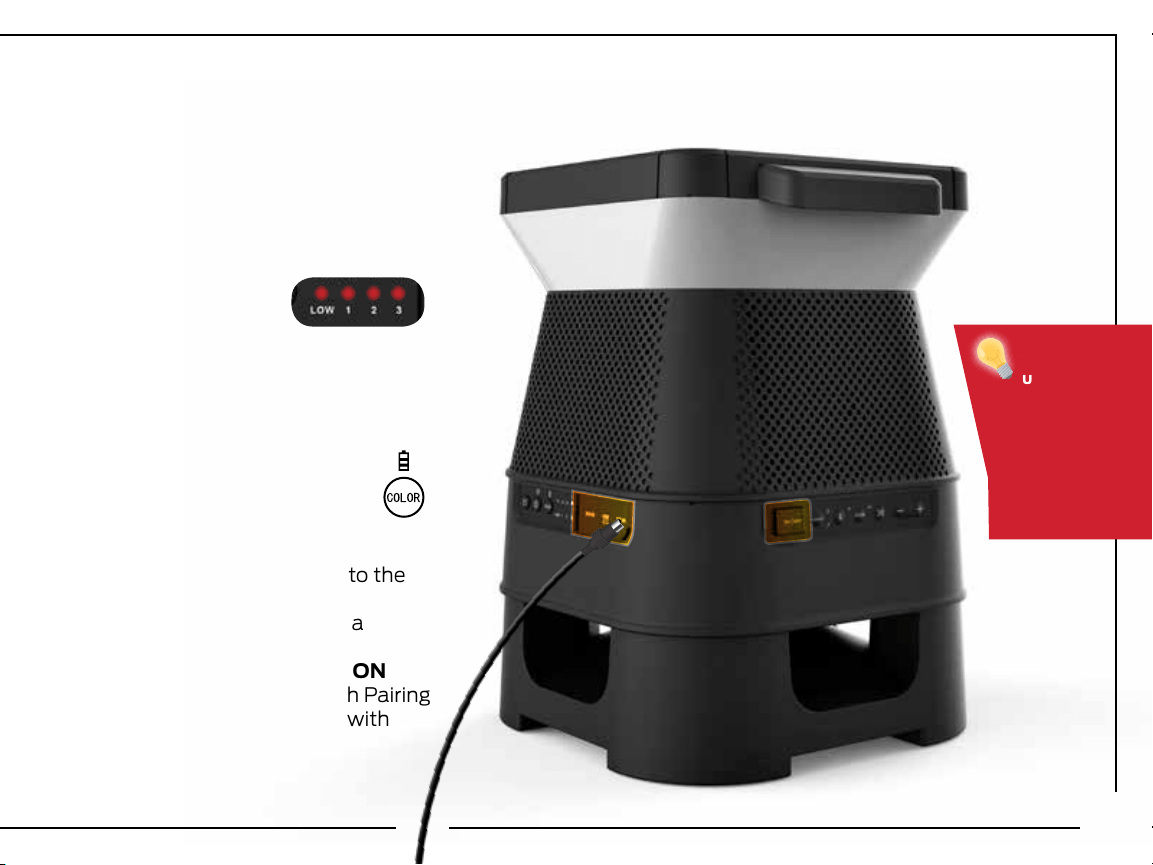
GETTING STARTED - CHARGING THE SPEAKER
1. Connect the power cable to the
Solara speaker.
2. Plug the power cable into a
wall outlet.
3. Flip the Power switch to ON
4. Solara will enter Bluetooth Pairing
mode automatically. Pair with
your Bluetooth device.
When
unplugged,
the speaker
will enter
standby
mode after
15 minutes
of inactivity.
(Not To Scale)
BEFORE FIRST USE:
Charge the unit for 6 hours.
Connect the speaker to a
power outlet to start charging.
When fully charged
RED LED +1, +2, +3
WIll remain solid
When low on battery
RED LED will flash rapidly.
To indicate battery level
Long Press (3 seconds) the
Color/Battery Indicator button.
7
8
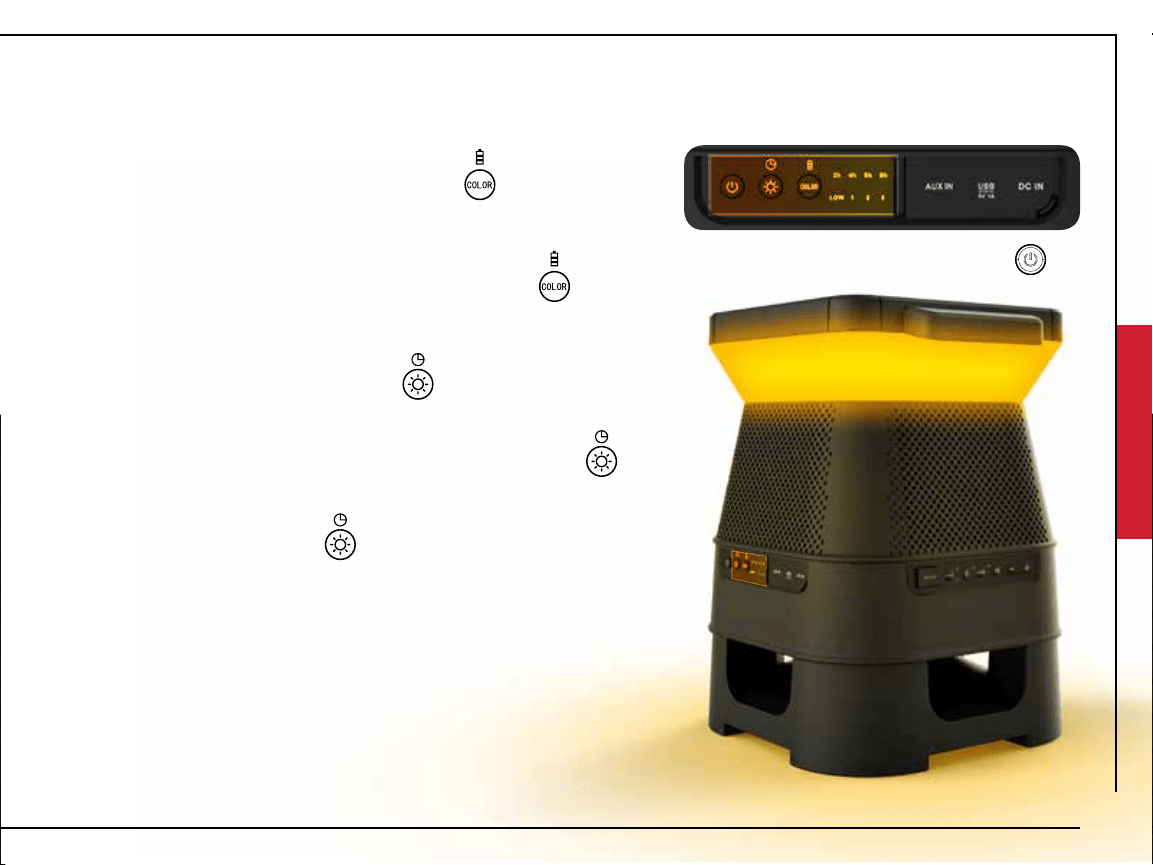
LED COLOR FUNCTION
CHANGING COLORS
Short Press the Color/Battery Indicator button to
cycle through the preset colors:
Chrome (Demo Mode), Red, Dark Blue, Green, Purple,
Amber, Light Blue, White
NOTE: Long Press (3 seconds) the Color/Battery Indicator button
to display battery capacity: (LOW, 1,2,3)
AUTO MODE
Auto Mode will be enable/disabled when light sensor in solar
panel detects change from day to night or night to day.
Day Time (AUTO MODE ON): Lights will remain o during
day time, unless user input changes light brightness, color, or
enables timer.
Night Time (AUTO MODE ON): Lights will remain on durring
night time to the last color and brightness level setting that
was used. NOTE: To disable AUTO MODE at night set brightness to 0%
Long Press (3 seconds) the Standby key
to enter Standby mode mode
9
CHANGING LIGHT BRIGHTNESS/TIMER
Short Press the Light/Brightness button to cycle through
the preset brightness level:
100%, 75%, 50%, 25%, OFF.
Long Press (3 seconds) the Light/Brightness button to
adjust light timer duration:
2 Hours, 4 Hours, 6 Hours, 8 Hours
NOTE: When light is OFF, press the key to turn light ON
(Not To Scale)
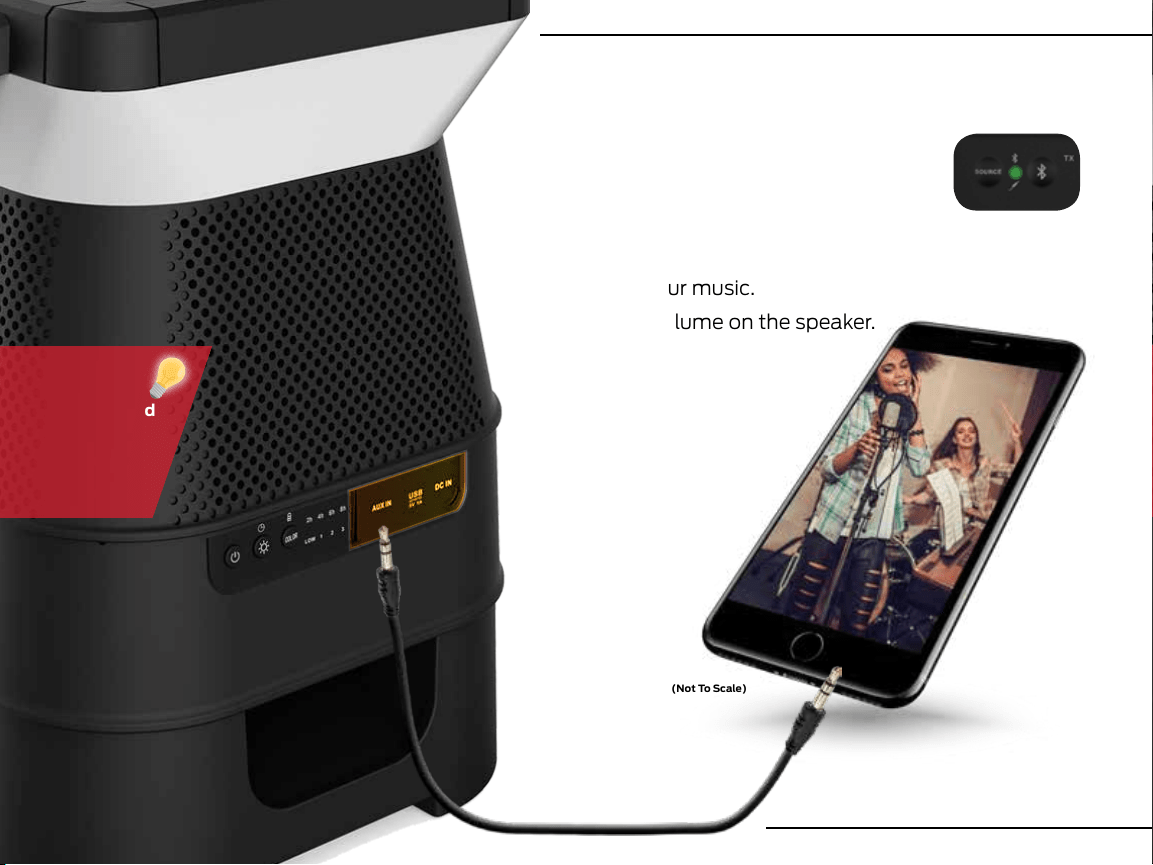
3.5MM AUX INPUT (Cable Included)
1. Ensure the speaker is in AUX mode, if
not press the SOURCE button until
the green LED is solid.
2. Plug a the 3.5mm cable into the AUX port.
3. Connect your audio device to the AUX cable
to play your music.
4. Control volume on the speaker.
For best
sound it is
recommended
to turn the
volume on
your mobile
device up.
10
1. Set the speaker source to Bluetooth (unpaired).
Blue LED will flash
2. Make sure the Bluetooth function is enabled on
your device.
3. Place the Bluetooth device and speaker within pairing
distance (~1 meter).
4. Press and hold the Bluetooth button for 3 seconds
to enter pairing mode (BLUE LED will flash fast).
5. Search for Bluetooth connections on your device.
Select “Monster Solara.”
6. The speaker will confirm connection with an
audible message (BLUE LED will turn solid).
BLUETOOTH CONNECTION
(Not To Scale)
SOLARA
must be in
Bluetooth
Pairing Mode
(Fast Flash
Blue LED)
to connect
to device.
11

EZ-PLAY WIRELESS CONNECTION (ADDITIONAL SPEAKERS SOLD SEPARATELY)
The EZ-Play feature allows you to connect up to 8 compatible speakers and broadcast your favorite
music through all speakers simultaneously – without using a single wire! Speakers can sync and play up
to 30 meters apart from each other, and continue to function eectively through walls.
1. Make sure the speaker is powered on.
The Bluetooth BLUE LED and EZ-PLAY
TRANSMIT (TX) WHITE LED will flash slowly.
2. Press and hold the EZ-PLAY button for 3 seconds
to put the speaker into Transmit Pairing Mode. The
TRANSMIT (TX) WHITE LED will flash rapidly.
3. The TX speaker will automatically connect with RX
speakers that are in Receive Pairing Mode and
within pairing range (<3 meters).
SET TX SPEAKER (TRANSMIT)
(RX)
(RX)
(RX)
(TX)
12
1. Make sure the speaker is powered on.
The Bluetooth BLUE LED and EZ-PLAY TRANSMIT (TX) WHITE LED will flash slowly.
4. The RX speaker will automatically connect with a TX speaker that is in Transmit Pairing Mode
and within pairing range (<3 meters). RECEIVE (RX) AMBER LED will stay solid.
5. Repeat steps to add up to 7 RX speakers. Play audio through up to 8 speakers at once.
SET RX SPEAKER (RECEIVING)
2. Press the EZ-PLAY button to change the speaker mode from Transmit to Receive. The RECEIVE
(RX) AMBER LED will flash slowly.
3. Press and hold the EZ-PLAY button for 3 seconds to put the speaker into Receive Pairing Mode.
The RECEIVE (RX) AMBER LED will flash rapidly.
13

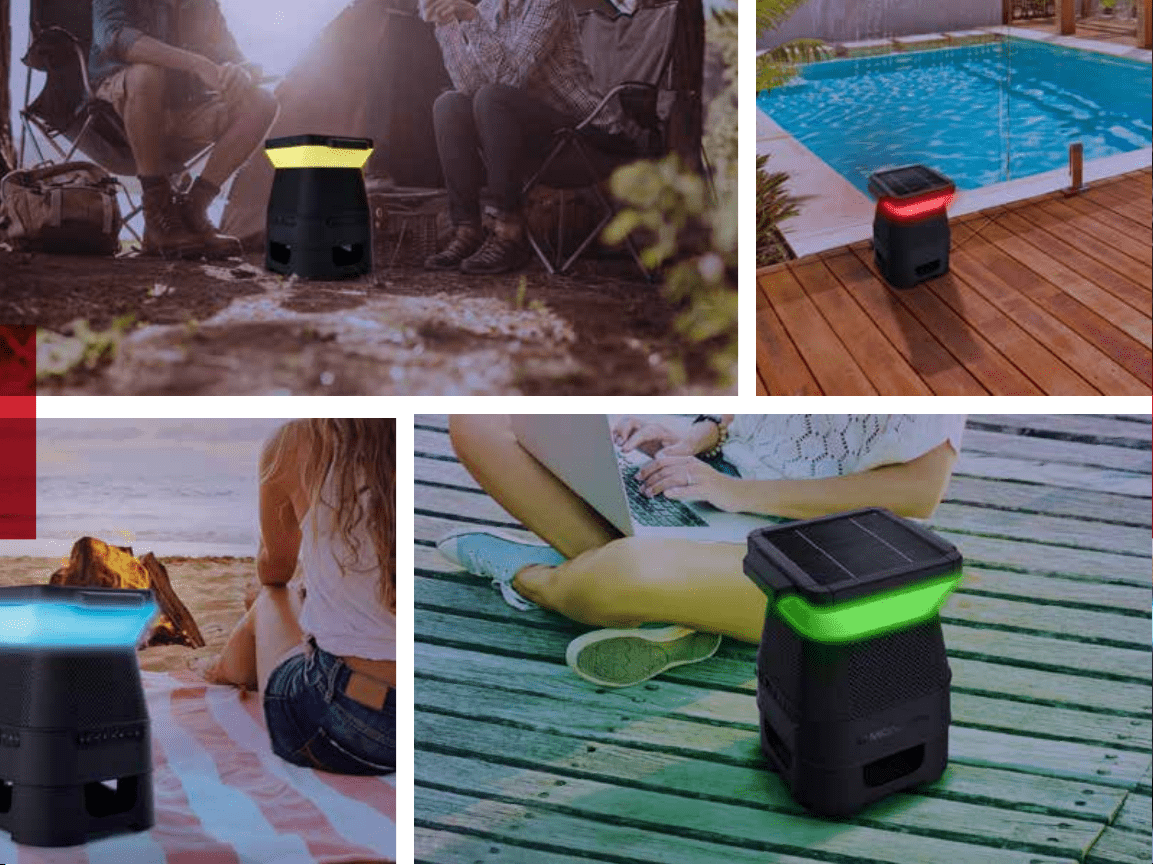
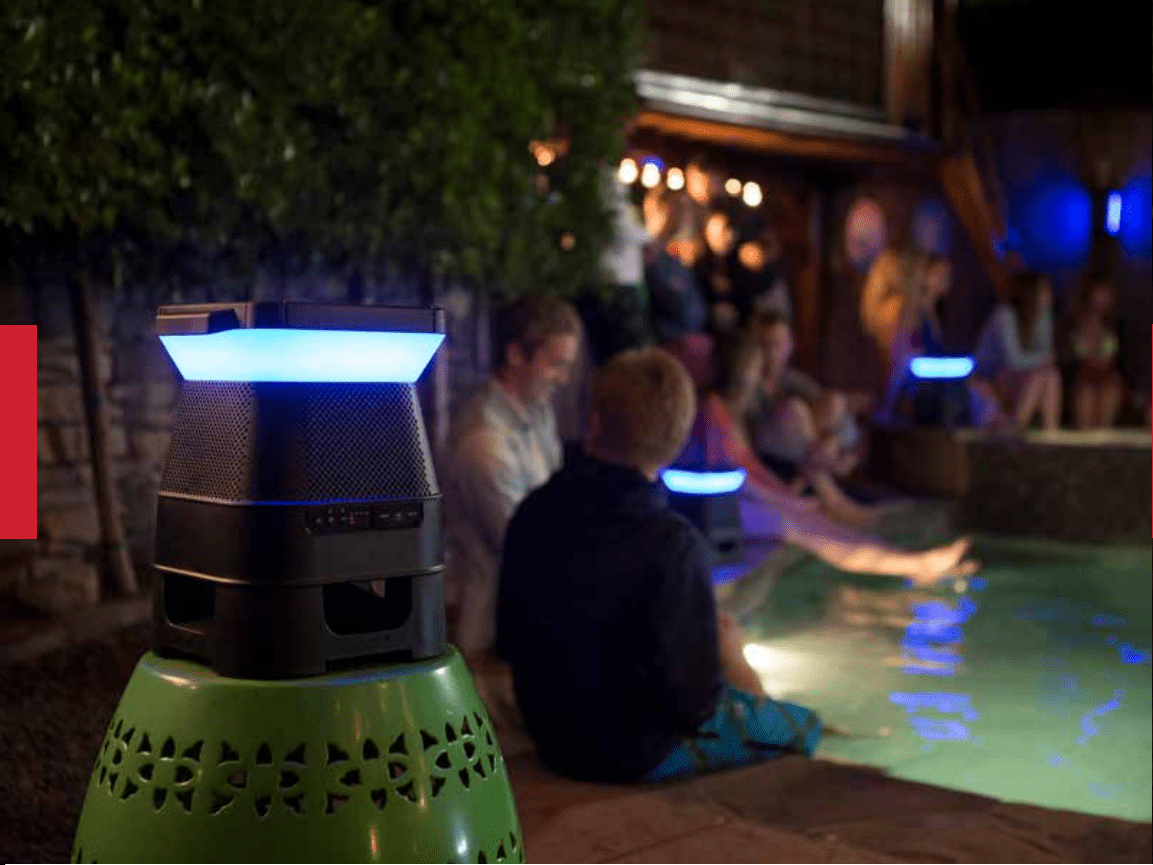
THE
HARNESS
SUN
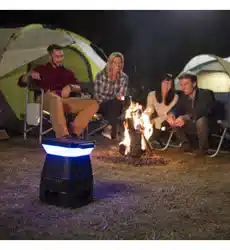
Wireless speakers can free your listening experience in ways that a corded speaker cannot.
But even wireless speakers need time to recharge at the power outlet.
The Solara speaker harnesses the sun’s energy to recharge its power bank.
Every minute out in the sun means less time being spent plugged into a socket.
By taking advantage of solar energy, you get to spend more time outdoors, enjoying the
music you love and bask in the Solara experience.
14
15
SPECIFICATIONS
General
Input(s) Bluetooth 3.0 | AUX | EZ-Play | USB (5V/1A)
Buttons
Wake Up | Brightness/Light Timer | Color/Battery Level | Source | Bluetooth |
EZ-PLAY | Play/Pause | Volume Down/UP
Switch ON/OFF
LED Indicators
Transmit (TX) (White) | Receive (RX) (Amber) | AUX (Green) |
Bluetooth (Blue) | Battery/Timer (Red x1, Green x3)
Power Input 5.5V/2.6A DC In
Power Saving Auto off after 15 min.
Speaker Power 2 x 3.5W
Drive(s) 3.5” Full Range (x4) | 6.5” Passive Radiator (x1)
THD + Noise 75dB
Cabinet Material Plastic
Dimensions (W x H x D) 28.70” x 36.07” x 28.70”
Weight 4 kg
Operating Temperature
Operating Temperature Range 0°C - 40°C
Operating Humidity Range 40~90% RH
Storage Temperature Range -25°C to 70°C
16

IMPORTANT SAFETY INSTRUCTIONS
1. Read all instructions and save them for personal reference in the future.
2. Follow all directions for operating the product.
3. Heed all warnings on the product and in the operation instructions.
4. Clean with a dry cloth only. Always unplug the product from any power source before cleaning.
5. Do not use third-party attachments or non-recommended accessories with this product.
6. Do not place product on an unstable surface, such as a cart, stand, tripod, table, etc.
Unstable surfaces may cause the product to fall and cause serious injury to people
and serious damage to the product. Follow all manufacturer instructions for mounting
and accessories.
7. Do not block or cover ventilation slots. Openings in the product cabin ensure reliable
operation and prevent overheating. Avoid placing on beds, sofas, and rugs, or mounting
on racks or bookcases, unless proper ventilation is provided.
8. Do not use plug incorrectly. The product may come with a polarized, alternating-current line plug
(one blade is wider/larger than the other). This is a safety feature: the plug will only go into outlet
receptacles one way. Do not force the plug. If the plug does not fit, contact your electrician to re
place the outlet.
9. Prevent power cord hazards. Route cords to avoid walking on them or pinching them, especially at
plug ends and connection points to the product & power outlets.
17

10. Unplug power cord when not in use. The product should not be plugged into a power source when
not in use for long periods of time.
11. Do not use this product near bodies of water. The product is not waterproof and cannot be fully sub
merged in water. Power cords and electric currents should never be exposed to water.
12. Do not set up near heat sources. Avoid radiators, stoves, heat registers, amplifiers, and other devices
that produce heat. Avoid long exposure to sunlight and high temperatures.
13. Refer all service to qualified personnel. If the product becomes damaged during use or encounters a
malfunction, contact qualified service personnel. Do not attempt to service yourself.
14. To use wirelessly, disconnect AC plug completely. The plug must be completed disconnected from
the power outlet.
15. Do not stand, sit, jump or strike the Solara with sharp objects. The product may break and
not function.
16. Solar panel must be cleared of dust, leaves and water to achieve maximum power conversion.
Avoid using cleaning materials and manually dissecting parts.
17. Solar panel may be hot when sitting under sun, please use caution when touching.
IMPORTANT SAFETY INSTRUCTIONS
(CONTINUED)
18
HELP & TROUBLESHOOTING
For additional help please contact our support team at:
Phone: Telephone: 1300-792-219
Email: monster.products@arisit.com
No power / Will not turn on
Press the battery indicator button to check the current battery level. Plug
into a power source and charge the speaker.
No sound playing
● Increase the volume on source device, press Volume Up (+). Ensure device
is not muted.
● Increase the volume on speaker, press Volume Up (+).
● Ensure speaker is properly paired with the source device.
● Press Play/Pause button on speaker.
● If source device is outside Bluetooth range move speaker closer.
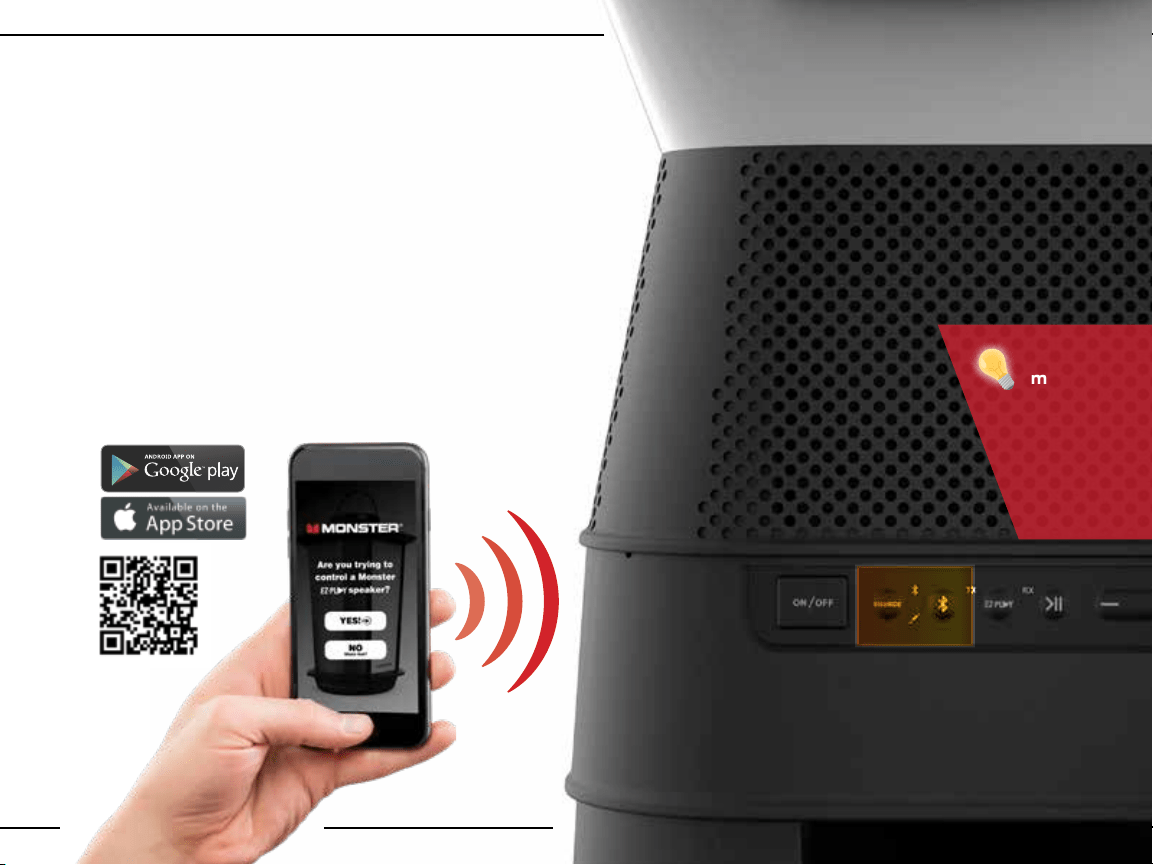
Smartphone / Tablet remote
app isn’t working
Ensure phone or tablet is properly paired with the Solara speaker.
LED button is flashing red
Please charge by plugging directly into wall outlet. Ensure that charging
cable is not damaged.
19
20
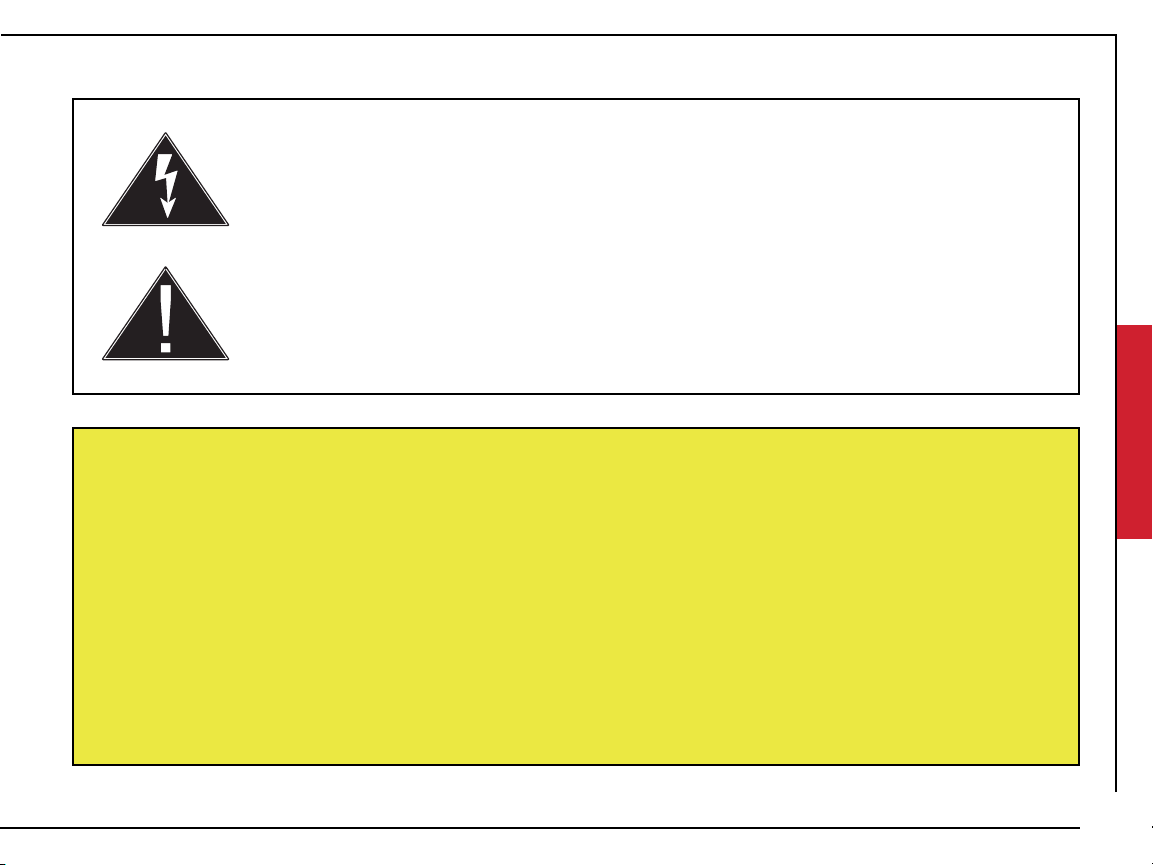
Prevent fire and shock hazards. Do not use extension
cords or outlets that expose plug blades. Do not
expose cables and plugs to rain or moisture.
Do not attempt to perform any servicing that is not included in the operating instructions. Do not
attempt to replace the battery, as incorrect installation can cause fire or explosion. For service,
contact qualified service personnel.
Do not remove cover or back of product. There are no user-serviceable parts inside. Attempting to
modify controls or performance beyond manufacturer specifications may result in hazardous
exposure to radiation.
A lightning flash and arrowhead within an equilateral triangle denotes the
presence of insulated “dangerous voltage” within the product’s enclosure. The
voltage may be of sucient magnitude to constitute a risk of electric shock to
persons who come into contact with it.
An exclamation point within an equilateral triangle denotes
the presence of important operation & maintenance/
service instructions.
WARNING
21

LIMITED WARRANTY
Model: MNSOLANZ-BLK
Telephone: 1300-762-219
Email: monster.products@arisit.com
To obtain warranty service:
The Warranty
Subject to the following terms, Arisit Pty Limited will repair or replace any part of any eligible Arisit product that is defective within the warranty
period indicated in the table below or refund you the cost of the replacement. The benefits to a consumer given by this warranty are in addition to
other rights and remedies of the consumer under a law in relation to the goods or services to which the warranty relates.
Eligibility
1. To claim the benefit of this warranty you must:
(a) be the original purchaser of a genuine Arisit product from an authorised reseller (this warranty is not transferable);
(b) produce proof of your purchase; and
(c) provide the details required in the ‘How to Claim’ section below.
2. This warranty is limited to defects that arise:
(a) In the course of normal installation and use; and
(b) within the warranty period identified for the product in the table below, commencing on the date of original purchase.
3. This warranty excludes:
(a) defects arising from misuse, accident, neglect or improper care, fluctuation in electrical current, incorrect or failed software
upgrade, damage or malfunction from incorrect assembly or installation, defects from alteration or modification,
unauthorised service or repair.
4. Arisit may elect between repair, replacement or refund to honour this warranty, at its sole discretion.
In making a claim under this warranty, you agree that if, following receipt of your claim under this warranty, Arisit or its authorised service centre
determine that your claim in respect of a product is invalid or you have provided false, inaccurate or misleading information with your claim, Arisit
or its authorised service centre may charge you for any labour, parts or transport costs incurred.
22

How to Claim:
In order to make a claim under this warranty, take the following steps:
1. Attach your proof of purchase document(s) to this card and complete the following details:
Brand: ____________________________ Model No: __________________________________
Date of Purchase: ___________________ Where Purchased: ____________________________
2. a) AUSTRALIA - Contact Arisit by telephone in Melbourne, Australia on 1300 726 219, or by emailing productreturns@arisit.com or by letter to
ATTN: Product Returns, Arisit Pty Limited, 40-44 Mark Anthony Drive, Dandenong South, VIC 3175 and submit such details of your claim as
Arisit requires.
b) NEW ZEALAND - Contact Arisit by telephone in Auckland on (+64) 9 306 1020, or by e-mailing sal[email protected]o.nz or by letter to
ATTN: Product Returns, Arisit Pty Limited, 1a Howe Street, Newton, Auckland 1145, NZ and submit such details of your claim as Arisit requires.
3. Deliver the product(s) to the address above or the original place of purchase.
4. You must bear any expense you incur in claiming this warranty.
Notice to Australian Consumers
Our goods come with guarantees that cannot be excluded under the Australian Consumer Law. You are entitled to a replacement or refund for a
major failure and compensation for any other reasonably foreseeable loss or damage. You are also entitled to have the goods repaired or replaced
if the goods fail to be of acceptable quality and the failure does not amount to a major failure.
Notice to New Zealand Consumers
Our goods come with guarantees that cannot be excluded under the Consumer Guarantees Act 1993. This warranty should not be construed
as any attempt to contract out of or exclude any or the guarantees available to any consumers under this Act provided that you agree that the
provisions of the Consumer Guarantees Act 1993 will not apply if you are acquiring the goods for the purpose of a business.
Warranty Period Use:
Brand Category Warranty Period
MONSTER AUDIO 1 (One) Year
Arisit Pty Limited Australia, 40-44 Mark Anthony Drive, Dandenong South, VIC 3175 Australia Tel: 1300 762 219
Arisit Pty Limited NZ, 1a Howe Street, Newton, Auckland, 1145 NZ, Tel: (+64) 9 306 1020
23
SOLARA
INDOOR/OUTDOOR WIRELESS
SOLAR POWERED SPEAKER
MUSIC WITHOUT LIMITS
www.MonsterProducts.com.au
24