Loading ...
Loading ...
Loading ...
OPERATION
INSTALLING BONNETS
1. Unplug your Buffer-Polisher. Danger: Failure to
unplug your buffer-polisher may result in acciden-
tal starting causing serious injury.
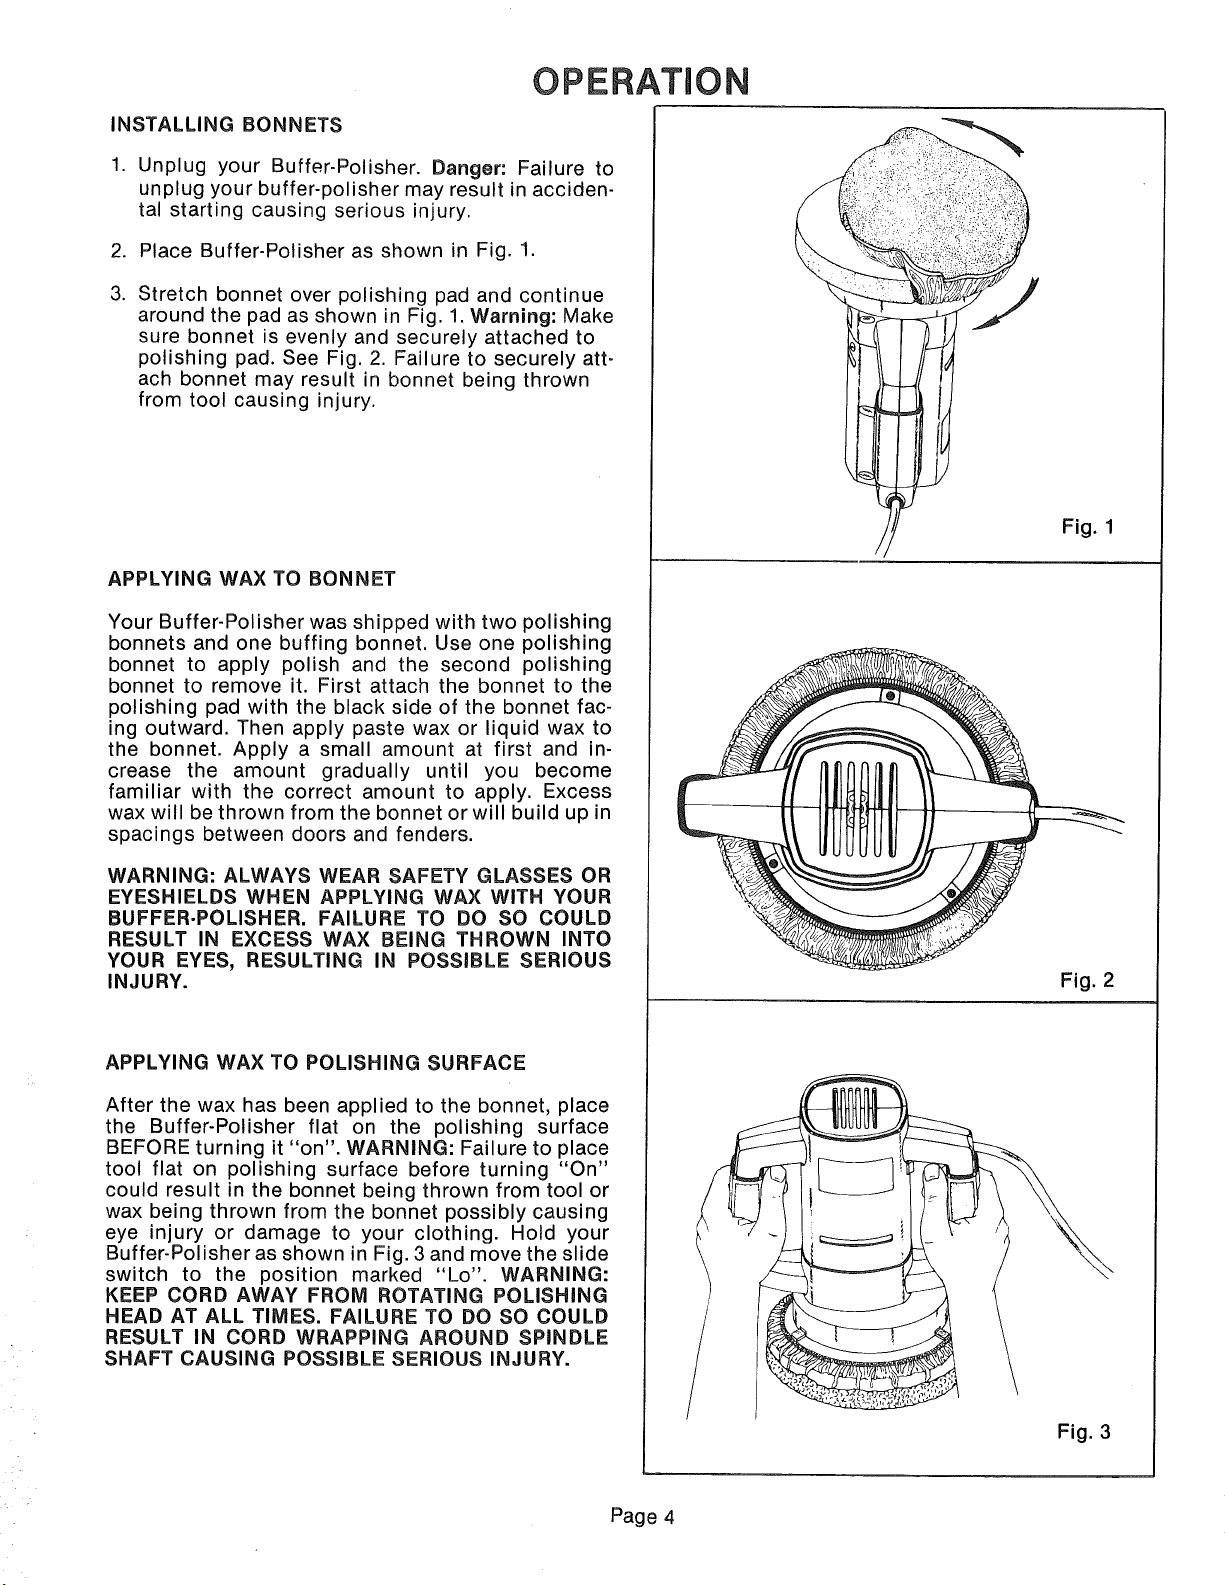
2. Place Buffer-Polisher as shown in Fig. 1.
.
Stretch bonnet over polishing pad and continue
around the pad as shown in Fig. 1. Warning: Make
sure bonnet is evenly and securely attached to
polishing pad. See Fig. 2. Failure to securely att-
ach bonnet may result in bonnet being thrown
from toot causing injury.
APPLYING WAX TO BONNET
Your Buffer-Polisher was shipped with two polishing
bonnets and one buffing bonnet. Use one polishing
bonnet to apply polish and the second polishing
bonnet to remove it. First attach the bonnet to the
polishing pad with the black side of the bonnet fac-
ing outward. Then apply paste wax or liquid wax to
the bonnet. Apply a small amount at first and in-
crease the amount gradually until you become
familiar with the correct amount to apply. Excess
wax will be thrown from the bonnet or will build up in
spacings between doors and fenders.
WARNING: ALWAYS WEAR SAFETY GLASSES OR
EYESHIELDS WHEN APPLYING WAX WITH YOUR
BUFFER.POLISHER. FAILURE TO DO SO COULD
RESULT IN EXCESS WAX BEING THROWN INTO
YOUR EYES, RESULTING IN POSSIBLE SERIOUS
INJURY.
APPLYING WAX TO POLISHING SURFACE
After the wax has been applied to the bonnet, place
the Buffer-Polisher flat on the polishing surface
BEFORE turning it "on". WARNING: Failure to place
tool flat on polishing surface before turning "On"
could result in the bonnet being thrown from tool or
wax being thrown from the bonnet possibly causing
eye injury or damage to your clothing. Hold your
Buffer-Polisher as shown in Fig. 3 and move the slide
switch to the position marked "Lo". WARNING:
KEEP CORD AWAY FROM ROTATING POLISHING
HEAD AT ALL TIMES. FAILURE TO DO SO COULD
RESULT IN CORD WRAPPING AROUND SPINDLE
SHAFT CAUSING POSSIBLE SERIOUS INJURY.
Fig. 1
Fig. 2
Fig. 3
Page 4
Loading ...
Loading ...
Loading ...