Loading ...
Loading ...
Loading ...
10
WORKTOPS/UNDERCOUNTERS & SANDWICH UNITS
OPERATIONS MANUAL
FIGURE 8: Door Hinge Components
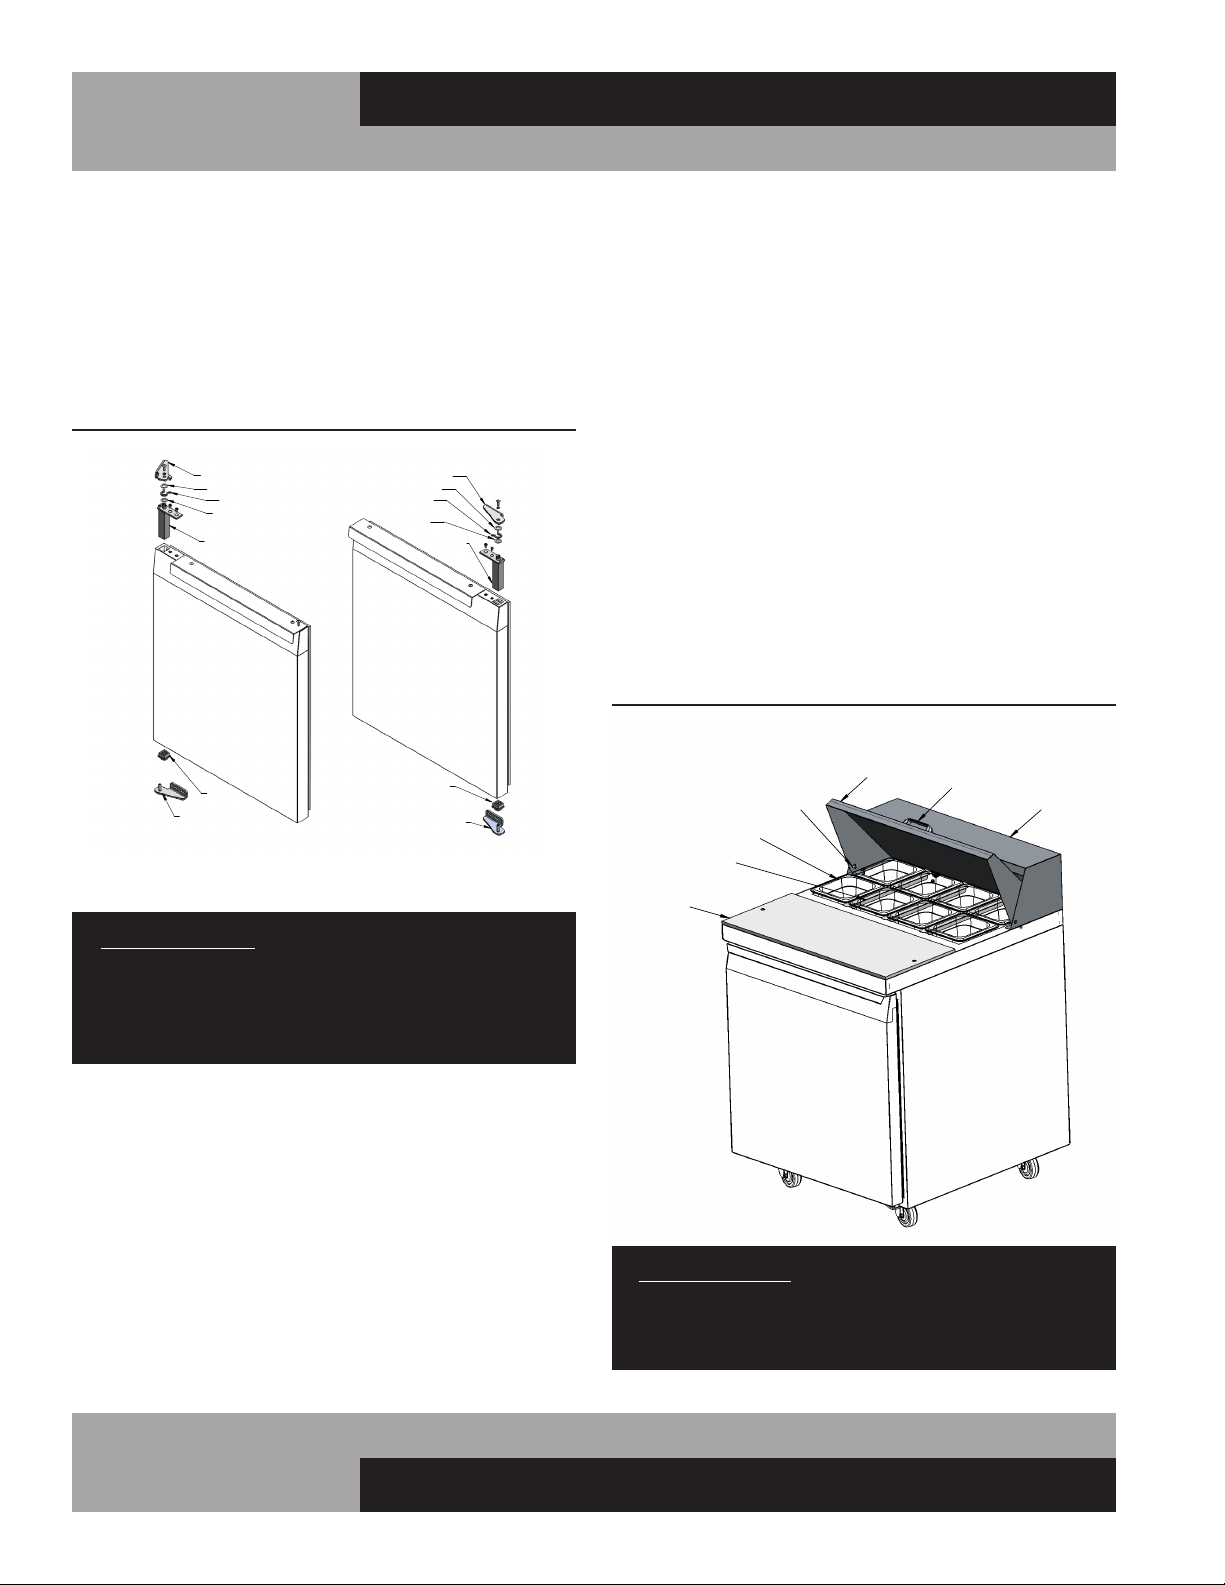
FIGURE 9: Sandwich Top Lid Open
(TYPICAL UNIT WITH 1/6-SIZE PANS SHOWN)
HOOD
LID
FOOD PANS
CUTTING
BOARD
PIVOT PIN (2)
PAN DIVIDERS
LID HANDLE
For doors with spring cartridge on the bottom: Open the door
fully (115°) and remove the mounting screws securing the
hinge cartridge bracket to the cabinet below the door. Lower
the door down carefully, to avoid bumping the cartridge bracket,
and slide it off the pivot pin bracket over the door. To reinstall,
reverse this procedure and follow the instructions above to set
the hinge tension and adjust the door properly.
RE-HINGING DOORS
IMPORTANT NOTE: DOORS ARE FIELD REVERSIBLE,
BUT DIFFERENT HINGE BRACKETS ARE REQUIRED.
HAVE YOUR MODEL & SERIAL NUMBER READY AND
CONTACT THE FACTORY FOR THE PARTS NEEDED FOR
YOUR UNIT.
Remove the door and hinge cartridge bracket from the cabinet,
as described above (see Figure 7). Remove the pivot bracket,
located at the opposite edge of the door (see Figure 8) by
loosening the (2) mounting screws. Remove the hinge cartridge
from the door by removing the (2) screws and sliding the car-
tridge out. Remove the plastic pivot insert from the opposite
end of the door by carefully prying it out with a flat-blade screw-
driver or putty knife. Remove the remaining “filler screws” from
the face of the cabinet and reinstall them in the threaded holes
where the brackets were originally mounted.
To re-assemble the reverse-hinged door, obtain the correct car-
tridge bracket and pivot bracket for the top and bottom of the
“opposite-hand” door (see Figure 8 for parts identification).
Follow the steps above, in reverse order.
SANDWICH TOP AND FOOD PANS
Sandwich units are provided with food pans and divider bars. All
pans must be kept in place whenever your unit is operating and
lids should be closed whenever possible for optimum perfor-
mance. To remove the lid over the pans (see Figure 9), lift it 1/2
way up and carefully push in on one end at the bottom corner,
so the pivot pin comes out of the mating hole in the hood. Swing
the end of the lid forward, so it clears the end of the hood. Slide
the entire lid sideways, so the pivot pin on the opposite end is
free from the hood. If you have an insulated lid, to remove the
liner and insulation, take out the screws along the back edge, let
the back of the liner drop down and rotate it so the front edge
of the liner disengages from the front of the lid. To remove the
hood from the cabinet, take out the screws located inside each
end and along the back edge.
IMPORTANT NOTE: The top opening on your sandwich
unit must be completely filled with pans at all times, even
if some pans are empty, to maintain air flow for proper
cabinet and pan temperature.
Loading ...
Loading ...
Loading ...