Loading ...
Loading ...
Loading ...
ASSEMBLY INSTRUCTIONS
TOOLS REQUIRED
(1) Adjustable Wrench
(1) 318" Open Er_d or Box Wrench
(1) 7/16" Open Endor Box Wrench
(1} 1/2" Open End or Box Wrench
(1) 9/16" Open End or Box Wrench
(1) Standard Screwdriver
(1) Pair of Pliers
Refer to carton contents figure on page 2 and figure
1 on page 3 for parts and hardware needed to
assemble sweeper housing.
1.
Remove the 5/16"hex nuts, 5/16" lock washers
and 5/16" fiat washers from the two 5/16" x 1-3/4"
carriage bolts as shown in figure 3. Assemble
the hitch tongue to the sweeper, reusing the
same two carriage bolts, flat washers, lock
washers and hex nuts. Do not tighten at this
time,
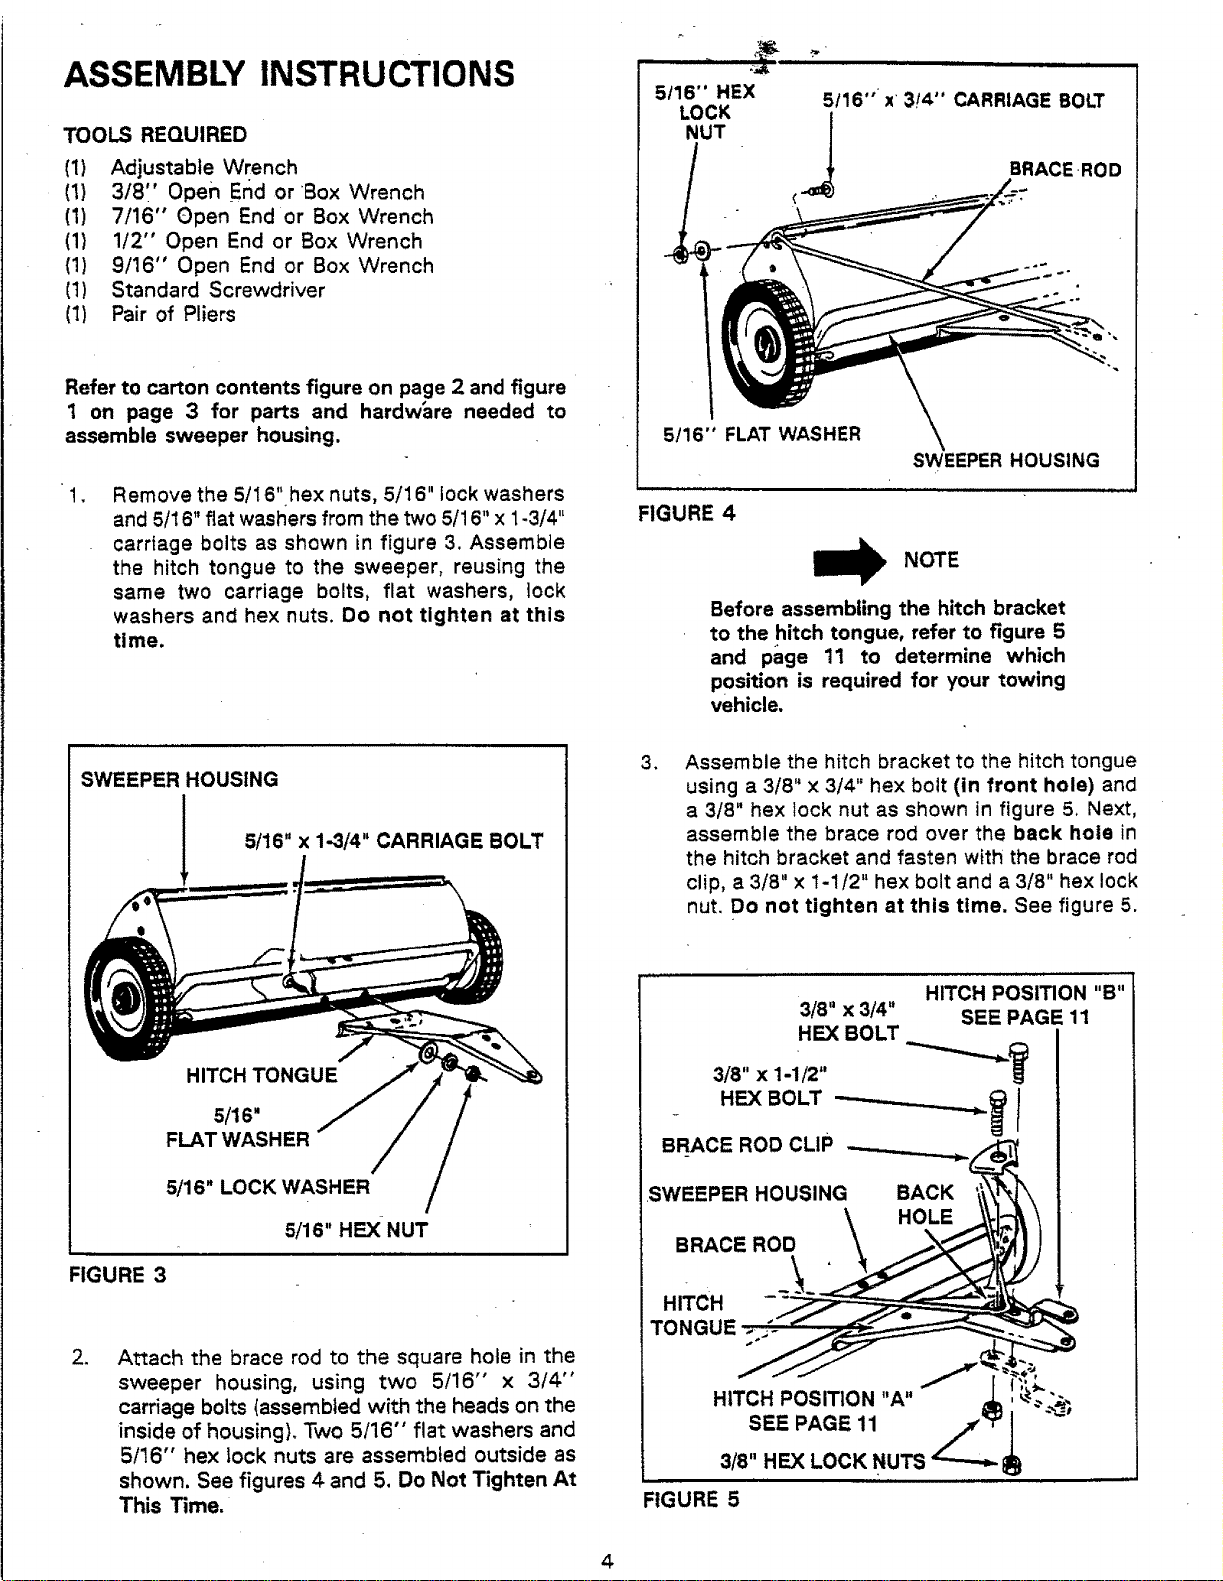
5116" FLAT WASHER
SWEEPER HOUSING
FIGURE 4
NOTE
Before assembling the hitch bracket
to the hitch tongue, refer to figure 5
and page 11 to determine which
position is required for your towing
vehicle.
SWEEPER HOUSING
5/16" x 1-3/4" CARRIAGE BOLT
HITCH TONGUE
5/16"
FLAT WASHER
5/16" LOCK WASHER
5/16" HEX NUT
FIGURE 3
2.
Attach the brace rod to the square hole in the
sweeper housing, using two 5/16" x 3/4"
carriage bolts (assembled with the heads on the
inside of housing). Two 5/16" flat washers and
5/16" hex lock nuts are assembled outside as
shown. See figures 4 and 5. Do Not Tighten At
This Time.
.
Assemble the hitch bracket to the hitch tongue
using a 3/8" x 3/4" hex bolt (in front hole) and
a 3/8" hex lock nut as shown in figure 5. Next,
assemble the brace rod over the back hole in
the hitch bracket and fasten with the brace rod
clip, a 3/8" x 1-1/2" hex bolt and a 3/8" hex lock
nut. Do not tighten at this time. See figure 5.
SWEEPER HOUSING
BRACE ROD
HITCH
TONGUE -._-
BACK
HOLE
HITCH POSITION "A"
SEE PAGE 11
3/8" HEX LOCK NUTS
FIGURE 5
4
Loading ...
Loading ...
Loading ...