Loading ...
Loading ...
Loading ...
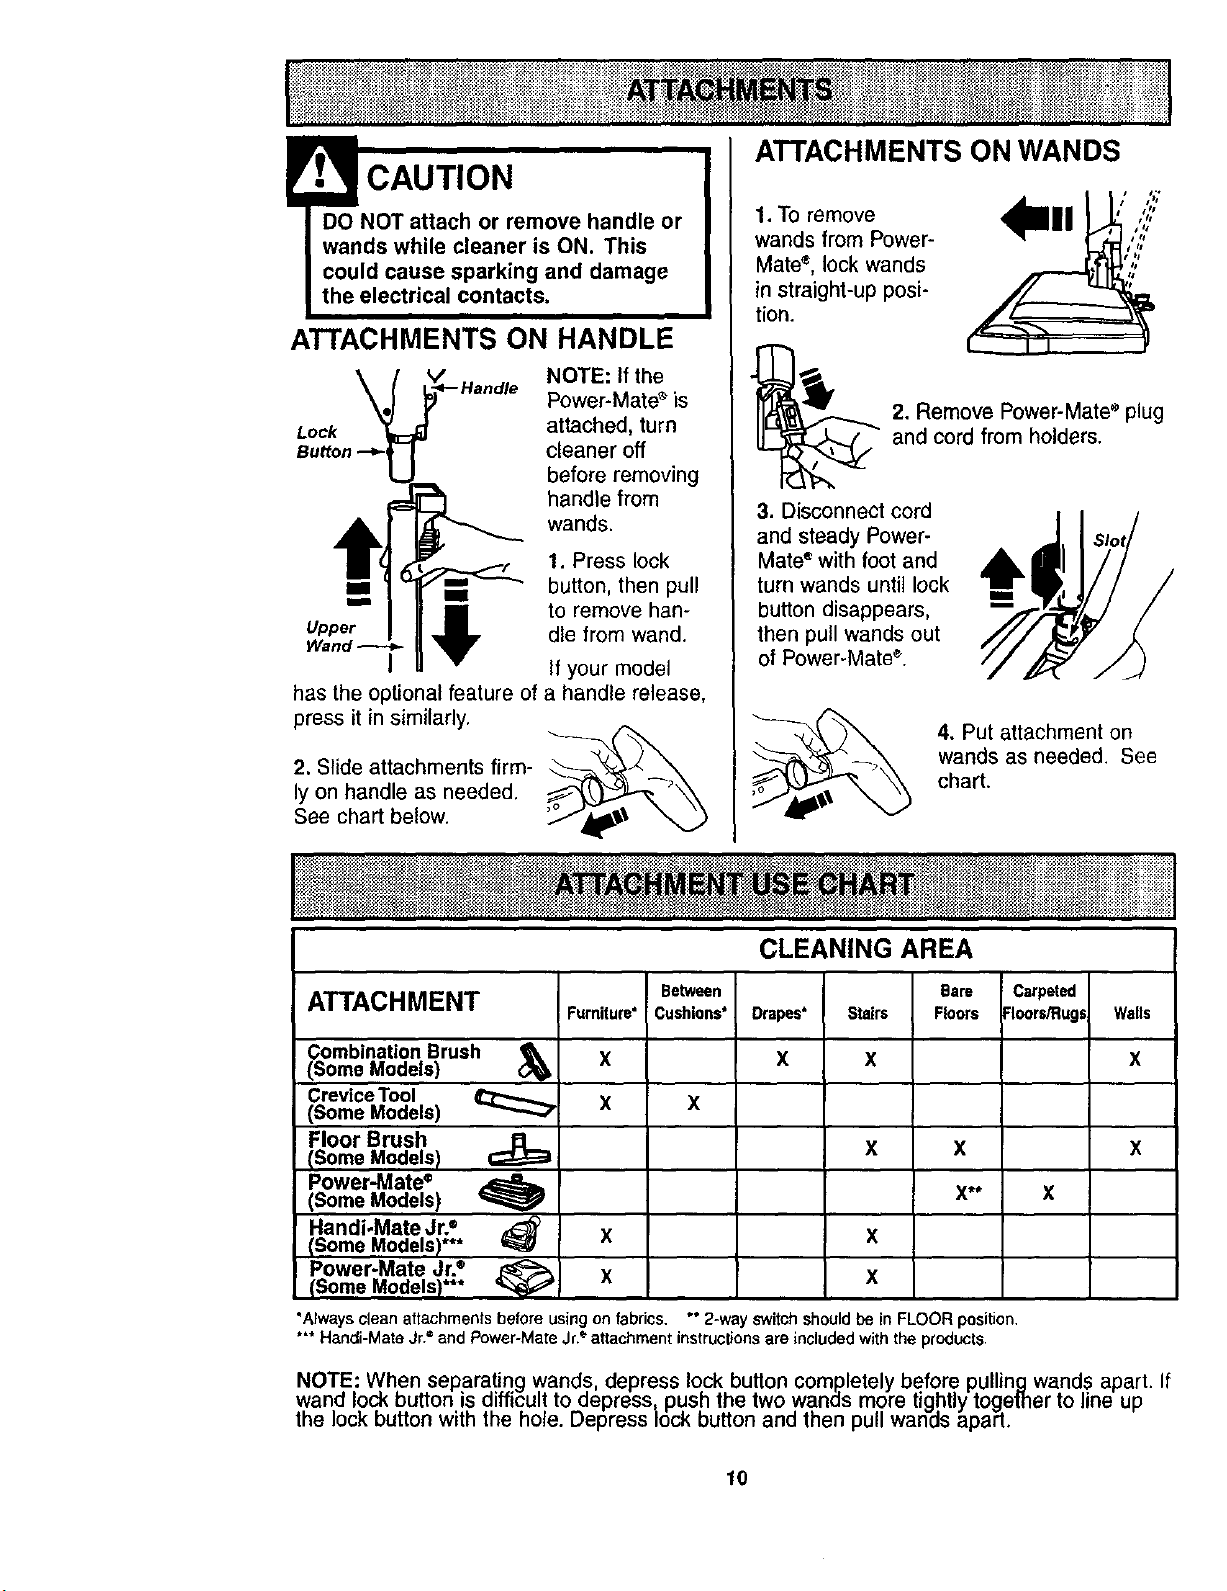
! CAUTION
DO NOT attach or remove handle or
wands while cleaner is ON. This
could cause sparking and damage
the electrical contacts.
ATTACHMENTS ON HANDLE
Lock
Button
NOTE: If the
Power-Mate s is
attached, turn
cleaner off
before removing
handle from
wands.
1. Press lock
" i button, then pull
'== to remove han-
Upper die from wand.
I If your model
has the optional feature of a handle release,
press it in similarly.
2. Slide attachments firm- __
ly on handle as needed.
See chart below.
ATTACHMENTS ON WANDS
1. To remove
wands from Power-
Mate`*, lock wands
in straight-up posi-
tion.
II ' ,,:;:'
2. Remove Power-Matee plug
and cord from holders.
3. Disconnect cord
and steady Power-
Mate '_with foot and A
turn wands until lock
t
button disappears, ==
then pull wands out
of Power-Mate *.
4. Put attachment on
wands as needed. See
chart.
ATTACHMENT Furniture"
Combination Brush &
(Some Models) X
Crevice Tool
(Some Models) _ X
Floor Brush
(Some Models)
Power-Mate`*
(Some Models)
Handi.Mate Jr.'*
(Some Models)*** _ X
Between
Cushions*
CLEANING AREA
Drapes*
X
Stairs
X
Bare
Floors
Carpeted
Floors/Rug_
Walls
X
x
x x x
x** x
x
Power-Mate Jr.®
4_i X x
(Some Models)***
"Alwayscleanattachmentsbefore usingonfabrics, ** 2-way switchshouldbe in FLOOR position.
Handi-MateJr. and Power-MateJr. attachmentinstructionsare includedwith the products,
NOTE: When separat!ng wands, depress lock button completely before pullingwands apart.
wand Io_ outton is airricul! to aepress_ push the two wanas more tightly togemer to line up
the lock outton with the no_e. uepress lock button and then pull wanas apart.
If
lO
Loading ...
Loading ...
Loading ...