Loading ...
Loading ...
A
WARNING: To prevent accidental starting that
could cause possible serious personal injury,
assemble all parts to your saw completely before
connecting itto power supply• Saw should never
be connected to power supply when you are
assembling parts, making adjustments, installing
or removing blades or accessodas, or when not
in use.
WORK CLAMP
See Figure 2.
The work clamp (Item no. 92.3461) provides greater
control by clamping the workpiece to the fence. It
also prevents the workpiece from creeping toward the
saw blade. This is very helpful when cutting com-
pound miters. To install the work clamp, place the
shaft of the clamp in either hole in front of the miter
table base. Thread the 8 mm work clamp screw
provided into the side of the base and tighten itto
secure the clamp in position. Rotate the knob on the
clamp to move it in or out as needed.
_IL WARNING: Make sure the saw blade or blade
guard will not hit the work clamp assembly when
cutting 35° to 45° angles. Failure to heed this
warning can result in serious personal injury.
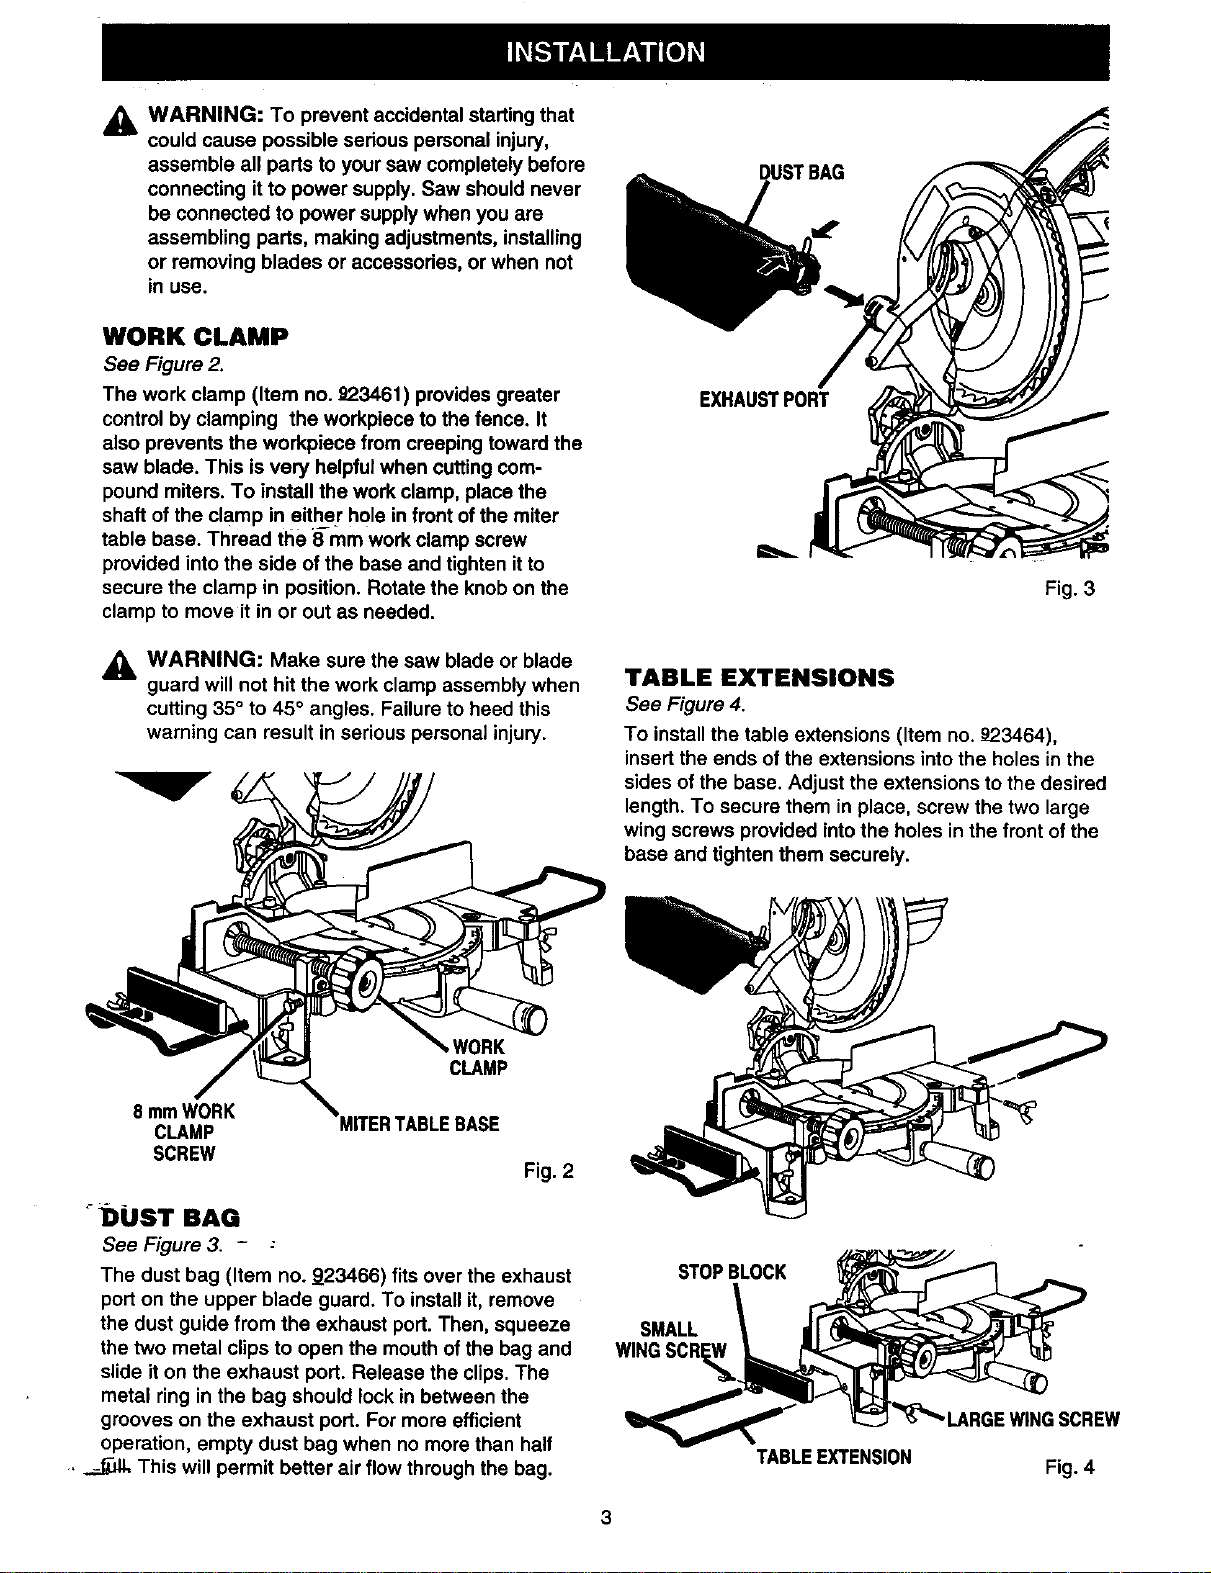
EXHAUSTPORT
Fig. 3
TABLE EXTENSIONS
See Figure 4.
To install the table extensions (Item no. _23464),
insert the ends of the extensions intothe holes in the
sides of the base. Adjust the extensions to the desired
length. To secure them in place, screw the two large
wing screws provided intothe holes in the front ofthe
base and tighten them securely.
8 mmWORK
CLAMP
SCREW
tVORK
CLAMP
° DUST BAG
See Figure 3. - :
Fig. 2
The dust bag (Item no. 923466) fits over the exhaust
port on the upper blade guard. To install it, remove
the dust guide from the exhaust port. Then, squeeze
the two metal clips to open the mouth of the bag and
slide it on the exhaust port. Release the clips. The
metal ring in the bag should lock in between the
grooves on the exhaust port. For more efficient
operation, empty dust bag when no more than half
• _ This will permit better air flow through the bag.
STOPBLOCK
SMALL
WIN4
TABLEEXTENSION
; SCREW
Fig. 4
Loading ...