®
DRYER
SECADORA
O
\
Sears, Roebuck and Co., Hoffman Estates, IL 60179 U.S.A. P/N134235700(0307)
www.sears.com
Table of Contents
Product Record ....................................................... 2
Dryer Warranty ........................................................ 2
Sears Maintenance Agreement ................................. 2
IMPORTANT SAFETY INSTRUCTIONS ................. 3-4
Drying Procedures ............................................. 5-6
Common Drying Problems ..................................... 6
Care and Cleaning .............................................. 7
Avoid Service Checklist ..................................... 8
Espa5ol ............................................................ 9
Service .................................................... Back Cover
Product Record
In the space below, record the date of purchase, model and
serial number of your product. You will find the model and
serial number printed on an identification plate located on
the left side of the door opening,
Model No. 417.
Date of Purchase
Serial No.............................................
Save these instructions and your sales receipt for future
reference.
Dryer Warranty
Full One Year Warranty on Mechanical and Electrical Parts
For one year from the date of purchase, if this Dryer is installed and operated according to the instructions in the Use
and Care Guide, Operating Instructions, and Installation Instructions, Sears will repair or replace any of its mechanical
or electrical parts if they are defective in material or workmanship.
Warranty Restriction
If this Dryer is used for any purpose other than Private Family Use, all warranty coverage is effective for only 90 days.
Warranty Service
Warranty service is available by contacting your nearest Sears Service Center in the United States.
This warranty applies only while this Dryer is in use in the United States.
This warranty gives you specific legal rights, and you may also have other rights which vary from state to state,
Sears, Roebuck and Co., Dept. 817WA, Hoffman Estates, IL 60179
Master Protection Agreement IntheU.S.A
Congratulations on making a smart purchase. Your new Kenmore@ appliance is designed and manufactured for years of
dependable operation. But like all products, it may require preventive maintenance or repair from time to time. That's when
having a Master Protection Agreement can save you money and aggravation.
Purchase e Master Protection Agreement now and protect yourself from unexpected hassle and expense.
The Master Protection Agreement also helps extend the life of your new appliance. Here's what's included in the Agreement:
Expert service by our 12,000 professional repair specialists
Unlimited service and no charge for parts and labor on all covered repairs
"Noqemon" guarantee - replacement of your covered product it more than three product failures occur within 12 months
Product replacement if your covered product can't be fixed
Annual Preventive Maintenance Check at your request - no extra charge
Fast help by phone - non-technicaI and instructional assistance on products repaired in your home, plus convenient
repair scheduling
Power surge protection against electrical damage due to power fluctuations
Rental reimbursement if repair of your covered product takes longer than promised
Once you purchase the Agreement, a simple phone call is all that it takes for you to schedule service. You can call anytime day
or night, or schedule a service appointment online.
Sears has over 12,000 professional repair specialists, who have access to over 4.5 million quality parts and accessories. That's
the kind of professionalism you can count on to help prolong the life of your new purchase for years to come. Purchase your
Master Protection Agreement today!
Some limitations and exclusions apply.
For prices and additional information,
call 1-800-827-6655.
Sears Installation Service
For Sears guaranteed professional installation of home
appliances and items like garage door openers and
water heaters, in the U.S.A. call 1-800-4-MY-HOME®
2
Foryoursafety,theinformationinthismanualmustbefollowedtominimizetheriskoffireor
explosionortopreventpropertydamage,personalinjuryorlossoflife.
Donotstoreorusegasolineorotherflammablevaporsandliquidsinthevicinityofthisoranyotherappliance.
WHATTODOIFYOUSMELLGAS:
• Donottrytolightanyappliance.
• Donottouchanyelectricalswitch;donotuseany phone in your building.
• Clear the room, building or area of all occupants.
• Immediately call your gas supplier from a neighbor's phone. Follow the gas supplier's instructions.
• If you cannot reach your gas supplier, call the fire department.
Installation and service must be performed by a qualified installer, service agency or the gas supplier.
Your safety and the safety of
others is very important.
We have provided many important
safety messages in the Use and
Care G uide, Operating Instructions,
installation instructionsand on your
appliance. Always read and obey all
safety messages.
[] This is the safety alert symbol.
This symbol alerts you to hazards
that can kill or hurt you or others. All
safety messages will be preceded by
the safety alert symbol and the word
"DANGER" or "WARNING". These
words mean:
You wilJ be killed or
seriously injured if you don't follow
instructions.
You can be killed or
seriously injured if you don't follow
instructions.
All safety messages will identify
the hazard, tell you how to reduce
the chance of injury, and tell you
what can happen if the
instructions are not followed.
Pedestal
A pedestal accessory specifically
designed for this dryer may be used
when elevating the dryer for ease of
use.
Failure to use accessories certified by
the manufacturer couldresult inpersonal
injury, property damage or damage to
the dryer.
Important Safety Instructions
Read all instructions before using this dryer.
To reduce the risk of fire, electrical shock, or injury to persons
when using this dryer, comply with the basic warnings listed below.
[] Failure to comply with these warnings could result in serious personal
injuries.
Prevent Fire
Do not dry items that have been previously cleaned in, soaked
in, or spotted with gasoline, cleaning solvents, kerosene, cooking oils, waxes,
etc. Do not store these items on or near the dryer. These substances give off
vapors that could ignite or explode.
To prevent fire, do not use heat to dry items containing plastic,
foam rubber or similarly textured rubberqike materials, or items containing
feathers or down. Use Air Fluff (No Heat) only.
Clean the lint screen before or after each load. The interior of
the dryer, lint screen housing and exhaust duct should be cleaned
approximately every 18 months by qualified service personnel. An excessive
amount of lint build-up in these areas could result in inefficient drying and
possible fire. See Care and Cleaning, page 7.
Do not operate the dryer if the lint screen is blocked, damaged
or missing. Fire hazard, overheating and damage to fabrics can occur. If your
dryer has a drying rack, always replace the lint screen when finished using the
drying rack.
_Keep area around the exhaust opening and surrounding areas
free from the accumulation of lint, dust and dirt.
Do not obstruct the flow of ventilating air. Do not stack or place
laundry or throw rugs against the front or back of the dryer.
Do not spray any type of aerosol into, on or near dryer at any
time.
Do not use fabric softeners or products to eliminate static
unless recommended by the manufacturer of the fabric softener or product.
[] Failure to comply with these warnings could result in
fire,
explosion,
serious bodily injury and/or damage to the rubber or plastic parts of the dryer.
Printed in U.S.A.
3
9_
¢_';,
This Use and Care Guide provides
general operating instructions foryour
dryer. It also contains information
about features for several other
models. Your dryer may not have
every feature included,
Use the dryer only as instructed in
this Use & Care Guide and the
Operating Instructions included with
yourdryer.
Protect Children
Do not allow children to play on or in the dryer. Close
supervision of children is necessary when the dryer is used near children, As
children grow, teach them the proper, safe use of all appliances.
Destroy the carton, plastic bag and other packing materials after
the dryer is unpacked. Children might use them for play. Cartons covered with
rugs, bedspreads or plastic sheets can become airtight chambers.
Keep laundry products out of children's reach, To prevent
personal injury, observe all warnings on product labels.
Avoid fire hazard or
electrical shock. Do not use an
adaptor plug or extension cord or
remove grounding prong from
electrical power cord. Failure to
follow this warning can cause
serious injury, fire or death,
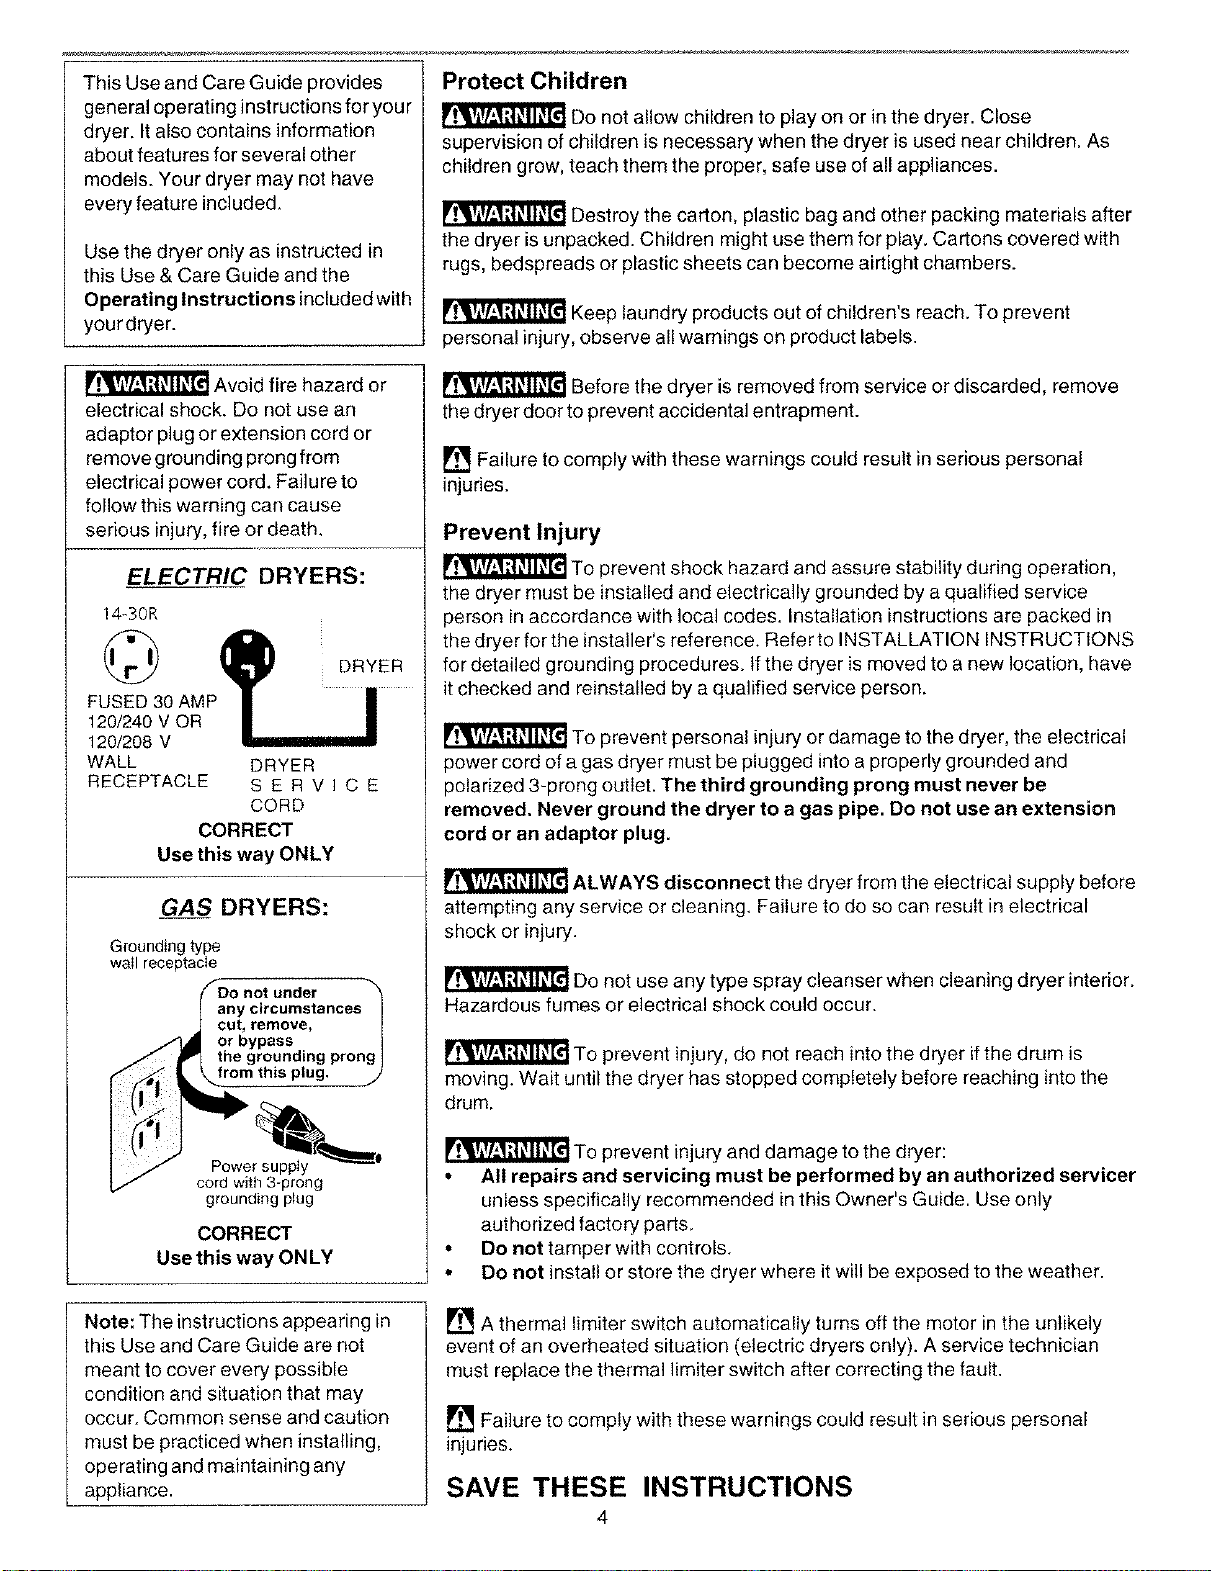
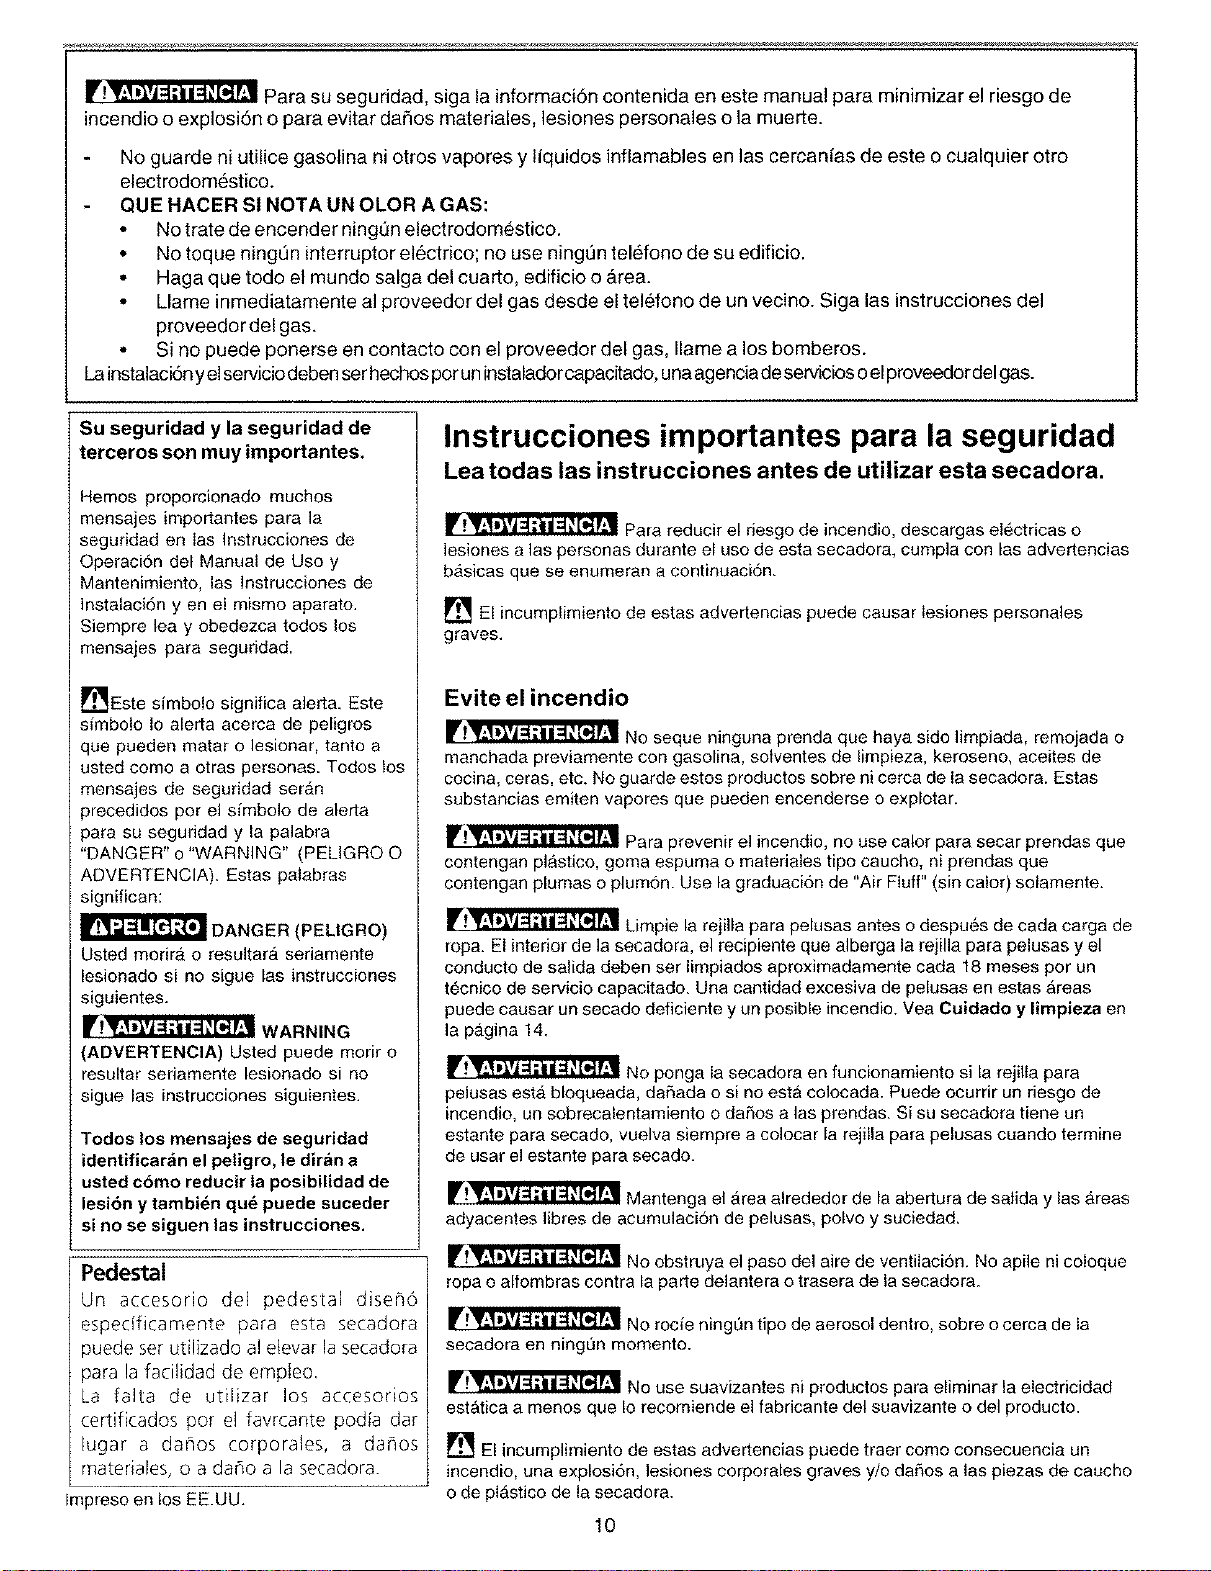
ELECTRIC DRYERS:
14_30R
FUSED 30 AMP
120/240 V OR
120/208 V
WALL DRYER
RECEPTACLE S E R V I C E
CORD
CORRECT
Use this way ONLY
GAS DRYERS:
Groundingtype
wail receptacle
priot under
any circumstanees_
eut_ remove_
or bypass /
the grounding prong I
isp,ug. j
Power supply
cord with 3-prong
grounding plug
CORRECT
Use this way ONLY
Before the dryer is removed from service or discarded, remove
the dryer door to prevent accidental entrapment.
[] Failure to comply with these warnings could result in serious personal
injuries.
Prevent Injury
To prevent shock hazard and assure stability during operation,
the dryer must be installed and electrically grounded by a qualified service
person in accordance with local codes. Installation instructions are packed in
the dryer for the installer's reference. Refer to INSTALLATION INSTRUCTIONS
for detailed grounding procedures, tf the dryer is moved to a new location, have
it checked and reinstalled by a qualified service person.
To prevent personal injury or damage to the dryer, the electrical
power cord of a gas dryer must be plugged into a properly grounded and
polarized 3-prong outlet. The third grounding prong must never be
removed. Never ground the dryer to a gas pipe. Do not use an extension
cord or an adaptor plug.
ALWAYS disconnect the dryer from the electrical supply before
attempting any service or cleaning. Failure to do so can result in electrical
shock or injury.
Do not use any type spray cleanser when cleaning dryer interior.
Hazardous fumes or electrical shock could occur.
To prevent injury, do not reach into the dryer if the drum is
moving. Wait until the dryer has stopped completely before reaching into the
drum,
To prevent injury and damage to the dryer:
• All repairs and servicing must be performed by an authorized servicer
unless specifically recommended in this Owner's Guide, Use only
authorized factory parts,
• Do not tamper with controls.
• Do not install or store the dryer where it will be exposed to the weather.
Note: The instructions appearing in
this Use and Care Guide are not
meant to cover every possible
condition and situation that may
occur Common sense and caution
must be practiced when installing,
operating and maintaining any
appliance.
[] A thermal limiter switch automatically turns off the motor in the unlikely
event of an overheated situation (electric dryers only). A service technician
must replace the thermal limiter switch after correcting the fault.
[] Failure to comply with these warnings could result in serious personal
injuries.
SAVE THESE INSTRUCTIONS
4
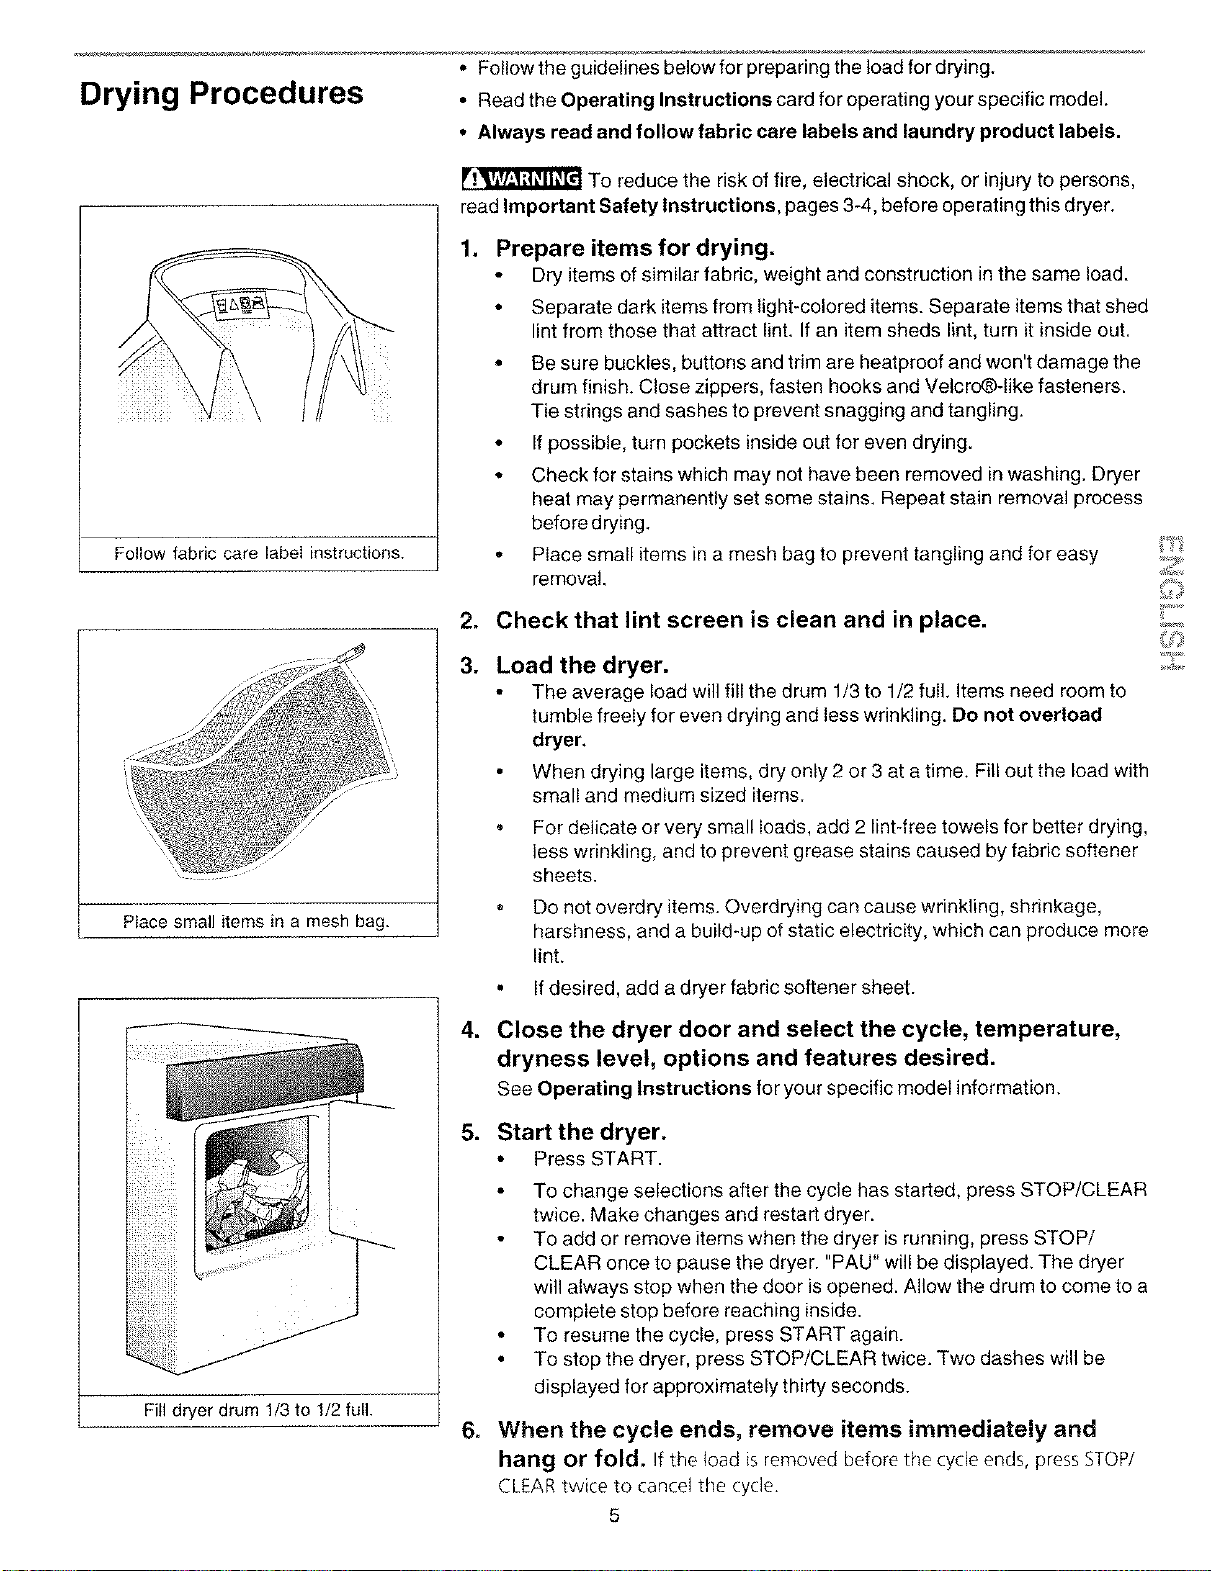
Drying Procedures • Read the Operating Instructions card for operating your specific model.
• Always read and follow fabric care labels and laundry product labels.
Follow fabric care label instructions.
PIace small items in a mesh bag.
_'!"_'I'_1'_}'I_I_ To reduce the risk of fire, electrical shock, or injury to persons,
read Important Safety Instructions, pages 3-4, before operating this dryer.
Fill dryer drum 1/3 to 1/2 full,
M
.
3.
.
Prepare items for drying.
• Dry items of similar fabric, weight and construction in the same load.
• Separate dark items from light-colored items. Separate items that shed
lint from those that attract lint. If an item sheds lint, turn it inside out.
• Be sure buckles, buttons and trim are heatproof and won't damage the
drum finish. Close zippers, fasten hooks and Velcr_-Iike fasteners,
Tie strings and sashes to prevent snagging and tangling,
• If possible, turn pockets inside out for even drying.
• Check for stains which may not have been removed in washing. Dryer
heat may permanently set some stains. Repeat stain removal process
before drying.
• Place small items in a mesh bag to prevent tangling and for easy
removal.
Check that lint screen is clean and in place.
Load the dryer.
• The average load will fill the drum 1/3 to 1/2 full. Items need room to
tumble freely for even drying and less wrinkling. Do not overload
dryer.
When drying large items, dry only 2 or 3 at a time. Fill out the load with
small and medium sized items.
For delicate or very small loads, add 2 lint-free towels for better drying,
less wrinkling, and to prevent grease stains caused by fabric softener
sheets.
Do not overdry items. Overdrying can cause wrinkling, shrinkage,
harshness, and a build*up of static electricity, which can produce more
lint.
If desired, add a dryer fabric softener sheet.
Close the dryer door and select the cycle, temperature,
dryness level, options and features desired.
See Operating Instructions for your specific model information,
.
Start the dryer.
• Press START.
To change selections after the cycle has started, press STOP/CLEAR
twice. Make changes and restart dryer.
To add or remove items when the dryer is running, press STOP/
CLEAR once to pause the dryer. "PAU" will be displayed. The dryer
will always stop when the door is opened. Allow the drum to come to a
complete stop before reaching inside.
To resume the cycle, press START again.
To stop the dryer, press STOP/CLEAR twice. Two dashes will be
displayed for approximately thirty seconds.
6. When the cycle ends, remove items immediately and
hang or fold. If the toad is removed before the cycle ends, press STOP!
CLEARtwice to cancel tile cycle.
5

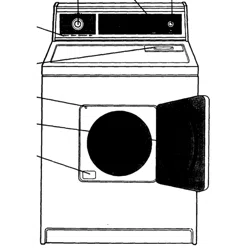
Features End of Cycle Signal
A signal will sound at the end of the cycle and periodically during Wrinkle-Rid
at the volume level selected. (some models)
Drum Light (some models)
A drum light will come on whenever the door isopened to illuminate the dryer
drum during loading and unloading, Closing the door turns off the fight.
Reversible Dryer Door
Your dryer is equipped with a reversible door. The door can be hinged on the
right or left side, Refer to the INSTALLATION INSTRUCTIONS for directions
on changing the door.
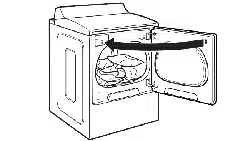
,......
Place the front bar under
the lip of the lint screen opening,
Drying Rack (some models)
Use the drying rack to dry items which should not be tumble dried.
1. Open the dryer door and remove the lint screen.
2. Insert drying rack into the dryer drum. Place the front bar under the lip of
the lint screen opening.
3, Place items to be dried on top of the rack. Weight should not exceed 10
Ibs. Leave space between items, but do not let items hang over the sides
or through the grids. De not tumble other items when using the drying
rack.
4. Select Time Dry. Use only the Air Fluff/No Heat option for items
containing plastic, foam rubber, rubber-like materials, feathers or down.
5. When items are dry, remove the rack and replace the lint screen, tf lint
screen is not in place, tumbling items could enter the exhaust system and
cause damage to the dryer,
Common Drying Problems
Many drying problems involve poor cleaning results, poor soil and stain removal, residues of lint and scum, and fabric
damage. For satisfactory drying results, follow these suggestions provided by The Soap and Detergent Association.
PROBLEM
Greasy, oily
stains
Lint
Pilling
(Fibers break
off, ball up and
cling to fabric.)
Shrinking
Wrinkling
POSSIBLE CAUSES SOLUTIONS PREVENTIVE MEASURES
" Fabric softener sheet. • Rub fabric softener stains with bar ° Add a few bath towels to small loads for
soap. Rinse and rewash, proper tumbling.
" Some "silk-like" fabrics should be air
dried,
• Use proper drying temperature.
• Place fabric softener sheet on top of load
before starting the dryer,
• Overloading.
• Overdrying causes static
electricity.
• Lint screen not clean
when cycle began.
• Lint is attached to "pills."
• Reduce load size and rewash using
liquid fabric softener in the final rinse.
• Or, add a fabric softener sheet and
tumble without heat.
• Use lint brush or roller to remove lint.
• Do not overload dryer.
• Use fabric softener in washer or dryer to
reduce static electricity.
• Remove items when they are slightly
damp to avoid overdrying.
• Check that lint screen is clean and in
place.
Pilling is normal with
synthetic and permanent
press fabrics. This is due
to abrasion from normal
• Use a lint brush or shaver to remove
pills.
• Use fabric softener to lubricate fibers,
• When ironing, use spray starch or fabric
finish on collars and cuffs.
• Turn items inside out to reduce abrasion.
wear.
• Overdrying.
• Overloading.
• Leaving items in dryer
after cycle ends.
• irreversible condition.
• Reduce load size and tumble at
medium or low heat for 5-10 minutes.
• Remove items immediately. Hang or
fold. 6
• Follow fabric care label directions.
• If shrinking is a concern, check load often.
• Remove items while slightly damp and
hang or lay flat to complete drying.
• Block knits into shape.
• Do not overload dryer.
• Remove items as soon as cycle ends.
Care and
Cleaning To reduce risk of fire or serious injury to persons or property,
comply with the basic warnings listed in Important Safety Instructions, pages
3-4, and those listed below.
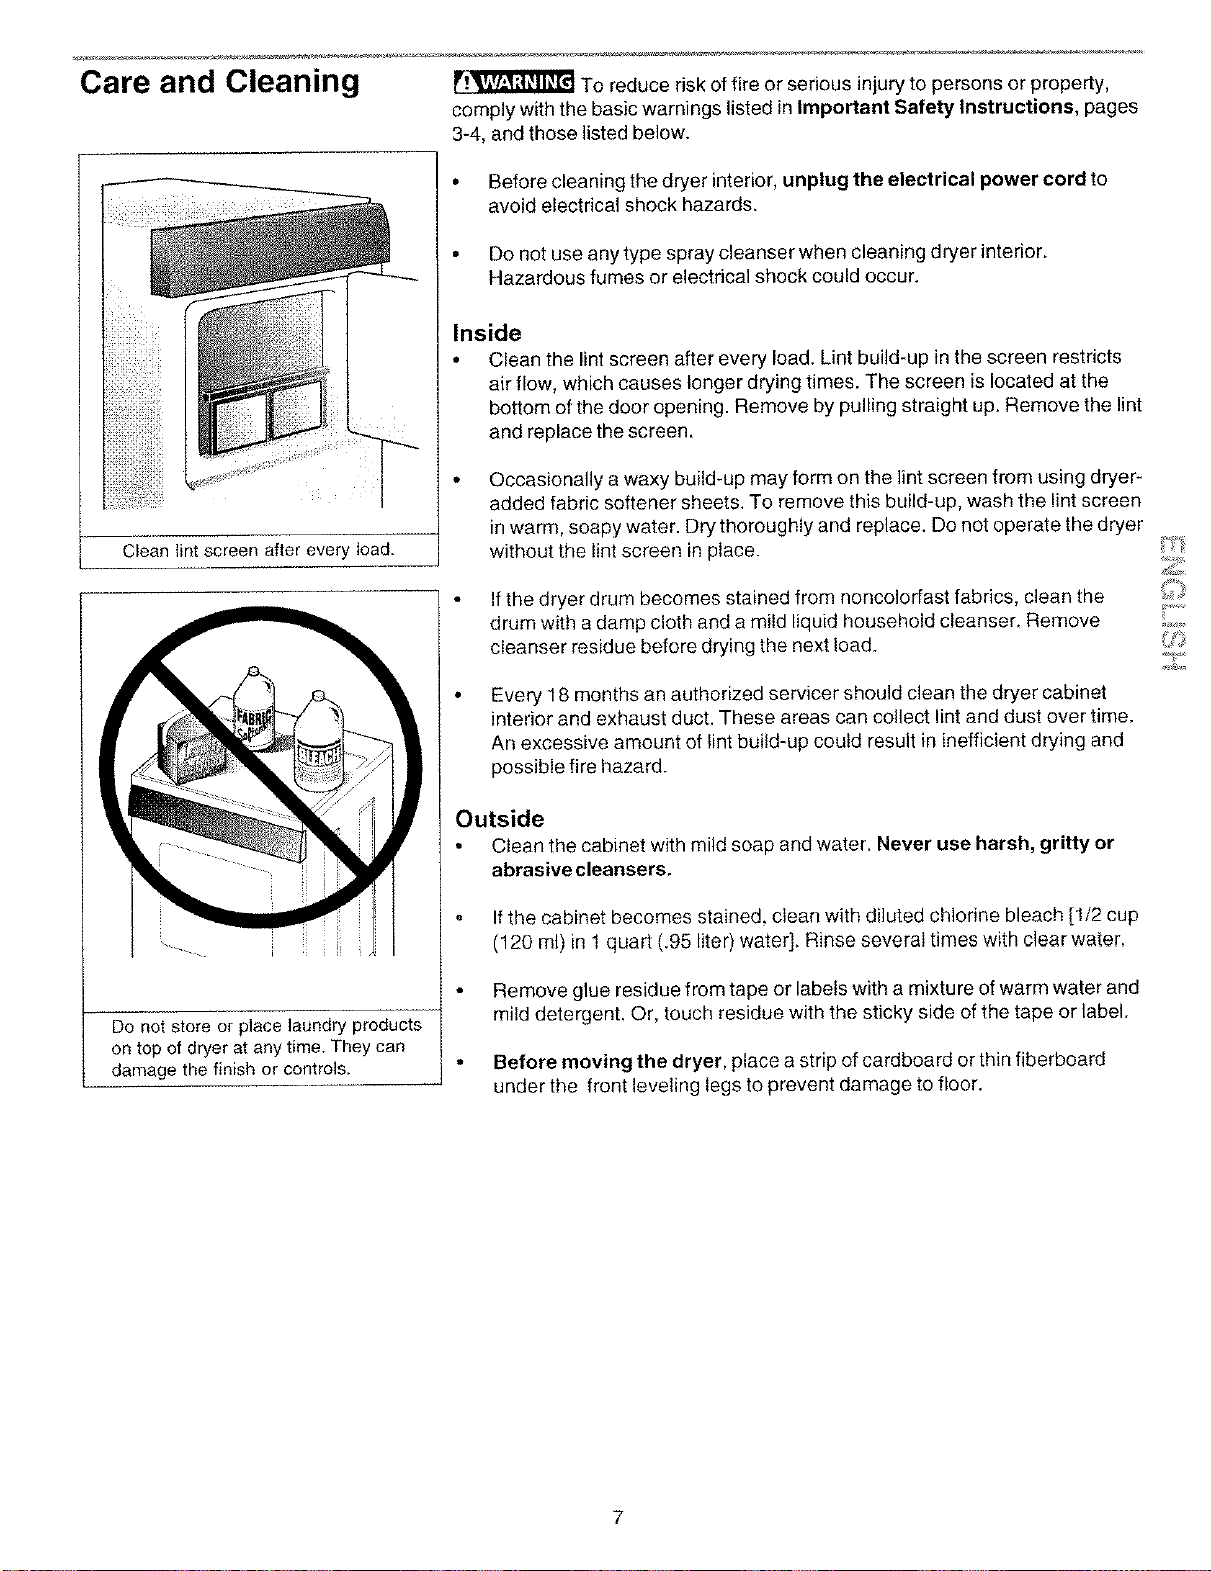
Clean lint screen after every load.
Before cleaning the dryer interior, unplug the electrical power cord to
avoid electrical shock hazards,
Do not use any type spray cleanser when cleaning dryer interior.
Hazardous fumes or electrical shock could occur.
Inside
• Clean the lint screen after every load. Lint build-up in the screen restricts
air flow, which causes longer drying times. The screen is located at the
bottom of the door opening. Remove by pulling straight up. Remove the lint
and replace the screen.
Occasionally a waxy build-up may form on the lint screen from using dryer-
added fabric softener sheets. To remove this build-up, wash the lint screen
in warm, soapy water. Dry thoroughly and replace. Do not operate the dryer
without the lint screen in place.
Do not store or place laundry products
on top of dryer at any time. They can
damage the finish or controls.
If the dryer drum becomes stained from noncolorfast fabrics, clean the
drum with a damp cloth and a mild liquid household cleanser, Remove
cleanser residue before drying the next load.
Every 18 months an authorized servicer should clean the dryer cabinet
interior and exhaust duct. These areas can collect lint and dust over time.
An excessive amount of lint build-up could result in inefficient drying and
possible fire hazard.
Outside
• Clean the cabinet with mild soap and water, Never use harsh, gritty or
abrasive cleansers.
If the cabinet becomes stained, clean with diluted chlorine bleach [1/2 cup
(120 ml) in 1 quart (.95 liter) water]. Rinse several times with clear water,
Remove glue residue from tape or labels with a mixture of warm water and
mild detergent. Or, touch residue with the sticky side of the tape or label.
Before moving the dryer, place a strip of cardboard or thin fiberboard
under the front leveling legs to prevent damage to floor.
7
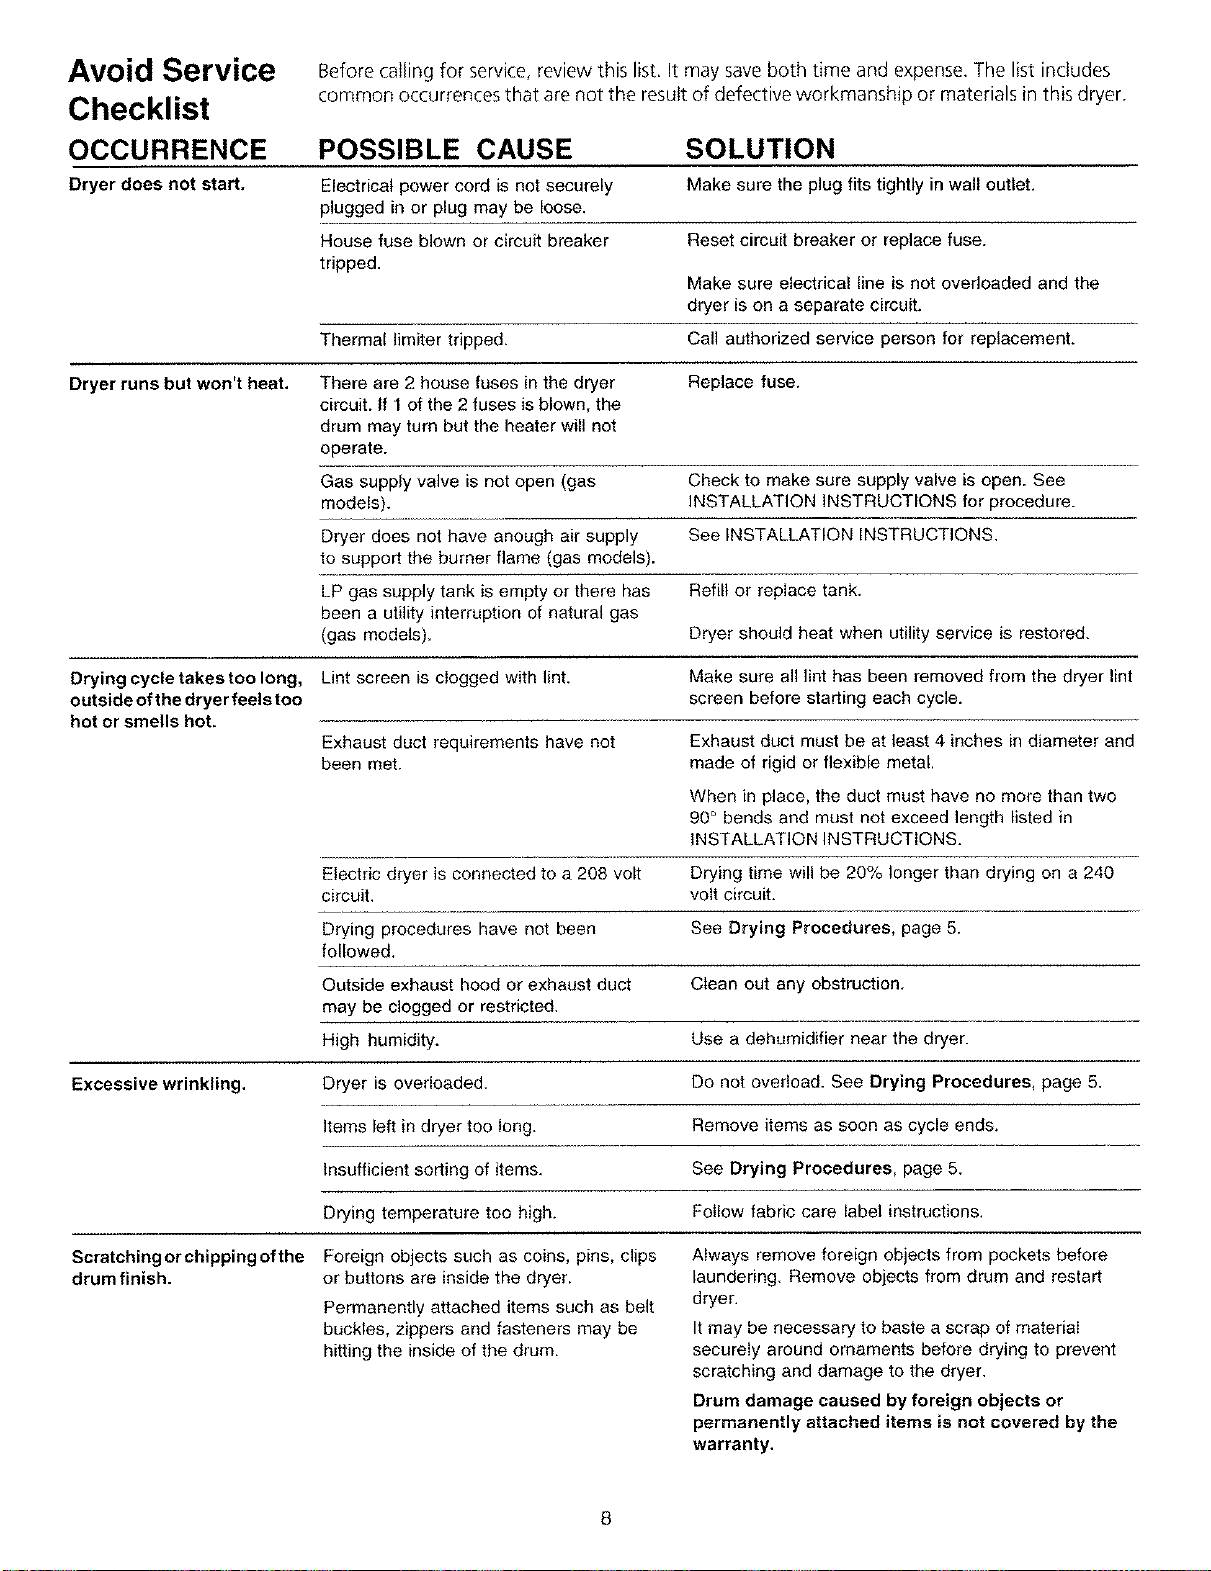
Beforecallingforservice,reviewthislist.Itmaysavebothtimeandexpense.Thelistincludes
commonoccurrencesthatarenottheresultofdefectiveworkmanshipormaterialsinthisdryer.
Avoid Service
Checklist
OCCURRENCE POSSIBLE CAUSE SOLUTION
Dryer does not start, Electrical power cord is not securely Make sure the plug fits tightly in wall outlet.
plugged in or plug may be loose.
House fuse blown or circuit breaker Reset circuit breaker or replace fuse.
tripped.
Make sure electrical line is net overloaded and the
dryer is on a separate circuit.
Thermal limiter tripped. Call authorized service person for replacement.
Dryer runs but won't heat. There are 2 house fuses in the dryer Replace fuse.
circuit. If 1 of the 2 fuses is blown, the
drum may turn but the heater will not
operate.
Gas supply valve is not open (gas Check to make sure supply valve is open. See
models). INSTALLATION INSTRUCTIONS for procedure.
Dryer does not have anough air supply See INSTALLATION INSTRUCTIONS,
to support the burner flame (gas models).
LP gas supply tank is empty or there has Refill or replace tank.
been a utility interruption of natural gas
(gas models). Dryer should heat when utility service is restored.
Drying cycle takes too long, Lint screen is clogged with lint. Make sure all lint has been removed from the dryer lint
outsideofthedryerfeelstoo screen before starting each cycle.
hot or smells hot.
Exhaust duct requirements have not Exhaust duct must be at least 4 inches in diameter and
been met. made of rigid or flexible metal.
When in place, the duct must have no more than two
90° bends and must not exceed length listed in
INSTALLATION INSTRUCTIONS.
Electric dryer is connected to a 208 volt Drying time will be 20% longer than drying on a 240
circuit, volt circuit.
Drying procedures have not been See Drying Procedures, page 5.
followed,
Outside exhaust hood or exhaust duct Clean out any obstruction.
may be clogged or restricted.
High humidity. Use a dehumidifier near the dryer.
Excessive wrinkling. Dryer is overloaded. Do not overload. See Drying Procedures, page 5.
Items left in dryer too long. Remove items as soon as cycle ends,
insufficient sorting of items. See Drying Procedures, page 5.
Drying temperature too high. Follow fabric care label instructions,
Scratching or chipping of the
drum finish.
Foreign objects such as coins, pins, clips
or buttons are inside the dryer.
Permanently attached items such as belt
buckles, zippers and fasteners may be
hitting the inside of the drum.
Always remove foreign objects from pockets before
laundering Remove objects from drum and restart
dryer.
It may be necessary to baste a scrap of material
securely around omaments before drying to prevent
scratching and damage to the dryer.
Drum damage caused by foreign objects or
permanently attached items is not covered by the
warranty.
[ndice Registro de producto
English ........................................................................ 2-8
Registrode producto ...................................................... 9
Garantia para la secadora ............................................... 9
Contrato de mantenimiento Sears .................................... 9
INSTRUCCIONES IMPORTANTES
PARA LA SEGURIDAD ............................................ 10-11
Procedimientos paraelsecado ....................................... 12
Caracteristicas ............................................................... 13
Problemas comunes del secado ..................................... 13
Cuidado ylimpieza ........................................................ 14
Evitar Ilamadas de servicio ........................................... 15
Servicio ............................................................... Cubierta
Registre en la parte reservada a continuacibn la fecha de
compra, el n_mero de modelo y el n_mero de serie de su
electrodomestico. El numero de modelo y et ntimero de serie
est&n inscribidos sobre una placa de identificaci6n ubicada
en la parte izquierda de la abertura de la puerta.
N5mero de modelo: 417.
Fecha de compra:
No de serie:
Guarde estas instrucciones y su boleta de compra para
futuras referencias.
Garantia completa de un aSo para las piezas mec_nicas y el_ctricas
Por uo afro desde la fecha de compra original, siesta secadora se instala y opera de acuerdo con las Instrucciones del
Manual de Uso y Mantenimiento, las Instrucciones para la Operaci6n y las instrucciones para la InstalaciOn, Sears
reparar& o reemplazara cualesquiera de sus piezas mec&nicas o electricas en caso de que elias estan defectuosas debido
a material o a mano de obra.
Restricci6n de la garantia
Si se opera esta secadora para un uso distinto al uso domestico de una sola familia, toda la cobertura de la garant[a es
efectiva para solamento 90 dias.
Servicio bajo la garant[a
Para obtener servicio bajo la garantia pongase en contacte con el mas cercano Centre de Servicio Sears en los Estados
Unidos.
Esta garantia se aplica Onicamente mientras esta secadora est_ siendo usado en los Estados Unidos.
Esta garantia te otorga derechos legales especfficos, y usted tambi_n puede tener otros derechos que varian de un
estado a otro.
Sears, Roebuck and Co. Dept. 817WA, Hoffman Estates, IL 60179
CONTRATOS DE PROTECCION PRINCIPALES
Lo felicitamos por su sabia decision de compra. Su nuevo electrodomestico Kenmo_e ha sido dise[iado y fabricado para ofrecede muchos aOos de *_
rendimiento seguro. Pero, al igual que todos tos productos, de vez en euando puede necesitar mantenimiento preventivo o reparaciOn. En taI momento _
es cuando un Contrato de Proteecion le puede ahorrar preoeupaciones y gastos.
Adquiera un Contfato de Proteccion Principal ahota y prot#jase contra incertidumbres y gastos inesperados,
Et Contrato de ProtecciOn Principal ademas le ayuda a protongar la vida 6tiI de su nuevo electrodomestico. El Contrato incluye Io siguiente:
Servicio posventa pot nuestros 12.000 profesionaIes especiatizados en reparaciones
Servicio posventa ilimitado y gratis de piezas y mane de obra para todas las reparaciones cubiertas par et contrato
Garantia de rendimiento - reemplazo del producto bajo contrato si ocurren mas de tres fallas del producto dentro de dace
meses.
Reemplazo de su produeto si el producto bajo contrato no puede set reparado.
Revision Anuai de Mantenimiento Preventivo cuando Io solicite _sin costa adicional
Ayuda rapida por tet_fono - ayuda e informacion no t_cnica para los productos reparados en su hogar, ademas de fijaciOn de
fechas convenientes para los reparaciones
Proteecion contra arremetidas electricas debido a fluctuaciones de la corriente el_ctrica
*,' Reembolso de costos de arriendo si las reparaciones de su producto bajo contrato demoran mas tiempo que Io prometido
Una vez que usted ha comprado el Contrato, solamente necesita una tIamada pot teiefono para fijar ta fecha del servicio. Puede Ilamar a cualquier hera,
durante el d[a o en ta noche o puede fijar la fecha para et servicio a traves de ia computadora.
Sears tiene mas de 12.000 profesionales especializados en reparaciones, que tienen acceso amas de 4,5 milIonesde piezas y accesorios de calidad.
Este esel tipo de profesionaIismoal que usted puede recurrir para prolongar ia visa util de su nuevo electrodomestico durante muchos aOos. iCompre
hoy mismo su Contrato de Proteccion Principal! Servicio de Instalaci6n Sears
Para instalaciOn profesional garantizada de electrodomesticos
Existen ciertas Iimitaciones y exclusiones. Sears y art[culos tales como sisterna de apertura de puertas de
Para precios y mayor informacion, cocheras y calefactores de agua, en los EE.UU. Ilame al 1*800-
1lame ai 1-800-827-6655. 4-My-HOME®
9
Para su seguridad, siga la informaci6n contenida en este manual 3ara minimizar el riesgo de
incendio o explosi6n o para evitar daSos materiales, lesiones personales o la muerte.
No guarde ni utilice gasolina ni otros vapores y liquidos inflamables en las cercanfas de este o cualquier otro
electrodomestico.
QUE HACER Sl NOTA UN OLOR A GAS:
• No trate de encender ningQn electrodom6stico,
• No toque ningun interruptor el6ctrico; no use ning_n tel_fono de su edificio,
• Haga que todo el mundo salga del cuarto, edificio o Area.
• Llame inmediatamente al proveedor del gas desde el telefono de un vecino. Siga las instrucciones del
proveedor del gas.
° Si no puede ponerse en contacto con el proveedor del gas, Ilame a los bomberos.
Lainstalaci6nyelse_viciodeben serhechos por uninstalador capacitado, una agenciadeservicios oel proveedor delgas.
Su seguridad y la seguridad de
terceros son muy importantes+
Hemos proporcionado muchos
mensajes importantes para la
seguridad en las Instrucciones de
Operaci6n del Manual de Uso y
Mantenimiento, las Instrucciones de
Instalaei6n yen el mismo aparato.
Siempre lea y obedezca todos los
mensajes para seguridad.
_l"_Este sfmbolo significa a]erta. Este
sfmbolo Io alerta acerca de peligros
que pueden matar o lesionar, tanto a
usted coma a otras personas. Todos los
rnensajes de seguridad seran
precedides per el sfmbolo de aler_a
para su seguridad y la palabra
"DANGER" o "WARNING" (PELIGRO O
ADVERTENCIA). Estas palabras
significan:
_ DANGER (PEUGRO)
Usted morira o resultarfi seriamente
lesionado si no sigue las instrucciones
siguientes.
WARNING
ADVERTENClA) Usted puede morir o
resultar seriamente lesionado si no
sigue las instrucciones siguientes.
Todos los mensajes de seguridad
identificar&n el peligro, le diran a
usted c6mo reducir la posibilidad de
lesi6n y tambi6n qu_ puede suceder
si no se siguen las instrucciones.
Pedestal
Un accesorio del pedestal disefl6
especfficamente para esta secadora
puede ser utiNzado al elevar la secadora
para la facilidad de empleo,
La falta de utilizar los accesorios
certificados por el favrcante podfa dar
lugar a daflos corporales, a daf_os
materiales, o a daf/o a la secadora.
Impreso en los EE.UU.
Instrucciones importantes para la seguridad
Lea todas las instrucciones antes de utilizar esta secadora.
Para reducir el riesgo de incendio, descargas el6ctricas o
lesiones alas personas durante el uso de esta secadora, cumpla con las advertencias
b_sicas que se enumeran a continuaci6n.
V_EI incumplimiento de estas advertencias puede causar Iesiones personales
graves.
Evite el incendio
No seque ninguna prenda que haya side limpiada, remojada o
manchada previamente con gasoliea, sotventes de limpieza, kerosene, aceites de
coeina, ceras, etc. No guarde estos productos sobre ni cerca de la secadora. Estas
substancias emiten vapores que pueden encenderse o explotar.
IIIr!_ Para prevenir el incendio, no use calor para secar prendas que
contengan plAstico, goma espuma o materiales tipo caucho, ni prendas que
contengan plumas o plumon. Use la graduaci6n de "Air Fluff" (sin calor) solamente.
Y!_ Limpie la rejilla para pelusas antes o despues de cada carga de
ropa. El interior de la secadora, el recipiente que alberga la rejilla para pelusas y el
conducto de salida deben ser limpiados aproximadamente cada 18 meses por un
t6cnico de servicio capacitado. Una cantidad excesiva de pelusas en estas areas
puede causar un secado deficiente y un posible incendio. Vea Cuidado y limpieza en
la pa.gina 14.
iV_ No ponga la secadora en funcionamiento si la rejilta para
pelusas est& bloqueada, daSada o si no esta colocada. Puede ocurrir un riesgo de
incendio, un sobrecalentamiento o daSos alas prendas. Si su secadora tiene un
estante para secado, vuelva siempre a colocar la rejilla para pelusas cuando termine
de usar el estante para secado.
Ilrt_ Mantenga el Area alrededor de la abertura de satida y las Areas
adyacentes libres de acumulacion de pelusas, polvo y suciedad,
Ir_ No obstruya el paso del aire de ventiIacion. No apile ni coloque
ropa o alfombras contra la parte delantera o trasera de la secadora.
_!_ No rocfe ningQn tipo de aerosol dentro, sobre o cerca de Ia
secadora en ningun memento.
No use suavizantes ni productos para eliminar la electricidad
est&tica a menos que Io recomiende el fabricante del suavizante odel producto.
V'_EI incumplimiento de estas advertencias puede traer como consecuencia un
incendio, una explosi6n, lesiones eorporales graves y/o daSos alas piezas de caucho
o de pl_stico de la secadora.
10
Este Manual de Use y Mantenimiento le
ofrece instrucciones generales para la
utilizaci6n de su secadora. Tambien
contiene infermaci6n sabre las
caracteristicas de etros medelos, Puede
ser que su secadora no tenga todas las
caracteristicas que se incluyen aquL
Use la secadera solamente come se
indica en el Manual de Use y
Mantenimiento y la tarjeta de
Instruoeiones para el Funcionamiento
que se incluye con la secadora.
iV !_ Evite los riesgos
de incendio o las descargas electricas,
No use un adaptador o un cable de
extensi6n ni saque la clavija de toma
de tierra del cable elestrico. El no
seguir esta advertencia puede causar
lesiones graves, incendio o la muerte,
SECADORAS EL_'CTRICAS:
14-30R
RE_ACULO
MO A< ON I
FUSIBLES DE
30 AMP CORDON
120/240 VOLTIOS ELECTRICO
O 120/208 VOLTIOS DE LA
SECADORA
ISECADORA
MANERACORRECTA
UseseasiSOLAMENTE
SECADORAS A GAS:
Recept_culo -_
mura/con No corte, saqueni
toma de cortocircuite bajo nin-
tierra gunacircunstanciala
clavija detoma de
tierradeesteenchufe.
Cable de alimentaci_n
el_ctrica con enchufe de toma
de tierra con 3 clavijas
MANERA CORRECTA
Usese asiSOLAMENTE
Nota: Las instrucciones que aparecen
en este Manual de Use y Mantenimiento
no pretenden cubrir todas las
condiciones y situaciones posibles que
pueden ocurrir. Debe tenerse sentido
comL'lny cuidado a] instaIar, operar y
mantener cualquier electrodomestico.
Proteja a los nifios
No permita que los nifios jueguen encima de o dentro de la
secadora. Debe vigilar de cerca a los nifios cuande la secadora est6 siendo usada en
presencia de nifios. Cuando estos crezcan, ens_fieles el use correcto y seguro de redes
los electrodomesticos.
_F_ Deseche la caja de carton, la bolsa de plastico y los demas
materiales de envfo usa vez que baya desembalado la secadora. Los niflos podrian
usarlos para jugar. Las cajas de cart6n tapadas con alfombras, colchas u hojas de
pl_stico pueden convertirse en c_.maras herm6ticas.
__ Mantenga todos los productos de lavado fuera del alcance de los
niflos. Para evitar las tesiones personales, siga todas las advertencias de las etiquetas
de los productos.
i I!'_ Antes de retirar la secadora de servicio o desechada, saque la
puerta de la secadora para evitar que alguien quede atrapado.
_e_EI incumplimiento de estas advertencias puede causar lesiones personales graves.
Evite lesiones
IF_ Para evitar el riesgo de descargas electricas y garantizar la
estabilidad durante el funcionamiento, la secadora debe set instalada y conectada a
usa toma de tierra per un tecnico de servicio capacitado de conformidad con los c6digos
electricos locales. Se incluyen instrucciones para ]a instalaci6n con la secadora para
referencia del instalador. Vea las INSTRUCClQNES PARA LA INSTALAClON para los
procedimientos detallados sobre la conexion a la toma de tierra. Si se mueve la
secadora a otra ubicaci6n, haga que un t_cnico de servicio capacitado examine y
vuelva a instalar la secadora.
V i_ Para evitar Iesiones personales o daSos a la seeadora, el cable
el6ctrico de la secadora a gas debe estar enchufado en un tomacorrientes de 3 clavijas,
polarizado y con toma de tierra adecuada. No debe saearse nunca la clavija de tierra.
No conecte nunca latoma de tierra a una tuberia de gas. No use un cable de
extensi6n ni un adaptador.
mlr!_ Descenecte SIEMPRE la secadora deI tomacorrientes antes de _;'
tratar de hacer cualquier mantenimiento e limpieza. Si no Io hace, pueden ocurrir
descargas el6ctricas e iesiones,
m_
r _ NO use ningun limpiador en vaporizador cuando limpie el interior ';_,'
de la secadora. Pueden desprenderse vapores peligrosos o producirse descargas _/.,_
electricas.
_'_ Para evitar lesiones, no meta la mane en la secadora mientras el
tambor este en movimiento. Deje que et tambor se detenga completamente antes de
meter la mane.
_Para evitar lesiones personales graves y dafios a la secadora:
Todas las reparaciones y el eervicio deben ser Ilevados a cabo per un t_enieo
autorizado a menos que se recomiende Io contrario en este Manual del Usuario.
Use solamente piezas de repuesto autorizadas per la fabrica.
No modifique los contreles.
No instale ni guarde la secadora en un lugar a la intemperie.
_Un disyuntor de seguridad apaga el motor autom_ticamente en el case poco
probable de que ocurra un sobrecalentamiento (secadoras el6ctricas solamente). Un
tecnico de servicio deber& cambiar el disyuntor de seguridad despues de haber
corregido ]a falla.
_EI incumplimiento de estas advertencias puede causar lesiones personales graves.
GUARDE ESTAS INSTRUCClONES
11
Procedimientos para el
secado
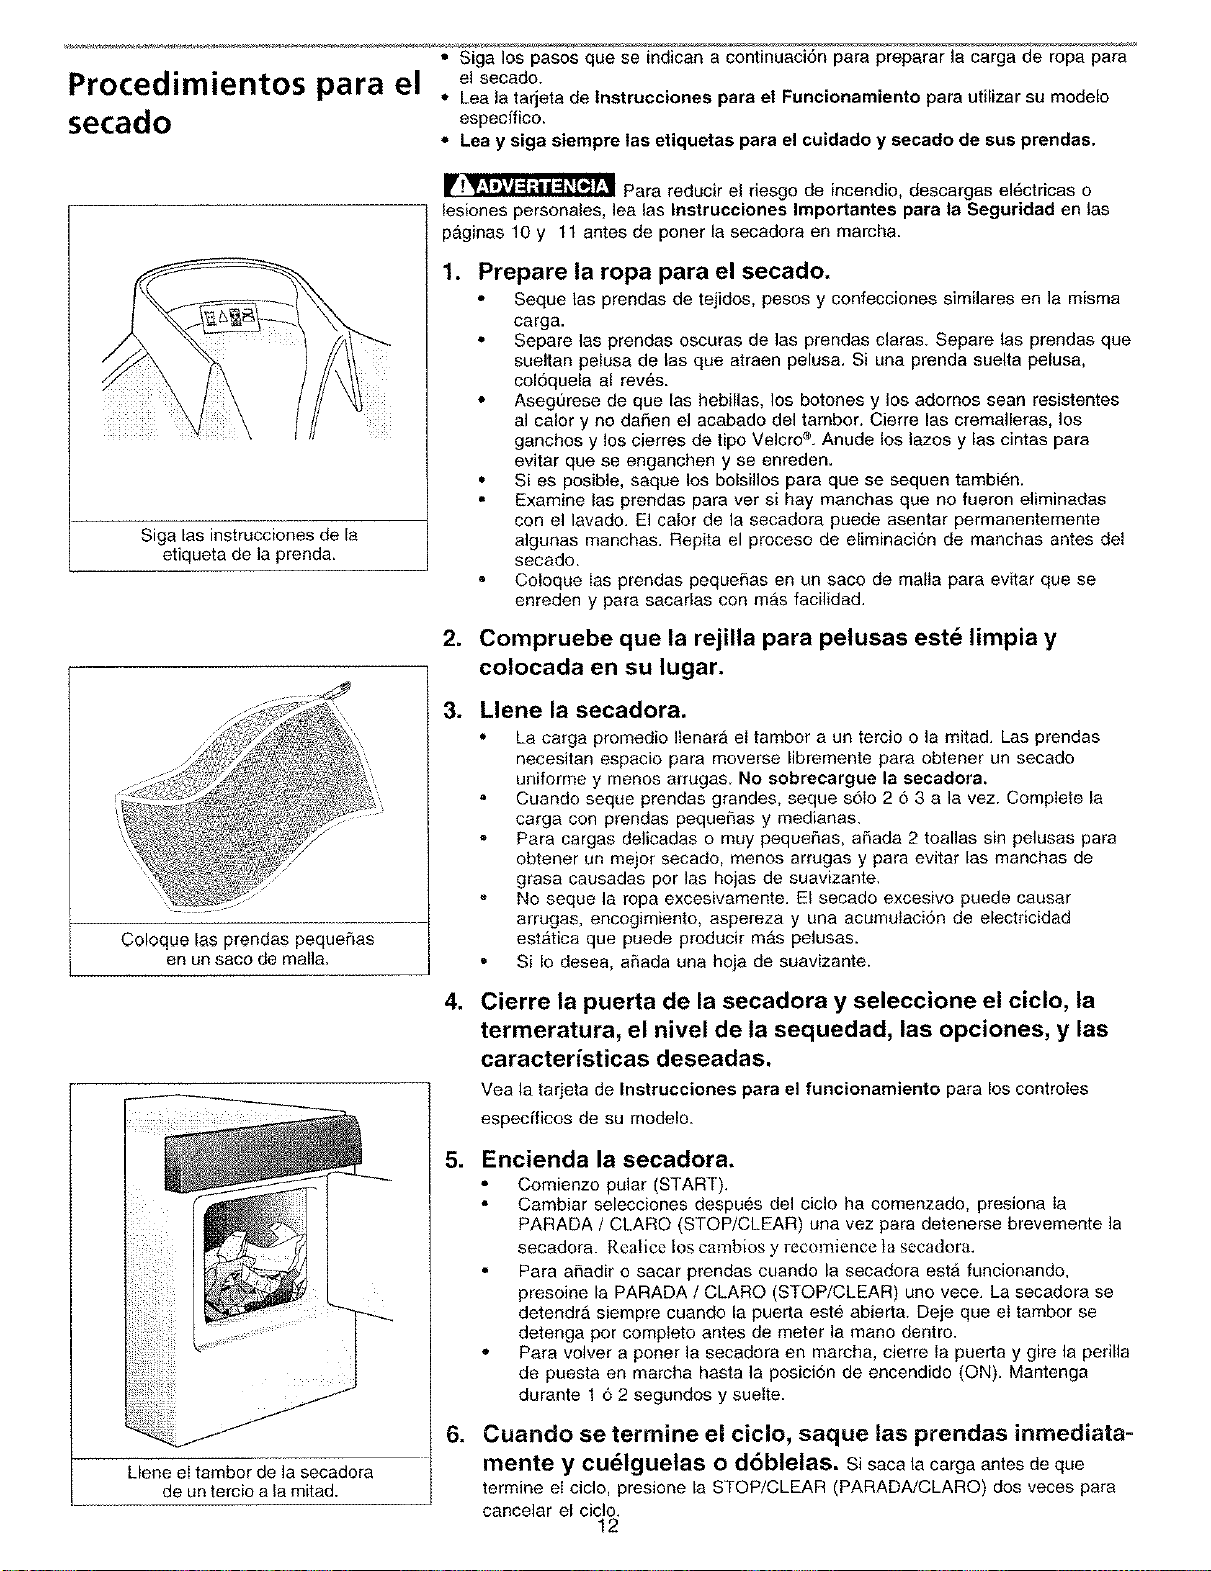
Siga las instrucciones de la
L etiqueta de la prenda.
. _,_
Coloque [as prendas pequefias
I en un saco de rnalla.
Llene el tarnbor de la secadora
de un tercio a la mitad.
el secado.
" Lea la tarjeta de tnstrucciones para el Funcionarniento para utilizar su modelo
especffico.
*' Lea y siga siempre las etiquetas para el cuidado y secado de sus prendas,
_'_ Para reducir el riesgo de incendio, descargas el6ctricas o
lesiones personales, lea las Instruccionee Importantes para ta Seguridad en las
p&ginas 10 y 11 antes de poner la secadora en marcha.
=
Prepare la ropa para el secado.
• Seque tas prendas de tejidos, pesos y confecciones similares en la misma
carga.
• Separe las prendas oscuras de ]as prendas claras. Separe las prendas que
sueltan pelusa de las que atraen pelusa. Si una prenda suelta pelusa,
coloquela al reves.
• Asegurese de que las hebillas, los botones y los adornos sean resistentes
al calory no daSen el acabado del tambor. Cierre las crernalleras, los
ganchos y los cierres de tipo Velcro ®.Anude los lazos y las cintas para
evitar que se enganchen y se enreden.
• Si es posiNe, saque los bolsillos para que se sequen tambien.
• Examine las prendas para ver si hay manehas que no fueron elirninadas
con el lavado. El calor de la secadora puede asentar permanentemente
a]gunas manchas. Repita el proceso de eliminaci6n de rnanchas antes del
secado.
Coloque Ias prendas pequehas en un saeo de malla para evitar que se
enreden y para sacarlas con rnas facilidad.
2. Compruebe que la rejilla para pelusas est_ limpia y
colocada en su lugar.
3. Llene la secadora.
La carga prornedio lienara el tarnbor a un tereio o la mitad. Las prendas
necesitan espacio para moverse librernente para obtener un secado
uniforrne y rnenos arrugas. No sobreeargue la eecadora,
Cuando seque prendas grandes, seque s6Io 2 6 3 a la vez. Complete la
carga con prendas pequefias y medianas.
Para cargas delicadas o muy pequefias, aSada 2 toallas sin pelusas para
obtener un mejor secado, rnenos arrugas y para evitar las rnanchas de
grasa causadas por las hojas de suavizante.
No seque la ropa excesivamente. El secado excesivo puede causar
arrugas, encogirniento, aspereza y una acumulaci6n de electricidad
estatica que puede producir md=spelusas.
Si Io desea, aSada una hoja de suavizante,
4. Cierre la puerta de la secadora y seleccione el ciclo, la
termeratura, el nivel de la sequedad, las opciones, y las
caracteristicas deseadas.
Yea la tarjeta de Instrucciones para el funcionamiento para los controles
especfficos de su modelo.
5. Encienda la secadora.
Comienzo pular (START)_
• Cambiar selecciones despues del ciclo ha comenzado, presiona Ia
PARADA / CLARO (STOP/CLEAR) una vez para detenerse brevemente ]a
secadora. Realice los cambios y recomience ta secadora.
Para afiadir o sacar prendas cuando la seeadora estfi funcionando,
presoine la PARADA / CLARO (STOP/CLEAR) uno vece. La secadora se
detendra siempre cuando la puerta este abierta. Deje que el tambor se
detenga pot cornpleto antes de meter la mano dentro.
• Para volver a poner la secadora en rnarcha, cierre la puerta y gire la perilla
de puesta en rnarcha hasta la posici6n de encendido (ON). Mantenga
durante 16 2 segundos y suelte.
6. Cuando se termine el ciclo, saque las prendas inmediata _
mente y cu_lguelas o d6blelas, si sacala carga antes de que
termine eI cicle, presione la STOP/CLEAR (PARADAiCLARO) dos veces para
cancelar el ciclo.
12
Caractedsticas
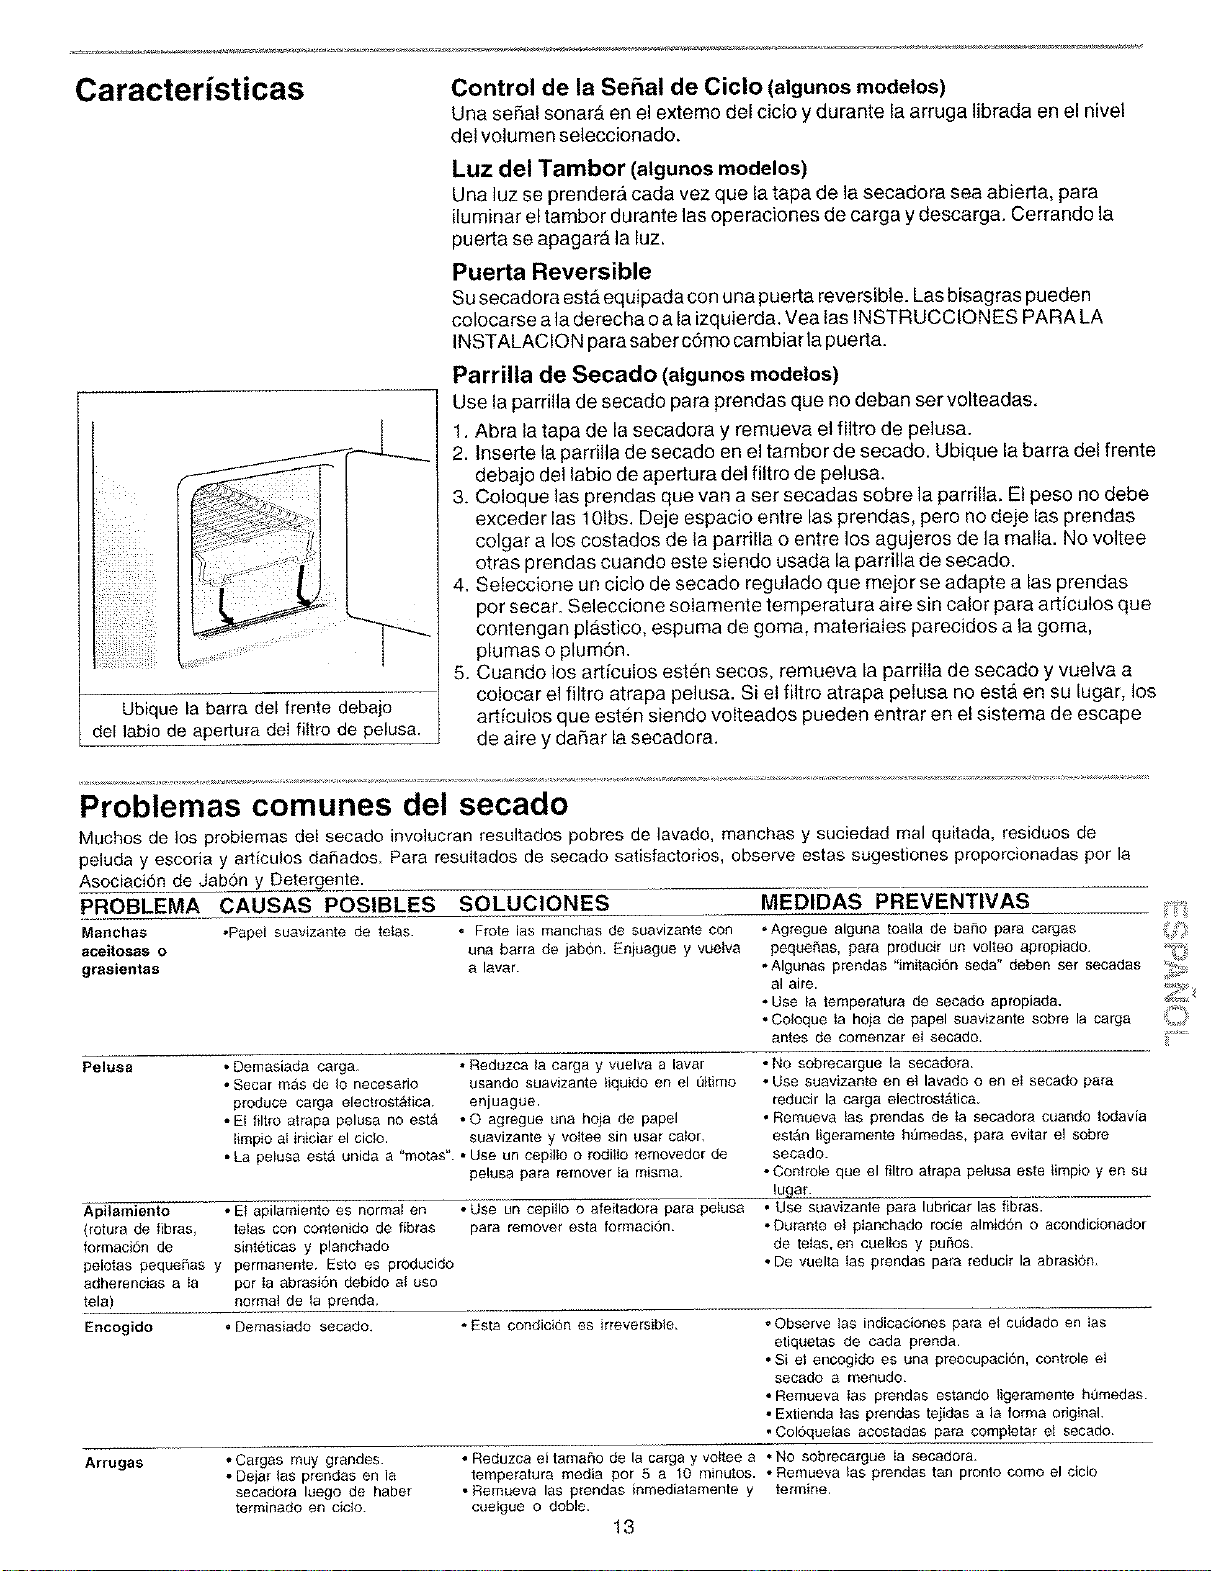
Ubique la barra del frente debajo
del ]abio de apertura deI filtro de pelusa.
Control de la Se£1al de Ciclo (algunos modelos)
Una sepal sonar_ en el extemo del ciclo y durante la arruga librada en el nivel
del volumen seleccionado,
Luz del Tambor (algunos modelos)
Una luz se prendera cada vez que la tapa de ]a secadora sea abierta, para
iluminar el tambor durante las operaciones de carga y descarga. Cerrando la
puerta se apagarb, la luz,
Puerta Reversible
Su secadora est_ equipada con una puerta reversible. Las bisagras pueden
colocarse a la derecha oa la izquierda, Vea las INSTRUCCIONES PARA LA
INSTALAC!ON para saber cdmo cambiar la puerta.
Parrilla de Secado (algunos modelos)
Use la parrilla de secado para prendas que no deban ser volteadas.
1, Abra la tapa de la secadora y remueva el filtro de pe]usa.
2. Inserte la parrilla de secado en el tambor de secado. Ubique la barra del frente
debajo del labio de apertura del filtro de pelusa.
3. Coloque las prendas que van a set secadas sobre ]a parrilla. E!peso no debe
exceder las 10Ibs. Deje espacio entre las prendas, pero no deje las prendas
colgar a los costados de ta parrilla o entre los agujeros de ]a malla. No voitee
otras prendas cuando este siendo usada la parrilla de secado.
4. Seleccione un ciclo de secado regulado que mejor se adapte alas prendas
pot secar. Seleccione solamente temperatura aire sin calor para articutos que
contengan plastico, espuma de goma, materiales parecidos a la goma,
plumas o plum6n.
5. Cuando los artfculos est6n secos, remueva la parrilla de secado y vuelva a
colocar el filtro atrapa pelusa. Si el fi]tro atrapa pelusa no esta en su lugar, los
ardculos que esten siendo volteados pueden entrar en el sistema de escape
de aire y daSar la secadora.
Problemas comunes del secado
Muchos de los probiemas del secado involucran resLiItadospobres de lavado, manchas y suciedad real quitada, residuos de
peluda y escoria y articulos dafiados, Para resultados de secado satisfactorios, observe estas sugestiones proporcionadas por la
Asociaci6n de Jabon y Detergente.
CAUSAS POSlBLES
opapel suavizante de tetas.
PROBLEMA
Manchas
aceitosas o
grasientas
SOLUCIONES
MEDIDAS PREVENTIVAS
• Rote las manchas de suavizante con
una barra de jabon. Enjuague y vuelva
a lavar.
* Agregue alguna toalla de baSo para cargas
peque5as, para producir un volteo apropiado.
• Algunas prendas "imitacidn seda" deben set secadas
al aire.
• Use la temperatura de secado apropiada.
• Coloque Ia hoja de papel suavizante sobre la carga
antes de comenzar el secado.
Pelusa • eemasiada carga. * Reduzca la carga y vuelva a lavar
• Secar mas de Io necesario usando suavizante tiquido en el _}timo
produce carga electrost&tica, enjuague,
• Et filt_o atrapa pelusa no est_ • O agregue una hoja de papel
timpio al iniciar el ciclo, suavizante y voltee sin usar calor.
• La pelusa est#_ unida a "motas". • Use un cepilto o rodiilo temovedor de
pelusa para remover ta misma.
Apilamiento • El apilamiento es normal en • Use un cepitlo o afeitadora para pelusa
(rotura de fibras, telas con contenido de fibras para remover esta formaci6n.
formacidn de sinteticas y planchado
pelotas pequeflas y permanente. Esto es producido
adherencias a Ia por ia abrasi6n debido ai uso
tela) normal de la prenda.
Encogido * Demasiado secado. * Esta condicion es ir[eversible,
• No sobrecargue la secadora.
• Use suavizante en el lavado o en eI secado para
reducir la carga electrost_tica,
• Remueva _as prendas de _a secadora cuando todavia
estan Iigeramente h_medas, para evitar e] sobre
secado.
• Controle que el filtro atrapa pelusa este timpio yen su
lugar.
• Use suavizante para lubricar las fibras.
• Durante el planchado rocie almiddn o acondicionador
de telas, en cuellos y pu_os.
• De vuelta Ias prendas pala reducir la abrasi6n.
Observe las indicaciones para el cuidado en tas
etiquetas de cada prenda,
• Si el encogido es una preocupaci6n, controle et
secado a menudo.
• Remueva Ias prendas estando ligeramente h0medas.
• Extienda tas prendas tejidas a la forma original.
. Coldquelas acostadas para completar ei secado,
Arrugas
• Cargas muy grandes.
• Dejar las p_endas en la
secadora luego de haber
terminado en cic_o.
• Reduzca el tamaSo de la carga y voltee a
temperatura media por 5 a 10 minutos.
• Remueva las prendas inmediatamente y
cuelgue o doble.
•No sobrecargue Ia secadora.
• Remueva Ias prendas tan pronto como el ciclo
termine.
13
Cuidado y limpieza
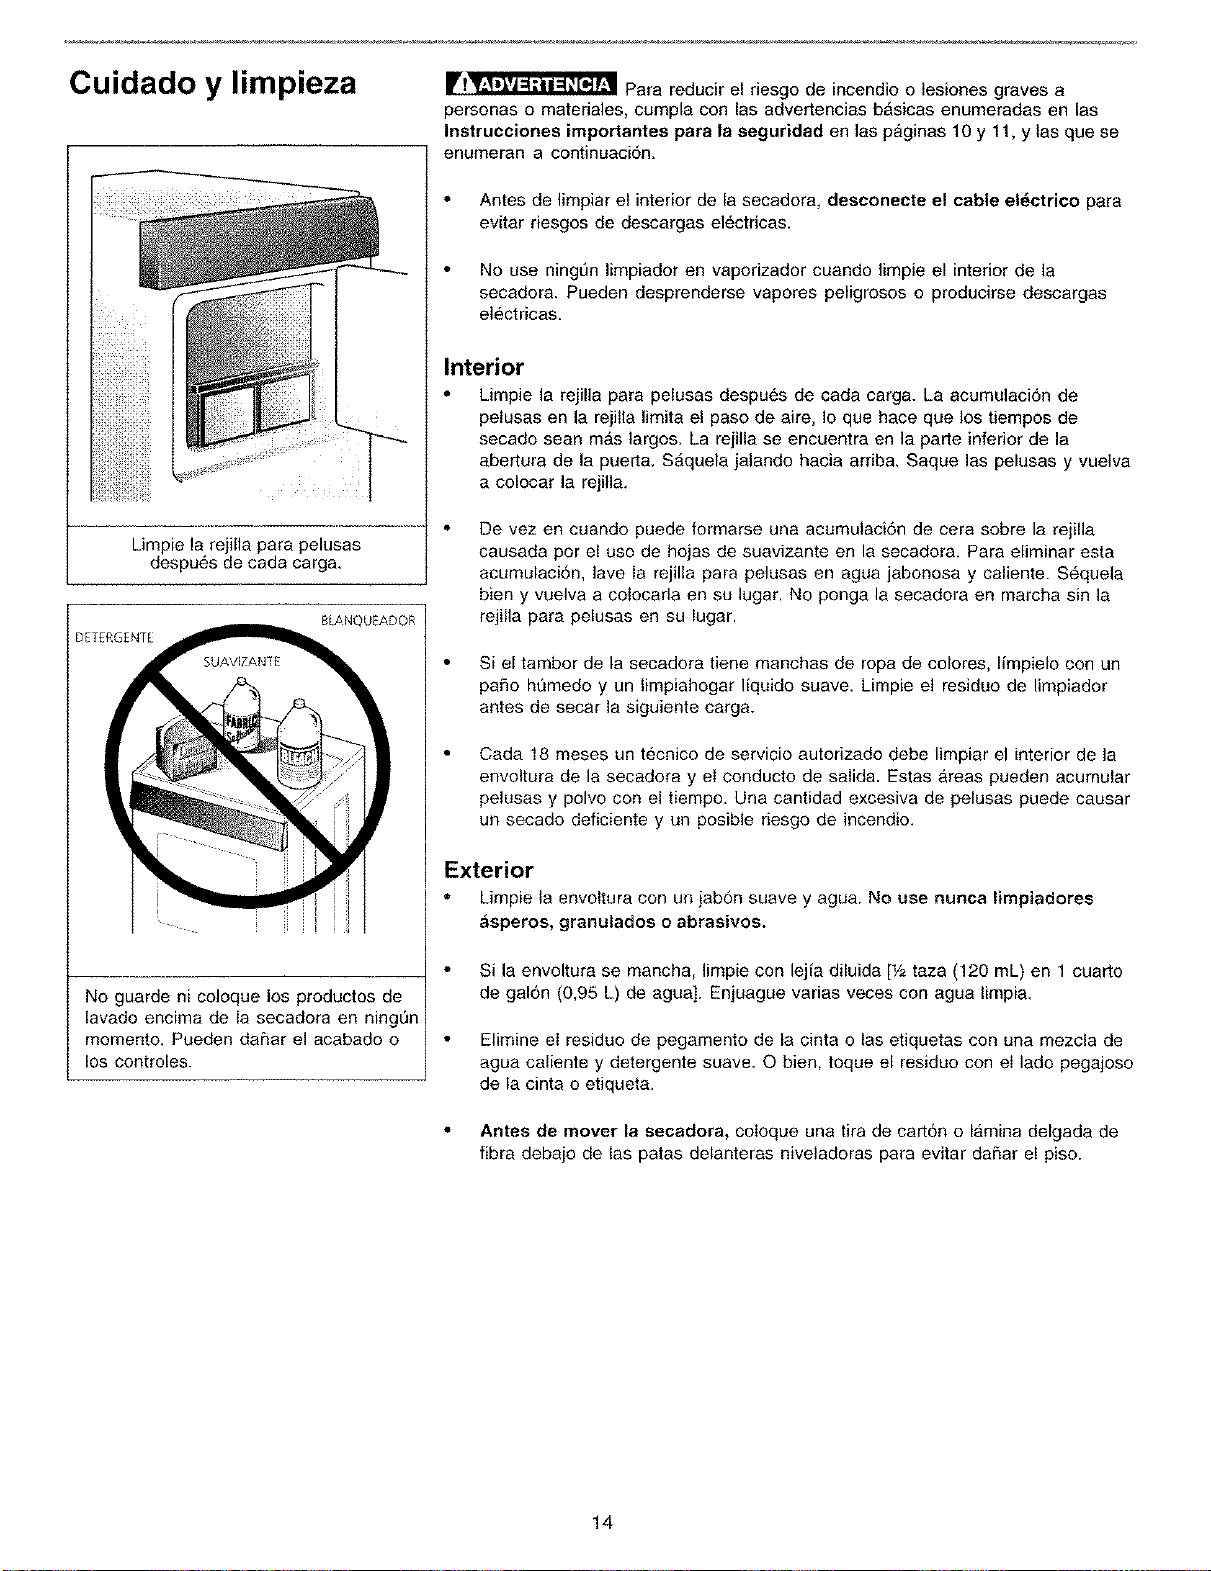
Limpie la rejilla para pelusas
despu6s de cada carga.
8LANQUEADOR
DETERGENTE
No guarde ni coloque los productos de
lavado encima de Ia secadora en ningt)n
momento. Pueden da_ar el acabado o
los controles.
r _ Para reducir el riesgo de incendio o lesiones graves a
personas o materiales, cumpla con las advertencias b_sicas enumeradas en las
Instrucciones importentes para la seguridad en las paginas 10 y 11, y las que se
enumeran a continuaci6n,
Antes de limpiar el interior de la secadora, desconecte el cable el_ctrico para
evitar riesgos de descargas electricas.
No use ningt_n limpiador en vaporizador cuando limpie el interior de la
secadora. Pueden desprenderse vapores peligrosos o producirse descargas
electricas.
Interior
Limpie la rejilla para pelusas despu6s de cada carga. La acumulacion de
pelusas en la rejilla limita el paso de aire, Io que hace que los tiempos de
secado sean mas largos. La rejilla se eecueetra en la padre inferior de la
abedrura de la puedra. SAquela jalando hacia arriba. Saque las pelusas y vuelva
a colocar la rejilla,
De vez en cuando puede formarse una acumulaci6n de cera sobre la rejilla
causada pot el uso de hojas de suavizante en la secadora. Para eliminar esta
acumulaci6n, lave Ia rejilla para pelusas en agua jabonosa y caliente. S_quela
bien y vuelva a colocarla en su lugar, No ponga la secadora en marcha sin la
rejiIla para pelusas en su lugar.
Si el tambor de la secadora tiene manchas de ropa de colores, limpielo con ue
pa5o hQmedo y un limpiahogar liquido suave. Limpie el residuo de limpiador
antes de secar la siguiente carga.
Cada 18 meses un tecnico de servicio autorizado debe limpiar el interior de la
envoltura de la secadora y el conducto de salida. Estas Areas puedee acumular
pelusas y polvo con el tiempo. Una cantidad excesiva de pelusas puede causar
un secado deficiente y un posible riesgo de incendio.
Exterior
" Limpie ta envoltura con un jabon suave y agua. No use nunca limpiadoree
asperos, granulados o abrasivos.
" Si la envoltura se mancha, limpie con lejfa diluida [t/2 taza (120 mL) en 1 cuarto
de galon (0,95 L) de agua]. Enjuague varias veces con agua limpia.
Elimine el residuo de pegamento de la cinta o las etiquetas con una mezcla de
agua caliente y detergente suave. Q bien, toque el residuo con el lado pegajoso
de la cinta o etiqueta.
• Antes de mover la secadora, coloque una tira de cadron o lamina delgada de
fibra debaje de las patas delanteras niveladoras para evitar dafiar e! piso.
14
Evitar Ilamadas de servicio
Antes de Ilamar pare obtener servicio, examine esta lista Puede ahorrarle tiempo y dinero, Esta lista incluye los problemas comunes
que no son el resultado de una fabricaci6n o materiales defectuosos de esta secadora.
PROBLEMA CAUSA POSIBLE SOLUCION
La secadora no se pone El cable el_ctrico no esta bien enchufado o el Aseg_rese de que el enchufe este bien encajado en el
en marcha eachufe puede ester fiojo, tomacorrientes de la pared.
El fusible de la case se ha fundido o el disyuntor Prenda el disyuntor o cambie el fusible.
se ha disparado.
Asegerese de que Ia linea electdca no este sobrecargada y de
que la secadora este en un circuito separado.
El disyuntor de seguridad para Iatemperatura Uame ai tecnico autorizado de servicio pare que Io cambie.
se ha disparado.
La secadora se pone en Hay 2 fusibIes domesticos en el circuito de la Cambie elfusible.
marcha pero no calienta, secadora, Si 1de los 2 fusibles se ha fundido, el
tambor puede girar pero el catentador no
funciona.
La vAIvula de entrada de gas no estA abierta Compruebe que la valvula de entrada este abierta, Vea las
(modelos de gas), INSTRUCCIONES PARA LA tNSTALACION pare saber cbmo
hacedo.
La secadora no tiene una cantidad suficiente Vea las INSTRUCCIONES PARA LA INSTALACiON.
de aire de entrada pare e{quemador de la ttama
(modelos de gas),
La bombona de gas estA vacta o ha habido un Llene o cambie ia bombona,
eorte en el uministro de gas natural (modetos
de gas).
La seeadora debera secar cuando regrese el suministro de gas,
El ¢iclo de secado es La rejilla bare pelusas esta obstruida con AsegQrese de haber quitado !as pelusas de Ia rejilla para pelusas
demasiado lento, el exterior pelusas, de la secadora antes de comenzar cada cielo,
de la secadora est_
demasiado caliente o huele NO se hen cumpIido los requisitos pare el Ei conducto de salida debe tener como minimo 10 cm (4
caliente, conducto de sa_ida, puIgadas) de diametro y debe ester hecho de metal rigido o
flexible_
Uea vez colocado, el conducto de salida no debe tener mas de
dos dobleces de 90° y no debe sobrepasar ia Iongitud indicada en
las INSTRUCCtONES PARA LA INSTALACION.
La seeadora etectrica estA coneetada a un El tiempo de secado sere un 20% mas largo queet secado hecho
circuito de 208 voltios, con un cireuito de 240 vottios.
NO se hen seguido las procedimientos de Vea los Procedimientos para el secado en ta pagina 12.
secede.
La campana de salida exterior o el conducto de Limpie Ia obstruccion.
salida pueden ester taponados o semi
obstruidos,
Mucha humedad, Use un deshumidificador cerca de Ia secadora,
Arrugas exeesivas. La secadora estA sobrecalentada. No Ia sobrecargue. Yea los Procedimientos para el seeado en
la pagina 12.
Las prendas se hart dejado demasiado tiempo Saque las prendas tan pronto come termine el ciclo.
en la secadora.
Distribuci6n iesuficiente de las prendas. Vee los Procedimientos pare el secado en Ia pAgina 12.
Temperatura de secado demasiado alta. Siga las instrucciones de la etiqueta de la prenda.
AraSazos o descascarillado Objetos extra5os come monedas alfileres, Saque siempre los objetos extraRos de los bolsitlos antes de lavar
del acabado del tambor, pinzas o botones dentro de la secadora, la prenda. Saque los objetos de_tambor y ponga la secadora en
marcbe de nuevo.
Accesorios permanentes come hebiltas de
cinturones, cremalIeras y cierres pueden estar
gotpeaado etinterior del tambor.
Puede ser necesario envolver bien un pedazo sobrante de tela
a#ededor de los adornos antes del secado para evitar los
araSazos y daSos ala secadora.
Los dahos al tambor causados pot objetos extra_os o
accesorios permanentes no estan cubiertos pot la garantia.
15
For in-home major brand repair service:
Call 24 hours a day, 7 days a week
1-800-4- MY-HOME" (1-800-469-4663)
Para pedir servicio de reparacibn a domicillio - 1-800-676-5811
In Canada for all your service and parts needs call
- 1-800-665-4455
Au Canada pour tout le service ou les pi_ces
For the repair or replacement parts you need:
Call 6 am - 11 pm CST, 7 days a week
PartsDirect"
1-800-366-PART (1-800-366-7278)
Para ordenar piezas con entrega a domicilio - 1-800-659-7084
For the location of a Sears Parts and Repair Center in your area:
Call 24 hours a day, 7 days a week
1-800-488-1222
For information on purchasing a Sears Maintenance Agreement
or to inquire about an existing Agreement:
Call 9 am - 5 prn, Monday - Saturday
1-800-827-6655
The ServiceSideof Sears."