
VOOR PERFECTE RESULTATEN
Bedankt dat u voor dit AEG-product heeft gekozen. Dit apparaat is ontworpen om vele
jaren uitstekend te presteren, met innovatieve technologieën die het leven gemakkelijker
helpen maken – functies die gewone apparaten wellicht niet hebben. Neem een paar
minuten de tijd om het door te lezen zodat u er optimaal van kunt profiteren.
Ga naar onze website voor:
Advies over gebruik, brochures, het oplossen van problemen, onderhouds- en
reparatie-informatie:
www.aeg.com/support
Registreer uw product voor een betere service:
www.registeraeg.com
Koop accessoires, verbruiksartikelen en originele reserveonderdelen voor uw
apparaat:
www.aeg.com/shop
KLANTENSERVICE
Gebruik altijd originele onderdelen.
Als u contact opneemt met de klantenservice zorg dat u de volgende gegevens bij de
hand hebt: Model, productnummer, serienummer.
De informatie staat op het typeplaatje.
Waarschuwing / Belangrijke veiligheidsinformatie
Algemene informatie en tips
Milieu‑informatie
Wijzigingen voorbehouden.
INHOUDSOPGAVE
1. VEILIGHEIDSINFORMATIE............................................................................................2
2. VEILIGHEIDSVOORSCHRIFTEN...................................................................................4
3. BESCHRIJVING VAN HET PRODUCT.......................................................................... 7
4. BEDIENINGSPANEEL....................................................................................................7
5. VOOR HET EERSTE GEBRUIK.....................................................................................8
6. DAGELIJKS GEBRUIK................................................................................................... 9
7. KLOKFUNCTIES...........................................................................................................10
8. GEBRUIK VAN DE ACCESSOIRES.............................................................................11
9. EXTRA FUNCTIES....................................................................................................... 12
10. AANWIJZINGEN EN TIPS.......................................................................................... 12
11. ONDERHOUD EN REINIGING...................................................................................25
12. PROBLEEMOPLOSSING........................................................................................... 28
13. ENERGIEZUINIGHEID............................................................................................... 29
1. VEILIGHEIDSINFORMATIE
Lees zorgvuldig de meegeleverde instructies voor installatie
en gebruik van het apparaat. De fabrikant is niet
2 NEDERLANDS

verantwoordelijk voor verwondingen of schade die voortvloeit
uit de onjuiste installatie of het onjuiste gebruik. Bewaar de
instructies altijd op een veilige, toegankelijke plek voor
toekomstig gebruik.
1.1 De veiligheid van kinderen en kwetsbare
personen
• Dit apparaat kan worden gebruikt door kinderen van 8 jaar
en ouder en door mensen met beperkte lichamelijke,
zintuiglijke of verstandelijke vermogens of een gebrek aan
ervaring en kennis, indien zij onder toezicht staan of
instructies hebben gekregen over het veilig gebruiken van
het apparaat en indien zij de eventuele gevaren begrijpen.
Kinderen jonger dan 8 jaar oud en personen met zware en
complexe beperkingen dienen altijd uit de buurt van het
apparaat te worden gehouden, tenzij ze voortdurend onder
toezicht staan.
• Laat kinderen niet spelen met het apparaat.
• Houd alle verpakkingen uit de buurt van kinderen en
verwijder ze op gepaste wijze.
• WAARSCHUWING: Houd kinderen en huisdieren uit de
buurt van het apparaat als het in werking is of afkoelt.
Makkelijk toegankelijke onderdelen worden heet tijdens
gebruik.
• Als het apparaat is voorzien van een kinderslot, dient dit te
worden geactiveerd.
• Kinderen mogen zonder toezicht geen reinigings- en
onderhoudswerkzaamheden aan het apparaat uitvoeren.
1.2 Algemene veiligheid
• Alleen een erkende installatietechnicus mag het apparaat
en de kabel vervangen.
• WAARSCHUWING: Het apparaat en de toegankelijke
onderdelen ervan worden heet tijdens gebruik. U dient te
voorkomen de verwarmingselementen aan te raken.
• Gebruik altijd ovenhandschoenen om accessoires of
kookgerei te plaatsen of verwijderen.
NEDERLANDS 3

• Voordat u welke onderhoudshandeling dan ook verricht,
dient u de stekker van het apparaat uit het stopcontact te
trekken.
• WAARSCHUWING: Zorg ervoor dat het apparaat is
uitgeschakeld voordat u de lamp vervangt om elektrische
schokken te voorkomen.
• Gebruik het apparaat niet voordat u het in de ingebouwde
structuur installeert.
• Gebruik geen stoomreiniger om het apparaat schoon te
maken.
• Gebruik nooit agressieve reinigingsmiddelen of scherpe
metalen schrapers om de glazen deur schoon te maken,
deze kunnen krassen veroorzaken op het oppervlak,
waardoor het glas zou kunnen breken.
• Als het netsnoer beschadigd is, moet de fabrikant, een
erkende serviceverlener of een gekwalificeerd persoon
deze vervangen teneinde gevaarlijke situaties te
voorkomen.
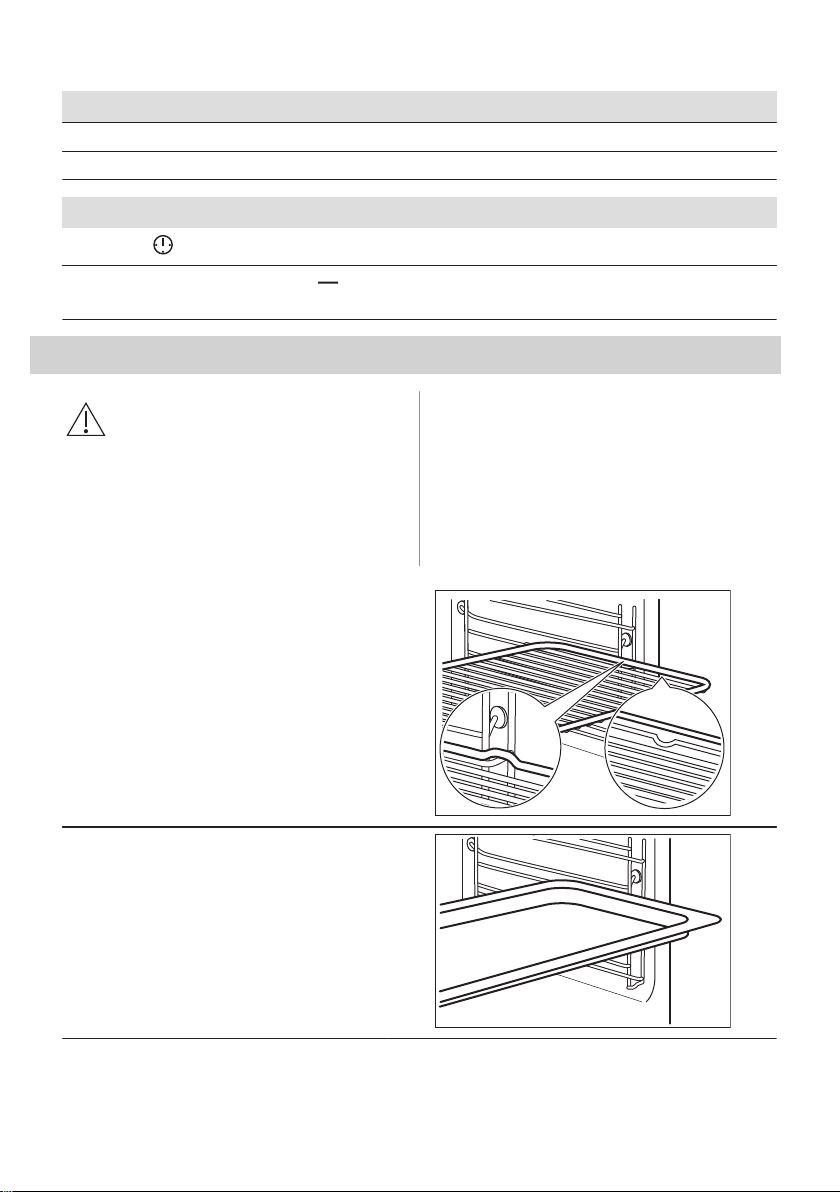
• Om de inschuifrails te verwijderen trekt u eerst de voorkant
van de inschuifrail en dan de achterkant uit de zijwanden.
Installeer de inschuifrails in de omgekeerde volgorde.
2. VEILIGHEIDSVOORSCHRIFTEN
2.1 Installatie
WAARSCHUWING!
Alleen een erkende
installatietechnicus mag het
apparaat installeren.
• Verwijder alle verpakkingsmaterialen.
• Installeer en gebruik geen beschadigd
apparaat.
• Volg de installatie-instructies die zijn
meegeleverd met het apparaat.
• Pas altijd op bij verplaatsing van het
apparaat, want het is zwaar. Gebruik altijd
veiligheidshandschoenen en gesloten
schoeisel.
• Trek het apparaat nooit aan de handgreep
van zijn plaats.
• Installeer het apparaat op een veilige en
geschikte plaats die aan alle installatie-
eisen voldoet.
• Houd de minimumafstand naar andere
apparaten en units in acht.
• Controleer voordat u het apparaat
monteert of de ovendeur onbelemmerd
opent.
• Het apparaat is uitgerust met een
elektrisch koelsysteem. Het heeft
elektrische stroom nodig.
• De stevigheid van de inbouwkast moet
voldoen aan de DIN 68930-norm.
Minimumhoogte kast (Mini‐
mumhoogte kast onder
werkblad)
578 (600) mm
Kastbreedte 560 mm
Kastdiepte 550 (550) mm
Hoogte van de voorkant
van het apparaat
594 mm
4 NEDERLANDS
Hoogte van de achterkant
van het apparaat
576 mm
Breedte van de voorkant
van het apparaat
595 mm
Breedte van de achterkant
van het apparaat
559 mm
Diepte van het apparaat 567 mm
Ingebouwde diepte van het
apparaat
546 mm
Diepte met open deur 1027 mm
Minimumgrootte ventilatie‐
opening. Opening ge‐
plaatst aan de onderkant
van de achterzijde
560 x 20 mm
Lengte netvoedingskabel.
Kabel wordt in de rechter‐
hoek van de achterzijde
geplaatst
1500 mm
Bevestigingsschroeven 4 x 25 mm
2.2 Elektrische aansluiting
WAARSCHUWING!
Gevaar voor brand en
elektrische schokken.
• Alle elektrische aansluitingen moeten
door een gediplomeerd elektromonteur
worden gemaakt.
• Dit apparaat moet worden aangesloten op
een geaard stopcontact.
• Zorg ervoor dat de parameters op het
vermogensplaatje overeenkomen met
elektrische vermogen van de netstroom.
• Gebruik altijd een juist geïnstalleerd
schokbestendig stopcontact.
• Gebruik geen adapters met meerdere
stekkers en verlengkabels.
• Zorg dat u de netstekker en het netsnoer
niet beschadigt. Indien de voedingskabel
moet worden vervangen, dan moet dit
gebeuren door onze Klantenservice.
• Laat de stroomkabel niet in aanraking
komen met de deur van het apparaat of
de niche onder het apparaat, met name
niet als deze werkt of als de deur heet is.
• De schokbescherming van delen onder
stroom en geïsoleerde delen moet op zo'n
manier worden bevestigd dat het niet
zonder gereedschap kan worden
verplaatst.
• Steek de stekker pas in het stopcontact
als de installatie is voltooid. Zorg ervoor
dat het netsnoer na installatie bereikbaar
is.
• Als het stopcontact los zit, mag u de
stekker niet in het stopcontact steken.
• Trek niet aan het netsnoer om het
apparaat los te koppelen. Trek altijd aan
de stekker.
• Gebruik enkel correcte
isolatievoorzieningen:
stroomonderbrekers, zekeringen
(schroefzekeringen moeten uit de houder
worden verwijderd), aardlekschakelaars
en contactgevers.
• De elektrische installatie moet een
isolatieapparaat bevatten waardoor het
apparaat volledig van het lichtnet
afgesloten kan worden. Het
isolatieapparaat moet een contactopening
hebben met een minimale breedte van 3
mm.
• Dit apparaat wordt geleverd met stekker
en netsnoer.
2.3 Gebruik
WAARSCHUWING!
Gevaar voor letsel,
brandwonden, elektrische
schokken of een explosie.
• Dit apparaat is uitsluitend bestemd voor
huishoudelijk gebruik.
• De specificatie van dit apparaat niet
wijzigen.
• Zorg ervoor dat de ventilatieopeningen
niet geblokkeerd zijn.
• Laat het apparaat tijdens het gebruik niet
onbeheerd achter.
• Schakel het apparaat telkens na gebruik
uit.
• Wees voorzichtig met het openen van de
deur van het apparaat als het apparaat
aan staat. Er kan hete lucht ontsnappen.
• Bedien het apparaat niet met natte
handen of als het contact maakt met
water.
• Oefen geen kracht uit op een geopende
deur.
• Het apparaat mag niet worden gebruikt
als werkblad of aanrecht.
• Open de deur van het apparaat
voorzichtig. Als u alcoholische
NEDERLANDS 5

toevoegingen gebruikt, kan er alcohol-
luchtmengsel ontstaan.
• Houd vonken of open vlammen uit de
buurt van het apparaat bij het openen van
de deur.
• Plaats geen ontvlambare producten of
items die vochtig zijn door ontvlambare
producten in, bij of op het apparaat.
WAARSCHUWING!
Risico op schade aan het
apparaat.
• Om schade of verkleuring van het email te
voorkomen:
– zet geen kookgerei of andere
voorwerpen direct op de bodem van
het apparaat.
– leg geen aluminiumfolie op de bodem
van de ruimte in het apparaat.
– plaats geen water direct in het hete
apparaat.
– haal vochthoudende schotels en eten
uit het apparaat als u klaar bent met
koken.
– wees voorzichtig bij het verwijderen of
bevestigen van accessoires.
• Verkleuring van het email of roestvrij staal
is niet van invloed op de werking van het
apparaat.
• Gebruik een diepe pan voor vochtige
taarten. Fruitsappen kunnen permanente
vlekken maken.
• Dit apparaat is uitsluitend bestemd om
mee te koken. Het mag niet worden
gebruikt voor andere doeleinden, zoals
het verwarmen van een kamer.
• Alle bereidingen moeten worden
uitgevoerd met gesloten ovendeur.
• Als het apparaat achter een
meubelpaneel gemonteerd is (bijv. een
deur), zorg er dan voor dat de deur nooit
gesloten is als het apparaat in werking is.
Warmte en vocht kunnen achter een
gesloten meubelpaneel ophopen en
schade aan het apparaat, de behuizing of
de vloer veroorzaken. Sluit het
meubelpaneel niet tot het apparaat
compleet is afgekoeld na gebruik.
2.4 Onderhoud en reiniging
WAARSCHUWING!
Gevaar voor letsel, brand en
schade aan het apparaat.
• Schakel het apparaat uit en trek de
stekker uit het stopcontact voordat u
onderhoudshandelingen verricht.
• Zorg ervoor dat het apparaat is afgekoeld.
Er bestaat een risico dat de glasplaten
kunnen breken.
• Vervang direct de glazen deurpanelen als
deze beschadigd zijn. Neem contact op
met een erkend servicecentrum.
• Wees voorzichtig als u de deur van het
apparaat verwijdert. De deur is zwaar!
• Reinig het apparaat regelmatig om te
voorkomen dat het materiaal van het
oppervlak achteruitgaat.
• Maak het apparaat schoon met een
vochtige zachte doek. Gebruik alleen
neutrale schoonmaakmiddelen. Gebruik
geen schuurmiddelen, schuursponsjes,
oplosmiddelen of metalen voorwerpen.
• Volg als u een ovenspray gebruikt de
aanwijzingen op de verpakking.
2.5 Binnenverlichting
WAARSCHUWING!
Gevaar voor elektrische
schokken.
• Met betrekking tot de lamp(en) in dit
product en reservelampen die afzonderlijk
worden verkocht: Deze lampen zijn
bedoeld om bestand te zijn tegen extreme
fysieke omstandigheden in huishoudelijke
apparaten, zoals temperatuur, trillingen,
vochtigheid, of zijn bedoeld om informatie
te geven over de operationele status van
het apparaat. Ze zijn niet bedoeld voor
gebruik in andere toepassingen en zijn
niet geschikt voor verlichting in
huishoudelijke ruimten.
• Gebruik alleen lampjes met dezelfde
specificaties.
2.6 Service
• Neem contact op met de erkende
servicedienst voor reparatie van het
apparaat.
• Gebruik uitsluitend originele
reserveonderdelen.
2.7 Afvalverwerking
WAARSCHUWING!
Gevaar voor letsel of verstikking.
6 NEDERLANDS
• Haal de stekker uit het stopcontact.
• Snijd het netsnoer vlak bij het apparaat af
en gooi het weg.
• Verwijder de deurvergrendeling om te
voorkomen dat kinderen of huisdieren
binnen in het apparaat vast komen te
zitten.
3. BESCHRIJVING VAN HET PRODUCT
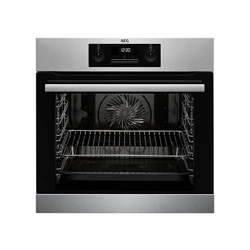
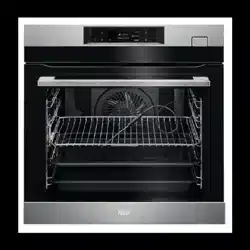
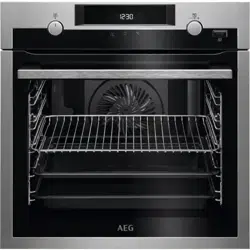
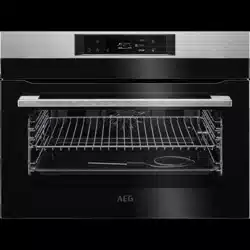
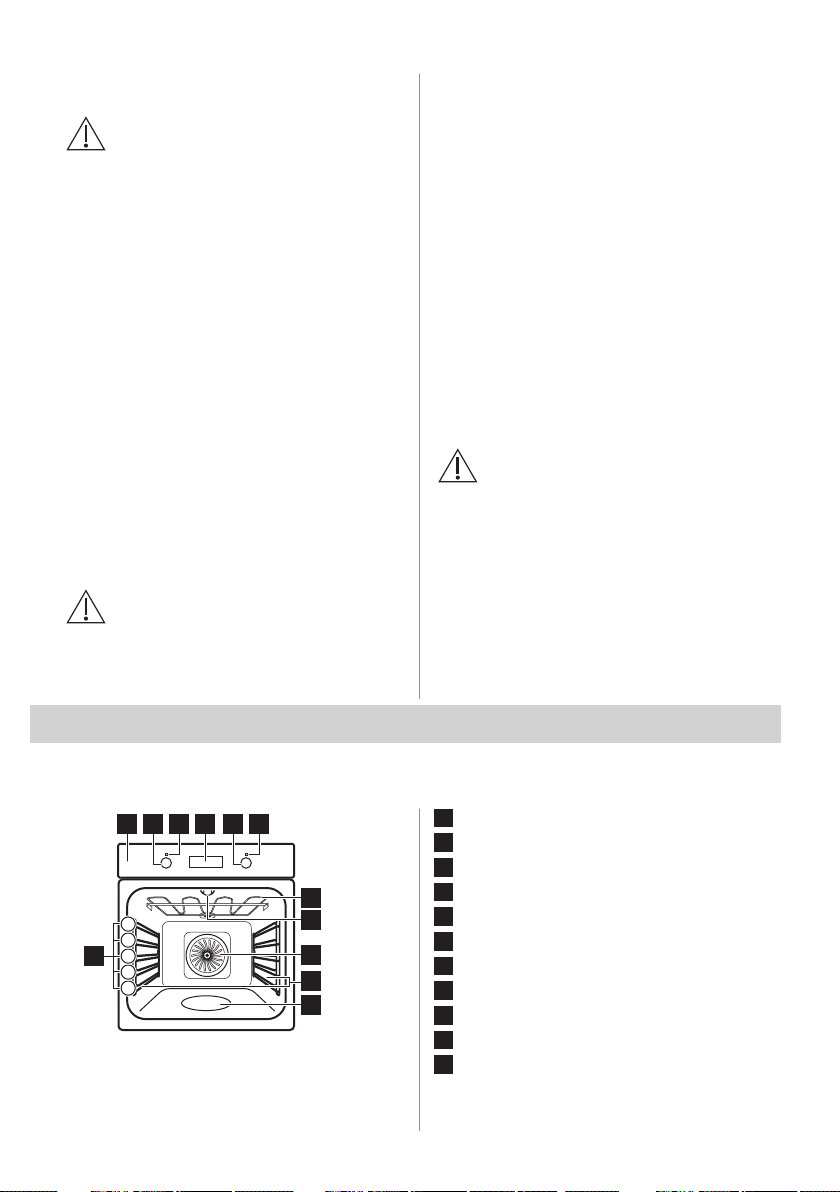
3.1 Algemeen overzicht
7
9
8
41 2 3 5 6
1
2
3
4
5
12
10
11
1
Bedieningspaneel
2
Knop voor verwarmingsfuncties
3
Stroomlampje/symbool
4
Scherm
5
Bedieningsknop (voor de temperatuur)
6
Temperatuurindicator/symbool
7
Verwarmingselement
8
Lamp
9
Ventilator
10
Verwijderbare inschuifrail
11
Uitholling reliëf - Aqua-
reinigingscontainer
12
Roosterhoogtes
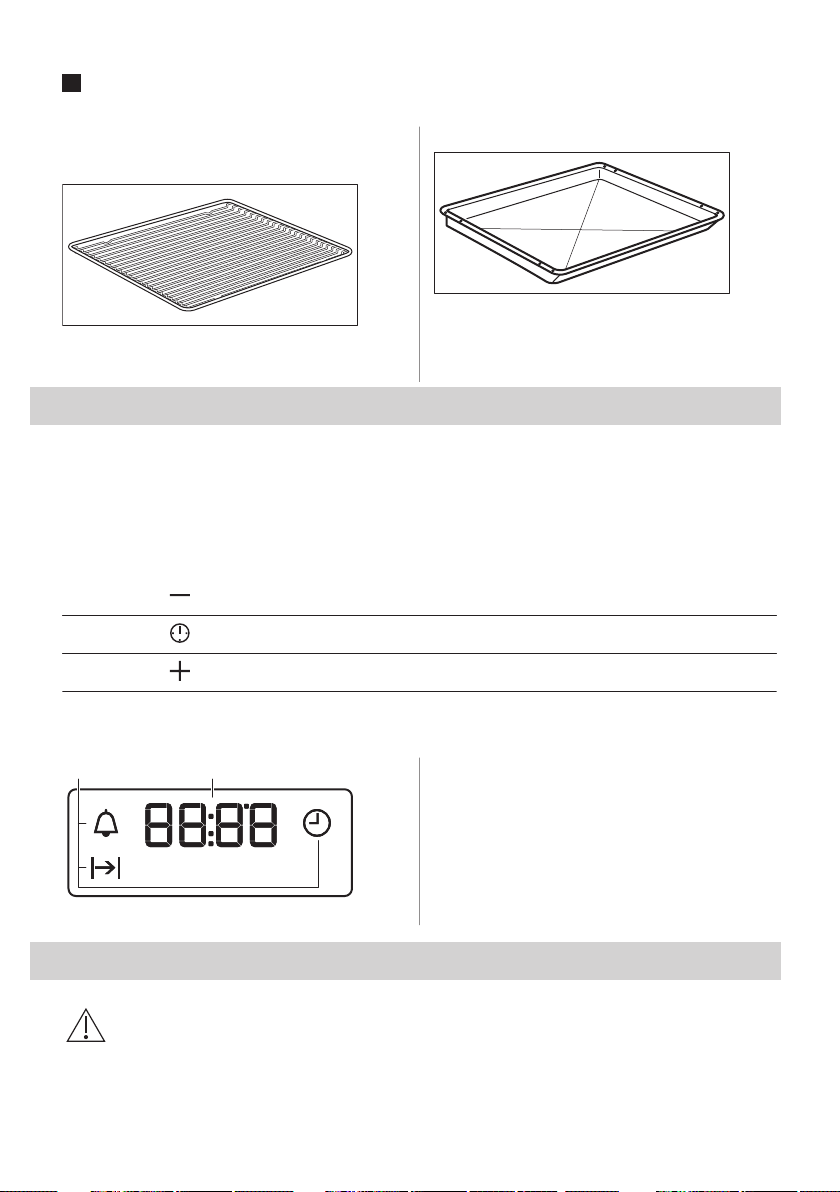
3.2 Accessoires
Bakrooster
Voor kookgerei, bak- en braadvormen.
Combipan
Voor gebak en koekjes. Voor braden en
roosteren of als pan om vet op te vangen
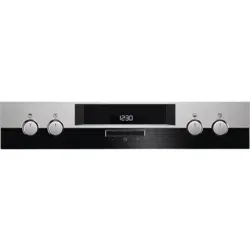
4. BEDIENINGSPANEEL
4.1 Verzonken knoppen
Om het apparaat te bedienen, moet u de
bedieningsknop indrukken. De knop komt
dan naar buiten.
NEDERLANDS 7
4.2 Sensorveld / Knoppen
Om de tijd in te stellen.
De klokfunctie instellen.
Om de tijd in te stellen.
4.3 Display
A B
A. Klokfuncties
B. Timer
5. VOOR HET EERSTE GEBRUIK
WAARSCHUWING!
Raadpleeg de hoofdstukken
Veiligheid.
5.1 Voorafgaand aan het eerste gebruik
De oven kan een vreemde geur en rook afgeven tijdens het voorverwarmen. Zorg ervoor dat
de kamer goed is geventileerd.
Stap 1 Stap 2
Stap 3
Stel de klok in De oven reinigen Verwarm de lege oven voor
1. , - druk hierop om de tijd
in te stellen. Na ongeveer 5 se‐
conden stopt het knipperen en
geeft de klok de tijd weer.
1. Haal alle accessoires en verwij‐
derbare inschuifrails uit de
oven.
2. Reinig de oven en de accessoi‐
res met een zachte doek, warm
water en een mild reinigings‐
middel.
1. Stel de maximale temperatuur
in voor de functie: .
Tijd: 1 uur
2. Stel de maximale temperatuur
in voor de functie: .
Tijd: 15 min
Schakel de oven uit en wacht tot deze is afgekoeld. Plaats de accessoires en de verwijderbare inschuifrails in de
oven.
8 NEDERLANDS
6. DAGELIJKS GEBRUIK
WAARSCHUWING!
Raadpleeg de hoofdstukken
Veiligheid.
6.1 Instellen: Verwarmingsfunctie
Stap 1 Draai aan de knop voor de verwar‐
mingsfuncties om een verwarmings‐
functie te selecteren.
Stap 2 Draai aan de regelknop om de tempe‐
ratuur te selecteren.
Stap 3 Draai wanneer het bereiden stopt aan
de knoppen naar de uit-stand om de
oven uit te schakelen.
6.2 Verwarmingsfuncties
Verwarmings‐
functie
Toepassing
Uit-stand
De oven is uitgeschakeld.
Binnenverlichting
Om de lamp in te schakelen.
Hetelucht
Bakken op maximaal drie rek‐
standen tegelijkertijd en voedsel
drogen.
Stel de temperatuur 20 °C tot
40 °C lager in dan voor Boven- /
onderwarmte.
Pizza-functie
Voor het bakken van pizza.
Voor intensieve bruining en een
knapperige bodem.
Boven- /onder‐
warmte / Reiniging
met water
Voor het bakken en braden op
één rekstand.
Zie het hoofdstuk "Onderhoud
en reiniging" voor meer informa‐
tie over: Reiniging met water.
Onderwarmte
Voor het bakken van taarten
met een knapperige bodem en
het inmaken van voedsel.
Verwarmings‐
functie
Toepassing
Ontdooien
Om voedsel te ontdooien
(groenten en fruit). De ontdooi‐
tijd hangt af van de hoeveelheid
en dikte van het voedsel.
Hetelucht (vochtig)
Deze functie is ontworpen om
tijdens de bereiding energie te
besparen. Bij het gebruik van
deze functie kan de temperatuur
in de ruimte verschillen van de
ingestelde temperatuur. Het ver‐
warmingsvermogen kan worden
verminderd. Raadpleeg voor
meer informatie het hoofdstuk
"Dagelijks gebruik", opmerkin‐
gen op: Hetelucht (vochtig).
Grill
Voor het roosteren van dunne
stukjes voedsel en voor het ma‐
ken van toast.
Turbo grill
Voor het braden van grotere
stukken vlees of gevogelte met
botten op één niveau. Voor gra‐
tineren en bruinen.
De lamp kan tijdens bepaalde
ovenfuncties automatisch
uitgaan bij een temperatuur die
lager is dan 60° C.
6.3 Toelichting van: Hetelucht
(vochtig)
Deze functie wordt gebruikt om te voldoen
aan de energie-efficiëntieklasse en
ecodesign-vereisten overeenkomstig EU
65/2014 en EU 66/2014. Testen volgens EN
60350-1.
De ovendeur dient tijdens de bereiding
gesloten te zijn zodat de functie niet wordt
onderbroken en de oven werkt op de hoogst
mogelijke energie-efficiëntie.
Zie het hoofdstuk 'Hints and tips’, Hetelucht
(vochtig) voor bereidingsinstructies. Zie voor
algemene aanbevelingen voor
energiebesparing het hoofdstuk ‘Energie-
efficiëntie’, Energiebesparing.
NEDERLANDS 9
7. KLOKFUNCTIES
7.1 Klokfuncties
Klokfunctie Toepassing
Tijdstip van de dag
Met deze functie kunt u de dagtijd instellen, wijzigen of controleren.
Duur
Instellen hoe lang de oven in werking is.
Kookwekker
Om een afteltijd in te stellen. Deze functie heeft geen invloed op de werk‐
ing van de oven. U kunt deze functie op elk gewenst moment instellen, ook
als de oven uit staat.
7.2 Instellen: Klokfuncties
Wijzigen: Tijdstip van de dag
- knippert als u de oven aansluit op het stopcontact, als er een stroomstoring is geweest of als de timer niet is
ingesteld.
Stap 1
- druk herhaaldelijk. - begint te knipperen.
Stap 2
, - druk hierop om de tijd in te stellen.
Na ongeveer 5 seconden stopt het knipperen en geeft de klok de tijd weer.
- druk hier herhaaldelijk op om het tijdstip van de dag te wijzigen. - begint te knipperen.
Instellen: Duur
Stap 1 Stel een ovenfunctie en de temperatuur in.
Stap 2
- druk herhaaldelijk. - begint te knipperen.
Stap 3
, - druk hierop om de duur in te stellen.
Op het display verschijnt: .
- knippert wanneer de ingestelde tijd is verstreken. Er weerklinkt een geluidssignaal en de
oven schakelt uit.
Stap 4 Druk op een willekeurige toets om het signaal uit te zetten.
Stap 5 Draai de knoppen naar de uitstand.
Instellen: Kookwekker
Stap 1
- druk herhaaldelijk. - begint te knipperen.
Stap 2
, - druk hierop om de tijd in te stellen.
De functie wordt automatisch na 5 seconden gestart.
Wanneer de ingestelde tijd is verstreken, klinkt er een geluidssignaal.
10 NEDERLANDS
Instellen: Kookwekker
Stap 3 Druk op een willekeurige toets om het signaal uit te zetten.
Stap 4 Draai de knoppen naar de uitstand.
Annuleren: Klokfuncties
Stap 1
- druk herhaaldelijk totdat het klokfunctiesymbool begint te knipperen.
Stap 2
Indrukken en vasthouden: .
De klokfunctie schakelt na enkele seconden uit.
8. GEBRUIK VAN DE ACCESSOIRES
WAARSCHUWING!
Raadpleeg de hoofdstukken
Veiligheid.
8.1 Accessoires plaatsen
Een kleine inkeping bovenaan verhoogt de
veiligheid. Deze inkepingen voorkomen
bovendien omkanteling. De hoge rand rond
het rooster voorkomt dat het kookgerei van
het rooster afglijdt.
Bakrooster:
Plaats het rooster tussen de geleidestangen van
de inschuifrail.
Braadpan:
Schuif de plaat tussen de geleidestangen van de
inschuifrail.
NEDERLANDS 11
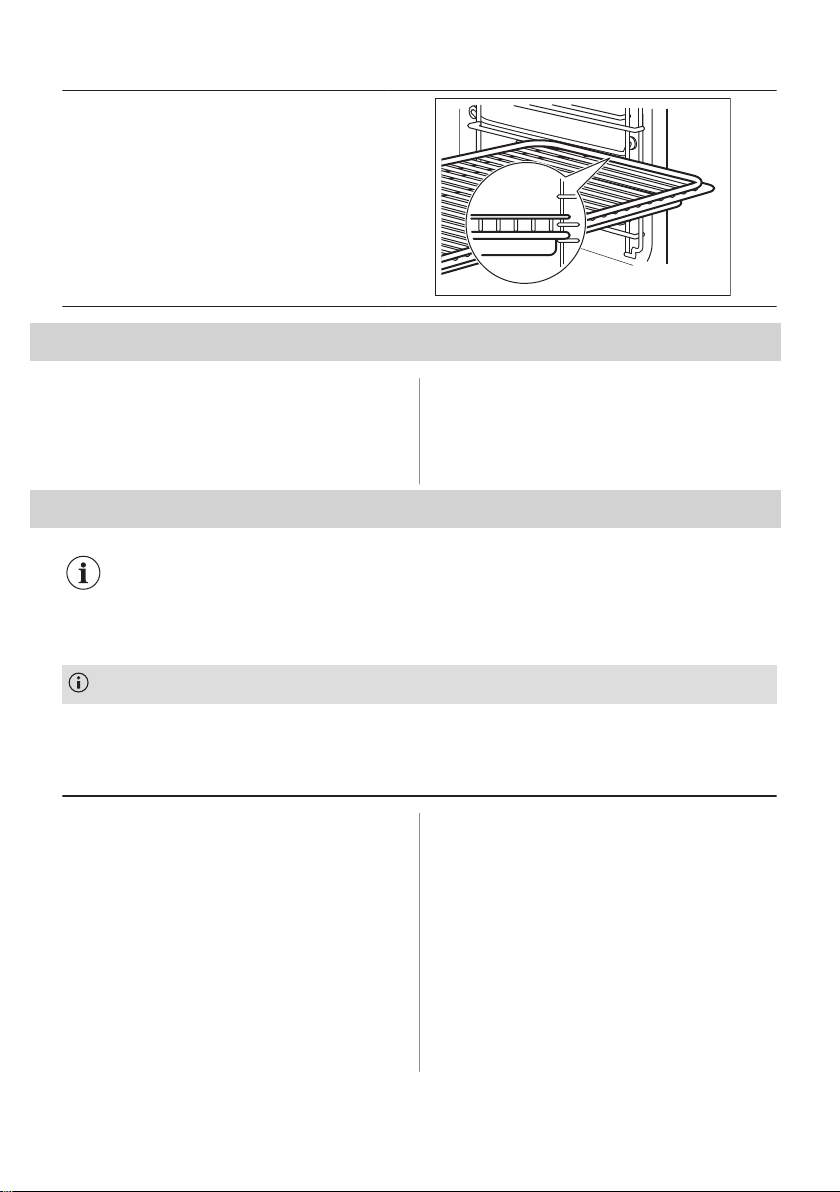
Bakrooster, Braadpan:
Plaats de plaat tussen de geleiders van de in‐
schuifrails en het bakrooster op de geleiders erbo‐
ven.
9. EXTRA FUNCTIES
9.1 Koelventilator
Als de oven in werking is, wordt de
koelventilator automatisch ingeschakeld om
de oppervlakken van de oven koel te
houden. Als u de oven uitschakelt, kan de
koelventilator blijven werken totdat de oven is
afgekoeld.
10. AANWIJZINGEN EN TIPS
Raadpleeg de hoofdstukken
Veiligheid.
10.1 Kookadviezen
De temperatuur en kooktijden in de tabellen zijn slechts als richtlijn bedoeld. Deze zijn afhankelijk van de recep‐
ten en de kwaliteit en de hoeveelheid van de gebruikte ingrediënten.
Uw oven kan anders bakken of roosteren dan de oven die u tot nu toe gebruikt heeft. De onderstaande tabellen
tonen aanbevolen instellingen voor temperatuur, kooktijd en rekstand voor specifieke soorten voedsel.
Als u voor een speciaal recept de instelling niet kunt vinden, zoek dan naar een soortgelijk recept.
10.2 Binnenzijde van de deur
Aan de binnenkant van de deur vindt u
het volgende:
• de nummers van de inzetniveaus.
• informatie over de ovenfuncties,
aanbevolen niveaus en temperaturen voor
gerechten.
10.3 Bakken
Gebruik voor de eerste baksessie de lagere
temperatuur.
Bij het bereiden van cake op meerdere
niveaus kan de baktijd ca. 10 - 15 minuten
langer zijn.
Als de cake niet overal even hoog is, wordt
de cake niet overal even bruin. Als de cake
niet overal even bruin wordt, hoeft u de
temperatuurinstelling niet te wijzigen. De
verschillen verminderen tijdens het bakken.
Tijdens het bakken kunnen bakplaten in de
oven vervormen. Wanneer de bakplaten
weer afgekoeld zijn, verdwijnt de vervorming.
12 NEDERLANDS
10.4 Baktips
Bakresultaat Mogelijke oorzaak Oplossing
De onderkant van de cake is
niet voldoende gebakken.
De rekstand is incorrect. Plaats de cake op een lagere rekstand.
De cake zakt in en wordt klef,
of streperig.
De oventemperatuur is te hoog. Stel de volgende keer de oventemperatuur
iets lager in.
De oventemperatuur is te hoog en
de baktijd te kort.
Stel volgende keer een langere baktijd en
een lagere oventemperatuur in.
De cake is te droog. De oventemperatuur is te laag. Stel de volgende keer de oventemperatuur
hoger in.
Te lange baktijd. Stel volgende keer een kortere baktijd in.
De cake wordt ongelijkmatig
gebakken.
De oventemperatuur is te hoog en
de baktijd te kort.
Stel volgende keer een langere baktijd en
een lagere oventemperatuur in.
Het cakebeslag is niet gelijkmatig
verdeeld.
Verspreid de volgende keer het cakebe‐
slag gelijkmatig over de bakplaat.
De cake wordt niet gaar bin‐
nen de in het recept aangege‐
ven baktijd.
De oventemperatuur is te laag. Stel de volgende keer de oventemperatuur
iets hoger in.
10.5 Bakken op 1 rekniveau
BAK‐
KEN IN BAK‐
VORMEN
(°C) (min)
Taartbodem -
zandtaartdeeg,
verwarm de oven
voor
Hetelucht 170 - 180 10 - 25 2
Taartbodem -
zacht cakedeeg
Hetelucht 150 - 170 20 - 25 2
Tulband / Brioche Hetelucht 150 - 160 50 - 70 1
Zandgebak / Fruit‐
gebak
Hetelucht 140 - 160 70 - 90 1
Kwarktaart Boven- /onderwarmte 170 - 190 60 - 90 1
Gebruik de derde rekstand.
Gebruik de functie: Hetelucht.
Gebruik een bakplaat.
CAKE/GEBAK/BROOD
(°C) (min)
Kruimeltaart, droog 150 - 160 20 - 40
NEDERLANDS 13
CAKE/GEBAK/BROOD
(°C) (min)
Vruchtentaart (gemaakt van gistdeeg/zacht cake‐
deeg), gebruik een diepe pan
150 35 - 55
Vruchtencake van zanddeeg 160 - 170 40 - 80
Verwarm de lege oven voor.
Gebruik de functie: Boven- /onderwarmte.
Gebruik een bakplaat.
CAKE/
GEBAK/BROOD (°C) (min)
Koninginnenbrood (opge‐
rolde cake met jam)
180 - 200 10 - 20 3
Roggebrood: eerst: 230 20 1
dan: 160 - 180 30 - 60
Beboterde amandeltaart /
Suikerkoek
190 - 210 20 - 30 3
Roomsoezen / Eclairs 190 - 210 20 - 35 3
Plaatbrood / Broodkrans 170 - 190 30 - 40 3
Vruchtentaart (gemaakt
van gistdeeg/zacht cake‐
deeg), gebruik een diepe
pan
170 35 - 55 3
Plaatkoek met delicate
garnering (bijvoorbeeld
kwark, room, puddingvul‐
ling)
160 - 180 40 - 80 3
Christstollen 160 - 180 50 - 70 2
Gebruik de derde rekstand.
KOEKJES EN
BISCUITS (°C) (min)
Zandkoekjes Hetelucht 150 - 160 10 - 20
Broodjes, verwarm de oven
voor
Hetelucht 160 10 - 25
Koekjes gemaakt van spons‐
deeg
Hetelucht 150 - 160 15 - 20
Koekjes van bladerdeeg, ver‐
warm de oven voor
Hetelucht 170 - 180 20 - 30
14 NEDERLANDS
KOEKJES EN
BISCUITS (°C) (min)
Koekjes gemaakt van gistdeeg Hetelucht 150 - 160 20 - 40
Makarons Hetelucht 100 - 120 30 - 50
Eiwitgebak/schuimgebak /
Schuimgebakjes
Hetelucht 80 - 100 120 - 150
Broodjes, verwarm de oven
voor
Boven- /onderwarmte 190 - 210 10 - 25
10.6 Ovenschotels en gegratineerde gerechten
Gebruik de eerste rekstand.
(°C) (min)
Stokbroden bedekt met ge‐
smolten kaas
Hetelucht 160 - 170 15 - 30
Groentegratin, verwarm de
oven voor
Turbo grill 160 - 170 15 - 30
Lasagne Boven- /onderwarmte 180 - 200 25 - 40
Visschotels Boven- /onderwarmte 180 - 200 30 - 60
Gevulde groente Hetelucht 160 - 170 30 - 60
Zoete ovenschotels Boven- /onderwarmte 180 - 200 40 - 60
Pasta gebakken Boven- /onderwarmte 180 - 200 45 - 60
10.7 Bakken op meerdere niveaus
Gebruik de functie: Hetelucht.
Gebruik de bakplaten.
CAKE/
GEBAK (°C) (min)
2 posities
Roomsoezen / Eclairs,
verwarm de oven voor
160 - 180 25 - 45 1 / 4
Kruimeltaart 150 - 160 30 - 45 1 / 4
NEDERLANDS 15
KOEK‐
JES/CAKEJES/
GEBAK/BROOD‐
JES
(°C) (min)
2 posities 3 posities
Broodjes 180 20 - 30 1 / 4 -
Zandkoekjes 150 - 160 20 - 40 1 / 4 1 / 3 / 5
Koekjes gemaakt
van sponsdeeg
160 - 170 25 - 40 1 / 4 -
Koekjes van blader‐
deeg, verwarm de
oven voor
170 - 180 30 - 50 1 / 4 -
Koekjes gemaakt
van gistdeeg
160 - 170 30 - 60 1 / 4 -
Makarons 100 - 120 40 - 80 1 / 4 -
Koekjes gemaakt
van eiwit / Schuim‐
gebakjes
80 - 100 130 - 170 1 / 4 -
10.8 Tips voor braden
Gebruik hittebestendig kookgerei.
Geroosterd mager vlees bedekt (u kunt
aluminiumfolie gebruiken).
Braad grote vleesstukken direct in de diepe
bakplaat of op een bakrooster boven de
bakplaat.
Doe wat water in de bakplaat om te
voorkomen dat druipend vet verbrandt.
Draai het braadstuk na 1/2 - 2/3 van de
gaartijd.
Rooster vlees en vis in grote stukken (1 kg of
meer).
Bedruip vleesstukken meerdere malen met
hun eigen sap tijdens het roosteren.
10.9 Braden
Gebruik de eerste rekstand.
RUNDVLEES
(°C) (min)
Stoofvlees 1 - 1,5 kg Boven- /onder‐
warmte
230 120 - 150
Rosbief of ossenhaas,
rood, verwarm de oven
voor
per cm dikte Turbo grill 190 - 200 5 - 6
Rosbief of ossenhaas,
medium, verwarm de
oven voor
per cm dikte Turbo grill 180 - 190 6 - 8
16 NEDERLANDS

RUNDVLEES
(°C) (min)
Rosbief of ossenhaas,
gaar, verwarm de oven
voor
per cm dikte Turbo grill 170 - 180 8 - 10
VARKENSVLEES
Gebruik de functie: Turbo grill.
(kg)
(°C) (min)
Schouder / Nek / Hamlap 1 - 1,5 160 - 180 90 - 120
Karbonade / Spare ribs 1 - 1,5 170 - 180 60 - 90
Gehaktbrood 0,75 - 1 160 - 170 50 - 60
Varkensschenkel, voorgekookt 0,75 - 1 150 - 170 90 - 120
KALFSVLEES
Gebruik de functie: Turbo grill.
(kg)
(°C) (min)
Geroosterd kalfsvlees 1 160 - 180 90 - 120
Kalfsschenkel 1,5 - 2 160 - 180 120 - 150
NEDERLANDS 17

LAMSVLEES
Gebruik de functie: Turbo grill.
(kg)
(°C) (min)
Lamsbout / Geroosterd
lamsvlees
1 - 1,5 150 - 170 100 - 120
Lamsrugfilet 1 - 1,5 160 - 180 40 - 60
WILD
Gebruik de functie: Boven- /onderwarmte.
(kg)
(°C) (min)
Rug / Hazenpoot, verwarm
de oven voor
tot 1 230 30 - 40
Hert rugfilet 1,5 - 2 210 - 220 35 - 40
Reebout, hertenbout 1,5 - 2 180 - 200 60 - 90
GEVOGELTE
Gebruik de functie: Turbo grill.
(kg)
(°C) (min)
Gevogelte, porties 0,2 - 0,25 elk 200 - 220 30 - 50
Halve kip 0,4 - 0,5 elk 190 - 210 35 - 50
Kip, haantje 1 - 1,5 190 - 210 50 - 70
Eend 1,5 - 2 180 - 200 80 - 100
Gans 3,5 - 5 160 - 180 120 - 180
Kalkoen 2,5 - 3,5 160 - 180 120 - 150
Kalkoen 4 - 6 140 - 160 150 - 240
18 NEDERLANDS
VIS (GESTOOMD)
Gebruik de functie: Boven- /onderwarmte.
(kg)
(°C) (min)
Hele vis 1 - 1,5 210 - 220 40 - 60
10.10 Knapperig bakken met:Pizza-
functie
PIZZA
Gebruik de eerste rekstand.
(°C) (min)
Taarten 180 - 200 40 - 55
Spinazietaart 160 - 180 45 - 60
Quiche Lorrai‐
ne / Zwitserse
flan
170 - 190 45 - 55
Kwarktaart 140 - 160 60 - 90
Groentetaart 160 - 180 50 - 60
PIZZA
Warm de lege oven voor het koken
voor.
Gebruik de tweede rekstand.
(°C) (min)
Pizza, dunne
korst, gebruik
een diepe pan
200 - 230 15 - 20
PIZZA
Warm de lege oven voor het koken
voor.
Gebruik de tweede rekstand.
(°C) (min)
Pizza, dikke
korst
180 - 200 20 - 30
Ongedesemd
brood
230 - 250 10 - 20
Bladerdeegtaart 160 - 180 45 - 55
Flammkuchen 230 - 250 12 - 20
Pierogi 180 - 200 15 - 25
10.11 Grill
Warm de lege oven voor het koken voor.
Alleen dunne stukken vlees of vis grillen.
Plaats een pan op de eerste rekstand om vet
op te vangen.
NEDERLANDS 19
GRILLEN
Gebruik de functie: Grill
(°C) (min)
1e kant
(min)
2e kant
Rosbief 210 - 230 30 - 40 30 - 40 2
Runderfilet 230 20 - 30 20 - 30 3
Varkenshaas 210 - 230 30 - 40 30 - 40 2
Kalfsvlees 210 - 230 30 - 40 30 - 40 2
Lamsrugfilet 210 - 230 25 - 35 20 - 25 3
Hele vis, 0,5 kg - 1 kg 210 - 230 15 - 30 15 - 30 3 / 4
10.12 Bevroren gerechten
ONTDOOIEN
Gebruik de functie: Hetelucht.
(°C) (min)
Pizza, bevroren 200 - 220 15 - 25 2
American pizza, bevroren 190 - 210 20 - 25 2
Pizza, gekoeld 210 - 230 13 - 25 2
Pizzasnacks, bevroren 180 - 200 15 - 30 2
Frietjes, dun 200 - 220 20 - 30 3
Frietjes, dik 200 - 220 25 - 35 3
Aardappelschijfjes / Kroketjes 220 - 230 20 - 35 3
Rösties 210 - 230 20 - 30 3
Lasagne / Cannelloni, vers 170 - 190 35 - 45 2
Lasagne / Cannelloni, bevroren 160 - 180 40 - 60 2
Gebakken kaas 170 - 190 20 - 30 3
Vleugels van kippen 190 - 210 20 - 30 2
20 NEDERLANDS
10.13 Ontdooien
Haal het gerecht uit de verpakking en plaats
het op een bord.
Dek het voedsel niet af, want dat kan de
ontdooitijd verlengen.
Plaats voor grote porties voedsel een
omgedraaid bord op de bodem van de
ovenruimte. Leg het voedsel op een diepe
schaal en zet deze bovenop het bord in de
oven. Verwijder indien nodig de
bakplaatsteunen.
Gebruik het eerste ovenniveau.
(kg)
(min)
Ontdooitijd
(min)
Verdere ontdooi‐
tijd
Kip 1 100 - 140 20 - 30 Halverwege de berei‐
dingstijd omdraaien.
Vlees 1 100 - 140 20 - 30 Halverwege de berei‐
dingstijd omdraaien.
Forel 0,15 25 - 35 10 - 15 -
Aardbeien 0,3 30 - 40 10 - 20 -
Boter 0,25 30 - 40 10 - 15 -
Room 2 x 0,2 80 - 100 10 - 15 Klop de nog licht bevro‐
ren slagroom.
Taart 1,4 60 60 -
10.14 Inmaken
Gebruik de functie Onderwarmte.
Gebruik alleen weckpotten van dezelfde
afmetingen.
Gebruik geen weckpotten met een draai- of
bajonetsluiting en metalen bakken.
Gebruik de eerste rekstand.
Zet niet meer dan zes weckflessen van 1 liter
op het bakrooster.
Vul de glazen potten gelijkmatig en sluit ze af
met een klem.
De potten mogen elkaar niet aanraken.
Doe ongeveer 1/2 liter water in de bakplaat
om voldoende vocht in de oven te geven.
Als de vloeistof in de weckpotten begint te
borrelen (na ca. 35 - 60 minuten bij
weckpotten van 1 liter), stop de oven of
verlaag de temperatuur tot 100 °C (raadpleeg
de tabel).
Stel de temperatuur in op 160 - 170 °C.
ZACHTE
VRUCHTEN (min)
Kooktijd tot het
sudderen begint
Aardbeien / Bosbessen /
Frambozen / rijpe kruis‐
bessen
35 - 45
STEEN‐
VRUCHTEN (min)
Kooktijd tot
het sudderen
begint
(min)
Door blijven
koken op
100 °C
Perziken / Kwee‐
peren / Pruimen
35 - 45 10 - 15
NEDERLANDS 21

GROENTEN (min)
Kooktijd tot
het sudde‐
ren begint
(min)
Door blijven
koken op
100 °C
Wortelen 50 - 60 5 - 10
Komkommers 50 - 60 -
Gemengde au‐
gurken
50 - 60 5 - 10
Koolrabi / Erw‐
ten / Asperge
50 - 60 15 - 20
10.15 Dehydrateren - Hetelucht
Bedek de bakplaten met vetbestendig papier
of bakpapier.
Voor een beter resultaat, stop de oven
halverwege de droogtijd, open de deur en
laat het een nacht afkoelen om het drogen af
te ronden.
Gebruik de derde rekstand voor 1 bakplaat.
Gebruik de eerste en de vierde rekstand voor
2 bakplaten.
GROENTEN
(°C) (u)
Bonen 60 - 70 6 - 8
Paprika’s 60 - 70 5 - 6
Soepgroenten 60 - 70 5 - 6
Champignons 50 - 60 6 - 8
Kruiden 40 - 50 2 - 3
Stel de temperatuur in op 60 - 70 °C.
FRUIT
(u)
Pruimen 8 - 10
Abrikozen 8 - 10
Schijfjes appel 6 - 8
Peren 6 - 9
10.16 Hetelucht (vochtig) - aanbevolen accessoires
Gebruik de donkere en niet-reflecterende bakjes en schalen. Ze nemen de warmte beter op
dan licht en reflecterend servies.
Pizza pan
Ovenschotel
Ovenschaaltjes
Blik voor flanbodem
Donker, niet-reflecterend
Diameter van 28 cm
Donker, niet-reflecterend
Diameter van 26 cm
Keramiek
8 cm diameter, 5
cm hoog
Donker, niet-reflecterend
Diameter van 28 cm
10.17 Hetelucht (vochtig)
Volg voor de beste resultaten de volgende
aanwijzingen op die hieronder in de tabel
staan.
22 NEDERLANDS
(°C) (min)
Zoete broodjes, 16
stuks
bakplaat of lekschaal 190 3 45 - 55
Pizza, bevroren, 0,35
kg
rooster 190 2 45 - 50
Koninginnenbrood (op‐
gerolde cake met jam)
bakplaat of lekschaal 180 2 45 - 55
Brownie bakplaat of lekschaal 180 2 55 - 60
Luchtige vlaaibodem flanvorm op rooster 180 2 40 - 50
Gepocheerde vis, 0,3
kg
bakplaat of lekschaal 180 3 25 - 35
Hele vis, 0,2 kg bakplaat of lekschaal 180 3 25 - 35
Visfilet, 0,3 kg pizzavorm op rooster 180 3 40 - 50
Gepocheerd vlees,
0,25 kg
bakplaat of lekschaal 190 3 40 - 50
Sjasliek, 0,5 kg bakplaat of lekschaal 190 3 35 - 45
Koekjes, 16 stuks bakplaat of lekschaal 160 2 40 - 50
Makarons, 24 stuks bakplaat of lekschaal 150 2 35 - 45
Muffins, 12 stuks bakplaat of lekschaal 160 2 35 - 45
Hartig gebak, 20 stuks bakplaat of lekschaal 170 2 35 - 45
Zandkoekjes, 20 stuks bakplaat of lekschaal 150 2 40 - 45
Taartjes, 8 stuks bakplaat of lekschaal 170 2 35 - 45
Groenten, gepo‐
cheerd, 0,4 kg
bakplaat of lekschaal 180 3 45 - 55
Vegetarisch omelet pizzavorm op rooster 190 3 40 - 50
10.18 Aanwijzingen voor
testinstituten
Testen in overeenstemming met: EN 60350,
IEC 60350.
BAKKEN OP ÉÉN NIVEAU. Bakken in een bakblik
(°C) (min)
Biscuittaart zonder vet Hetelucht 140 - 150 35 - 50 2
NEDERLANDS 23
BAKKEN OP ÉÉN NIVEAU. Bakken in een bakblik
(°C) (min)
Biscuittaart zonder vet Boven- /onderwarmte 160 35 - 50 2
Appeltaart, 2 blikken Ø20 cm Hetelucht 160 60 - 90 2
Appeltaart, 2 blikken Ø20 cm Boven- /onderwarmte 180 70 - 90 1
BAKKEN OP ÉÉN NIVEAU. Koekjes
Gebruik de derde rekstand.
(°C) (min)
Zandtaartdeeg / Deegreepjes
voor op vlaaien/taarten
Hetelucht 140 25 - 40
Zandtaartdeeg / Deegreepjes
voor op vlaaien/taarten, verwarm
de oven voor
Boven- /onderwarmte 160 20 - 30
Kleine cakes, 20 stuks per bak‐
plaat, verwarm de oven voor
Hetelucht 150 20 - 35
Kleine cakes, 20 stuks per bak‐
plaat, verwarm de oven voor
Boven- /onderwarmte 170 20 - 30
BAKKEN OP MEERDERE NIVEAUS. Koekjes
(°C) (min)
Zandtaartdeeg / Deegreepjes
voor op vlaaien/taarten
Hetelucht 140 25 - 45 1 / 4
Kleine cakes, 20 stuks per bak‐
plaat, verwarm de oven voor
Hetelucht 150 23 - 40 1 / 4
Biscuittaart zonder vet Hetelucht 160 35 - 50 1 / 4
24 NEDERLANDS
GRILLEN
Verwarm de lege oven 5 minuten voor.
Grill met de maximale temperatuurinstelling.
(min)
Geroosterd brood Grill 1 - 3 5
Biefstuk, halverwege de bereidings‐
tijd omdraaien
Grill 24 - 30 4
11. ONDERHOUD EN REINIGING
WAARSCHUWING!
Raadpleeg de hoofdstukken
Veiligheid.
11.1 Opmerkingen over schoonmaken
Reinigingsmid‐
delen
Maak de voorkant van de oven schoon met een zachte doek, warm water en een mild reini‐
gingsmiddel.
Gebruik een reinigingsoplossing om metalen oppervlakken te reinigen.
Reinig vlekken met een mild reinigingsmiddel.
Dagelijks gebruik
Reinig de uitsparing telkens na gebruik. Vetophoping of andere resten kunnen brand veroor‐
zaken.
Bewaar het voedsel niet langer dan 20 minuten in de oven. Droog de uitsparing na elk ge‐
bruik met een zachte doek.
Accessoires
Reinig alle accessoires na elk gebruik en laat ze drogen. Gebruik een zachte doek met
warm water en een mild reinigingsmiddel. De accessoires niet in de afwasmachine reinigen.
Reinig de antiaanbakaccessoires niet met agressieve reinigingsmiddelen of scherpe voor‐
werpen.
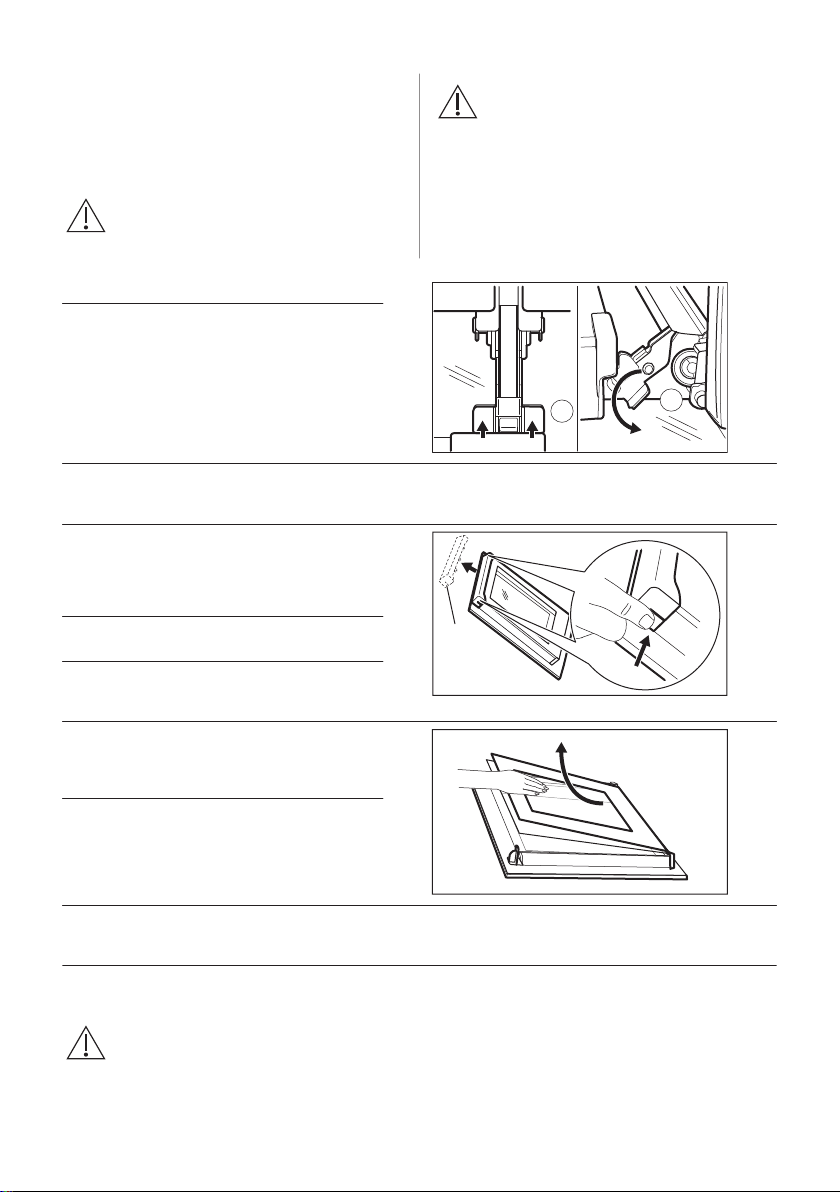
11.2 Hoe te verwijderen:
Inschuifrails/
Verwijder de inschuifrails om de oven te
reinigen.
NEDERLANDS 25

Stap 1 Schakel de oven uit en wacht tot deze
afgekoeld is.
Stap 2 Trek de inschuifrail bij de voorkant uit
de zijwand.
Stap 3 Trek de inschuifrail bij de achterkant
uit de zijwand en verwijder deze.
2
1
Stap 4 Installeer de inschuifrails in de omge‐
keerde volgorde.
11.3 Ga als volgt te werk voor
gebruik: Reiniging met water
Deze reinigingsprocedure maakt gebruik van
vocht om achtergebleven vet en
voedselresten uit de oven te verwijderen.
Stap 1 Giet water in de uitsparing van de
ovenruimte: 300 ml.
Stap 2
Stel de functie in: .
Stap 3 Stel de temperatuur in op 90 °C.
Stap 4 Laat de oven 30 minuten werken.
Stap 5 Schakel de oven uit.
Stap 6 Wacht tot de oven afgekoeld is. Maak
de holte droog met een zachte doek.
11.4 Hoe te verwijderen: Grill
WAARSCHUWING!
Gevaar voor brandwonden.
Stap 1 Zet de oven uit en wacht tot de oven af‐
gekoeld is om deze schoon te maken.
Verwijder de inschuifrails.
Stap 2 Pak de grillhoeken vast. Trek de grill
naar voren tegen de veerdruk in en uit
de twee houders. De grill klapt naar be‐
neden.
Stap 3 Reinig het plafond van de oven met
warm water, een zachte doek en een
mild reinigingsmiddel. Laat de oven dro‐
gen.
Stap 4 Installeer de grill in de omgekeerde volg‐
orde.
Stap 5 Installeer de inschuifrails.
26 NEDERLANDS
11.5 Verwijderen en installeren:
Deur
U kunt de deur en de binnenste glasplaten
verwijderen om ze te reinigen. U Het aantal
glasplaten verschilt per model.
WAARSCHUWING!
De deur is zwaar.
LET OP!
Behandel het glas voorzichtig,
vooral rond de randen van het
voorpaneel. Het glas kan
breken.
Stap 1 Open de deur volledig.
A
A
Stap 2 Hef en druk de klemhendels (A) op
de twee deurscharnieren.
Stap 3 Sluit de ovendeur in de eerste openingsstand (in een hoek van ongeveer 70°). Houd de deur aan
beide kanten vast en trek deze onder een opwaartse hoek weg van de oven. Plaats de ovendeur
met de buitenkant omlaag op een zachte doek op een stabiele ondergrond.
Stap 4 Pak de deurafdekking (B) aan de
bovenkant van de deur aan beide
kanten vast en druk deze naar bin‐
nen om de klemsluiting te ontgren‐
delen.
1
2
B
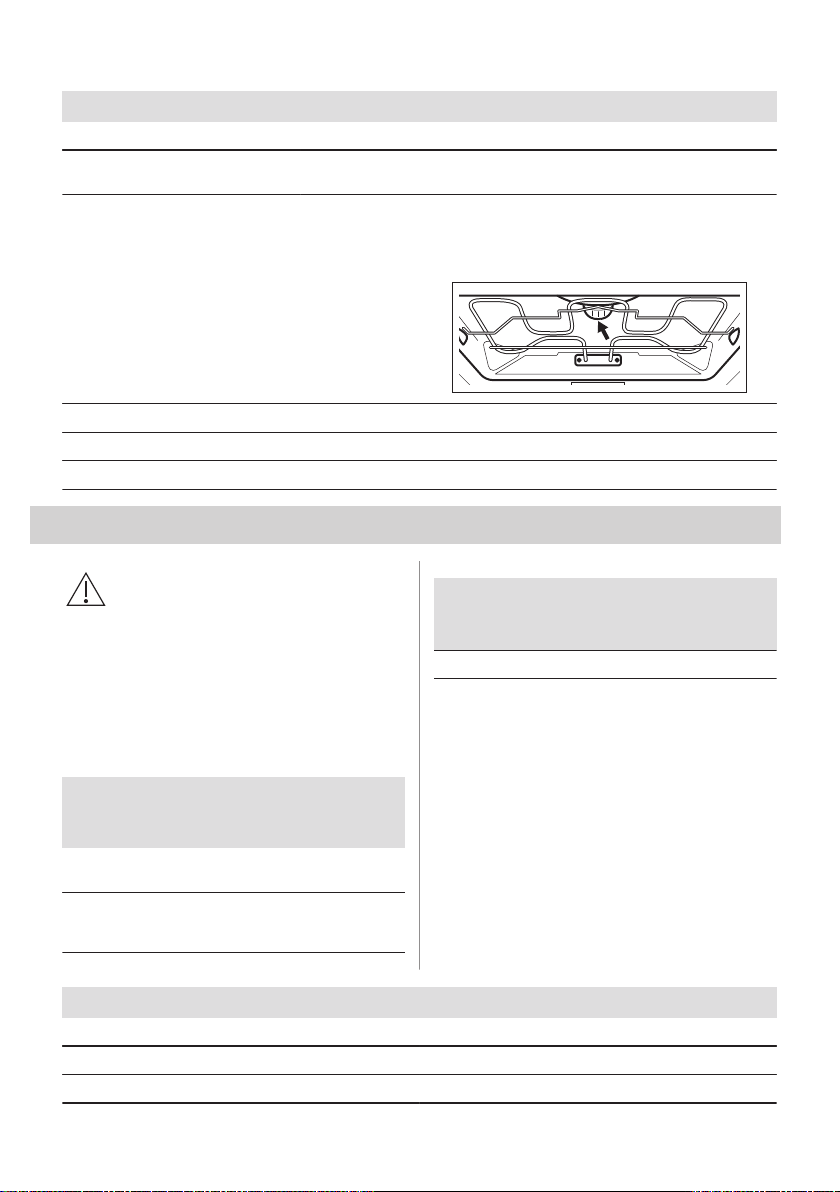
Stap 5 Trek de deurlijst naar voren om
hem te verwijderen.
Stap 6 Houd de glasplaten aan hun boven‐
kant vast en trek deze een voor een
omhoog uit de geleider.
Stap 7 Reinig de glasplaat met een sopje.
Droog de glasplaat voorzichtig af.
Reinig de glasplaten niet in de vaat‐
wasser.
Stap 8 Voer na het reinigen de boven‐
staande stappen in de omgekeerde
volgorde uit.
Stap 9 Plaats de kleinste glasplaat eerst, daarna de grotere glasplaat en de deur.
Zorg ervoor dat de glasplaten op de juiste manier worden geplaatst, anders kan het oppervlak van
de deur oververhit raken.
11.6 Hoe te vervangen: Lamp
WAARSCHUWING!
Gevaar voor elektrische
schokken.
Het lampje kan heet zijn.
NEDERLANDS 27
Voordat u de lamp vervangt:
Stap 1 Stap 2 Stap 3
Schakel de oven uit. Wacht tot de
oven afgekoeld is.
Trek de oven uit het stopcontact. Plaats een doek op de bodem van
de holte.
Bovenlamp
Stap 1 Draai de glazen afdekking om die te ver‐
wijderen.
Stap 2 Reinig het glazen deksel.
Stap 3 Vervang de lamp door een geschikte hittebestendige lamp van 300 °C.
Stap 4 Installeer het glazen deksel.
12. PROBLEEMOPLOSSING
WAARSCHUWING!
Raadpleeg de hoofdstukken
Veiligheid.
12.1 Wat te doen in de volgende
gevallen...
Neem in alle gevallen die niet in deze tabel
zijn opgenomen contact op met een erkend
servicecentrum.
Probleem Controleer of de vol‐
gende zaken gel‐
den...
De oven wordt niet warm. De zekering is doorgesla‐
gen.
Op het display wordt
"12.00" weergegeven.
Er is een stroomstoring
geweest. Stel de dagtijd
in.
Probleem Controleer of de vol‐
gende zaken gel‐
den...
De lamp werkt niet. De lamp is opgebrand.
12.2 Onderhoudsgegevens
Als u niet zelf het probleem kunt verhelpen,
neem dan contact op met uw verkoper ofeen
erkende serviceafdeling.
De contactgegevens van het servicecentrum
staan op het typeplaatje. Het typeplaatje
bevindt zich aan de voorkant van de
binnenkant van de oven. Verwijder het
typeplaatje niet uit de ovenruimte.
Wij adviseren u om de gegevens hier te noteren:
Model (MOD.) .........................................
Productnummer (PNC) .........................................
Serienummer (S.N.) .........................................
28 NEDERLANDS
13. ENERGIEZUINIGHEID
13.1 Productinformatie- en productinformatieblad*
Naam leverancier AEG
Modelidentificatie BEB331010M 944188242, 944188459
Energie-efficiëntie-index 95.3
Energie-efficiëntieklasse A
Energieverbruik bij een standaardbelasting, stand boven + onder‐
warmte
0.99 kWh/cyclus
Energieverbruik bij een standaardbelasting, stand hetelucht 0.81 kWh/cyclus
Aantal ruimten 1
Warmtebron Elektriciteit
Volume 71 l
Soort oven Inbouwoven
Massa 31.5 kg
* Voor de Europese Unie overeenkomstig EU-verordeningen 65/2014 en 66/2014.
Voor de Republiek Belarus overeenkomstig STB 2478-2017, aanhangsel G; STB 2477-2017, bijlagen A en B.
Voor Oekraïne overeenkomstig 568/32020.
De energie-efficiëntieklasse is niet van toepassing op Rusland.
EN 60350-1 - Elektrische huishoudelijke kookapparaten - Deel 1: Range-ovens, ovens, stoomovens en grills -
Methoden voor prestatiemeting.
13.2 Energiebesparing
Deze oven bevat functies die u
helpen energie te besparen
tijdens het dagelijks koken.
Zorg ervoor dat de ovendeur gesloten is als u
de oven in werking stelt. Open de ovendeur
niet te vaak tijdens gebruik. Houd het
deurrubber schoon en zorg ervoor dat het
goed op zijn plaats vastzit.
Gebruik metalen kookgerei om meer energie
te besparen.
Verwarm de oven indien mogelijk niet voor
het koken voor.
Houd de onderbrekingen tussen het bakken
zo kort mogelijk als u een aantal gerechten
tegelijkertijd bereidt.
Bereiding met hete lucht
Gebruik indien mogelijk de bereidingsfuncties
met hete lucht om energie te besparen.
Restwarmte
Wanneer de kookduur langer is dan 30
minuten, verlaag dan de oventemperatuur tot
minimaal 3-10 minuten voor het einde van
het koken. De restwarmte in de oven zorgt
ervoor dat het gerecht wordt voltooid.
U kunt de restwarmte gebruiken om andere
maaltijden op te warmen.
Eten warm houden
Kies de laagst mogelijke
temperatuurinstelling om de restwarmte te
gebruiken en een maaltijd warm te houden.
Hetelucht (vochtig)
Functie is ontworpen om tijdens de bereiding
energie te besparen.
NEDERLANDS 29

14. MILIEUBESCHERMING
Recycleer de materialen met het symbool
. Gooi de verpakking in een geschikte
afvalcontainer om het te recycleren.
Bescherm het milieu en de volksgezondheid
en recycleer op een correcte manier het afval
van elektrische en elektronische apparaten.
Gooi apparaten gemarkeerd met het symbool
niet weg met het huishoudelijk afval. Breng
het product naar het milieustation bij u in de
buurt of neem contact op met de gemeente.
30 NEDERLANDS
FOR PERFECT RESULTS
Thank you for choosing this AEG product. We have created it to give you impeccable
performance for many years, with innovative technologies that help make life simpler –
features you might not find on ordinary appliances. Please spend a few minutes reading
to get the very best from it.
Visit our website to:
Get usage advice, brochures, trouble shooter, service and repair information:
www.aeg.com/support
Register your product for better service:
www.registeraeg.com
Buy Accessories, Consumables and Original spare parts for your appliance:
www.aeg.com/shop
CUSTOMER CARE AND SERVICE
Always use original spare parts.
When contacting our Authorised Service Centre, ensure that you have the following data
available: Model, PNC, Serial Number.
The information can be found on the rating plate.
Warning / Caution-Safety information
General information and tips
Environmental information
Subject to change without notice.
CONTENTS
1. SAFETY INFORMATION.............................................................................................. 31
2. SAFETY INSTRUCTIONS............................................................................................ 33
3. PRODUCT DESCRIPTION...........................................................................................35
4. CONTROL PANEL........................................................................................................36
5. BEFORE FIRST USE....................................................................................................36
6. DAILY USE....................................................................................................................37
7. CLOCK FUNCTIONS....................................................................................................38
8. USING THE ACCESSORIES........................................................................................39
9. ADDITIONAL FUNCTIONS...........................................................................................40
10. HINTS AND TIPS........................................................................................................40
11. CARE AND CLEANING.............................................................................................. 53
12. TROUBLESHOOTING................................................................................................ 56
13. ENERGY EFFICIENCY...............................................................................................56
1. SAFETY INFORMATION
Before the installation and use of the appliance, carefully read
the supplied instructions. The manufacturer is not responsible
ENGLISH 31

for any injuries or damage that are the result of incorrect
installation or usage. Always keep the instructions in a safe
and accessible location for future reference.
1.1 Children and vulnerable people safety
• This appliance can be used by children aged from 8 years
and above and persons with reduced physical, sensory or
mental capabilities or lack of experience and knowledge if
they have been given supervision or instruction concerning
the use of the appliance in a safe way and understand the
hazards involved. Children of less than 8 years of age and
persons with very extensive and complex disabilities shall
be kept away from the appliance unless continuously
supervised.
• Do not let children play with the appliance.
• Keep all packaging away from children and dispose of it
appropriately.
• WARNING: Keep children and pets away from the
appliance when it operates or when it cools down.
Accessible parts become hot during use.
• If the appliance has a child safety device, it should be
activated.
• Children shall not carry out cleaning and user maintenance
of the appliance without supervision.
1.2 General Safety
• Only a qualified person must install this appliance and
replace the cable.
• WARNING: The appliance and its accessible parts become
hot during use. Care should be taken to avoid touching
heating elements.
• Always use oven gloves to remove or put in accessories or
ovenware.
• Before carrying out any maintenance, disconnect the
appliance from the power supply.
• WARNING: Ensure that the appliance is switched off before
replacing the lamp to avoid the possibility of electric shock.
32 ENGLISH
• Do not use the appliance before installing it in the built-in
structure.
• Do not use a steam cleaner to clean the appliance.
• Do not use harsh abrasive cleaners or sharp metal scrapers
to clean the glass door since they can scratch the surface,
which may result in shattering of the glass.
• If the mains power supply cable is damaged, it must be
replaced by the manufacturer, its Authorised Service Centre
or similarly qualified persons to avoid an electrical hazard.
• To remove the shelf supports first pull the front of the shelf
support and then the rear end away from the side walls.
Install the shelf supports in the opposite sequence.
2. SAFETY INSTRUCTIONS
2.1 Installation
WARNING!
Only a qualified person must
install this appliance.
• Remove all the packaging.
• Do not install or use a damaged
appliance.
• Follow the installation instructions
supplied with the appliance.
• Always take care when moving the
appliance as it is heavy. Always use
safety gloves and enclosed footwear.
• Do not pull the appliance by the handle.
• Install the appliance in a safe and suitable
place that meets installation requirements.
• Keep the minimum distance from other
appliances and units.
• Before mounting the appliance, check if
the oven door opens without restraint.
• The appliance is equipped with an electric
cooling system. It must be operated with
the electric power supply.
• The built-in unit must meet the stability
requirements of DIN 68930.
Cabinet minimum height
(Cabinet under the worktop
minimum height)
578 (600) mm
Cabinet width 560 mm
Cabinet depth 550 (550) mm
Height of the front of the
appliance
594 mm
Height of the back of the
appliance
576 mm
Width of the front of the ap‐
pliance
595 mm
Width of the back of the
appliance
559 mm
Depth of the appliance 567 mm
Built in depth of the appli‐
ance
546 mm
Depth with open door 1027 mm
Ventilation opening mini‐
mum size. Opening placed
on the bottom rear side
560 x 20 mm
Mains supply cable length.
Cable is placed in the right
corner of the back side
1500 mm
Mounting screws 4 x 25 mm
2.2 Electrical connection
WARNING!
Risk of fire and electric shock.
• All electrical connections should be made
by a qualified electrician.
• The appliance must be earthed.
ENGLISH 33

• Make sure that the parameters on the
rating plate are compatible with the
electrical ratings of the mains power
supply.
• Always use a correctly installed
shockproof socket.
• Do not use multi-plug adapters and
extension cables.
• Make sure not to cause damage to the
mains plug and to the mains cable.
Should the mains cable need to be
replaced, this must be carried out by our
Authorised Service Centre.
• Do not let mains cables touch or come
near the appliance door or the niche
below the appliance, especially when it
operates or the door is hot.
• The shock protection of live and insulated
parts must be fastened in such a way that
it cannot be removed without tools.
• Connect the mains plug to the mains
socket only at the end of the installation.
Make sure that there is access to the
mains plug after the installation.
• If the mains socket is loose, do not
connect the mains plug.
• Do not pull the mains cable to disconnect
the appliance. Always pull the mains plug.
• Use only correct isolation devices: line
protecting cut-outs, fuses (screw type
fuses removed from the holder), earth
leakage trips and contactors.
• The electrical installation must have an
isolation device which lets you disconnect
the appliance from the mains at all poles.
The isolation device must have a contact
opening width of minimum 3 mm.
• This appliance is supplied with a main
plug and a main cable.
2.3 Use
WARNING!
Risk of injury, burns and electric
shock or explosion.
• This appliance is for household use only.
• Do not change the specification of this
appliance.
• Make sure that the ventilation openings
are not blocked.
• Do not let the appliance stay unattended
during operation.
• Deactivate the appliance after each use.
• Be careful when you open the appliance
door while the appliance is in operation.
Hot air can release.
• Do not operate the appliance with wet
hands or when it has contact with water.
• Do not apply pressure on the open door.
• Do not use the appliance as a work
surface or as a storage surface.
• Open the appliance door carefully. The
use of ingredients with alcohol can cause
a mixture of alcohol and air.
• Do not let sparks or open flames to come
in contact with the appliance when you
open the door.
• Do not put flammable products or items
that are wet with flammable products in,
near or on the appliance.
WARNING!
Risk of damage to the appliance.
• To prevent damage or discoloration to the
enamel:
– do not put ovenware or other objects
in the appliance directly on the
bottom.
– do not put aluminium foil directly on
the bottom of cavity of the appliance.
– do not put water directly into the hot
appliance.
– do not keep moist dishes and food in
the appliance after you finish the
cooking.
– be careful when you remove or install
the accessories.
• Discoloration of the enamel or stainless
steel has no effect on the performance of
the appliance.
• Use a deep pan for moist cakes. Fruit
juices cause stains that can be
permanent.
• This appliance is for cooking purposes
only. It must not be used for other
purposes, for example room heating.
• Always cook with the oven door closed.
• If the appliance is installed behind a
furniture panel (e.g. a door) make sure the
door is never closed when the appliance
operates. Heat and moisture can build up
behind a closed furniture panel and cause
subsequent damage to the appliance, the
housing unit or the floor. Do not close the
furniture panel until the appliance has
cooled down completely after use.
34 ENGLISH
2.4 Care and cleaning
WARNING!
Risk of injury, fire, or damage to
the appliance.
• Before maintenance, deactivate the
appliance and disconnect the mains plug
from the mains socket.
• Make sure the appliance is cold. There is
the risk that the glass panels can break.
• Replace immediately the door glass
panels when they are damaged. Contact
the Authorised Service Centre.
• Be careful when you remove the door
from the appliance. The door is heavy!
• Clean regularly the appliance to prevent
the deterioration of the surface material.
• Clean the appliance with a moist soft
cloth. Use only neutral detergents. Do not
use abrasive products, abrasive cleaning
pads, solvents or metal objects.
• If you use an oven spray, follow the safety
instructions on its packaging.
2.5 Internal lighting
WARNING!
Risk of electric shock.
• Concerning the lamp(s) inside this product
and spare part lamps sold separately:
These lamps are intended to withstand
extreme physical conditions in household
appliances, such as temperature,
vibration, humidity, or are intended to
signal information about the operational
status of the appliance. They are not
intended to be used in other applications
and are not suitable for household room
illumination.
• Use only lamps with the same
specifications.
2.6 Service
• To repair the appliance contact the
Authorised Service Centre.
• Use original spare parts only.
2.7 Disposal
WARNING!
Risk of injury or suffocation.
• Disconnect the appliance from the mains
supply.
• Cut off the mains electrical cable close to
the appliance and dispose of it.
• Remove the door catch to prevent
children or pets from becoming trapped in
the appliance.
3. PRODUCT DESCRIPTION
3.1 General overview
7
9
8
41 2 3 5 6
1
2
3
4
5
12
10
11
1
Control panel
2
Knob for the heating functions
3
Power lamp / symbol
4
Display
5
Control knob (for the temperature)
6
Temperature indicator / symbol
7
Heating element
8
Lamp
9
Fan
10
Shelf support, removable
11
Cavity embossment - Aqua cleaning
container
ENGLISH 35
12
Shelf positions
3.2 Accessories
Wire shelf
For cookware, cake tins, roasts.
Combi pan
For cakes and biscuits. To bake and roast or
as a pan to collect fat.
4. CONTROL PANEL
4.1 Retractable knobs
To use the appliance press the knob. The
knob comes out.
4.2 Sensor fields / Buttons
To set the time.
To set a clock function.
To set the time.
4.3 Display
A B
A. Clock functions
B. Timer
5. BEFORE FIRST USE
WARNING!
Refer to Safety chapters.
36 ENGLISH
5.1 Before first use
The oven can emit an odour and smoke during preheating. Make sure that the room is
ventilated.
Step 1 Step 2
Step 3
Set the clock Clean the oven Preheat the empty oven
1. , - press to set the time.
After approximately 5 sec., the
flashing stops and the display
shows the time.
1. Remove all accessories and re‐
movable shelf supports from
the oven.
2. Clean the oven and the acces‐
sories with a soft cloth, warm
water and a mild detergent.
1. Set the maximum temperature
for the function: .
Time: 1 h.
2. Set the maximum temperature
for the function: .
Time: 15 min.
Turn off the oven and wait until it is cold. Place the accessories and the removable shelf supports in the oven.
6. DAILY USE
WARNING!
Refer to Safety chapters.
6.1 How to set: Heating function
Step 1 Turn the knob for the heating functions
to select a heating function.
Step 2 Turn the control knob to select the tem‐
perature.
Step 3 When the cooking ends, turn the knobs
to the off position to turn off the oven.
6.2 Heating functions
Heating func‐
tion
Application
Off position
The oven is off.
Light
To turn on the lamp.
Heating func‐
tion
Application
True Fan Cooking
To bake on up to three shelf po‐
sitions at the same time and to
dry food.
Set the temperature 20 - 40 °C
lower than for Conventional
Cooking.
Pizza Function
To bake pizza. To make inten‐
sive browning and a crispy bot‐
tom.
Conventional
Cooking / Aqua
Cleaning
To bake and roast food on one
shelf position.
Refer to "Care and cleaning"
chapter for more information
about: Aqua Cleaning.
Bottom Heat
To bake cakes with crispy bot‐
tom and to preserve food.
Defrost
To defrost food (vegetables and
fruit). The defrosting time de‐
pends on the amount and size
of the frozen food.
ENGLISH 37
Heating func‐
tion
Application
Moist Fan Baking
This function is designed to
save energy during cooking.
When you use this function, the
temperature in the cavity may
differ from the set temperature.
The heating power may be re‐
duced. For more information re‐
fer to "Daily Use" chapter, Notes
on: Moist Fan Baking.
Grill
To grill thin pieces of food and
to toast bread.
Turbo Grilling
To roast large meat joints or
poultry with bones on one shelf
position. To make gratins and to
brown.
The lamp may turn off
automatically at a temperature
below 60 °C during some oven
functions.
6.3 Notes on: Moist Fan Baking
This function was used to comply with the
energy efficiency class and ecodesign
requirements according to EU 65/2014 and
EU 66/2014. Tests according to EN 60350-1.
The oven door should be closed during
cooking so that the function is not interrupted
and the oven operates with the highest
energy efficiency possible.
For the cooking instructions refer to "Hints
and tips" chapter, Moist Fan Baking. For
general energy saving recommendations
refer to "Energy Efficiency" chapter, Energy
Saving.
7. CLOCK FUNCTIONS
7.1 Clock functions
Clock function Application
Time of Day
To set, change or check the time of day.
Duration
To set how long the oven works.
Minute Minder
To set a countdown. This function has no effect on the operation of the
oven. You can set this function at any time, also when the oven is off.
7.2 How to set: Clock functions
How to change: Time of Day
- flashes when you connect the oven to the electrical supply, when there was a power cut or when the timer is
not set.
Step 1
- press repeatedly. - starts to flash.
38 ENGLISH
How to change: Time of Day
Step 2
, - press to set the time.
After approximately 5 sec., the flashing stops and the display shows the time.
- press repeatedly to change the time of day. - starts to flash.
How to set: Duration
Step 1 Set an oven function and the temperature.
Step 2
- press repeatedly. - starts to flash.
Step 3
, - press to set the duration.
The display shows: .
- flashes when the set time ends. The signal sounds and the oven turns off.
Step 4 Press any button to stop the signal.
Step 5 Turn the knobs to the off position.
How to set: Minute Minder
Step 1
- press repeatedly. - starts to flash.
Step 2
, - press to set the time.
The function starts automatically after 5 sec.
When the set time ends, the signal sounds.
Step 3 Press any button to stop the signal.
Step 4 Turn the knobs to the off position.
How to cancel: Clock functions
Step 1
- press repeatedly until the clock function symbol starts to flash.
Step 2
Press and hold: .
The clock function turns off after few seconds.
8. USING THE ACCESSORIES
WARNING!
Refer to Safety chapters.
8.1 Inserting accessories
A small indentation at the top increases
safety. The indentations are also anti-tip
devices. The high rim around the shelf
prevents cookware from slipping of the shelf.
ENGLISH 39
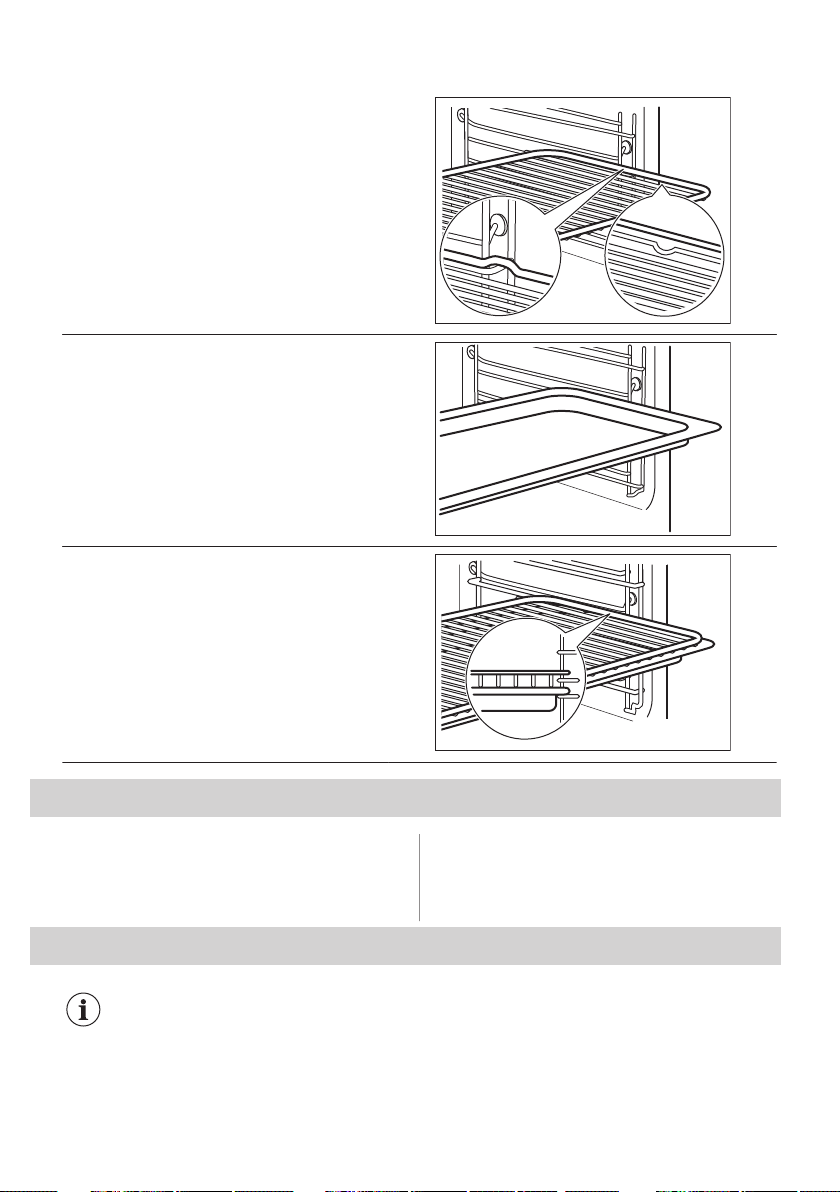
Wire shelf:
Push the shelf between the guide bars of the shelf
support.
Deep pan:
Push the tray between the guide bars of the shelf
support.
Wire shelf, Deep pan:
Push the tray between the guide bars of the shelf
support and the wire shelf on the guide bars
above.
9. ADDITIONAL FUNCTIONS
9.1 Cooling fan
When the oven operates, the cooling fan
turns on automatically to keep the surfaces of
the oven cool. If you turn off the oven, the
cooling fan can continue to operate until the
oven cools down.
10. HINTS AND TIPS
Refer to Safety chapters.
40 ENGLISH
10.1 Cooking recommendations
The temperature and cooking times in the tables are guidelines only. They depend on the recipes and the quality
and quantity of the ingredients used.
Your oven may bake or roast differently to the oven you had before. The tables below show recommended set‐
tings for temperature, cooking time and shelf position for specific types of the food.
If you cannot find the settings for a special recipe, look for the similar one.
10.2 Inner side of the door
On the inner side of the door you can
find:
• the numbers of the shelf positions.
• information about the oven functions,
recommended shelf positions and
temperatures for dishes.
10.3 Baking
For the first baking, use the lower
temperature.
You can extend the baking time by 10 – 15
minutes if you bake cakes on more than one
shelf position.
Cakes and pastries at different heights do not
always brown equally. There is no need to
change the temperature setting if an unequal
browning occurs. The differences equalize
during baking.
Trays in the oven can distort during baking.
When the trays are cold again, the distortions
disappear.
10.4 Tips on baking
Baking results Possible cause Remedy
The bottom of the cake is not
baked sufficiently.
The shelf position is incorrect. Put the cake on a lower shelf.
The cake sinks and becomes
soggy or streaky.
The oven temperature is too high. Next time set slightly lower oven tempera‐
ture.
The oven temperature is too high
and the baking time is too short.
Next time set a longer baking time and
lower oven temperature.
The cake is too dry. The oven temperature is too low. Next time set higher oven temperature.
The baking time is too long. Next time set shorter baking time.
The cake bakes unevenly. The oven temperature is too high
and the baking time is too short.
Next time set a longer baking time and
lower oven temperature.
The cake batter is not evenly dis‐
tributed.
Next time spread the cake batter evenly on
the baking tray.
The cake is not ready in the
baking time specified in a rec‐
ipe.
The oven temperature is too low. Next time set a slightly higher oven tem‐
perature.
ENGLISH 41
10.5 Baking on one shelf level
BAK‐
ING IN TINS (°C) (min)
Flan base - short
pastry, preheat the
empty oven
True Fan Cooking 170 - 180 10 - 25 2
Flan base -
sponge cake mix‐
ture
True Fan Cooking 150 - 170 20 - 25 2
Ring cake / Brio‐
che
True Fan Cooking 150 - 160 50 - 70 1
Madeira cake /
Fruit cakes
True Fan Cooking 140 - 160 70 - 90 1
Cheesecake Conventional Cooking 170 - 190 60 - 90 1
Use the third shelf position.
Use the function: True Fan Cooking.
Use a baking tray.
CAKES / PASTRIES / BREADS
(°C) (min)
Cake with crumble topping 150 - 160 20 - 40
Fruit flans (made of yeast dough / sponge cake mix‐
ture), use a deep pan
150 35 - 55
Fruit flans made of short pastry 160 - 170 40 - 80
Preheat the empty oven.
Use the function: Conventional Cooking.
Use a baking tray.
CAKES /
PASTRIES / BREADS (°C) (min)
Swiss roll 180 - 200 10 - 20 3
Rye bread: first: 230 20 1
then: 160 - 180 30 - 60
Buttered almond cake /
Sugar cakes
190 - 210 20 - 30 3
Cream puffs / Eclairs 190 - 210 20 - 35 3
Plaited bread / Bread
crown
170 - 190 30 - 40 3
42 ENGLISH
CAKES /
PASTRIES / BREADS (°C) (min)
Fruit flans (made of yeast
dough / sponge cake mix‐
ture), use a deep pan
170 35 - 55 3
Yeast cakes with delicate
toppings (e.g. quark,
cream, custard)
160 - 180 40 - 80 3
Christstollen 160 - 180 50 - 70 2
Use the third shelf position.
BISCUITS
(°C) (min)
Short pastry biscuits True Fan Cooking 150 - 160 10 - 20
Rolls, preheat the empty oven True Fan Cooking 160 10 - 25
Biscuits made of sponge cake
mixture
True Fan Cooking 150 - 160 15 - 20
Puff pastries, preheat the emp‐
ty oven
True Fan Cooking 170 - 180 20 - 30
Biscuits made of yeast dough True Fan Cooking 150 - 160 20 - 40
Macaroons True Fan Cooking 100 - 120 30 - 50
Pastries made of egg white /
Meringues
True Fan Cooking 80 - 100 120 - 150
Rolls, preheat the empty oven Conventional Cooking 190 - 210 10 - 25
10.6 Bakes and gratins
Use the first shelf position.
(°C) (min)
Baguettes topped with mel‐
ted cheese
True Fan Cooking 160 - 170 15 - 30
Vegetables au gratin, pre‐
heat the empty oven
Turbo Grilling 160 - 170 15 - 30
Lasagne Conventional Cooking 180 - 200 25 - 40
Fish bakes Conventional Cooking 180 - 200 30 - 60
Stuffed vegetables True Fan Cooking 160 - 170 30 - 60
Sweet bakes Conventional Cooking 180 - 200 40 - 60
Pasta bake Conventional Cooking 180 - 200 45 - 60
ENGLISH 43
10.7 Multilevel Baking
Use the function: True Fan Cooking.
Use the baking trays.
CAKES /
PASTRIES (°C) (min)
2 positions
Cream puffs / Eclairs, pre‐
heat the empty oven
160 - 180 25 - 45 1 / 4
Dry streusel cake 150 - 160 30 - 45 1 / 4
BIS‐
CUITS / SMALL
CAKES / PAS‐
TRIES / ROLLS
(°C) (min)
2 positions 3 positions
Rolls 180 20 - 30 1 / 4 -
Short pastry biscuits 150 - 160 20 - 40 1 / 4 1 / 3 / 5
Biscuits made of
sponge cake mixture
160 - 170 25 - 40 1 / 4 -
Puff pastries, pre‐
heat the empty oven
170 - 180 30 - 50 1 / 4 -
Biscuits made of
yeast dough
160 - 170 30 - 60 1 / 4 -
Macaroons 100 - 120 40 - 80 1 / 4 -
Biscuits made of egg
white / Meringues
80 - 100 130 - 170 1 / 4 -
10.8 Tips on Roasting
Use heat-resistant ovenware.
Roast lean meat covered (you can use
aluminium foil).
Roast large meat joints directly in the tray or
on the wire shelf placed above the tray.
Put some water in the tray to prevent
dripping fat from burning.
Turn the roast after 1/2 - 2/3 of the cooking
time.
Roast meat and fish in large pieces (1 kg or
more).
Baste meat joints with their own juice several
times during roasting.
10.9 Roasting
Use the first shelf position.
44 ENGLISH
BEEF
(°C) (min)
Pot roast 1 - 1.5 kg Conventional Cook‐
ing
230 120 - 150
Roast beef or fillet, rare,
preheat the empty oven
per cm of thickness Turbo Grilling 190 - 200 5 - 6
Roast beef or fillet, medi‐
um, preheat the empty
oven
per cm of thickness Turbo Grilling 180 - 190 6 - 8
Roast beef or fillet, well
done, preheat the empty
oven
per cm of thickness Turbo Grilling 170 - 180 8 - 10
PORK
Use the function: Turbo Grilling.
(kg)
(°C) (min)
Shoulder / Neck / Ham joint 1 - 1.5 160 - 180 90 - 120
Chops / Spare rib 1 - 1.5 170 - 180 60 - 90
Meatloaf 0.75 - 1 160 - 170 50 - 60
Pork knuckle, precooked 0.75 - 1 150 - 170 90 - 120
VEAL
Use the function: Turbo Grilling.
(kg)
(°C) (min)
Roast veal 1 160 - 180 90 - 120
Veal knuckle 1.5 - 2 160 - 180 120 - 150
ENGLISH 45
LAMB
Use the function: Turbo Grilling.
(kg)
(°C) (min)
Lamb leg / Roast lamb 1 - 1.5 150 - 170 100 - 120
Lamb saddle 1 - 1.5 160 - 180 40 - 60
GAME
Use the function: Conventional Cooking.
(kg)
(°C) (min)
Saddle / Hare leg, preheat
the empty oven
up to 1 230 30 - 40
Venison saddle 1.5 - 2 210 - 220 35 - 40
Haunch of venison 1.5 - 2 180 - 200 60 - 90
POULTRY
Use the function: Turbo Grilling.
(kg)
(°C) (min)
Poultry, portions 0.2 - 0.25 each 200 - 220 30 - 50
Chicken, half 0.4 - 0.5 each 190 - 210 35 - 50
Chicken, poulard 1 - 1.5 190 - 210 50 - 70
Duck 1.5 - 2 180 - 200 80 - 100
Goose 3.5 - 5 160 - 180 120 - 180
Turkey 2.5 - 3.5 160 - 180 120 - 150
Turkey 4 - 6 140 - 160 150 - 240
46 ENGLISH

FISH (STEAMED)
Use the function: Conventional Cooking.
(kg)
(°C) (min)
Whole fish 1 - 1.5 210 - 220 40 - 60
10.10 Crispy baking with: Pizza
Function
PIZZA
Use the first shelf position.
(°C) (min)
Tarts 180 - 200 40 - 55
Spinach flan 160 - 180 45 - 60
Quiche lorraine /
Swiss flan
170 - 190 45 - 55
Cheesecake 140 - 160 60 - 90
Vegetable pie 160 - 180 50 - 60
PIZZA
Preheat the empty oven before cook‐
ing.
Use the second shelf position.
(°C) (min)
Pizza, thin crust,
use a deep pan
200 - 230 15 - 20
PIZZA
Preheat the empty oven before cook‐
ing.
Use the second shelf position.
(°C) (min)
Pizza, thick
crust
180 - 200 20 - 30
Unleavened
bread
230 - 250 10 - 20
Puff pastry flan 160 - 180 45 - 55
Flammkuchen 230 - 250 12 - 20
Pierogi 180 - 200 15 - 25
10.11 Grill
Preheat the empty oven before cooking.
Grill only thin pieces of meat or fish.
Put a pan on the first shelf position to collect
fat.
ENGLISH 47
GRILL
Use the function: Grill
(°C) (min)
1st side
(min)
2nd side
Roast beef 210 - 230 30 - 40 30 - 40 2
Beef fillet 230 20 - 30 20 - 30 3
Pork loin 210 - 230 30 - 40 30 - 40 2
Veal loin 210 - 230 30 - 40 30 - 40 2
Lamb saddle 210 - 230 25 - 35 20 - 25 3
Whole fish, 0.5 kg - 1
kg
210 - 230 15 - 30 15 - 30 3 / 4
10.12 Frozen Foods
DEFROSTING
Use the function: True Fan Cooking.
(°C) (min)
Pizza, frozen 200 - 220 15 - 25 2
Pizza American, frozen 190 - 210 20 - 25 2
Pizza, chilled 210 - 230 13 - 25 2
Pizza snacks, frozen 180 - 200 15 - 30 2
French fries, thin 200 - 220 20 - 30 3
French fries, thick 200 - 220 25 - 35 3
Wedges / Croquettes 220 - 230 20 - 35 3
Hash browns 210 - 230 20 - 30 3
Lasagne / Cannelloni, fresh 170 - 190 35 - 45 2
Lasagne / Cannelloni, frozen 160 - 180 40 - 60 2
Baked cheese 170 - 190 20 - 30 3
Chicken wings 190 - 210 20 - 30 2
48 ENGLISH
10.13 Defrost
Remove the food packaging and put the food
on a plate.
Do not cover the food, as this can extend the
defrost time.
For large portions of food place an upturned
empty plate on the bottom of the oven cavity.
Put the food in a deep dish and set it on top
of the plate inside the oven. Remove the
shelf supports if necessary.
Use the first shelf position.
(kg)
(min)
Defrosting time
(min)
Further defrost‐
ing time
Chicken 1 100 - 140 20 - 30 Turn halfway through.
Meat 1 100 - 140 20 - 30 Turn halfway through.
Trout 0.15 25 - 35 10 - 15 -
Strawberries 0.3 30 - 40 10 - 20 -
Butter 0.25 30 - 40 10 - 15 -
Cream 2 x 0.2 80 - 100 10 - 15 Whip the cream when
still slightly frozen in pla‐
ces.
Gateau 1.4 60 60 -
10.14 Preserving
Use the function Bottom Heat.
Use only preserve jars of the same
dimensions available on the market.
Do not use jars with twist-off and bayonet
type lids or metal tins.
Use the first shelf position.
Put no more than six one-litre preserve jars
on the baking tray.
Fill the jars equally and close with a clamp.
The jars cannot touch each other.
Put approximately 1/2 litre of water into the
baking tray to give sufficient moisture in the
oven.
When the liquid in the jars starts to simmer
(after approximately 35 - 60 minutes with
one-litre jars), stop the oven or decrease the
temperature to 100 °C (see the table).
Set the temperature to 160 - 170 °C.
SOFT FRUIT
(min)
Cooking time until
simmering
Strawberries / Blueber‐
ries / Raspberries / Ripe
gooseberries
35 - 45
STONE
FRUIT (min)
Cooking
time until
simmering
(min)
Continue to
cook at
100 °C
Peaches / Quin‐
ces / Plums
35 - 45 10 - 15
ENGLISH 49
VEG‐
ETABLES (min)
Cooking
time until
simmering
(min)
Continue to
cook at
100 °C
Carrots 50 - 60 5 - 10
Cucumbers 50 - 60 -
Mixed pickles 50 - 60 5 - 10
Kohlrabi / Peas /
Asparagus
50 - 60 15 - 20
10.15 Dehydrating - True Fan
Cooking
Cover trays with grease proof paper or
baking parchment.
For a better result, stop the oven halfway
through the drying time, open the door and
let it cool down for one night to complete the
drying.
For 1 tray use the third shelf position.
For 2 trays use the first and fourth shelf
position.
VEGETA‐
BLES (°C) (h)
Beans 60 - 70 6 - 8
Peppers 60 - 70 5 - 6
Vegetables for soup 60 - 70 5 - 6
Mushrooms 50 - 60 6 - 8
Herbs 40 - 50 2 - 3
Set the temperature to 60 - 70 °C.
FRUIT
(h)
Plums 8 - 10
Apricots 8 - 10
Apple slices 6 - 8
Pears 6 - 9
10.16 Moist Fan Baking - recommended accessories
Use the dark and non-reflective tins and containers. They have better heat absorption than the
light colour and reflective dishes.
Pizza pan
Baking dish
Ramekins
Flan base tin
Dark, non-reflective
28 cm diameter
Dark, non-reflective
26 cm diameter
Ceramic
8 cm diameter, 5
cm height
Dark, non-reflective
28 cm diameter
10.17 Moist Fan Baking
For the best results follow suggestions listed
in the table below.
50 ENGLISH
(°C) (min)
Sweet rolls, 16 pieces baking tray or dripping pan 190 3 45 - 55
Pizza, frozen, 0.35 kg wire shelf 190 2 45 - 50
Swiss roll baking tray or dripping pan 180 2 45 - 55
Brownie baking tray or dripping pan 180 2 55 - 60
Sponge flan base flan base tin on wire shelf 180 2 40 - 50
Poached fish, 0.3 kg baking tray or dripping pan 180 3 25 - 35
Whole fish, 0.2 kg baking tray or dripping pan 180 3 25 - 35
Fish fillet, 0.3 kg pizza pan on wire shelf 180 3 40 - 50
Poached meat, 0.25
kg
baking tray or dripping pan 190 3 40 - 50
Shashlik, 0.5 kg baking tray or dripping pan 190 3 35 - 45
Cookies, 16 pieces baking tray or dripping pan 160 2 40 - 50
Macaroons, 24 pieces baking tray or dripping pan 150 2 35 - 45
Muffins, 12 pieces baking tray or dripping pan 160 2 35 - 45
Savory pastry, 20
pieces
baking tray or dripping pan 170 2 35 - 45
Short crust biscuits, 20
pieces
baking tray or dripping pan 150 2 40 - 45
Tartlets, 8 pieces baking tray or dripping pan 170 2 35 - 45
Vegetables, poached,
0.4 kg
baking tray or dripping pan 180 3 45 - 55
Vegetarian omelette pizza pan on wire shelf 190 3 40 - 50
10.18 Information for test institutes
Tests according to: EN 60350, IEC 60350.
BAKING ON ONE LEVEL. Baking in tins
(°C) (min)
Fatless sponge cake True Fan Cooking 140 - 150 35 - 50 2
Fatless sponge cake Conventional Cooking 160 35 - 50 2
Apple pie, 2 tins Ø20 cm True Fan Cooking 160 60 - 90 2
Apple pie, 2 tins Ø20 cm Conventional Cooking 180 70 - 90 1
ENGLISH 51
BAKING ON ONE LEVEL. Biscuits
Use the third shelf position.
(°C) (min)
Short bread / Pastry strips True Fan Cooking 140 25 - 40
Short bread / Pastry strips, pre‐
heat the empty oven
Conventional Cooking 160 20 - 30
Small cakes, 20 per tray, preheat
the empty oven
True Fan Cooking 150 20 - 35
Small cakes, 20 per tray, preheat
the empty oven
Conventional Cooking 170 20 - 30
MULTILEVEL BAKING. Biscuits
(°C) (min)
Short bread / Pastry strips True Fan Cooking 140 25 - 45 1 / 4
Small cakes, 20 per tray, pre‐
heat the empty oven
True Fan Cooking 150 23 - 40 1 / 4
Fatless sponge cake True Fan Cooking 160 35 - 50 1 / 4
GRILL
Preheat the empty oven for 5 minutes.
Grill with the maximum temperature setting.
(min)
Toast Grill 1 - 3 5
Beef steak, turn halfway through Grill 24 - 30 4
52 ENGLISH
11. CARE AND CLEANING
WARNING!
Refer to Safety chapters.
11.1 Notes on cleaning
Cleaning Agents
Clean the front of the oven with a soft cloth with warm water and a mild detergent.
Use a cleaning solution to clean metal surfaces.
Clean stains with a mild detergent.
Everyday Use
Clean the cavity after each use. Fat accumulation or other residue may cause fire.
Do not store the food in the oven for longer than 20 minutes. Dry the cavity with a soft cloth
after each use.
Accessories
Clean all accessories after each use and let them dry. Use a soft cloth with warm water and
a mild detergent. Do not clean the accessories in a dishwasher.
Do not clean the non-stick accessories using abrasive cleaner or sharp-edged objects.
11.2 How to remove: Shelf supports
Remove the shelf supports to clean the oven.
Step 1 Turn off the oven and wait until it is
cold.
Step 2 Pull the front of the shelf support
away from the side wall.
Step 3 Pull the rear end of the shelf support
away from the side wall and remove
it.
2
1
Step 4 Install the shelf supports in the oppo‐
site sequence.
ENGLISH 53
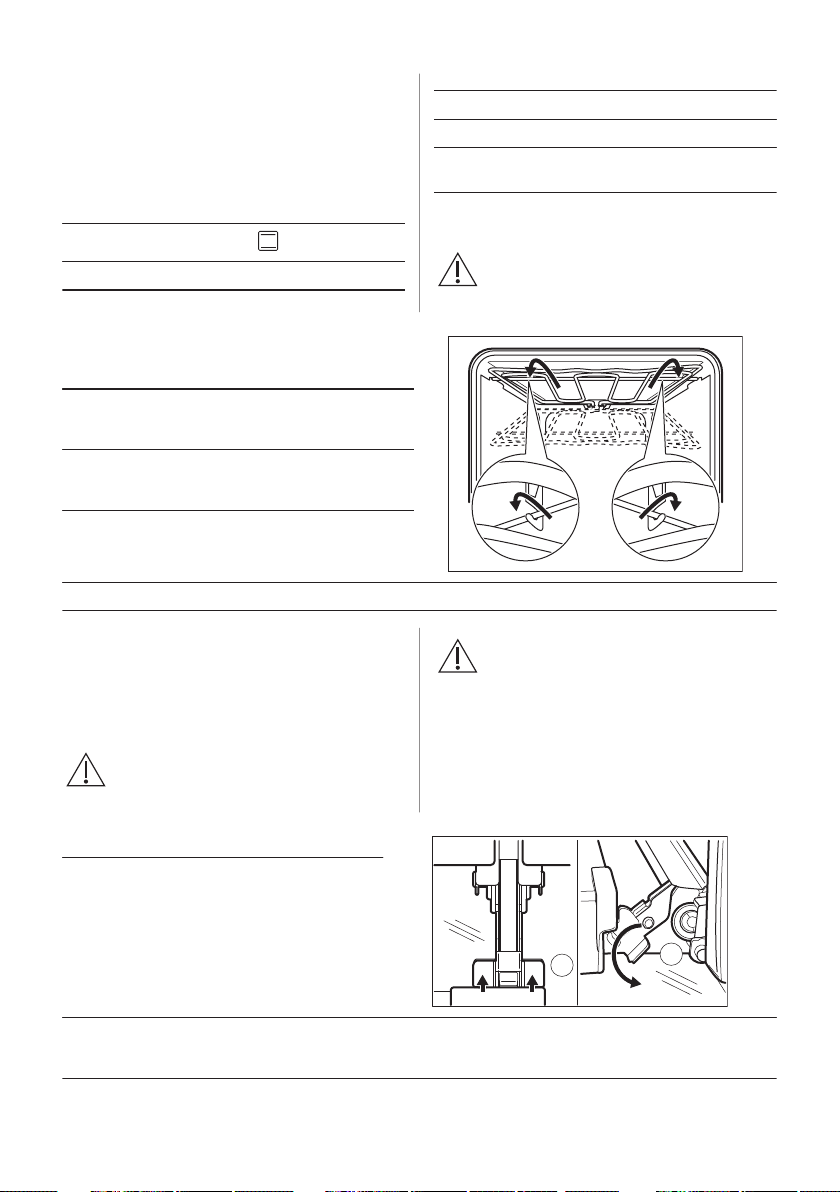
11.3 How to use: Aqua Cleaning
This cleaning procedure uses humidity to
remove remaining fat and food particles from
the oven.
Step 1 Pour water into the cavity embossment:
300 ml.
Step 2
Set the function: .
Step 3 Set the temperature to 90 °C.
Step 4 Let the oven work for 30 min.
Step 5 Turn off the oven.
Step 6 Wait until the oven is cold. Dry the cavi‐
ty with a soft cloth.
11.4 How to remove: Grill
WARNING!
There is a risk of burns.
Step 1 Turn off the oven and wait until it is cold
to clean it.
Remove the shelf supports.
Step 2 Grab the grill corners. Pull it forwards
against the spring pressure and out of
two holders. The grill folds down.
Step 3 Clean the oven ceiling with warm water,
a soft cloth and a mild detergent. Let it
dry.
Step 4 Install the grill in the opposite sequence.
Step 5 Install the shelf supports.
11.5 How to remove and install:
Door
You can remove the door and the internal
glass panels to clean it. The number of glass
panels is different for different models.
WARNING!
The door is heavy.
CAUTION!
Carefully handle the glass,
especially around the edges of
the front panel. The glass can
break.
Step 1 Fully open the door.
A
A
Step 2 Lift and press the clamping levers
(A) on the two door hinges.
Step 3 Close the oven door to the first opening position (approximately 70° angle). Hold the door at both
sides and pull it away from the oven at an upwards angle. Put the door with the outer side down on
a soft cloth on a stable surface.
54 ENGLISH
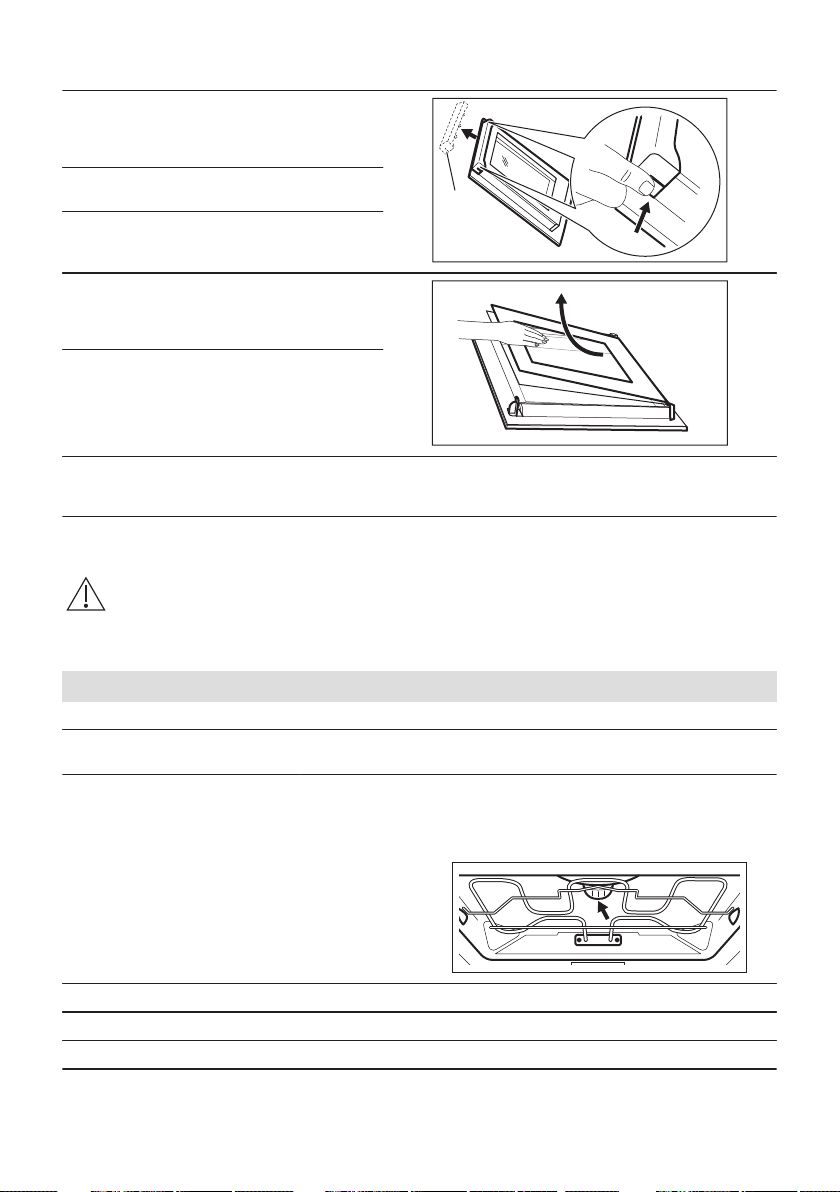
Step 4 Hold the door trim (B) on the top
edge of the door at the two sides
and push inwards to release the clip
seal.
1
2
B
Step 5 Pull the door trim to the front to re‐
move it.
Step 6 Hold the door glass panels on their
top edge one by one and pull them
up out of the guide.
Step 7 Clean the glass panel with water
and soap. Dry the glass panel care‐
fully. Do not clean the glass panels
in the dishwasher.
Step 8 After cleaning, do the above steps
in the opposite sequence.
Step 9 Install the smaller panel first, then the larger and the door.
Make sure that the glasses are inserted in the correct position otherwise the surface of the door
may overheat.
11.6 How to replace: Lamp
WARNING!
Risk of electric shock.
The lamp can be hot.
Before you replace the lamp:
Step 1 Step 2 Step 3
Turn off the oven. Wait until the
oven is cold.
Disconnect the oven from the
mains.
Put a cloth on the bottom of the cav‐
ity.
Top lamp
Step 1 Turn the glass cover to remove it.
Step 2 Clean the glass cover.
Step 3 Replace the lamp with a suitable 300 °C heat-resistant lamp.
Step 4 Install the glass cover.
ENGLISH 55

12. TROUBLESHOOTING
WARNING!
Refer to Safety chapters.
12.1 What to do if...
In any cases not included in this table please
contact with an Authorised Service Centre.
Problem Check if...
The oven does not heat
up.
The fuse is blown.
The display shows
"12.00".
There was a power cut.
Set the time of day.
Problem Check if...
The lamp does not work. The lamp is burnt out.
12.2 Service data
If you cannot find a solution to the problem
yourself, contact your dealer or an
Authorised Service Centre.
The necessary data for the service centre is
on the rating plate. The rating plate is on the
front frame of the oven cavity. Do not remove
the rating plate from the oven cavity.
We recommend that you write the data here:
Model (MOD.) .........................................
Product number (PNC) .........................................
Serial number (S.N.) .........................................
13. ENERGY EFFICIENCY
13.1 Product Information and Product Information Sheet*
Supplier's name AEG
Model identification BEB331010M 944188242, 944188459
Energy Efficiency Index 95.3
Energy efficiency class A
Energy consumption with a standard load, conventional mode 0.99 kWh/cycle
Energy consumption with a standard load, fan-forced mode 0.81 kWh/cycle
Number of cavities 1
Heat source Electricity
Volume 71 l
Type of oven Built-In Oven
Mass 31.5 kg
* For European Union according to EU Regulations 65/2014 and 66/2014.
For Republic of Belarus according to STB 2478-2017, Appendix G; STB 2477-2017, Annexes A and B.
For Ukraine according to 568/32020.
Energy efficiency class is not applicable for Russia.
56 ENGLISH
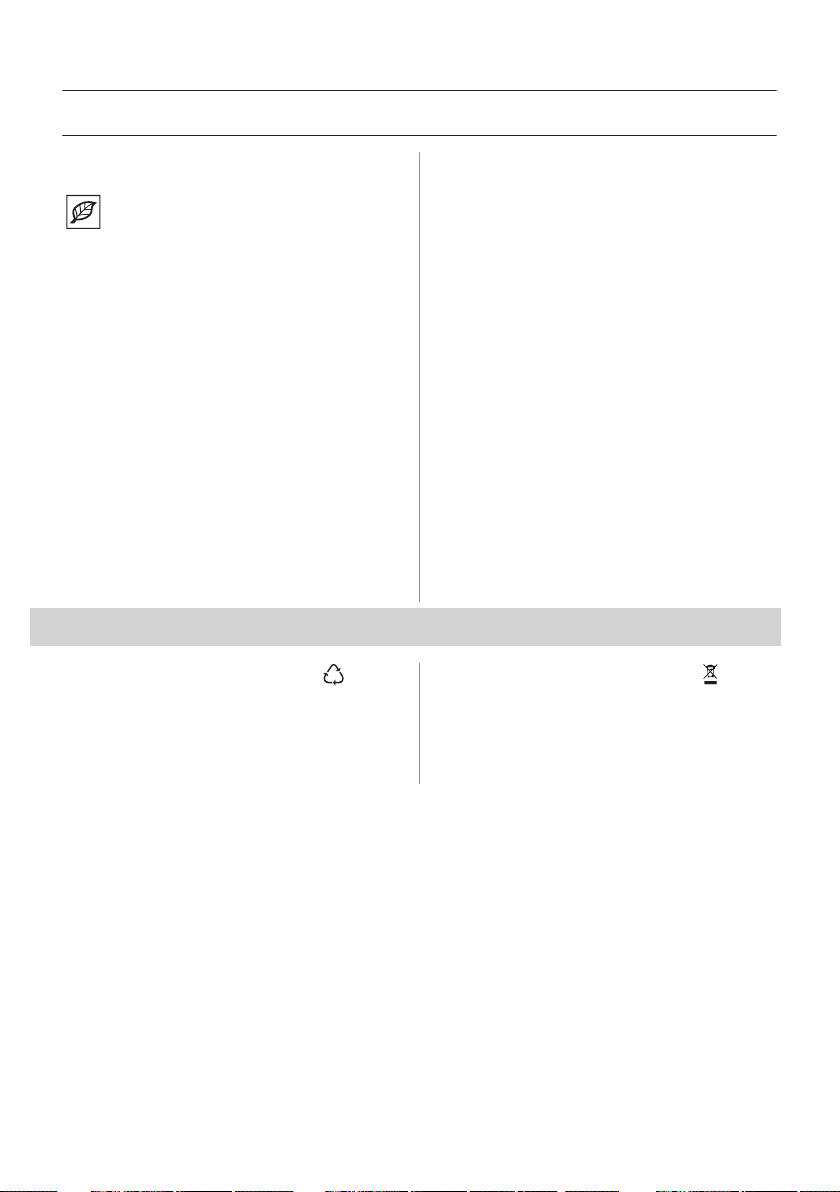
EN 60350-1 - Household electric cooking appliances - Part 1: Ranges, ovens, steam ovens and grills - Methods
for measuring performance.
13.2 Energy saving
The oven has features which
help you save energy during
everyday cooking.
Make sure that the oven door is closed when
the oven operates. Do not open the oven
door too often during cooking. Keep the door
gasket clean and make sure it is well fixed in
its position.
Use metal cookware to improve energy
saving.
When possible, do not preheat the oven
before cooking.
Keep breaks between baking as short as
possible when you prepare a few dishes at
one time.
Cooking with fan
When possible, use the cooking functions
with fan to save energy.
Residual heat
When the cooking duration is longer than 30
min, reduce the oven temperature to
minimum 3 - 10 min before the end of
cooking. The residual heat inside the oven
will continue to cook.
Use the residual heat to warm up other
dishes.
Keep food warm
Choose the lowest possible temperature
setting to use residual heat and keep a meal
warm.
Moist Fan Baking
Function designed to save energy during
cooking.
14. ENVIRONMENTAL CONCERNS
Recycle materials with the symbol . Put
the packaging in relevant containers to
recycle it. Help protect the environment and
human health by recycling waste of electrical
and electronic appliances. Do not dispose of
appliances marked with the symbol with
the household waste. Return the product to
your local recycling facility or contact your
municipal office.
ENGLISH 57

POUR DES RÉSULTATS PARFAITS
Merci d'avoir choisi ce produit AEG. Nous l'avons conçu pour vous offrir des
performances irréprochables pendant longtemps, avec des technologies innovantes qui
simplifient la vie : autant de caractéristiques que vous ne trouverez peut-être pas sur des
appareils ordinaires. Veuillez prendre quelques instants pour lire cette notice afin d'utiliser
au mieux votre appareil.
Visitez notre site Web pour :
Obtenir des conseils d'utilisation, des brochures, un dépanneur, des informations sur
le service et les réparations :
www.aeg.com/support
Enregistrer votre produit pour un meilleur service :
www.registeraeg.com
Acheter des accessoires, des consommables et des pièces de rechange d'origine
pour votre appareil :
www.aeg.com/shop
SERVICE ET ASSISTANCE À LA CLIENTÈLE
Utilisez toujours des pièces de rechange d'origine.
Avant de contacter notre centre de service agréé, assurez-vous de disposer des
informations suivantes : Modèle, PNC, Numéro de série.
Les informations se trouvent sur la plaque signalétique.
Avertissement/Mise en garde-Information de sécurité
Informations générales et conseils
Informations environnementales
Sous réserve de modifications.
TABLE DES MATIÈRES
1. INFORMATION SUR LA SÉCURITÉ............................................................................58
2. CONSIGNES DE SÉCURITÉ........................................................................................60
3. DESCRIPTION DE L'APPAREIL.................................................................................. 63
4. BANDEAU DE COMMANDE.........................................................................................64
5. AVANT LA PREMIÈRE UTILISATION..........................................................................64
6. UTILISATION QUOTIDIENNE...................................................................................... 65
7. FONCTIONS DE L'HORLOGE..................................................................................... 66
8. UTILISATION DES ACCESSOIRES.............................................................................67
9. FONCTIONS SUPPLÉMENTAIRES.............................................................................68
10. CONSEILS ET ASTUCES...........................................................................................68
11. ENTRETIEN ET NETTOYAGE................................................................................... 82
12. DÉPANNAGE..............................................................................................................85
13. RENDEMENT ÉNERGÉTIQUE.................................................................................. 86
1. INFORMATION SUR LA SÉCURITÉ
Avant d'installer et d'utiliser cet appareil, lisez soigneusement
les instructions fournies. Le fabricant ne pourra être tenu pour
58 FRANÇAIS

responsable des blessures et dégâts résultant d'une
mauvaise installation ou utilisation. Conservez toujours les
instructions dans un lieu sûr et accessible pour vous y référer
ultérieurement.
1.1 Sécurité des enfants et des personnes
vulnérables
• Cet appareil peut être utilisé par des enfants âgés d'au
moins 8 ans et par des personnes ayant des capacités
physiques, sensorielles ou mentales réduites ou dénuées
d’expérience ou de connaissance, s'ils sont correctement
surveillés ou si des instructions relatives à l'utilisation de
l'appareil en toute sécurité leur ont été données et s’ils
comprennent les risques encourus. Les enfants de moins
de 8 ans et les personnes ayant un handicap très important
et complexe doivent être tenus à l'écart de l’appareil, à
moins d'être surveillés en permanence.
• Ne laissez pas les enfants jouer avec l'appareil.
• Ne laissez pas les emballages à la portée des enfants et
jetez-les convenablement.
• AVERTISSEMENT : Tenez les enfants et les animaux
éloignés de l'appareil lorsqu'il est en cours de
fonctionnement ou lorsqu'il refroidit. Les parties accessibles
deviennent chaudes en cours d'utilisation.
• Si l'appareil est équipé d'un dispositif de sécurité enfants,
nous vous recommandons de l'activer.
• Le nettoyage et l'entretien ne doivent pas être effectués par
des enfants sans surveillance.
1.2 Consignes générales de sécurité
• L'appareil doit être installé et le câble remplacé uniquement
par un professionnel qualifié.
• AVERTISSEMENT : L'appareil et ses parties accessibles
deviennent chauds pendant son fonctionnement. Veillez à
ne pas toucher les éléments chauffants.
• Utilisez toujours des gants de cuisine pour retirer ou
enfourner des accessoires ou des plats allant au four.
FRANÇAIS 59

• Avant d'effectuer une opération de maintenance,
débranchez l'appareil de la prise secteur.
• AVERTISSEMENT : Assurez-vous que l'appareil est éteint
et débranché avant de remplacer l'éclairage afin d'éviter
tout risque de choc électrique.
• N'utilisez pas l'appareil avant de l'avoir installé dans la
structure encastrée.
• N'utilisez pas de nettoyeur vapeur pour nettoyer l'appareil.
• N'utilisez pas de produits abrasifs ni de racloirs pointus en
métal pour nettoyer la porte en verre car ils peuvent rayer
sa surface, ce qui peut briser le verre.
• Si le câble d'alimentation est endommagé, il doit être
remplacé par le fabricant, un service de maintenance agréé
ou un technicien qualifié afin d'éviter tout danger lié à
l'électricité.
• Pour retirer les supports de grille, tirez d'abord sur l'avant
de ceux-ci, puis sur l'arrière, pour les écarter des parois
extérieures. Réinstallez les supports de grille en répétant
cette procédure dans l'ordre inverse.
2. CONSIGNES DE SÉCURITÉ
2.1 Installation
AVERTISSEMENT!
L'appareil doit être installé
uniquement par un professionnel
qualifié.
• Retirez l'intégralité de l'emballage.
• N'installez pas et ne branchez pas un
appareil endommagé.
• Suivez scrupuleusement les instructions
d'installation fournies avec l'appareil.
• Soyez toujours vigilants lorsque vous
déplacez l'appareil car il est lourd. Utilisez
toujours des gants de sécurité et des
chaussures fermées.
• Ne tirez jamais l'appareil par la poignée.
• Installez l'appareil dans un lieu sûr et
adapté répondant aux exigences
d'installation.
• Respectez l'espacement minimal requis
par rapport aux autres appareils et
éléments.
• Avant de monter l’appareil, vérifiez si la
porte du four s’ouvre sans retenue.
• Cet appareil est équipé d'un système de
refroidissement électrique. Il doit être
utilisé lorsque l'appareil est raccordé à
une prise secteur.
• La stabilité de l'élément encastré doit être
conforme à la norme DIN 68930.
Hauteur minimale du meu‐
ble (Hauteur minimale du
meuble sous le plan de tra‐
vail)
578 (600) mm
Largeur du meuble 560 mm
Profondeur du meuble 550 (550) mm
Hauteur de l’avant de l’ap‐
pareil
594 mm
Hauteur de l’arrière de l’ap‐
pareil
576 mm
Largeur de l’avant de l’ap‐
pareil
595 mm
60 FRANÇAIS
Largeur de l’arrière de l’ap‐
pareil
559 mm
Profondeur de l'appareil 567 mm
Profondeur d’encastrement
de l’appareil
546 mm
Profondeur avec porte ou‐
verte
1027 mm
Dimensions minimales de
l’ouverture de ventilation.
Ouverture placée sur la
partie inférieure de la face
arrière
560 x 20 mm
Longueur du câble d’ali‐
mentation secteur. Le câ‐
ble est placé dans le coin
droit de la face arrière
1500 mm
Vis de montage 4 x 25 mm
2.2 Raccordement électrique
AVERTISSEMENT!
Risque d'incendie ou
d'électrocution.
• Tous les raccordements électriques
doivent être effectués par un électricien
qualifié.
• L’appareil doit être relié à la terre.
• Assurez-vous que les paramètres figurant
sur la plaque signalétique correspondent
aux données électriques nominale de
l’alimentation secteur.
• Utilisez toujours une prise de courant de
sécurité correctement installée.
• N'utilisez pas d'adaptateurs multiprise et
de rallonges.
• Veillez à ne pas endommager la fiche
secteur ni le câble d'alimentation. Le
remplacement du câble d’alimentation de
l’appareil doit être effectué par notre
service après-vente agréé.
• Ne laissez pas les câbles d'alimentation
entrer en contact ou s'approcher de la
porte de l'appareil ou de la niche
d'encastrement sous l'appareil,
particulièrement lorsqu'il est en marche ou
que la porte est chaude.
• La protection contre les chocs des parties
sous tension et isolées doit être fixée de
telle manière qu'elle ne puisse pas être
enlevée sans outils.
• Ne branchez la fiche secteur dans la prise
secteur qu'à la fin de l'installation.
Assurez-vous que la prise secteur est
accessible après l'installation.
• Si la prise secteur est détachée, ne
branchez pas la fiche secteur.
• Ne tirez pas sur le câble secteur pour
débrancher l'appareil. Tirez toujours sur la
fiche de la prise secteur.
• N'utilisez que des systèmes d'isolation
appropriés : des coupe-circuits, des
fusibles (les fusibles à visser doivent être
retirés du support), un disjoncteur
différentiel et des contacteurs.
• L'installation électrique doit comporter un
dispositif d'isolation qui vous permet de
déconnecter l'appareil du secteur à tous
les pôles. Le dispositif d'isolement doit
avoir une largeur d'ouverture de contact
de 3 mm minimum.
• Cet appareil est fourni avec une fiche
d'alimentation et un câble d'alimentation.
2.3 Utilisation
AVERTISSEMENT!
Risque de blessures, de
brûlures, d'électrocution ou
d'explosion.
• Cet appareil est exclusivement destiné à
une utilisation domestique.
• Ne modifiez pas les caractéristiques de
cet appareil.
• Assurez-vous que les orifices de
ventilation ne sont pas bouchés.
• Ne laissez jamais l'appareil sans
surveillance pendant son fonctionnement.
• Éteignez l'appareil après chaque
utilisation.
• Soyez prudent lors de l'ouverture de la
porte de l'appareil lorsque celui-ci est en
fonctionnement. De l'air brûlant peut s'en
échapper.
• N'utilisez jamais cet appareil avec les
mains mouillées ou lorsqu'il est en contact
avec de l'eau.
• N'exercez jamais de pression sur la porte
ouverte.
• N'utilisez jamais l'appareil comme plan de
travail ou comme plan de stockage.
• Ouvrez prudemment la porte de l'appareil.
Si vous utilisez des ingrédients contenant
de l'alcool, un mélange d'alcool et d'air
facilement inflammable peut
éventuellement se former.
FRANÇAIS 61

• Ne laissez pas des étincelles ou des
flammes nues entrer en contact avec
l'appareil lorsque vous ouvrez la porte.
• Ne placez pas de produits inflammables
ou d'éléments imbibés de produits
inflammables à l'intérieur ou à proximité
de l'appareil, ni sur celui-ci.
AVERTISSEMENT!
Risque d'endommagement de
l'appareil.
• Pour éviter tout endommagement ou
décoloration de l’émail :
– ne posez pas de plats allant au four ni
aucun autre objet directement sur le
fond de l'appareil.
– ne placez jamais de feuilles
d'aluminium directement sur le fond
de la cavité de l'appareil.
– ne versez jamais d'eau directement
dans l'appareil lorsqu'il est chaud.
– une fois la cuisson terminée, ne
laissez jamais d'aliments ou de plats
humides à l'intérieur de l'appareil.
– faites attention lorsque vous retirez ou
remettez en place les accessoires.
• La décoloration de l'émail ou de l'acier
inoxydable est sans effet sur les
performances de l'appareil.
• Utilisez un plat à rôtir pour obtenir des
gâteaux moelleux. Les jus de fruits
causent des taches qui peuvent être
permanentes.
• Cet appareil est exclusivement destiné à
un usage culinaire. Ne l'utilisez pas pour
des usages autres que celui pour lequel il
a été conçu, à des fins de chauffage par
exemple.
• La porte du four doit toujours être fermée
pendant la cuisson.
• Si l’appareil est installé derrière la paroi
d’un meuble (par ex. une porte), veuillez à
ce que la porte ne soit jamais fermée
lorsque l’appareil fonctionne. La chaleur
et l’humidité peuvent s’accumuler derrière
la porte fermée du meuble et provoquer
d’importants dégâts sur l’appareil, votre
logement ou le sol. Ne fermez pas la paroi
du meuble tant que l’appareil n’a pas
refroidi complètement.
2.4 Entretien et Nettoyage
AVERTISSEMENT!
Risque de blessure, d'incendie
ou de dommages matériels sur
l'appareil.
• Avant toute opération d'entretien, éteignez
l'appareil et débranchez la fiche de la
prise secteur.
• Vérifiez que l'appareil est froid. Les
panneaux de verre risquent de se briser.
• Remplacez immédiatement les vitres de
la porte si elles sont endommagées.
Contactez le service après-vente agréé.
• Soyez prudent lorsque vous retirez la
porte de l'appareil. La porte est lourde !
• Nettoyez régulièrement l'appareil afin de
maintenir le revêtement en bon état.
• Nettoyez l'appareil avec un chiffon doux
humide. Utilisez uniquement des produits
de lavage neutres. N'utilisez pas de
produits abrasifs, de tampons à récurer,
de solvants ni d'objets métalliques.
• Si vous utilisez un spray pour four, suivez
les consignes de sécurité figurant sur son
emballage.
2.5 Éclairage intérieur
AVERTISSEMENT!
Risque d'électrocution !
• Concernant la/les lampe(s) à l’intérieur de
ce produit et les lampes de rechange
vendues séparément : Ces lampes sont
conçues pour résister à des conditions
physiques extrêmes dans les appareils
électroménagers, telles que la
température, les vibrations, l’humidité, ou
sont conçues pour signaler des
informations sur le statut opérationnel de
l’appareil. Elles ne sont pas destinées à
être utilisées dans d'autres applications et
ne conviennent pas à l’éclairage des
pièces d’un logement.
• Utilisez uniquement des ampoules ayant
les mêmes spécifications.
2.6 Maintenance
• Pour réparer l'appareil, contactez un
service après-vente agréé.
• Utilisez exclusivement des pièces
d'origine.
62 FRANÇAIS
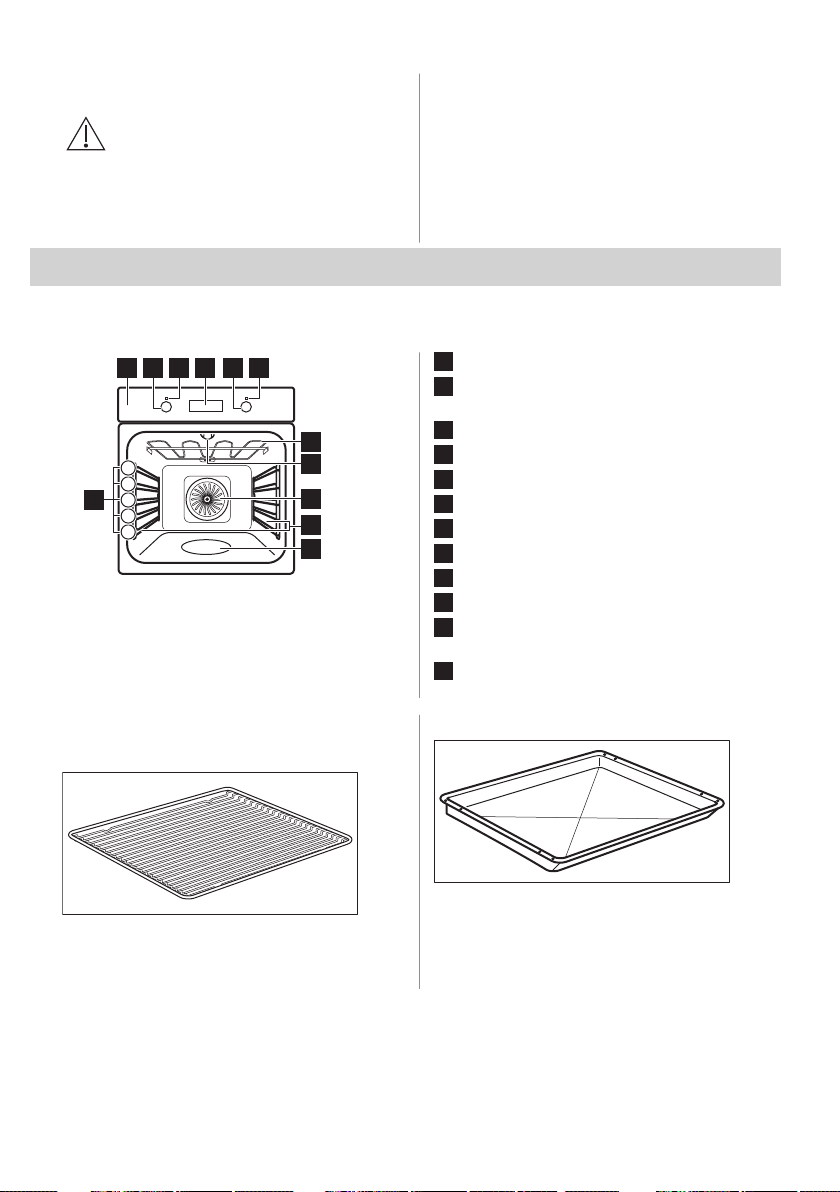
2.7 Mise au rebut
AVERTISSEMENT!
Risque de blessure ou
d'asphyxie.
• Débranchez l'appareil de l'alimentation
électrique.
• Coupez le câble d'alimentation au ras de
l'appareil et mettez-le au rebut.
• Retirez le dispositif de verrouillage du
hublot pour empêcher les enfants et les
animaux de s'enfermer dans l'appareil.
3. DESCRIPTION DE L'APPAREIL
3.1 Présentation générale
7
9
8
41 2 3 5 6
1
2
3
4
5
12
10
11
1
Bandeau de commande
2
Manette de sélection des modes de
cuisson
3
Voyant / symbole de mise sous tension
4
Affichage
5
Thermostat
6
Indicateur / symbole de température
7
Élément chauffant
8
Éclairage
9
Ventilateur
10
Support de grille, amovible
11
Bac de la cavité - Bac de nettoyage Aqua
Clean
12
Position des grilles
3.2 Accessoires
Grille métallique
Pour les plats à rôti, à gratin et les moules à
gâteau/pâtisserie.
Plat multi-usages
Pour gâteaux et biscuits Pour cuire et griller
ou à utiliser comme plat pour recueillir la
graisse.
FRANÇAIS 63
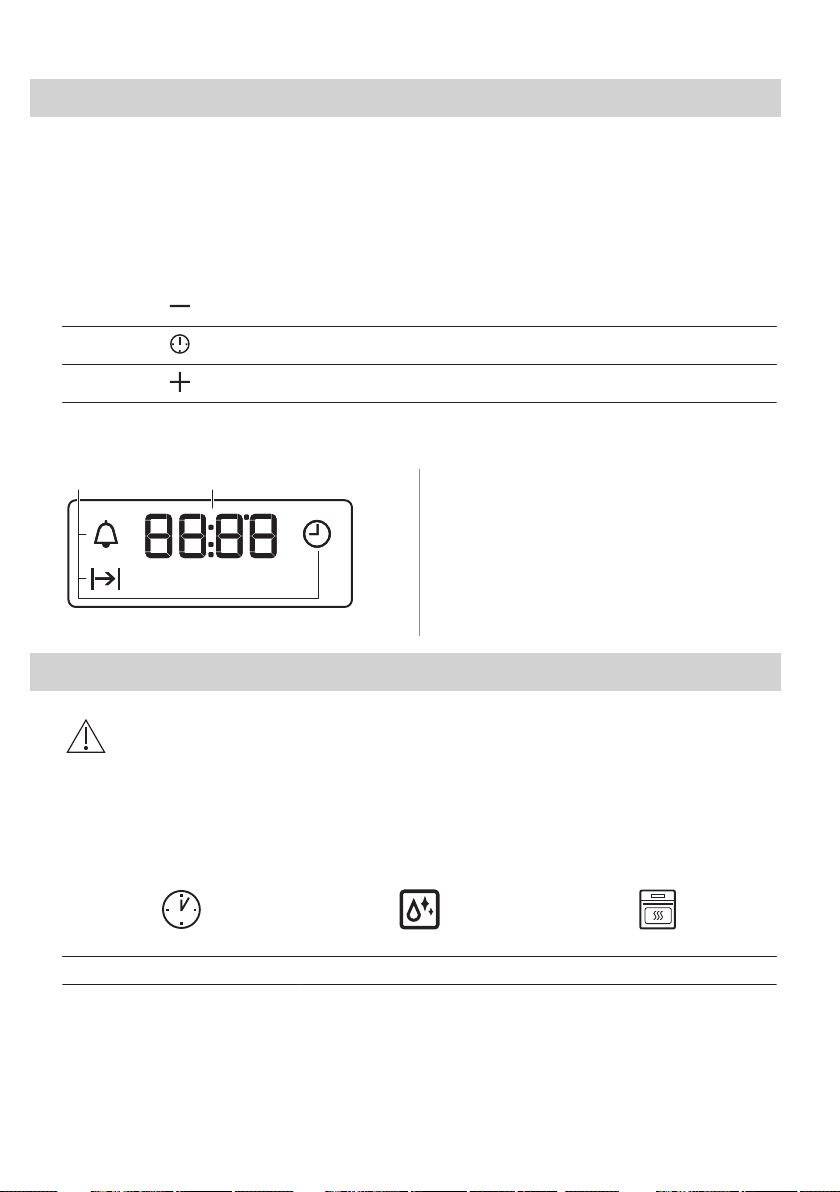
4. BANDEAU DE COMMANDE
4.1 Manettes rétractables
Pour utiliser l'appareil, appuyez sur la
manette. La manette sort alors de son
logement.
4.2 Touches sensitives
Pour régler l'heure.
Pour régler une fonction de l'horloge.
Pour régler l'heure.
4.3 Affichage
A B
A. Fonctions de l’horloge
B. Minuteur
5. AVANT LA PREMIÈRE UTILISATION
AVERTISSEMENT!
Reportez-vous aux chapitres
concernant la sécurité.
5.1 Avant la première utilisation
Une odeur et de la fumée peuvent s'échapper du four durant le préchauffage. Assurez-vous
que la pièce est ventilée.
Étape 1 Étape 2
Étape 3
Réglez l’horloge. Nettoyez le four Préchauffez le four à vide
64 FRANÇAIS

1. , - appuyez pour régler
l’heure. Après environ 5 s, le
symbole cesse de clignoter et
l'heure s'affiche.
1. Retirez les supports de grille
amovibles et tous les accessoi‐
res du four.
2. Nettoyez le four et les acces‐
soires avec un chiffon doux, de
l’eau tiède et un détergent
doux.
1. Réglez la température maxima‐
le pour la fonction : .
Durée : 1 h.
2. Réglez la température maxima‐
le pour la fonction : .
Durée : 15'
Éteignez le four et attendez qu’il soit froid. Placez les accessoires et les supports de grille amovibles dans le four.
6. UTILISATION QUOTIDIENNE
AVERTISSEMENT!
Reportez-vous aux chapitres
concernant la sécurité.
6.1 Comment régler : Mode de
cuisson
Étape 1 Tournez la manette des modes de cuis‐
son pour sélectionner un mode de cuis‐
son.
Étape 2 Tournez la manette pour sélectionner
la température.
Étape 3 Une fois la cuisson terminée, tournez
les manettes sur la position Arrêt pour
éteindre le four.
6.2 Modes de cuisson
Mode de cuis‐
son
Application
Position Arrêt
Le four est éteint.
Eclairage four
Pour allumer l’éclairage.
Chaleur tournante
Pour faire cuire sur 3 niveaux en
même temps et pour déshydra‐
ter des aliments.
Diminuez les températures du
four de 20 à 40 °C par rapport à
la Chauffage Haut/ Bas.
Fonction Pizza
Pour cuire des pizzas. Pour do‐
rer de façon intensive et obtenir
un fond croustillant.
Mode de cuis‐
son
Application
Chauffage Haut/
Bas / Nettoyage
Aqua Clean
Pour cuire et rôtir des aliments
sur un seul niveau.
Reportez-vous au chapitre « En‐
tretien et nettoyage » pour obte‐
nir plus d'informations sur : Net‐
toyage Aqua Clean.
Cuisson de sole
Pour cuire des gâteaux à fond
croustillant et pour stériliser des
aliments.
Décongélation
Pour décongeler des aliments
(fruits et légumes). Le temps de
décongélation dépend de la
quantité et de l'épaisseur des
aliments surgelés.
Chaleur Tournante
Humide
Cette fonction est conçue pour
économiser de l'énergie en
cours de cuisson. Lorsque vous
utilisez cette fonction, la tempé‐
rature à l'intérieur de la cavité
peut différer de la température
sélectionnée. La puissance peut
être réduite. Pour plus d’infor‐
mations, consultez le chapitre
« Utilisation quotidienne », Re‐
marques sur : Chaleur Tournan‐
te Humide.
Gril
Pour faire griller des aliments
peu épais et du pain.
Turbo gril
Pour rôtir de grosses pièces de
viande ou de volaille avec os
sur un seul niveau. Également
pour gratiner et faire dorer.
FRANÇAIS 65
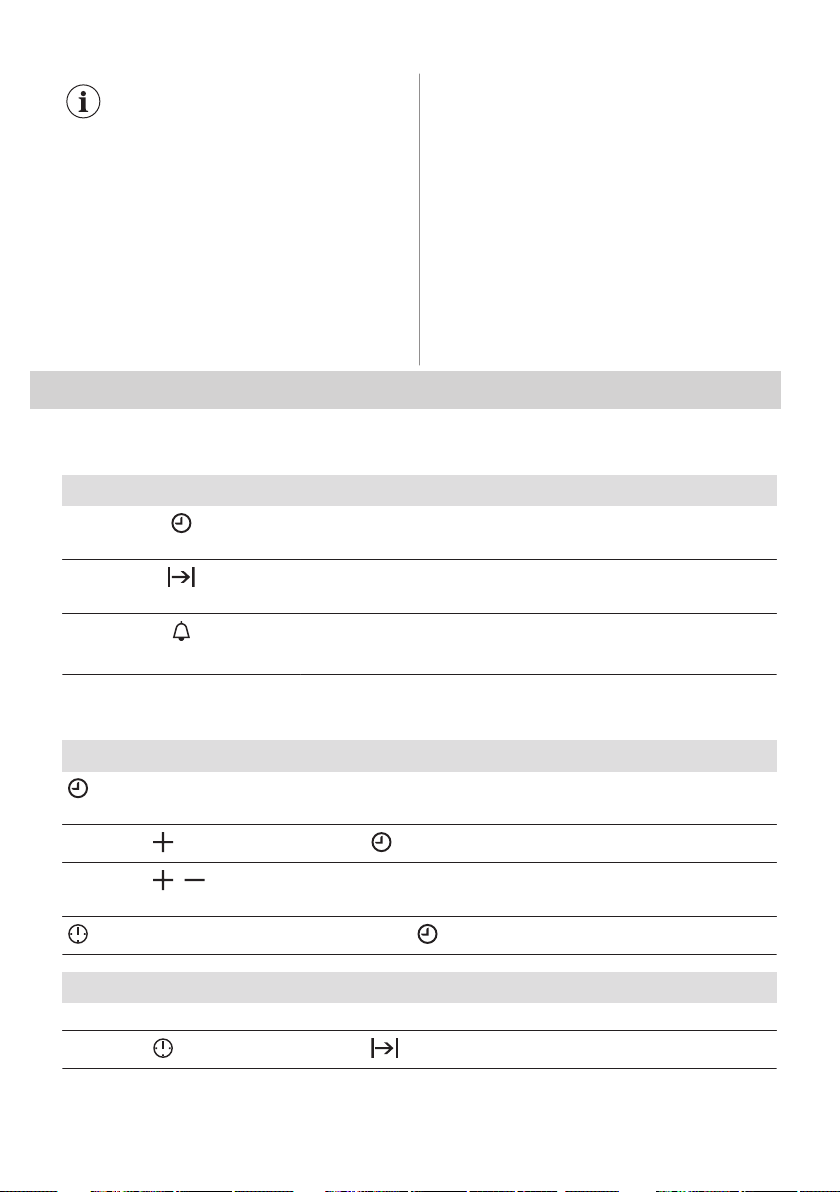
Durant certaines fonctions,
l'éclairage s'éteint
automatiquement lorsque le four
atteint une température
inférieure à 60 °C.
6.3 Remarques sur : Chaleur
Tournante Humide
Cette fonction était utilisée pour se conformer
à la classe d'efficacité énergétique et aux
exigences d’éco-conception selon les
normes EU 65/2014 et EU 66/2014. Tests
conformément à la norme EN 60350-1.
Pendant la cuisson, la porte du four doit
rester fermée pour éviter d'interrompre la
fonction et pour un fonctionnement avec la
meilleure efficacité énergétique possible.
Pour obtenir des instructions de cuisson,
reportez-vous au chapitre « Conseils »,
paragraphe Chaleur Tournante Humide. Pour
obtenir des recommandations générales sur
les économies d'énergie, consultez le
chapitre « Efficacité énergétique, « Four -
Économie d'énergie ».
7. FONCTIONS DE L'HORLOGE
7.1 Fonctions de l’horloge
Fonction de l'horloge Utilisation
Heure
Pour régler, changer ou vérifier l'heure.
Durée
Pour régler la durée de fonctionnement du four.
Minuteur
Pour régler la minuterie. Cette fonction est sans effet sur le fonctionnement
du four. Vous pouvez régler cette fonction à tout moment, même quand le
four est éteint.
7.2 Comment régler : Fonctions de l’horloge
Comment modifier : Heure
- clignote lorsque vous branchez le four à l'alimentation électrique, lorsqu'il y a eu une coupure de courant ou
que le minuteur n'est pas réglé.
Étape 1
- appuyez à plusieurs reprises. - commence à clignoter.
Étape 2
, - appuyez pour régler l’heure.
Après environ 5 s, le symbole cesse de clignoter et l'heure s'affiche.
- appuyez à plusieurs reprises pour modifier l'heure. - commence à clignoter.
Comment régler : Durée
Étape 1 Sélectionnez une fonction du four et la température.
Étape 2
- appuyez à plusieurs reprises. - commence à clignoter.
66 FRANÇAIS
Comment régler : Durée
Étape 3
, - appuyez pour régler la durée.
L'affichage indique : .
- clignote lorsque la durée définie est écoulée. Le signal sonore retentit et le four s'éteint.
Étape 4 Appuyez sur n'importe quelle touche pour arrêter le signal sonore.
Étape 5 Tournez la manette sur la position Arrêt.
Comment régler : Minuteur
Étape 1
- appuyez à plusieurs reprises. - commence à clignoter.
Étape 2
, - appuyez pour régler l’heure.
La fonction démarre automatiquement au bout de 5 s.
Lorsque la durée définie est écoulée, un signal sonore retentit.
Étape 3 Appuyez sur n'importe quelle touche pour arrêter le signal sonore.
Étape 4 Tournez la manette sur la position Arrêt.
Comment annuler : Fonctions de l’horloge
Étape 1
- appuyez plusieurs fois jusqu’à ce que le symbole de la fonction horloge commence à cligno‐
ter.
Étape 2
Maintenez la touche : .
La fonction horloge est désactivée au bout de quelques secondes.
8. UTILISATION DES ACCESSOIRES
AVERTISSEMENT!
Reportez-vous aux chapitres
concernant la sécurité.
8.1 Insertion des accessoires
Une petite indentation sur le dessus apporte
plus de sécurité. Les indentations sont
également des dispositifs anti-bascule. Le
rebord élevé de la grille empêche les
ustensiles de cuisine de glisser.
FRANÇAIS 67
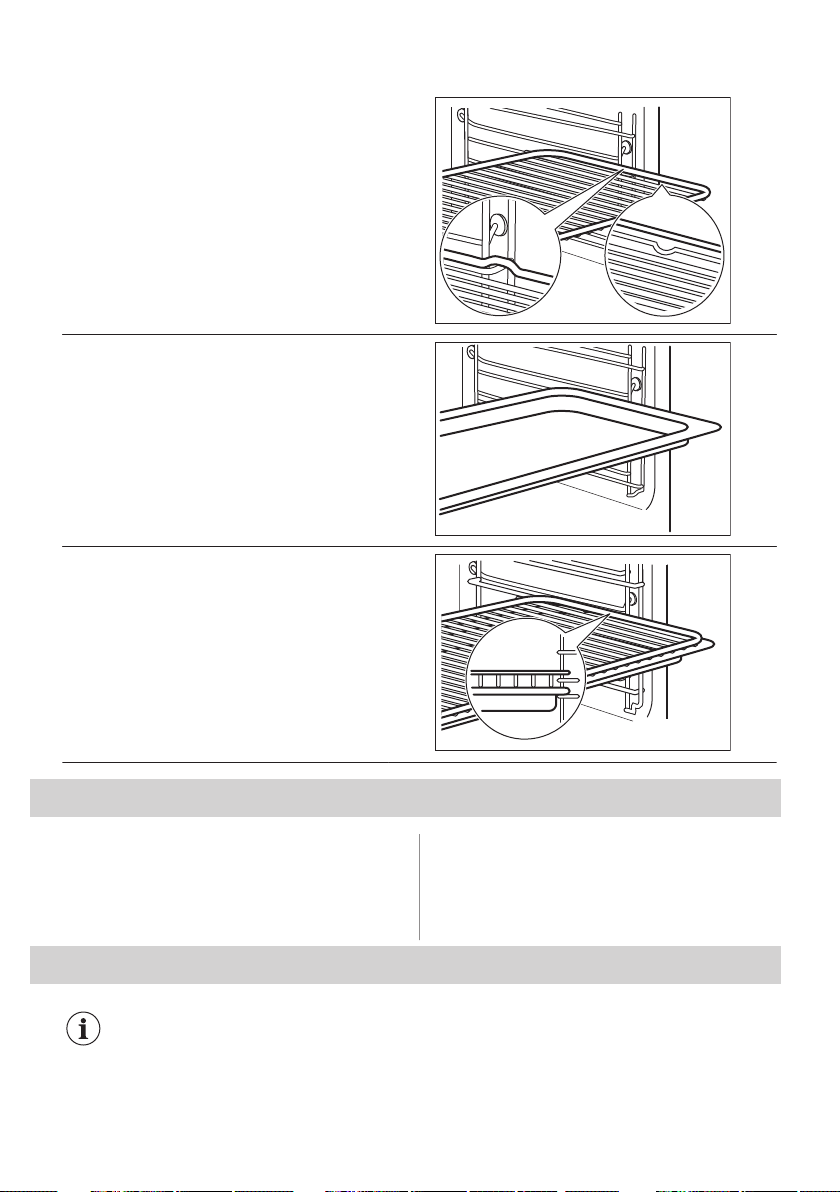
Grille métallique:
Poussez la grille entre les barres de guidage des
supports de grille.
Lèchefrite:
Poussez le plateau entre les rails du support de
grille.
Grille métallique, Lèchefrite:
Poussez le plateau entre les rails du support de
grille et glissez la grille métallique entre les rails se
trouvant juste au-dessus.
9. FONCTIONS SUPPLÉMENTAIRES
9.1 Ventilateur de refroidissement
Lorsque le four fonctionne, le ventilateur de
refroidissement se met automatiquement en
marche pour refroidir les surfaces du four. Si
vous éteignez le four, le ventilateur de
refroidissement continue à fonctionner
jusqu'à ce que le four refroidisse.
10. CONSEILS ET ASTUCES
Reportez-vous aux chapitres
concernant la sécurité.
68 FRANÇAIS

10.1 Recommandations de cuisson
Les températures et temps de cuisson se trouvant dans les tableaux ne sont indiqués qu'à titre indicatif. Ils va‐
rient en fonction des recettes ainsi que de la qualité et de la quantité des ingrédients utilisés.
Votre four peut cuire les aliments d'une manière complètement différente de celle de votre ancien four. Les ta‐
bleaux ci-dessous contiennent les réglages de température, les temps de cuisson et les positions de grilles re‐
commandés pour des types de plats en particulier.
Si vous ne trouvez pas les réglages appropriés pour une recette spécifique, cherchez-en une qui s'en rapproche.
10.2 Intérieur de la porte
Vous trouverez à l'intérieur de la porte du
four :
• les numéros des niveaux d'enfournement.
• des informations sur les fonctions du four,
les niveaux d'enfournement et les
températures recommandés pour certains
plats.
10.3 Cuisson
Pour la première cuisson, utilisez la
température inférieure.
Le temps de cuisson peut être prolongé de
10 à 15 minutes, si vous cuisez des gâteaux
sur plusieurs niveaux.
Les gâteaux et petites pâtisseries placés à
différentes hauteurs ne dorent pas toujours
de manière homogène. S'ils ne dorent
uniformément, il n'est pas nécessaire de
modifier la température. Les différences
s'atténuent en cours de cuisson.
Les plateaux insérés dans le four peuvent se
déformer en cours de cuisson. Une fois les
plateaux refroidis, les déformations
disparaissent.
10.4 Conseils de cuisson
Résultats de cuisson Cause possible Solution
Le dessous du gâteau n'est
pas suffisamment cuit.
La position de la grille est incorrec‐
te.
Placez le gâteau sur un niveau plus bas.
Le gâteau s'affaisse et devient
mou ou plein de grumeaux.
La température du four est trop éle‐
vée.
La prochaine fois, réglez une température
du four légèrement plus basse.
Température du four trop élevée et
durée de cuisson trop courte.
Réglez une température de cuisson légè‐
rement inférieure et un temps de cuisson
plus long la prochaine fois.
Le gâteau est trop sec. Température de cuisson trop bas‐
se.
La prochaine fois, réglez une température
du four plus élevée.
Durée de cuisson trop longue. La prochaine fois, réduisez le temps de
cuisson.
La cuisson du gâteau n'est
pas homogène.
Température du four trop élevée et
durée de cuisson trop courte.
Réglez une température de cuisson légè‐
rement inférieure et un temps de cuisson
plus long la prochaine fois.
La pâte à gâteau n'est pas correc‐
tement répartie.
La prochaine fois, étalez la préparation de
façon homogène sur le plateau de cuis‐
son.
Le gâteau n'est pas cuit à la
fin de la durée de cuisson indi‐
quée dans la recette.
Température de cuisson trop bas‐
se.
La prochaine fois, réglez une température
du four légèrement plus élevée.
FRANÇAIS 69
10.5 Cuisson sur un seul niveau
CUIS‐
SON DANS
DES MOULES
(°C) (min)
Fond de tarte - pâ‐
te brisée, pré‐
chauffer le four à
vide
Chaleur tournante 170 - 180 10 - 25 2
Fond de tarte -
mélange de génoi‐
se
Chaleur tournante 150 - 170 20 - 25 2
Savarin / Brioche Chaleur tournante 150 - 160 50 - 70 1
Quatre-quarts /
Gâteaux aux fruits
Chaleur tournante 140 - 160 70 - 90 1
Cheesecake Chauffage Haut/ Bas 170 - 190 60 - 90 1
Utilisez le troisième niveau de la grille.
Utilisez la fonction : Chaleur tournante.
Utilisez un plateau de cuisson.
GÂTEAUX / PÂTISSERIES / PAINS
(°C) (min)
Gâteau avec garniture à base de crumble 150 - 160 20 - 40
Flans aux fruits (à base de pâte levée/mélange de
génoise), utilisez un plat à rôtir
150 35 - 55
Flans aux fruits à base de pâte brisée 160 - 170 40 - 80
Préchauffez le four à vide.
Utilisez la fonction : Chauffage Haut/ Bas.
Utilisez un plateau de cuisson.
GÂTEAUX /
PÂTISSERIES /
PAINS
(°C) (min)
Gâteau roulé 180 - 200 10 - 20 3
Pain de seigle: d'abord : 230 20 1
puis : 160 - 180 30 - 60
Gâteau aux amandes
beurré / Gâteaux au sucre
190 - 210 20 - 30 3
Choux à la crème / Éclairs 190 - 210 20 - 35 3
70 FRANÇAIS

GÂTEAUX /
PÂTISSERIES /
PAINS
(°C) (min)
Pain tressé / Pain en for‐
me de couronne
170 - 190 30 - 40 3
Flans aux fruits (à base de
pâte levée/mélange de gé‐
noise), utilisez un plat à
rôtir
170 35 - 55 3
Gâteaux à pâte levée à
garniture fragile (par ex.
fromage blanc, crème,
crème anglaise)
160 - 180 40 - 80 3
Brioche de Noël 160 - 180 50 - 70 2
Utilisez le troisième niveau de la grille.
BISCUITS
(°C) (min)
Biscuits à pâte brisée Chaleur tournante 150 - 160 10 - 20
Petits pains, préchauffer le
four à vide
Chaleur tournante 160 10 - 25
Biscuits à base de mélange de
génoise
Chaleur tournante 150 - 160 15 - 20
Pâtes feuilletées, préchauffer
le four à vide
Chaleur tournante 170 - 180 20 - 30
Biscuits à base de pâte levée Chaleur tournante 150 - 160 20 - 40
Macarons Chaleur tournante 100 - 120 30 - 50
Pâtisseries à base de blanc
d’œuf / Meringues
Chaleur tournante 80 - 100 120 - 150
Petits pains, préchauffer le
four à vide
Chauffage Haut/ Bas 190 - 210 10 - 25
10.6 Gratins
Utilisez le premier niveau de la grille.
(°C) (min)
Baguettes nappées de fro‐
mage fondu
Chaleur tournante 160 - 170 15 - 30
Gratin de légumes, préchauf‐
fer le four à vide
Turbo gril 160 - 170 15 - 30
FRANÇAIS 71
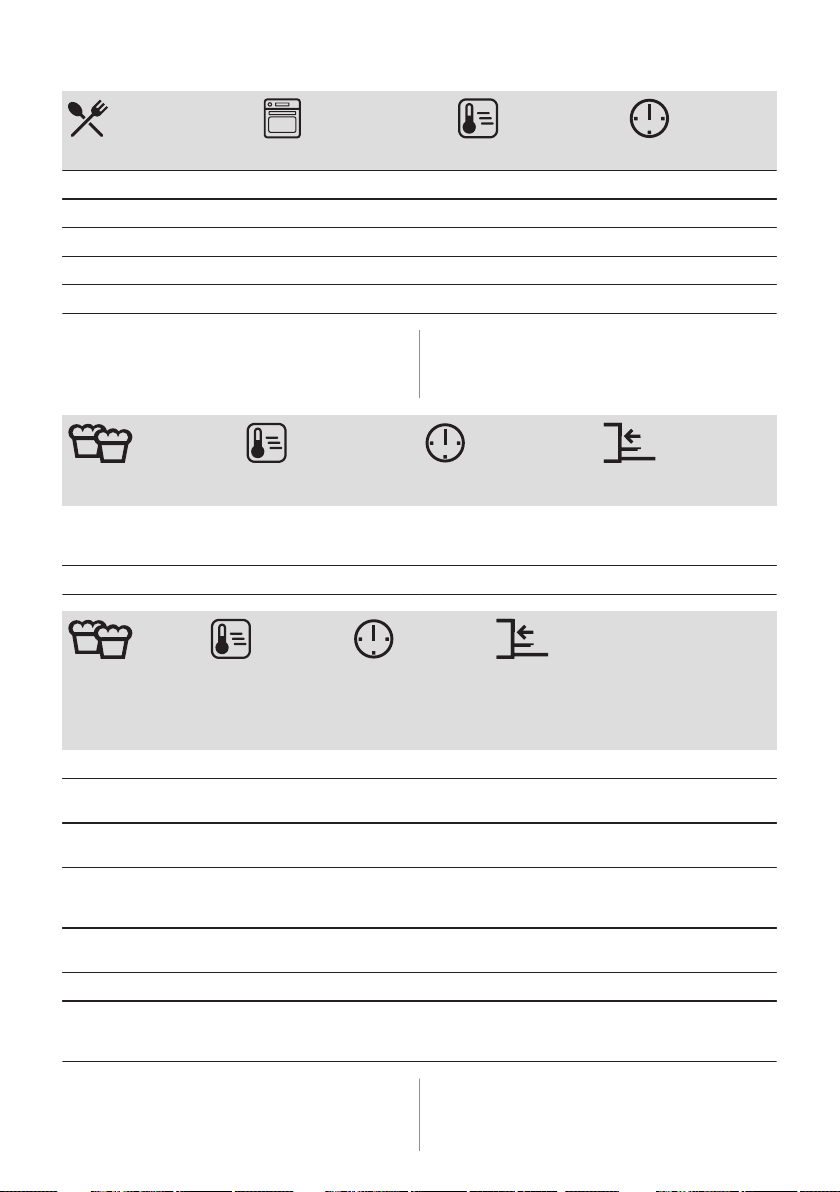
(°C) (min)
Lasagne Chauffage Haut/ Bas 180 - 200 25 - 40
Poisson gratiné Chauffage Haut/ Bas 180 - 200 30 - 60
Légumes farcis Chaleur tournante 160 - 170 30 - 60
Pâtisseries sucrées Chauffage Haut/ Bas 180 - 200 40 - 60
Cuisson des pâtes Chauffage Haut/ Bas 180 - 200 45 - 60
10.7 Cuisson sur plusieurs niveaux
Utilisez la fonction : Chaleur tournante.
Utilisez les plateaux de cuisson.
GÂTEAUX /
PÂTISSERIES (°C) (min)
2 positions
Choux à la crème /
Éclairs, préchauffer le four
à vide
160 - 180 25 - 45 1 / 4
Gâteau Streusel sec 150 - 160 30 - 45 1 / 4
BIS‐
CUITS / PETITS
GÂTEAUX /
VIENNOISE‐
RIES / ROULÉS
(°C) (min)
2 positions 3 positions
Petits pains 180 20 - 30 1 / 4 -
Biscuits à pâte bri‐
sée
150 - 160 20 - 40 1 / 4 1 / 3 / 5
Biscuits à base de
mélange de génoise
160 - 170 25 - 40 1 / 4 -
Pâtes feuilletées,
préchauffer le four à
vide
170 - 180 30 - 50 1 / 4 -
Biscuits à base de
pâte levée
160 - 170 30 - 60 1 / 4 -
Macarons 100 - 120 40 - 80 1 / 4 -
Biscuits à base de
blanc d’œuf / Merin‐
gues
80 - 100 130 - 170 1 / 4 -
10.8 Conseils de rôtissage
Utilisez des plats résistant à la chaleur.
Viande maigre rôtie couverte (vous pouvez
utiliser du papier aluminium).
72 FRANÇAIS
Vous pouvez cuire de gros rôtis directement
dans le plat à rôtir ou sur la grille métallique
en plaçant le plat à rôtir en dessous.
Pour éviter que les graisses de cuisson ne
brûlent, versez un peu d'eau dans le plat à
rôtir.
Si nécessaire, retournez le rôti à la moitié ou
aux deux tiers du temps de cuisson.
Faites rôtir la viande et le poisson par
morceaux d'au moins 1 kg.
Arrosez les morceaux de viande avec leur
propre jus de cuisson plusieurs fois durant la
cuisson.
10.9 Rôtissage
Utilisez le premier niveau de la grille.
BŒUF
(°C) (min)
Braisé 1 - 1,5 kg Chauffage Haut/
Bas
230 120 - 150
Rôti ou filet de bœuf, sai‐
gnant, préchauffer le four
à vide
par cm d'épaisseur Turbo gril 190 - 200 5 - 6
Rôti ou filet de bœuf, à
point, préchauffer le four
à vide
par cm d'épaisseur Turbo gril 180 - 190 6 - 8
Rôti ou filet de bœuf,
bien cuit, préchauffer le
four à vide
par cm d'épaisseur Turbo gril 170 - 180 8 - 10
PORC
Utilisez la fonction : Turbo gril.
(kg)
(°C) (min)
Épaule / Cou / Noix de jambon 1 - 1.5 160 - 180 90 - 120
Côtelettes / Côte levée 1 - 1.5 170 - 180 60 - 90
Pain de viande 0.75 - 1 160 - 170 50 - 60
Jarret de porc, pré-cuit 0.75 - 1 150 - 170 90 - 120
FRANÇAIS 73
VEAU
Utilisez la fonction : Turbo gril.
(kg)
(°C) (min)
Rôti de veau 1 160 - 180 90 - 120
Jarret de veau 1.5 - 2 160 - 180 120 - 150
AGNEAU
Utilisez la fonction : Turbo gril.
(kg)
(°C) (min)
Gigot d’agneau / Rôti
d’agneau
1 - 1.5 150 - 170 100 - 120
Selle d’agneau 1 - 1.5 160 - 180 40 - 60
GIBIER
Utilisez la fonction : Chauffage Haut/ Bas.
(kg)
(°C) (min)
Selle / Cuisse de lièvre,
préchauffer le four à vide
jusqu'à 1 230 30 - 40
Selle de cerf 1.5 - 2 210 - 220 35 - 40
Cuissot de chevreuil 1.5 - 2 180 - 200 60 - 90
74 FRANÇAIS
VOLAILLE
Utilisez la fonction : Turbo gril.
(kg)
(°C) (min)
Volaille, portions 0,2 - 0,25 chacun 200 - 220 30 - 50
Poulet, demi 0,4 - 0,5 chacun 190 - 210 35 - 50
Poulet, poularde 1 - 1.5 190 - 210 50 - 70
Canard 1.5 - 2 180 - 200 80 - 100
Oie 3.5 - 5 160 - 180 120 - 180
Dinde 2.5 - 3.5 160 - 180 120 - 150
Dinde 4 - 6 140 - 160 150 - 240
POISSON (À LA VAPEUR)
Utilisez la fonction : Chauffage Haut/ Bas.
(kg)
(°C) (min)
Poisson entier 1 - 1.5 210 - 220 40 - 60
10.10 Cuisson croustillante avec la
fonction :Fonction Pizza
PIZZA
Utilisez le premier niveau de la grille.
(°C) (min)
Tartes 180 - 200 40 - 55
Flan d’épinards 160 - 180 45 - 60
Quiche lorraine /
Flan suisse
170 - 190 45 - 55
PIZZA
Utilisez le premier niveau de la grille.
(°C) (min)
Cheesecake 140 - 160 60 - 90
Tourte aux légu‐
mes
160 - 180 50 - 60
FRANÇAIS 75
PIZZA
Avant la cuisson, faites préchauffer
votre four vide.
Utilisez le deuxième niveau de la gril‐
le.
(°C) (min)
Pizza, croûte fi‐
ne, utilisez un
plat à rôtir
200 - 230 15 - 20
Pizza, croûte
épaisse
180 - 200 20 - 30
Pain sans levain 230 - 250 10 - 20
Flan à pâte
feuilletée
160 - 180 45 - 55
Tarte flambée 230 - 250 12 - 20
PIZZA
Avant la cuisson, faites préchauffer
votre four vide.
Utilisez le deuxième niveau de la gril‐
le.
(°C) (min)
Pierogi 180 - 200 15 - 25
10.11 Gril
Avant la cuisson, faites préchauffer votre four
vide.
Ne faites griller que des morceaux plats de
viande ou de poisson.
Placez un plat au premier niveau pour
récupérer les graisses.
GRIL
Utilisez la fonction : Gril
(°C) (min)
1re face
(min)
2e face
Rôti de bœuf 210 - 230 30 - 40 30 - 40 2
Filet de bœuf 230 20 - 30 20 - 30 3
Longe de porc 210 - 230 30 - 40 30 - 40 2
Longe de veau 210 - 230 30 - 40 30 - 40 2
Selle d’agneau 210 - 230 25 - 35 20 - 25 3
Poisson entier, 0,5 kg
- 1 kg
210 - 230 15 - 30 15 - 30 3 / 4
76 FRANÇAIS
10.12 Plats surgelés
DÉCONGÉLATION
Utilisez la fonction : Chaleur tournante.
(°C) (min)
Pizza, surgelée 200 - 220 15 - 25 2
Pizza épaisse, surgelée 190 - 210 20 - 25 2
Pizza, fraîche 210 - 230 13 - 25 2
Bouchées de pizza, surgelées 180 - 200 15 - 30 2
Frites, fines 200 - 220 20 - 30 3
Frites, épaisses 200 - 220 25 - 35 3
Quartiers / Croquettes 220 - 230 20 - 35 3
Röstis 210 - 230 20 - 30 3
Lasagne / Cannellonis, frais 170 - 190 35 - 45 2
Lasagne / Cannellonis, surgelés 160 - 180 40 - 60 2
Fromage cuit au four 170 - 190 20 - 30 3
Ailes de poulet 190 - 210 20 - 30 2
10.13 Décongélation
Retirez l'emballage des aliments puis placez-
les dans une assiette.
Ne couvrez pas les aliments car cela peut
rallonger le temps de décongélation.
Pour les grosses quantités d'aliments, placez
une assiette vide retournée au fond de la
cavité. Placez les aliments dans un plat
creux, et posez le tout sur l'assiette retournée
dans le four. Retirez les supports de grille si
nécessaire.
Utilisez le premier niveau de la grille.
(kg)
(min)
Temps de décon‐
gélation
(min)
Temps de décon‐
gélation supplé‐
mentaire
Poulet 1 100 - 140 20 - 30 Retournez à la moitié du
temps.
FRANÇAIS 77
(kg)
(min)
Temps de décon‐
gélation
(min)
Temps de décon‐
gélation supplé‐
mentaire
Viande 1 100 - 140 20 - 30 Retournez à la moitié du
temps.
Truite 0,15 25 - 35 10 - 15 -
Fraises 0,3 30 - 40 10 - 20 -
Beurre 0,25 30 - 40 10 - 15 -
Crème 2 x 0,2 80 - 100 10 - 15 La crème fraîche peut
être battue même si elle
n'est pas complètement
décongelée.
Gâteau 1,4 60 60 -
10.14 Stérilisation
Utilisez la fonction Cuisson de sole.
Utilisez toujours des bocaux à stériliser de
dimensions identiques, disponibles dans le
commerce.
N'utilisez pas de bocaux à couvercles à
visser ou à baïonnette, ni de boîtes
métalliques.
Utilisez le premier niveau de la grille.
Ne mettez pas plus de six bocaux à
conserves d'un litre sur le plateau de
cuisson.
Remplissez les bocaux au même niveau et
enclenchez le système de fermeture.
Les bocaux ne doivent pas se toucher.
Mettez environ 1/2 litre d'eau dans le plateau
de cuisson pour humidifier le four.
Lorsque le liquide contenu dans les pots
commence à frémir (au bout d'environ 35 à
60 minutes pour des pots d'un litre), éteignez
le four ou réduisez la température à 100 °C
(reportez-vous au tableau).
Réglez la température sur 160 - 170 °C.
BAIES
(min)
Cuisson jusqu'à ce
que la préparation
commence à frémir
Fraises / Myrtilles / Fram‐
boises / Groseilles à ma‐
quereau mûres
35 - 45
FRUITS
À NOYAU (min)
Cuisson jus‐
qu'à ce que
la prépara‐
tion com‐
mence à fré‐
mir
(min)
Continuez la
cuisson à
100 °C
Pêches / Coings /
Prunes
35 - 45 10 - 15
78 FRANÇAIS
LÉ‐
GUMES (min)
Cuisson jus‐
qu'à ce que
la prépara‐
tion com‐
mence à fré‐
mir
(min)
Continuez la
cuisson à
100 °C
Carottes 50 - 60 5 - 10
Concombres 50 - 60 -
Cornichons mé‐
langés
50 - 60 5 - 10
Chou-rave / Pe‐
tits pois / Asper‐
ges
50 - 60 15 - 20
10.15 Déshydratation - Chaleur
tournante
Couvrez les plateaux avec du papier
sulfurisé ou du papier de cuisson.
Pour de meilleurs résultats, arrêtez le four à
mi-cuisson, ouvrez la porte et laissez-la
refroidir pendant une nuit pour terminer le
séchage.
Pour un plateau, utilisez le troisième niveau
de la grille.
Pour deux plateaux, utilisez les premier et
quatrième niveaux de la grille.
LÉGUMES
(°C) (h)
Haricots 60 - 70 6 - 8
Poivrons 60 - 70 5 à 6
Légumes pour soupe 60 - 70 5 à 6
Champignons 50 - 60 6 - 8
Herbes 40 - 50 2 à 3
Réglez la température sur 60 - 70 °C.
FRUITS
(h)
Prunes 8 à 10
Abricots 8 à 10
Tranches de pommes 6 - 8
Poires 6 à 9
10.16 Chaleur Tournante Humide - accessoires recommandés
Utilisez les moules et récipients foncés et non réfléchissants. Ils offrent une meilleure
absorption de la chaleur que les plats réfléchissants de couleur claire.
Plaque à pizza
Plat de cuisson
Ramequins
Moule pour fond de tarte
Sombre, non réfléchissant
Diamètre de 28 cm
Sombre, non réfléchissant
Diamètre de 26 cm
Céramique
8 cm de diamètre,
5 cm de hauteur
Sombre, non réfléchissant
Diamètre de 28 cm
10.17 Chaleur Tournante Humide
Pour de meilleurs résultats, suivez les
suggestions indiquées dans le tableau ci-
dessous.
FRANÇAIS 79

(°C) (min)
Petits pains sucrés,
(16 pièces)
Plateau de cuisson ou plat à
rôtir
190 3 45 - 55
Pizza, surgelée, 0,35
kg
grille métallique 190 2 45 - 50
Gâteau roulé Plateau de cuisson ou plat à
rôtir
180 2 45 - 55
Brownie Plateau de cuisson ou plat à
rôtir
180 2 55 - 60
Fond de tarte en gé‐
noise
moule à tarte sur une grille
métallique
180 2 40 - 50
Poisson poché, 0,3 kg Plateau de cuisson ou plat à
rôtir
180 3 25 - 35
Poisson entier, 0,2 kg Plateau de cuisson ou plat à
rôtir
180 3 25 - 35
Filet de poisson, 0,3
kg
plaque à pizza sur la grille
métallique
180 3 40 - 50
Viande pochée, 0,25
kg
Plateau de cuisson ou plat à
rôtir
190 3 40 - 50
Chachlyk, 0,5 kg Plateau de cuisson ou plat à
rôtir
190 3 35 - 45
Cookies, (16 pièces) Plateau de cuisson ou plat à
rôtir
160 2 40 - 50
Macarons, (24 pièces) Plateau de cuisson ou plat à
rôtir
150 2 35 - 45
Muffins, (12 pièces) Plateau de cuisson ou plat à
rôtir
160 2 35 - 45
Pâtisserie salée,
(20 pièces)
Plateau de cuisson ou plat à
rôtir
170 2 35 - 45
Biscuits à pâte brisée,
(20 pièces)
Plateau de cuisson ou plat à
rôtir
150 2 40 - 45
Tartelettes, (8 pièces) Plateau de cuisson ou plat à
rôtir
170 2 35 - 45
Légumes, pochés, 0,4
kg
Plateau de cuisson ou plat à
rôtir
180 3 45 - 55
Omelette végétarienne plaque à pizza sur la grille
métallique
190 3 40 - 50
10.18 Informations pour les
instituts de test
Tests conformes aux normes : EN 60350,
IEC 60350.
80 FRANÇAIS
CUISSON SUR UN SEUL NIVEAU. Cuisson dans des moules
(°C) (min)
Génoise allégée Chaleur tournante 140 - 150 35 - 50 2
Génoise allégée Chauffage Haut/ Bas 160 35 - 50 2
Tourte aux pommes, 2 mou‐
les Ø20 cm
Chaleur tournante 160 60 - 90 2
Tourte aux pommes, 2 mou‐
les Ø20 cm
Chauffage Haut/ Bas 180 70 - 90 1
CUISSON SUR UN SEUL NIVEAU. Biscuits/Gâteaux secs
Utilisez le troisième niveau de la grille.
(°C) (min)
Sablé / Lamelles de pâtisserie Chaleur tournante 140 25 - 40
Sablé / Lamelles de pâtisserie,
préchauffer le four à vide
Chauffage Haut/ Bas 160 20 - 30
Petits gâteaux, 20 par plateau,
préchauffer le four à vide
Chaleur tournante 150 20 - 35
Petits gâteaux, 20 par plateau,
préchauffer le four à vide
Chauffage Haut/ Bas 170 20 - 30
CUISSON SUR PLUSIEURS NIVEAUX. Biscuits/Gâteaux secs
(°C) (min)
Sablé / Lamelles de pâtisserie Chaleur tournante 140 25 - 45 1 / 4
Petits gâteaux, 20 par plateau,
préchauffer le four à vide
Chaleur tournante 150 23 - 40 1 / 4
Génoise allégée Chaleur tournante 160 35 - 50 1 / 4
FRANÇAIS 81
GRIL
Préchauffez toujours le four à vide pendant 5 minutes.
Réglez le gril à la température maximale.
(min)
Toasts Gril 1 - 3 5
Steak de bœuf, tourner à mi-cuis‐
son
Gril 24 - 30 4
11. ENTRETIEN ET NETTOYAGE
AVERTISSEMENT!
Reportez-vous aux chapitres
concernant la sécurité.
11.1 Remarques concernant l'entretien
Agents nettoy‐
ants
Nettoyez la façade du four avec un chiffon doux, de l’eau tiède et un détergent doux.
Utilisez une solution de nettoyage pour nettoyer les surfaces métalliques.
Nettoyez les taches avec un détergent doux.
Utilisation quoti‐
dienne
Nettoyez la cavité après chaque utilisation. L’accumulation de graisse ou d’autres résidus
peut provoquer un incendie.
Ne conservez pas les aliments dans le four pendant plus de 20 minutes. Sécher la cavité
avec un chiffon doux après chaque utilisation.
Accessoires
Après chaque utilisation, lavez tous les accessoires et séchez-les. Utilisez un chiffon doux
avec de l’eau tiède et un détergent doux. Ne lavez pas les accessoires au lave-vaisselle.
Ne nettoyez pas les accessoires antiadhésifs avec un produit nettoyant abrasif ou des objets
tranchants.
82 FRANÇAIS
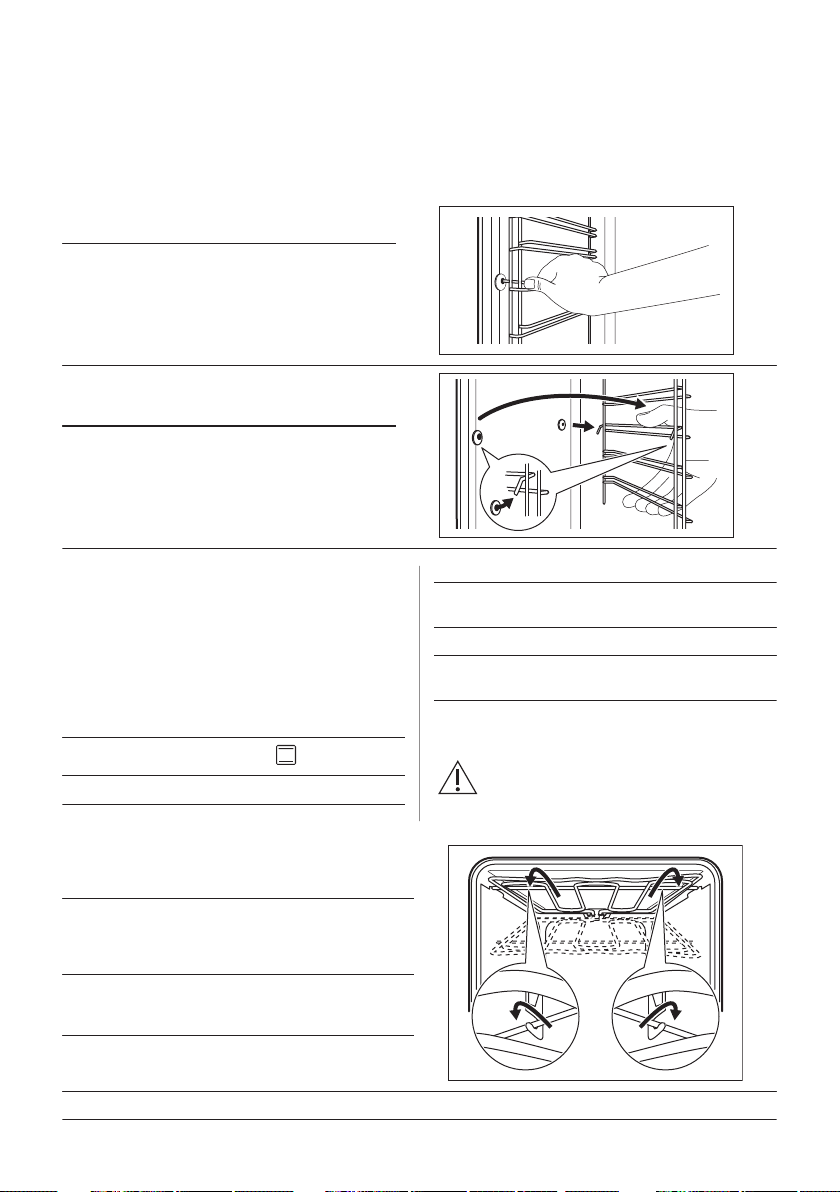
11.2 Comment enlever : Supports
de grille
Retirez les supports de grille pour nettoyer le
four.
Étape 1 Éteignez le four et attendez qu’il soit
froid.
Étape 2 Écartez l'avant du support de grille de
la paroi latérale.
Étape 3 Écartez l'arrière du support de grille
de la paroi latérale et retirez le sup‐
port.
2
1
Étape 4 Réinstallez les supports de grille en
répétant cette procédure dans l'ordre
inverse.
11.3 Comment utiliser : Nettoyage
Aqua Clean
Ce processus de nettoyage utilise l'humidité
pour retirer la graisse et les particules
alimentaires restant dans le four.
Étape 1 Versez de l’eau dans le bac de la cavi‐
té : 300 ml.
Étape 2
Réglez la fonction : .
Étape 3 Réglez la température sur 90 °C.
Étape 4 Laissez le four fonctionner pendant
30 minutes.
Étape 5 Éteignez le four.
Étape 6 Attendez que le four ait refroidi. Séchez
la cavité avec un chiffon doux.
11.4 Comment enlever : Gril
AVERTISSEMENT!
Risque de brûlure !
Étape 1 Éteignez le four et attendez qu’il soit
froid pour le nettoyer.
Retirez les supports de grille.
Étape 2 Saisissez les coins de la grille Tirez-la
vers l'avant en surmontant la pression du
ressort et sortez-la des deux supports.
Le gril se replie.
Étape 3 Nettoyez la voûte du four avec de l'eau
chaude, un chiffon doux et un détergent
doux. Laissez-la sécher.
Étape 4 Installez le gril selon la même procédure,
mais dans l'ordre inverse.
Étape 5 Installez les supports de grille.
FRANÇAIS 83

11.5 Comment démonter et
installer : Porte
Vous pouvez retirer la porte ainsi que les
panneaux de verre intérieurs pour les
nettoyer. Le nombre de vitres diffère selon
les modèles.
AVERTISSEMENT!
La porte est lourde.
ATTENTION!
Manipulez soigneusement la
vitre, en particulier autour des
bords du panneau avant Le
verre peut se briser.
Étape 1 Ouvrez entièrement la porte.
A
A
Étape 2 Soulevez et appuyez sur les leviers
de blocage (A) sur les deux char‐
nières de la porte.
Étape 3 Fermez la porte du four à la première position (à un angle d'environ 70°). Tenez la porte des deux
côtés et retirez-la du four en la soulevant. Posez la porte, face extérieure vers le bas, sur un linge
doux posé sur une surface stable.
Étape 4 Tenez la garniture de porte (B) sur
le bord supérieur de la porte des
deux côtés et poussez vers l'inté‐
rieur pour libérer le joint du clip.
1
2
B
Étape 5 Retirez le cache de la porte en le ti‐
rant vers l'avant.
Étape 6 Saisissez les panneaux de verre de
la porte par leur bord supérieur un
par un et dégagez-les du guide.
Étape 7 Nettoyez la vitre à l'eau savonneu‐
se. Essuyez soigneusement la vitre.
Ne passez pas les panneaux en
verre au lave-vaisselle.
Étape 8 Après le nettoyage, effectuez les
étapes ci-dessus dans le sens in‐
verse.
Étape 9 Installez d'abord le plus petit des panneaux, puis le plus grand, et terminez par la porte.
Assurez-vous que les panneaux en verre sont insérés dans la bonne position, car la surface de la
porte pourrait surchauffer.
11.6 Comment remplacer :
Éclairage
AVERTISSEMENT!
Risque d'électrocution.
L'éclairage peut être chaud.
84 FRANÇAIS
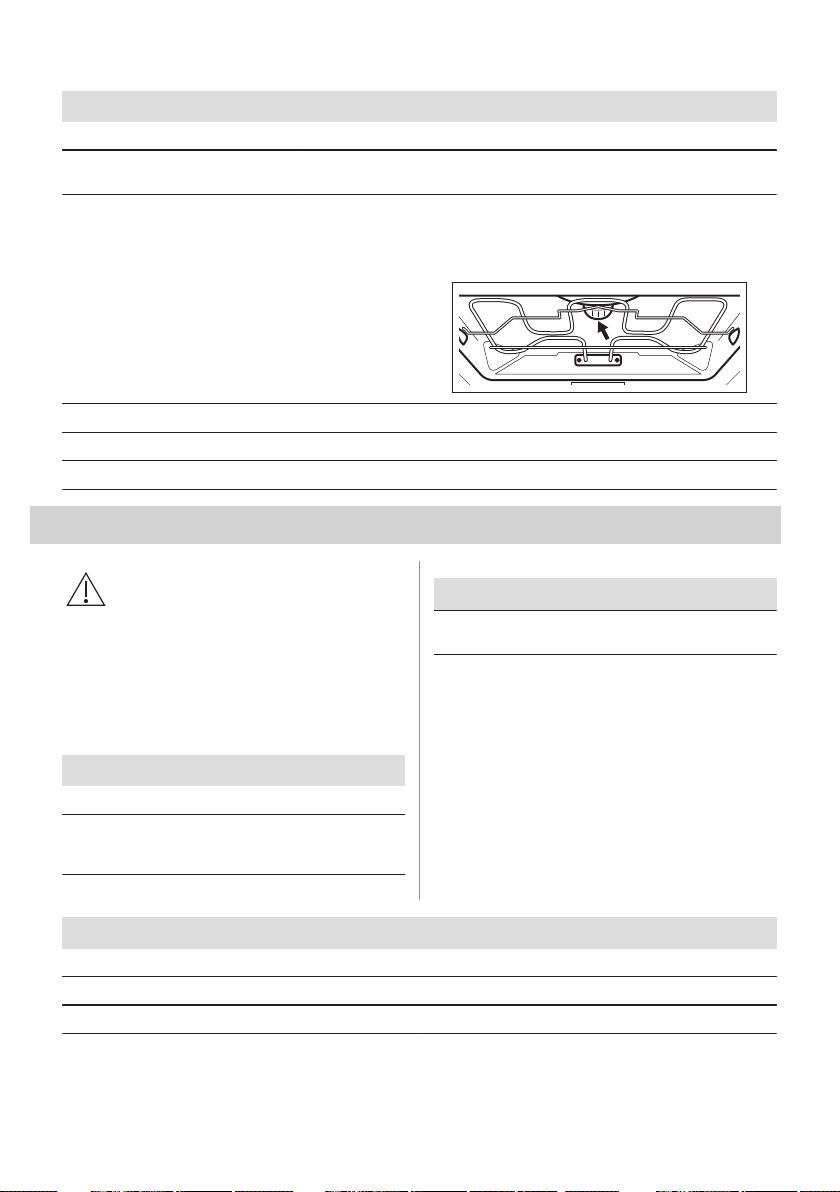
Avant de remplacer l'éclairage :
Étape 1 Étape 2 Étape 3
Éteignez le four. Attendez que le
four ait refroidi.
Débranchez le four de l'alimentation
secteur.
Placez un chiffon au fond de la cavi‐
té.
Lampe supérieure
Étape 1 Tournez le diffuseur en verre pour le reti‐
rer.
Étape 2 Nettoyez le diffuseur en verre.
Étape 3 Remplacez l'éclairage par une ampoule adaptée résistant à une température de 300 °C.
Étape 4 Remettez en place le diffuseur en verre.
12. DÉPANNAGE
AVERTISSEMENT!
Reportez-vous aux chapitres
concernant la sécurité.
12.1 Que faire si…
Dans tous les cas ne figurant pas dans ce
tableau, veuillez contacter un service après-
vente agréé.
Problème Vérifiez si...
Le four ne chauffe pas. Le fusible a disjoncté.
L'affichage indique
« 12.00 ».
Une coupure de courant
s'est produite. Pour régler
l'heure.
Problème Vérifiez si...
L'éclairage ne fonctionne
pas.
L’ampoule est grillée.
12.2 Données de maintenance
Si vous ne trouvez pas de solution au
problème, veuillez contacter votre revendeur
ou un service après-vente agréé.
Les informations à fournir au service après-
vente figurent sur la plaque signalétique. La
plaque signalétique se trouve sur
l'encadrement avant de la cavité du four. Ne
retirez pas la plaque signalétique de la cavité
du four.
Nous vous recommandons de noter ces informations ici :
Modèle (MOD.) .........................................
Référence du produit (PNC) .........................................
Numéro de série (S.N.) .........................................
FRANÇAIS 85
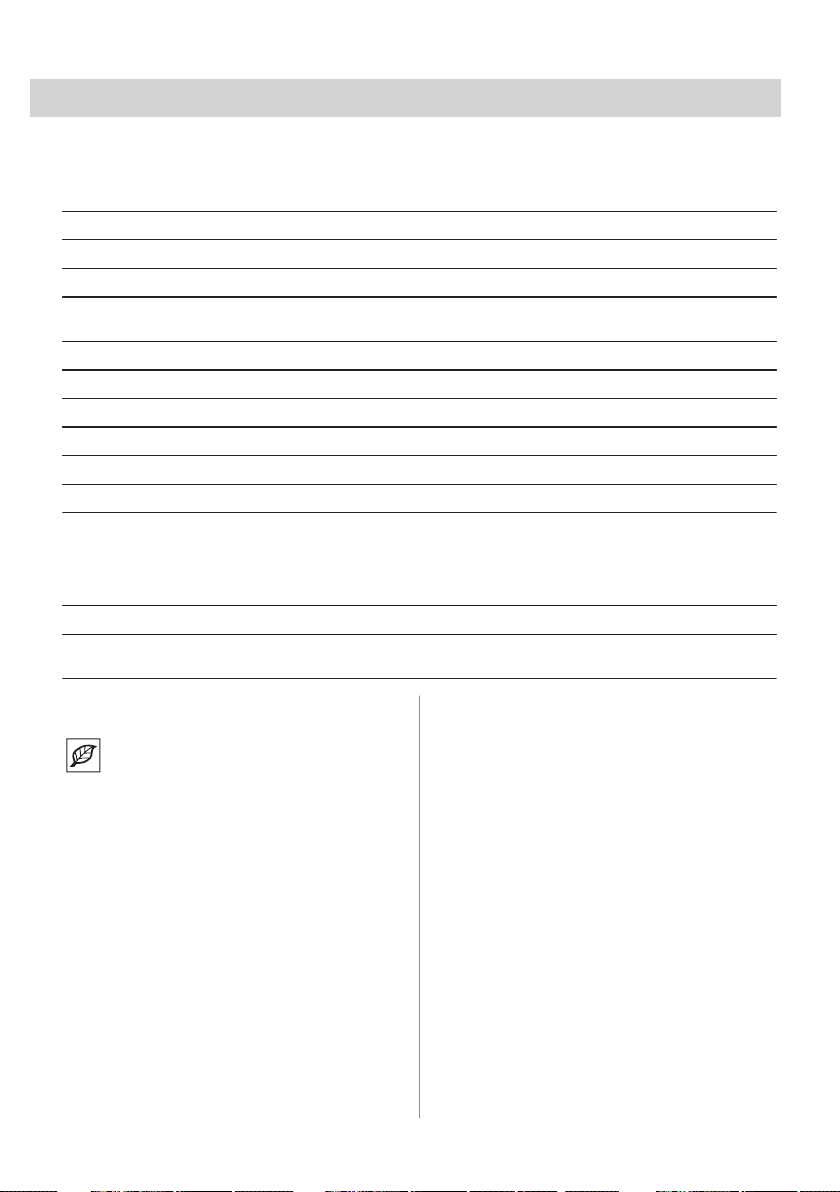
13. RENDEMENT ÉNERGÉTIQUE
13.1 Informations produit et Fiche d’informations produit*
Nom du fournisseur AEG
Identification du modèle BEB331010M 944188242, 944188459
Index d'efficacité énergétique 95.3
Classe d’efficacité énergétique A
Consommation d'énergie avec charge standard et mode tradition‐
nel
0.99 kWh/cycle
Consommation d'énergie avec charge standard et mode air pulsé 0.81 kWh/cycle
Nombre de cavités 1
Source de chaleur Électricité
Volume 71 l
Type de four Four encastrable
Masse 31.5 kg
* Pour l’Union européenne conformément aux Règlements UE 65/2014 et 66/2014.
Pour la République de Biélorussie conformément à STB 2478-2017, Annexe G ; STB 2477-2017, Annexes A et
B.
Pour l’Ukraine conformément à 568/32020.
La classe d’efficacité énergétique n’est pas applicable pour la Russie.
EN 60350-1 - Appareils de cuisson domestiques électriques - Partie 1 : Plages, fours, fours à vapeur et grils -
Méthodes de mesure des performances.
13.2 Économie d'énergie
Ce four est doté de
caractéristiques qui vous
permettent d'économiser de
l'énergie lors de votre cuisine au
quotidien.
Veillez à ce que la porte du four soit fermée
lorsqu'il fonctionne. N'ouvrez pas la porte du
four trop souvent pendant la cuisson. Gardez
le joint de porte propre et veillez à ce qu'il
soit bien fixé en place.
Utilisez des plats en métal pour accroître les
économies d'énergie.
Si possible, ne préchauffez pas le four avant
la cuisson.
Lorsque vous cuisez plusieurs plats les uns
après les autres, veillez à ne pas trop
espacer les cuissons.
Cuisson avec ventilation
Si possible, utilisez les fonctions de cuisson
avec la ventilation pour économiser de
l'énergie.
Chaleur résiduelle
Si la cuisson doit durer plus de 30 minutes,
réduisez la température du four au minimum
3 à 10 minutes avant la fin de la cuisson. La
chaleur résiduelle à l’intérieur du four
poursuivra la cuisson.
Utilisez la chaleur résiduelle pour réchauffer
d'autres plats.
Maintien des aliments au chaud
Sélectionnez la température la plus basse
possible pour utiliser la chaleur résiduelle et
maintenir le repas au chaud.
Chaleur Tournante Humide
Fonction conçue pour économiser de
l'énergie en cours de cuisson.
86 FRANÇAIS

14. EN MATIÈRE DE PROTECTION DE L'ENVIRONNEMENT
Recyclez les matériaux portant le symbole
. Déposez les emballages dans les
conteneurs prévus à cet effet. Contribuez à
la protection de l'environnement et à votre
sécurité, recyclez vos produits électriques et
électroniques. Ne jetez pas les appareils
portant le symbole avec les ordures
ménagères. Emmenez un tel produit dans
votre centre local de recyclage ou contactez
vos services municipaux.
FRANÇAIS 87

PER RISULTATI PERFETTI
Grazie per aver scelto di acquistare questo prodotto AEG. Lo abbiamo creato per fornirvi
prestazioni impeccabili per molti anni, grazie a tecnologie innovative che vi
semplificheranno la vita - funzioni che non troverete sulle normali apparecchiature. Vi
invitiamo di dedicare qualche minuto alla lettura per sapere come trarre il massimo dal
vostro elettrodomestico.
Visitate il nostro sito web per:
Ricevere consigli, scaricare i nostri opuscoli, eliminare eventuali anomalie, ottenere
informazioni sull'assistenza e la riparazione:
www.aeg.com/support
Per registrare il vostro prodotto e ricevere un servizio migliore:
www.registeraeg.com
Acquistare accessori, materiali di consumo e ricambi originali per la vostra
apparecchiatura:
www.aeg.com/shop
SERVIZIO CLIENTI E MANUTENZIONE
Consigliamo sempre l’impiego di ricambi originali.
Quando si contatta l'Assistenza, accertarsi di disporre dei seguenti dati: Modello, PNC,
numero di serie.
Le informazioni si trovano sulla targhetta dei dati.
Avvertenza / Attenzione - Importanti Informazioni di Sicurezza.
Informazioni e consigli generali
Informazioni ambientali
Con riserva di modifiche.
INDICE
1. INFORMAZIONI DI SICUREZZA.................................................................................. 88
2. ISTRUZIONI DI SICUREZZA........................................................................................90
3. DESCRIZIONE DEL PRODOTTO................................................................................ 93
4. PANNELLO DEI COMANDI.......................................................................................... 93
5. PRIMA DI UTILIZZARE L'ELETTRODOMESTICO.......................................................94
6. UTILIZZO QUOTIDIANO...............................................................................................95
7. FUNZIONI DEL TIMER................................................................................................. 96
8. UTILIZZO DEGLI ACCESSORI.................................................................................... 97
9. FUNZIONI AGGIUNTIVE.............................................................................................. 98
10. CONSIGLI E SUGGERIMENTI UTILI......................................................................... 98
11. PULIZIA E CURA...................................................................................................... 111
12. RISOLUZIONE DEI PROBLEMI............................................................................... 114
13. EFFICIENZA ENERGETICA.....................................................................................115
1. INFORMAZIONI DI SICUREZZA
Leggere attentamente le istruzioni fornite prima di installare e
utilizzare l'apparecchiatura. I produttori non sono responsabili
88 ITALIANO

di eventuali lesioni o danni derivanti da un'installazione o un
uso scorretti. Conservare sempre le istruzioni in un luogo
sicuro e accessibile per poterle consultare in futuro.
1.1 Sicurezza di bambini e persone vulnerabili
• Questa apparecchiatura può essere usata da bambini a
partire dagli 8 anni e da adulti con limitate capacità fisiche,
sensoriali o mentali o con scarsa esperienza o conoscenza
sull'uso dell'apparecchiatura, solamente se sorvegliati o se
istruiti relativamente all'uso dell'apparecchiatura e se hanno
compreso i rischi coinvolti. I bambini che hanno meno di 8
anni e le persone con disabilità diffuse e complesse vanno
tenuti lontani dall’apparecchiatura a meno che non vi sia
una supervisione continua.
• Non lasciare che i bambini giochino con l'apparecchiatura.
• Tenere gli imballaggi lontano dai bambini e smaltirli in modo
adeguato.
• AVVERTENZA: Tenere i bambini e gli animali domestici
lontano dall'apparecchiatura durante il funzionamento o
raffreddamento. Alcune parti accessibili diventano calde
durante l’uso.
• Se l'apparecchiatura ha un dispositivo di sicurezza per i
bambini sarà opportuno attivarlo.
• I bambini non devono eseguire interventi di pulizia e
manutenzione sull'apparecchiatura senza essere
supervisionati.
1.2 Avvertenze di sicurezza generali
• L'installazione dell'apparecchiatura e la sostituzione dei cavi
deve essere svolta unicamente da personale qualificato.
• AVVERTENZA: L'apparecchiatura e le parti accessibili si
riscaldano molto durante l'uso. Abbiate cura di non toccare
gli elementi riscaldanti.
• Servirsi sempre degli appositi guanti da forno per estrarre o
inserire accessori o pentole resistenti al calore.
• Prima di qualsiasi intervento di manutenzione, scollegare
l'apparecchiatura dalla presa di corrente.
ITALIANO 89

• AVVERTENZA: Assicurarsi che l’apparecchiatura sia
spenta prima di sostituire la lampadina per evitare la
possibilità di scosse elettriche.
• Non usare l'apparecchiatura prima di installarla nella
struttura a incasso.
• Non usare una pulitrice a vapore per pulire
l'apparecchiatura.
• Non utilizzare detergenti abrasivi o raschietti di metallo per
pulire il vetro della porta per non rigare la superficie e
causare la rottura del vetro.
• Se il cavo di alimentazione è danneggiato, deve essere
sostituito dal produttore, da un tecnico autorizzato o da una
persona qualificata per evitare situazioni di pericolo.
• Per rimuovere i supporti ripiano, sfilare innanzitutto la parte
anteriore del supporto, quindi quella posteriore, dalle pareti
laterali. Installare i supporti griglia seguendo al contrario la
procedura indicata.
2. ISTRUZIONI DI SICUREZZA
2.1 Installazione
AVVERTENZA!
L’installazione
dell'apparecchiatura deve essere
eseguita da personale
qualificato.
• Rimuovere tutti i materiali di imballaggio.
• Non installare o utilizzare
l'apparecchiatura se è danneggiata.
• Attenersi alle istruzioni fornite insieme
all'apparecchiatura.
• Prestare sempre attenzione in fase di
spostamento dell'apparecchiatura, dato
che è pesante. Usare sempre i guanti di
sicurezza e le calzature adeguate.
• Non tirare l’apparecchiatura per la
maniglia.
• Installare l'apparecchiatura in un luogo
sicuro e idoneo che soddisfi i requisiti di
installazione.
• È necessario rispettare la distanza
minima dalle altre apparecchiature.
• Prima di montare l'apparecchiatura
controllare che la porta del forno si apra
senza limitazioni.
• L'apparecchiatura è dotata di un sistema
elettrico di raffreddamento. Questo deve
essere alimentato elettricamente.
• La stabilità del mobile da incasso deve
essere conforme alla norma DIN 68930.
Altezza minima del mobi‐
letto (mobiletto sotto all'al‐
tezza minima del piano di
lavoro)
578 (600) mm
Larghezza del mobiletto 560 mm
Profondità del moibiletto 550 (550) mm
Altezza della parte anterio‐
re dell'apparecchiatura
594 mm
Altezza della parte poste‐
riore dell'apparecchiatura
576 mm
Larghezza della parte ante‐
riore dell'apparecchiatura
595 mm
90 ITALIANO
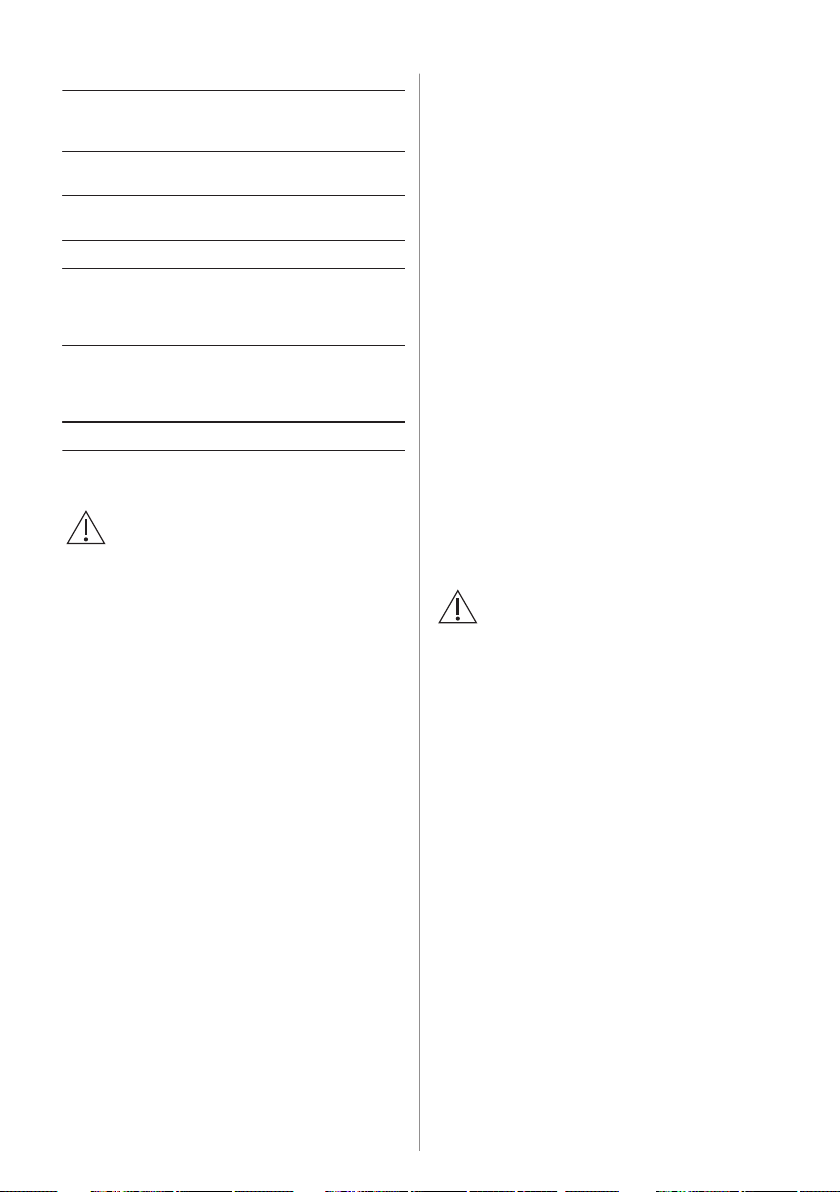
Larghezza della parte po‐
steriore dell'apparecchiatu‐
ra
559 mm
Profondità dell'apparec‐
chiatura
567 mm
Profondità di incasso del‐
l'apparecchiatura
546 mm
Profondità con oblò aperto 1027 mm
Dimensioni minime dell'a‐
pertura di ventilazione.
Apertura collocata sul lato
posteriore inferiore
560 x 20 mm
Lunghezza del cavo di ali‐
mentazione. Il cavo è collo‐
cato nell'angolo destro del
lato posteriore.
1500 mm
Viti di montaggio 4 x 25 mm
2.2 Collegamento elettrico
AVVERTENZA!
Rischio di incendio e scossa
elettrica.
• Tutti i collegamenti elettrici devono essere
realizzati da un elettricista qualificato.
• L'apparecchiatura deve disporre di una
messa a terra.
• Verificare che i parametri sulla targhetta
siano compatibili con le indicazioni
elettriche dell'alimentazione.
• Utilizzare sempre una presa elettrica con
contatto di protezione correttamente
installata.
• Non utilizzare prese multiple e prolunghe.
• Accertarsi di non danneggiare la spina e il
cavo. Qualora il cavo elettrico debba
essere sostituito, l’intervento dovrà essere
effettuato dal nostro Centro di Assistenza
autorizzato.
• Evitare che i cavi entrino a contatto o si
trovino vicino alla porta
dell'apparecchiatura o sulla nicchia sotto
all'apparecchiatura, in particolare quando
il dispositivo è in funzione o la porta è
calda.
• I dispositivi di protezione da scosse
elettriche devono essere fissati in modo
tale da non poter essere disattivati senza
l'uso di attrezzi.
• Inserire la spina di alimentazione nella
presa solo al termine dell'installazione.
Verificare che la spina di alimentazione
rimanga accessibile dopo l'installazione.
• Nel caso in cui la spina di corrente sia
allentata, non collegarla alla presa.
• Non tirare il cavo di alimentazione per
scollegare l’apparecchiatura. Tirare
sempre dalla spina.
• Servirsi unicamente di dispositivi di
isolamento adeguati: interruttori
automatici, fusibili (quelli a tappo devono
essere rimossi dal portafusibile),
sganciatori per correnti di guasto a terra e
relè.
• L'impianto elettrico deve essere dotato di
un dispositivo di isolamento che consenta
di scollegare l'apparecchiatura dalla presa
di corrente a tutti i poli. Il dispositivo di
isolamento deve avere una larghezza
dell'apertura di contatto non inferiore ai 3
mm.
• La dotazione standard
dell'apparecchiatura al momento della
fornitura prevede una spina e un cavo di
rete.
2.3 Utilizzo:
AVVERTENZA!
Rischio di lesioni, ustioni, scosse
elettriche o esplosioni.
• Questa apparecchiatura è stata prevista
unicamente per un uso domestico.
• Non modificare le specifiche tecniche
dell'apparecchiatura.
• Accertarsi che le fessure di ventilazione
non siano ostruite.
• Non lasciare mai l'apparecchiatura
incustodita durante il funzionamento.
• Spegnere l'apparecchiatura dopo ogni
utilizzo.
• Prestare attenzione in fase di apertura
della porta dell'apparecchiatura quando
quest'ultima è in funzione. Può fuoriuscire
aria calda.
• Non mettere in funzione l'apparecchiatura
con le mani umide o quando c'è un
contatto con l'acqua.
• Non esercitare pressione sulla porta
aperta.
• Non utilizzare l'apparecchiatura come
superficie di lavoro o come piano di
appoggio.
• Aprire la porta dell'apparecchiatura con
cautela. L'uso di ingredienti contenenti
ITALIANO 91

alcol può causare una miscela di alcol e
aria.
• Evitare la presenza di scintille o fiamme
aperte vicino all'apparecchiatura quando
si apre la porta.
• Non appoggiare o tenere liquidi o
materiali infiammabili, né oggetti
facilmente incendiabili
sull'apparecchiatura, al suo interno o nelle
immediate vicinanze.
AVVERTENZA!
Vi è il rischio di danneggiare
l'apparecchiatura.
• Per evitare danni o lo scolorimento dello
smalto:
– Non mettere pentole resistenti al
calore o altri oggetti direttamente sulla
superficie inferiore
dell'apparecchiatura.
– Non appoggiare la pellicola di
alluminio direttamente sulla parte
bassa della cavità
dell'apparecchiatura.
– Non mettere direttamente acqua
all'interno dell'apparecchiatura calda.
– Non tenere piatti umidi e cibo
all'interno dell'apparecchiatura dopo
aver terminato la fase di cottura.
– Prestare attenzione quando si tolgono
o inseriscono gli accessori.
• Lo scolorimento dello smalto o dell'acciaio
inox non influisce sulle prestazioni
dell'apparecchiatura.
• Per le torte molto umide, usare una
leccarda. I succhi di frutta provocano
macchie che possono essere permanenti.
• L'apparecchiatura è destinata solo alla
cottura. Non deve essere utilizzata per
altri scopi, come per esempio il
riscaldamento di un ambiente.
• La cottura deve sempre essere eseguita
con la porta del forno chiusa.
• Se l'apparecchiatura si trova dietro a un
pannello anteriore (ad es. una porta),
assicurarsi che questo non sia mai chiuso
quando l'apparecchiatura è in funzione.
Calore e umidità possono accumularsi sul
retro di un pannello chiuso causando
danni all'apparecchiatura,
all’alloggiamento o al pavimento. Dopo
l’uso non chiudere il pannello dell'armadio
finché l'apparecchiatura non si è
completamente raffreddata.
2.4 Pulizia e cura
AVVERTENZA!
Vi è il rischio di lesioni, incendio
o danni all'apparecchiatura.
• Prima di eseguire qualunque intervento di
manutenzione, spegnere
l'apparecchiatura ed estrarre la spina
dalla presa.
• Controllare che l'apparecchiatura sia
fredda. Vi è il rischio che i pannelli in vetro
si rompano.
• Sostituire immediatamente i pannelli in
vetro della porta nel caso in cui siano
danneggiati. Contattare il Centro
Assistenza Autorizzato.
• Prestare attenzione quando si rimuove la
porta dall'apparecchio. La porta è
pesante!
• Pulire regolarmente l'apparecchiatura per
evitare il deterioramento dei materiali che
compongono la superficie.
• Pulire l'apparecchiatura con un panno
inumidito e morbido. Utilizzare solo
detergenti neutri. Non usare prodotti
abrasivi, spugnette abrasive, solventi od
oggetti metallici.
• Se si utilizza uno spray per il forno,
seguire attentamente le istruzioni di
sicurezza sulla confezione.
2.5 Illuminazione interna
AVVERTENZA!
Pericolo di scosse elettriche.
• Per quanto riguarda la lampada o le
lampade all'interno di questo prodotto e le
lampade di ricambio vendute
separatamente: Queste lampade sono
destinate a resistere a condizioni fisiche
estreme negli elettrodomestici, come
temperatura, vibrazioni, umidità, o sono
destinate a segnalare informazioni sullo
stato operativo dell'apparecchio. Non
sono destinate ad essere utilizzate in altre
applicazioni e non sono adatte per
l'illuminazione di ambienti domestici.
• Servirsi unicamente di lampadine con le
stesse specifiche tecniche .
2.6 Assistenza tecnica
• Per riparare l'apparecchiatura contattare
un Centro di Assistenza Autorizzato.
92 ITALIANO
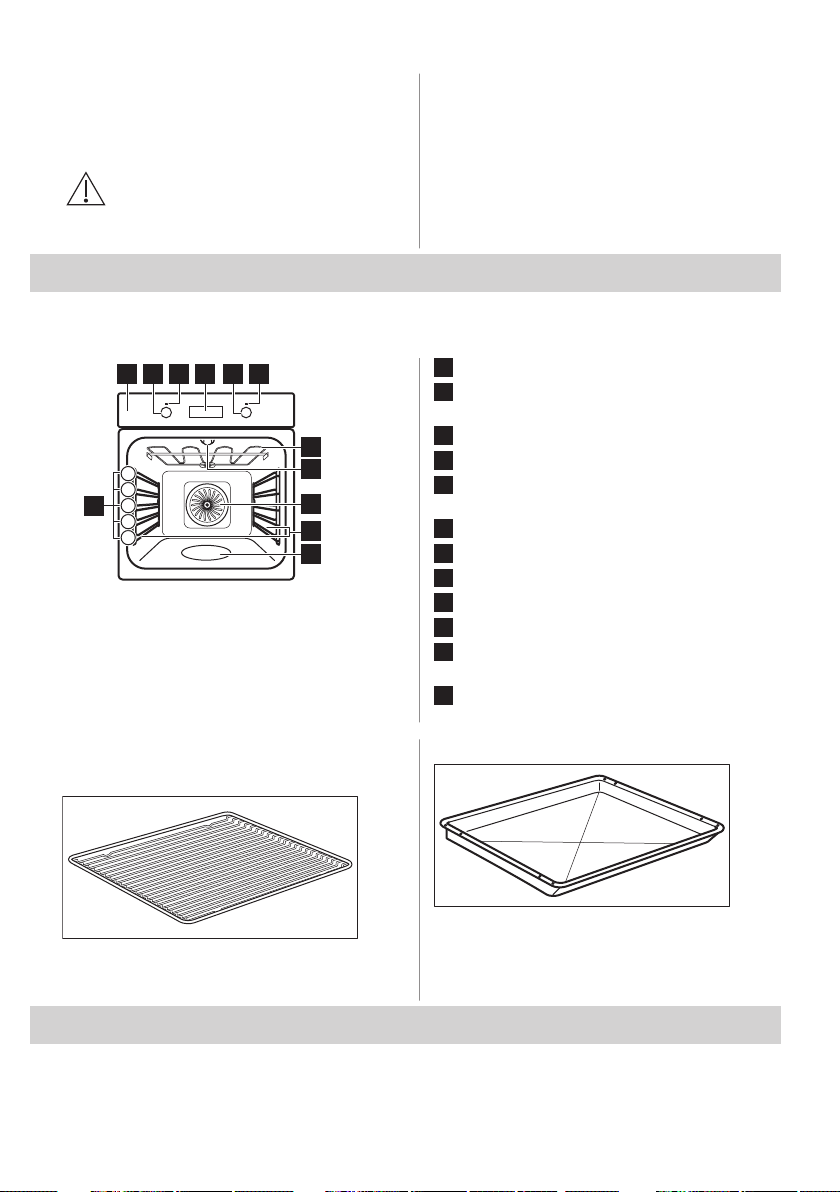
• Utilizzare esclusivamente ricambi
originali.
2.7 Smaltimento
AVVERTENZA!
Rischio di lesioni o
soffocamento.
• Staccare la spina dall'alimentazione
elettrica.
• Tagliare il cavo elettrico
dell'apparecchiatura e smaltirlo.
• Togliere il blocco porta per evitare che
bambini o animali restino intrappolati
nell'apparecchiatura.
3. DESCRIZIONE DEL PRODOTTO
3.1 Panoramica
7
9
8
41 2 3 5 6
1
2
3
4
5
12
10
11
1
Pannello di controllo
2
Manopola di regolazione delle funzioni di
riscaldamento
3
Lampadina/simbolo alimentazione
4
Display
5
Manopola di regolazione (per la
temperatura)
6
Indicatore della temperatura / simbolo
7
Resistenza
8
Lampadina
9
Ventilatore
10
Supporto ripiano, smontabile
11
Incavo cavità - Contenitore della pulizia
dell'acqua
12
Posizioni dei ripiani
3.2 Accessori
Griglia
Per pentole, stampi per dolci, arrosti.
Teglia universale
Per la cottura di torte e biscotti. Per cuocere
al forno, arrostire o come recipiente per
raccogliere i grassi.
4. PANNELLO DEI COMANDI
4.1 Manopola incassabile
Per utilizzare l'apparecchiatura, premere la
manopola. La manopola fuoriesce.
ITALIANO 93
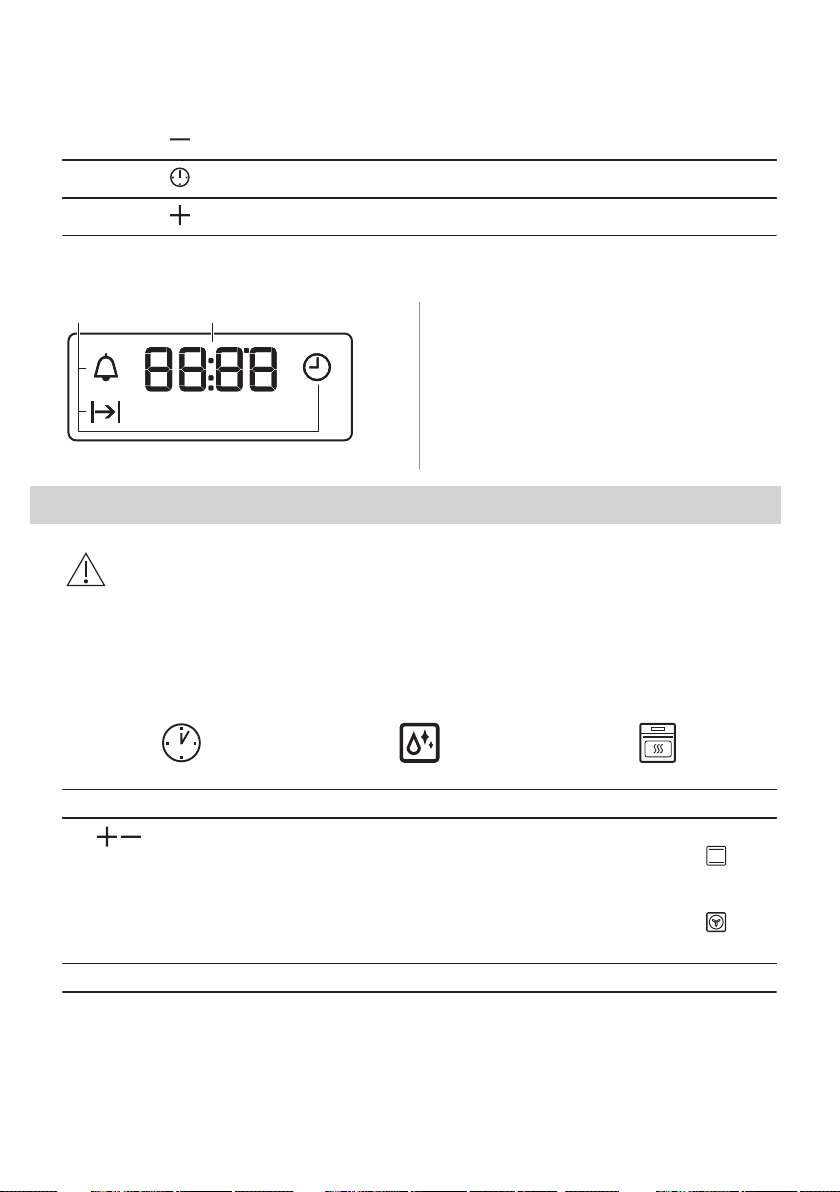
4.2 Campo sensore / Pulsante
Per impostare l'ora.
Per impostare una funzione orologio.
Per impostare l'ora.
4.3 Display
A B
A. Funzioni dell’orologio
B. Timer
5. PRIMA DI UTILIZZARE L'ELETTRODOMESTICO
AVVERTENZA!
Fare riferimento ai capitoli sulla
sicurezza.
5.1 Prima di utilizzare l’apparecchiatura per la prima volta
Il forno può produrre un odore sgradevole e fumo in fase di preriscaldamento. Accertarsi che la
stanza sia ventilata.
Fase 1 Fase 2
Fase 3
Imposta l’orologio Pulire il forno Preriscaldare il forno vuoto
1. , - premere per imposta‐
re l’ora. Dopo 5 secondi circa,
la spia smette di lampeggiare e
l’orologio indica l’ora impostata.
1. Rimuovere gli accessori e i
supporti ripiano rimovibili dal
forno.
2. Pulire il forno e gli accessori
con un panno morbido imbevu‐
to di acqua tiepida e detergente
delicato.
1. Impostare la temperatura mas‐
sima per la funzione: .
Tempo: 1 ora
2. Impostare la temperatura mas‐
sima per la funzione: .
Tempo: 15 min.
Spegnere il forno e attendere che si raffreddi. Collocare gli accessori e i supporti ripiano rimovibili nel forno.
94 ITALIANO
6. UTILIZZO QUOTIDIANO
AVVERTENZA!
Fare riferimento ai capitoli sulla
sicurezza.
6.1 Come impostare: Funzione
cottura
Fase 1 Ruotare la manopola delle funzioni di
riscaldamento per selezionare una fun‐
zione di riscaldamento.
Fase 2 Ruotare la manopola di controllo per
selezionare la temperatura.
Fase 3 Al termine della cottura, ruotare le ma‐
nopole fino alla posizione off per spe‐
gnere il forno.
6.2 Funzioni cottura
Funzione cot‐
tura
Applicazione
Posizione di spen‐
to
Il forno è spento.
Luce forno
Per accendere la lampada.
Cottura ventilata
Per cuocere su un massimo di
tre ripiani contemporaneamente
e per asciugare gli alimenti.
Impostare la temperatura 20 -
40 °C inferiore a per Cottura
convenzionale .
Funzione Pizza
Per cuocere la pizza al forno.
Per abbrustolire in modo intensi‐
vo ed avere un fondo croccante.
Cottura convenzio‐
nale / Pulizia Con
Acqua
Per cuocere e arrostire alimenti
su una sola posizione della gri‐
glia.
Far riferimento al capitolo “Ma‐
nutenzione e pulizia” per ulterio‐
ri informazioni su: Aqua Clea‐
ning .
Funzione cot‐
tura
Applicazione
Resistenza inferio‐
re
Per cuocere torte dal fondo
croccante e conservare gli ali‐
menti.
Scongelamento
Per scongelare gli alimenti (ver‐
dure e frutta). Il tempo di sbrina‐
mento dipende dalla quantità e
dalle dimensioni degli alimenti
congelati.
Cottura Ecoventi‐
lata
Questa funzione è stata proget‐
tata per risparmiare energia du‐
rante la cottura. Quando si utiliz‐
za questa funzione, la tempera‐
tura nella cavità può differire
dalla temperatura impostata. La
potenza di riscaldamento può
essere ridotta. Per ulteriori infor‐
mazioni, fare riferimento al capi‐
tolo "Uso quotidiano", Note su:
Cottura Ecoventilata.
Grill
Per grigliare pezzi sottili e tosta‐
re il pane.
Turbo Grill
Per tostare grandi pezzi di carne
o pollame con le ossa in una po‐
sizione del ripiano. Per fare gra‐
tin e abbrustolire.
La lampada si potrebbe
spegnere automaticamente a
temperature inferiori a 60°C
durante alcune funzioni del
forno.
6.3 Note su: Cottura Ecoventilata
Questa funzione è stata usata per attenersi
alla classe energetica e ai requisiti di
ecodesign conformemente alla normativa EU
65/2014 e EU 66/2014. Test conformemente
alla norma EN 60350-1.
La porta del forno dovrebbe essere chiusa in
fase di cottura, di modo che la funzione non
venga interrotta. Ciò garantisce inoltre che il
forno funzioni con la più elevata efficienza
energetica possibile.
ITALIANO 95
Per istruzioni di cottura rimandiamo al
capitolo "Consigli e suggerimenti", Cottura
Ecoventilata. Per indicazioni generali
relativamente al risparmio energetico
rimandiamo al capitolo "Efficienza
energetica", Risparmio energetico.
7. FUNZIONI DEL TIMER
7.1 Funzioni dell’orologio
Funzione orologio Applicazione
Imposta ora
Permette di modificare o controllare l'ora.
Durata
Per impostare la durata di funzionamento del forno.
Contaminuti
Per impostare il conto alla rovescia. Questa funzione non ha effetto sull'u‐
so del forno. È possibile impostare questa funzione in qualsiasi momento,
anche quando il forno è spento.
7.2 Come impostare: Funzioni dell’orologio
Come sostituire: Imposta ora
- lampeggia quando si collega il forno all'alimentazione elettrica, quando c'è stato un blackout o quando il
timer non è impostato.
Fase 1
- premere ripetutamente. - inizia a lampeggiare.
Fase 2
, - premere per impostare l'ora.
Dopo 5 secondi circa, la spia smette di lampeggiare e l'orologio indica l'ora impostata.
- premere ripetutamente per cambiare l'ora del giorno. - inizia a lampeggiare.
Come impostare: Durata
Fase 1 Impostare una funzione del forno e la temperatura.
Fase 2
- premere ripetutamente. - inizia a lampeggiare.
Fase 3
, - premere per impostare la durata.
Il display mostra: .
- lampeggia al termine del tempo impostato. Il segnale suona e il forno si spegne.
Fase 4 Premete un tasto qualsiasi per disattivare il segnale.
Fase 5 Ruotare la manopola fino a portarla alla posizione di spegnimento.
Come impostare: Contaminuti
Fase 1
- premere ripetutamente. - inizia a lampeggiare.
96 ITALIANO
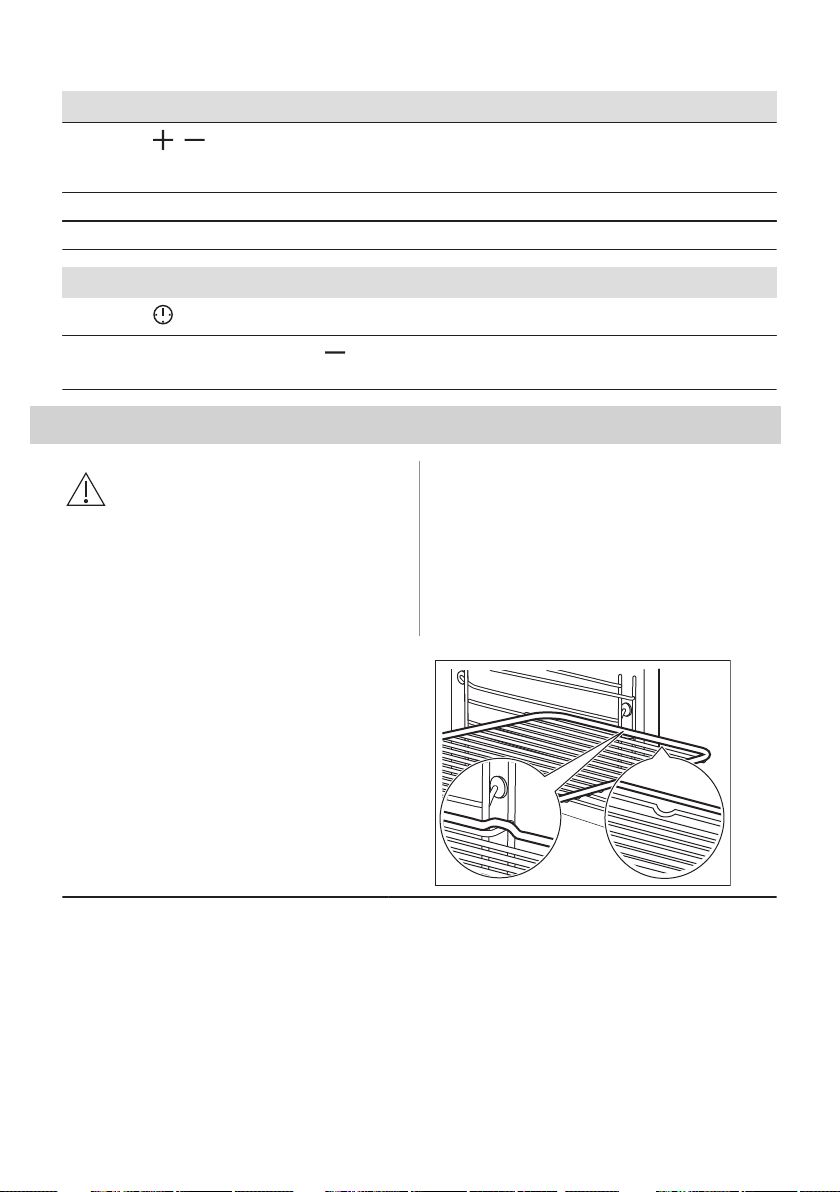
Come impostare: Contaminuti
Fase 2
, - premere per impostare l'ora.
La funzione si avvia automaticamente dopo 5 secondi.
Quando si conclude il tempo impostato viene emesso un segnale acustico.
Fase 3 Premete un tasto qualsiasi per disattivare il segnale.
Fase 4 Ruotare la manopola fino a portarla alla posizione di spegnimento.
Come annullare: Funzioni dell’orologio
Fase 1
- premere ripetutamente fino a quando il simbolo della funzione orologio inizia a lampeggiare.
Fase 2
Premere e tenere premuto: .
La funzione orologio si disattiva dopo pochi secondi.
8. UTILIZZO DEGLI ACCESSORI
AVVERTENZA!
Fare riferimento ai capitoli sulla
sicurezza.
8.1 Inserimento di accessori
Un piccolo rientro sulla parte superiore
aumenta il livello di sicurezza. Gli incavi
fungono anche da dispositivi
antiribaltamento. Il bordo alto intorno al
ripiano evita che le pentole scivolino dal
ripiano.
Griglia:
Spingere il ripiano fra le guide del supporto.
ITALIANO 97
Leccarda:
Spingere la lamiera tra le guide del supporto ripia‐
no.
Griglia, Leccarda:
Spingere il vassoio tra le guide del supporto ripia‐
no e il ripiano a filo sulle guide sovrastanti.
9. FUNZIONI AGGIUNTIVE
9.1 Ventola di raffreddamento
Quando il forno è in funzione, la ventola di
raffreddamento si accende in modo
automatico per tenere fresche le superfici del
forno. Dopo aver spento il forno, la ventola di
raffreddamento potrebbe continuare a
funzionare fino a che il forno non si è
raffreddato.
10. CONSIGLI E SUGGERIMENTI UTILI
Fare riferimento ai capitoli sulla
sicurezza.
10.1 Consigli di cottura
La temperatura ed i tempi di cottura specificati nelle tabella sono valori indicativi. Possono variare in base alle
ricette, alla qualità e alla quantità degli ingredienti utilizzati.
Il vostro nuovo forno può cuocere o arrostire in modo differente rispetto al forno posseduto in precedenza. Le
seguenti tabelle mostrano le impostazioni consigliate per temperatura, tempo di cottura e ripiano griglia per deter‐
minate tipologie di cibo.
Qualora non si trovino le impostazioni per una ricetta speciale, cercarne una simile.
10.2 Lato interno della porta
Nella parte interna del forno si trova:
• i numeri delle posizioni della griglia.
• Informazioni sulle funzioni forno, posizioni
della griglia e temperature consigliate per
alcune pietanze.
98 ITALIANO
10.3 Panificare
Per la prima cottura, usare la temperatura più
bassa.
È possibile estendere i tempi di cottura di 10
– 15 minuti se si cuociono torte su più di una
posizione di ripiano.
Torte e dolci a diverse altezze non si dorano
in modo equivalente. Non occorre modificare
l'impostazione di temperatura se si verifica
una doratura non identica. Le differenze si
livellano durante la cottura.
I vassoi nel forno possono distorcersi durante
la cottura. Quando si raffreddano
nuovamente, le distorsioni scompaiono.
10.4 Suggerimenti sulla cottura
Risultati di cottura Causa possibile Rimedio
Il fondo della torta non è cotto
a sufficienza.
La posizione del ripiano non è cor‐
retta.
Mettere la torta nel ripiano inferiore.
La torta si affloscia e diventa
inzuppata o striata.
La temperatura del forno è troppo
alta.
La prossima volta impostare la temperatu‐
ra del forno leggermente inferiore.
La temperatura del forno è troppo
alta e il tempo di cottura troppo cor‐
to.
La prossima volta impostare un tempo di
cottura più lungo e una temperatura del
forno inferiore.
La torta è troppo asciutta. La temperatura del forno è troppo
bassa.
La prossima volta impostare una tempera‐
tura del forno superiore.
Il tempo di cottura è troppo lungo. La prossima volta impostare un tempo di
cottura più breve.
La torta si cuoce in modo non
uniforme.
La temperatura del forno è troppo
alta e il tempo di cottura troppo cor‐
to.
La prossima volta impostare un tempo di
cottura più lungo e una temperatura del
forno inferiore.
La pastella della torta non è distri‐
buita in modo uniforme.
La prossima volta distribuire la pastella
della torta in modo uniforme nella tortiera.
La torta non è pronta nel tem‐
po di cottura specificato nella
ricetta.
La temperatura del forno è troppo
bassa.
La prossima volta impostare una tempera‐
tura del forno leggermente superiore.
10.5 Cottura su un solo livello ripiano
COT‐
TURA IN
STAMPI
(°C) (min)
Base per flan – pa‐
sta frolla, preriscal‐
dare il forno vuoto
Cottura ventilata 170 - 180 10 - 25 2
Base per flan - im‐
pasto per torte lie‐
vitate
Cottura ventilata 150 - 170 20 - 25 2
Ciambella / Brio‐
che
Cottura ventilata 150 - 160 50 - 70 1
ITALIANO 99
COT‐
TURA IN
STAMPI
(°C) (min)
Pan di Spagna /
Torte alla frutta
Cottura ventilata 140 - 160 70 - 90 1
Cheesecake Cottura convenzionale 170 - 190 60 - 90 1
Utilizzare la posizione del terzo ripiano.
Utilizzare la funzione: Cottura ventilata.
Usare una piastra di cottura.
TORTE / DOLCI / PANE
(°C) (min)
Dolce secco con granelli di zucchero 150 - 160 20 - 40
Torte di frutta (realizzati con pasta lievitata/pasta
frolla), utilizzare una leccarda
150 35 - 55
Flan di frutta fatte con pasta frolla 160 - 170 40 - 80
Preriscaldare il forno vuoto.
Utilizzare la funzione: Cottura convenzionale.
Usare una piastra di cottura.
TORTE /
DOLCI / PANE (°C) (min)
Rotolo con marmellata 180 - 200 10 - 20 3
Pane di segale: prima: 230 20 1
poi: 160 - 180 30 - 60
Torta al burro di mandor‐
le / Torta zuccherata
190 - 210 20 - 30 3
Bignè / Eclair 190 - 210 20 - 35 3
Treccia / Corona di pane 170 - 190 30 - 40 3
Torte di frutta (realizzati
con pasta lievitata/pasta
frolla), utilizzare una lec‐
carda
170 35 - 55 3
Ciambelle lievitate guarni‐
te (ad es. con formaggio
morbido, panna, crema)
160 - 180 40 - 80 3
Christstollen 160 - 180 50 - 70 2
Utilizzare la posizione del terzo ripiano.
100 ITALIANO
BISCOTTI
(°C) (min)
Biscotti di pasta frolla Cottura ventilata 150 - 160 10 - 20
Panini, preriscaldare il forno
vuoto
Cottura ventilata 160 10 - 25
Biscotti realizzati con pasta lie‐
vitata
Cottura ventilata 150 - 160 15 - 20
Pasticcini di pasta sfoglia, pre‐
riscaldare il forno vuoto
Cottura ventilata 170 - 180 20 - 30
Biscotti realizzati con pasta lie‐
vitata
Cottura ventilata 150 - 160 20 - 40
Macarons Cottura ventilata 100 - 120 30 - 50
Pasta fatti con bianco d'uovo /
Meringhe
Cottura ventilata 80 - 100 120 - 150
Panini, preriscaldare il forno
vuoto
Cottura convenzionale 190 - 210 10 - 25
10.6 Sformati e gratinati
Utilizzare la posizione del primo ripiano.
(°C) (min)
Baguette con formaggio fuso Cottura ventilata 160 - 170 15 - 30
Gratin di verdure, preriscal‐
dare il forno vuoto
Turbo Grill 160 - 170 15 - 30
Lasagne Cottura convenzionale 180 - 200 25 - 40
Sformati di pesce Cottura convenzionale 180 - 200 30 - 60
Verdure farcite Cottura ventilata 160 - 170 30 - 60
Dolci al forno Cottura convenzionale 180 - 200 40 - 60
Pasta al forno Cottura convenzionale 180 - 200 45 - 60
10.7 Cottura multilivello
Utilizzare la funzione: Cottura ventilata.
Usare le piastre.
TORTE/
DOLCI (°C) (min)
2 posizioni
Bignè / Eclair, preriscalda‐
re il forno vuoto
160 - 180 25 - 45 1 / 4
ITALIANO 101
TORTE/
DOLCI (°C) (min)
2 posizioni
Torta Streusel 150 - 160 30 - 45 1 / 4
BI‐
SCOTTI / TORTE
PICCOLE / PA‐
STA / ROLL
(°C) (min)
2 posizioni 3 posizioni
Panini 180 20 - 30 1 / 4 -
Biscotti di pasta frol‐
la
150 - 160 20 - 40 1 / 4 1 / 3 / 5
Biscotti realizzati con
pasta lievitata
160 - 170 25 - 40 1 / 4 -
Pasticcini di pasta
sfoglia, preriscaldare
il forno vuoto
170 - 180 30 - 50 1 / 4 -
Biscotti realizzati con
pasta lievitata
160 - 170 30 - 60 1 / 4 -
Macarons 100 - 120 40 - 80 1 / 4 -
Biscotti fatti con
bianco d'uovo / Me‐
ringhe
80 - 100 130 - 170 1 / 4 -
10.8 Suggerimenti per l'arrostitura
Utilizzare pentolame da forno resistente al
calore.
Arrostire la carne magra coperta (è possibile
usare pellicola di alluminio).
Arrostire grandi pezzi di carne direttamente
nel vassoio o sulla griglia posta sopra il
vassoio.
Mettere un po' d'acqua nel vassoio onde
evitare la bruciatura del grasso che cola.
Girare l'arrosto dopo 1/2 - 2/3 del tempo di
cottura.
Arrostire la carne e il pesce in pezzi di grandi
dimensioni (1 kg o più).
Ungere diverse volte i pezzi di carne con il
proprio sugo durante l'arrostimento.
10.9 Cottura arrosto
Utilizzare la posizione del primo ripiano.
102 ITALIANO
MANZO
(°C) (min.)
Arrosto misto 1 - 1,5 kg Cottura convenzio‐
nale
230 120 - 150
Roastbeef o filetto al
sangue, preriscaldare il
forno vuoto
per cm di altezza Turbo Grill 190 - 200 5 - 6
Roastbeef o filetto, cottu‐
ra media, preriscaldare il
forno vuoto
per cm di altezza Turbo Grill 180 - 190 6 - 8
Roastbeef o filetto, ben
cotto, preriscaldare il for‐
no vuoto
per cm di altezza Turbo Grill 170 - 180 8 - 10
MAIALE
Utilizzare la funzione: Turbo Grill.
(kg)
(°C) (min.)
Spalla / Coppa / Coscia 1 - 1.5 160 - 180 90 - 120
Braciole / Costoletta di maiale 1 - 1.5 170 - 180 60 - 90
Polpettone di carne 0.75 - 1 160 - 170 50 - 60
Stinco di maiale, precotto 0.75 - 1 150 - 170 90 - 120
VITELLO
Utilizzare la funzione: Turbo Grill.
(kg)
(°C) (min.)
Arrosto di vitello 1 160 - 180 90 - 120
Stinco di vitello 1.5 - 2 160 - 180 120 - 150
ITALIANO 103
AGNELLO
Utilizzare la funzione: Turbo Grill.
(kg)
(°C) (min.)
Coscia d'agnello / Arrosto
di agnello
1 - 1.5 150 - 170 100 - 120
Sella d'agnello 1 - 1.5 160 - 180 40 - 60
SELVAGGINA
Utilizzare la funzione: Cottura convenzionale.
(kg)
(°C) (min.)
Sella / Coscia di lepre,
preriscaldare il forno vuoto
fino a 1 230 30 - 40
Sella di cervo 1.5 - 2 210 - 220 35 - 40
Coscia di capriolo 1.5 - 2 180 - 200 60 - 90
POLLAME
Utilizzare la funzione: Turbo Grill.
(kg)
(°C) (min.)
Pollame, porzioni 0,2 - 0,25 ciascuno 200 - 220 30 - 50
Mezzo pollo 0,4 - 0,5 ciascuno 190 - 210 35 - 50
Pollo, pollastra 1 - 1.5 190 - 210 50 - 70
Anatra 1.5 - 2 180 - 200 80 - 100
Oca 3.5 - 5 160 - 180 120 - 180
Tacchino 2.5 - 3.5 160 - 180 120 - 150
Tacchino 4 - 6 140 - 160 150 - 240
104 ITALIANO
PESCE (STUFATO)
Utilizzare la funzione: Cottura convenzionale.
(kg)
(°C) (min.)
Pesce intero 1 - 1.5 210 - 220 40 - 60
10.10 Cottura croccante
con:Funzione Pizza
IMPOSTAZIONE
Utilizzare la posizione del primo ri‐
piano.
(°C) (min.)
Torte 180 - 200 40 - 55
Flan agli spinaci 160 - 180 45 - 60
Quiche lorraine /
Flan al formag‐
gio
170 - 190 45 - 55
Cheesecake 140 - 160 60 - 90
Torta di verdure 160 - 180 50 - 60
IMPOSTAZIONE
Preriscaldare il forno vuoto prima di
iniziare a utilizzarlo.
Utilizzare la posizione del secondo
ripiano.
(°C) (min.)
Pizza, sottile,
utilizzare una
leccarda
200 - 230 15 - 20
Pizza, spessa 180 - 200 20 - 30
Pane non lievi‐
tato
230 - 250 10 - 20
Torta di pasta
frolla
160 - 180 45 - 55
Flammkuchen 230 - 250 12 - 20
Pierogi 180 - 200 15 - 25
10.11 Grill
Preriscaldare il forno vuoto prima di iniziare a
utilizzarlo.
Cuocere al grill solo pezzi di carne o pesce
sottili.
Mettere una pentola sulla posizione del primo
ripiano per raccogliere i grassi.
ITALIANO 105

GRILL
Utilizzare la funzione: Grill
(°C) (min.)
1° lato
(min.)
2° lato
Roast beef 210 - 230 30 - 40 30 - 40 2
Filetto di manzo 230 20 - 30 20 - 30 3
Carré 210 - 230 30 - 40 30 - 40 2
Lonza di vitello 210 - 230 30 - 40 30 - 40 2
Sella d'agnello 210 - 230 25 - 35 20 - 25 3
Pesce intero, 0.5 kg -
1 kg
210 - 230 15 - 30 15 - 30 3 / 4
10.12 Cibi congelati
SBRINAMENTO
Utilizzare la funzione: Cottura ventilata.
(°C) (min.)
Pizza surgelata 200 - 220 15 - 25 2
Pizza Americana surgelata 190 - 210 20 - 25 2
Pizza fredda 210 - 230 13 - 25 2
Pizzette surgelate 180 - 200 15 - 30 2
Patatine fritte sottili 200 - 220 20 - 30 3
Patatine fritte tagliate spesse 200 - 220 25 - 35 3
Patate a spicchi / Crocchette 220 - 230 20 - 35 3
Sformato di patate 210 - 230 20 - 30 3
Lasagne / Cannelloni, freschi 170 - 190 35 - 45 2
Lasagne / Cannelloni, surgelati 160 - 180 40 - 60 2
Cheesecake cotta 170 - 190 20 - 30 3
Ali di pollo 190 - 210 20 - 30 2
106 ITALIANO
10.13 Scongelamento
Rimuovere gli alimenti dall'imballaggio e
metterli su una piastra.
Non coprire il cibo, in quanto ciò può
prolungare il tempo di sbrinamento.
Per grandi porzioni di cibo posizionare una
piastra vuota capovolta sul fondo della cavità
del forno. Mettere il cibo in un piatto profondo
e collocarlo sulla parte superiore della piastra
all'interno del forno. Se necessario,
rimuovere i supporti del ripiano.
Usare il primo livello griglia.
(kg)
(min)
Tempo di scon‐
gelamento
(min)
Ulteriore tempo
di sbrinamento
Pollo 1 100 - 140 20 - 30 Girare a metà tempo.
Carne 1 100 - 140 20 - 30 Girare a metà tempo.
Trota 0,15 25 - 35 10 - 15 -
Fragole 0,3 30 - 40 10 - 20 -
Burro 0,25 30 - 40 10 - 15 -
Panna 2 x 0,2 80 - 100 10 - 15 Frustare la crema quan‐
do ancora leggermente
congelata in alcune zo‐
ne.
Dolce 1,4 60 60 -
10.14 Marmellate/Conserve
Utilizzare la funzione Resistenza inferiore.
Utilizzare esclusivamente vasi da conserva
delle stesse dimensioni disponibili sul
mercato.
Non utilizzare vasi con coperchi a scatto o a
baionetta o lattine metalliche.
Utilizzare la posizione del primo ripiano.
Non collocare più di 6 vasi da conserva da
un litro sul vassoio di cottura.
Riempire i vasi in modo equo e chiudere con
un morsetto.
I vasi non devono toccarsi tra loro.
Mettere circa 1/2 litro d'acqua nel vassoio di
cottura per fornire sufficiente umidità al forno.
Quando il liquido nei vasi inizia a sobbollire
(dopo circa 35 - 60 minuti con vasi da un
litro), spegnere il forno o diminuire la
temperatura a 100°C (vedere la tabella).
Impostare la temperatura a 160 - 170 °C.
FRUTTA MOR‐
BIDA (min)
Tempi di cottura fi‐
no alla comparsa
delle prime bollici‐
ne
Fragole / Mirtilli / Lamponi /
Uva spina matura
35 - 45
ITALIANO 107
DRUPA
(min)
Tempi di cot‐
tura fino alla
comparsa
delle prime
bollicine
(min)
Tempi di
cottura re‐
stanti a
100°C
Pesche / Mele
cotogne / Prugne
35 - 45 10 - 15
VER‐
DURE (min)
Tempi di cot‐
tura fino alla
comparsa
delle prime
bollicine
(min)
Tempi di
cottura re‐
stanti a
100°C
Carote 50 - 60 5 - 10
Cetrioli 50 - 60 -
Ortaggi misti in
agrodolce
50 - 60 5 - 10
Cavolo rapa / Pi‐
selli / Asparagi
50 - 60 15 - 20
10.15 Essicatura - Cottura ventilata
Coprire le teglie con carta resistente al
grasso o carta da forno.
Per ottenere risultati migliori, spegnere il
forno a metà del tempo di asciugatura, aprire
lo sportello e lasciarlo raffreddare per una
notte per completare l’asciugatura.
Per 1 teglia usare la terza posizione ripiano.
Per 2 teglie usare la prima e quarta posizione
ripiano.
VERDURE
(°C) (ore)
Fagioli 60 - 70 6 - 8
Peperoni 60 - 70 5 - 6
Verdure per minestrone 60 - 70 5 - 6
Funghi 50 - 60 6 - 8
Erbette 40-50 2 - 3
Impostare la temperatura su 60 - 70 °C.
FRUTTA
(ore)
Prugne 8 - 10
Albicocche 8 - 10
Fette di mela 6 - 8
Pere 6 - 9
10.16 Cottura Ecoventilata - accessori consigliati
Usare scatole e contenitori scuri e non riflettenti. Assorbono meglio il calore rispetto al colore
chiaro e ai piatti riflettenti.
Teglia da pizza
Pirofila
Pirofile monopor‐
zione
Tortiera per flan
Scura, non riflettente
28 cm di diametro
Scura, non riflettente
26 cm di diametro
Ceramica
diametro 8 cm, al‐
tezza 5 cm
Scura, non riflettente
28 cm di diametro
108 ITALIANO
10.17 Cottura Ecoventilata
Per ottenere i risultati migliori, attenersi ai
suggerimenti elencati nella tabella
sottostante.
(°C) (min.)
Roll dolci, 16 pezzi vassoio di cottura o ghiotta 190 3 45 - 55
Pizza surgelata, 0,35
kg
ripiano a filo 190 2 45 - 50
Rotolo con marmellata vassoio di cottura o ghiotta 180 2 45 - 55
Brownie vassoio di cottura o ghiotta 180 2 55 - 60
Base pan di Spagna teglia per timballo su griglia 180 2 40 - 50
Pesce al vapore, 0,3
kg
vassoio di cottura o ghiotta 180 3 25 - 35
Pesce intero, 0,2 kg vassoio di cottura o ghiotta 180 3 25 - 35
Filetto di pesce, 0,3 kg teglia per pizza su griglia 180 3 40 - 50
Carne al vapore, 0,25
kg
vassoio di cottura o ghiotta 190 3 40 - 50
Shashlik, 0,5 kg vassoio di cottura o ghiotta 190 3 35 - 45
Cookie, 16 pezzi vassoio di cottura o ghiotta 160 2 40 - 50
Macarons, 24 pezzi vassoio di cottura o ghiotta 150 2 35 - 45
Muffin, 12 pezzi vassoio di cottura o ghiotta 160 2 35 - 45
Pasta saporita, 20
pezzi
vassoio di cottura o ghiotta 170 2 35 - 45
Biscotti di pasta frolla,
20 pezzi
vassoio di cottura o ghiotta 150 2 40 - 45
Tortine, 8 pezzi vassoio di cottura o ghiotta 170 2 35 - 45
Verdure, al vapore, 0,4
kg
vassoio di cottura o ghiotta 180 3 45 - 55
Omelette vegetariana teglia per pizza su griglia 190 3 40 - 50
10.18 Informazioni per gli istituti di
prova
Test conformemente a: EN 60350, IEC
60350.
ITALIANO 109

COTTURA SU UN LIVELLO Cottura in stampi
(°C) (min)
Pan di Spagna senza grassi Cottura ventilata 140 - 150 35 - 50 2
Pan di Spagna senza grassi Cottura convenzionale 160 35 - 50 2
Torta di mele, 2 stampi Ø20
cm
Cottura ventilata 160 60 - 90 2
Torta di mele, 2 stampi Ø20
cm
Cottura convenzionale 180 70 - 90 1
COTTURA SU UN LIVELLO Biscotti
Utilizzare la posizione del terzo ripiano.
(°C) (min)
Frollini al burro / Strisce di pasta Cottura ventilata 140 25 - 40
Frollini al burro / Strisce di pasta,
preriscaldare il forno vuoto
Cottura convenzionale 160 20 - 30
Dolcetti, 20 per lamiera dolci, pre‐
riscaldare il forno vuoto
Cottura ventilata 150 20 - 35
Dolcetti, 20 per lamiera dolci, pre‐
riscaldare il forno vuoto
Cottura convenzionale 170 20 - 30
COTTURA MULTILIVELLO. Biscotti
(°C) (min)
Frollini al burro / Strisce di pa‐
sta
Cottura ventilata 140 25 - 45 1 / 4
Dolcetti, 20 per lamiera dolci,
preriscaldare il forno vuoto
Cottura ventilata 150 23 - 40 1 / 4
Pan di Spagna senza grassi Cottura ventilata 160 35 - 50 1 / 4
110 ITALIANO
GRILL
Preriscaldare il forno vuoto per 5 minuti.
Grigliare con l'impostazione di temperatura massima.
(min)
Toast Grill 1 - 3 5
Bistecca di manzo, girare il piatto a
metà tempo
Grill 24 - 30 4
11. PULIZIA E CURA
AVVERTENZA!
Fare riferimento ai capitoli sulla
sicurezza.
11.1 Note sulla pulizia
Agenti di pulizia
Pulire la parte anteriore del forno con un panno morbido imbevuto di acqua tiepida e deter‐
gente delicato.
Servirsi di una soluzione detergente per pulire le superfici metalliche.
Pulire le macchie con un detergente delicato.
Uso quotidiano
Pulire la cavità dopo ogni utilizzo. L'accumulo di grasso o di altri residui potrebbe causare un
incendio.
Non lasciare le vivande nel forno per più di 20 minuti. Asciugare la cavità con un panno mor‐
bido dopo ogni uso.
Accessori
Pulire tutti gli accessori dopo ogni uso e lasciarli asciugare. Utilizzare un panno morbido im‐
bevuto di acqua tiepida e un detergente delicato. Non pulire gli accessori in lavastoviglie.
Non pulire gli accessori anti-aderenti con agenti abrasivi o oggetti appuntiti.
11.2 Come togliere: Supporti
ripiano
Rimuovere i supporti ripiano per pulire il
forno.
ITALIANO 111
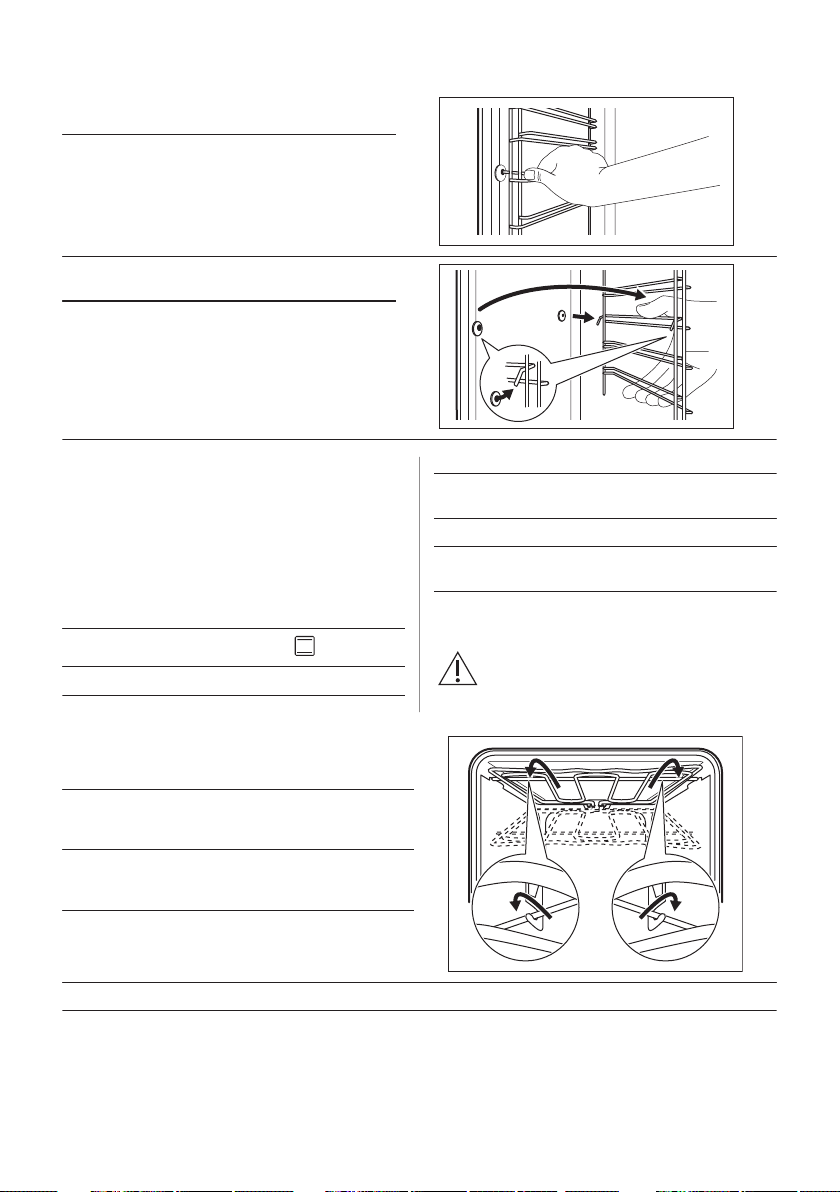
Fase 1 Spegnere il forno e attendere che sia
freddo.
Fase 2 Sfilare dapprima la guida di estrazio‐
ne dalla parete laterale tirandola in
avanti.
Fase 3 Sfilare la guida di estrazione posterio‐
re dalla parete laterale e toglierla.
2
1
Fase 4 Installare i supporti griglia seguendo
al contrario la procedura indicata.
11.3 Istruzioni d'uso: Pulizia Con
Acqua
Questa procedura di pulizia con acqua
utilizza l'umidità per facilitare la rimozione dei
residui di grasso e di cibo dal forno.
Fase 1 Versare l'acqua nell'incavo della cavità:
300 ml.
Fase 2
Impostare la funzione: .
Fase 3 Impostare la temperatura su 90 °C.
Fase 4 Lasciare in funzione il forno per 30 mi‐
nuti.
Fase 5 Spegnere il forno.
Fase 6 Attendere che il forno sia freddo. Asciu‐
gare la cavità con un panno morbido.
11.4 Come togliere: Grill
AVVERTENZA!
Pericolo di ustione.
Fase 1 Spegnere il forno e attendere che sia
freddo per pulirlo.
Rimuovere i supporti ripiano.
Fase 2 Tirarlo in avanti contro la molla a pres‐
sione ed estrarlo dai due supporti. La gri‐
glia si piega.
Fase 3 Pulire la parte superiore del forno con
acqua tiepida, un panno morbido e de‐
tergente delicato. Lasciare asciugare.
Fase 4 Installare la griglia seguendo al contrario
la procedura indicata.
Fase 5 Montare i supporti ripiano.
112 ITALIANO
11.5 Procedura di rimozione e
installazione: Porta
È possibile rimuovere la porta e i pannelli in
vetro interni per procedere alle operazioni di
pulizia. Il numero di pannelli di vetro varia a
seconda dei modelli.
AVVERTENZA!
La porta è pesante.
ATTENZIONE!
Maneggiare con cura il vetro, in
particolare intorno ai bordi del
pannello frontale. Il vetro può
rompersi.
Passaggio
1
Aprire completamente la porta.
A
A
Passaggio
2
Sollevare e premere le leve di ser‐
raggio (A) sulle due cerniere.
Passaggio
3
Chiudere la porta del forno fino alla prima posizione di apertura (un angolo di circa 70°). Afferrare la
porta su entrambi i lati e tirarla fino ad allontanarla dal forno mantenendo un'inclinazione verso l'al‐
to. Poggiare la porta con il lato esterno rivolto verso il basso su un panno morbido su una superficie
stabile.
Passaggio
4
Tenere il rivestimento della porta
(B) sul bordo superiore della porta
da entrambi i lati e spingere verso
l'interno per sbloccare la guarnizio‐
ne a clip.
1
2
B
Passaggio
5
Rimuovere il rivestimento tirandolo
in avanti.
Passaggio
6
Afferrare uno ad uno i pannelli di
vetro della porta dal bordo superio‐
re e estrarli dalla guida.
Passaggio
7
Pulire il pannello in vetro con acqua
e sapone. Asciugare con cura il
pannello in vetro. Non pulire i pan‐
nelli in vetro in lavastoviglie.
Passaggio
8
Dopo la pulizia, eseguire i passaggi
di cui sopra nella sequenza oppo‐
sta.
Passaggio
9
Installare per primo il pannello più piccolo, poi quello più grande e la porta.
Verificare che i pannelli in vetro vengano inseriti nella posizione corretta, altrimenti la superficie del‐
la porta potrebbe surriscaldarsi.
ITALIANO 113
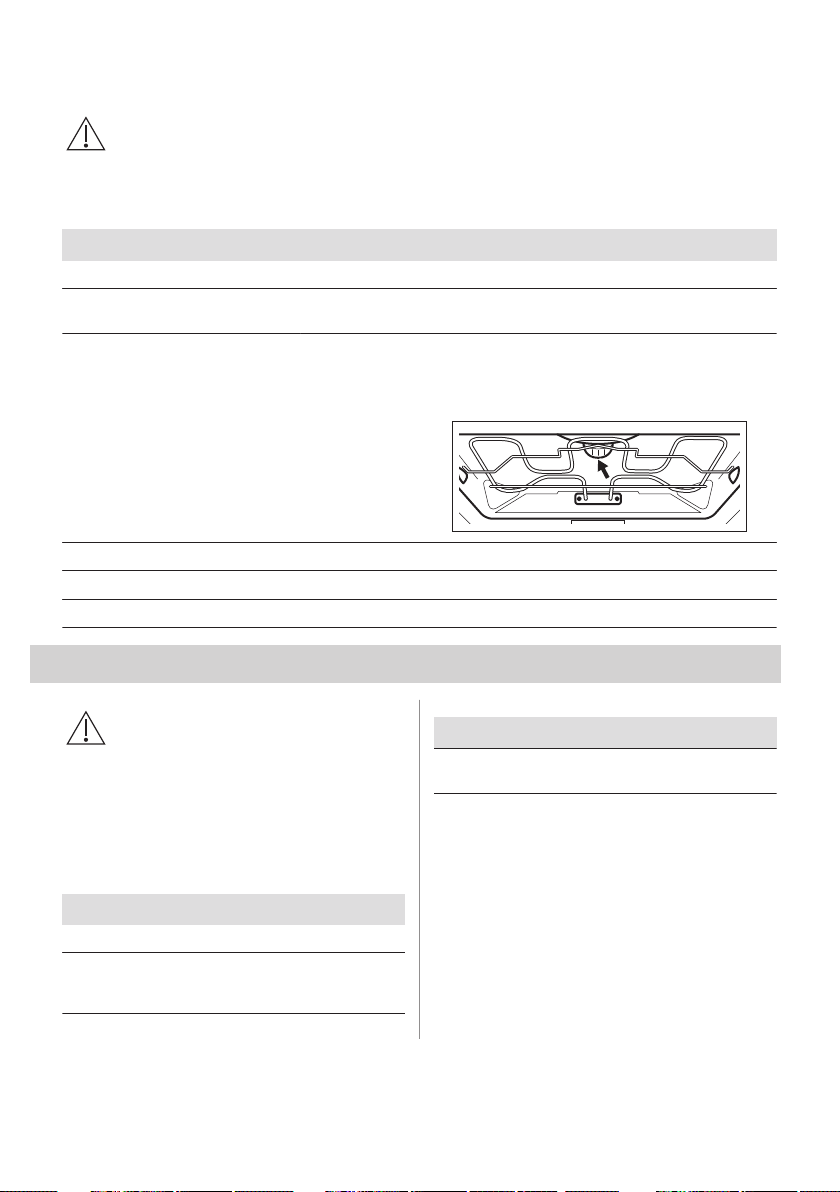
11.6 Come sostituire: Lampadina
AVVERTENZA!
Pericolo di scosse elettriche.
La lampada potrebbe essere
calda.
Prima di sostituire la lampadina:
Fase 1 Fase 2 Fase 3
Spegnere il forno. Attendere che il
forno sia freddo.
Estrarre la spina dalla presa di cor‐
rente.
Appoggiare un panno sul fondo del‐
la cavità.
Lampadina superiore
Fase 1 Girare il rivestimento di vetro per toglierlo.
Fase 2 Pulire il rivestimento di vetro.
Fase 3 Sostituire la lampadina con una adatta, termoresistente fino a 300 °C.
Fase 4 Installare la calotta di vetro.
12. RISOLUZIONE DEI PROBLEMI
AVVERTENZA!
Fare riferimento ai capitoli sulla
sicurezza.
12.1 Cosa fare se...
In tutti i casi non inclusi in questa tabella si
prega di contattare un Centro di Assistenza
Autorizzato.
Problema Controllare se...
Il forno non si scalda. È scattato il fusibile.
Il display indica "12.00". Si è verificata un'interru‐
zione dell'alimentazione
elettrica. Impostare l'ora.
Problema Controllare se...
La lampadina non si ac‐
cende.
La lampada è bruciata.
12.2 Dati Assistenza
Qualora non sia possibile trovare una
soluzione al problema, contattare il
rivenditore o il Centro di Assistenza
Autorizzato.
Le informazioni necessarie per il Centro di
Assistenza si trovano sulla targhetta dei dati.
La targhetta si trova sul telaio anteriore del
forno. Non rimuovere la targhetta dei dati
dalla cavità del forno.
114 ITALIANO
Consigliamo di annotarli in questo spazio:
Modello (MOD.) .........................................
Codice Prodotto (PNC) .........................................
Numero di serie (S.N.) .........................................
13. EFFICIENZA ENERGETICA
13.1 Informazioni sul prodotto e Scheda informativa sul prodotto*
Nome fornitore AEG
Identificativo modello BEB331010M 944188242, 944188459
Indice di efficienza energetica 95.3
Classe di efficienza energetica A
Consumo di energia con un carico standard, in modalità tradiziona‐
le
0.99 kWh/ciclo
Consumo di energia con un carico standard, in modalità ventola
forzata
0.81 kWh/ciclo
Numero di cavità 1
Fonte di calore Elettricità
Volume 71 l
Tipo di forno Forno a incasso
Massa 31.5 kg
* Per l'Unione europea secondo i regolamenti UE 65/2014 e 66/2014.
Per la Repubblica di Bielorussia ai sensi di STB 2478-2017, appendice G; STB 2477-2017, allegati A e B.
Per l'Ucraina secondo 568/32020.
La classe di efficienza energetica non è applicabile alla Russia.
EN 60350-1 - Apparecchiature elettriche per la cottura per uso domestico - Parte 1: Cucine, forni, forni a vapore e
grill - Metodi per la misura delle prestazioni.
13.2 Risparmio energetico
Il forno è dotato di funzioni che
consentono di aiutarvi a
risparmiare energia durante le
operazioni di cottura di tutti i
giorni.
Verificare che la porta del forno sia chiusa
quando lo stesso è in funzione. Non aprire la
porta del forno con eccessiva frequenza in
fase di cottura. Tenere pulita la guarnizione
della porta e verificare che sia saldamente
fissata in posizione.
Servirsi di pentole in metallo per migliorare il
risparmio energetico.
Ove possibile, non pre-riscaldare il forno
prima della cottura.
Ridurre quanto più possibile gli intervalli fra le
diverse operazioni di cottura quando
vengono preparati più piatti
contemporaneamente.
Cucinare con ventola
Ove possibile, servirsi delle funzioni di
cottura con la ventola per risparmiare
energia.
ITALIANO 115

Calore residuo
Quando la durata di cottura è superiore ai 30
minuti, ridurre la temperatura del forno al
minimo 3-10 minuti prima della fine del
processo di cottura. Il calore residuo
all'interno del forno proseguirà la cottura.
Utilizzare il calore residuo per scaldare altri
piatti.
Tenere in caldo gli alimenti
Scegliere l'impostazione di temperatura più
bassa per usare il calore residuo e tenere
calda la pietanza.
Cottura Ecoventilata
Funzione progettata per risparmiare energia
in fase di cottura.
14. CONSIDERAZIONI SULL'AMBIENTE
Riciclare i materiali con il simbolo . Buttare
l'imballaggio negli appositi contenitori per il
riciclaggio. Aiutare a proteggere l’ambiente e
la salute umana e a riciclare rifiuti derivanti
da apparecchiature elettriche ed elettroniche.
Non smaltire le apparecchiature che
riportano il simbolo insieme ai normali
rifiuti domestici. Portare il prodotto al punto di
riciclaggio più vicino o contattare il comune di
residenza.
116 ITALIANO
*

117

118

119

www.aeg.com/shop
867361953-A-342020