Loading ...
Assembling your machine
Getting started
Use both hands to lift your machine out of the box, by its base.
Do not lift out by the loop amplifier.
Assemble your machine with the filters that are supplied.
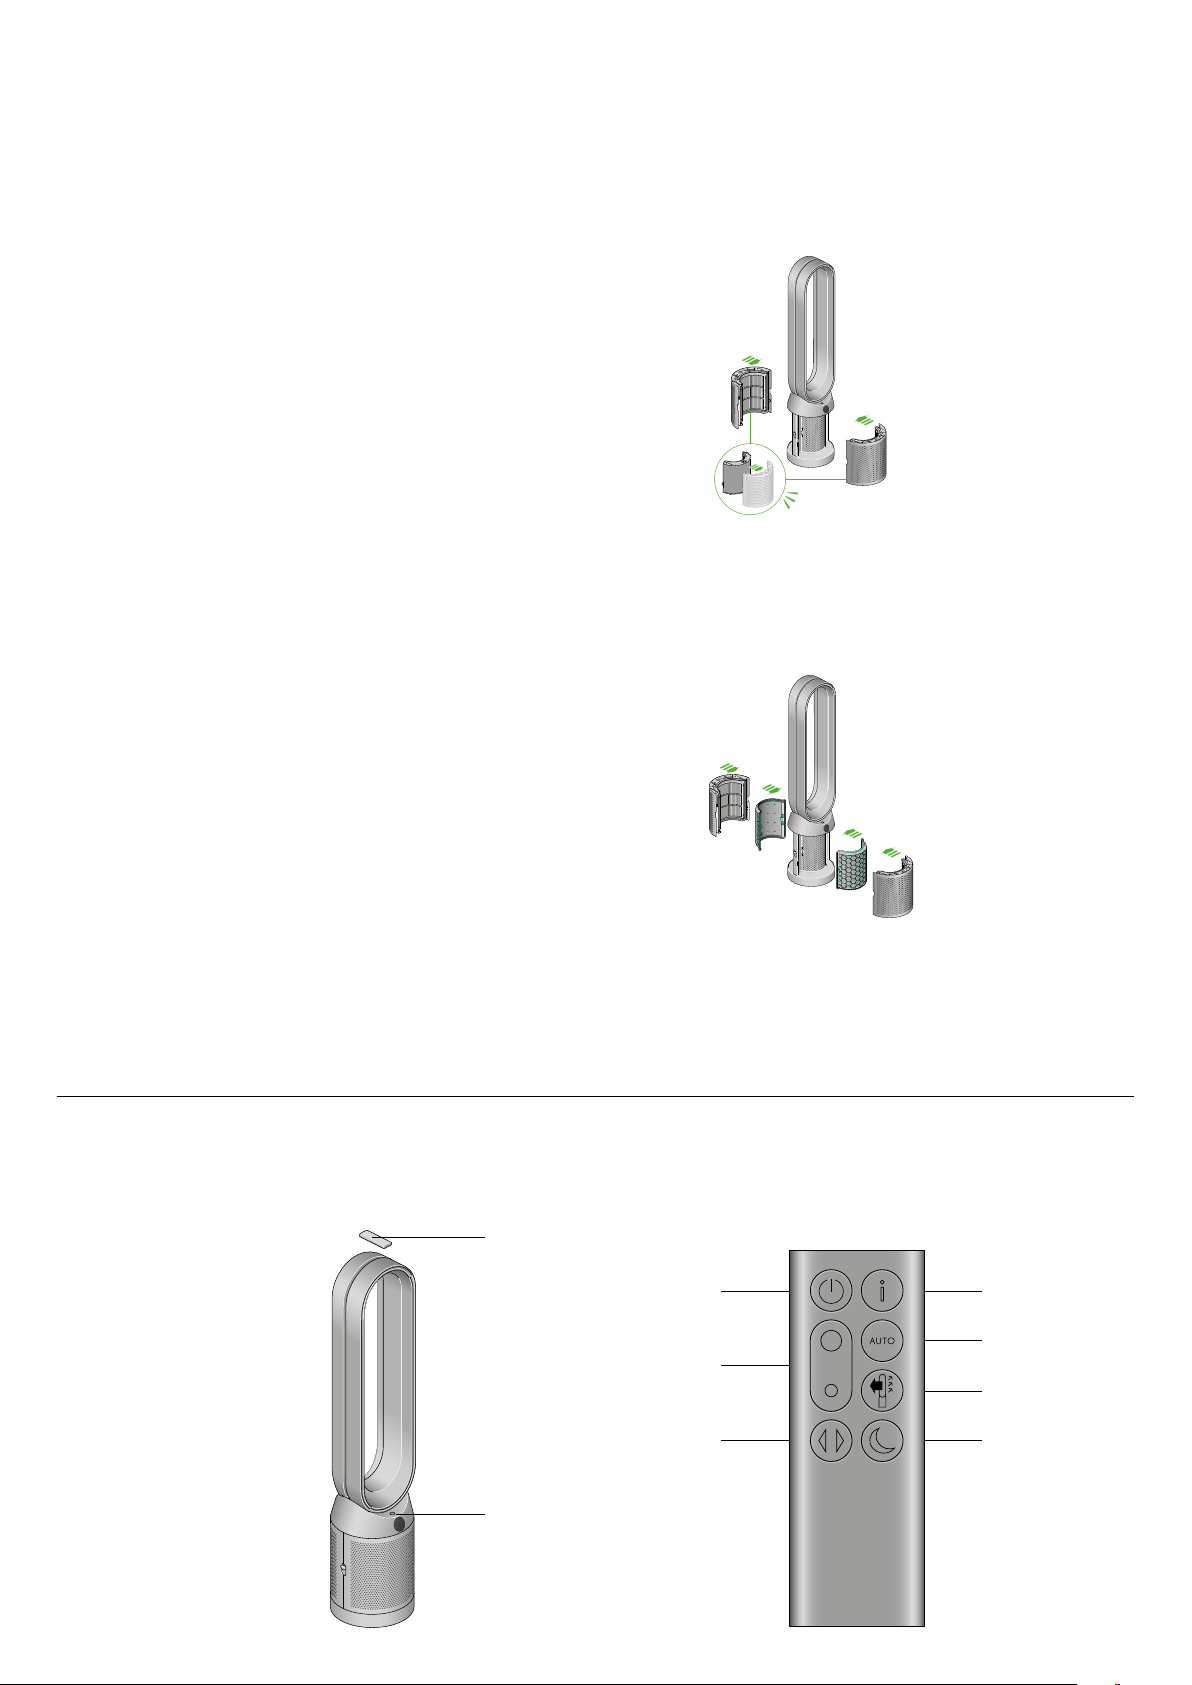
Supplied with a HEPA+Carbon filter.
Push your HEPA+Carbon filter into the outer cover and position onto
the base. Push firmly until both outer covers click securely into place.
Supplied with separate HEPA and carbon filters.
Push the carbon filters into place on the machine.
Push the HEPA filter into the outer cover. Put the outer covers into position
on the base and push firmly until they both click securely into place.
Standby on/off
Standby on/off
Remote control
Information menu
Airflow speed
Auto mode
Oscillation on/off
Airflow direction
Night mode
Place the remote control on top
of the machine with the buttons
facing down.
Plug in and switch on.
Clik
Dyson Purifier Cool Auto React
Dyson Purifier Cool Auto React
The air purifier fan with the
filter covers open showing
a HEPA filter located in the
filter covers and a carbon
filter. Arrows demonstrate
that the carbon filter is
fitted directly to the base
of the machine and the
filter covers will need to be
assembled onto the base
of the machine.
An image of the air purifier fan with
the remote placed on the top of the
loop amplifier and the location of the
standby on/off button on the top of
the base of the machine.
The layout of the remote control with the power button on the top left, the
airflow speed toggle button in the middle left and the oscillation button on
the bottom left. On the top right-hand side is the Information menu button,
then going downwards is the Auto mode button, Airflow direction and then
the Night mode button at the bottom.
The air purifier fan with
the filter covers open
showing a HEPA plus
carbon filter located in
the filter covers. Arrows
demonstrate that the filter
covers will need to be
assembled onto the base
of the machine.
Loading ...
Loading ...
Loading ...