Loading ...
5. Remove all the extra blade bracket screw
with spring washer (FF) from the lower
motor shell.
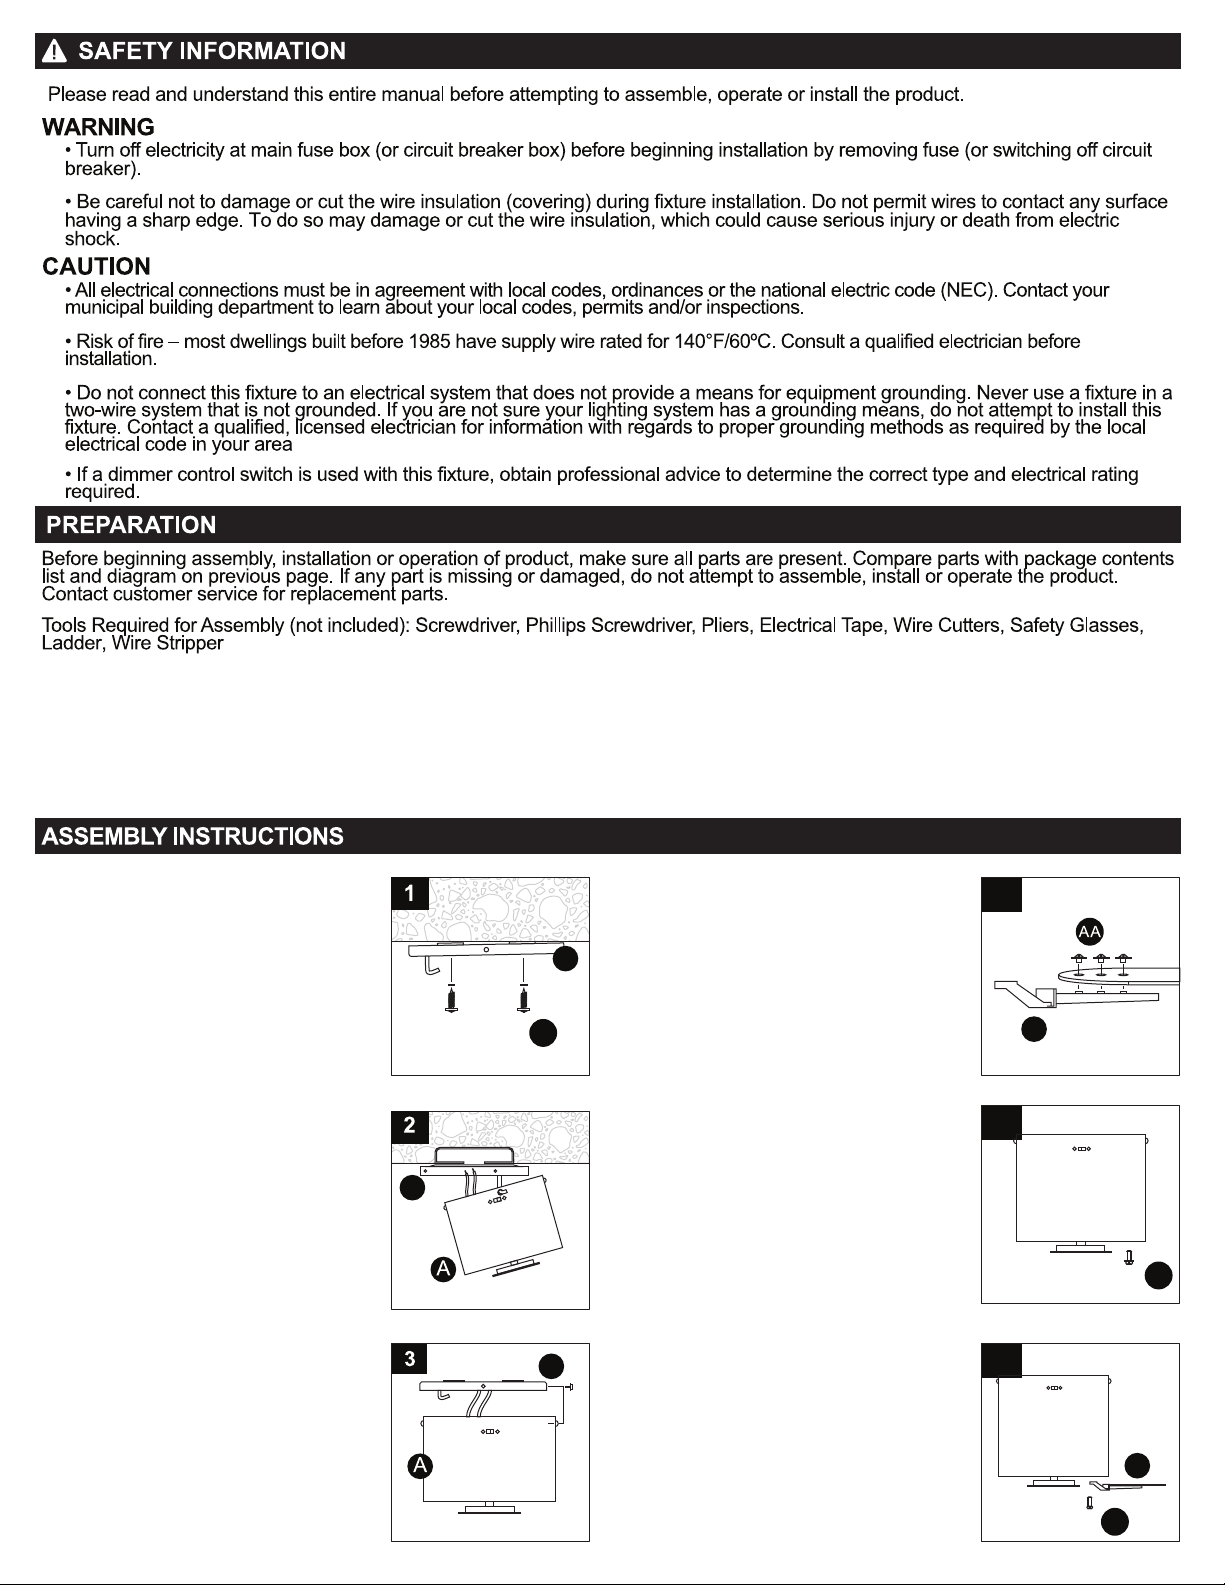
2. Raise canopy-motor assembly (A) to
mounting plate's (B) hook and hang
by the screw hole on the canopy.
This will allow for hands-free wiring. with
the fan assembly (A) hanging off the
mounting bracket's (B) hook, follow wiring
instructions
Tips: To reduce the risk of personal injury,
seek the help of another person to hold
the stepladder in place and to lift the fan
up to you once you are set on the ladder.
3. Secure the fan to (A) the mounting plate
(B) with the side screws and washers.
4. Position blade arm (D) under blade (E) and
secure with screws (AA).Do not tighten
screws until each screw has been
started.Then, tighten each screw starting
with the center screw. Repeat for each
blade.
Make sure that the fan voltage (120) is compatible with your own electrical system. Check to make sure that your carton contains all the parts
mentioned in the parts list.
NOTE: The box can be used as a work space to prevent any damage on the ornamental surface.
CAUTION: Before installing, choose a location for mounting the fan where the blades have at least 7 feet of clearance from all objects and oor.
Mount an outlet box to the ceiling or use an existing box
CAUTION: Do not mount fan to sheet rock or drywall type materials. To insure proper support, use the two #1 wood screws to secure mounting
bracket to joist or beam. If the location you choose does not have a suitable support beam, install a 2"x 4" brace between ceiling joists to
support. Check to make sure blades are at least 30" from any obstruction. Check Down rod Length to make sure blades are at least 7 .1' above
the oor.
6. Align blade holes and attach blade arm
(D) with blade screws and washers (FF).
Before securing screws permanently, repeat
with remaining blade. Securely tighten all
screws.
IMPORTANT: Tighten blade screws twice a
year.
5
4
6
1. Normal Masonry Ceiling
Securely attach the mounting bracket (B)
to an outlet box marked “Acceptable for
Fan Support”, using the supplied outlet
box screws with lock washers (EE).
Wooden ceiling
Drill two mounting holes in the ceiling joist.
Securely attach the mounting bracket (B)
to the ceiling or wooden ceiling as
indicated below.
D
D
B
B
B
EE
FF
FF
Loading ...
Loading ...