Loading ...
Loading ...
Loading ...
page 8
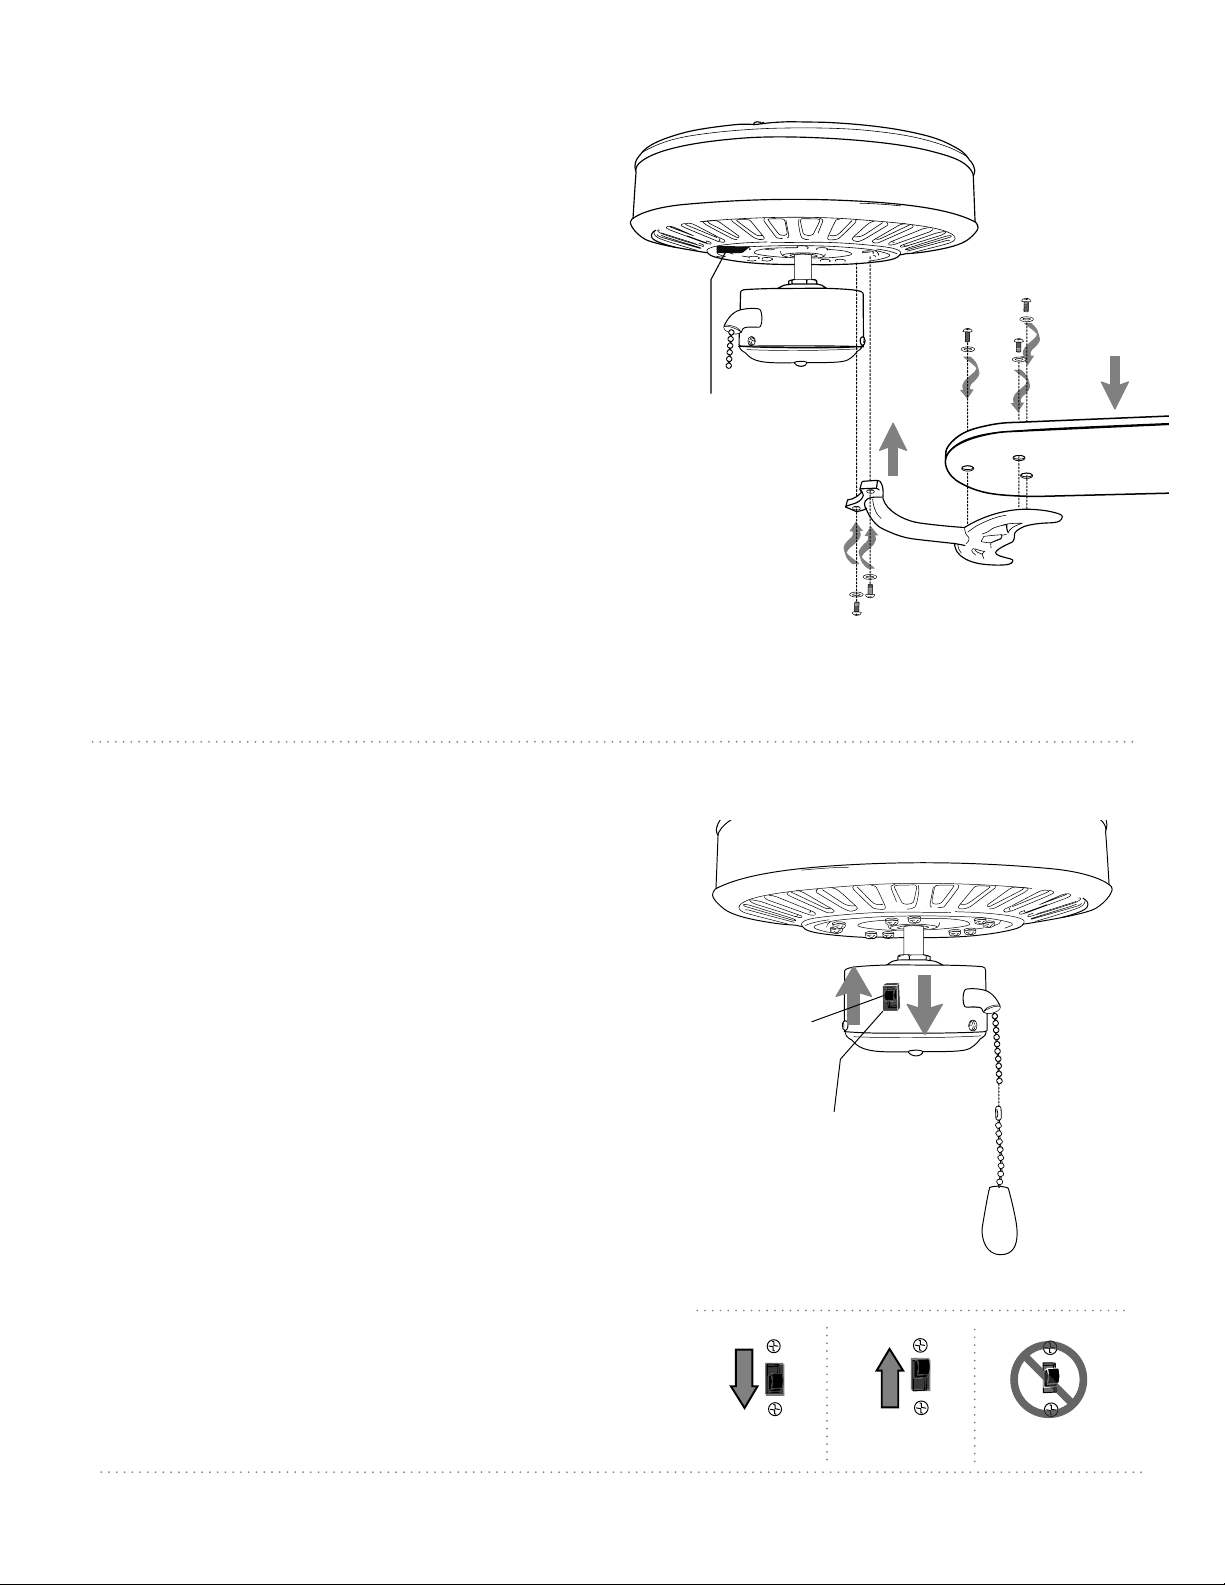
8. Blade Assembly.
blade arm screws
lock washers
motor housing
blade arm
blade
pull chain
extension
reverse
switch
weatherproof
cover
9. Testing Your Fan.
plastic
motor lock
WARNING: To reduce the risk of serious bodily
injury, DO NOT use power tools to assemble the
blades. If screws are overtightened, blades may
crack and break.
Time Saver: Washers for blade screws can be set
on each blade screw prior to installing blades.
Locate 15 blade attachment screws and washers
in hardware pack. Hold blade arm up to blade and
align holes. Insert 3 blade attachment screws
(along with washers) with fingers first and then
tighten screws securely with a Phillips screwdriver.
Repeat for the remaining blades.
Remove blade arm screws and lock washers from
underside of motor. If plastic motor locks are
installed with blade arm screws, discard plastic
motor locks (save blade arm screws and lock washers
to secure blade arms). Align blade arm holes with
motor screw holes and attach blade arm with lock
washers and blade arm screws. Before securing
screws permanently, repeat with remaining blade
arms. Securely tighten all screws.
NOTE: Tighten blade arm screws twice a year.
It is recommended that you test fan before finalizing
installation. Restore power from circuit box and light
switch (if applicable). Test fan speeds with pull chain.
(diagram 1) Start at the OFF position (no blade
movement). First pull will set the fan to HI. Second
pull will set the fan to MEDIUM. Third pull will set the
fan to LOW. Fourth pull will again set the fan to the
OFF setting. If fan does not function, please refer to
"Troubleshooting" section to solve any issues before
contacting Customer Service.
Turn fan completely off before moving the reverse
switch. Set reverse switch to recirculate air depending
on the season:
- DOWN position in summer (diagram 2)
- UP position in winter (diagram 3)
A ceiling fan will allow you to raise your thermostat
setting in summer and lower your thermostat setting
in winter without feeling a difference in your comfort.
Important: Reverse switch must be set either
completely UP or completely DOWN for fan to function.
If the reverse switch is set in the middle position
(diagram 4), fan will not operate.
WARNING: Do NOT remove weatherproof cover from
reverse switch.
Attach pull chain extension supplied or custom pull
chain extension (sold separately) to the end of the
pull chain.
diagram 1
diagram 3
diagram 4
diagram 2
blade attachment
screws and washers
Loading ...
Loading ...
Loading ...