Loading ...
Loading ...
Loading ...

39
1. The colon flashes after switching on.
:
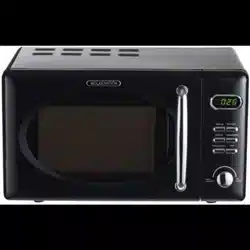
2. Use the ROTARY KNOB (8) to select the menu.
A.8
3. Press the START-button (7) to initialise cooking. The
DISPLAY indicates the cooking time remaining.
3.8 Programmed start of cooking
➢ Ensure that the time of the day is set properly (see chapter 3.3).
➢ Carry out your programming.
Example: It is 12:30. You want the appliance to operate for 9 minutes and 30
seconds at 14:20 (2:20 pm).
1. Set the power using the POWER-button(2.
100P
2. Set the cooking time using the ROTARY KNOB (8).
9:30
3. Press and hold the PRE-SET/CLOCK-button (6) for 3 seconds
to enter the time of the day indication.
4. Set the desired starting time (see chapter 3.3, items 3,4 and
5).
14:20
5. Press the PRE-SET/CLOCK-button (6) to confirm. The
programme has been activated. Cooking will start at 14:20.
6. You can check the preset starting time by pressing the PRE-
SET/CLOCK-button (6).
3.9 Multi-Sequence Cooking
Some recipes require different cooking methods and cooking times to reach the best
result.
Example: You want to cook with 100P power for 3 minutes and then with 20P for
9 minutes.
➢ This example is a 2-sequence-programming.
➢ You can programme up to 4 sequences by repeating the steps.
1. 100P power for 3 minutes.
a. Set the power using the POWER-button (2).
100P
b. Set the cooking time using the ROTARY KNOB (8).
3:00
2. 20P power for 9 minutes.
a. Set the power using the POWER-button (2).
20P
Loading ...
Loading ...
Loading ...