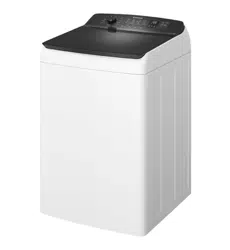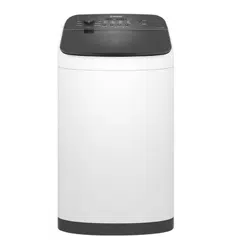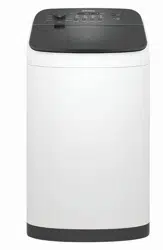
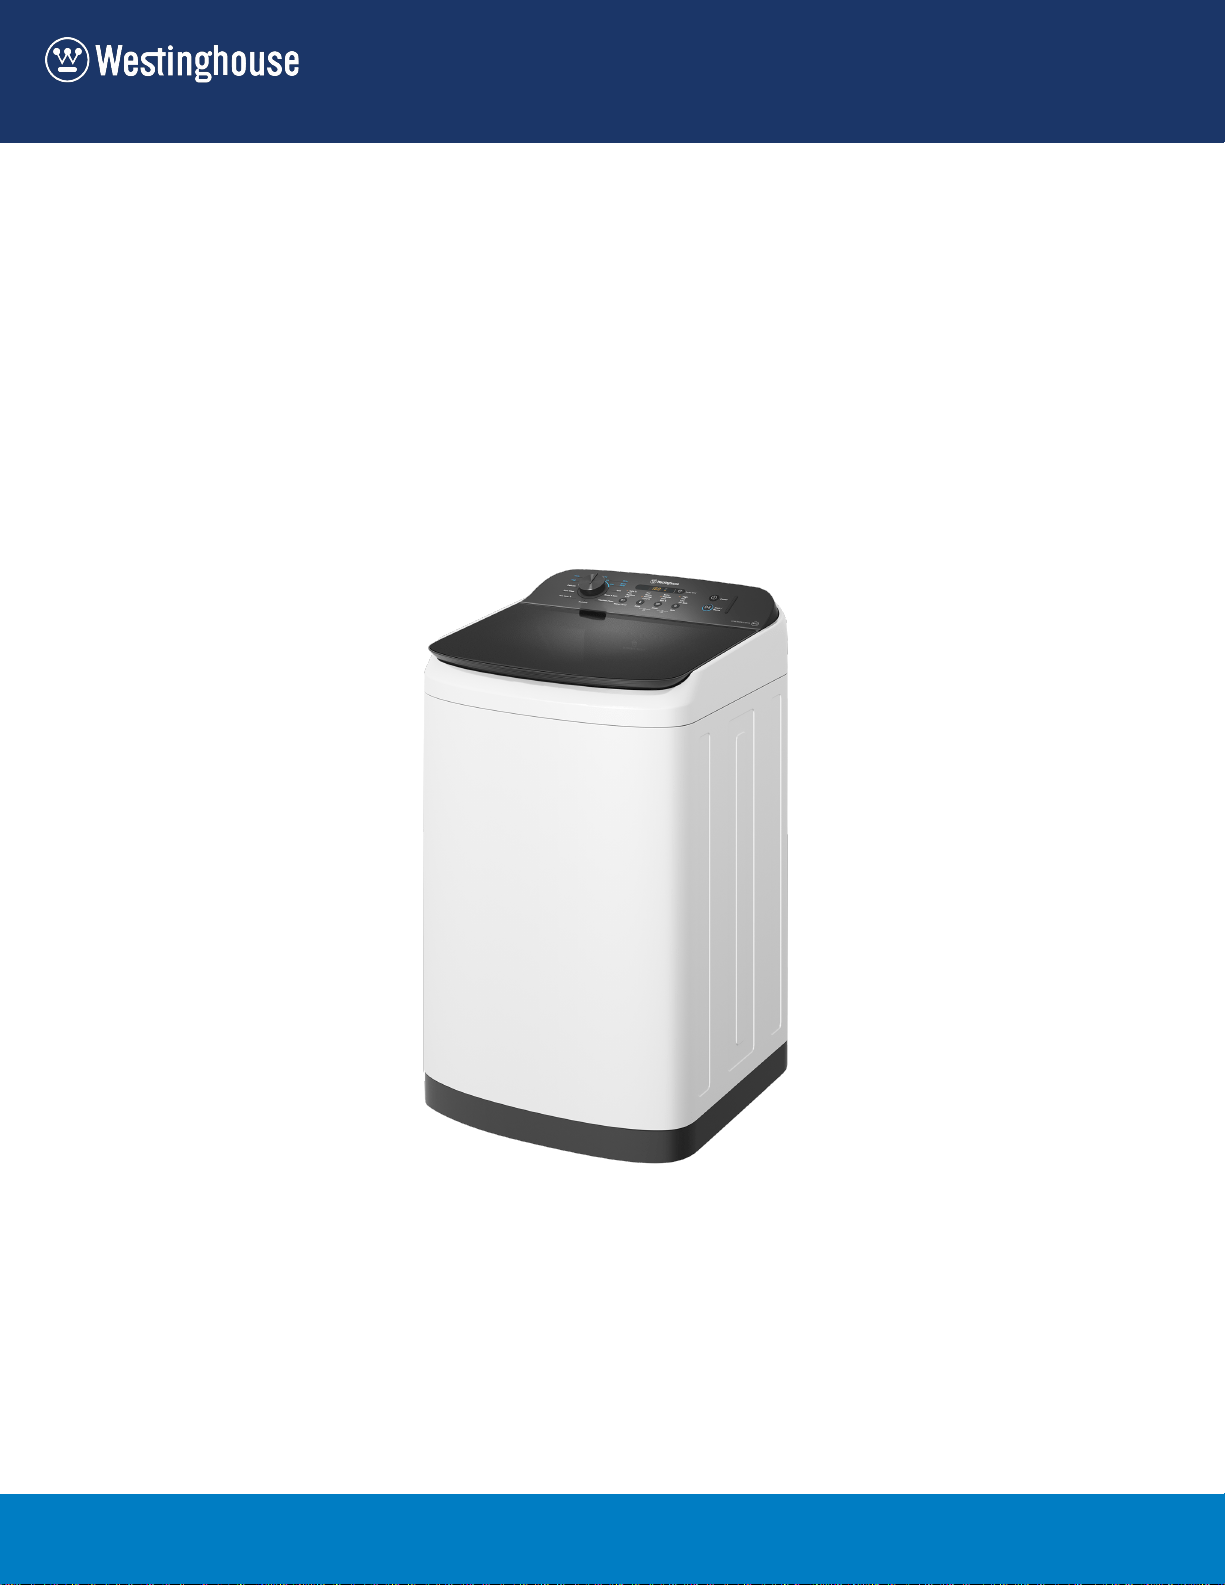
TOP-LOAD
WASHING MACHINE
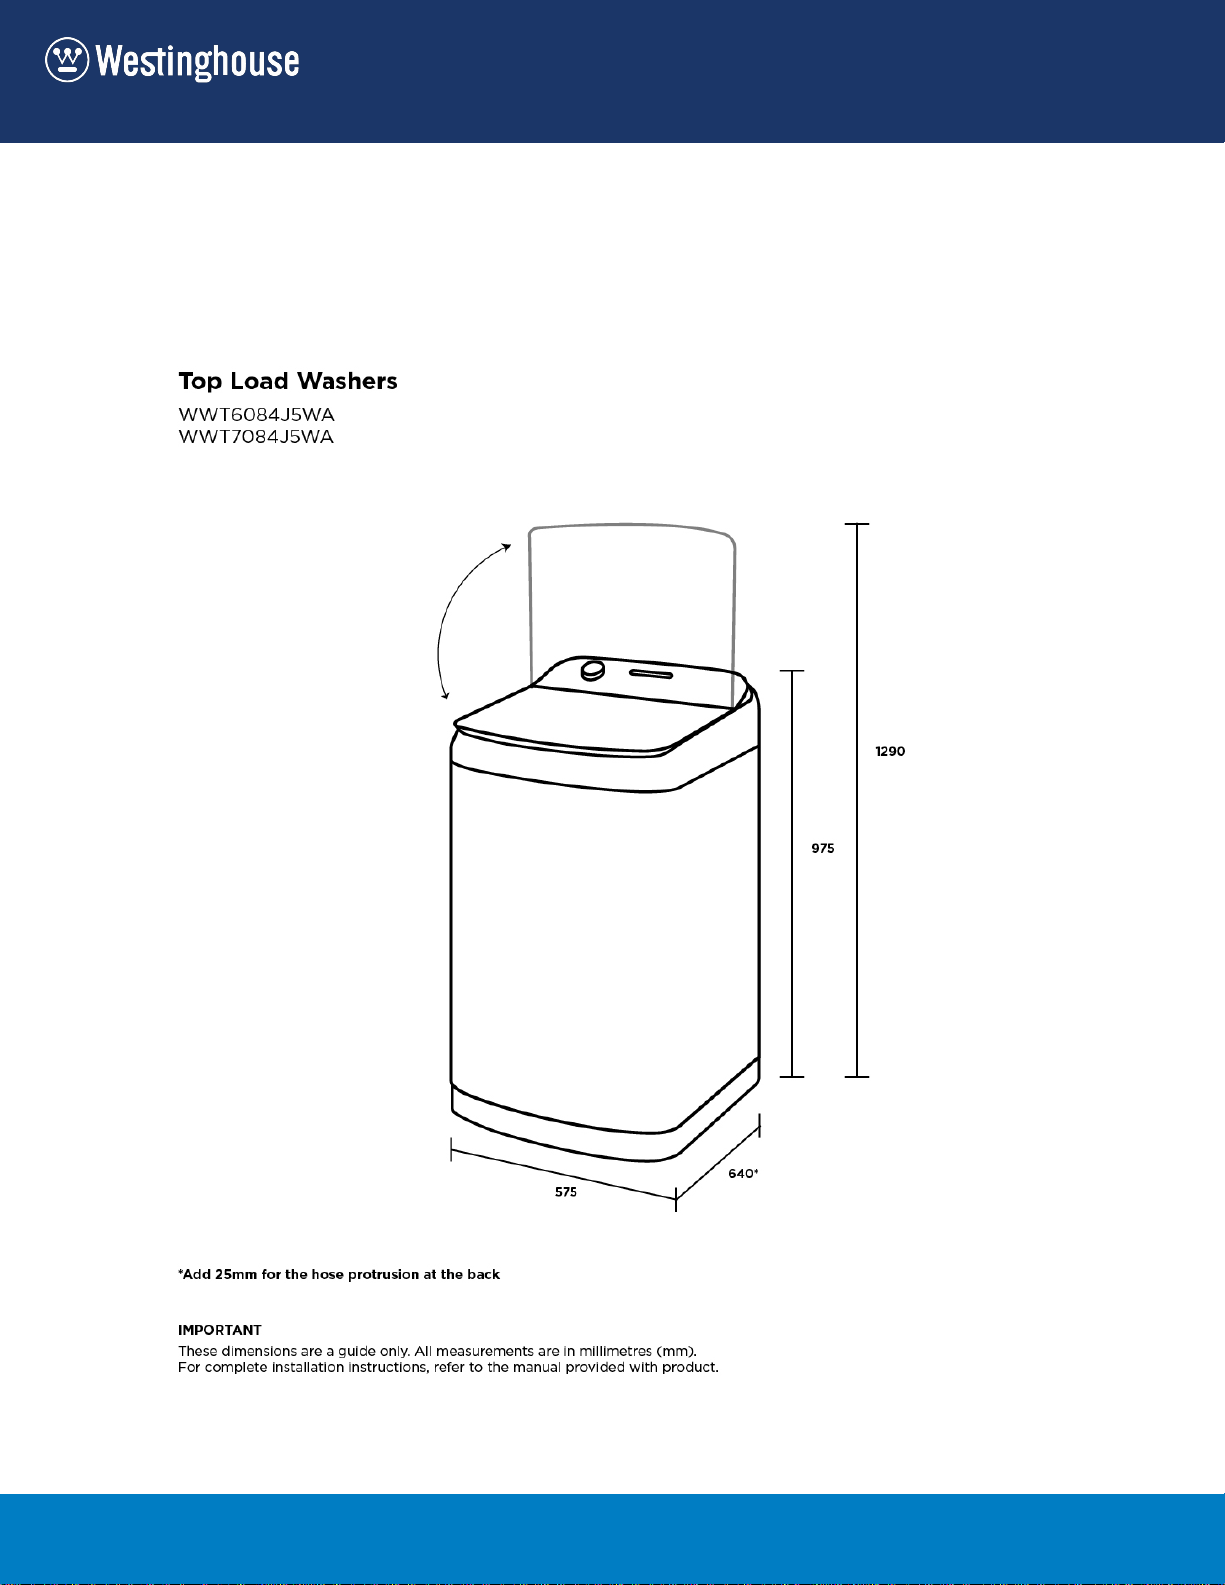
WWT6084J5WA
WWT7084J5WA

2 www.westinghouse.com.au / www.westinghouse.co.nz
Adherence to the directions for use in this manual is extremely important for health and
safety. Failure to strictly adhere to the requirements in this manual may result in personal
injury, property damage and affect your ability to make a claim under the Westinghouse
manufacturer’s warranty provided with your product. Products must be used, installed
and operated in accordance with this manual. You may not be able to claim on the
Westinghouse manufacturer’s warranty in the event that your product fault is due to
failure to adhere to this manual.
IMPORTANT INFORMATION THAT MAY IMPACT YOUR
MANUFACTURER’S WARRANTY
We recommend the use of original spare parts. When contacting Service, ensure that
you have the following data available. The information can be found on the rating plate.
Model, PNC, Serial Number.
Subject to change without notice.
Warning / Caution-Safety information.
General information and tips.
Environmental information.
CUSTOMER CARE AND SERVICE
3
Adherence to the directions for use in this manual is extremely important for health and
safety. Failure to strictly adhere to the requirements in this manual may result in personal
injury, property damage and affect your ability to make a claim under the Westinghouse
manufacturer’s warranty provided with your product. Products must be used, installed
and operated in accordance with this manual. You may not be able to claim on the
Westinghouse manufacturer’s warranty in the event that your product fault is due to
failure to adhere to this manual.
IMPORTANT INFORMATION THAT MAY IMPACT YOUR
MANUFACTURER’S WARRANTY
CONTENTS
1. SAFETY INFORMATION ......... 4
1.1 Conditions Of Use ..................... 4
1.2 Child Safety ............................... 5
1.3 General Safety .......................... 6
1.4 Installation ................................. 6
1.5 Use ............................................ 7
2. PRODUCT DESCRIPTION ........... 8
2.1 Parts .......................................... 8
2.2 Product Features ..................... 10
3. CONTROL PANEL ....................... 11
3.1 Control Panel Description ....... 11
3.2 Program Chart ......................... 12
3.3 Program Options Compatibility 13
3.4 Options .................................... 14
3.5 Settings ................................... 16
4. DAILY USE ................................... 17
4.1 Starting Your Washing Machine 17
4.2 Load The Washing Machine .... 17
4.3 Add The Detergent / Bleach .... 17
4.4 Add Fabric Softener ................ 18
4.5 Adding Bleach ......................... 18
4.6 Setting a Program ................... 19
4.7 Starting a Program .................. 19
4.8 Interruption Of A Program ....... 19
4.9 Changing A Program ............... 19
4.10 Changing The Options .......... 19
4.11 At The End Of The Program .. 20
5. WASHING HINTS ........................ 21
5.1 Sort Your Washing Into
Separate Wash Loads ............. 21
5.2 Pre-treatment Sprays And
Stain Removers ...................... 22
5.3 Detergent ................................ 22
5.4 A Guide To Stain Removal ....... 22
6. INTERNATIONAL WASH CODE
SYMBOLS ........................................ 24
7. CARE AND CLEANING ............... 25
7.1 What To Do After You Have
Finished Your Washing. ........... 25
7.2 Cleaning The Lint Filter ........... 25
7.3 Cleaning The Dispenser ......... 25
7.4 Cleaning The Drawer Recess . 26
7.5 Cleaning The Water Inlet Filter 26
7.6 Cleaning Your Washing
Machine ................................... 27
7.7 Cleaning Stains In The
Washbowl ................................ 27
8. TROUBLESHOOTING................. 28
8.1 Possible Failures ..................... 28
8.2 Troubleshooting Fault Displays 30
8.3 Yellowing Or Greying Clothes . 32
9. TECHNICAL DATA ....................... 33
10. INSTALLATION .......................... 34
10.1 Unpacking ............................. 34
10.2 Positioning ............................. 35
10.3 Water Inlet ............................. 36
10.4 Water Drainage ..................... 36
10.5 Electrical Connection ............ 37
11. ENVIRONMENT CONCERNS .. 38
11.1 Packaging Materials .............. 38
11.2 Old Machine .......................... 38
11.3 Ecological Hints ..................... 38
WARRANTY ..................................... 43
4 www.westinghouse.com.au / www.westinghouse.co.nz
In the interest of your safety and to ensure the correct
use, before installing and first using the appliance, read
this user manual carefully, including its hints and
warnings.
This appliance is intended to be used in household and
similar applications such as:
farm houses;
by clients in hotels, motels, and other residential type
environment;
To avoid unnecessary mistakes and accidents, it is
important to ensure that all people using the appliance
are thoroughly familiar with its operation and safety
features.
Save these instructions and make sure that they remain
with the appliance if it is moved or sold, so that everyone
using it through its life will be properly informed on
appliance use and safety.
●
bed and breakfast type environments;
●
areas for communal use in blocks of flats or in
launderettes.
●
staff kitchen areas in shops, offices and other working
environment;
●
●
WARNING! The appliance must not be supplied
through an external switching device, such as timer,
or connected to a circuit that is regularly switched on
and off by utility.
1. SAFETY INFORMATION
1.1 Conditions Of Use

5
In the interest of your safety and to ensure the correct
use, before installing and first using the appliance, read
this user manual carefully, including its hints and
warnings.
This appliance is intended to be used in household and
similar applications such as:
farm houses;
by clients in hotels, motels, and other residential type
environment;
To avoid unnecessary mistakes and accidents, it is
important to ensure that all people using the appliance
are thoroughly familiar with its operation and safety
features.
Save these instructions and make sure that they remain
with the appliance if it is moved or sold, so that everyone
using it through its life will be properly informed on
appliance use and safety.
●
bed and breakfast type environments;
●
areas for communal use in blocks of flats or in
launderettes.
●
staff kitchen areas in shops, offices and other working
environment;
●
●
WARNING! The appliance must not be supplied
through an external switching device, such as timer,
or connected to a circuit that is regularly switched on
and off by utility.
●
●
●
●
This appliance is not intended for use by young
children or infirm persons without supervision.
Young children should be supervised to ensure that
they do not play with the appliance.
The packaging components (e.g. plastic film,
polystyrene) can be dangerous to children - danger of
suffocation! Keep them out of children’s reach.
Keep all detergents in a safe place out of children’s
reach.
Make sure that children or pets do not climb into the
drum.
●
●
This machine is provided with child safety lock option
( ) to prevent children playing with the control
panel. (see page 16)
1.2 Child Safety

6 www.westinghouse.com.au / www.westinghouse.co.nz
It is dangerous to alter the specifications
or attempt to modify this product in
anyway.
Make sure that small pets do not climb
into the washbowl. To avoid this, please
check into the washbowl before using
the appliance.
Only use the advised quantities of fabric
softener and detergent. Damage to the
fabric can ensue if you overfill. Refer to
the manufacturer’s recommendations of
quantities.
This appliance is not intended for use
by persons (including children) with
reduced physical, sensory or mental
capabilities, or lack of experience and
knowledge, unless they have been
given supervision or instruction
concerning use of the appliance by a
person responsible for their safety.
Wash small items such as socks,
laces, washable belts etc in a washing
bag or pillowcase as it is possible for
such items to slip down between the
tub and the agitator.
Do not use your washing machine to
wash articles with whale bones,
material without hems or torn material.
Always unplug the appliance and turn
off the water supply after use, clean
and maintenance.
Under no circumstances should you
attempt to repair the machine yourself.
Repairs carried out by inexperienced
persons may cause injury or serious
malfunctioning. Contact your local
Service Centre. Always insist on
genuine spare parts.
Any objects such as coins, safety pins,
nails, screws, hairpin, toothpick, stones
or any other hard, sharp material can
cause extensive damage and must not
be placed into the machine.
When unpacking the appliance, check
that it is not damaged. If in doubt, do
not use it and contact the Service
Centre.
After having installed the appliance,
check that it is not standing on the inlet
and drain hose.
The appliance should not be installed
in a humid place. The machine should
be installed indoors without touchLQJ
the rain.
If the machine is situated on a carpeted
floor, please adjust the feet in order to
allow air to circulate freely.
Always be sure that there is no water
leakage from hoses and their
connections after the installation.
Any plumbing work required to install
this appliance should be carried out by
a qualified plumber.
Any electrical work required to install
this appliance should be carried out by
a qualified electrician.
If the supply cord is damaged,
should the appliance power supply
cable need to be replaced, this shall
be carried out by our Service Centre.
1.3 General Safety
1.4 Installation
This appliance is designed for domestic
use. It must not be used for purposes
other than those for which it was
designed.
Make sure that the drainage is working
properly.
Only wash fabrics which are designed
to be machine washed. Follow the
instructions on each garment label.
Do not overload the appliance. See the
relevant section in the user manual.
Before washing, ensure that all pockets
are empty, and buttons and zips are
fastened. Avoid washing frayed or torn
articles and treat stains such as paint,
ink, rust, and grass before washing.
Garments which have been in contact
with volatile petroleum products should
not be machine washed. If volatile
cleaning fluids are used, care should be
taken to ensure that the fluid is
removed from the garment before
placing it in the machine.
Never pull the power supply cable to
remove the plug from the socket,
always take hold of the plug itself.
Never use the Top-load Washing
Machine if the power supply cable, the
control panel, the working surface or
the base are damaged so that the
inside of the Top-load Washing
Machine is accessible.
Components in the machine
are designed to be used with
water not hotter than 60 °C.
Water pressures between minimum
50kPa and maximum 800kPa are
acceptable.
Do not touch the power plug
while your hand is still wet.
Do not put your hand, foot, or
anything under the washing
machine while the machine is
operated.
May cause electric shock! if the
machine is not connected to an
earthed/ground system. DO NOT
touch the wet clothes and metal
parts.
For safety reasons do not use
double adaptors, extension cords
and multi-plug adapters.
7
It is dangerous to alter the specifications
or attempt to modify this product in
anyway.
Make sure that small pets do not climb
into the washbowl. To avoid this, please
check into the washbowl before using
the appliance.
Only use the advised quantities of fabric
softener and detergent. Damage to the
fabric can ensue if you overfill. Refer to
the manufacturer’s recommendations of
quantities.
This appliance is not intended for use
by persons (including children) with
reduced physical, sensory or mental
capabilities, or lack of experience and
knowledge, unless they have been
given supervision or instruction
concerning use of the appliance by a
person responsible for their safety.
Wash small items such as socks,
laces, washable belts etc in a washing
bag or pillowcase as it is possible for
such items to slip down between the
tub and the agitator.
Do not use your washing machine to
wash articles with whale bones,
material without hems or torn material.
Always unplug the appliance and turn
off the water supply after use, clean
and maintenance.
Under no circumstances should you
attempt to repair the machine yourself.
Repairs carried out by inexperienced
persons may cause injury or serious
malfunctioning. Contact your local
Service Centre. Always insist on
genuine spare parts.
Any objects such as coins, safety pins,
nails, screws, hairpin, toothpick, stones
or any other hard, sharp material can
cause extensive damage and must not
be placed into the machine.
When unpacking the appliance, check
that it is not damaged. If in doubt, do
not use it and contact the Service
Centre.
After having installed the appliance,
check that it is not standing on the inlet
and drain hose.
The appliance should not be installed
in a humid place. The machine should
be installed indoors without touchLQJ
the rain.
If the machine is situated on a carpeted
floor, please adjust the feet in order to
allow air to circulate freely.
Always be sure that there is no water
leakage from hoses and their
connections after the installation.
Any plumbing work required to install
this appliance should be carried out by
a qualified plumber.
Any electrical work required to install
this appliance should be carried out by
a qualified electrician.
If the supply cord is damaged,
should the appliance power supply
cable need to be replaced, this shall
be carried out by our Service Centre.
This appliance is designed for domestic
use. It must not be used for purposes
other than those for which it was
designed.
Make sure that the drainage is working
properly.
Only wash fabrics which are designed
to be machine washed. Follow the
instructions on each garment label.
Do not overload the appliance. See the
relevant section in the user manual.
Before washing, ensure that all pockets
are empty, and buttons and zips are
fastened. Avoid washing frayed or torn
articles and treat stains such as paint,
ink, rust, and grass before washing.
Garments which have been in contact
with volatile petroleum products should
not be machine washed. If volatile
cleaning fluids are used, care should be
taken to ensure that the fluid is
removed from the garment before
placing it in the machine.
Never pull the power supply cable to
remove the plug from the socket,
always take hold of the plug itself.
Never use the Top-load Washing
Machine if the power supply cable, the
control panel, the working surface or
the base are damaged so that the
inside of the Top-load Washing
Machine is accessible.
Components in the machine
are designed to be used with
water not hotter than 60 °C.
Water pressures between minimum
50kPa and maximum 800kPa are
acceptable.
Do not touch the power plug
while your hand is still wet.
Do not put your hand, foot, or
anything under the washing
machine while the machine is
operated.
May cause electric shock! if the
machine is not connected to an
earthed/ground system. DO NOT
touch the wet clothes and metal
parts.
For safety reasons do not use
double adaptors, extension cords
and multi-plug adapters.
1.5 Use

8 www.westinghouse.com.au / www.westinghouse.co.nz
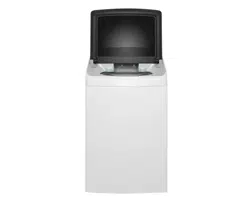
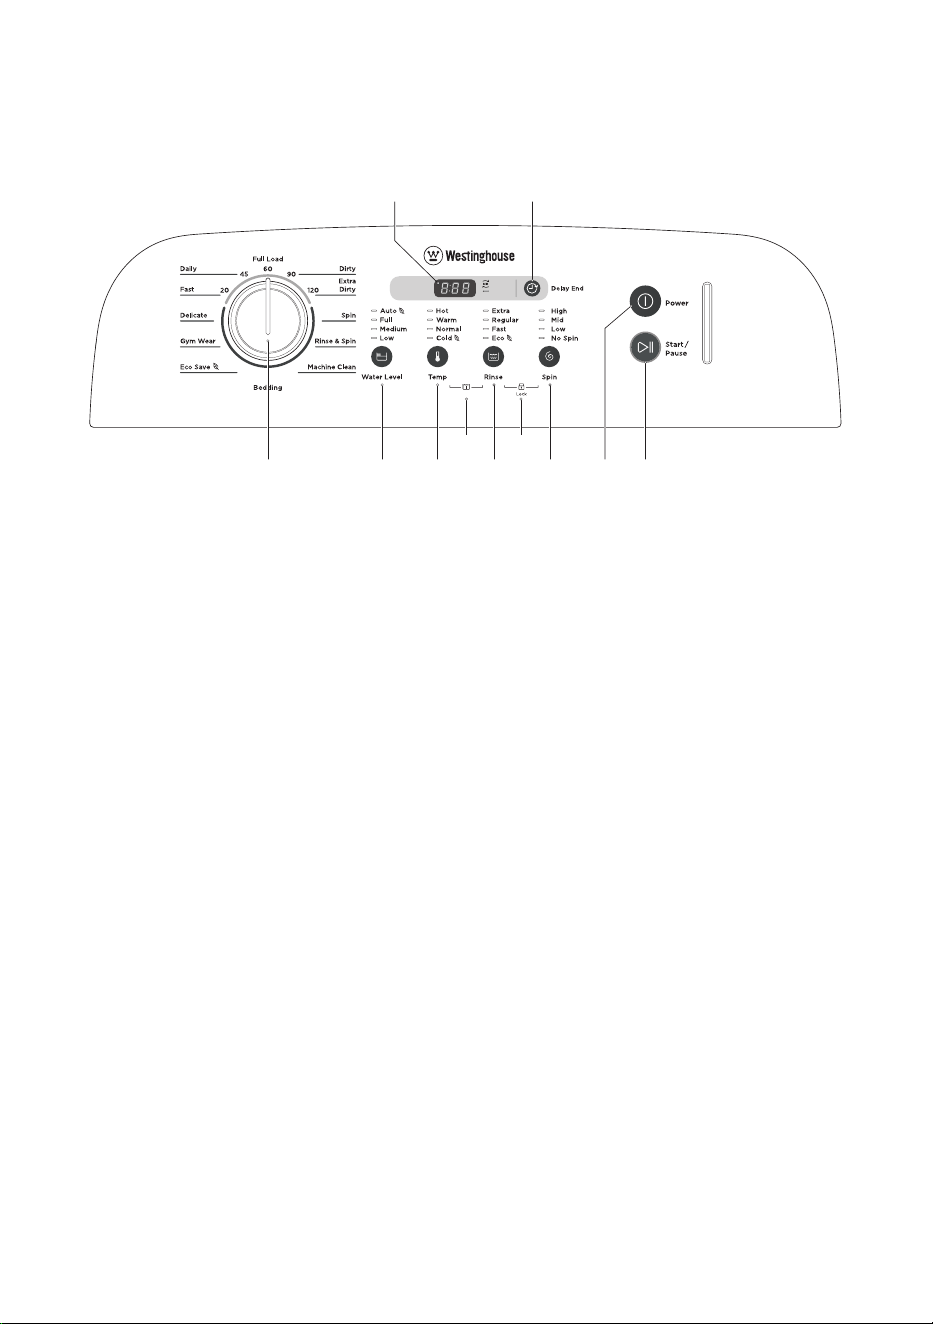
Control Panel
Lid
Cabinet
Front Feet
Levelling Adjustable : Right & Left
Mains Cable
Water Inlet Hose
Outlet Hose/Drain Hose (See
installation instructions sheet
to fit & position drain hose)
Rear Feet (Fixed)
Old inlet hose should be
discharged if any and use
the inlet hose provided
with machine.
2. PRODUCT DESCRIPTION
2.1 Parts
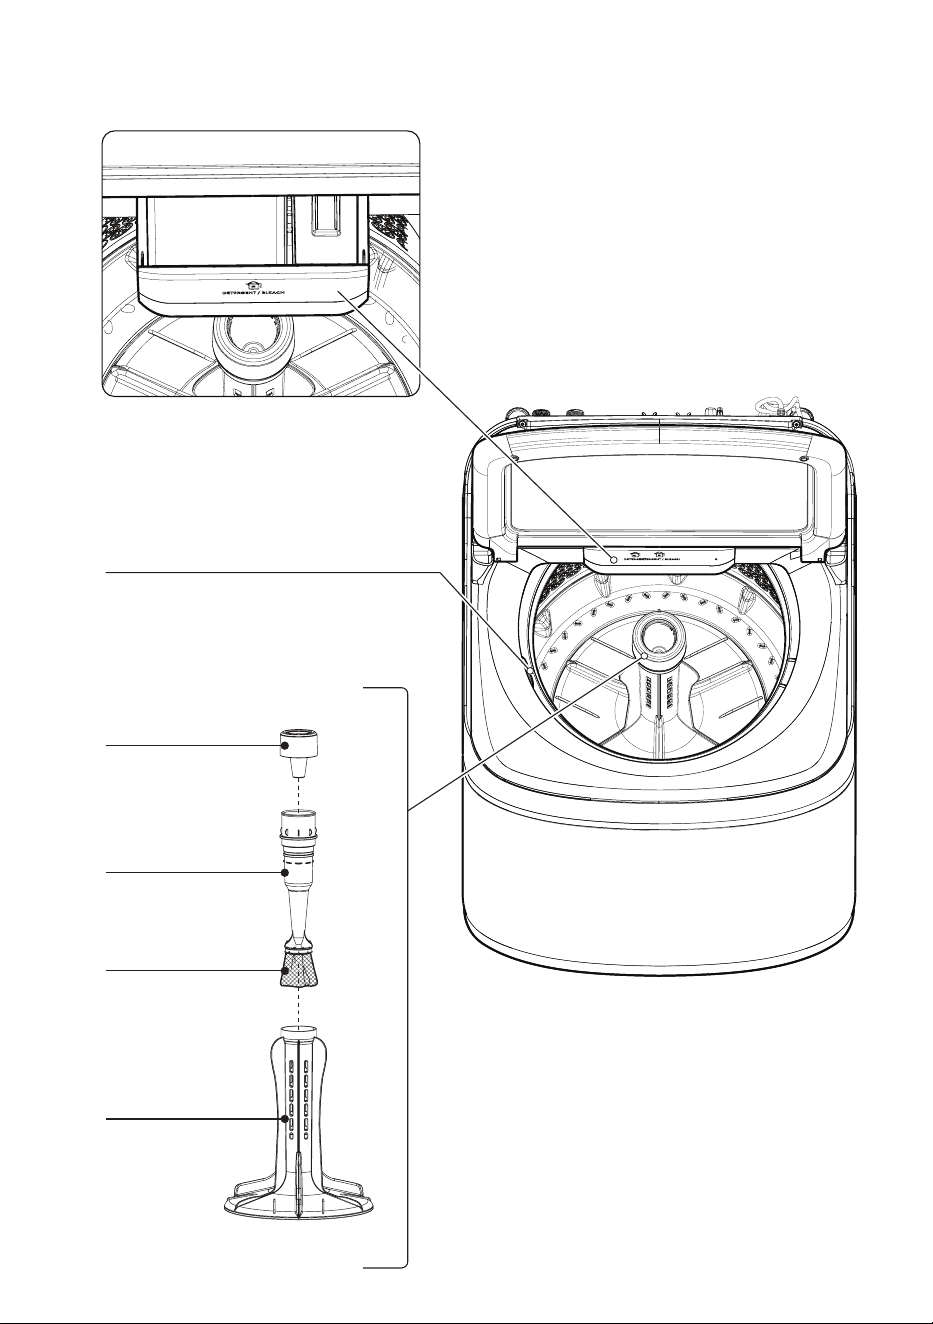
9
Bleach Dispenser (option)
Fabric Softener
Dispenser
Agitator
Lint Filter
Frame Filter
Detergent/Bleach Dispenser
(see page 17)
Lint Filter (see
page 25)

10 www.westinghouse.com.au / www.westinghouse.co.nz
Power Failure Recovery
When there is power failure while the machine
is washing or rinsing or spinning. The machine
tries to save the settings at which stage the
machine is doing and then when the power
returns back the machine will start washing
from the stage where it is left off.
PreMix
This feature helps to dissolve and activate
the active ingredients of the detergent, by
blending the detergent with the water for about
5 minutes (except Fast 20 program), before
dispensing into the tub and onto the clothes.
2.2 Product Features
Auto sensing water level
Auto sensing is a feature where the
washer fills automatically with water to
just the right level for your clothes load.
You do have the option to manually set
the water level if you wish.
We recommend you use the auto sensing
water level option to ensure there is just
the right amount of water for the wash
load in the machine. In other words, it will
usually give you the best wash while also
being the most efficient in terms of water
usage.
At times during a wash, it may appear
your machine is either doing nothing or
intermittently it is only gently vibrating/
jiggling/agitating.
This is because your machine could be:
• In auto sensing test mode and the
machine is determining the correct
amount of water for your wash.
• At a drain stage of the wash program
and the machine is allowing time for
water to flow the washbowl from to the
out bowl.
• Engaging or disengaging the drive
clutch mechanism. Wait a short time,
your washing machine will complete
the above tasks and continue with the
wash.
The amount of water for auto is factory
set at an optimised level. You can adjust
the Auto level up or down by a small
amount.
11
B C D E
KJ
G
IH
FA
Soak
A
Program knob
H
Display
B
Water Level button
I
Delay End button
C
Temp button
J
Soak option **
D
Rinse button
K
Child safety lock option **
E
Spin button
F
Power button
G
Start/Pause button
3. CONTROL PANEL
3.1 Control Panel Description
two combination buttons, press and hold these two buttons about 3 seconds**
12 www.westinghouse.com.au / www.westinghouse.co.nz
Program
Type of load and soil level Max. Load
(Dry Clothes)
1)
Delicate
Delicate fabrics such as acrylics,
viscose, polyester items.
For heavily soiled cotton fabric.
For moderately soiled cotton fabric.
For normally soiled cotton fabric.
For normally soiled synthetic and
mixed fabric.
For lightly soiled synthetic and mixed
fabric.
Extra Dirty 120
Gym Wear
Sportswear labelled “Machine
washable”.
Eco Save
3)
For normally soiled white and colourfast
cotton. Set this program to have a good
washing results and decrease the
energy consumption.
Bedding
For bedding fabrics labelled “Machine
Washable”.
Rinse & Spin
For items that you want to rinse and
spin e.g. Clothes items you have hand
washed in a wash tub.
Spin
For very wet clothes to remove the
water.
Machine Clean
Clean the tub.
2 kg
2 kg
2 kg
2 kg
2 kg
2 kg
2 kg
2 kg
2 kg
Maximum Capacity
No Load
2 kg
4 kg
2 kg
4 kg
4 kg
4 kg
2 kg
4 kg
2 kg
4 kg
–
Max
4 kg
Max
Max
–
3 kg
Max
4 kg
Max
–
Max
2)
4 kg
Max
Max
–
3 kg
Max
4 kg
–
–
Fast 20
1)
3)
Water Level
Auto FullMid Low
Dirty 90
Full Load 60
Daily 45
2)
Maximum capacity depended on the model of the Washing Machine.
Clothes Load depends on the Water level selected. For the best washing result, do not exceed
the load weight over the suggestion as in the table above.
The energy label specification has been determined by using the following program according
to AS/NZS 2040.
Eco save, Normal temp, Full water level, No soak, Eco rinse, High spin speed.
Model :
WWT6084J5WA
WWT7084J5WA
6 kg
7 kg
3.2 Program Chart
13
Program
Option
Delay
End
Soak
Spin
Extra Dirty 120
Fast 20
Daily 45
Full Load 60
Dirty 90
High
Mid
Low
No Spin
Rinse
Extra
Regular
Fast
(FR
Temp
Hot
Warm
Normal
Cold
Delicate
Gym Ware
Eco Save
Bedding
Machine Clean
Rinse & Spin
Spin
Water Level
Auto
Full
Medium
Low
Remark
Default option
Available select option
30 Min
No Soak
3.3 Program Options Compatibility
14 www.westinghouse.com.au / www.westinghouse.co.nz
Water Level Button
Choose the water level by pressing “Water
Level” button.
Use only the amount of water you need for
the wash load.
Please refer to the program table on page
Flood diagnostic is explained on
page 30. You should refer to this if
you have water pouring onto the
floor. The display will show “ ”
and you will hear rapid short beeps
continuously to remind you about
this problem.
Temp %XWWRQ
For each wash program your washing
machine automatically selects a suitable fill
water temperature. If you want to use a
different wash water temperature, press
the Temperature button repeatedly.
The temperature of warm water will
depend on the temperature and pressure
of your hot and cold water supplies. The
recommended temperature for warm is
35°C.
You have four temperatures to choose
from Hot, Warm, Normal and Cold.
The water temp lights will tell you the
temperature for each press of the button.
Always check your label for the washing
temperature symbols which the
International Care Labelling Code now
uses
If you have a cold water connection
ONLY and the hot inlet valve is
capped off (refer installation
instructions) you must select Cold
washes only.
You can adjust the flow rate of the water
supplies to adjust the Warm temperature.
All rinse water temperatures are cold.
Cold,Warm, Hot.
Pressing the Rinse button to choose the
rinse type for your wash load. For most
washes, the machine automatically fills
the full tub of water for a rinse.
Rinse Button
Extra rinse - 2 rinses cycles.
Regular rinse - 1 rinse cycle.
Fast rinse - Spraying water 3 rinses
cycles.
Eco - Spraying water 4 rinses cycles.
When Eco rinse is used, rinse water is
sprayed into the washbowl in pulses.
After each pulse the washbowl will spin
to remove detergent laden water from
the clothes.
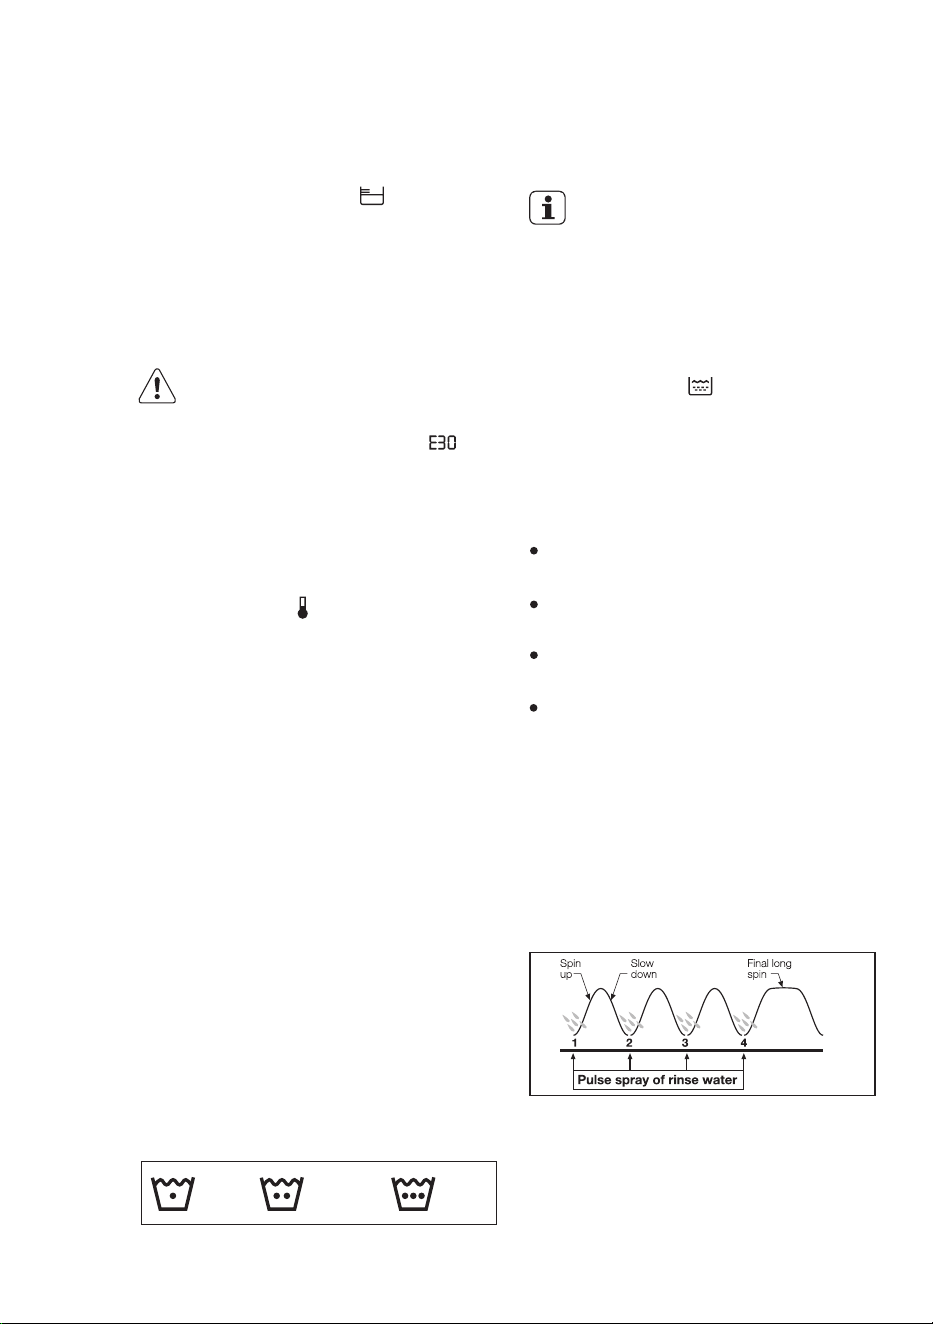
How does Eco Rinse work?
The machine will go through a series of
maximum 4 pulses spray and short spin
cycles in this manner, depending on
program selection, followed by a final
long spin that removes the water from the
clothes to complete the full wash
program.
3.4 Options
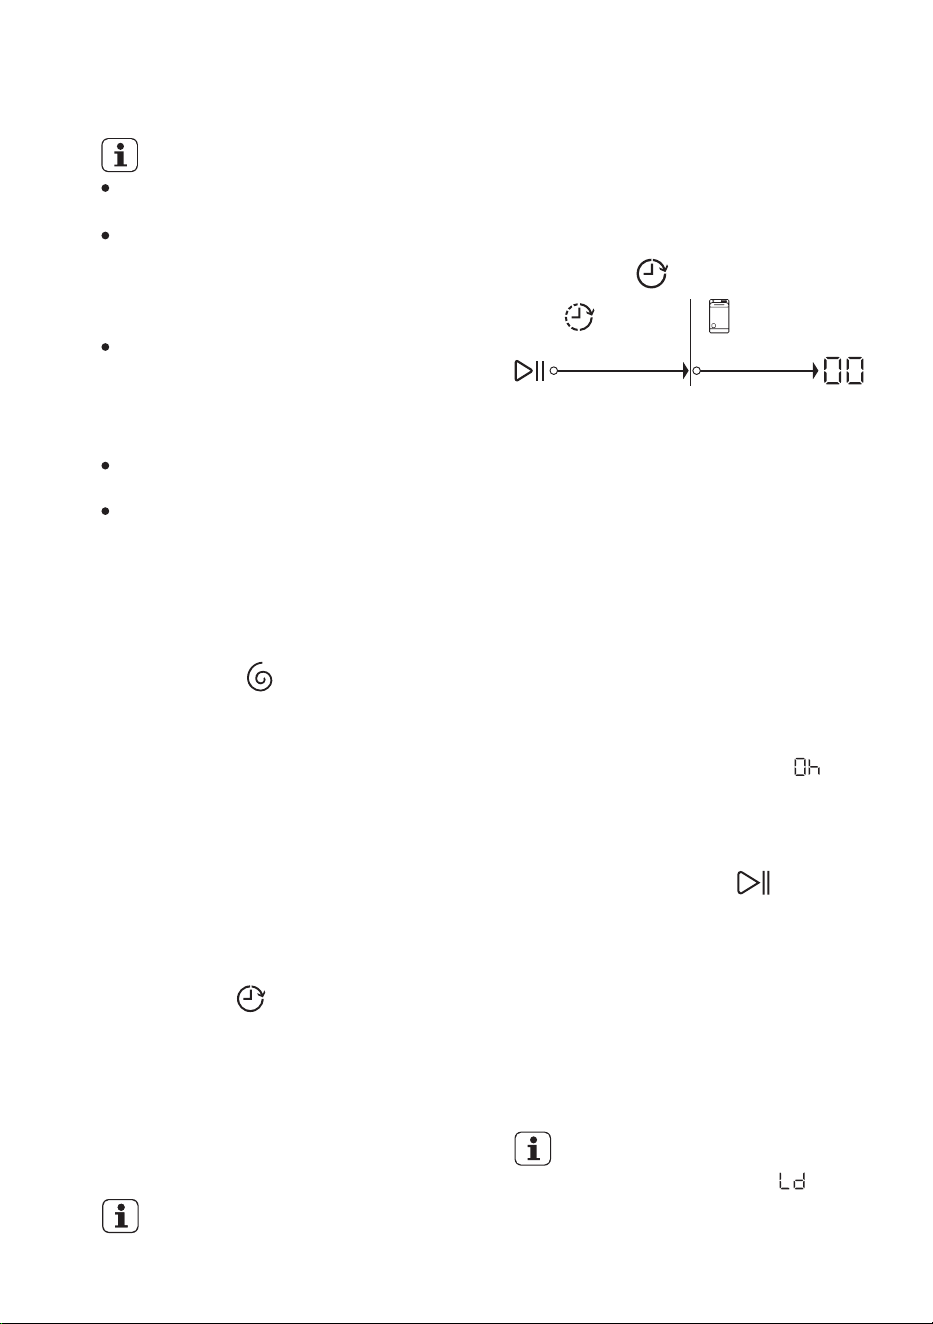
Delay End ( ) Button
Before you start the program, this option
makes it possible to define the end of the
washing program from minimum of 1 hour to
maximum of 20 hours.
After selecting Delay End time, press
Start/Pause button to start the program.
Machine will then countdown and update
time on the display every hour until it
reaches the starting point of the wash
cycle.
Press the Delay End button to choose the
end time as you wish. The display shows the
number of hours.
For example, if the program duration of
your selected program is 3.20 hours and
you define the “Delay End” time to 6
hours. This means your wash program
will finish in 6 hours. (See diagram)
3.20 hrs.2.40 hrs.
Program Cycle
: 6 hrs.
Pressed
Start/Pause
End of
Cycle
Start the
Program
Countdown
This option must be selected after
choosing the wash program, and before
pressing the “Start/Pause” button.
If you wish to modify or cancel Delay End
option after starting the program, follow
the steps below:
set the washing machine to PAUSE by
pressing “Start/Pause” button;
-
deselect this option by pressing
“Delay End” button repeatedly till
the display shows delay time “ ”;
-
press the “Start/Pause” to start the
program.
-
To start the selected program, press the
“Start/Pause” button.
If you have started your wash and you
wish to stop it for some reason, press the
“Start/Pause” button to enter PAUSE
mode
Start/Pause Button
To restart the program from the point at
which it was interrupted, press the
“Start/Pause” again.
If the lid is opened during operation,
the machine will go into PAUSE
mode and display show “ ”.
After closing the lid press
Start/Pause button on the control
panel to restart the program.
Press this button to select the spin speed or
no spin, if you want your laundry to be spun
at a speed different from the one proposed
by the washing machine.
The speed of spin level are:
– High, about 800 rpm ;
– Mid, about 650 rpm ;
– Low, about 550 rpm ;
– No Spin, 0 rpm.
Spin Button
Note:
Compare this with Regular rinse where
much more water is used.
Regular rinse, water enters the
machine filling up to the wash water
level selected. The washer agitates and
finally empties the rinse water through
the drain hose.
Extra rinse, this is a special option for
those people who suffer from allergies,
this extra rinse will provide 2 rinses to
ensure all detergent residue has been
removed.
Select Regular rinse if you are going to
use fabric softener.
Regular rinse ensures the fabric
softener is correctly dispensed and
thoroughly removed from your clothes
during rinsing.
15
Delay End ( ) Button
Before you start the program, this option
makes it possible to define the end of the
washing program from minimum of 1 hour to
maximum of 20 hours.
After selecting Delay End time, press
Start/Pause button to start the program.
Machine will then countdown and update
time on the display every hour until it
reaches the starting point of the wash
cycle.
Press the Delay End button to choose the
end time as you wish. The display shows the
number of hours.
For example, if the program duration of
your selected program is 3.20 hours and
you define the “Delay End” time to 6
hours. This means your wash program
will finish in 6 hours. (See diagram)
3.20 hrs.2.40 hrs.
Program Cycle
: 6 hrs.
Pressed
Start/Pause
End of
Cycle
Start the
Program
Countdown
This option must be selected after
choosing the wash program, and before
pressing the “Start/Pause” button.
If you wish to modify or cancel Delay End
option after starting the program, follow
the steps below:
set the washing machine to PAUSE by
pressing “Start/Pause” button;
-
deselect this option by pressing
“Delay End” button repeatedly till
the display shows delay time “ ”;
-
press the “Start/Pause” to start the
program.
-
To start the selected program, press the
“Start/Pause” button.
If you have started your wash and you
wish to stop it for some reason, press the
“Start/Pause” button to enter PAUSE
mode
Start/Pause Button
To restart the program from the point at
which it was interrupted, press the
“Start/Pause” again.
If the lid is opened during operation,
the machine will go into PAUSE
mode and display show “ ”.
After closing the lid press
Start/Pause button on the control
panel to restart the program.
Press this button to select the spin speed or
no spin, if you want your laundry to be spun
at a speed different from the one proposed
by the washing machine.
The speed of spin level are:
– High, about 800 rpm ;
– Mid, about 650 rpm ;
– Low, about 550 rpm ;
– No Spin, 0 rpm.
Spin Button
Note:
Compare this with Regular rinse where
much more water is used.
Regular rinse, water enters the
machine filling up to the wash water
level selected. The washer agitates and
finally empties the rinse water through
the drain hose.
Extra rinse, this is a special option for
those people who suffer from allergies,
this extra rinse will provide 2 rinses to
ensure all detergent residue has been
removed.
Select Regular rinse if you are going to
use fabric softener.
Regular rinse ensures the fabric
softener is correctly dispensed and
thoroughly removed from your clothes
during rinsing.
16 www.westinghouse.com.au / www.westinghouse.co.nz
This setting permits you to either enable
or disable the buzzer at the end of the
program. As an example, you might wish
to disable this buzzer when you start a
wash when going to bed, so that when
the wash finishes approximately 1 hour
later, it will not disturb you through the
night.
Error warning beeps such as critical
faults are not disabled.
Enabling/Disabling End-Of-Wash
Buzzer
To disable the buzzer sound, press
“Water Level” and “Temp” buttons at
the same time about 3 seconds, the
icon “ ” will show on display
along with buzzer sound.
To return to default configuration press
these two buttons at the same time
about 3 seconds, the icon “ ” will
show on display along with buzzer
sound.
●
●
–
–
Child Safety Lock ( ) Option
Your appliance is provided with CHILD
SAFETY LOCK which permits you to leave
the appliance unsupervised with the door
closed without having to worry that children
might be injured by or cause damage to
the appliance.
Soak ( ) Option
Set this option AFTER pressing the
Start/Pause button.
To activate the function, press and
hold “Rinse” and “Spin” button about 3
seconds until the display shows the
icon “ ”.
To set “Child Lock” option:
To deactivate the function, press and
hold these two buttons again until the
display shows the icon “ ”.
You must deactivate the function
before operating the washing
machine.
All the buttons are locked.
●
●
If you press any button while
Child Lock is activated, the icon
“ ” will flash on display
3 times along with buzzer sound.
This option allows you to soak heavily
soiled clothes at the beginning of the
wash. To do this, press the “Temp” and
“Rinse” buttons at the same time for about
3 seconds to add the soak phase.
The lid must be closed to allow Soak
functions to operate. The machine will
agitate for short periods. At other times,
the clothes are soaking and the machine
will be doing nothing.
3.5 Settings
When loading the clothes into your
washing machine, there are four things to
remember:
Clothes must be loaded evenly
around the agitator. For best results
load small items first, followed by
large items.
1.
1.
Clothes must not be wrapped around
the agitator.
2.
The washing machine must not be
overloaded. Clothes must be able to
move during wash.
3.
The load should contain only three or
four large items, for example sheets.
The rest of the load should be small
items. A mixed load of large and
small items will wash cleaner than a
load of all large items.
4.
Powder / Liquid Detergent /
Bleach
Connect the mains plug to the mains
socket.
1.
Pull the dispenser drawer forward out
from its position.
Liquid Detergent (option)
1.
Measure the correct amount of liquid
detergent by following the
recommendations on the package.
Pouring onto the clothes.
2.
Measure the correct amount of powder
or liquid detergent by following the
recommendations on the package.
3.
Pour it into the detergent dispenser
drawer.
4.
Put the dispenser back into its recess.
2.
Turn the water tap on.
move around
agitator

17
When loading the clothes into your
washing machine, there are four things to
remember:
Clothes must be loaded evenly
around the agitator. For best results
load small items first, followed by
large items.
1.
1.
Clothes must not be wrapped around
the agitator.
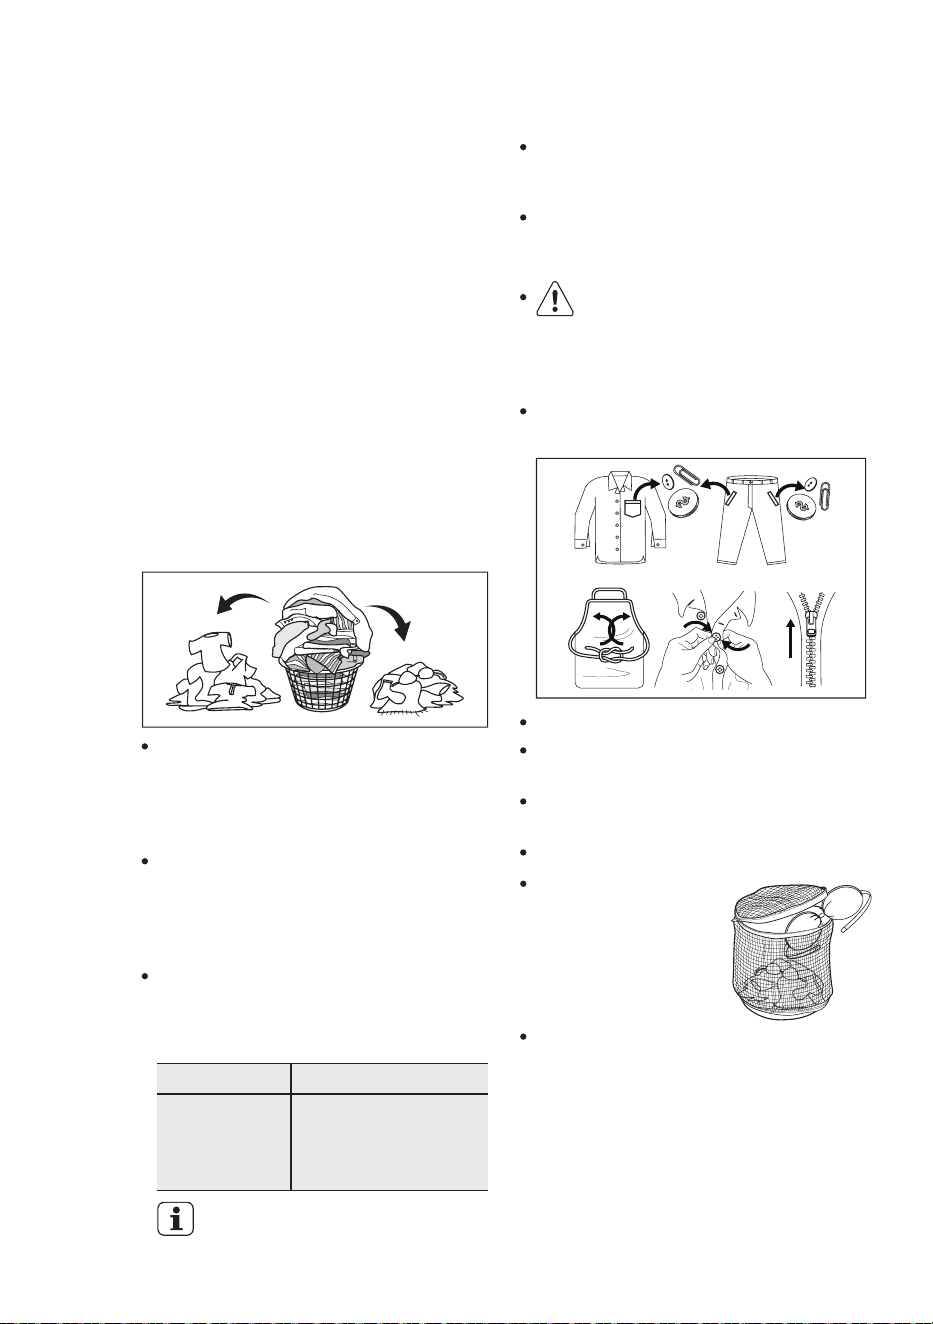
2.
The washing machine must not be
overloaded. Clothes must be able to
move during wash.
3.
The load should contain only three or
four large items, for example sheets.
The rest of the load should be small
items. A mixed load of large and
small items will wash cleaner than a
load of all large items.
4.
Powder / Liquid Detergent /
Bleach
Connect the mains plug to the mains
socket.
1.
Pull the dispenser drawer forward out
from its position.
Liquid Detergent (option)
1.
Measure the correct amount of liquid
detergent by following the
recommendations on the package.
Pouring onto the clothes.
2.
Measure the correct amount of powder
or liquid detergent by following the
recommendations on the package.
3.
Pour it into the detergent dispenser
drawer.
4.
Put the dispenser back into its recess.
2.
Turn the water tap on.
move around
agitator
4. DAILY USE
4.1 Starting Your Washing
Machine
4.3 Add The Detergent / Bleach
4.2 Load The Washing
Machine

18 www.westinghouse.com.au / www.westinghouse.co.nz
Do not use gelatinous or thick liquid
detergents.
NOTE: When you use the
liquid detergent
-
Residues of softener and water may
remain in the cup. It is recommended to
clean the cup regularly to remove any
residue.
Mix softener with an equal amount of
warm water but only mix enough to fill
to the line marked inside the cup. The
softener cup holds 75ml.
2.
Do not spill fabric softener on the
clothes as it may stain them.
Pour the mixed softener into the cup in
the top of the agitator. Do not overfill
the cup.
3.
Measure the correct amount of fabric
softener by following the
recommendations on the package.
1.
–
–
The softener amount used must not
exceed the “MAX” mark in the cup.
If you use thick softeners it is
recommended to dilute with water.
NOTE
Press the Start/Pause touchpad to
commence water fill.
2.
Pour the bleach solution down the hole
in the top of washing tub during fill when
there is some water in the washbowl by
tilting the washing tub as picture below.
3.
Turn Program Selector to a Full Load
60 position.
1.
Bleaching of clothes can help to remove
stains, heavy soiling and to kill bacteria.
This is generally a powder type bleach.
Pour it into the detergent dispenser
drawer or mix the required quantity with
water and pour down the bleach hole in
the top of the washing tub during the fill
when there is some water in the
washbowl.
This type of bleach should not be mixed
with detergent. Mix the bleach with water
as per the instructions on the container.
How to soak with bleach, proceed as
follows:
Oxygen Type
Chlorine Type
Allow the machine to agitate for a few
minutes, then let it stand for the
required time by pressing Start/Pause
button to pause the machine.
4.
When soaking bleach reached the
required time, turn Program Selector
to Rinse & Spin position and press the
Start/Pause button to empty the wash
bowl.
5.
2.
Mix detergent in one litre of water.
3.
Add the pre-mixed detergent to the
wash load.
tilting the
washing tub
–
4.4 Add Fabric Softener
4.5 Adding Bleach (Option)
19
1.
Press Power ( ) EXWWRQ, turn the
program selector to the required
program.
The relevant light will light up.
-
Your washing machine is now in
STAND-BY-MODE and ready to
wash your clothes.
-
The buzzer will sound.
-
Once you select a program, the
program selected will stay at that
position for the whole of the cycle.
-
The selector dial can be turned
either clockwise or anticlockwise.
-
The display shows the program
duration.
-
2.
If you want your laundry to be
washed with functions different from
the one proposed by the machine,
press Water Level, Soak, Rinse and
Spin option buttons.
If the settings shown on the control
panel are what you want to use,
press the Start/Pause touchpad to
start your wash.
NOTE:
To start a program, press the Start/Pause
( ) button, a default program duration
will be displayed on the screen.
3.
If you want to define the end of the
washing program, press the “Delay
End” button repeatedly to choose
your machine end time.
Different functions can be combined
which is dependent on the program
selected. When these buttons are
pressed, the corresponding pilot
lights come on.
When you select the Rinse & Spin
program, there will be a delay of at least
2 minutes before the washing machine
starts to spin.
This delay is a drain out period to ensure
the bowl is empty of water, which is
necessary before spin commences. Even
though you may have only put wet clothes
into an empty bowl, the delay before spin
will still occur to be safe and to protect
your washing machine.
NOTE
Press the Start/Pause again. The
program will continue.
It is possible to change only some
options after the program has started.
Press the Start/Pause button to enter
PAUSE mode.
1.
Change the options.
2.
Press Start/Pause button again. The
program will continue.
3.
If you have started your wash and you
wish to stop it for some reason, press the
Start/Pause button to enter PAUSE mode.
The time remaining is shown then
“ ”.
You can turn the Program Selector Knob
to a new program position at any time. If
you do move the Program Selector Knob
the effect will be different depending on
the status of the machine at the time you
do this, as follows:
When the machine is in PAUSE mode,
moving the Knob to a new position will
result in the machine resetting to the
start of the new program.
When the machine is running, moving
the Knob to a new position will result in
the machine continuing the wash and
the display will show “ ” and
flashing with 3 consecutive short beeps
to remind you that this option is not
allowed.
4.6 Setting a Program
4.8 Interruption Of A Program
4.9 Changing A Program
4.10 Changing The Options
4.7 Starting a Program

20 www.westinghouse.com.au / www.westinghouse.co.nz
The appliance stops automatically.
The display will show “ ” and
flashing with 3 consecutive long
beeps.
-
-
-
-
-
Remove the laundry from the
appliance. Make sure that the washing
tub is empty.
Keep the lid ajar, to prevent the
mildew and odours.
Press the Power button to turn off the
machine.
-
Turn off the water tap.
4.11 At The End Of The Program
Each load of washing should contain
clothing which needs the same washing
conditions. For example, you should
not wash delicate clothes with very dirty
work clothes.
Colour fast and non-colourfast fabrics
should be separated. Knowing the type
of fabrics you have and how dirty they
are will help when you make selections
from the wash program options.
Some fabrics are lint collectors and can
pick up lint, dirt and colour from other
fabrics which are lint producers. Some
examples are listed below:
Lint collectors
Lint producers
- Corduroy
- Synthetics
- Permanent
press fabrics
- Towels
- Nappies
- Chenille/Candlewick
Make sure that you wash lint collectors
separately from lint producers.
NOTE:
IMPORTANT!
However, due to the variables of fabric
types, soil levels, detergent types and
available program settings you may find
some combinations of these which do
not always result in the perfect wash.
If for example you see residuals of
detergent or soils on some items, please
read the section Residues on washed
items paragraph.
Over time you will learn what is the best
set-up of programs, detergent and load
sorting for different load types and soils.
These Washing Instructions are of a
general nature and you should get good
wash results by following them.
Rub particularly soiled areas with a
special detergent or detergent paste.
Treat curtains with special care.
Never wash whites and coloureds
together. Whites may lose their
“whiteness” in the wash.
New coloured items may run in the first
wash; they should therefore be washed
separately the first time.
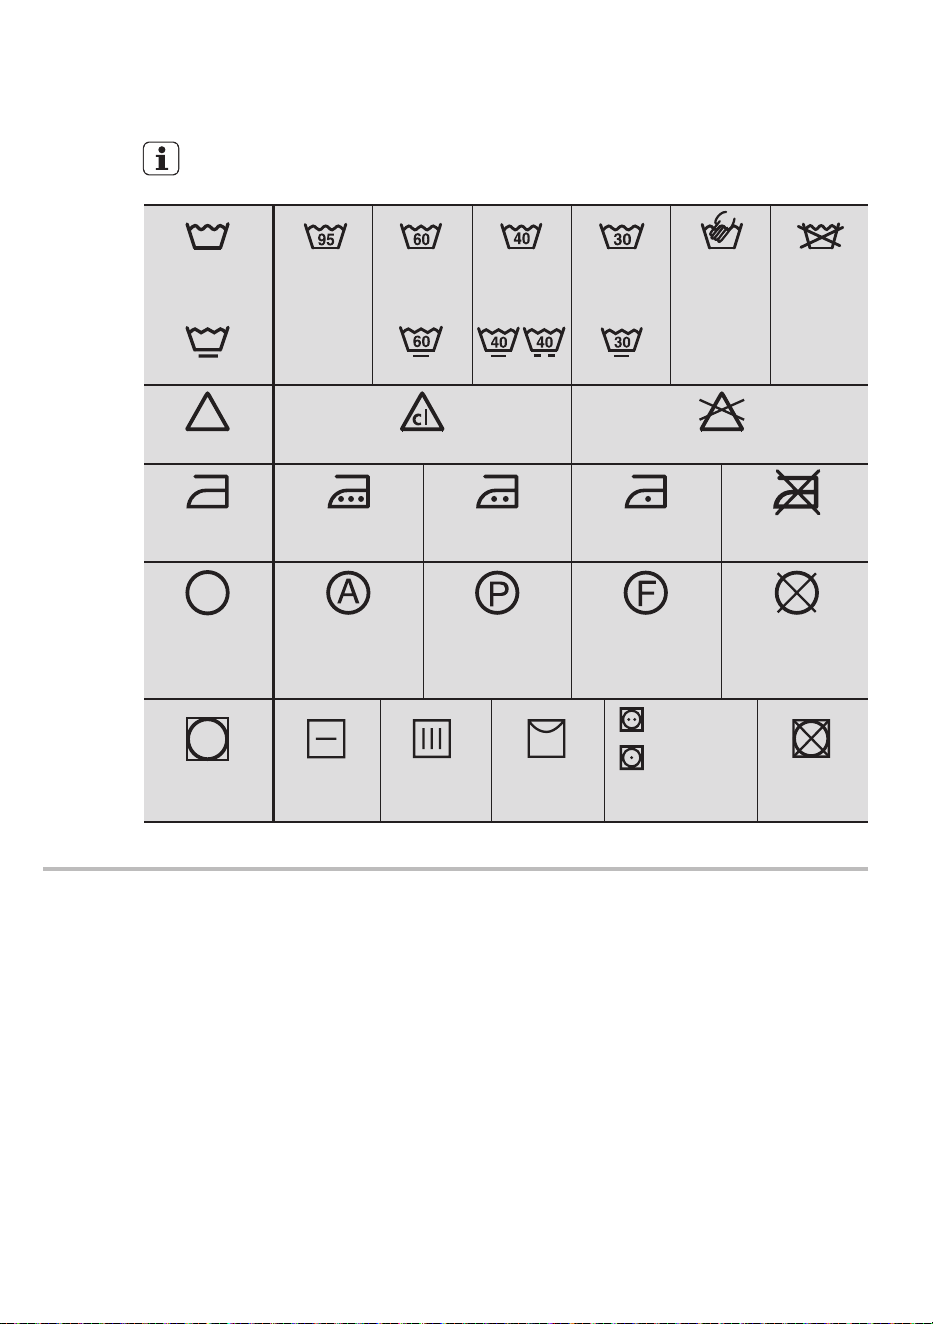
Button up pillowcases, close zip
fasteners, hooks and poppers.
Tie any belts or long tapes.
Remove persistent stains before
washing.
Make sure that no metal objects are
left in the laundry (e.g. hair clips, safety
pins, pins).
Wash bras, pantyhose
and other delicates in
a mesh laundry bag,
which you can
purchase from your
supermarket.
Remove hooks or tie them up in a bag
or net.
21
The appliance stops automatically.
The display will show “ ” and
flashing with 3 consecutive long
beeps.
-
-
-
-
-
Remove the laundry from the
appliance. Make sure that the washing
tub is empty.
Keep the lid ajar, to prevent the
mildew and odours.
Press the Power button to turn off the
machine.
-
Turn off the water tap.
Each load of washing should contain
clothing which needs the same washing
conditions. For example, you should
not wash delicate clothes with very dirty
work clothes.
Colour fast and non-colourfast fabrics
should be separated. Knowing the type
of fabrics you have and how dirty they
are will help when you make selections
from the wash program options.
Some fabrics are lint collectors and can
pick up lint, dirt and colour from other
fabrics which are lint producers. Some
examples are listed below:
Lint collectors
Lint producers
- Corduroy
- Synthetics
- Permanent
press fabrics
- Towels
- Nappies
- Chenille/Candlewick
Make sure that you wash lint collectors
separately from lint producers.
NOTE:
IMPORTANT!
However, due to the variables of fabric
types, soil levels, detergent types and
available program settings you may find
some combinations of these which do
not always result in the perfect wash.
If for example you see residuals of
detergent or soils on some items, please
read the section Residues on washed
items paragraph.
Over time you will learn what is the best
set-up of programs, detergent and load
sorting for different load types and soils.
These Washing Instructions are of a
general nature and you should get good
wash results by following them.
Rub particularly soiled areas with a
special detergent or detergent paste.
Treat curtains with special care.
Never wash whites and coloureds
together. Whites may lose their
“whiteness” in the wash.
New coloured items may run in the first
wash; they should therefore be washed
separately the first time.
Button up pillowcases, close zip
fasteners, hooks and poppers.
Tie any belts or long tapes.
Remove persistent stains before
washing.
Make sure that no metal objects are
left in the laundry (e.g. hair clips, safety
pins, pins).
Wash bras, pantyhose
and other delicates in
a mesh laundry bag,
which you can
purchase from your
supermarket.
Remove hooks or tie them up in a bag
or net.
5. WASHING HINTS
5.1 Sort Your Washing Into
Separate Wash Loads

22 www.westinghouse.com.au / www.westinghouse.co.nz
If you use pre-treatment sprays or stain
removers, apply them to the clothing well
away from your washing machine.
Pre-treatment sprays and stain remover
can damage plastic components on your
washing machine.
WARNING!
Don’t use the wrong type of detergent.
You must use a low sudsing detergent
designed for front load washing
machines or high efficiency top loaders,
such as Cold Power for Front Loaders
and High Efficiency Top Loaders or
detergents labelled “Matic”.
Don’t use soap-based products in your
washing machine.
Don’t use too much detergent. This can
result in excessive suds that can cause
low spin speeds, poor rinsing and
overloading the motor during spin stages
of the wash program.
Don’t use too little detergent because
you will get a poor wash. If you think you
need more, increase dosages by only
small amounts to avoid excessive suds.
Quantity of detergent to be
used
Good washing results also depend on the
choice of detergent and use of the correct
quantities to avoid waste and protect the
environment.
Although biodegradable, detergents
contain substances which, in large
quantities, can upset the delicate balance
of nature.
The choice of detergent will depend on the
type of fabric (delicates, woollens, cottons,
etc.), the colour, washing temperature and
degree of soiling.
The type and quantity of detergent will
depend on the type of fabric, load size,
degree of soiling and hardness of the
water used.
Information on the hardness of the water
in your area can be obtained from the
relevant water supply company, or from
your local authority.
Follow the product manufacturers’
instructions on quantities to use.
Not enough washing powder causes:
the washload to turn grey, greasy
clothes.
Too much washing powder causes:
sudsing, reduced washing effect,
inadequate rinsing.
Use less detergent if: you are washing
a small load, the laundry is lightly
soiled, large amounts of foam form
during washing.
Water hardness is classified in so-called
“degrees” of hardness.
Blood: treat fresh stains with cold water.
For dried stains, soak overnight in water
with a special detergent then rub in the
soap and water.
Oil based paint: moisten with benzine
stain remover, lay the garment on a soft
cloth and dab the stain; treat several
times.
Dried grease stains: moisten with
turpentine, lay the garment on a soft
surface and dab the stain with the
fingertips and a cotton cloth.
Stubborn stains may not be removed by
just water and detergent. It is therefore
advisable to treat them prior to washing.
Rust: oxalic acid dissolved in hot water
or a rust removing product used in cold
water. Be careful with rust stains which
are not recent since the cellulose
structure will already have been
damaged and the fabric tends to hole.
5.2 Pre-treatment Sprays And
Stain Removers
5.3 Detergent
5.4 A Guide To Stain Removal

23
If you use pre-treatment sprays or stain
removers, apply them to the clothing well
away from your washing machine.
Pre-treatment sprays and stain remover
can damage plastic components on your
washing machine.
WARNING!
Don’t use the wrong type of detergent.
You must use a low sudsing detergent
designed for front load washing
machines or high efficiency top loaders,
such as Cold Power for Front Loaders
and High Efficiency Top Loaders or
detergents labelled “Matic”.
Don’t use soap-based products in your
washing machine.
Don’t use too much detergent. This can
result in excessive suds that can cause
low spin speeds, poor rinsing and
overloading the motor during spin stages
of the wash program.
Don’t use too little detergent because
you will get a poor wash. If you think you
need more, increase dosages by only
small amounts to avoid excessive suds.
Quantity of detergent to be
used
Good washing results also depend on the
choice of detergent and use of the correct
quantities to avoid waste and protect the
environment.
Although biodegradable, detergents
contain substances which, in large
quantities, can upset the delicate balance
of nature.
The choice of detergent will depend on the
type of fabric (delicates, woollens, cottons,
etc.), the colour, washing temperature and
degree of soiling.
The type and quantity of detergent will
depend on the type of fabric, load size,
degree of soiling and hardness of the
water used.
Information on the hardness of the water
in your area can be obtained from the
relevant water supply company, or from
your local authority.
Follow the product manufacturers’
instructions on quantities to use.
Not enough washing powder causes:
the washload to turn grey, greasy
clothes.
Too much washing powder causes:
sudsing, reduced washing effect,
inadequate rinsing.
Use less detergent if: you are washing
a small load, the laundry is lightly
soiled, large amounts of foam form
during washing.
Water hardness is classified in so-called
“degrees” of hardness.
Blood: treat fresh stains with cold water.
For dried stains, soak overnight in water
with a special detergent then rub in the
soap and water.
Oil based paint: moisten with benzine
stain remover, lay the garment on a soft
cloth and dab the stain; treat several
times.
Dried grease stains: moisten with
turpentine, lay the garment on a soft
surface and dab the stain with the
fingertips and a cotton cloth.
Stubborn stains may not be removed by
just water and detergent. It is therefore
advisable to treat them prior to washing.
Rust: oxalic acid dissolved in hot water
or a rust removing product used in cold
water. Be careful with rust stains which
are not recent since the cellulose
structure will already have been
damaged and the fabric tends to hole.
Mould stains: treat with bleach, rinse
well (whites and fast coloureds only).
Grass: soap lightly and treat with bleach
(whites and fast coloureds only).
Ball point pen and glue: moisten with
acetone (*), lay the garment on a soft
cloth and dab the stain.
Lipstick: moisten with acetone (*) as
above, then treat stains with methylated
spirits. Remove any residual marks from
white fabrics with bleach.
Red wine: soak in water and detergent,
rinse and treat with acetic or citric acid,
then rinse. Treat any residual marks with
bleach.
Ink: depending on the type of ink,
moisten the fabric first with acetone (*),
then with acetic acid; treat any residual
marks on white fabrics with bleach and
then rinse thoroughly.
Tar stains: first treat with stain remover,
methylated spirits or benzine, then rub
with detergent paste.
(*) do not use acetone on artificial silk.
24 www.westinghouse.com.au / www.westinghouse.co.nz
23
ENGLISH
These symbols appear on fabric labels, in order to help you choose the best
way to treat your laundry.
Bleach in cold water DO NOT bleach
Bleaching
Hand wash
Max. wash
temperature
95 °C
Hot iron
max. 200 °C
Dry cleaning in
all solvents
Dry cleaning in
perchloroethylene,
petrol, pure alcohol,
R 111 & R 113
Dry cleaning in
petrol, pure alcohol
and R 113
DO NOT
dry clean
Warm iron
max. 150 °C
Lukewarm iron
max. 110 °C
DO NOT iron
Max. wash
temperature
60 °C
Max. wash
temperature
40 °C
Max. wash
temperature
30 °C
DO NOT
wash at all
Ironing
Dry cleaning
Drying
Flat Tumble dry DO NOT
tumble dry
High
temperature
Low
temperature
On clothes
hanger
On the line
Energetic
wash
Delicate wash
6. INTERNATIONAL WASH CODE SYMBOLS
The dispenser needs to be cleaned
regularly, preferably after each wash.
Inspect the dispenser after each wash to
see if there is any residue of detergent.
Your washing machine will give you long
and trouble-free service, if you follow the
instructions in this section.
These instructions show you how to care
for your washing machine.
Press the Power button to turn off the
machine.
1.
Turn off the water taps. This will extend
the life of the inlet hoses.
3.
Leave the lid open for a while. This
allows time for moisture inside the
washing machine to evaporate and for
any odours to disperse.
4.
Switch off the electricity at the power
point.
2.
Remove the softener dispenser cup and
filter column from the centre of the
agitator.
1.
Unclip the filter bag from the column.
2.
Turn the bag inside out and remove
the lint.
3.
Wash the filter bag and dispenser cup
in hot water.
4.
Reassemble the filter to the column
and place it back in the centre of the
agitator.
5.
Lint is a collection of threads and fluff which
comes off your clothes during washing.
Your washing machine collects this lint in
the lint filter. It is important to clean out this
lint filter preferably after each wash.
How to clean the lint filter:
Squeeze tabs
together and
push out.

25
The dispenser needs to be cleaned
regularly, preferably after each wash.
Inspect the dispenser after each wash to
see if there is any residue of detergent.
Your washing machine will give you long
and trouble-free service, if you follow the
instructions in this section.
These instructions show you how to care
for your washing machine.
Press the Power button to turn off the
machine.
1.
Turn off the water taps. This will extend
the life of the inlet hoses.
3.
Leave the lid open for a while. This
allows time for moisture inside the
washing machine to evaporate and for
any odours to disperse.
4.
Switch off the electricity at the power
point.
2.
Remove the softener dispenser cup and
filter column from the centre of the
agitator.
1.
Unclip the filter bag from the column.
2.
Turn the bag inside out and remove
the lint.
3.
Wash the filter bag and dispenser cup
in hot water.
4.
Reassemble the filter to the column
and place it back in the centre of the
agitator.
5.
Lint is a collection of threads and fluff which
comes off your clothes during washing.
Your washing machine collects this lint in
the lint filter. It is important to clean out this
lint filter preferably after each wash.
How to clean the lint filter:
Squeeze tabs
together and
push out.
7. CARE AND CLEANING
7.1 What To Do After You Have
Finished Your Washing.
7.2 Cleaning The Lint Filter
7.3 Cleaning The Dispenser
26 www.westinghouse.com.au / www.westinghouse.co.nz
Having removed the drawer, use a small
brush to clean the recess, ensuring that
all washing powder residue is removed
from the upper and lower part of the
recess. Replace the drawer and run the
rinse program without any clothes in the
drum.
Remove WKHdispenser drawer from
its places.
Pull out the dispenser drawer until it
stops then lift up and pull out from the
recess.
1.
To do this proceed as follows:
Clean the dispenser drawer with
water and a brush, e.g. an old
toothbrush.
2.
Dry the drawer.
3.
Remove the water inlet hose from
the water tap.
If your water is very hard or contains
traces of lime deposit, the water inlet
filter may become clogged. It is therefore
a good idea to clean it from time to time.
To clean the water inlet filters:
1.
Close the water tap.
2.
Clean the filter in the inlet hose with
a stiff brush.
3.
7.4 Cleaning The Drawer
Recess
7.5 Cleaning The Water Inlet
Filter
4.
5.
6.
7. Open the water tap.
Remove the inlet hose behind the
appliance.
Clean the filter in the valve with a
stiff brush or a towel.
Install the inlet hose again. Make
sure that the couplings are tight to
prevent leakages.
Wipe the surface with warm water.
1.
Wipe dry with a soft cloth.
2.
To clean the inside and outside of your
washing machine you should:
Never use solvents, alcohol, aerosol
cleaners, spray pack cleaners, glass
cleaners, metal polishes, caustic
materials, scourers or general household
cleaners on or near the top panel and lid,
control panel or other parts of your
washing machine.
Important:
Don’t leave wet clothing (especially
swimwear) in the bowl for too long before
you wash it.
metal objects such as bobby pins,
dressmaking pins and nails;
body oils and grease from very dirty or
sweaty clothes being deposited around
the top of the washbowl;
excessive foam during wash if incorrect
or too much detergent is used.
salt;
Stains in the wash bowl can be caused
by:
Check all pockets before loading clothes
into your washing machine.
Important:
Never use bleach cleaners or steel wool
to clean the stainless steel washbowl.
Important:
Wipe with a cleaning product which is
marked suitable for stainless steel.
1.
Oily deposits can be removed by
wiping surfaces with a mild
dishwashing detergent and warm
water.
2.
How To Clean the Stainless Steel Wash
Bowl :
27
4.
5.
6.
7. Open the water tap.
Remove the inlet hose behind the
appliance.
Clean the filter in the valve with a
stiff brush or a towel.
Install the inlet hose again. Make
sure that the couplings are tight to
prevent leakages.
Wipe the surface with warm water.
1.
Wipe dry with a soft cloth.
2.
To clean the inside and outside of your
washing machine you should:
Never use solvents, alcohol, aerosol
cleaners, spray pack cleaners, glass
cleaners, metal polishes, caustic
materials, scourers or general household
cleaners on or near the top panel and lid,
control panel or other parts of your
washing machine.
Important:
Don’t leave wet clothing (especially
swimwear) in the bowl for too long before
you wash it.
metal objects such as bobby pins,
dressmaking pins and nails;
body oils and grease from very dirty or
sweaty clothes being deposited around
the top of the washbowl;
excessive foam during wash if incorrect
or too much detergent is used.
salt;
Stains in the wash bowl can be caused
by:
Check all pockets before loading clothes
into your washing machine.
Important:
Never use bleach cleaners or steel wool
to clean the stainless steel washbowl.
Important:
Wipe with a cleaning product which is
marked suitable for stainless steel.
1.
Oily deposits can be removed by
wiping surfaces with a mild
dishwashing detergent and warm
water.
2.
How To Clean the Stainless Steel Wash
Bowl :
7.6 Cleaning Your Washing
Machine
7.7 Cleaning Stains In The
Washbowl
28 www.westinghouse.com.au / www.westinghouse.co.nz
29
ENGLISH
DO NOT call for service until you have
checked the points listed below.
If you call for service and there is nothing
wrong with your washing machine, you
will have to pay for the service call.
You will have to pay even when your
washing machine is under warranty.
Before you call for service, check the
points in the table below.
If after all checks, the problem persists,
contact your local Service Centre.
ProblemPossible CausesDisplay
Code
What to do
Power not switched on.
No electricity supply through
the power point.
Check the power point with
another appliance.
Water taps not turned on. Turn on taps.
Switch on power point.
Machine
not
working.
Machine has
washed load
but will not
spin.
Will not fill
with water.
Machine
goes out of
balance or
vibrates
excessively
when
spinning.
Water on
floor.
Water in
wash bowl.
Out of balance switch off.
Open lid, redistribute load
and close lid.
Lid not fully closed. Close lid and press
Start/Pause to resume
operation.
The main supply is
unstable.
Wait until the main supply is
stable and the appliance
automatically starts
operating.
Out of balance.
Open lid, redistribute load,
close lid.
Lid not fully closed. Close lid and press
Start/Pause to resume
operation.
Drain hose blocked.
Check drain hose for
blockage. Wait a short while,
the wash will continue.
Water taps not turned on.
Turn taps on.
Inlet hoses blocked.
Clean tap filters/washers.
Machine not level.
Make the machine level.
Levelling feet not adjusted.
Adjust feet to touch the floor.
Clothes not evenly
distributed.
Redistribute clothes evenly.
Loose inlet hose
connections.
Check connections at taps
and rear of machine.
Loose drain hose
connections.
Check connections at rear of
machine.
8. TROUBLESHOOTING
8.1 Possible Failures

29
ProblemPossible CausesDisplay
Code
What to do
Not enough or no detergent.
Check detergent use and
rewash clothes.
Too many clothes on load.
Remove some clothes and
rewash.
Incorrect wash program. Reselect program and
rewash.
Clothes
still dirty
after wash
program.
Bra wire or other thin items
caught between inner and
outer washbowls.
If the item is visible, remove
it with pliers.
Use a wash bag in future.
Scraping
noise on
spin.
Bowl rotation at start of
wash.
Normal noise.
Brake activation when
stopping after spin.
Normal noise.
Humming,
clicking
and other
noises.

30 www.westinghouse.com.au / www.westinghouse.co.nz
Description Display
Code
Customer action (Summary)
Make sure both wall taps are on and hose filters are
not blocked. Press “Start/Pause” to re-start wash.
If problem remains, call Service.
If the water is pouring onto the floor, turn OFF wall
taps. Wait a few minutes to see if the fault is
corrected.
If not, call Service.
Not filling with
water
Draining
problem
Loss of water,
while washing
Flood
Wait, this fault may clear itself. If not, rotate the
PROGRAM KNOB to “Rinse + Spin” program, then
press “Start/Pause” button to drain the wash bowl.
If this problem is repeated, call Service.
Water level
problem
If problem remains, call Service.
Wait a few minutes to see if the fault is corrected.
If not, set the washing machine to PAUSE by press
“Start/Pause” button then check the drain hose for
blockage. Press “Start/Pause” to continue the wash.
If water level in wash bowl is low and water is
flooding the floor, rotate the PROGRAM KNOB to
“Rinse + Spin” program, then press “Start/Pause”
button.
Should this make things worse, turn off the machine
and call Service.
Otherwise, press “Start/Pause” to continue the wash.
If you have a problem with your washing machine and before you call service, make
sure you have followed ALL of the instructions that may remedy the problem. You will
find instructions in the “Troubleshooting” section and in the table below.
When the washing machine detects a problem that requires your attention, you will be
alerted. The machine will warn you of this problem by displaying a fault code in the
digital display, accompanied by “Beeping”.
Fault information and the action you should take are described in the following table.
Fault information and a guide for when you should call for service.
8.2 Troubleshooting Fault Displays

31
Display
Code
DescriptionPossible fault
E50
E50
Motor
problems
system -Motor defective
-Motor Wiring or Motor Control board
defective
-Overload condition
E91
E91
UI -MB communication
error
-Wiring defective, or UI,
MB board defective
E
E
H
H
0
0
Power supply frequency
out of limits
-Wrong or disturbed Power Supply line.
-Main board defective
Power supply voltage too
high
-Wrong or disturbed Power Supply line.
-Main board defective
Power supply voltage too
low
-Wrong or disturbed Power Supply line.
-Main board defective
E
E
C
C
0
0
Drive train triac failure
(actuator)
-TY5 triac load device defective
(drive train device)
-Wiring or main board defective
E
E
F
F
0
0
Foam warning-Excessive detergent dosing
-Drain filter dirty or clogged
-Drain pipe kinked or clogged
Load too unbalanced -Load unbalanced

32 www.westinghouse.com.au / www.westinghouse.co.nz
ProblemPossible causes What to do
Greyness
Yellowing
ONLY use low sudsing,
front load washer
detergent in this machine,
such as Cold Power for
Front Loaders and High
Efficiency Top Loaders or
detergent labelled “Matic”.
Incorrect wash times and
using insufficient detergent
which can cause redeposit-
ing of detergent on clothes.
Using incorrect type or too
much detergent can cause
poor rinsing and poor spin
performance.
A build-up of oils in clothes
that come into close
contact with the skin, e.g.
underwear, T-shirts.
Ageing of clothes. Iron
deposits in the wash water.
Use of chlorine bleaches on
fabrics with resin finishes.
Incorrect drying.
1.
Re-sort load, then re-wash
using wash program
selections suitable for the
fabric.
1.
If the water is very dirty or
very sudsy, repeat 1 above
reducing the amount of
detergent you use.
2.
Re-sort load, then re-wash
using program selections
suitable for the fabric.
2.
If the water is very dirty or
very sudsy, repeat 2 above
reducing the amount of
detergent you use.
3.
Mixing whites with very
dirty clothes, e.g. work
clothes.
Using soap flakes instead
of laundry detergent.
8.3 Yellowing Or Greying Clothes

33
ProblemPossible causes What to do
Greyness
Yellowing
ONLY use low sudsing,
front load washer
detergent in this machine,
such as Cold Power for
Front Loaders and High
Efficiency Top Loaders or
detergent labelled “Matic”.
Incorrect wash times and
using insufficient detergent
which can cause redeposit-
ing of detergent on clothes.
Using incorrect type or too
much detergent can cause
poor rinsing and poor spin
performance.
A build-up of oils in clothes
that come into close
contact with the skin, e.g.
underwear, T-shirts.
Ageing of clothes. Iron
deposits in the wash water.
Use of chlorine bleaches on
fabrics with resin finishes.
Incorrect drying.
1.
Re-sort load, then re-wash
using wash program
selections suitable for the
fabric.
1.
If the water is very dirty or
very sudsy, repeat 1 above
reducing the amount of
detergent you use.
2.
Re-sort load, then re-wash
using program selections
suitable for the fabric.
2.
If the water is very dirty or
very sudsy, repeat 2 above
reducing the amount of
detergent you use.
3.
Mixing whites with very
dirty clothes, e.g. work
clothes.
Using soap flakes instead
of laundry detergent.
1) Maximum capacity depended on the model of the Washing Machine.
Dimensions (Height / Width / Depth) 972 x 575 x 638 mm
Power supply (Voltage / Frequency) 220 - 240 V~ / 50 Hz
Total power absorbed 550 W
Minimum fuse protection 10 A
Water supply pressure (Maximum / Minimum) 0.8 MPa / 0.08 MPa
Maximum dry clothes capacity
Extra Dirty 120
Dirty 90
Full Load 60
Daily 45
Fast 20
Delicate
Gym Wear
Eco Save
Bedding
Machine Clean
Rinse & Spin
Spin
Max
1)
Max
Max
4 kg
2 kg
4 kg
3 kg
Max
4 kg
No Load
Max
Max
Spin speed (Maximum / Minimum) 800 rpm / 550 rpm
9. TECHNICAL DATA
Model : WWT6084J5WA
WWT7084J5WA
6 kg
7 kg
34 www.westinghouse.com.au / www.westinghouse.co.nz
Remove the carton box. Remove the
polystyrene pieces.
2.
Lift the machine out of the packaging
base.
3.
Tilt the washing machine a little from
back side and insert the Bottom
Cover into slot at the bottom of the
machine (as shown on picture) until it
comes to the end.
4.
Use gloves. Cut the plastic packing
and remove plastic wrap from the
washing machine.
1.
Caution: Pay attention to the
machine lid, may hit your body.
10. INSTALLATION
10.1 Unpacking
35
8.
Pull up the appliance in vertical
position.
Open the washing
machine lid.
Remove the top
polystyrene.
Fasten the Screw (you can find screw
in the user manual bag) of the Bottom
Cover to the bottom rear frame of the
cabinet to secure its position.
Important: The top polystyrene
must be removed LAST, for
protecting the washing tub from
hitting the cabinet when the
machine is tilted.
Open the lid. Remove the polystyrene
piece from top panel and all the items
from the washing tub.
5.
Install polystyrene piece to the top
panel again.
6.
Lie down the washing machine on its
back side, taking care not to damage
cabinet by placing two of the corner
packing pieces between the machine
and the floor. (as shown in the
picture).
7.
It is important that your washing machine
stands firm and level on the floor to
ensure correct operation.
Use a spirit level on the front and side
panels of the washing machine to check
the levels. The spirit level should be used
close to the corners of the washing
machine for accuracy. By hand, or using a
spanner if necessary, the front legV are
adjustable and the back legs are factory
fitted in a fixed position (fixed legs have a
round base).
10.2 Positioning
36 www.westinghouse.com.au / www.westinghouse.co.nz
Connect the water inlet hose to a tap
with 3/4” BSP thread.
When installing this washing machine,
use the hoses supplied. DO NOT USE
OLD HOSES. The inlet hoses have the
sealing washer fitted.
Tilt the washer a little to adjust the right
front leg.
Never place cardboard, wood or similar
materials under the machine to
compensate for any unevenness in the
floor.
Install the machine on a flat hard floor.
Make sure that air circulation around the
machine is not impeded by carpets, rugs
etc. Check that the machine does not
touch the wall or cupboard units.
When the washing machine is levelled,
try to rock it from corner to corner. If it
does rock, adjust the legs again until it is
levelled and does not rock.
Turn the taps on and check that there are
no leaks from the connections.
Turn off the water taps and move the
washing machine into its final position.
Make sure that the inlet and drain hoses
do not kink.
Connect the inlet hose to the water tab.
Make sure the connections are tight.
Water Tap
Inlet hose
Filter and
rubber washer
inside nut.
You can find a drain hose from inside the
washbowl and a hose clamp from user
manual bag.
Holding the hose clamp and squeezing it
(same as in picture), then put it into the
drain hose inserting side (as shown on
picture).
Insert drain hose into the drainage holes
at the back of the washing machine until
it comes to end, then squeeze the hose
clamp again and shift it to the location as
shown on picture to lock the drain hose.
Squeeze spring hose
clamp
NOTE: Must be ensured that hose is
secured to prevent leak on the floor.
10.3 Water Inlet
10.4 Water Drainage
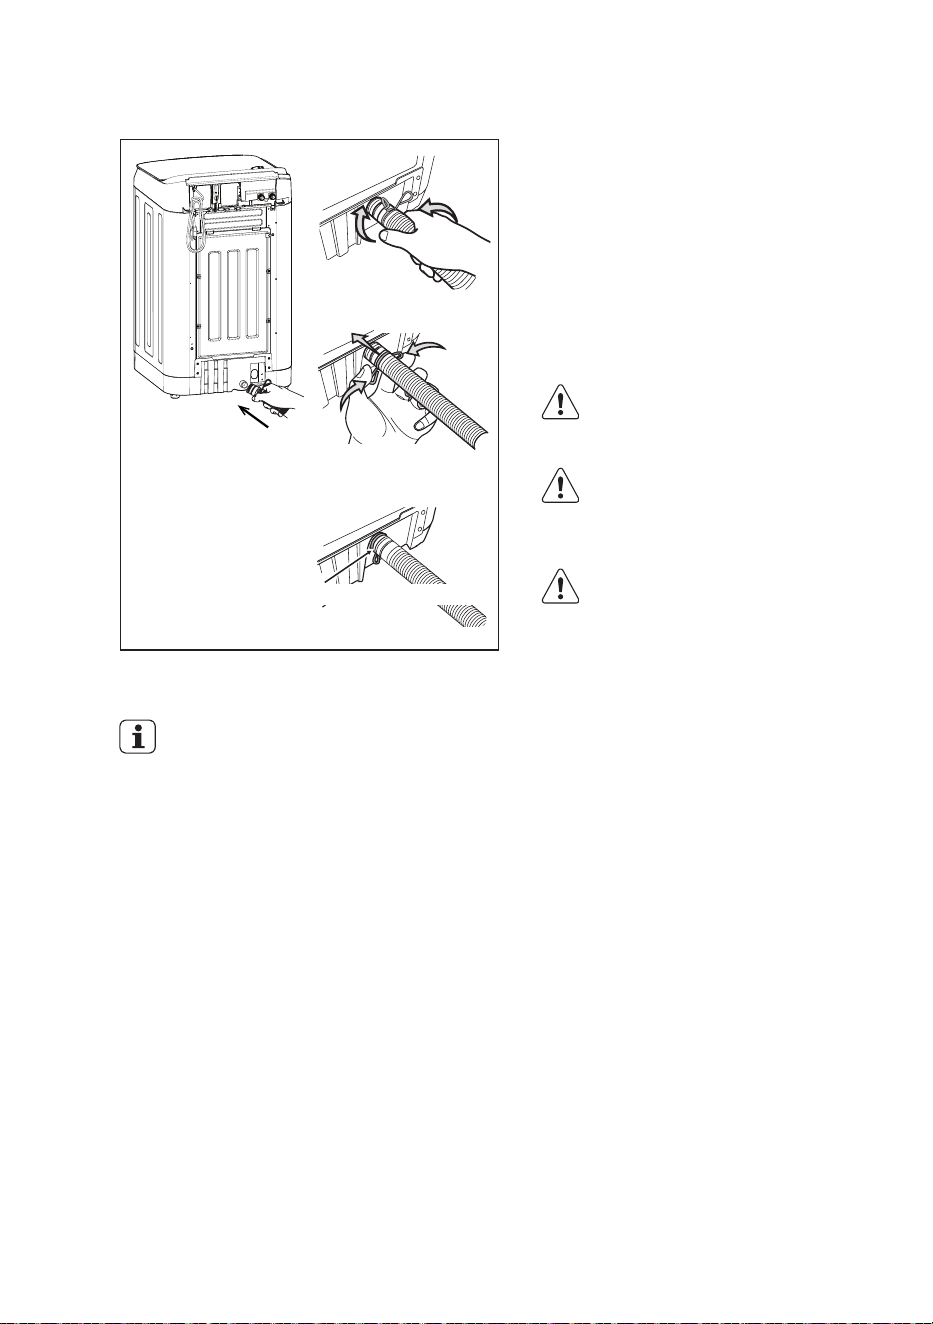
37
Position drain hose by adjusting the free
length of hose to suit your installation.
Please refer to the installation
instruction sheet, for more
information.
Shift hose clamp to
here
Squeeze spring
hose clamp
Insert /
Shift
1.
2.
3.
This machine is designed to operate on a
220 - 240 V, single-phase, 50 Hz supply.
“An incorrect power supply may void
your warranty.”
Check that your domestic electrical
installation can take the maximum
load required (2.0 kW), also taking into
account any other appliances in use.
When the appliance is installed, the
power supply cable must be easily
accessible.
CAUTION!
Connect the machine to an
earthed socket outlet.
The manufacturer declines any
responsibility for damage or
injury through failure to comply
with the above safety precaution.
Should the appliance power
supply cable need to be
replaced, this shall be carried
out by our Service Centre.
10.5 Electrical Connection
38 www.westinghouse.com.au / www.westinghouse.co.nz
The materials marked with the
symbol are recyclable.
>PE<=polyethylene
>PS<=polystyrene
>PP<=polypropylene
This means that they can be recycled by
disposing them properly in appropriate
collection containers.
To save water, energy and to help
protect the environment, we recommend
that you follow these tips:
Use authorized disposal sites for your old
appliance. Help to keep your country tidy!
The symbol on the product or on its
packaging indicates that this product may
not be treated as household waste.
Instead it shall be handed over to the
applicable collection point for the
recycling of electrical and electronic
equipment. By ensuring this product is
disposed of correctly, you will help
prevent potential negative consequences
for the environment and human health,
which could otherwise be caused by
inappropriate waste handling of this
product.
For more detailed information about
recycling of this product, please contact
your local city office, your household
waste disposal service or the shop where
you purchased the product.
Normally soiled laundry may be
washed without prewashing in order to
save detergent, water and time (the
environment is protected too!).
The machine works more economically
if it is fully loaded.
With adequate pre-treatment, stains
and limited soiling can be removed; the
laundry can then be washed at a lower
temperature.
Measure out detergent according to
the water hardness, the degree of
soiling and the quantity of laundry
being washed.
11. ENVIRONMENT CONCERNS
11.1 Packaging Materials
11.2 Old Machine
11.3 Ecological Hints

39
NOTE

40 www.westinghouse.com.au / www.westinghouse.co.nz
NOTE

41
NOTE

42 www.westinghouse.com.au / www.westinghouse.co.nz

G0034730-001-A12246408
www.westinghouse.com.au
www.westinghouse.co.nz