Loading ...
Loading ...
Loading ...
INSTALLATION
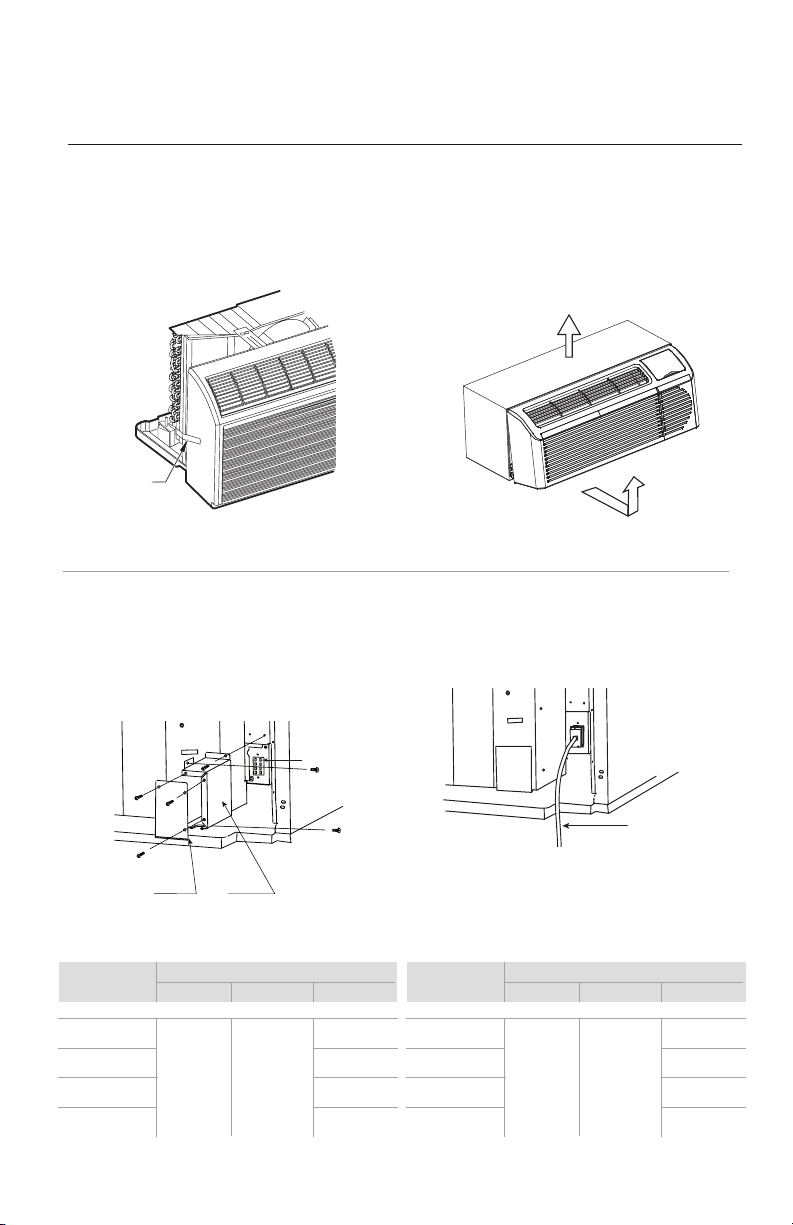
SHIPPING
TAPE
REMOVE SHIPPING
SCREW IF PRESENT
CHASSIS AND POWER CORD INSTALLATION PREPARATION
1. Carefully remove shipping tape from the
front panel.
Fig. 6
Fig. 9
Fig. 7
Fig. 8
2. Remove front panel.
a. Pull out at the bottom to release it from the tabs (1).
b. Then lift up (2).
Unit Connector
Junction Box Cover
Junction Box
Accessory
Power Supply Cord
2
1
3. Remove junction box.
a. Remove junction box cover by removing three
screws from front (save these for later).
b. Remove junction box by taking out top, rear and
side screws (save these for later).
Unit Connector
Junction Box Cover
Junction Box
Accessory
Power Supply Cord
4. Connect power cord connector to unit connector.
a. Units must be installed using the appropriate
power cord kit. See Power Connection Chart below.
Unit Connector
Junction Box Cover
Junction Box
Accessory
Power Supply Cord
Accessory
Power Cord
Unit Model
ETAC2-07HC265VA-A
ETAC2-09HC265VA-A
ETAC2-12HC265VA-A
ETAC2-15HC265VA-A
ETAC2-07HP265VA-A
ETAC2-09HP265VA-A
ETAC2-12HP265VA-A
ETAC2-15HP265VA-A
Electric Heater - Amp (KW)
20A (3.5KW)
265 VOLTS
E2CORD-
265V20A
15A (2.5KW)
E2CORD-
265V15A
30A (5.0KW)
Not available
*
E2CORD-
265V30A
Not available
*
E2CORD-
265V30A
Unit Model
ETAC2-07HC230VA-A
ETAC2-09HC230VA-A
ETAC2-12HC230VA-A
ETAC2-15HC230VA-A
ETAC2-07HP230VA-A
ETAC2-09HP230VA-A
ETAC2-12HP230VA-A
ETAC2-15HP230VA-A
POWER CONNECTION CHART
Electric Heater - Amp (KW)
20A (3.5KW)
230/208 VOLTS
E2CORD-
230V20A
15A (2.5KW)
E2CORD-
230V15A
30A (5.0KW)
Not available
*
E2CORD-
230V30A
Not available
*
E2CORD-
230V30A
* Using 30A on these units could result in damage to your unit.
12
Loading ...
Loading ...
Loading ...