Loading ...
Loading ...
Loading ...
Be sure on regulator is in position.
Brush soapy solution onto between regulator pipe
threads and regulator, and burner tube and orifice at .
1. control knob
3. connection
(B)
If growing bubbles appear, there is a leak. Retighten
.
connections and repeat
Brush soapy solution onto between gas container
and regulator at .
2. connection
(A)
steps 1 , 2, and 3.
A
B
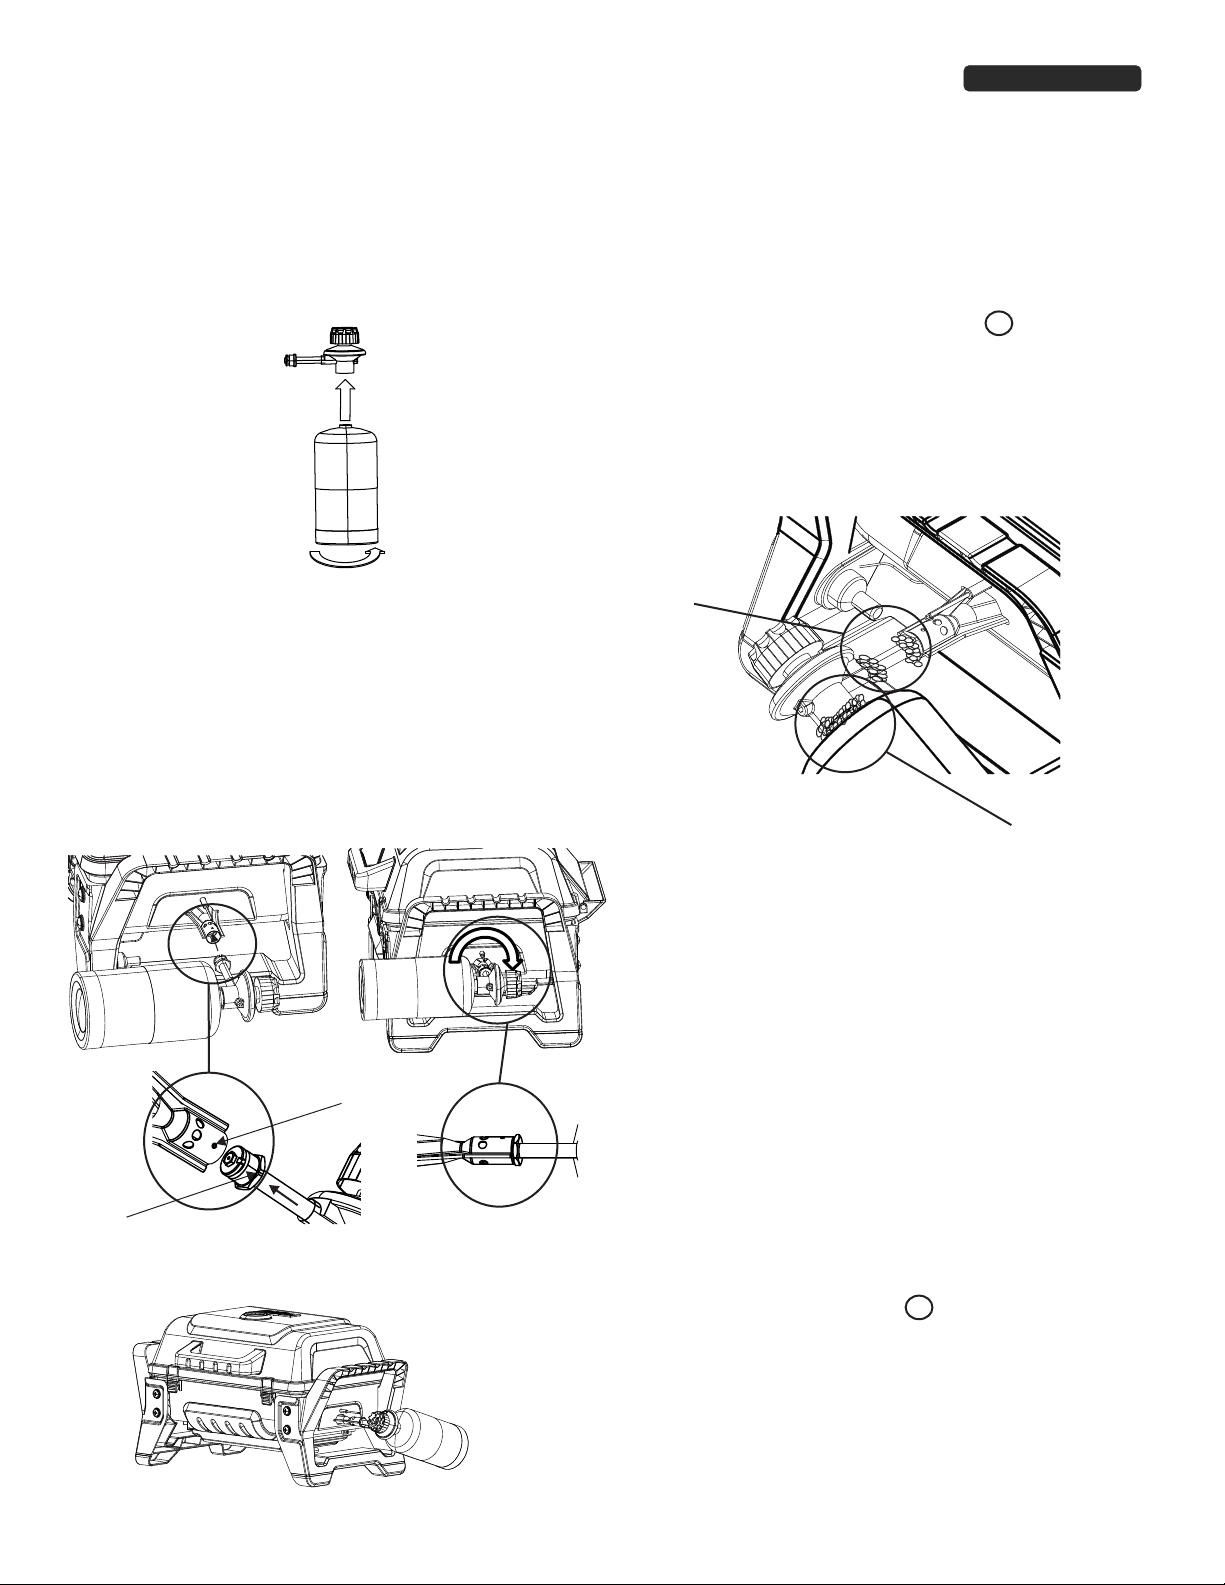
LP Gas Container Installation/Removal
LP Gas Container Installation:
1. Remove cap from end of Propane container (sold separately).
2. Cap should be kept on container when not in use to prevent dirt
and debris from entering Regulator/Valve.
3. Check end of container attachment for dirt and debris. Clean
out if necessary.
4. Insert threaded end of LP Gas Container into Regulator/Valve
and hand-tighten turning container clockwise as shown below.
DO NOT USE TOOLS! Over tightening can damage threads
on Regulator/Valve.
Propane Container Removal:
1. Turn regulator control knob to .
2. Allow barbecue to cool.
3. Remove the propane container by turning counter-clockwise until
disengaged from the Regulator/Valve.
4. Install cap on container. Cap should be kept on container when
not in use to prevent dirt and debris from entering Regulator/Valve.
Regulator/Valve Installation/Removal
1. With knob pointing to back of barbecue, insert Regulator/Valve
into end of burner (A)
Notch in Regulator/Valve MUST engage dimple in end of
burner.
2. Once Regulator/Valve has completely engaged burner, turn
Regulator/Valve clockwise (B) to lock in position with knob
pointing as shown (C).
3. To remove reverse steps.
A
B
C
IMPORTANT: REMOVE PROPANE CONTAINER FROM
REGULATOR/VALVE WHEN NOT IN USE.
Dimple
Red notch
Full engagement
Leak Testing ( 465g. Disposable)
• During leak test, keep barbecue away from open flames or sparks
and do not smoke. Barbecue must be leak tested outdoors in a
well ventilated area.
Leak test must be repeated each time gas container is replaced
or after storage.
Materials needed include clean paint brush and 50/50 soap and
water solution. Use mild soap and water.
Damage to components can
result.
•
Do not use
household cleaning agents.
IMPORTANT!
Call OZtrail Leisure Porducts at (07) 3279 1800 for
replacement parts to correct leaks.
If you cannot stop a leak, remove gas container from regulator
and check for damaged threads, dirt and debris on regulator and
gas container. Also check to see if anything is obstructing flow of
gas at regulator and gas container openings. Remove any
obstruction that may be found and repeat leak test. IF threads
are damaged on either regulator or gas container, replace.
If there is a leak from your appliance (smell of gas) and you
cannot stop the gas flow, remove the appliance to a well-
ventilated location away from any ignition source. Check for
leaks using soapy water. Do not try to detect leaks using a
flame.
Page 6
Loading ...
Loading ...
Loading ...