Loading ...
Loading ...
Loading ...
10
Non-Vented (recirculating) Installation through the
Cabinet/Soft
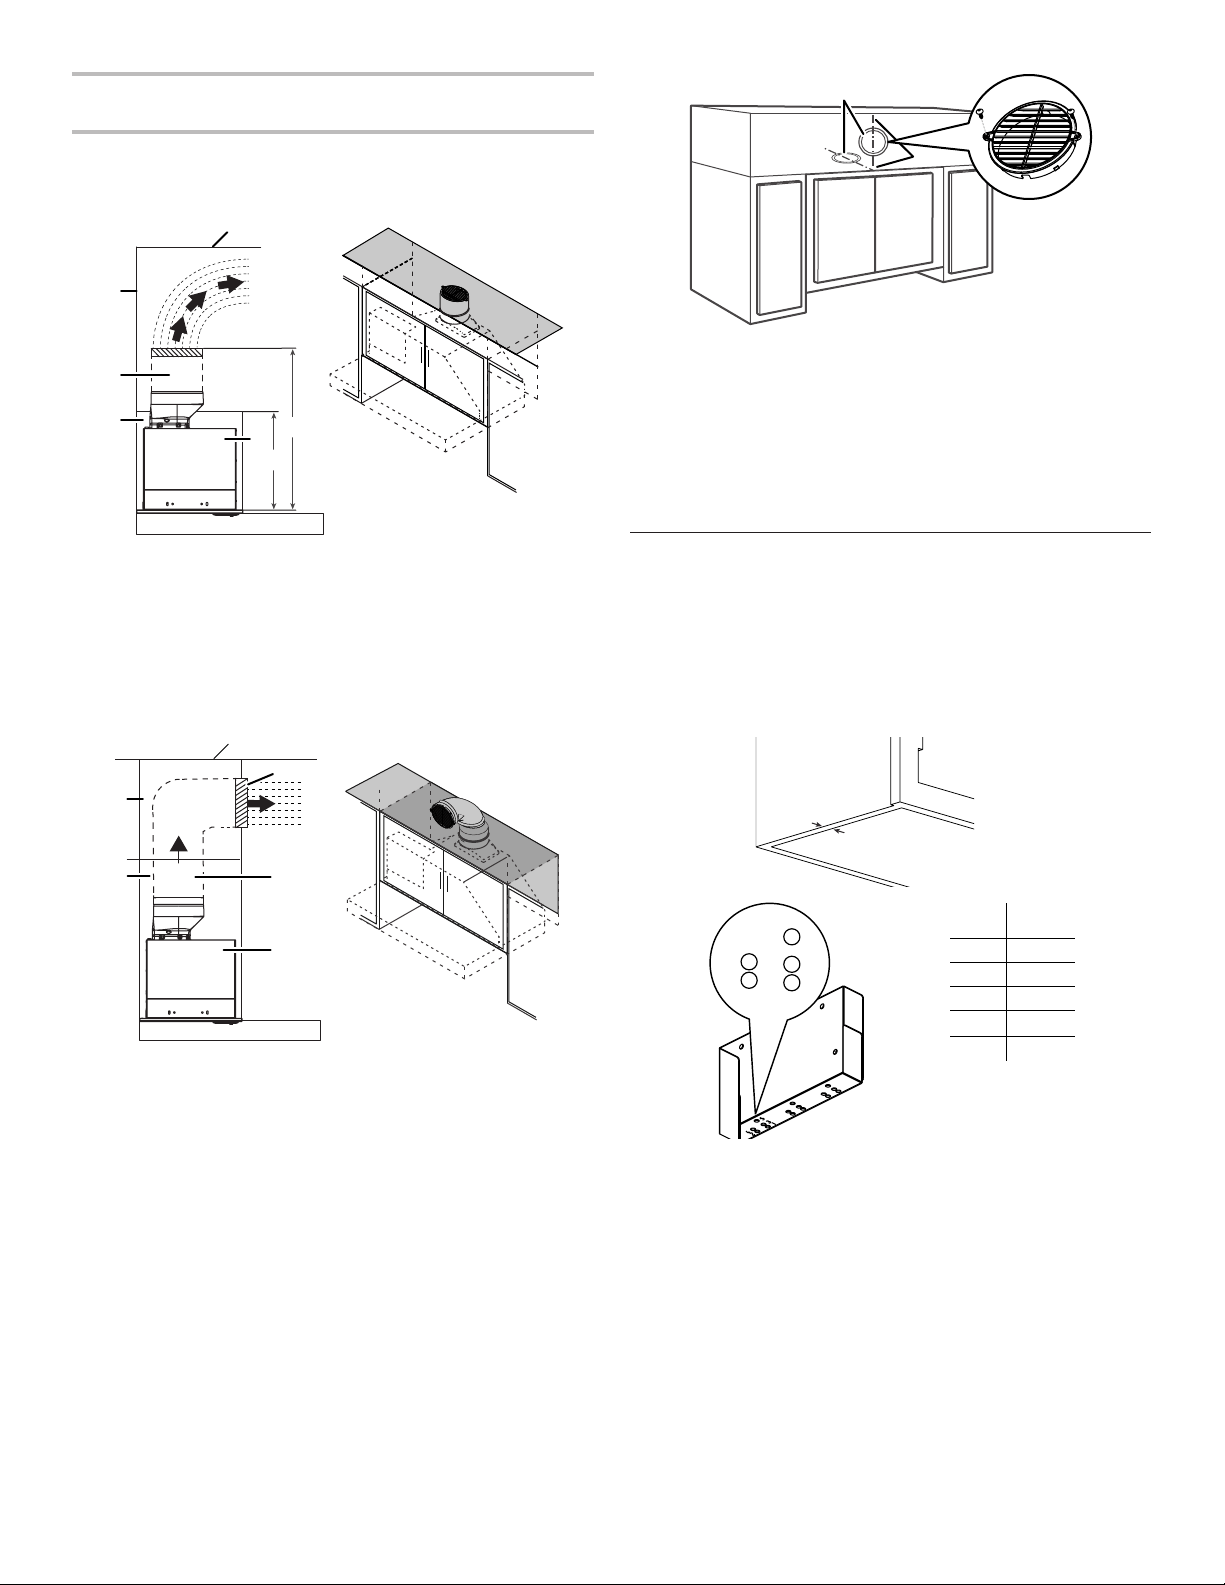
Through top of Cabinet:
Recirculating through
the cabinet top wall
Recirculating through
the soft
A. Ceiling
B. Recirculating grid
C. Soft
D. 6" (15.2 cm) round vent system
E. Range hood
F. Cabinet
G. Wall
H. 12" (30.5 cm) min. cabinet
height
I. 17" (43.2 cm) min. vent cover
height
Through Soft:
A. Ceiling
B. Recirculating grid
C. Soft
D. 6" (15.2 cm) round vent
system
E. Range hood
F. Cabinet
G. Wall
1. Measure and mark the centerline of the cabinet to the soft
above.
2. Measure from the bottom of the cabinet to the centerline of
the where the vent will come through the soft or cabinet top
wall. Mark the location and use a saber saw or keyhole saw
to cut a 5¾" (14.6 cm) hole for the vent cover.
A. Vent cover
B. Centerline
NOTE: For 12" (30.5 cm) high cabinets a 6¼" deep x 8" wide
(14.6 cm x 20.3 cm) rectangular opening in the cabinet top is
required for damper transition clearance.
3. Consider the cutout chart measures to make the openings
on the cabinet.
NOTE: 12" (30.5 cm) high cabinets without a soft may allow the
6" (15.2 cm) vent and vent cover to be seen.
Complete Preparation
Installation brackets conguration
To assemble the installation brackets, you must consider
the cabinet's material thickness and your cabinet's width
(30" [76.2 cm] or 36" [91.44 cm]).
1. Measure your cabinet material thickness, then locate the
bracket’s installation holes, based on your cabinet thickness
(see the chart below).
A
G
D
F
E
I
H
A
G
F
E
B
D
A
B
Cabinet
material
thickness
12
3
5
4
Bracket
marks
Cabinet
Thickness
1 3/8”
2 1/2”
3 5/8”
4 3/4”
5 1”
Loading ...
Loading ...
Loading ...