Loading ...
Loading ...
Loading ...
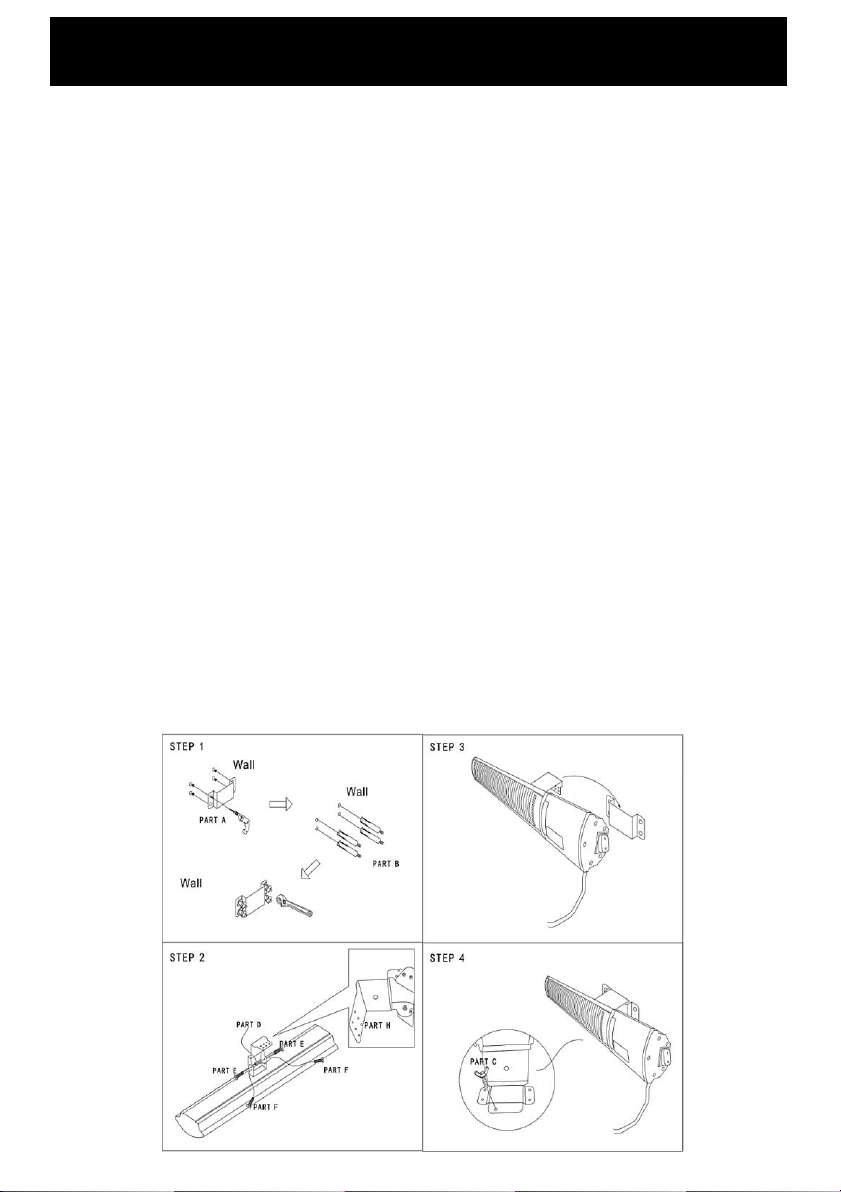
Assembly for Wall Mounting
Before using this appliance, remove all of the packing. Check to ensure that all parts
of this heater, cord and plug are not damaged. Confirm all parts before disposing of
carton. Do not leave packaging materials like bags and staples within reach of
children or animals.
WARNING: This heater should be installed at least 30cm from the ceiling,
50cm from side walls and at least 1.8m above the floor.
WARNING: This heater must be affixed to a sturdy wall. Never attach to
walls made of wood or other flammable material. Attach using the bracket
supplied; do not use any other supports or attachments.
Follow these instructions for wall mounted use.
1. Position the wall bracket (part A) on a suitably strong exterior wall, a minimum of 1.8m
above the ground.
2. Mark the hole positions using a pencil. Ensure that the holes are straight by using a spirit
level (not included).
3. Using a drill (not included), drill 4 holes in the positions that you have marked.
4. Reposition the wall bracket over the pre-drilled holes and secure to the wall using the 4
screws (part B) provided. The curved part of the wall bracket must be at the uppermost
position. The wall support must be horizontal.
5. Fix the securing bracket (part H) to the heater using the screw pack provided (part D, part E
and part F).
6. Place the securing bracket into the wall bracket and fix into place using the screw (part C)
provided.
7. You heater is now ready for use. Please follow the operating instructions on page 9.
8. Please ensure that you have read these instructions thoroughly prior to use.
Loading ...
Loading ...
Loading ...