Gas Range
& Cleaning ............................................ 19-22
Sdf-CHean Oven
CHeaningProcedures
Maintenance .................................................. 23-24
Troubleshooting ............................................ 25-26
Warranty & Service .............................................. 22
Guide d'utilisation et d'entretien ...................... 28
Gu_a de Use y Cuidado ....................................... 58
Form No. A/06/04 Part No 8113P429-60 ':,:'2004 Maytag Appliances Sales Co. Litho USA

|nstaller: Please leave this guide with this appl!ance.
ence. Keep sales rece!pt and/or canceled check as proof of
Serial Number
Date of Purchase
!fyou have questions, Call:
Amana Customer Assistance
1-80Q-843-0304USA
1_866%87_2002canada
Interact: httpiiiwwwlamanalcom
It/our Continuklg effort to improvethe quaHtyand performance
of our Cookingproducts, it may benecessaryto make Changes
to the appliance without revisklg this guide.
For senfice i#fermado#, see#age 27.
Warning and Important Safety Instructions appearing in
this guide are not meant to cover all possible conditions
and situations that may occur. Common sense, caution,
and care must be exercised when installing, maintaining,
or operating the appliance.
Always contact the manufacturer about problems or
conditions you do not understand.
Recognize Safety Symbols, Words, Labems
any part of your appliance unless it is specifically recom-
mended in this guide. All other servicmg should be
referred to a qualified servicer, Have the installer show
you the location of the gas shut off valve and how to
shut it off in an emergency,
Always disconnect power to appliance before servicing,
if the information in this manual is not followed
e×actmy, a fire or explosion may resolt causing
property damage, personal injury or death,
- Do not store or use gasoline or other flara-
mahle vapors and liquids in the vicinity of this
or any appliance.
- IF YON SMELL GAS:
o Do not try to Wight any appliance.
o Do not touch any electricam switch.
o Do not ase any phone in your building.
o immediately call yoor gas supplier from a
neighbor's phone. Follow the gas sopplieCs
instroctions.
o If you cannot reach your gas supplier, call
the fire department°
- instaUation and sewice most be performed by
a qaahfied installer, service agency or the gas
su pplier,
Gas leak s may occur in your system and resu!t in a
chase and instal! an UL approved gas detect0r, Install
and use in accordance With the manufacturer s
instructions.
COULD resu!t in severe personal injury or death,
Genera instructions
CAUTUON - Hazards 0_:unsafe practices which
COULD result in minor personal injury,
Read and follow aH instructions before using this
appliance to prevent the potential risk of fire, electric
shock, personal injury or damage to the appliance as a
result of improper usage of the appliance. Use appliance
only for its intended purpose as described in this guide.
To ensure proper and safe operation: Appliance must
be properly installed and grounded by a qualified techni-
cian. Do not attempt to adjust, repair, service, or replace
'ALL RANGES CAN TnP AND
WARNnNG: To reduce risk of :
tipping of the appliance fro_ri
abnormam usage or by e×cessive loading of the
oven door, the appliance most be secured by a
propermy installed anti.tip device.
i
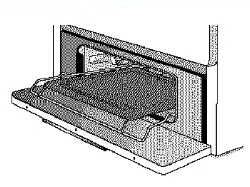
To check if device is properly installed, look underneath
range with a flashlight to make sure one of the rear
leveling legs is properly engaged in the bracket slot. The
antPtip device secures the rear leveling leg to the floor
when properly engaged. You should check this anytime
the range has been moved.
Do not use water on grease fires. Use baking soda, a
dry chemical or foam-type extinguisher to smother fire
or flame.
Child Safety
To Prevent Fire or Smoke
Be sure all packing materials are removed from the
appliance before operating it.
Keep area around appliance clear and free from com-
bustible materials, gasoline, and other flammable vapors
and materials.
If appliance is installed near a window, proper precau-
tions should be taken to prevent curtains from blowing
over burners.
NEVER leave any items on the cooktop. The hot air from
the vent may ignite flammabb items and may increase
pressure in dosed containers which may cause them to
burst.
Many aerosol-type spray cans are EXPLOSIVE when
exposed to heat and may be highly fiammabb. Avoid
their use or storage near an appliance.
Many plastics are vulnerabb to heat. Keep plastics away
from parts of the appliance that may become warm or
hot. Do not leave plastic items on the cooktop as they
may melt or soften if left too close to the vent or a
lighted surface burner.
To eliminate the hazard of reaching over hot surface
burners, cabinet storage should not be provided directly
above a unit. If storage is provided, it should be limited
to items which are used infrequently and which are
safely stored in an area subjected to heat from an
appliance. Temperatures may be unsafe for some items,
such as volatile liquids, cleaners or aerosol sprays.
In Case of Fire
Turn off appliance and ventilating hood to avoid spread-
ing the flame. Extinguish flame then turn on hood to
remove smoke and odor.
Cooktop: Smother fire or flame in a pan with a lid or
cookie sheet.
NEVER pick up or move a flaming pan.
Oven: Smother fire or flame by closing the oven door.
NEVER store items of interest to children in cabinets
above an appliance Or`on backguard 0f a range.
items could be seriously injured.
NEVER leave children alone or unsupervised near the
appliance when it is in use or is still hot.
NEVER allow children to sit or stand on any part of the
appliance as they could be injured or burned.
Children must be taught that the appliance and utensils
in it can be hot. Let hot utensils cool in a safe place, out
of reach of small children. Children should be taught
that an appliance is not a toy. Children should not be
allowed to play with controls or other parts of the unit.
About Your Appliance
2
NEVER use appliance doors as a step stool or seat as this
may result in possible tipping of the appliance and serious
injuries.
NEVER use this appliance as a space heater to heat o/
warm a room. Doing so may result in carbon monox-
ide poisoning and overheating of the oven.
NEVER cover any slots, holes or passages in the oven
bottom or cover the entire rack with materials such as
aluminum foil. Doing so blocks air flow through the
oven and may cause carbon monoxide poisoning.
Aluminum foil may also trap heat causing a fire
hazard.
NEVER obstruct the flow' of combustion and ventilation
air by blocking the oven vent ol air intakes. Doing so
restricts air to the burners and may result in carbon
monoxide poisomng.
The oven vent is located at the base of the backguard.
Avoid touching oven vent area while oven is on and for
several minutes after oven is turned off. Some parts of
the vent and surrounding area become hot enough to
causeburns.Afterovenisturnedoff,do nottouchthe
ovenventorsurroundingareasuntiltheyhavehad
sufficienttimeto cool.
Otherpotentiallyhotsurfacesincludecooktop,areas
facingthecooktop,ovenvent,surfacesnearthevent
opening,ovendoor,areasaroundthe ovendoorand
ovenwindow.
Do not touch a hot oven light bulb with a damp cloth as
the bulb could break. Should the bulb break, disconnect
power to the appliance before removing bulb to avoid
electrical shock.
Do not use the cooktop or ovens as a storage area for
food or cooking utensils.
Cooking Safety
Always place a pan on a surface burner before turning it
on. Be sure you know which knob controls which
surface burner. Make sure the correct burner is turned
on and that the burner has ignited. When cooking is
completed, turn burner off before removing pan to
prevent exposure to burner flame.
Always adjust surface burner flame so that it does not
extend beyond the bottom edge of the pan. An exces-
sive flame is hazardous, wastes energy and may damage
the appliance, pan or cabinets above the appliance.
NEVER leave a surface cooking operation unattended
especially when using a high heat setting or when deep
fat frying. Boilovers cause smoking and greasy spiiiovers
may ignite. Clean up greasy spills as soon as possible.
Do not use high heat for extended cooking operations.
NEVER heat an unopened container on the surface
burner or in the oven. Pressure build-up may cause
container to burst resulting in serious personal injury or
damage to the appliance.
Use dry, sturdy potholders. Damp potholders may cause
burns from steam. Dish towels or other substitutes
should never be used as potholders because they can
trail across hot surface burners and ignite or get caught
on appliance parts.
Always let quantities of hot fat used for deep fat frying
coo[ before attempting to move or handle.
Do not let cooking grease or other flammable materials
accumulate in or near the appliance, hood or vent fan.
Clean hood frequently to prevent grease from accumu-
lating on hood or filter. When flaming foods under the
hood turn the fan on.
NEVER wear garments made of flammable material or
loose fitting or long-sleeved apparel while cooking.
Clothing may ignite or catch utensil handles.
Always place oven racks in the desired positions while
oven is coo[. Slide oven rack out to add or remove food,
using dry, sturdy potho[ders. Always avoid reaching into
the oven to add or remove food. If a rack must be moved
while hot, use a dry potholder. Always turn the oven off at
the end of cooking.
Use racks only in the oven in which they were shipped/
purchased.
Use care when opening the oven door. Let hot air or
steam escape before moving or replacing food.
PREPARED FOOD WARNUNG: Follow food
manufacturer's instructions, if a plastic frozen food
container and/or its cover distorts, warps, or is otherwise
damaged during cooking, immediately discard the food
and its container. The food could be contaminated.
NEVER use aluminum foil to cover oven racks or oven
bottom. This could result in risk of electric shock, fire, or
damage to the appliance. Use foil only as directed in this
guide.
Utensil Safety
Use pans with flat bottoms and handles that are easily
grasped and stay cool. Avoid using unstable, warped,
easily tipped or loose-handled pans. Also avoid using
pans, especially small pans, with heavy handles as they
could be unstable and easily tip. Pans that are heavy to
move when filled with food may also be hazardous.
Be sure utensil is large enough to properly contain food
and avoid boilovers. Pan size is particularly important in
deep fat frying. Be sure pan will accommodate the vol-
ume of food that is to be added as well as the bubble
action of fat.
To minimize burns, ignition of flammable materials and
spillage due to unintentional contact with the utensil, do
not extend handles over adjacent surface burners. Always
turn pan handles toward the side or back of the appli-
ance, not out into the room where they are easily hit or
reached by small children.
Never let a pan boil dry as this could damage the utensil
and the appliance.
Follow the manufacturer's directions when using oven
cooking bags.
:3
Only certain types of glass, glass/ceramic, ceramic or
glazed utensils are suitable for cooktop or oven usage
without breaking due to the sudden change in tempera-
ture. Follow manufacturer's instructions when using
glass.
This appliance has been tested for safe performance
using conventional cookware. Do not use any devices or
accessories that are not specifically recommended in
this guide. Do not use eyelid covers for the surface
units, stovetop grills, or add-on oven convection sys-
tems. The use of devices or accessories that are not
expressly recommended in this manual can create
serious safety hazards, result in performance problems,
and reduce the life of the components of the appliance.
Cmeanin 9 Safety
Turn off all controls and wait for appliance parts to cool
before touching or cleaning them. Do not touch the
burner grates or surrounding areas until they have had
sufficient time to coo[.
Clean appliance with caution. Use care to avoid steam
burns [f a wet sponge or cloth is used to wipe spills on a
hot surface. Some cleaners can produce noxious fumes
if applied to a hot surface.
SeJf-CJean Oven (select models:}
Clean only parts listed in this guide. Do not clean door
gasket. The door gasket is essential for a good seal.
Care should be taken not to rub, damage, or move the
gasket. Do not use oven cleaners of any kind in or
around any part of the self-clean oven.
Before self-cleaning the oven, remove broiler pan, oven
racks and other utensils and wipe up excessive
spfllovers to prevent excessive smoke, flare-ups or
flaming.
It is normal for the cooktop of the range to become hot
during a self-clean cycle. Therefore, touching the
cooktop during a clean cycle should be avoided.
important Safety Notice and
The California Safe Drinking Water and Toxic Enforce-
ment Act of 1986 (Proposition 65} requires the Governor
of California to publish a list of substances known to the
State of California to cause cancer or reproductive harm,
and requires businesses to warn customers of potential
exposures to such substances.
Users of this appliance are hereby warned that the
burning of gas can result in low-level exposure to some
of the listed substances, including benzene, formalde-
hyde and soot, due primarily to the incomplete combus-
tion of natural gas or liquid petroleum (LP} fuels. Prop-
erly adjusted burners will minimize incomplete combus-
tion. Exposure to these substances can also be mini-
mized by properly venting the burners to the outdoors.
Users of this appliance are hereby warned that when
the oven is engaged in the self-clean cycle, there may
be some low-level exposure to some of the listed
substances, including carbon monoxide. Exposure to
these substances can be minimized by properly venting
the oven to the outdoors by opening the windows and/
or door in the room where the appliance is located
during the self-clean cycle.
UMPORTANT NOTUCE REGARDUNG PET BURDS:
Never keep pet birds in the kitchen or in rooms where
the fumes from the kitchen could reach. Birds have a
vep/sensitive respiratory system. Fumes released during
an oven self-cleaning cycle may be harmful or fatal to
birds. Fumes released due to overheated cooking off, fat,
margarine and overheated non-stick cookware may be
equally harmful.
Save These instructions for Future Reference
4
@
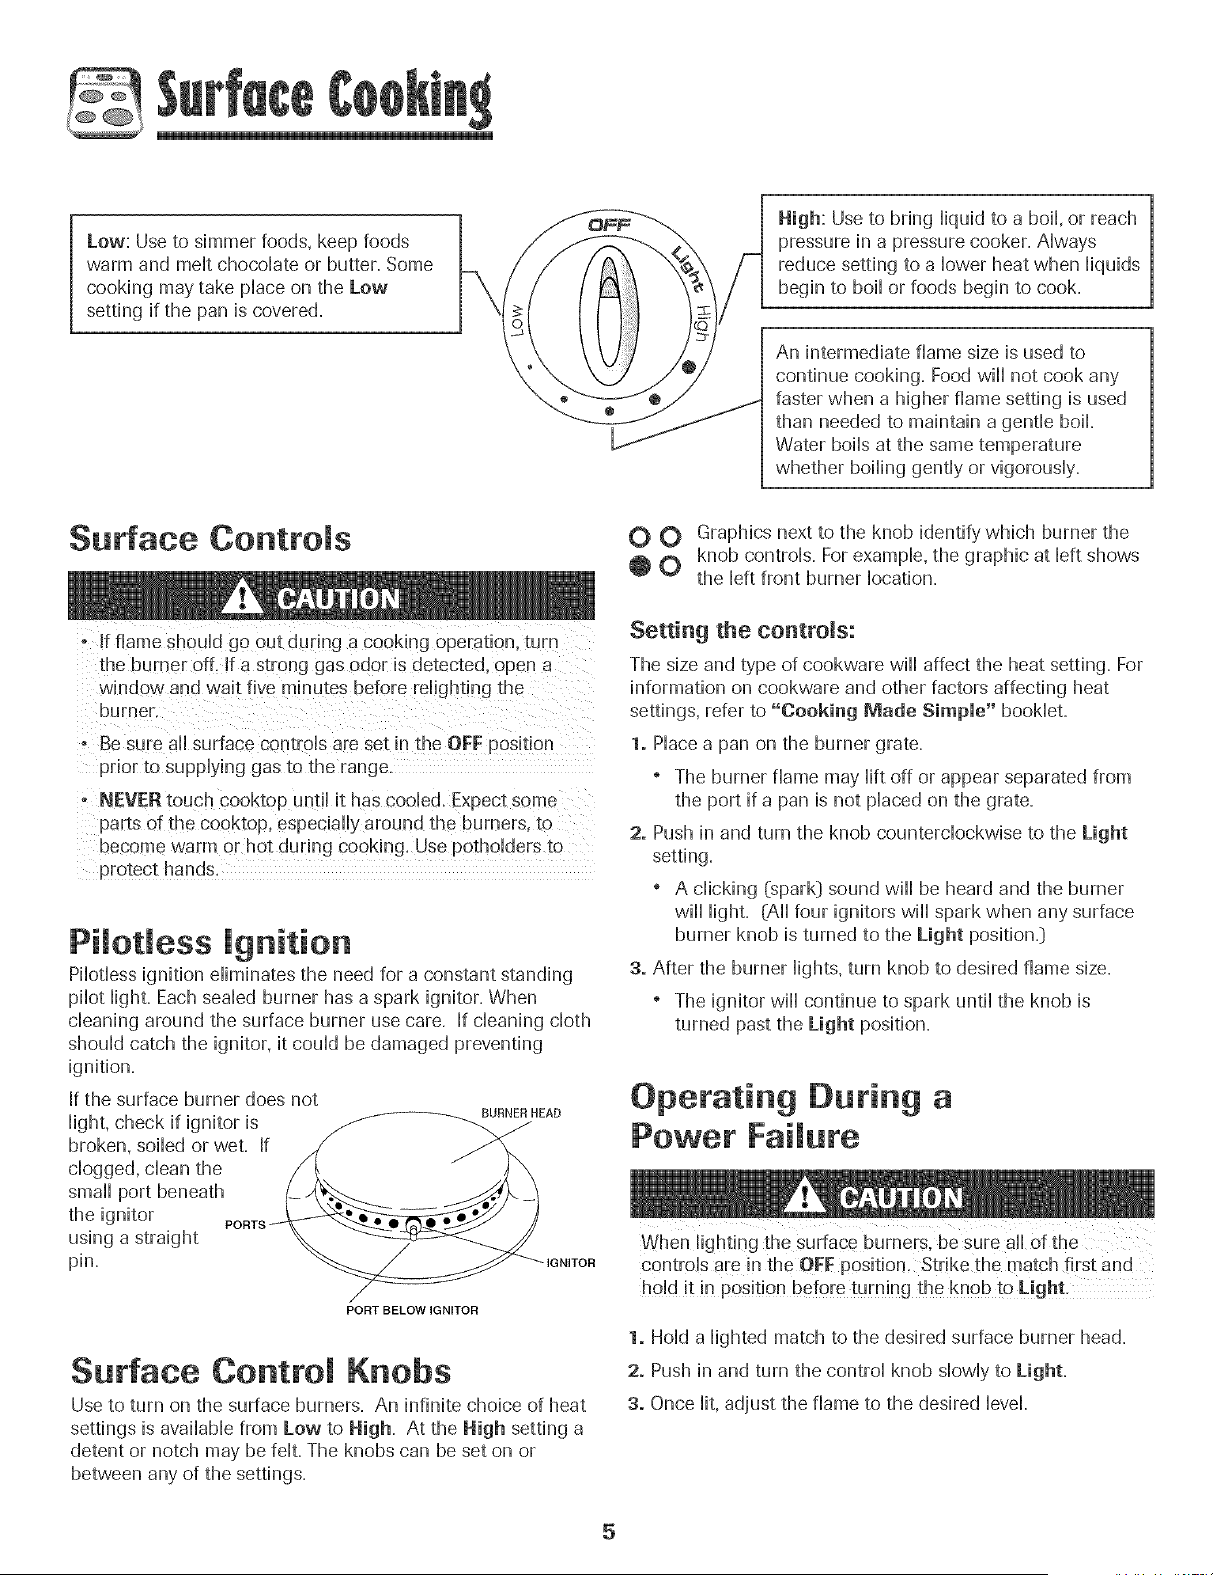
Low: Use to simmer foods, keep foods
warm and malt chocolate or butter. Some
cooking may take place on the Low
setting if the pan is covered.
High: Use to bring liquid to a boil, or reach
pressure in a pressure cooker. Always
reduce setting to a lower heat when liquids
begin to boil or foods begin to cook.
An intermediate flame size is used to
continue cooking. Food will not cook any
faster when a higher flame setting is used
than needed to maintain a gentle bo&
Water boils at the same temperature
whether boiling gently or vigorously.
Surface Controls
• If flame should go out during a cooking operation, turn
the burner off. If a strong gas odor is detected, open a
window and wait five minutes uetore relighting the
burner
- Be s_re all surface controls are set in the OFF position
prior to supplying gas to the range.
- NEVERtouch cooktop until it has cooled. Expect some
parts of the cooktop, especiaii} around the burners, to
become warm or hot during cooking, Use potholders to
Pilotless ignition
Pilotless ignition eliminates the need for a constant standing
pilot lighL Each sealed burner has a spark ignitor. When
cleaning around the surface burner use care. If cleaning cloth
should catch the ignitor, it could be damaged preventing
If the surface burner does not
light, check if ignitor is __,EAD
broken, soiled or wet. If /1/
clogged, clean tile / _,, " _ X
small port beneath (_ _ _ _#k -1
the ignitor PORTS ___
using a straight _,
pill. _ -'_- IGNITOR
PORT BELOW IGNITOR
Surface Control Knobs
Use to turn on the surface burners, An infinite choice of heat
settings is available from Low to High. At the High setting a
detent or notch may be felt. The knobs can be set on or
between any of the settings.
0 0 Graphics next to the knob identify which burner the
0 knob controls. For example, the graphic at left shows
the left front burner location.
Setting the controls:
The size and type of cookware will affect the heat setting. For
information on cookware and other factors affecting heat
settings, refer to "Cooking Made Simple" booklet.
1. Place a pan on the burner grate.
The burner flame may lift off or appear separated from
the port if a pan is not placed on the grate.
2. Push in and turn the knob counterclockwise to the Light
setting.
" A clicking (spark] sound will be heard and the burner
will light. (All four ignitors will spark when any surface
burner knob is turned to the Light position.]
3. After the burner lights, turn knob to desired flame size.
The ignitor will continue to spark until the knob is
turned past the Light position.
O#erating During a
Power Failure
controls are in the OFF position, Strike the match first and
hold it in pos!t!on bef0[e turning the knob tO Light,
1. Hold a lighted match to the desired surface burner head.
2. Push in and turn the control knob slowly to Light.
3. Once lit, adjust the flame to the desired level.
5

@
Cooktop
To prevent the cooktop from discoloring or
staining:
CHeancooktop after each use.
Wipe acidic or sugary' spills as soon as the cooktop has
_ cooHedas these spills may discoHorthe
__ UnHikea range with standard gas burners,
this cooktop does not Hilt-up nor is it
removaMe. Do not attempt to lift the
%®_,' eooktop for arty reason°
Burner Grates
The grates must be propedy positioned before
cooking. Improper installation of the grates may
result in chipping of the cooktop.
Do not operate the burners without a pan on the
grate.
The grate's porcelain finish may chip without
a pan to absorb the heat from the burner
flame.
Although the burner grates are durable, they will gradually
lose their shine and/or discolor, due to the high temperatures
of the gas flame.
Seamed Burners
The sealed burners of your range are secured to the cooktop
and are not designed to be removed. Since the burners are
sealed into the cooktop, boilovers or spills will not seep
underneath the cooktop=
However, the burner should be cleaned after each use= (See
page 21 for cleaning directions=_)
High Performance Burner
(12,000 BTU*
There is one high speed burner on your range, located in the
right front position. This burner offers higher speed cooking
that can be used to quickly bring water to a boil and for large-
quantity cooking.
Simmer Burner
This burner is located in the left rear position. The simmer
burner offers a lower BTU* flame for delicate sauces or
melting chocolate.
BTUratings will vary when using LP gas,
A properly adjusted burner with clean ports will light
within a few seconds. If using natural gas, the flame
will be blue with a deeper blue inner cone.
If the burner flame is yellow or is noisy, the air/gas
mixture may be incorrect. Contact a service technician
to adjust. (Adjustments are not covered by the war-
ranty.)
With LPgas, slight yellow tips on the flames are
acceptable. This is normal and adjustment is not
necessary'.
" With some types of gas, you may hear a "popping"
sound when the surface burner is turned off. This is a
normal operating sound of the burner.
" If the control knob is turned very' quickly from High to
Low, the flame may go out, particularly if the burner is
cold. If this occurs, turn the knob to the OFF position,
wait several seconds and relight the burner.
" The flame should be adjusted so it does not extend
beyond the edge of the pan.
6
@
Manuam CmeanOven Control
(:select models:)
A B
====h_
Broil
Timer Clock CanceH
C B E
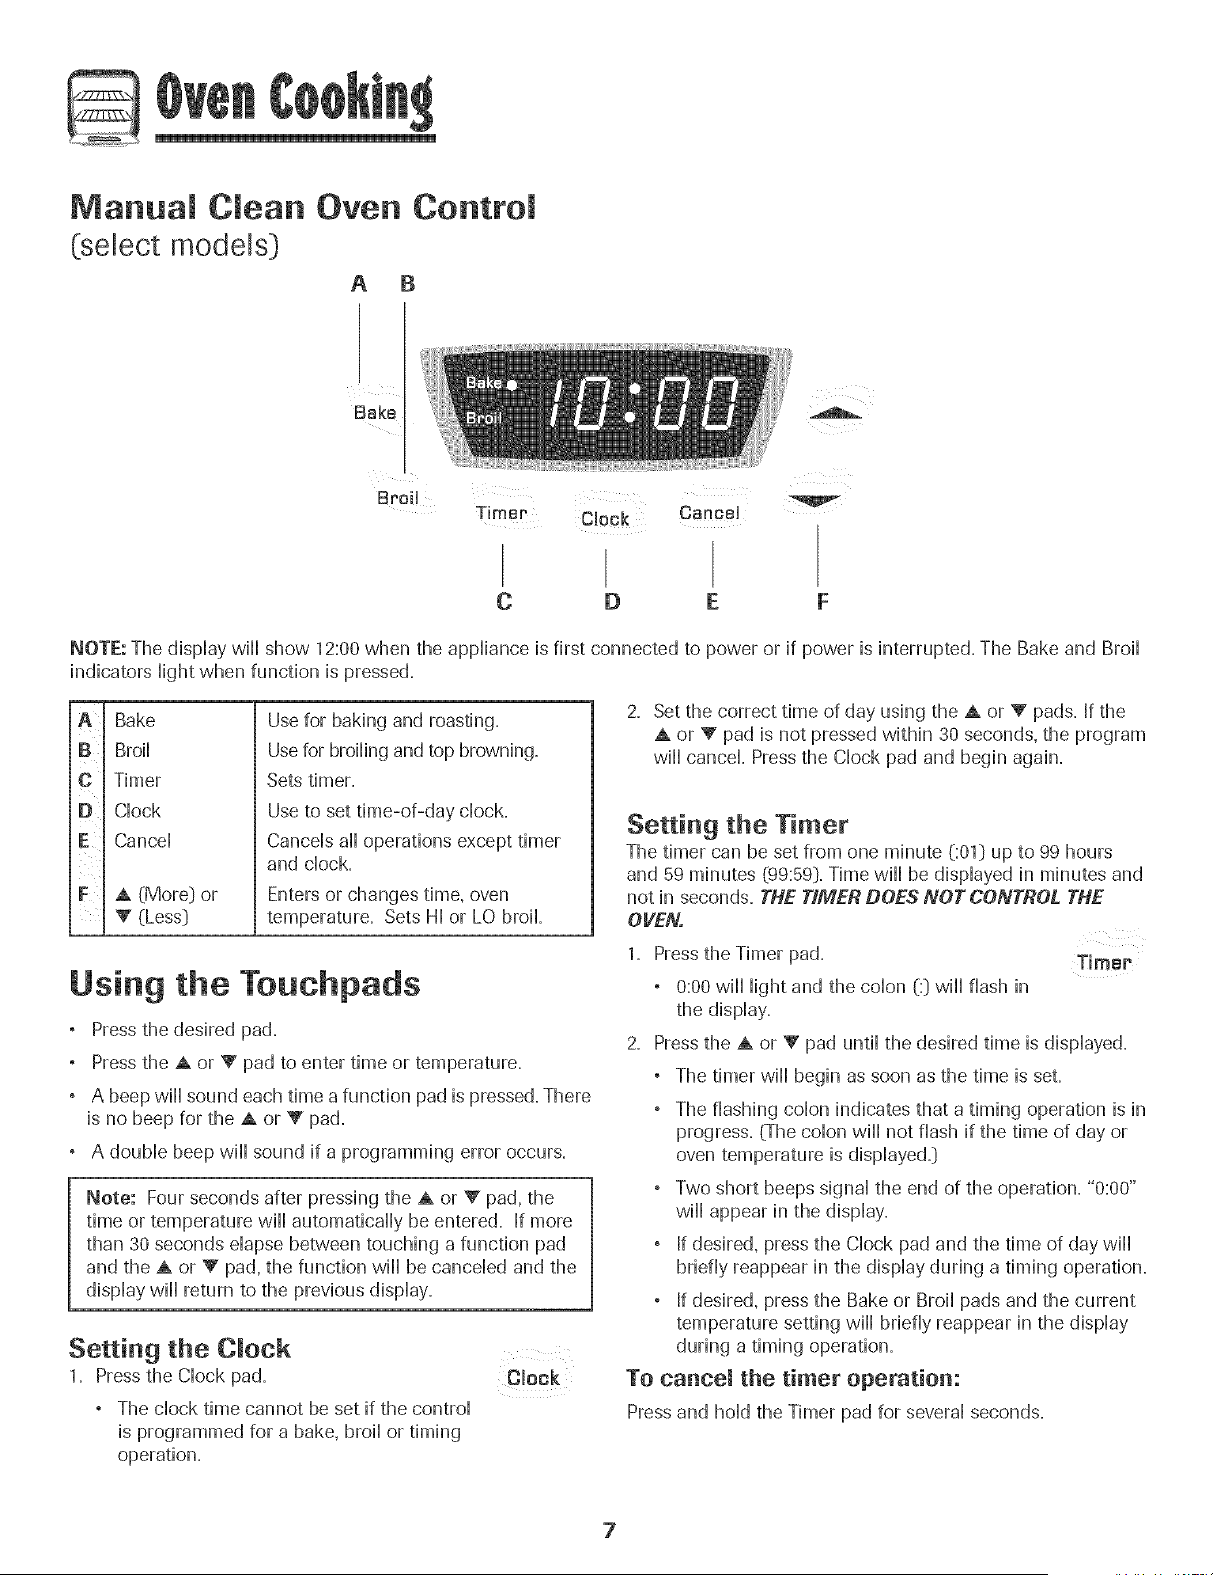
NOTE: The dispiay win show 12:00 when the appiiance is first connected to power or if power is interrupted. The Bake and Broii
indicators Hightwhen function is pressed.
A
B
D
F
Bake
Broii
Timer
Clock
Cancel
A (More} or
V (Less}
Use for baking and roasting.
Usefor broiling and top browning.
Sets timer.
Use to set time-of-day clock.
Cancels all operations except timer
and clock.
Enters or changes time, oven
temperature. Sets HI or LO broil
Using the Teuchpads
° Press the desired pad.
° Press the A or V pad to enter time or temperature.
° A beep win sound each time a function pad is pressed. There
is no beep for the A or V pad.
° A double beep wiii sound if a programming error occurs.
Note: Four seconds after pressing the A or V pad, the
time or temperature will automatically be entered. If more
than 30 seconds elapse between touching a function pad
and the A or V pad, the function will be canceled and the
display will return to the previous display.
Setting the C ock
1. Press the Clock pad.
° The clock time cannot be set if the control
is programmed for a bake, broil or timing
operation.
2. Set the correct time of day using the A or V pads. If the
A or V pad is not pressed within 30 seconds, the program
will cancel Press the Clock pad and begin again.
Settiog the Timer
The timer can be set from one minute (:01} up to 99 hours
and 59 minutes (99:59}. Time will be displayed in minutes and
not in seconds. THE TIMER DOES NOT CONTROL THE
OVEN.
1. Press the Timer pad.
° 0:00 wiii iight and the coion (:} wiii flash in
the display.
2. Press the A or V pad untii the desired time is displayed.
° The timer wiii begin as soon as the time is set.
, The flashing colon indicates that a timing operation is in
progress. (The colon wiii not flash if the time of day or
oven temperature is displayed.}
, Two short beeps signal the end of the operation. "0:00"
will appear in the display.
If desired, press the Clock pad and the time of day will
briefly reappear in the display during a timing operation.
If desired, press the Bake or Broil pads and the current
temperature setting will briefly reappear in the display
during a timing operation.
To cancel the timer operation:
Press and hold the Timer pad for several seconds.
7
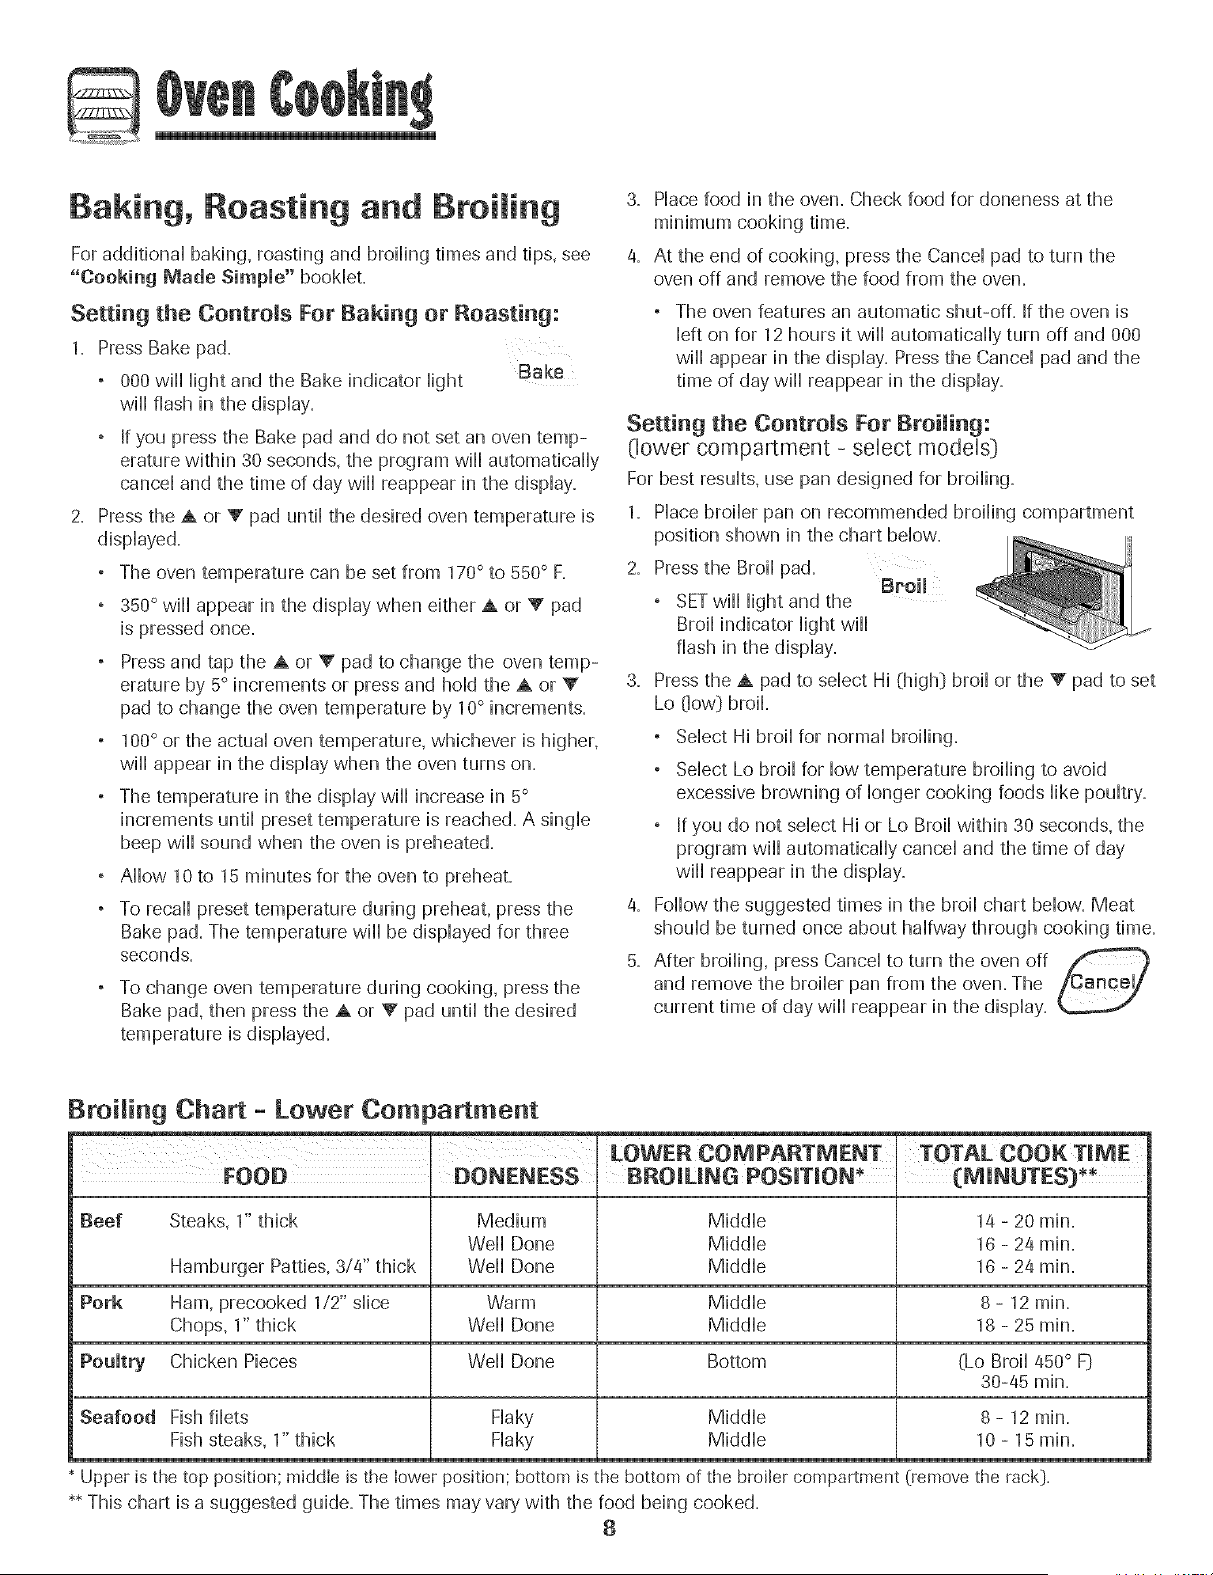
Baking, Roasting and Broiling
For additional baking, roasting and broiling times and tips, see
"Cooking Made Simple" booklet,
Setting the Controls For Baking or Roasting:
1. Press Bake pad.
, 000 will light and the Bake indicator light Bake
will flash in the display.
, [f you press the Bake pad and do not set an oven temp-
erature within 30 seconds, the program will automatically
cancel and the time of day will reappear in the display.
2. Press the A or V pad until the desired oven temperature is
displayed.
, The oven temperature can be set from 170° to 550° F.
, 350° will appear in the display when either A or V pad
is pressed once.
, Press and tap the A or V pad to change the oven temp-
erature by 5° increments or press and hold the A or V
pad to change the oven temperature by 10° increments.
, 100° or the actual oven temperature, whichever is higher,
will appear in the display when the oven turns on.
, The temperature in the display will increase in 5°
increments until preset temperature is reached. A single
beep will sound when the oven is preheated.
, Allow 10 to 15 minutes for the oven to preheat.
, To recall preset temperature during preheat, press the
Bake pad. The temperature will be displayed for three
seconds.
, To change oven temperature during cooking, press the
Bake pad, then press the A or V pad until the desired
temperature is displayed.
3, Place food in the oven. Check food for aloneness at the
minimum cooking time.
4. At the end of cooking, press the Cancel pad to turn the
oven off and remove the food from the oven.
The oven features an automatic shut-off. If the oven is
left on for 12 hours it will automatically turn off and 000
will appear in the display. Press the Cancel pad and the
time of day will reappear in the display.
Setting the Controls For Broiling:
(lower compartment - select models)
For best results, use pan designed for broiling.
1. Place broiler pan on recommended broiling compartment
position shown in the chart below.
Pressthe Broil pad.
° SETwiii iight and the Breim
Broil indicator light will
flash in the display.
3. Press the A pad to select Hi (high} broil or the _' pad to set
Lo (low} broil.
, Select Hi broil for normal broiling.
, Select Lo broil for low temperature broiling to avoid
excessive browning of longer cooking foods like poultry.
[f you do not select Hi or Lo Broil within 30 seconds, the
program wiil automatically cancel and the time of day
wiil reappear in the display.
4. Follow the suggested times in the broil chart below. Meat
should be turned once about halfway through cooking time.
5. After broiling, press Cancel to turn the oven off
and remove the broiler pan from the oven. The
current time of day wiil reappear in the display.
Broiling Chart - Lower Corn artment
[ LOWEP_COMPARTMENT_ _
FOOD DONENESS BROILING POSITION* _ (M[NUTES}_
Beef Steaks, 1" thick Medium Middle 14 - 20 rain.
Weil Done Middle 16 - 24 rain.
Hamburger Patties, 3/4" thick Well Done Middle 16 - 24 min.
Perk Ham, precooked 1/2" slice Warm Middle 8 - 12 rain.
Chops, 1" thick Well Done Middle 18 - 25 min.
Chicken Pieces Weil Done Bottom (Lo Broil 450° F}
30-45 min.
Seafood Fish filets Flaky Middle 8 - 12 min.
Fish steaks, 1" thick Flaky Middle 10 - 15 rain.
Upper is the top position; middle is the lower position; bottom is the bottom of the broiler compartment (remove the rack}.
** This chart is a suggested guide. The times may vary with the food being cooked.
8
©
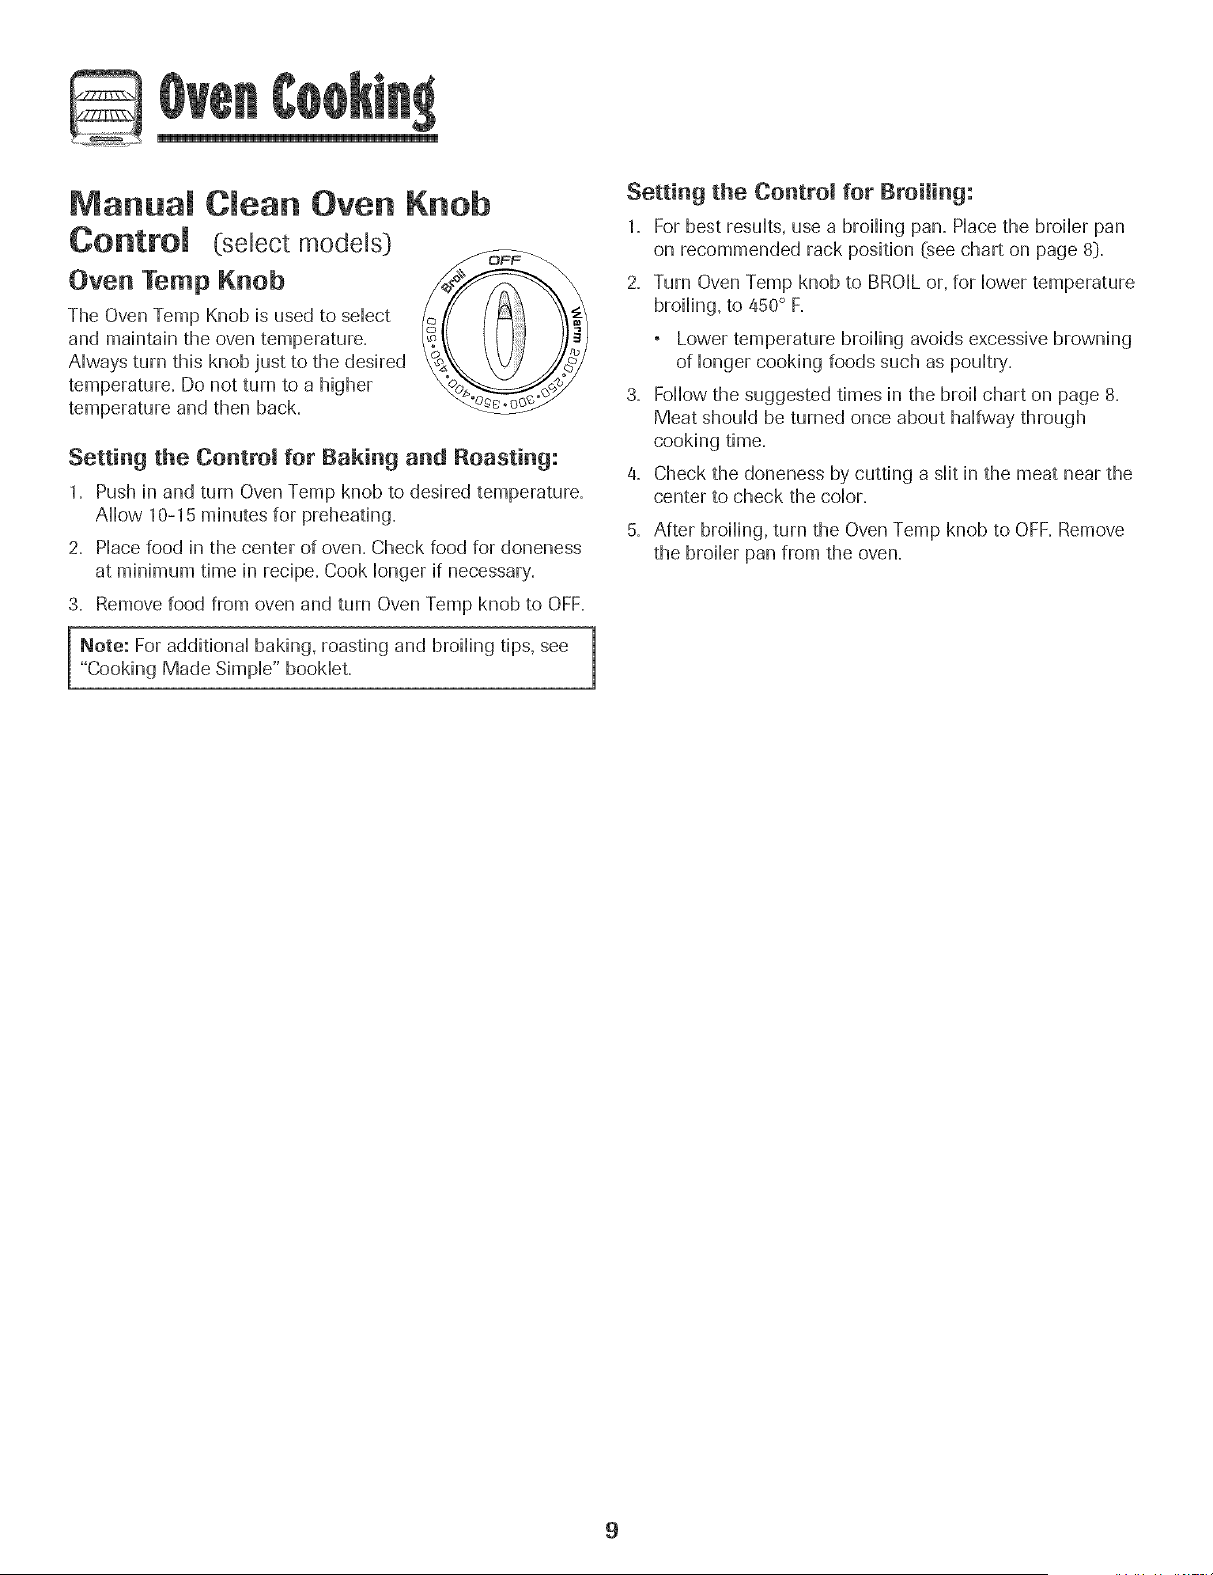
Manua C ean Oven Knob
(select models]
Oven Temp Knob
The Oven Temp Knob is used to sdect
and maintain the oven temperature.
AHwaysturn this knob just to the desired
temperature. Do not turn to a higher
temperature and then back.
Setting the Control for Baking and Roasting:
1. Push in and turn Oven Temp knob to desired temperature.
AHow 10-15 minutes for preheating.
2. PHacefood in the center of oven. Check food for aloneness
at minimum time in recipe. Cook Hongerif necessary.
3. Remove food from oven and turn Oven Temp knob to OFF.
1
Note: For additional baking, roasting and broiling tips, see [
"Cooking Made SimpHe"booklet.
1
Setting the Centro! for Broiling:
1. For best results, use a broiling pan. Place the broiler pan
on recommended rack position (see chart on page 8).
2. Turn Oven Temp knob to BROIL or, for lower temperature
broiling, to 450° F.
Lower temperature broiling avoids excessive browning
of longer cooking foods such as poultry.
3. Follow the suggested times in the broil chart on page 8.
Meat should be turned once about halfway through
cooking time.
4. Check the aloneness by cutting a slit in the meat near the
center to check the color.
5. After broiling, turn the Oven Temp knob to OFF. Remove
the broiler pan from the oven.
@
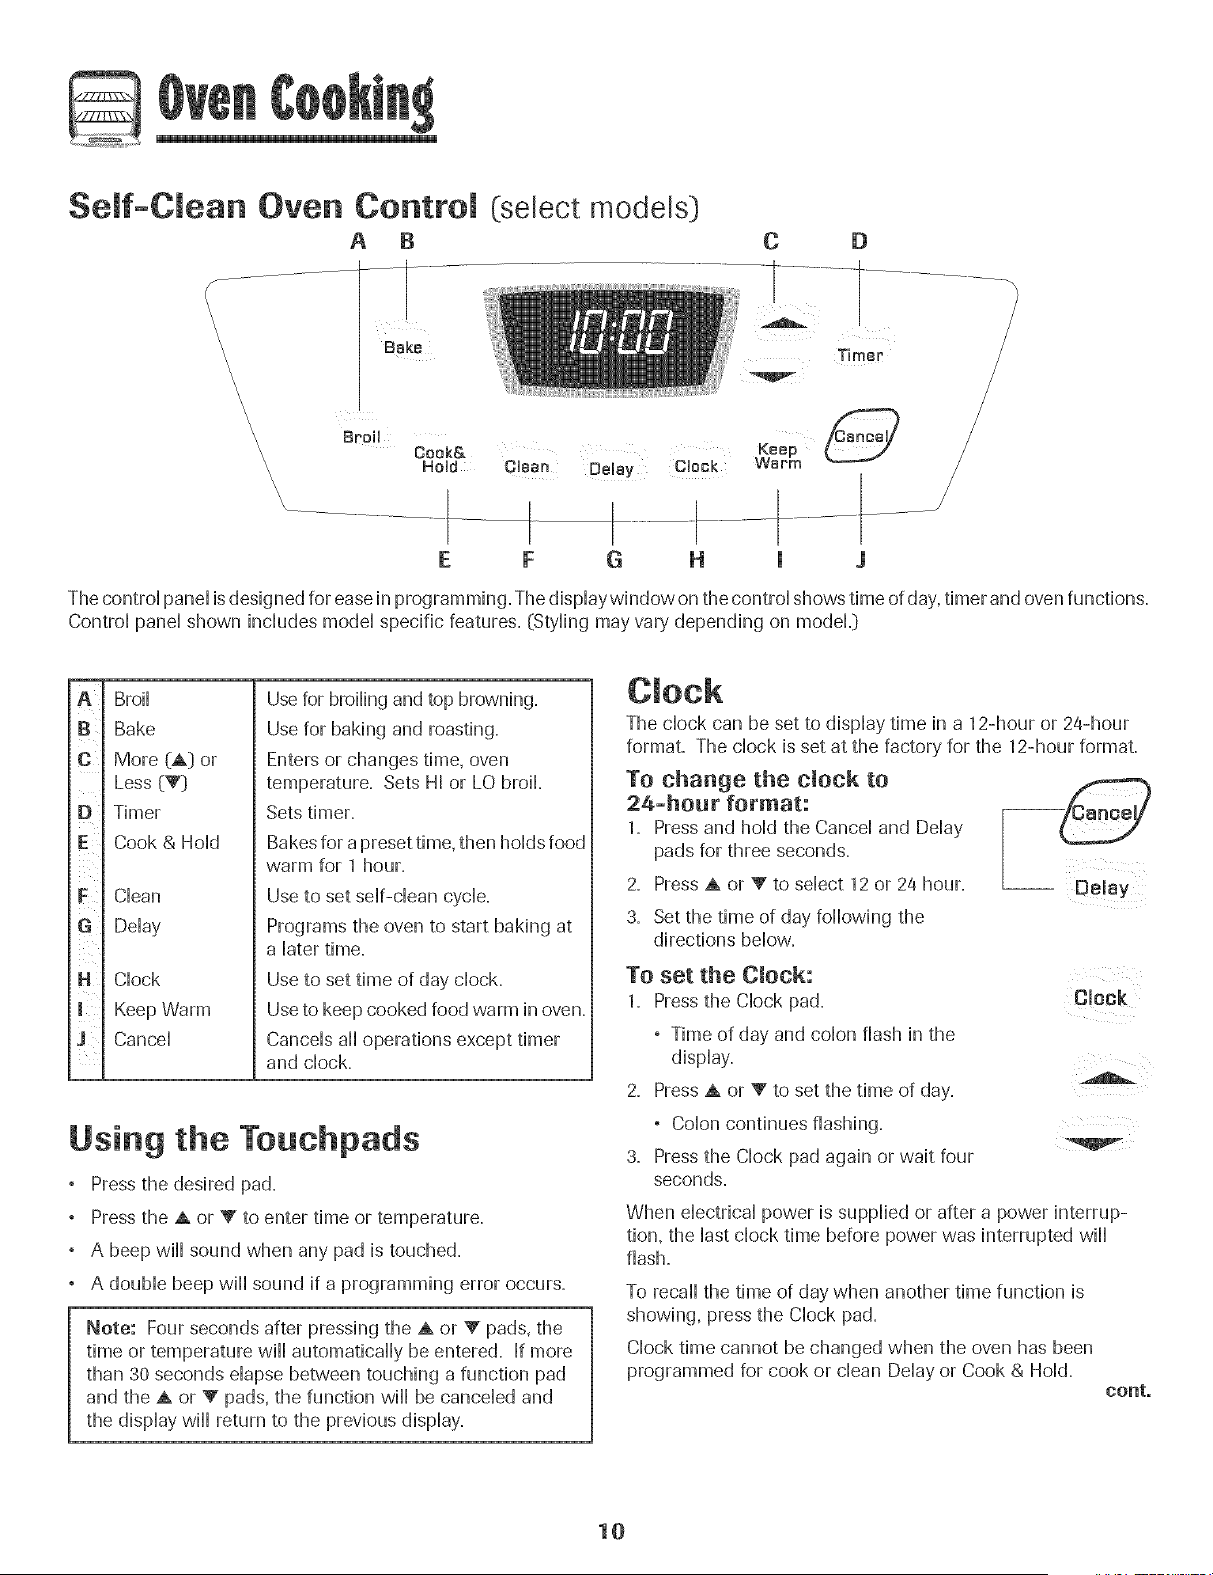
Seff-C ean Oven
Controm (select models:)
A B
\
\ Bake
\
\
\
\
\
\
\ Broil
\
\
\
\
\
\
Cook&
Hold
E F {3
The controi pand is designed for ease in programming. The dispiaywindow on the controi shows time of day, timer and oven functions.
Controi pand shown inciudes modal specific features. (Styiing may vary depending on modeL}
A
B
C
D
E
G
N
m¸
Broil
Bake
More (A} or
Less (V}
Timer
Cook & Hold
Clean
Delay
Clock
Keep Warm
Cancel
Use for broiling and top browning.
Use for baking and roasting.
Enters or changes time, oven
temperature. Sets HI or LO broil.
Sets timer.
Bakes for a preset time, then holds food
warm for 1 hour.
Use to set self-dean cycle.
Programs the oven to start baking at
a later time.
Use to set time of day clock.
Use to keep cooked food warm in oven.
Cancels all operations except timer
and clock.
Using the Touchpads
Pressthe desired pad.
Pressthe A or V to enter time or temperature.
° A beep will sound when any pad is touched.
° A double beep will sound if a programming error occurs.
Note: Four seconds after pressing the A or V pads, the
time or temperature will automatically be entered. If more
than 30 seconds elapse between touching a function pad
and the A or V pads, the function will be canceled and
the display will return to the previous display.
The clock can be set to display time in a 12-hour or 24-hour
format. The clock is set at the factory for the 12-hour format.
To change the clock to
2a-hour format:
1. Press and hold the Cancel and Delay
pads for three seconds.
2. Press A or V to select 12 or 24 hour.
3. Set the time of day following the
directions below.
-- Delay
To set the Clock:
1. Press the Clock pad. CJoo_,
° Time of day and colon flash in the
display.
2. Press A or _' to set the time of day.
° Colon continues flashing.
3. Press the Clock pad again or wait four
seconds.
When electrical power is supplied or after a power interrup-
tion, the last clock time before power was interrupted will
flash.
To recall the time of day when another time function is
showing, press the Clock pad.
Clock time cannot be changed when the oven has been
programmed for cook or clean Delay or Cook & Hold.
conto
10
@
To cance! the CJock dispJay:
If you do not want the time of day to display:
Press and hold the Cancel and Clock
pads for three seconds, The time of day
will disappear from the display
When the clock display is canceled, press __ Clock
the Clock pad to briefly display the time
of day.
To restore the Clock display:
Press and hold the Cancel and Clock pads for three seconds.
The time of day will reappear in the display.
The timer can be set from one minute (00:01) up to 99 hours
and 59 minutes (99:59).
The timer can be used independently of any other oven
activity. It can also be set while another oven function is
operating.
The Timer does not control the oven. It only controls a
beeper.
Timer
To set the Timer:
1. Press the Timer pad.
° 0:00 lights in the display.
° The colon will flash.
2.
A
Press the A or Y pad until the
correct time appears in the display.
° The colon win continue to flash.
3.
PressTimer pad again or wait four seconds.
° The colon continues flashing and the time begins
counting down.
° The last minute of the timer countdown win be displayed
as seconds.
4. At the end of the set time, one long beep will sound.
To cancel the Timer:
1. Press and hold the Timer pad for three seconds.
OR
2. Press the Timer pad and set the time to 00:00.
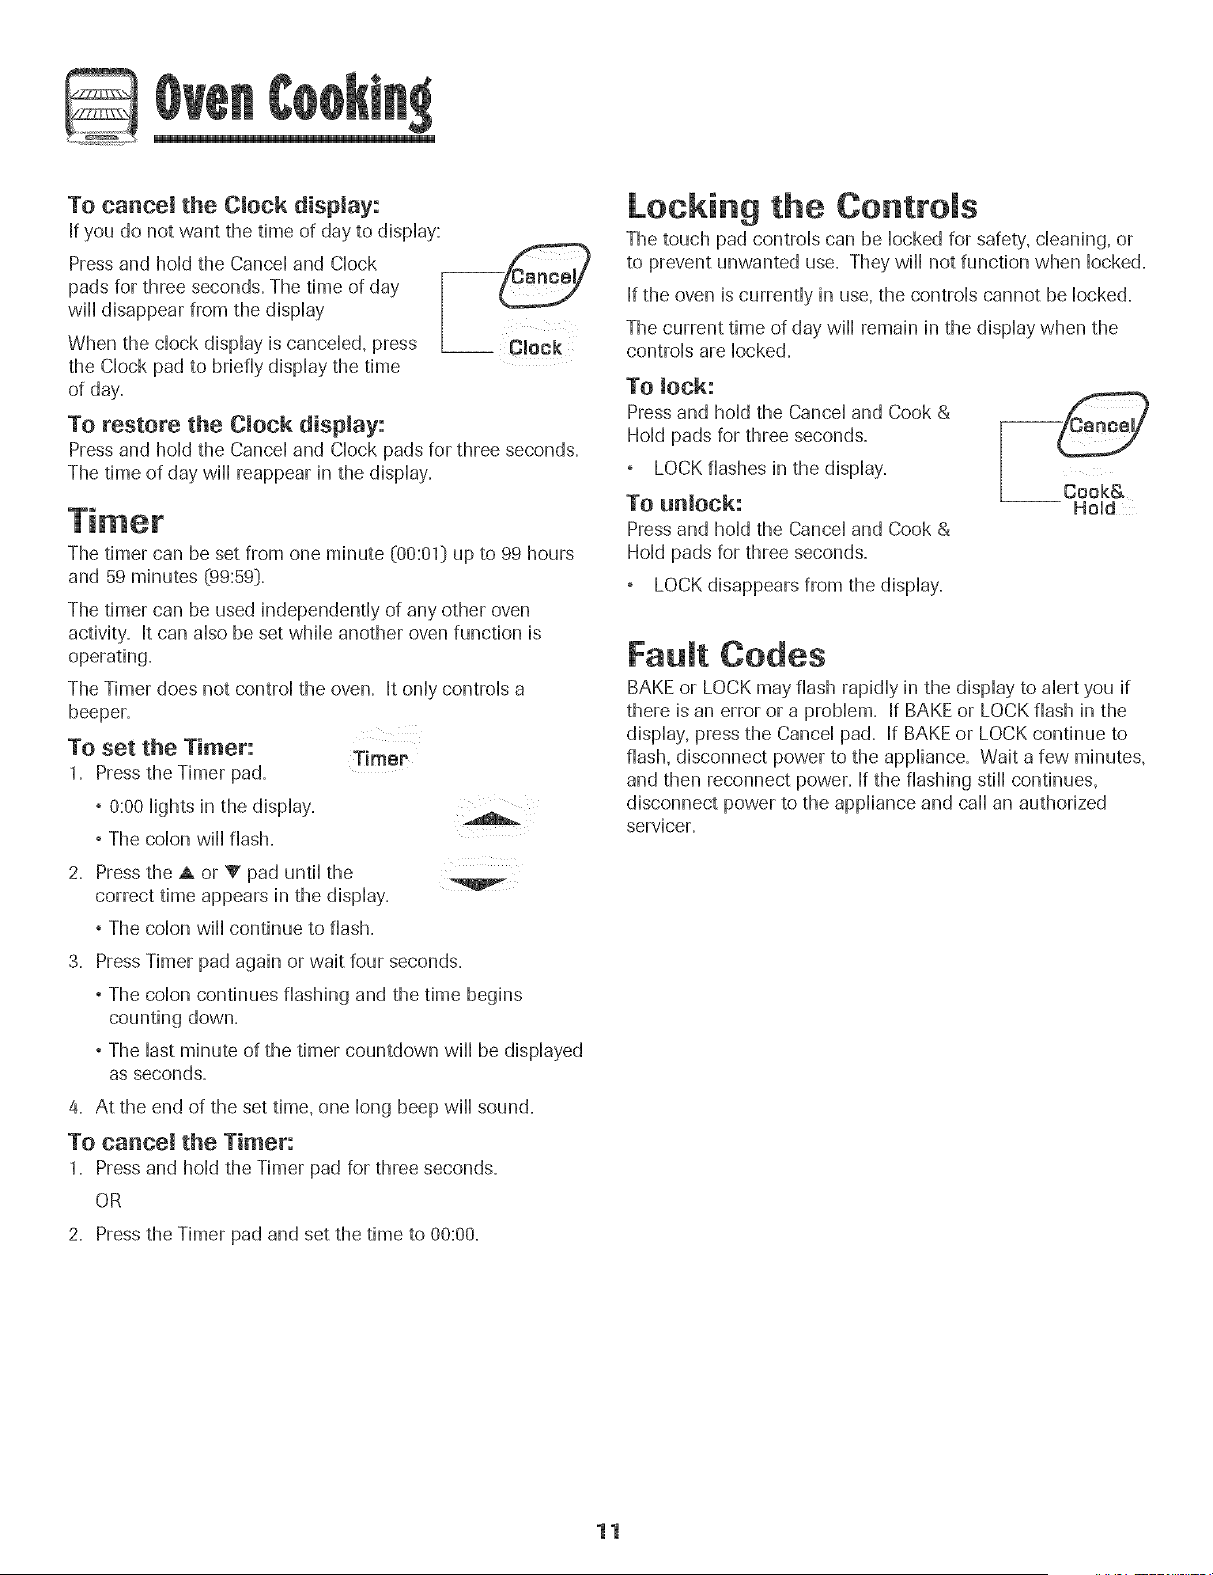
Locking the Controls
The touch pad controls can be locked for safety',cleaning, or
to prevent unwanted use. They will not function when locked.
If the oven is currently in use, the controls cannot be locked.
The current time of day will remain in the display when the
controls are locked.
To lock:
Press and hold the Cancel and Cook &
Hold pads for three seconds.
LOCK flashes in the display.
To nnlock:
Press and hold the Cancel and Cook &
Hold pads for three seconds.
LOCK disappears from the display.
Fault Codes
BAKE or LOCK may flash rapidly in the display to alert you if
there is an error or a problem. If BAKE or LOCK flash in the
display, press the Cancel pad. If BAKEor LOCK continue to
flash, disconnect power to the appliance. Wait a few minutes,
and then reconnect power. If the flashing still continues,
disconnect power to the appliance and can an authorized
servicer.
11
To set Bake:
1. Press the Bake pa&
, BAKE will flash.
, 000 wifl Hightin the dispHay.
2. Sdect the oven temperature. The oven tempera-
3.
A
ture can be set from 170° to 550°. Pressor press
and hold the A or V pads.
, 350° will light when either pad is first pressed.
, Press the A pad to increase the temperature.
, Press the V pad to decrease the temperature.
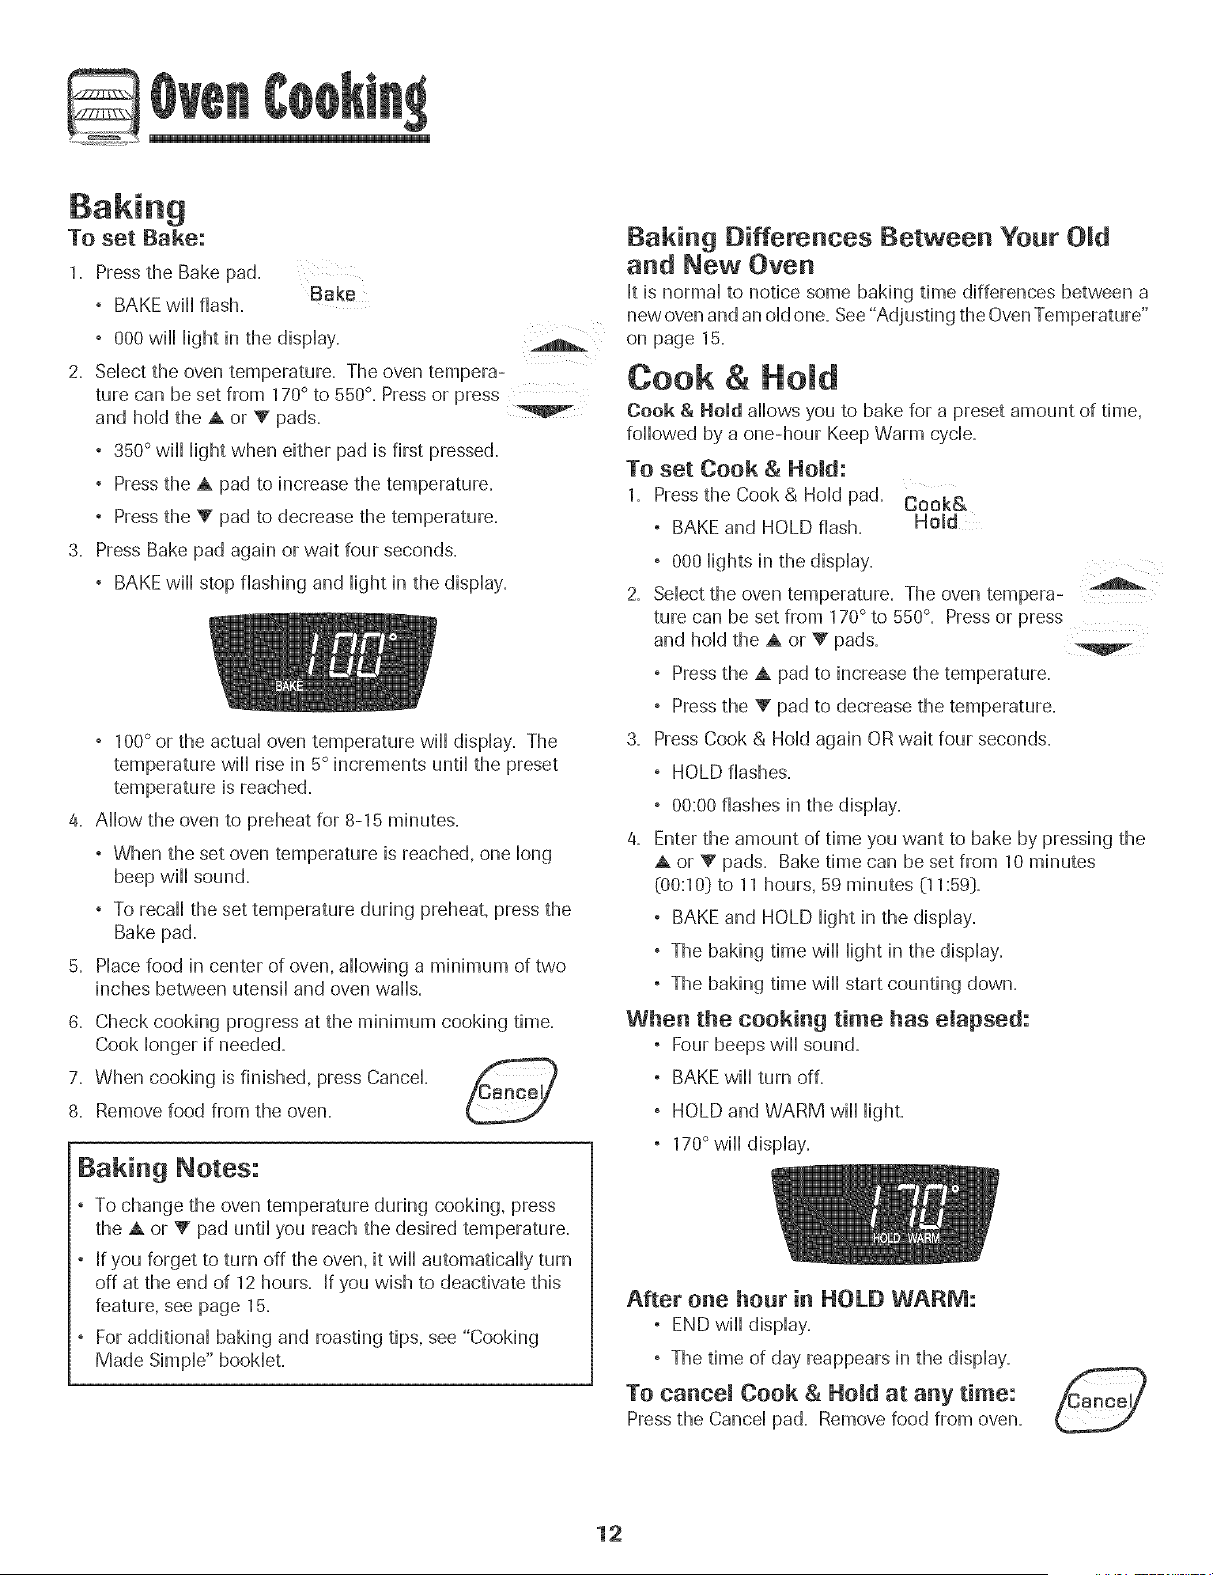
Press Bake pad again or wait four seconds.
, BAKE will stop flashing and light in the display.
, 100° or the actual oven temperature will display. The
temperature will rise in 5° increments until the preset
temperature is reached.
4. Allow the oven to preheat for 8-15 minutes.
, When the set oven temperature is reached, one long
beep will sound.
, To recall the set temperature during preheat, press the
Bake pad.
5. Place food in center of oven, allowing a minimum of two
inches between utensil and oven walls.
6. Check cooking progress at the minimum cooking time.
Cook longer if needed.
7. When cooking is finished, press Cancel P_.=nr_N_
8. Remove food from the oven.
Baking Notes:
° To change the oven temperature during cooking, press
the A or V pad until you reach the desired temperature.
° If you forget to turn off the oven, it will automatically turn
off at the end of 12 hours. If you wish to deactivate this
feature, see page 15.
° For additional baking and roasting tips, see "Cooking
Made Simple" booklet.
Baking Differences Between Your O_d
and New Oven
It is normaHto notice some baking time differences between a
new oven and an old one, See "Adjusting the OvenTemperature"
on page 15.
Cook & Ho d
Cook & Hold allows you to bake for a preset amount of time,
followed by a one-hour Keep Warm cycle.
To set Cook & Hold:
1. Press the Cook & Hold pad. Cook&
° BAKE and HOLD flash. Hold
° 000 lights in the display.
2. Select the oven temperature. The oven tempera-
ture can be set from170° to 550°. Pressor press
and hold the A or V pads.
, Press the A pad to increase the temperature.
, Press the V pad to decrease the temperature.
3. Press Cook & Hold again ORwait four seconds.
, HOLD flashes.
, 00:00 flashes in the display.
4. Enter the amount of time you want to bake by pressing the
A or _' pads. Bake time can be set from 10 minutes
(00:10} to 11 hours, 59 minutes (11:59}.
, BAKE and HOLD light in the display.
, The baking time wiil light in the display.
, The baking time wiil start counting down.
When the cooking time has elapsed:
° Four beeps wiii sound.
° BAKE will turn off.
° HOLD and WARM will light.
, 170°will display.
After one hour in HOLD WARM:
° END will display.
, The time of day reappears in the display.
To cancel Cook & Hold at any time:
Press the Cancel pad. Remove food from oven.
12
De ay Bake
Do not use deHayedbaking for HghHype[!shabHefoods such
as daky products, pork, poultry, or seafood.
When using Delay, the oven begins to cook Haterin the day.
Set the amount of time that you want to deHaybefore the oven
turns on and how Hongyou want to cook. The oven begins to
heat at the seHectedtime and cooks for the specified Hengthof
time.
DeHay time can be set from 10 minutes (00:1 O) to 11 hours, 59
minutes (11:59).
To set a Delayed Baking cycle:
1. Press the DeHaypad.
Delay
, DELAY flashes.
, 00:00 flashes in the dispHay.
2. Press the A or V pad to set the delay time.
While DELAY is still flashing:
3. Press the Cook & Hold pad.
° 000 lights in the display.
, BAKE and HOLD flash. Cook&
4. Press A to set the baking temperature. Hold
° 00:00 and HOLD flash.
° BAKE stays Hit.
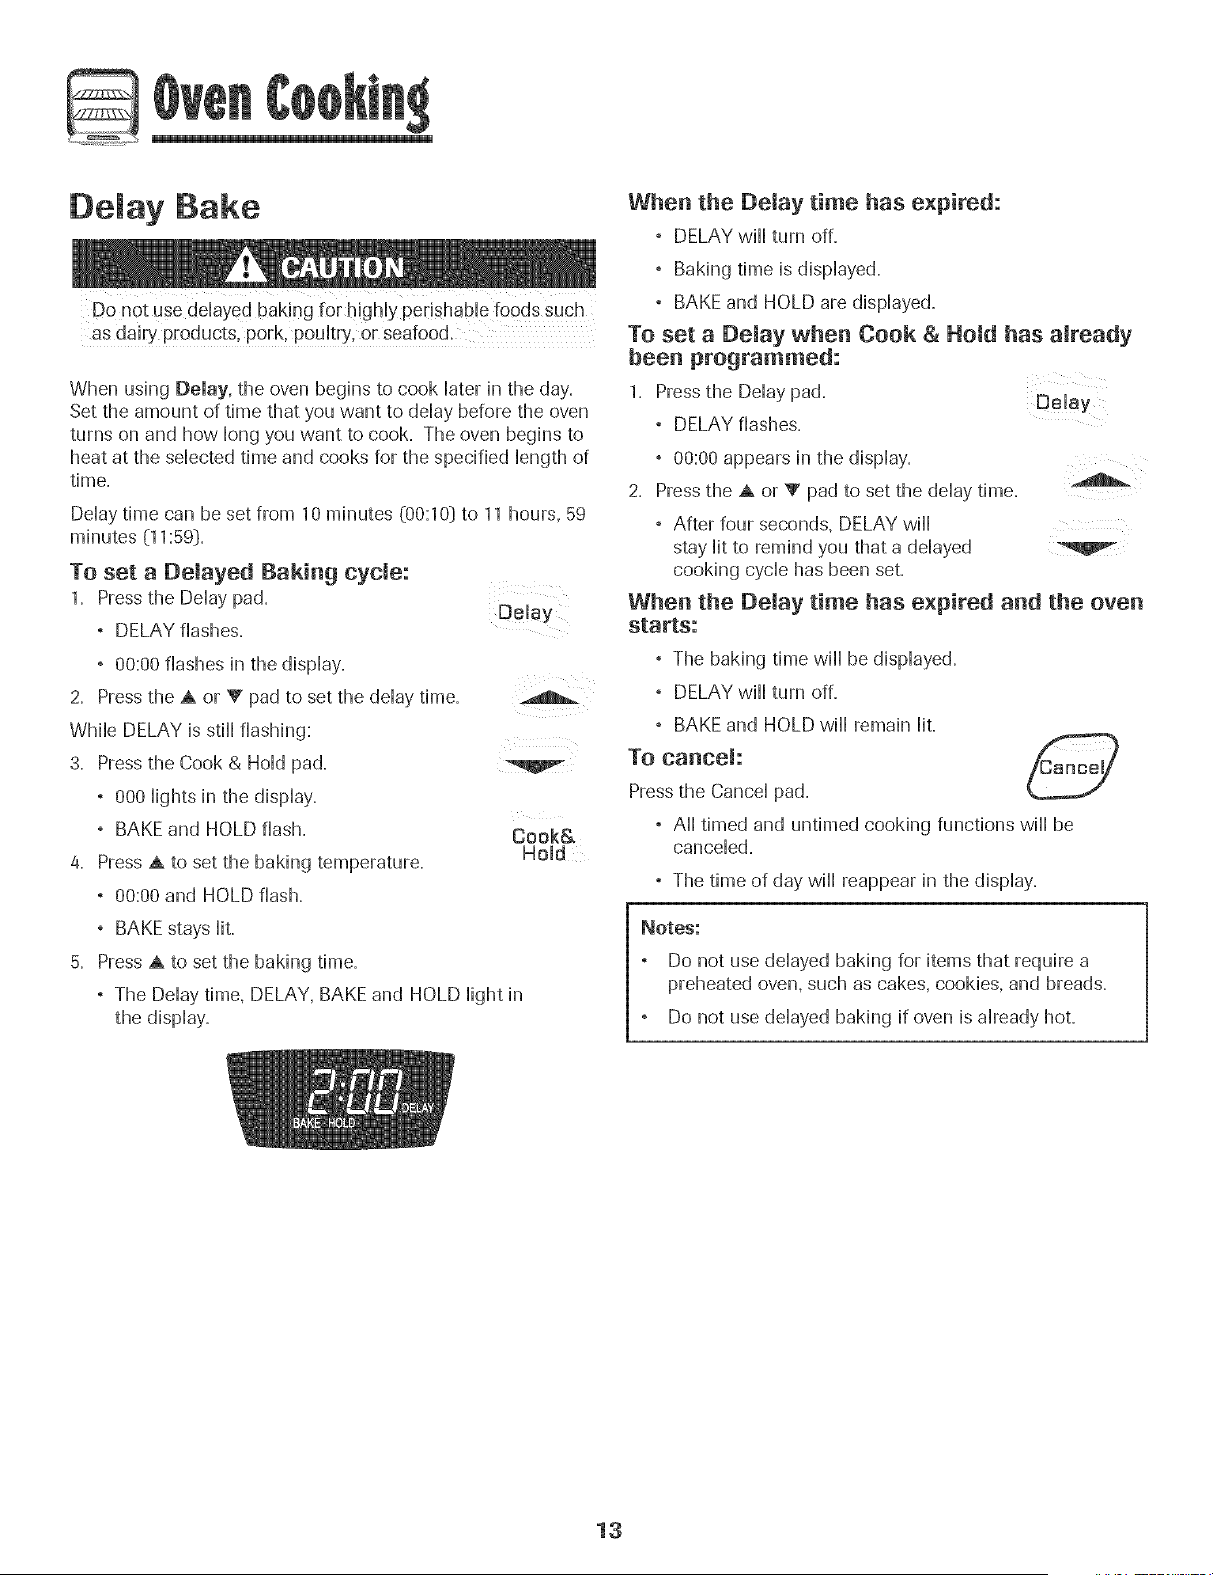
Press A to set the baking time.
° The DeHaytime, DELAY, BAKE and HOLD Hightin
the dispHay.
When the Delay time has expired:
° DELAY wiHHturn off.
, Baking time is dispHayed.
° BAKE and HOLD are dispHayed.
To set a Delay when Cook & Hold has aJready
been programmed:
1. Press the Delay pad. Delay
° DELAY flashes.
° 00:00 appears in the dispHay.
2. Press the A or V pad to set the deHaytime.
° After four seconds, DELAY wiHH
stay Hitto remind you that a deHayed
cooking cycHehas been set.
When the Delay time has expired and the oven
starts:
° The baking time wiHHbe dispHayed.
° DELAY wiHHturn off.
° BAKE and HOLD wiHHremain Hit.
To canoe!:
Press the CanceHpad.
° AHHtimed and untimed cooking functions wiHHbe
canceHed.
° The time of day wiHHreappear in the dispHay.
Notes:
Do not use deHayedbaking for items that require a
preheated oven, such as cakes, cookies, and breads.
Do not use deHayedbaking if oven is aHreadyhot.
13
Keep War
For safdy keephg foods warm or for vvarmhg breads and
pHates.
To set Keep Warm:
1= Press the Keep Warm pad. Keep
WBrm
, WARM flashes.
,000 appears in the dispHay.
Sdect the Keep Warm temperature. The
Keep Warm temperature can be set from
145° to 190°` Press or press and hoHdthe
A or V pads.
, 170° wiHHHightwhen either pad is first pressed.
, Press the A pad to increase the temperature.
, Press the V pad to decrease the temperature.
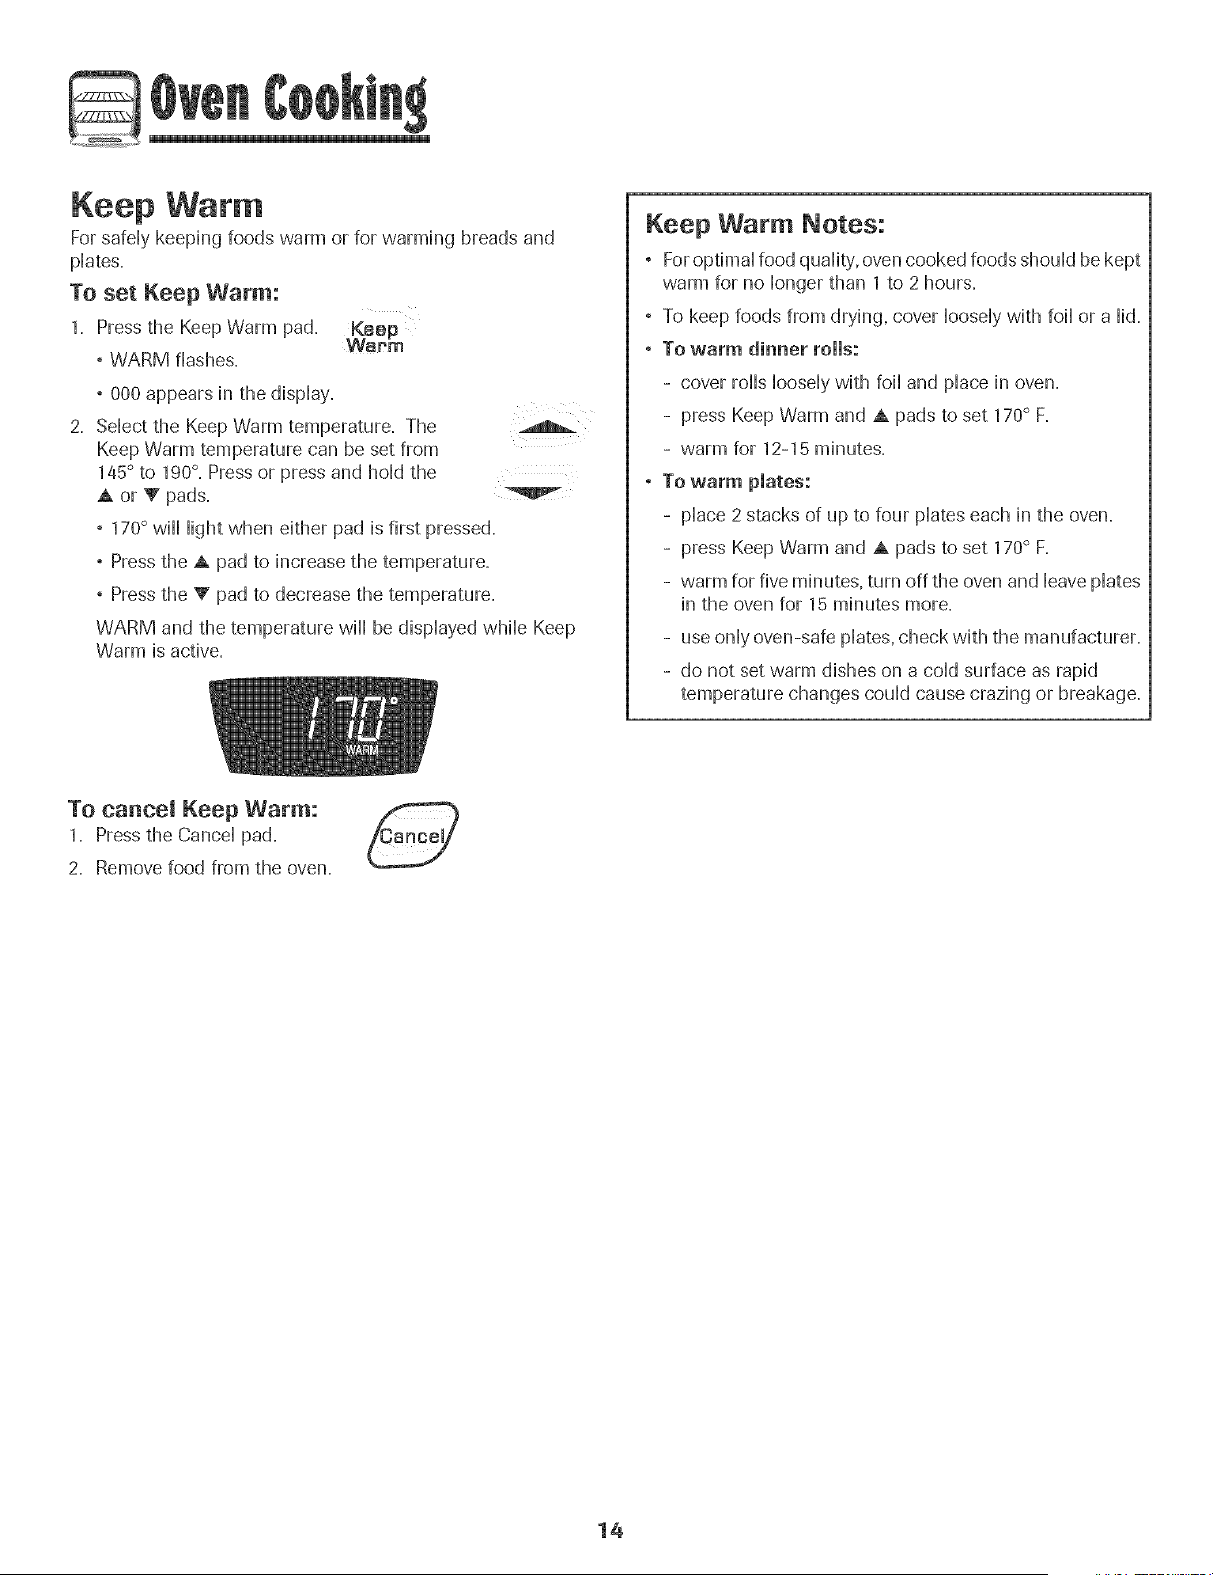
WARM and the temperature wiHHbe dispHayedwNe Keep
Warm is active.
Keep Warm Notes:
, Foroptimal food quality, oven cooked foods should be kept
warm for no longer than 1 to 2 hours.
, To keep foods from drying, cover loosely with foil or a lid.
, To warm dinner rolls:
- cover rolls loosely with foil and place in oven.
- press Keep Warm and A pads to set 170° R
- warm for 12-15 minutes.
, To warm pmates:
- place 2 stacks of up to four plates each in the oven.
- press Keep Warm and A pads to set 170° R
- warm for five minutes, turn off the oven and leave plates
in the oven for 15 minutes more.
- use only oven-safe plates, check with the manufacturer.
- do not set warm dishes on a cold surface as rapid
temperature changes could cause crazing or breakage.
To cancel Keep Warm:
1. Press the Cancel pad.
2. Remove food from the oven.
14
Automatic Shut-Off/Sabbath
Mode
The oven vviHautomatically turn off after 12 hours if you
accidentally Heaveit on= This safety feature can be turned off=
TO cancel the 12-hour shut-off and run the
oven continuously for 72 hours:
1. Set the oven to bake (see page 12]. Clock
2. Press and hoHdthe Clock pad for three seconds.
° SAb will be displayed and flash for five seconds.
, SAb will then be displayed continuously until turned off
or until the 72-hour time limit is reached.
, BAKE will also be displayed if a bake cycle is in use
while the oven is in Sabbath Mode.
All other functions EXCEPTBAKE t'Timer, Keep Warm,
Clean, etc.] are locked out during the Sabbath Mode.
To cancel Bake when in Sabbath Mode:
Press Cancel.
° BAKEwill turn off in the display.
, No beeps will sound.
To cancel the Sabbath Mode:
1. Press the Clock pad for three seconds.
C!ock
OR
2. After 72 hours, the Sabbath Mode will end.
, SAb will flash for 5 seconds.
° The time of day will return to the display.
Adjusting the Oven Tempe|'ature
Oven temperatures are carefully tested for accuracy at the
factory. It is normal to notice some baking or browning
differences between a new oven and an old one. As ranges
get older, the oven temperature can shift.
You may adjust the oven temperature if you think the oven is
not baking or browning correctly. To decide how much to
change the temperature, set the temperature 25° higher or
lower than your recipe recommends, then bake. The results
of the "test" should give you an idea of how much to adjust
the temperature.
To adjust the oven temperature: ................................
1. Press Bake.
2. Enter 550° by pressing the A pad.
3. Press and hold the Bake pad for several
seconds or until 0° appears in the display.
If the oven temperature was previously adjusted, the
change will be displayed. For example, if the oven tem-
perature was reduced by 15° the display will show "-15 °''-
4. Press the A or V pad to adjust the temperature.
Each time a pad is pressed, the temperature changes by
5°- The oven temperature can be increased or decreased
by 5° to 35°-
5. The time of day will automatically reappear in the display.
You do not need to readjust the oven temperature if there
is a power failure or interruption. Broiling and cleaning
temperatures cannot be adjusted.
Sabbath Mode Notes:
° Sabbath Mode can be turned on at any time with or
without the oven on.
° Sabbath Mode cannot be turned on if the touchpads are
locked out or when the door is locked.
° If the oven is baking when Sabbath Mode is set, BAKE
will go out at the end of the baking cycle. There will be
no audible beeps.
, When the Sabbath Mode is started, no preheat beep will
sound.
, All prompts, messages and beeps are deactivated when
Sabbath Mode is active.
, Pressing Cancel will cancel a bake cycle, however the
control will stay in the Sabbath Mode.
, If power fails, the oven will power up in Sabbath Mode with
72 hours remaining and no cycle active.
15
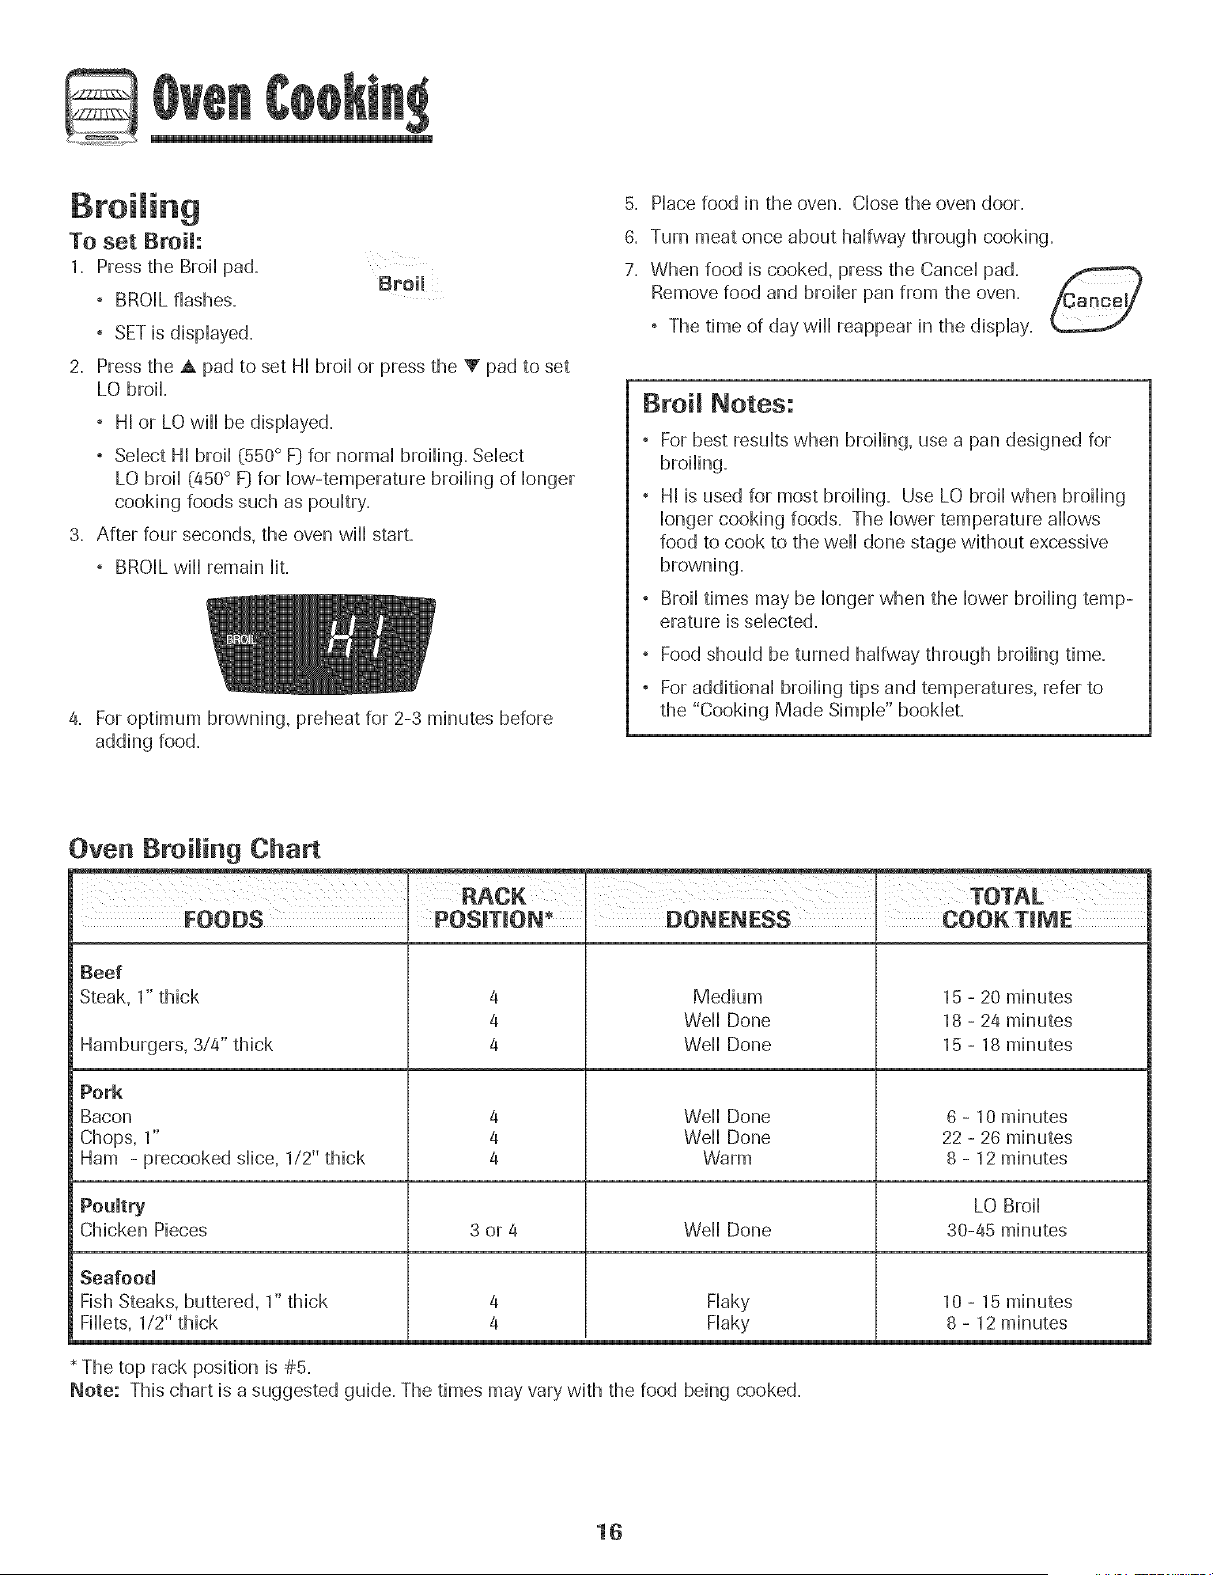
To set Broit:
1. Press the Broii pad.
BroiJ
, BROIL flashes.
, SET is dispiayed.
2. Press the A pad to set HI broii or press the V pad to set
LO broil
, HI or LO wiii be dispiayed.
, Seiect HI broii (550° F) for normai broiiing. Seiect
LO broii (450° F} for How-temperature broiiing of ionger
cooking foods such as pouitry.
3. After four seconds, the oven wiii start.
, BROIL wiii remain Hit.
4. For optimum browning, preheat for 2-3 minutes before
adding food.
5. Place food in the oven. Close the oven door.
6. Turn meat once about halfway through cooking.
7. When food is cooked, press the Cancel pad.
Remove food and broiler pan from the oven.
° The time of day wiii reappear in the display.
groiJ Notes:
, For best results when broiling, use a pan designed for
broiling.
, HI is used for most broiling. Use LO broil when broiling
longer cooking foods. The lower temperature allows
food to cook to the well done stage without excessive
browning.
, Broil times may be longer when the lower broiling temp-
erature is selected.
, Food should be turned halfway through broiling time.
° For additional broiling tips and temperatures, refer to
the "Cooking Made Simple" bookleL
Oven Broiling Chart
I i
FOOBS POSITION* BONENESS COOK TIPaE
Beef
Steak, 1" thick
Hamburgers, 3/4" thick
Pork
Bacon
Chops, 1"
Ham - precooked slice, 1/2" thick
Poumtry
Chicken Pieces
Seafood
Fish Steaks, buttered, 1" thick
Fillets, 1/2" thick
* The top rack position is #5.
4
4
4
4
4
4
Medium
Weii Done
Weii Done
Weii Done
Weii Done
Warm
15 - 20 minutes
18 - 24 minutes
15 - 18 minutes
6 - 10 minutes
22 - 26 minutes
8 - 12 minutes
LO Broil
3 or 4 Well Done 30-45 minutes
Flaky
Flaky
10 - 15 minutes
8 - 12 minutes
Note: This chart is a suggested guide. The times may vary with the food being cooked.
16
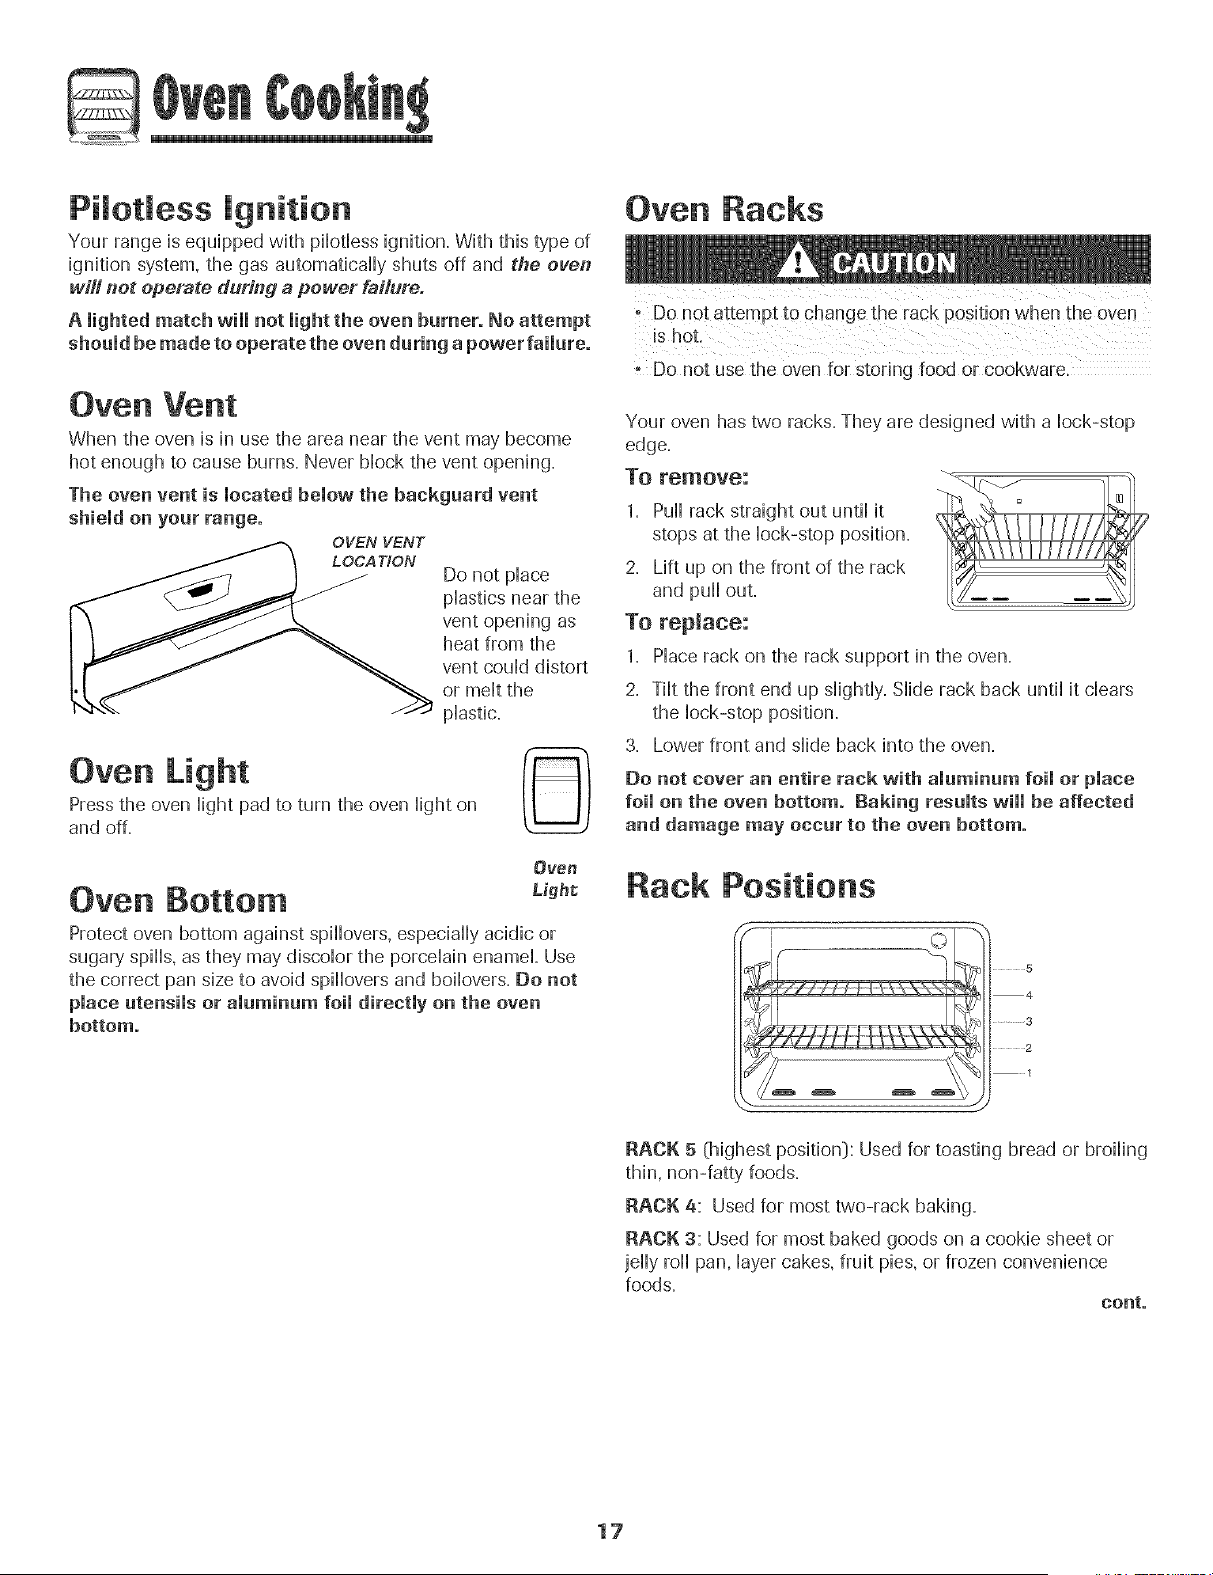
Pilotless ignition
Your range is equipped with piHotHessignition, With this type of
ignition system, the gas automatically shuts off and the even
will t?ot operate dur#tg a power failure.
A lighted match will not light the oven burner. No attempt
should be made to operate the oven daring a power failure.
Oven Vent
When the oven is in use the area near the vent may become
hot enough to cause bums, Never block the vent opening,
The oven vent is located below the backgaard vent
shield on your range.
OVEN VENT
Do not place
plastics near the
vent opening as
heat from the
vent could distort
or melt the
plastic,
Oven Light
Pressthe oven light pad to turn the oven light on
and off,
Oven
Oven Bottom ug.,
Protect oven bottom against spillovers, especially acidic or
sugary' spills, as they may discolor the porcelain enamel, Use
the correct pan size to avoid spillovers and boilovers= Do not
place utensils or aluminum foil directly on the oven
bottom.
Oven Racks
is hot,
Do no[ use the oven for storing food or cookware.
Your oven has two racks, They are designed with a lock-stop
edge,
To remove:
1, Pull rack straight out until it
stops at the lock-stop position,
2, Lift up on the front of the rack
and pull out,
To replace:
1= Place rack on the rack support in the oven,
2= Tilt the front end up slightly, Slide rack back until it clears
the lock-stop position,
3= Lower front and slide back into the oven,
Do not cover an entire rack with aluminum foil or place
foil on the oven bottom. Raking results will be affected
and damage may occur to the oven bottom.
Rack Positions
5
4
..... 3
2
RACK 5 (highest position): Used for toasting bread or broiling
RACK 4: Used for most two-rack baking,
RACK 3: Used for most baked goods on a cookie sheet or
jelly roll pan, layer cakes, fruit pies, or frozen convenience
foods,
cent.
17
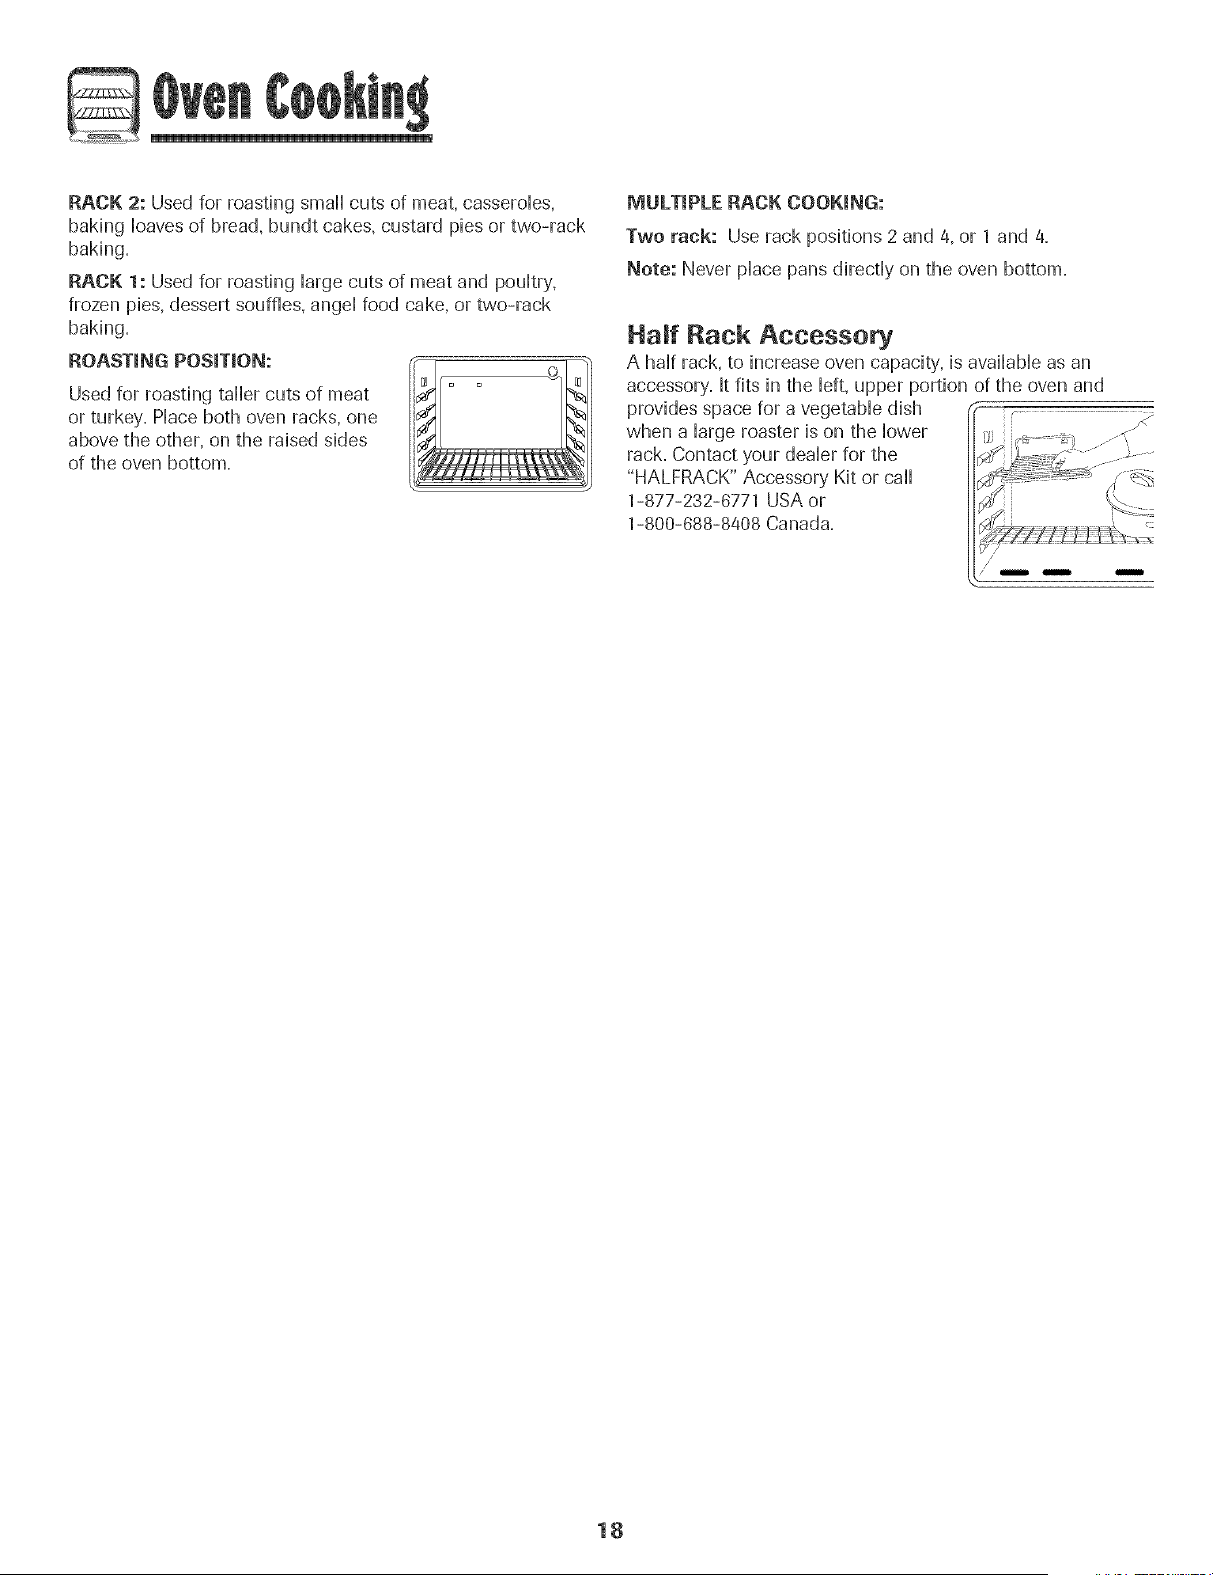
RACK 2: Used for roasting small cuts of meat, casseroHes,
baking Hoavesof bread, bundt cakes, custard pies or two-rack
baking+
RACK 1: Used for roasting Hargecuts of meat and pouHtry,
frozen pies, dessert souffles, angd food cake, or two-rack
baking+
ROASTING POSiTiON:
Used for roasting taller cuts of meat
or turkey, PHaceboth oven racks, one
above the other, on the raised sides
of the oven bottom,
MULTIPLE RACK COOKING:
Two rack: Use rack positions 2 and 4, or 1 and 4+
Note: Never pHacepans directHyon the oven bottom,
Haft Rack Accessory
A haHfrack, to increase oven capacity, is avaiHaMeas an
accessory, It fits in the Heft,upper portion of the oven and
provides space for a vegetaMe dish
when a Hargeroaster is on the Hower
rack, Contact your deaHerfor the
"HALFRACK" Accessory Kit or call
1-877-232-6771 USA or
1-800-688-8408 Canada+
18
Se f-C ean Oven (select models)
Note: For manual dean oven, see page 22. [
o it is normal for parts of the range to become hot during a
6. Wipe up sugary and acidic spiHoverssuch as sweet
potatoes, tomato, or miik-based sauces. Porceiain ename]
is add-resbtant, not acid-proof. The porceiain finish may
discobr if acidic spills are not wiped up before a serif-
dean cycb.
To set Self-Clean:
- To prevent personal injur_ and damage to the oven door
do not attempt to open door when "LOCK" is disphyed
• Avoid touching cooktop, door window or oven vent area
during a dean cycle.
• Do not use commercial oven cleaners on the oven finish
or around any part of the oven. They will damage the
finish or parts.
The self-clean cycle uses above-normal cooking temperatures
to automatically clean the oven interior. Do not force the oven
door or lock lever open. This may result in exposure to high
temperatures and be a burn hazard.
It is normal for flare-ups, smoking, or flaming to occur during
cleaning if the oven is heavily soiled. It is better to clean the
oven regularly rather than to wait until there is a heavy build-
up of soii in the oven.
During the cleaning process, the kitchen should be well
ventilated to get rid of normal odors associated with cleaning.
Before Serf-Cleaning
1. Turn off the oven light before cleaning. The light may burn
out during the clean cycle.
2. Remove broiler pan, all pans, and oven racks from the
oven. The oven racks will discolor and may not slide easily
after a self-dean cycb if they are not removed.
3. Clean oven frame, door frame, area outside of gasket, and
around the opening in the door gasket with a nonabrasive
cleaner such as Ban Ami* or detergent and water. The
sdf-cbaning process does not
clean these areas. They should be
cleaned to prevent soil from baking
on during the clean cycle. (The
gasket is the seal around the oven
door and window.}
4. To prevent damage, do not clean or
rub the gasket around the oven
door. The gasket is designed to seal in heat during the
clean cycle.
5. Wipe up excess grease or spillovers from the oven bottom.
This prevents excessive smoking, flare-ups or flaming
during the clean cycle.
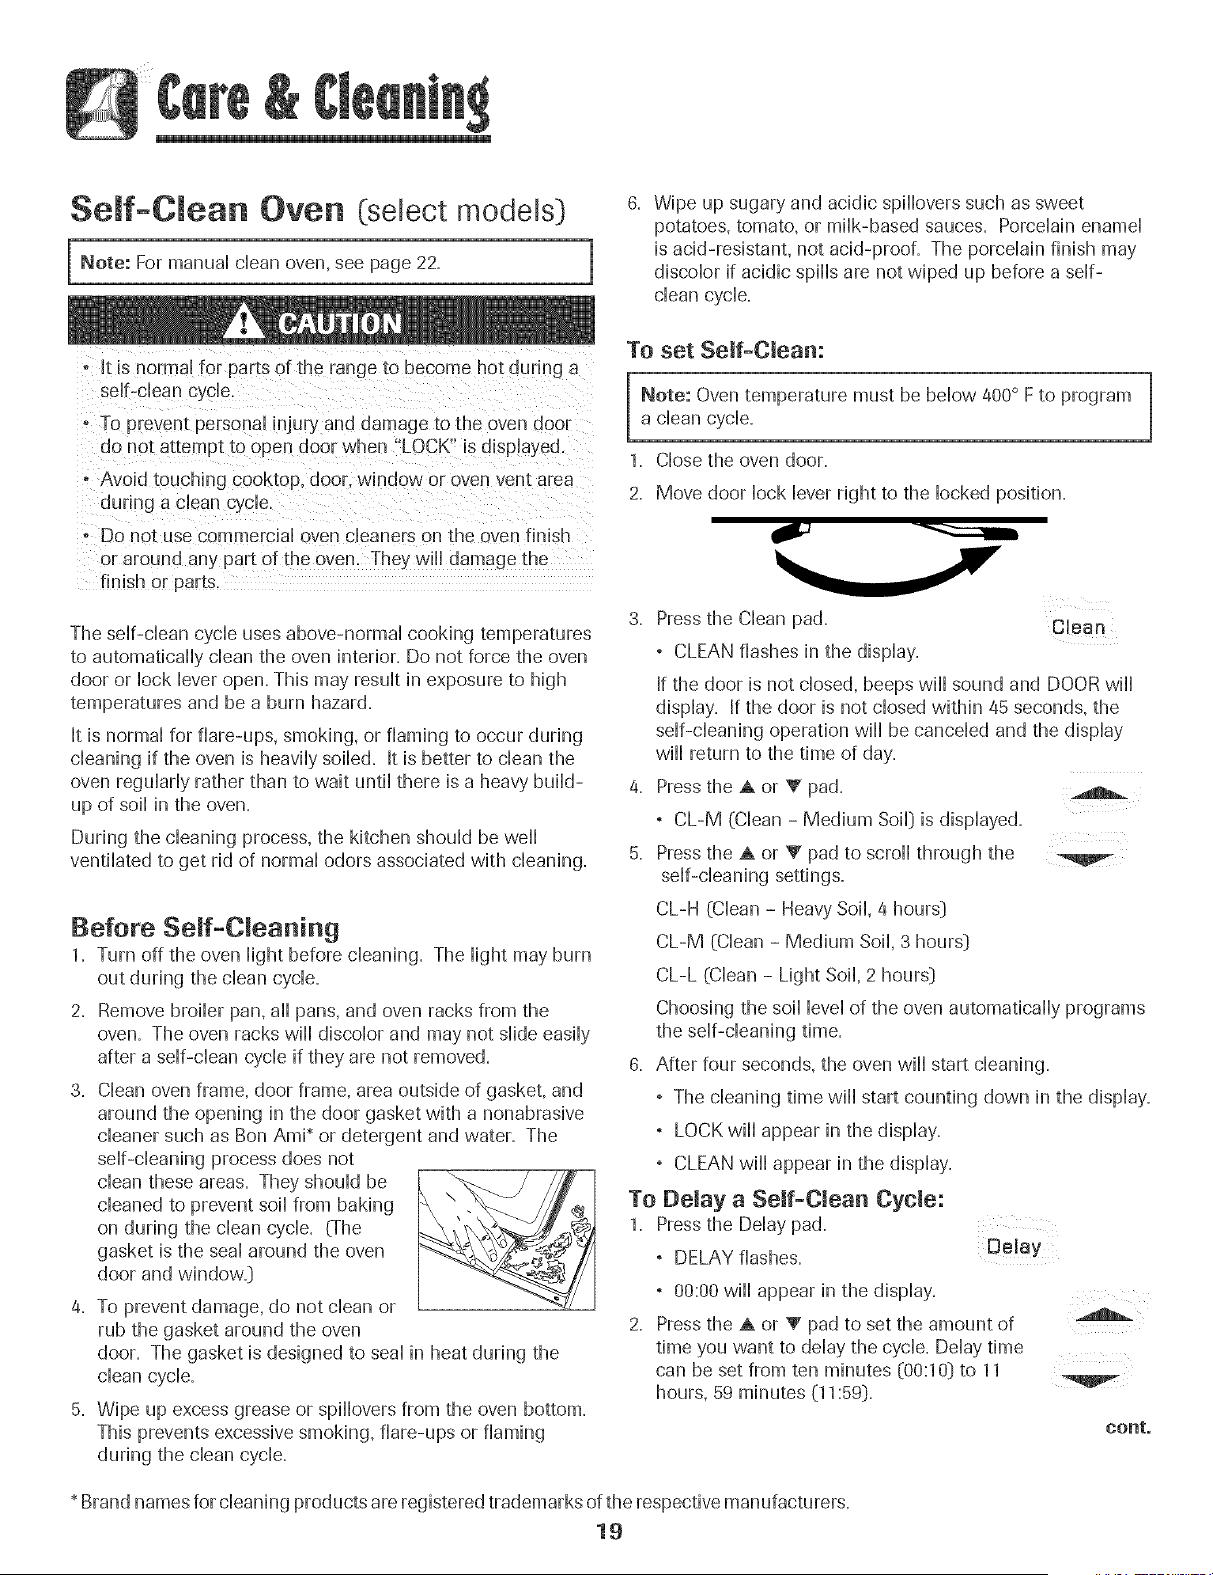
Note: Oven temperature must be below 400° F to program
a clean cycle.
1. Close the oven door.
2. Move door lock lever right to the locked position.
3. Press the Clean pad. Clean
° CLEAN flashes in the display.
If the door is not closed, beeps wiii sound and DOOR wiii
display. If the door is not closed within 45 seconds, the
self-cleaning operation wiii be canceled and the display
will return to the time of day.
4. Press the A or V pad.
° CL-M (Clean - Medium Soil} is displayed.
5. Press the A or V pad to scroll through the
self-cleaning settings.
CL-H (Clean - Heavy Soil, 4 hours}
CL-M (Clean - Medium Soil, 3 hours}
CL-L (Clean - Light Soil, 2 hours}
Choosing the soil level of the oven automatically programs
the self-cleaning time.
6. After four seconds, the oven wiii start cleaning.
° The cleaning time wiii start counting down in the display.
° LOCK wiii appear in the display.
° CLEAN wiii appear in the display.
To Delay a Self-Cmean Cycle:
1. Press the Delay pad.
° DELAY flashes. Delay
2.
, 00:00 wiii appear in the display.
Press the A or _' pad to set the amount of
time you want to delay the cycle. Delay time
can be set from ten minutes (00:10} to 11
hours, 59 minutes (11:59}.
eonto
* Brand names for cleaning products are registered trademarks of the respective manufacturers,
19
n
3. Press the Cban pad.
, CLEAN wii[ flash. CJean
4. Press the A or V pad.
, CL-M (Clean - Medium Soil} is displayed.
5. Press the A or V pad to scroii through the
self-cleaning settings.
CL-H (Clean - Heavy Soil, 4 hours}
CL-M (Clean - Medium Soil, 3 hours}
CL-L (Clean - Light Soil, 2 hours}
Choosing the soil level of the oven automatically programs
the self-cleaning time.
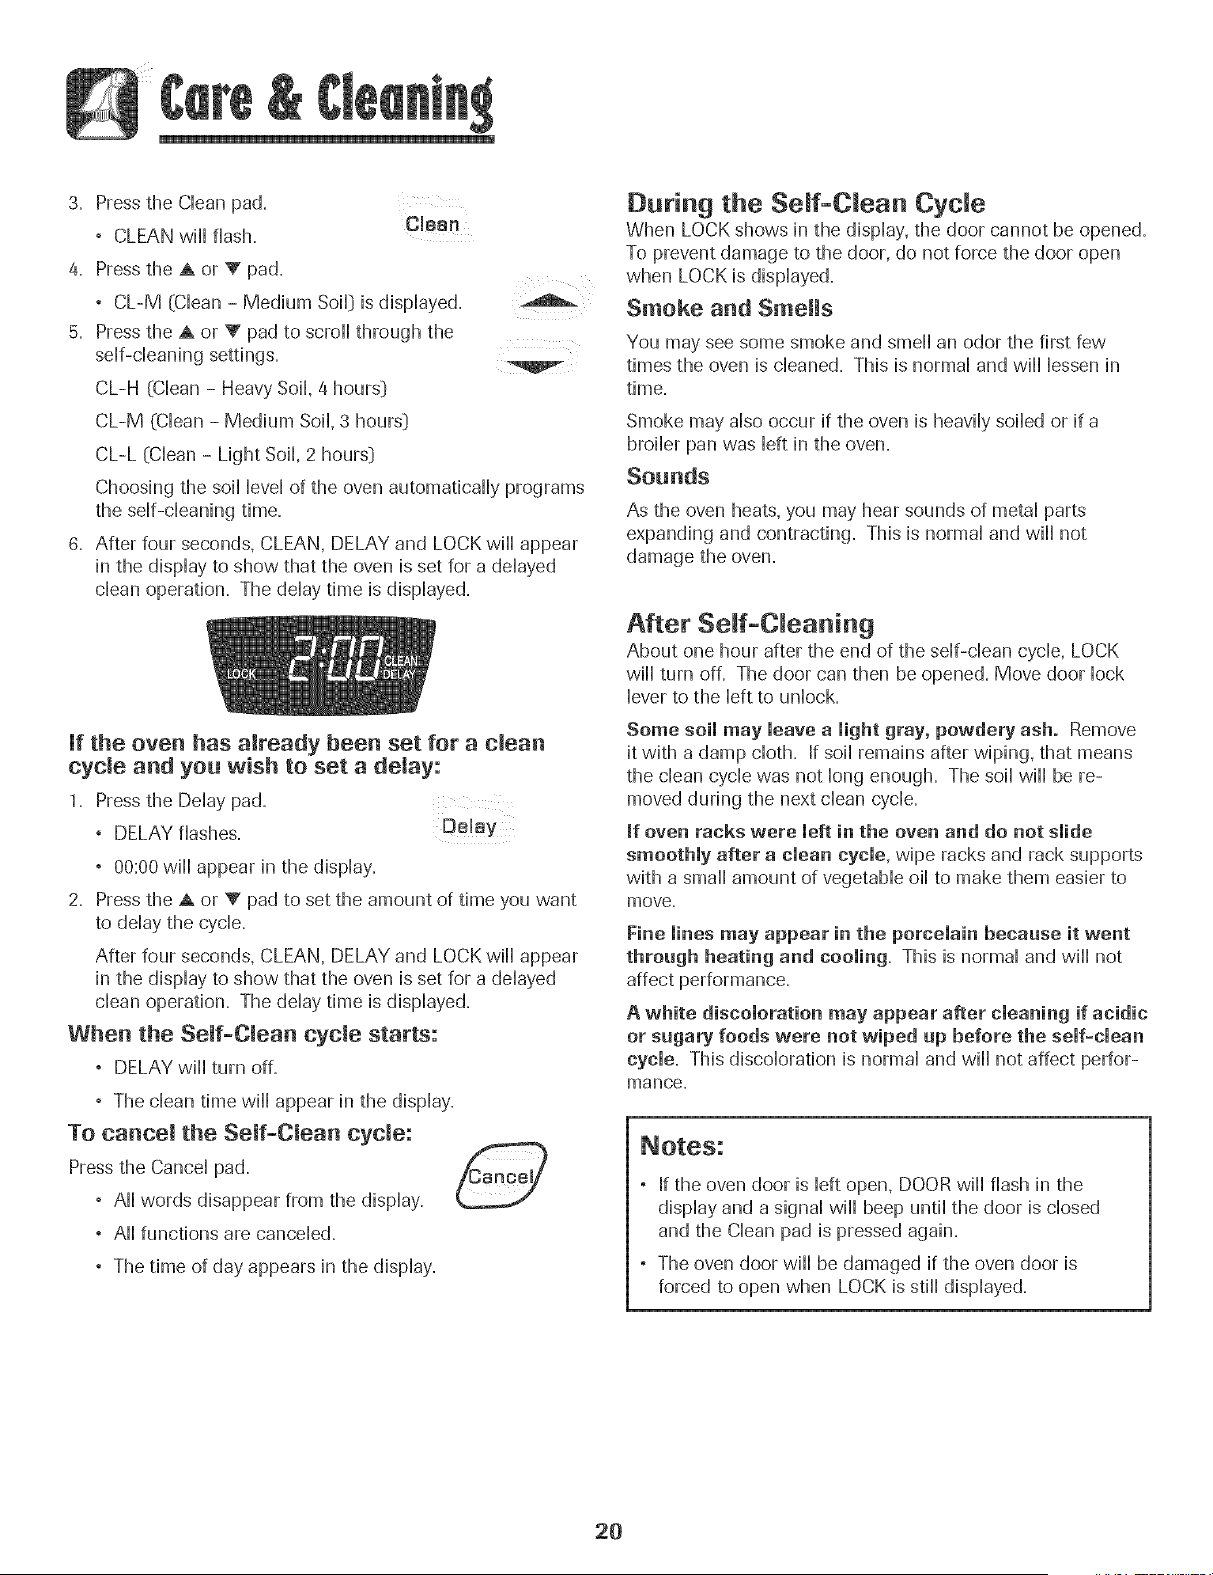
6. After four seconds, CLEAN, DELAY and LOCK wiii appear
in the display to show that the oven is set for a delayed
clean operation. The delay time is displayed.
Jf the oven has amready been set for a clean
cycJe and you wish to set a delay:
1. Press the Deiay pad.
, DELAY flashes. DeHay
, 00:00 will] appear in the dispiay.
2. Press the A or V pad to set the amount of time you want
to @Haythe cyclic.
After four seconds, CLEAN, DELAY and LOCK will] appear
in the dispiay to show that the oven is set for a @Hayed
dean operation. The @Haytime is dispiayed.
When the Self-Clean cycle starts:
, DELAY will] turn off.
, The dean time will] appear in the dispiay.
To cancem the Self-Clean cyde:
Press the Cancel pad. _CCancel/
° All words disappear from the display.
° All functions are canceled.
° The time of day appears in the display.
During the Se f-C ean Cycle
When LOCK shows in the dispiay, the door cannot be opened.
To prevent damage to the door, do not force the door open
when LOCK is dispiayed.
Smoke aad Smemls
You may see some smoke and smell an odor the first few
times the oven is cleaned. This is normal and will lessen in
time.
Smoke may also occur if the oven is heavily soiled or if a
broiler pan was left in the oven.
Sounds
As the oven heats, you may hear sounds of metal parts
expanding and contracting. This is normal and will not
damage the oven.
After Se f-C eaning
About one hour after the end of the self-clean cycle, LOCK
will turn off. The door can then be opened. Move door lock
lever to the left to unlock.
Some soil may leave a light gray, powdery ash. Remove
it with a damp cloth. If soil remains after wiping, that means
the clean cycle was not long enough. The soil will be re-
moved during the next clean cycle.
mfoven racks were meltin the oven and do not smide
smoothly after a clean cycle, wipe racks and rack supports
with a small amount of vegetable oil to make them easier to
move.
Fine lines may appear in the porcelain because it went
through heating and cooling. This is normal and will not
affect performance.
A white discoloration may appear after cleaning if acidic
or sugary foods were not wiped up before the self-clean
cycle. This discoloration is normal and will not affect perfor-
mance.
° If the oven door is left open, DOOR wiii flash in the
display and a signal will beep until the door is closed
and the Clean pad is pressed again.
° The oven door will be damaged if the oven door is
forced to open when LOCK is stiff displayed.
2O
Cleaning Procedures
, Be sure appliance is off and all parts ate bee! before handming
er cleaning. This is te avoid damage and possible burn s, _ Brand names are registered trademarks of the
, To p[event staining or discobrati0n, dean appliance after each use, respective manufacturers.
!1:a Pa[t is removed, be sure it is correct!y replaced. _* To order call 1-877-232-6771 USA and
1-800-688-8408 Canada.
PROCEDURE
Broiler Pan Never cover insert with aluminum foil as this prevents the fat from draining to the pan below.
and insert ° Place soapy cloth over insert and pan; let soak to loosen soil.
° Wash in warm soapy water. Use scouring pad to remove stubborn soil=
° Broiler pan and insert can be cleaned in dishwasher=
Sealed Gas ° Clean frequently. Allow burner to cool. Clean with soap and plastic scouring pad. For stubborn soils, use
Burners a non-abrasive cleaner and a cloth. Try to prevent the cleaner from seeping into the gas ports as this will
affect the fla me. If the cleaner does enter the ports, clean with asoft bristle brush or a straig ht pin especially
the port below the ignitor. Do not enlarge or distort holes.
, Be careful not to get water into burner ports.
, Use care when cleaning the ignitor. If the ignitor is wet or damaged the surface burner will not light.
Burner Grates , Wash grates with warm, soapy water and a nonabrasive, plastic scrubbing pad. For stubborn soils, clean
with a soap-filbd, nonabrasive pad or a sponge and Cooktop Cleaning Creme (Part #20000001}.**
° For burned on soils, remove grates, place on newspapers and carefully spray with commercial oven
cleaner. (Do not spray surrounding surfaces.:) Place in plastic bags for several hours or overnight.
Wearing rubber gloves, remove from bags. Wash, rinse, dry and replace on cooktop.
Clock and ° To activate "Control Lock" for cleaning, see page 11.
Control Pad ° Wipe with a damp cloth and dry. Do not use abrasive cleaning agents as they may scratch the finish.
Area ° Glass cleaners may be used if sprayed on a cloth first. BO NOTspray directly on controlpad and
display area.
Control Knobs ° Remove knobs in the OFF position by pulling forward.
° Wash, rinse and dry'. Do not use abrasive cleaning agents as they may scratch the finish.
° Turn on each burner to be sure the knobs have been correcdy replaced.
Deoktop and Porcelain enamel is glassfused on metal and may crack or chip with misuse. Itis acid resistant, not acid proof.
Control Panel = All spillovers, especially acidic or sugary spillovers, should be wiped up immediately with a dry cloth.
Porcelain Enamel ° When cool, wash with soapy water, rinse and dry.
, Never wipe off a warm or hot surface with a damp cloth. This may cause cracking or chipping.
, Never use oven cleaners, abrasive or caustic cleaning agents on exterior finish of range.
, When cool, wash with warm soapy water, rinse and dry. Never wipe a warm or hot surface with a damp
cloth as this may damage the surface and may cause a steam burn.
° Forstubborn soil, use mildly abrasive cleaning agents such as baking soda paste or Bon Ami*. Do not use
abrasive cleaners such as steel wool pads or oven cleaners. These products wiii scratch or permanently
damage the surface.
Note: Use a dry towel or cloth to wipe up spills, especially acidic or sugary spills. Surface may
discolor or dull if soil is not immediately removed. This is especially important for white surfaces.
Storage Drawer_
Oven Door
(select models),
Lower Broiler
Door (select
models} and
Door Handles =
Painted Enamel
21
Oven Window
and Door - Gmass
(semect models)
Oven mnterior
Oven Racks
Stainless Steel
(seiect madds}
, Avoid using excessive amounts of water which may seep under or behind glass causing staining.
, Wash with soap and water. Rinse with dear water and dry. Giass cbaner can be used if sprayed on a cloth
first+
, Do not use abrasive materiab such as scouring pads, steal wooi or powdered cbaners as theywiH scratch
giass.
Self-Clean:
+FoHow instructions on page 19-20 to set a sdf-cban cycle.
Manual Clean:
,Cban frequendy using miid abrasive charters and a plastic pad.
, Do not use metallic scouring pads because they will scratch the surface.
, When using commercial oven cleaners follow the manufacturer's instructions.
, Wipe up acidic spills (tomato or milk based foods[ as soon as possible with soap and water. If the spill
is not wiped up, it may discolor the porcelain.
To make cleaning easier, remove the oven door, if desired. (See Maintenance section on
page 23.}
®
®
®
Clean with soapy water.
Remove stubborn soil with cleansing powder or soap-filbd scouring pad. Rinse and dry.
Racks will permanently discolor and may not slide out smoothly if left in the oven during a self-dean
operation. If this occurs, wipe the rack and embossed rack supports with a small amount of vegetable oil
to restore ease of movement, then wipe off excess oil.
, DO NOT USE ANY CLEANING PRODUCT CONTAININO CHLORINE BLEACH.
+ DO NOT USEABRAStVE OR ORANGE CLEANERS.
+ ALWAYS WIPE WITH THE GRAIN WHEN CLEANING.
+ Daily Cleaning/Light Soil -= Wipe with one of the following - soapywater, white vinegar/water sohtion,
Formula 409 Glass and Surface Cleaner+ or a similar glass cleaner - using a sponge or soft cloth=
Rinse and dry=To polish and help prevent fingerprints, follow with Stainless Steel Magic Spray*
(Part No=20000008}+*.
+ _'loderate/Heavy Soil -- Wipe with one of the following - Ban Ami, Smart Cleanser, or Soft Scrub +-
using a damp sponge or soft cloth. Rinse and dry'. Stubborn soils may be removed with a damp multi-
purpose Scotch-Brite +pad; rub evenly with the grain=Rinse and dry=To restore luster and remove streaks,
follow with Stainless Steel Magic Spray+=
+ Discoloration -- Using a damp sponge or soft cloth, wipe with Cameo Stainless Steel Cleaner+=Rinse
immediately and dry=To remove streaks and restore luster+follow with Stainless Steel Magic Spray+=
* Brand names for cleaning products are registered trademarks of the respective manufacturers,
** To order direct, call 1+877+232+6771 USA and 1+800+688+8408 Canada.
22
Oven Door
Leve ing Legs
Do not place excessive weight on or stand on an open
o_en door. This could cause [he range to tip over. break
the door. or injure the user.
Do not attempt to open or close door or operate oven until
door is properly replaced.
NeveHplace fingers between hinge and front oven frame.
Hinge arms are sprung mounted. Jf accidentally hit. the
hinge wiii siam shut against oven frame and could injure
your fingers.
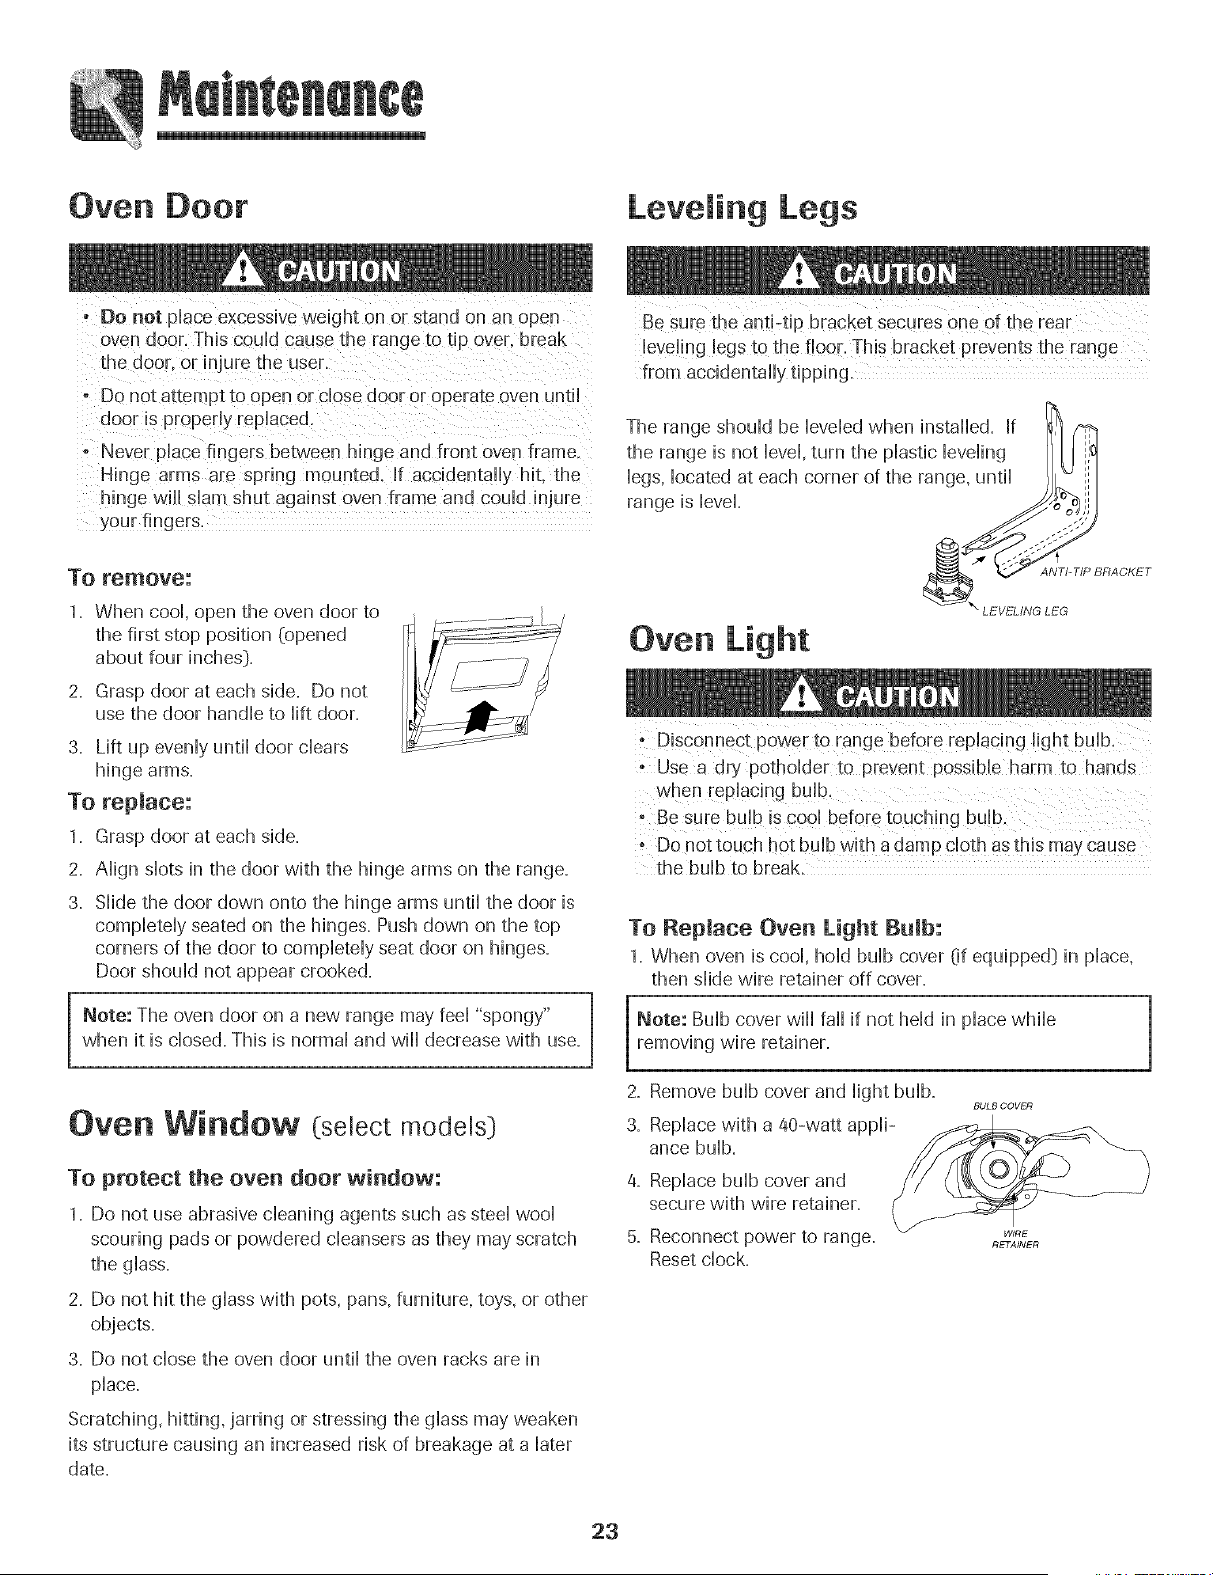
Be Sure the anti:tip bracket secures one of the rear
from accidentally tipping.
To remove:
1. When cool, open the oven door to
the first stop position (opened
about four inches}.
2. Grasp door at each side. Do not
use the door handle to lift door.
3. Lift up evenly until door clears
hinge arms.
To replace:
1. Grasp door at each side.
2. Align slots in the door with the hinge arms on the range.
3. Slide the door down onto the hinge arms until the door is
completely seated on the hinges. Push down on the top
corners of the door to completely seat door on hinges.
Door should not appear crooked.
Note: The oven door on a new range may feel "spongy"
when it is closed. This is normal and will decrease with use.
Oven Window (select models}
To protect the oven door window:
1. Do riot use abrasive cbanmg agents such as steel wool
scouring pads or powdered cbansers as they may scratch
the glass.
2. Do not hit the glass with pots, pans, furniture, toys, or other
objects.
3. Do not close the oven door until the oven racks are in
place.
Scratching, hitting, jarring or stressing the glass may weaken
its structure causing an increased risk of breakage at a later
date.
i i
- Use a dry potholder to prevent possible harm to hands
• Be sure bulb is cool before touching bulb.
o Do not touch hot bulb with a damp cloth as this may cause
the bulb to break.
To Replace Oven Light Butb:
1. When oven is cool, hold bulb cover Of equipped} in place,
then slide wire retainer off cover.
Note: Bulb cover will fall if riot held in place while
removing wire retainer.
2. Remove bulb cover and light bulb.
BULB COVER
3. Replace with a @-watt appli-
ance bulb.
4. Replace bulb cover and
secure with wire retainer.
5. Reconnect power to range.
Reset clock.
WIRE
RETAINER
23
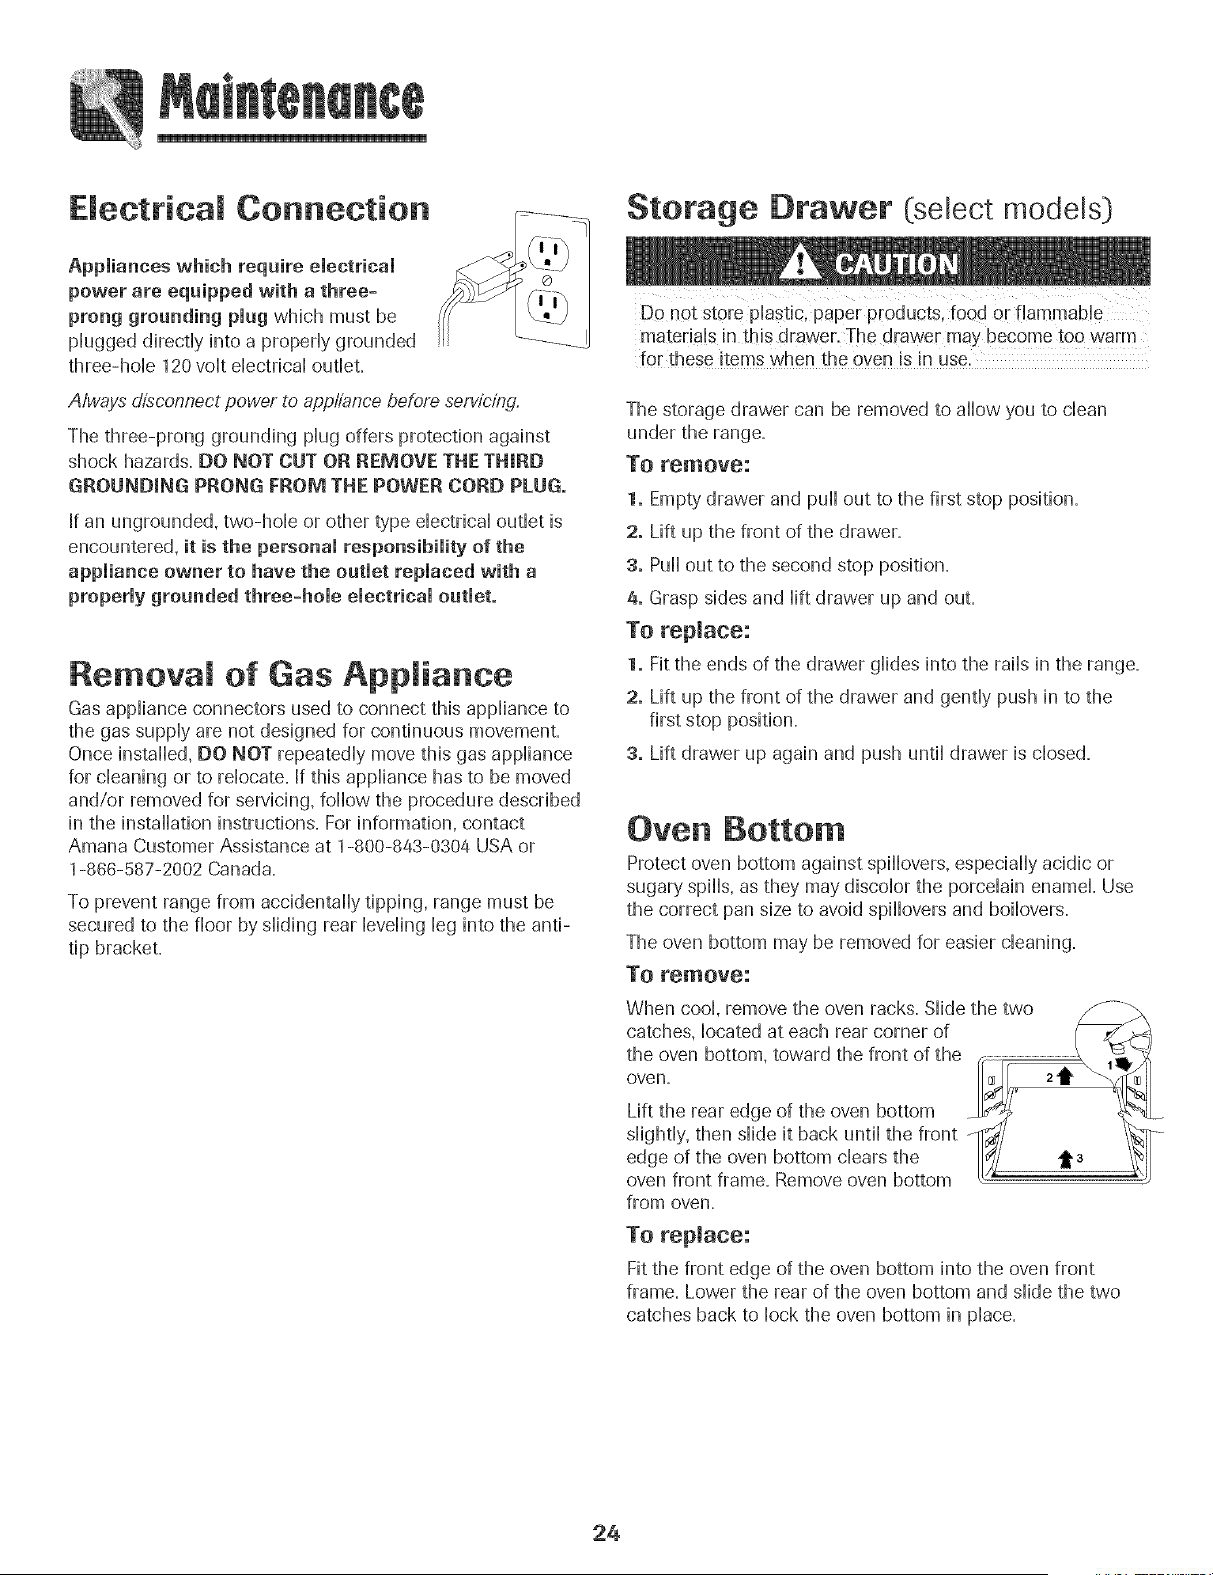
Electrical Connection
Appmiances which require emectricai
power are equipped with a three=
prong grounding plug which must be
pHuggeddirectHyinto a propedy grounded
three-hoNe 120 vog dectricd outHet.
A/ways ch_connect power to app/iance before servicing.
The three-prong grounding pHugoffers protection against
shock hazards. DO NOT CUT OR REMOVE THE THIRD
GROUNDING PRONG FROM THE POWER CORD PLUG.
If an ungrounded, two-hoNe or other type dectricd outHetis
encountered, it is the personal responsibility of the
appliance owner to have the outlet replaced with a
properly grounded three=hole electrical outlet.
Removal of Gas Appliance
Gas appliance connectors used to connect this appliance to
the gas supply are not designed for continuous movement.
Once installed, DO NOT repeatedly move this gas appliance
for cleaning or to relocate. If this appliance has to be moved
and/or removed for servicing, follow the procedure described
in the installation instructions. For information, contact
Amana Customer Assistance at 1-800-843-0304 USA,or
1-866-587-2002 Canada.
To prevent range from accidentally tipping, range must be
secured to the floor by sliding rear leveling leg into the anti-
tip bracket.
Storage Drawer (select models)
DO not store phstic, paper pEoducts, food or flammable
materials in this drawer. The drawer may become too warm
for these items when the oven is in use.
The storage drawer can be removed to allow you to clean
under the range.
To remove:
1. Empty drawer and pull out to the first stop position.
2. Lift up the front of the drawer.
3. Pull out to the second stop position.
4. Grasp sides and lift drawer up and out.
To replace:
1. Fit the ends of the drawer glides into the rails in the range.
2. Lift up the front of the drawer and gently push in to the
first stop position.
3. Lift drawer up again and push until drawer is closed.
Oven Bottom
Protect oven bottom against spillovers, especially acidic or
sugary spills, as they may discolor the porcelain enamel. Use
the correct pan size to avoid spillovers and boilovers.
The oven bottom may be removed for easier cleaning.
To remove:
from oven,
To replace:
Fit the front edge of the oven bottom into the oven front
frame. Lower the rear of the oven bottom and slide the two
catches back to lock the oven bottom in place.
24
PROBLEM SOLUTION
For most concerns, try these first. ° Check if oven controHshave been propedy set.
° Check to be sure pHugis secureHyinserted into receptacle.
° Check or re-set circuit breaker. Check or repHacefuse.
° Check power suppHy.
Surface burner fails to light. , Check to be sure unit is propedy connected to power suppHy.
° Check for a Mown circuit fuse or a tripped main circuit breaker.
° Check to be sure ignitor is dry and cHicHng.Burner will not Hightif ignitor is damaged.
soiHedor wet. If ignitor doesn't chick,turn controHknob OFF.
The flame is uneven. ° Burner ports may be clogged.
Sarface burner flame lifts ° Check to be sure a pan is sitting on the grate above.
off ports.
Baking results are not as , Check the oven temperature selected. Make sure oven is preheated when recipe
expected or differ from or directions recommend preheat.
previous oven. , Make sure the oven vent has not been blocked. See page 17 for location.
, Check to make sure range is level.
, Temperatures often vary between a new oven and an old one. ,Asovens age, the oven
temperature often "drifts" and may become hotter or cooler. See page 15 for
instructions on adjusting the oven temperature (select models:). NOTE: It is not
recommended to adjust the temperature if only one or two recipes are in question.
, Use correct pan. Dark pans produce dark browning. Shiny pans produce light
browning. See "Cooking Made Simple" booklet for more information on bakeware.
, Check rack positions and pan placement. Stagger pans when using two racks. Allow
1-2 inches between pans and oven wall.
, Check the use of foil in the oven. Never use foil to cover an entire oven rack. Place
a small piece of foil on the rack below the pan to catch spillovers.
Food is not broiling properly or , Check oven rack positions. Food may be too close to flame.
smokes excessively. , Aluminum foil was incorrectly used. Never line the broiler insert with foil.
, Trim excess fat from meat before broiling.
, A soiled broiler pan was used.
, Preheat oven for 2-3 minutes before placing food in the oven.
, Broil with the oven door closed.
Oven will not self-clean. , Check to make sure the cycle is not set for a delayed start. See pages 19-20.
(select models) , Check if door is closed.
° Check if control is in Sabbath Mode. See page 15.
° Oven may be over 400° F.Oven temperature must be below 400° F to program a
clean cycle.
25
PROBLEM $OLUTmON
Oven did not self-clean properly. ° Longer cHeaningtime may be needed.
(select models) , Excessive spiHovers, especially sugary' and/or acidic foods, were not removed prior
to the stir-dean cycle.
Oven door wiii not unlock after , Oven interior is still hot. AHow about one hour for the oven to cooHafter the
self-clean cycle, compHetionof a sdf-dean cycle. The door can be opened when "LOCK" is not
(select models) dispHayed.
, The controHand door may be Hocked.See pages 11 and 20 to unHock.
Moisture collects on oven ° This is normaHwhen cooking foods high in moisture.
window or steam comes from ° Excessive moisture was used when cleaning the window=
oven vent.
There is a strong odor or light , This is normal for a new range and will disappear after a few uses. hitiating a clean
smoke when oven is turned on. cycle will "burn off" the odors more quickly.
° Turning on a ventilation fan will help remove the smoke and/or odor.
° Excessive food soils on the oven bottom. Use a self-clean cycle.
Fault Codes ° BAKE or LOCK may flash rapidly in the display to alert you if there is an error
(select models) or a problem. [f BAKEor LOCK appear in the display, press the Cancel pad.
[f BAKE or LOCK continue to flash, disconnect power to the appliance.
Wait a few minutes, and then reconnect power. [f the flashing still continues,
disconnect power to the appliance and call an authorized servicer.
°[f the oven is heavily soiled, excessive flareups may result in a fault code during
cleaning. Press the CANCEL pad and allow the oven to cool completely, wipe out
excess soil, then reset the clean cycle. [f the fault code reappears, contact an
authorized servicer.
Noises may be heard. ° The oven makes several low level noises. You may hear the oven relays as they go on
and off. This is normal.
° As the oven heats and cools, you may hear sounds of metal parts expanding and
contracting. This is normal and will not damage your appliance.
There are no beeps and ° Control may be in Sabbath Mode. See page 15.
26
Fuji One Year Warranty -
Parts and Labor
For erie {1} year from the original retail
purchase date. any part which fails in
normal home use will be repaired or
replaced tree of charge.
Canadian Residents
The above warranties only cover an
appliance installed in Canada that. has
been certified or listed by appropriate
test agencies for compliance to a
National Standard of Canada unless the
appliance was brought into Canada due
to Eransfer of residence from the United
States to Ca nada
Limited Warranty Outside the
United States and Canada -
Parts Only
For one {1} yeaH from the date of
original retail purchase, any part which
fails in normal home use will be re-
paired or replaced free of charge for the
part itself, with the owner paying al
other costs, including labor, mileage,
tra nsportation, trip charge and diagnos-
tic charge, if required
The specific wafTantles expressed above
are the ONLY warranties provided by the
manufacturer. These warranties give you
specific legal ffghts, and you may also
have other r_ghts whic,_ va(v from state
to state.
What is Not Covered By These
1. Conditions and damages resulting from any of the following:
a. Improper installation, delivery, or maintenance.
b. Any repair, modification, alteration, or adjustment not authorized by
the manufacturer or an authorized servicer.
c. Misuse, abuse, accidents, or unreasonable use.
d. Incorrect electric current, voltage, or supply.
e. Improper setting of any control
2. Warranties are void if the original serial numbers have been removed,
altered, or cannot be readily determined.
3. Light bulbs.
4. Products purchased for commercial or industrial use.
5. The cost of service or service caii to:
a. Correct installation errors.
b. Instruct the user on the proper use of the product.
c. Transport the appliance to the servicer.
0. Consequential or incidental damages sustained by any person as a result of
any breach of these warranties. Some states do not allow the exclusion or
limitation of consequential or incidental damages, so the above exclusion may
not apply.
If You Need Service
o Call the dealer from whom your appliance was purchased or call Maytag
Services sM,Amana Customer Assistance at 1-800-843-0304 U.S.A. or
1-800-587-2002 Canada to locate an authorized servicer.
® Be sure to retain proof of purchase to verify' warranty' status. Refer to
WARRANTY for further information on owner's responsibilities for warranty
service.
o If the dealer or service company cannot resolve the problem, write to May'tag
Services sM,Attn: CAIR _ Center, P.O. Box 2370, Cleveland, TN 37320-2370, or
call 1-800-843-0304 UoSoAoor 1-866-587-2002 Canada.
U.S.customers using TTY for deaf, hearing impaired or speech impaired, caii
1-800-688-2080.
User's guides, service manuals and parts information are available from
Maytag ServicessM,Amana Customer Assistance.
When writing or calling about a service problem, please include:
aoYour name, address and telephone number;
boModel number and serial number;
co Name and address of your dealer or servicer;
doA clear description of the problem you are having;
eo Proof of purchase (sales receip0.
27

Cuisini re gaz
instructions de s6curit6
importantes ............................................................. 29-33
Cuissou sur la surface .......................................... 34-35
Commandos de Hasurface de cuisson
Br_JHeurssceH6s
Commando du four _ autonettoyage
Hodoge D6marrage diff6r6
Minuterie Maintien au chaud
Cuisson courante Grill
Cuisson et maintien Grilles du four
Nettoyage ................................................................ 48o51
Entretien ................................................................... 52-53
Recherche des pannes ..........................................54-55
Garantie et service aprSs-vente ................................57
Guia de Use y Cuidado ................................................58
x x x ¸¸
Censommateur: Veui[iez[ireb guide et [e conserverpour
consultation ult6rieure,Conser_/ez[a facture d'achat ou [e ch6que
Num6ro de s_rie
Date d'achat
1_866-587-2002 Canada
Dons[ecadre denos prat!quesdlam6[ioratienc0nstantede [a}
qua[it6 etdeB performancede nos produitsde cuissen,des
m0dificatiensde I appamflqu[ ne s0ntpas mentionn@sdons ce
guide p0urrant 6tie introduitesl
Reportez4fous _ la page 57 peur plus d'informatiens
co#cema#t ]e service apr_s_vente.
Los instructions de securit6 importantes et les paragraphes
<<avertissement >>de ce guide ne sent pas destines a couvrir
toutes les conditions et situations qui pourraient se presenter,
II faut faire preuve de ben sens, de prudence et de soin Iors de
I'installation, de I'entretien ou du fonctionnement de I'appareil,
Toujours prendre contact avec le fabricant dons lecas de
problemes ou de conditions qui ne seraient pas comprises,
Reconna tre Ues tiquettes, paragraphes et
symboUessat Uas6curit6
AVERTISSEMENT _ Dangers ou pratiques dangereuses qui
Life teutes bs instructions avant d'utiliser cot appareii;
observentoutes ies instructions pour eiiminer ies risques
d'incendie, choc electrique, dommages materiels et col porels
que pourrait susciteHune utilisation incorrecte de I'apparei[
Utiiiser i'appareii uniquement pou ies fonctions prevues,
d@rites darts ce guide,
Pour une utilisatien ad6quate et en s6curit6, ii faut que
i'appareii soit convenabiement instaiie par un technicien
quaiifi& et relic a ia terre, Ne pas regier, Feparel ni rempiacer
un composant, a moins que cola ne soit sp@ifiquement
recommande darts ce guide, Toute autre reparation doit 6tre
effectu6e par un technicien quaiifi& Demander a i'instaiiateur
de montrer oQ se trouve le robinet d'arr6t de gaz et comment
ie fermer en cas d'urgence.
Toujours d6branchen I'appareil avant d'_ [aire de I'entretien,
Si [es directives denn6es dons mepr6sent guide ne
sent pas respect6es _ la lettre, il y a risque d'ineendie
eu d'e×plesien peuvant causer des demmages, des
blessures et m_me la mort.
Ne pas ranger ni atiliser d'essenee eu autre vapeur
eu liquide inflammable _ pre×i_it_ de cot appareil
e_ de te_t a_tre appareiL
QUE FA_RESI L'ON SENT UNE ODE[JR DE GAZ :
. Ne raettre a_c_n appareil en raarche.
. Ne pas toucher _ _n interr_pte_r _lectriq_eo
. N'_tiliser a_c_n t_l_phene de I'im_eable.
o Se re,tire chez _n veisin et t_l@hener
imra_diatement _ la ce_pagnie de gaz. Saivre los
directives dennees par le pr_pes_ de la
compagnie de gaz.
. S'il est _mpossible de jeindre la co_pagnie de
gaz, t_l_phener a_ service des incendies.
L'instailatien et los r_paratiens deivent _tre
cenfi_es _ _n installate_r cerap_tent, _ _ne
entreprise de sewice e_ _ la ce_pagnie de gaze
mort.
ATTENTION _ Dangers ou pratiques dangereuses qui
POURRAtENTr6sulter en des blessures mineures,
Une fuit e de gaz pourrait survenir dans le syst6me et
gaz recommandent Finstallation d'un d6tecteur de gaz
(hom01ogation UL}_ ]ns_a!!eret uti!ise[ b d_tecteur
conform_ment aux instructions du fabricant.
29
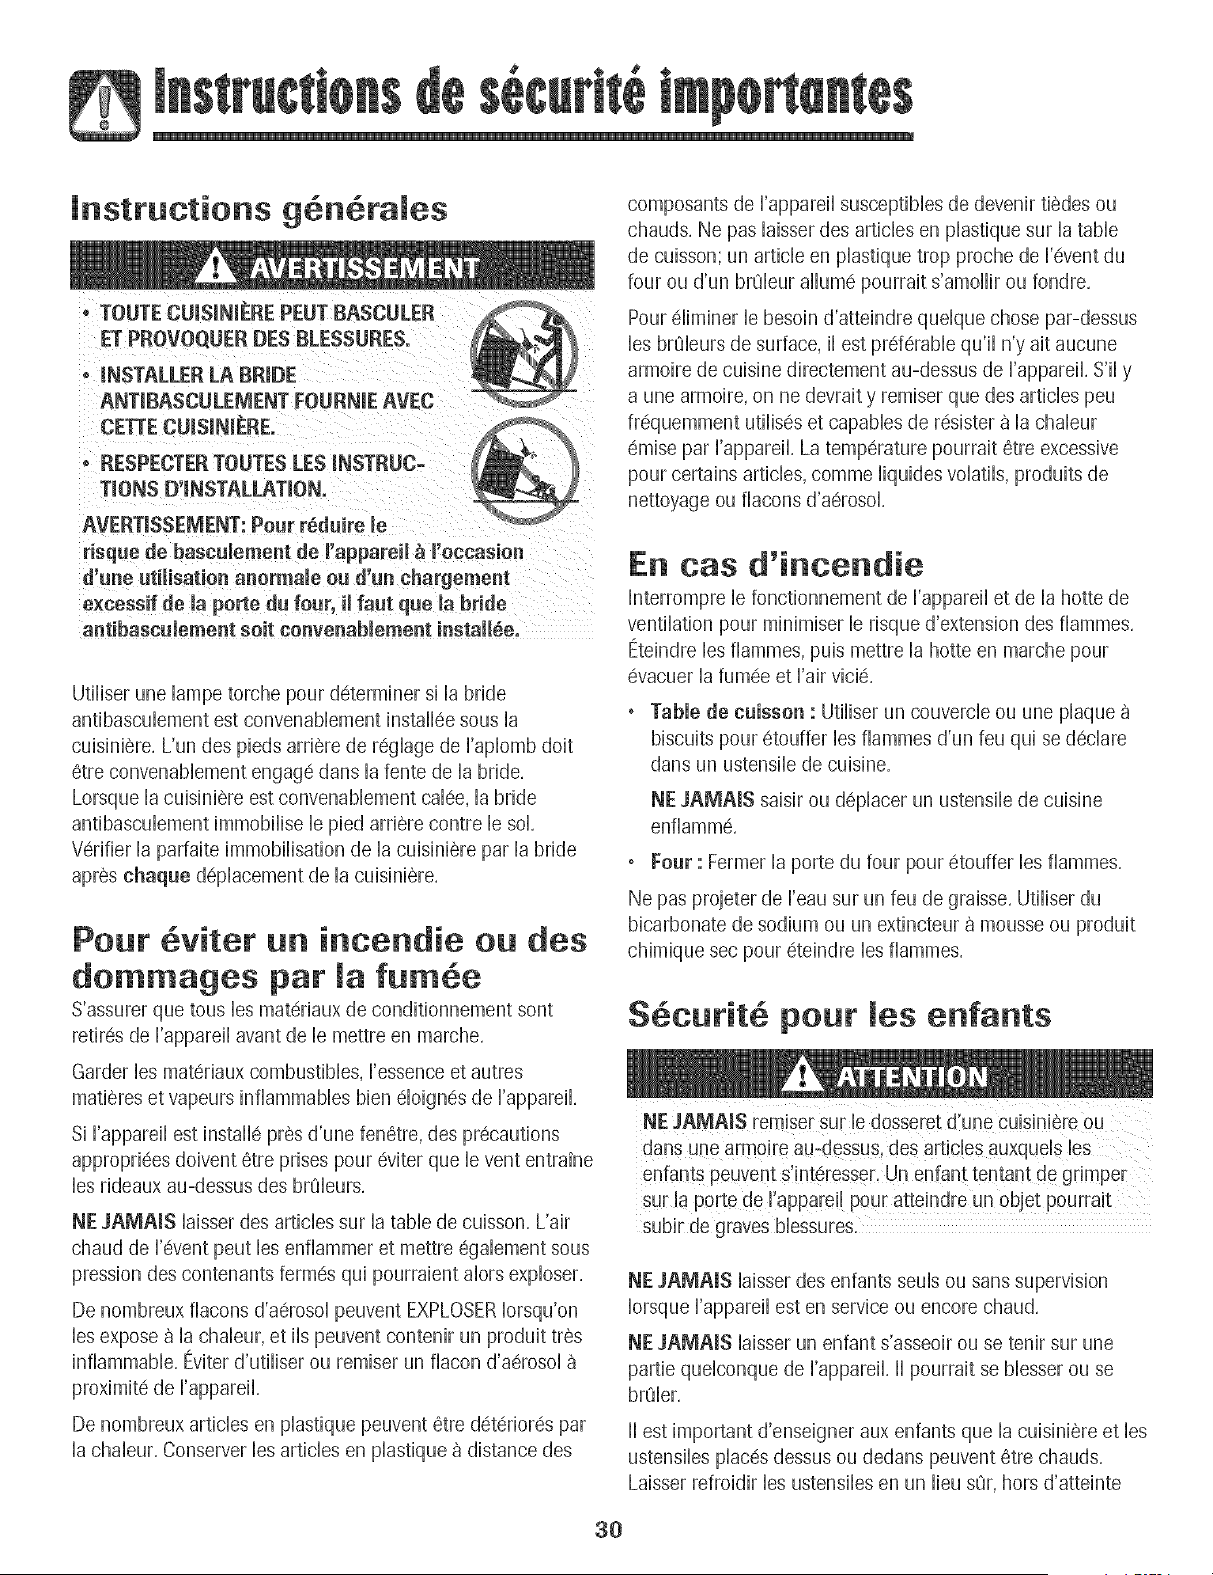
,u
instructions g neraJes
o TOUTE CUm$1NIEREPEUT BASCULER
ET PROVOQUER DES BLESSURES°
,, mNSTALLERLA BRIDE
ANTIBASCULEMENT FOURNIE AVEC
CETTE CUISINIERE.
o RESPECTERTOUTES LES iNSTRUC-
TiONS [}'iNSTALLATiON.
AVERTJSSEMENT: Peur r_duire Je
risque de basculement de I'appareil _ m'eccasien
d'une utiHsatien anermaie eu d'un chargement
e×cessif de Japorte du feur, il faut que JabrMe
antibascuiement seit cenvenabiement instaii_e,
Utiliser une Bmpe torche pour determiner si la bride
antibascubment est convenabbment instaflee sous la
cuisiniere, L'un des pie@ arriere de reghge de Faplomb doit
etre convenabbment engage darts la fente de la bride,
Lorsque la cuisiniere est convenabbment calee, la bride
antibascubment immoNise b pied arriere contre b sol,
Verifier la parfaite immobflisation de la cuisiniere par la bride
apres chaqae @placement de la cuisiniere,
Pour viter tin incendie ou des
dommages par la fumee
S'assurer que tous bs materiaux de conditionnement sont
retires de Fappareil avant de b mettre en marche,
Garder bs materiaux combustibles, [essence et autres
matieres et vapeurs inflammables bien 61oignesde Fappare&
Si Fappareil est instafle pres d'une fenetre, des precautions
appropriees doivent 6tre prises pour @iter que b vent entrdne
bs rideaux au-dessus des brQburs,
NE JAMAIS hisser des articles sur la table de cuisson, L'air
chaud de F@ent peut bs enfiammer et mettre egabment sous
pression des contenants fermes qui pourraient alors exploser,
De nombreux flacons d'aerosol peuvent EXPLOSERIorsqu'on
bs expose a la chabur, et ib peuvent contenir un produit tres
inflammable, Eviter d'utifiser ou remiser un flacon d'aerosol
proximite de [@pare&
De nombreux articles en plastique peuvent etre deteriores par
la chabur, Conserver bs articles en pBstique a distance des
composants de ['apparei[ susceptibies de devenir tiedes ou
chauds, Ne pas laisser des articles en plastique sur la table
de cuisson; un article en plastique trop proche de I'event du
four ou d'un bn:deur allume pourrait s'amollir ou fondre,
Pour eliminer le besoin d'atteindre quelque chose par-dessus
les brQburs de surface, il est preferable qu'il n'y ait aucune
armoire de cuisine directement au-dessus de I'appareil, S'il y
a une armoire, on ne devrait y remiser que des articles peu
frequemment utilises et capables de resister a la chaleur
emise par I'appareil, La temperature pourrait etre excessive
pour certains articles, comme liquides volatils, produits de
nettoyage ou flacons d'aerosol,
En cas d'incendie
[nterrompre [e fonctionnement de ['apparei[ et de [a hotte de
ventilation pour minimiser le risque d'extension des fiammes,
Eteindre les fiammes, pub mettre la hotte en marche pour
evacuer la fumee et Fair vicie,
, Table de caisson : Utfliser un couverde ou une plaque
biscuits pour etouffer bs fiammes d'un feu qui se declare
darts un ustensib de cuisine,
NE JAMAmS saisir ou d@Bcer un ustensib de cuisine
enfiamm&
, Fear : Fermer la porte du four pour etouffer bs fiammes,
Ne pas projeter de [eau sur un feu de graisse, Utiliser du
bicarbonate de sodium ou un extincteur a mousse ou produit
chimique sec pour eteindre bs fiammes,
S curit6 pour enfants
enfantS Peuvent s!nt_resser, Un enfant tentant de grimper
subiEde graves bbssures.
NE JAMAIS iaisser des enfants seuis ou sans supervision
Iorsque I'appareil est en service ou encore chaud,
NF JAMAIS laisser un enfant s'asseoir ou se tenir sur une
partie quelconque de I'appareil, II pourrait se blesser ou se
brQler,
II est important d'enseigner aux enfants que la cuisiniere et les
ustensiles places dessus ou dedans peuvent etre chauds,
Laisser refroidir les ustensiles en un lieu sQr,hors d'atteinte
30
des enfants, fl est important d'enseigner aux enfants qu'un
appareiI menager n'est pas un jouet, et qu'fls ne doivent
toucher aucune commande ou autre composant de rappareik
Familiarisation avee l'appareil
NE JAMAI$ utHiser la porte de I'appareiI ou le tiroiH ge cas
echeant} commetabouret-escabeau pourraitse renverser
et causer de graves blessures,
NE JAMAmS utiiiser cet appareil comme appareii de
chauffage d'appoint pourchauffer ou rechauffer une puece.
Ceci peut entrdner une asphyxie par oxyde de carbone et
une surchauffe du four,
NE JAMAIS obturer les fentes, oules ou ouvertures a la
pattie inferieure du four ou recouvrJr cornpletement une
grille avec par exemple une feuiiie d'aiuminium, Ceci
empeche Fair de circuUercorrectement dans le four, ce qui
pourrait entrainer une asphyxie par oxyde de carbone, La
feuiiie d'aiuminium pourrait aussi emprisonner la chaieur,
d'o8 risque d'incendie.
NE JAMAIS couper la circulation de I'air d'aeration ou de
combustion en obturant les events ou les arrivees d'air, Ceci
reduit la quantite d'air necessaire aux br0ieurs et pourrait
entrainer une asphyxie par oxyde de carbone,
L'event du four est situe a la base du tableau de commande,
Eviter de toucher ie voisinage de i'event du four iorsque ie four
est utiiise et pendant piusieurs minutes apres i'arnet du four,
Certains composants de I'event et la zone voisine peuvent
devenir suffisamment chauds pour provoquer des br0iures,
Apres i'arret du four, ne pas toucher i'event du four ou ia zone
voisine avant que ces composants aient pu se refroidir
suffisamment,
Autres surfaces potentiellement chaudes: table de cuisson,
zones faisant face a la table de cuisson, event du four, zones
voisines de i'event, porte du four et zones voisines de ia porte
et du hublot,
Ne pas toucher I'ampoule chaude du four avec un linge
humidel le choc thermique pourrait la briser, Encas de bris de
I'ampoule, d@rancher I'appareil de la source d'electricite
avant d'enlever I'ampoule, pour @iter un choc electrique,
Ne pas remiser des aliments ou ustensiles de cuisine sur la
table de cuisson ou dans le four,
31
Cuisson et s curit6
Placer toujours un ustensiie sur un brSieur de surface avant de
I'allumer, Veiller a bien connaitre la correspondance entre les
boutons de commande et les brQleurs,Veiller a allumer le
brOleur correct et verifier que le brQleur s'allume effectivement,
A la fin de la periode de cuisson, eteindre le brQleur avant de
retirer I'ustensile, pour eviter une exposition aux flammes du
brOleur,
Veiller a toujours ajuster correctement la taille des flammes pour
qu'elles ne depassent pas sur la peripherie de I'ustensile, Des
fiammes de trop grande taille sur un brSleur sont dangereuses,
elles entranent un gaspillage d'energie et elles peuvent faire
subir des dommages a I'ustensile, a I'appareil ou a I'armoire
situee au-dessus,
NE JAMAIS iaisser un brQieur de surface aiiume sans surveil-
lance, particulierement avec une puissance de chauffage elevee
ou Iors d'une operation de friture, Un debordement pourrait
provoquer la formation de fumee et des produits gras pourraient
s'enfiammer, Eiiminer des que possible ies produits gras
renverses, Ne pas utiliser une puissance de chauffage elevee
pendant une periode prolongee,
NE JAMAIS faire chauffer un recipient non ouvert dans le four
ou sur un brQieur de surface; i'accumuiation de pression clans ie
recipient pournait provoquer son eciatement et de graves
dommages materiels ou corporeis,
Utiliser des maniques robustes et s@hes, Des maniques
humides peuvent provoquer ia formation de vapeur brQiante, Ne
jamais utiliser un torchon a vaisselle ou autre article textile a la
place de maniques; un tel article pournait trainer sur un brQieur
et s'enflammer, ou accrocher un ustensile ou un composant de
i'appareii,
Laisser toujours refroidir un recipient d'huile de friture chaude
avant de tenter de le deplacer et le manipuler,
Ne pas laisser la graisse de cuisson ou autre materiau inflam-
mable s'accumuler dans ou pres de I'appareil, de la hotte ou du
ventilateur de I'@ent, Nettoyer frequemment la hotte pour
empecher toute accumulation sur la hotte elle-meme ou sur le
filtre, Lors du flambage d'aliments sous la hotte, mettre le
ventilateur en marche,
NE JAMAmS porter, Iors de I'utilisation de I'appareil, des
vetements faits d'un materiau inflammable, ou amples, ou
Iongues manches, De tels vetements peuvent s'enflammer ou
accrocher la poignee d'un ustensile,
Placer toujours ies grilles a ia position appropriee dans ie four
Iorsque le four est froid, Faire coulisser la grille vers I'exterieur
avant d'ajouter ou enlever un plat; utiliser pour cela une
manique robuste et seche, Eviter d'introduire la main dans le
four pour y placer ou retirer un plat. S'il est necessaire de
d@hcer une grille Iorsqu'elle est chaude, utiliser une manique
seche. Veiller a toujours arreter le four a la fin d'une periode
de cuisson.
N'utiliser les grilles que darts le four darts lequel elles ont ete
achetees/expediees.
Ouvrir toujours la porte du four tres prudemment. Laisser Fair
chaud ou la vapeur s'echapper avant de retirer/introduire un
plat.
AVERTmSSEMENT : Mets pr@ar_s : Respecter les instruc-
tions du fabricant. Si le contenant ou le couvercle en plastique
d'un mets surgele se ddorme ou est endommage durant la
cuisson, jeter immediatement le recipient et son contenu. Les
aliments pourraient etre contamines.
NE JAMAmS garnir la sole ou une grille du four avec de la
feuille d'aluminium. Ceci pourrait susciter un risque de choc
electrique ou d'incendie, ou une autre deterioration de
rappare& Utiliser de la feuille d'duminium uniquement selon
les instructions de ce guide.
Ustensiies et securit6
Utiliser des ustensiles a fond plat comportant une poignee
qu'on peut facilement saisir et qui reste froide. Eviter d'utiliser
un ustensile instaNe ou ddorme, qui pourrait facilement
basculer, ou dont la poignee est mal fixee. Eviter egdement
d'utiliser des ustensiles de petite taille comportant une
poignee Iourde; ces ustensiles sont generalement instables et
peuvent facilement basculer. Un ustensile Iourd Iorsqu'il est
rempli peut egalement etre dangereux Iors des manipulations.
Veiller a utiliser un ustensile de taille suffisante pour que le
contenu ne risque pas de deborder. Ceci est particulierement
important pour un ustensile rempli d'huile de friture. Verifier
que la taille de I'ustensile est suffisante pour qu'il puisse
recevoir les produits dimentaires a cuire, et absorber
I'augmentation de volume suscitee par I'ebullition de la
graisse.
Pour minimiser les risques de brOlure, d'infiammation de
matieres et de renversement par contact non intentionnel avec
un ustensile, ne pas orienter la poignee d'un ustensile vers un
brQleur adjacent; orienter toujours la poignee d'un ustensile
vers le cote ou rarriere de rappareil; ne pas laisser non plus la
poignee d'un ustensile deborder a ravant de rappareil, oQ un
jeune enfant pourrait facilement la saisir.
Veiller 8 ne jamais laisser le contenu liquide d'un ustensile
s'evaporer completement; I'ustensile et I'appareil pourraient
subir des dommages.
Appliquer [es instructions du fabricant [ors de ['emp[oi d'un
sachet pour cuisson au four.
Seuls certains materiaux en verre, vitroceramique, ceramique,
ou certains ustensiles vitrifies/emailles peuvent etre utilises sur
la table de cuisson ou darts le four sans risque de bris sous
I'effet du choc thermique. Observer les instructions du
fabricant Iors de I'utilisation d'un ustensile en verre.
La secur[te de fonctionnement de cet apparel[ a ete testee
I'aide d'ustensiles de cuisine conventionnels, Ne pas utiliser un
ustensile ou accessoire qui n'est pas specifiquement
recommande darts ce guide, Ne pas utiliser de couvre-brOleur,
gril place sur la table de cuisson ou systeme de convection
additionnel, L'utilisation d'un dispositif ou accessoire qui n'est
pas expressement recommande darts ce guide peut degrader
la securite de I'appareil ou sa performance, ou reduire la
Iongevite des composants,
Nettoyage et s curit
Arreter routes les commandes et attendre le refroidissement
de tousles composants avant de les toucher ou d'entre-
prendre le nettoyage. Ne pas toucher la grille d'un brOleur ou
la zone voisine avant que ces composants aient pu suffisam-
merit refroidir.
Exercer une grande prudence Iors du nettoyage de rappareil.
Travailler prudemment pour eviter des brOlures par la vapeur
en cas d'utilisation d'un chiffon ou d'une @onge humide Iors
de relimination d'un produit renverse sur une surface chaude.
Certains produits de nettoyage peuvent generer des vapeurs
nocives Iorsqu'on les applique sur une surface chaude.
Four autonettoyant
(certains modeles)
dans le four !ors d'une opdration d'autonettoyage,
Nettoyer uniquement les pieces mentionnees darts ce guide.
Ne pas nettoyer le joint de porte; le joint joue un role essentiel
quanta retancheite. Ne pas frotter, endommager ou d@lacer
le joint. Ne pas utiliser de produit de nettoyage du four darts
le four autonettoyant ou sur les zones voisines.
Avant d'executer une operation d'autonettoyage, retirer la
lechefrite, les grilles du four et les autres ustensiles, et eliminer
par essuyage tout exces de residus renverses pour eviter h
formation de fumee ou rinfiammation de ces residus.
32
flestnormalquelasurfacedecubsondevbnnechaude
durantuneoperationd'autonettoyage;parconsequent,eviter
detoucherlasurfacedecuissondurantI'autonettoyage,
Avertissement et avis
important pour la s6curit6
La ioi caiifornienne _ Safe Drinking Water and Toxic Enforce-
ment Act >>de 1986 {proposition 65} stipule la publication par
le gouverneur de la Californie d'une liste de substances que
I'etat de Californie considere comme cancerigenes ou
dangereuses pour le systeme reproducteur, et impose aux
entreprises commerciales I'obligation de signaler a burs
clients les risques d'exposition a de telles substances,
Les utilisateurs de cet appareil peuvent etre exposes a une
faible concentration de certaines substances figurant dans la
liste mentionnee ci-dessus, dont benzene, formaldehyde et
suie, du fait de la combustion incomplete du gaz naturel ou du
gaz de petrole liquefie, Pour minimiser la combustion
incomplete, veiller ace que les brQleurs soient parfaitement
regles, Pour minimiser I'exposition aces substances, veiller
bien evacuer les gaz de combustion a I'exterieur,
Nous informons les utilisateurs de cet appareil que Iors d'une
operation d'autonettoyage, iis peuvent etre exposes a une
faible concentration de certaines substances figurant dans la
liste mentionnee ci-dessus, dont le monoxyde de carbone,
Pour minimiser [exposition, veiller b ce que la piece 08 se
trouve le four soit convenablement aeree durant une operation
d'autonettoyage par I'ouverture d'une fenetre ou d'une porte,
AViS iMPORTANT - OISEAU× FAMIMERS : Les oiseaux ont
un systeme respiratoire tres sensible, Ne pas garder un oiseau
famiiier dans ia cuisine ou dans une piece o8 ii pourrait etre
expose aux fumees, Les fumees emises durant une operation
d'autonettoyage peuvent etre dangereuses ou morteiies pour
un oiseau, de meme que ies fumees emises iors du chauffage
excessif de graisse, huile, margarine, et du chauffage excessif
dans un ustensile a revetement antiadhesif,
Conserver ces instructions pout consultation ult tieute
33
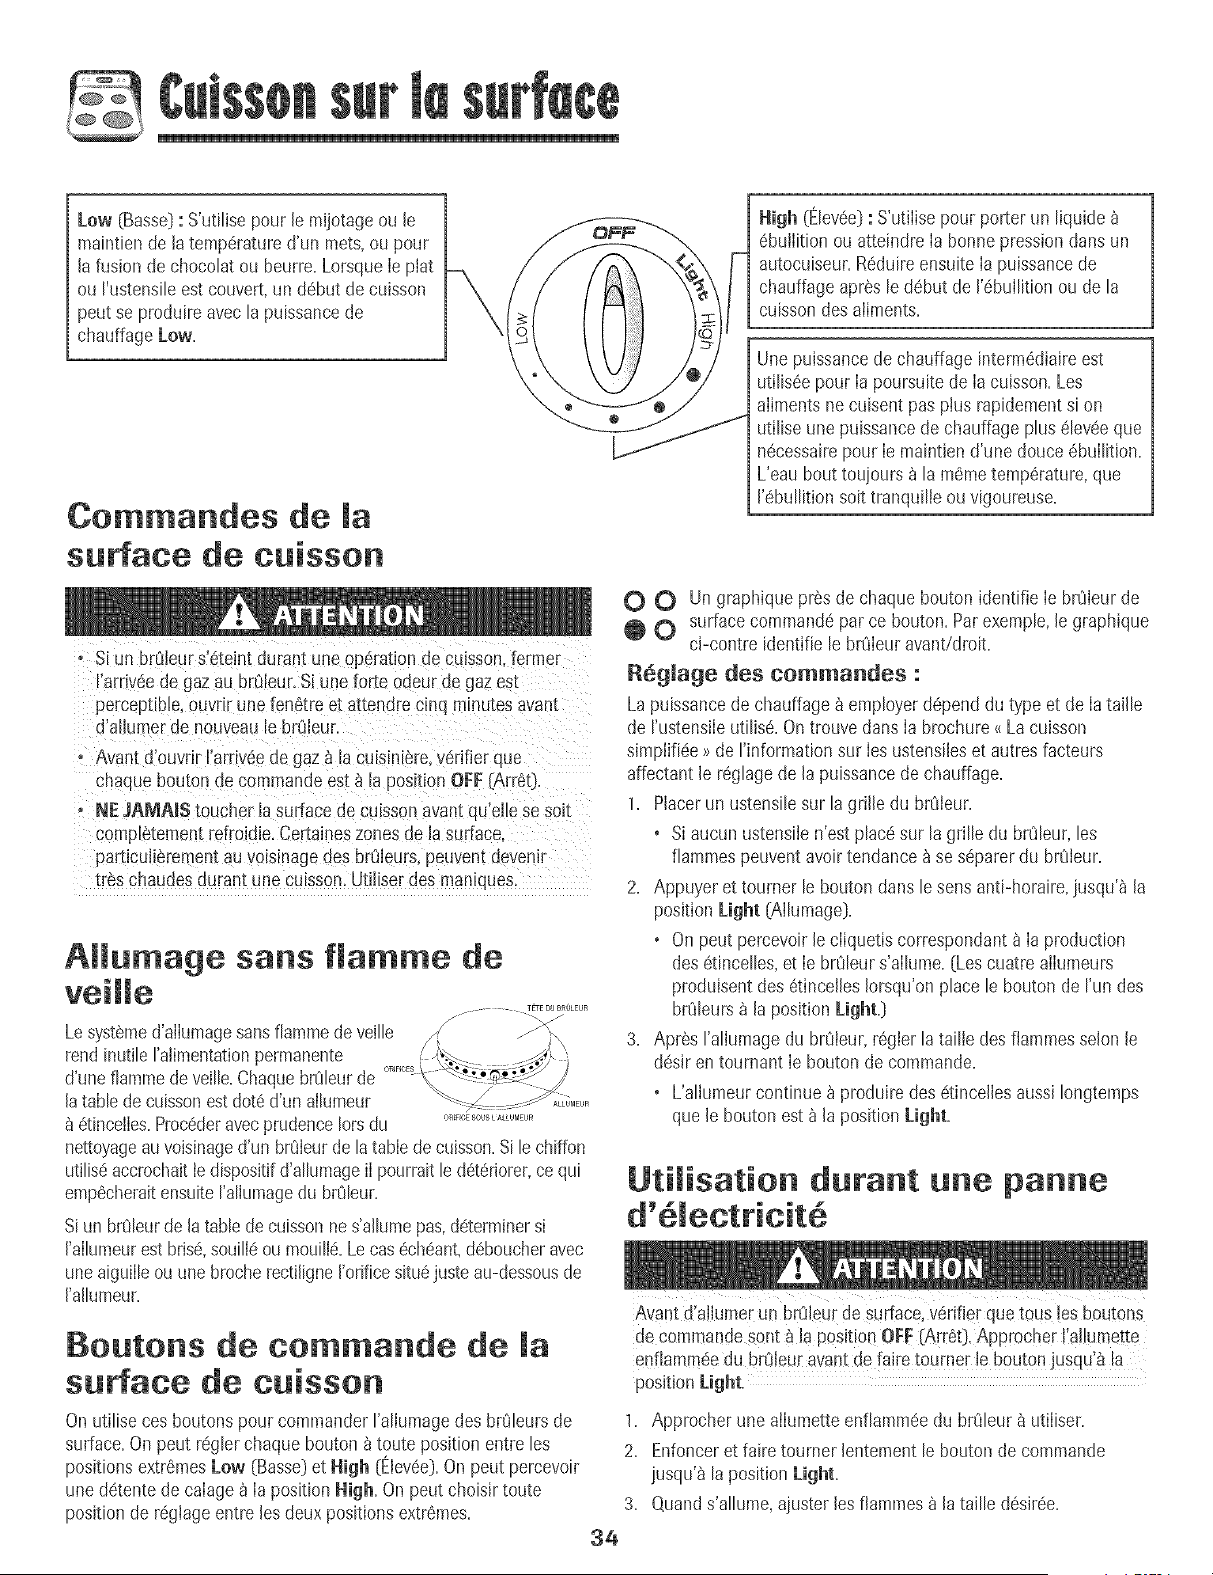
Low (Basse}: S'utilisepour le mijotage ou le
maintiende la temperatured'un mets,ou pour
lafusion de chocolatou beurre.Lorsquele plat
ou I'ustensileest couvert,un debut de cuisson
peut se produireavecla puissancede
chauffage Low=
Commandes de [a
surface de cuisson
Siun breieur s'eteintdurant une operationde cuisson.[ermer
%mvee de gaz au br_Ieur.Si une forte odeur de gazes_
perceptible,ouvrir une fenetre et attendre cmq minutesavan[
d'aIlumerde nouveau[e brlileur.
A_ant d'ouvrir I'arriveede gaz a la cuisiniere,verifier que
cnaquebouton de commandeest _ [a position OFF {Arre0.
NEJAMAI$ toucher [a surfacede culssonavan[qu'elle se solt
compi_tementrefroidie.Certalneszonesde [asurface
Darticulierementauvolsmagedes brl_leurs peuventdevenil
[r_schaudesdurant unecuisson.Utiliser des maniqaes.
Aiiumage sans fiamme de
Lesystemed'aiiumagesansfiammede veille
rend inutiIeI'aiimentationpermanente _!J'_ ..... _ _',
d'une fiammede veille.ChaquebrOleurde _.- _----_
[atable de cuissonestdoted'un alIumeur -< ....................
etincelies.ProcederavecprudenceIorsdu ......................
nettoyageau voisinaged'un brQieurde la tabiede cuisson.Si lechiffon
utiliseaccrochaitie dispositgd'allumagei[ pourrait le deteriorer,ce qui
empecheraitensuiteI'aliumagedu brOleur.
Siun brOleurde [a tablede cuissonne s'aliumepas,determinersi
['ailumeurest brise,souiileou mouiile.Le cas echeant,deboucheravec
uneaiguiileouune brocherectfligneI'orificesituejuste au-dessousde
['aiIumeur.
Boutons de commande de [a
surface de cuisson
Onutilise ces boutons pour commanderI'ailumagedes brOleursde
surface.Onpeut regierchaquebouton _ toute positionentre les
positionsextremesLow (Basse}et High {Elevee}.On peut percevoir
unedetentede calage_ [a position Nigh. On peut choisir toute
positionde reglageentre les deux positionsextremes.
34
High (Elevee}:S'utflisepour porter un liquide
ebullition ou atteindre [a bonnepression dansun
autocuiseur.Reduireensuite[a puissancede
chauffageapres le debut de I'ebuliition ou de la
cuissondes aliments.
Une puissancede chauffage intermediaireest
utiliseepour [a poursuite de [a cuisson.Les
ailmentsne cuisent pas plus rapidementsi on
utilise une puissancede chauffageplus eleveeque
necessairepour [e maintiend'une douce ebullition.
L'eau bout toujours _ la memetemperature,que
I'ebullition soit tranquilie ou vigoureuse.
O O Un graphique presde chaque bouton identifie le brOleurde
O surfacecommandepar ce bouton.Parexempie,le graphique
ci-contre identifie le br_ileuravant!droiL
Reglage des commandes :
La puissancede chauffage_ employerdependdu type et de [ataflie
de rustensiie utilise.Ontrouve dans[a brochure_ La cuisson
simpiifiee>>de rinformation sur [esustensfleset autres facteurs
affectant [e regiagede [a puissancedechauffage.
1. Placerun ustensiIesur lagrille du brOleur.
o Si aucun ustensiien'est placesur la grille du brOleur,les
fiammespeuventavoir tendance_se separerdu brOleur.
2. Appuyer et toumer le boutondans le sens anti-horaire,iusqu'_ [a
positionLight (Ailumage}.
o Onpeut percevoir[e ciiquetiscorrespondant_ [a production
desetincelles,et [e brOleurs'ailume.[Lescuatrealiumeurs
produisentdes etincefles[orsqu'onplace le bouton de run des
brO[eurs_ [a position Light.}
3. Apres railumage du brOleur,reglerla taiile des flammesselon le
desir en tournant [e bouton de commande.
o L'aliumeurcontinue _ produiredes etince%s aussiIongtemps
quele boutonest _ la positionLight,
Utiiisatio d raBt paBBe
Avant d:aliumeEun brQieurdesurface,vergler quetousies boutons
de commandesont _ la position OF_ (Arre0,Approc!!er [a!!urnette
enf[ammeedu brOieuravantde fa!retourner !e boutonjusqu'& [a
positronLight.
1. Appmcher une ailumetteenfiammeedu br8Jeura utiliser.
2. Enfonceret faire tourner [entement Jeboutonde commande
iusqu'_ JapositionLight,
3. O.uands'aJJume,ajuster [esflammesa [ataJJJedesiree.
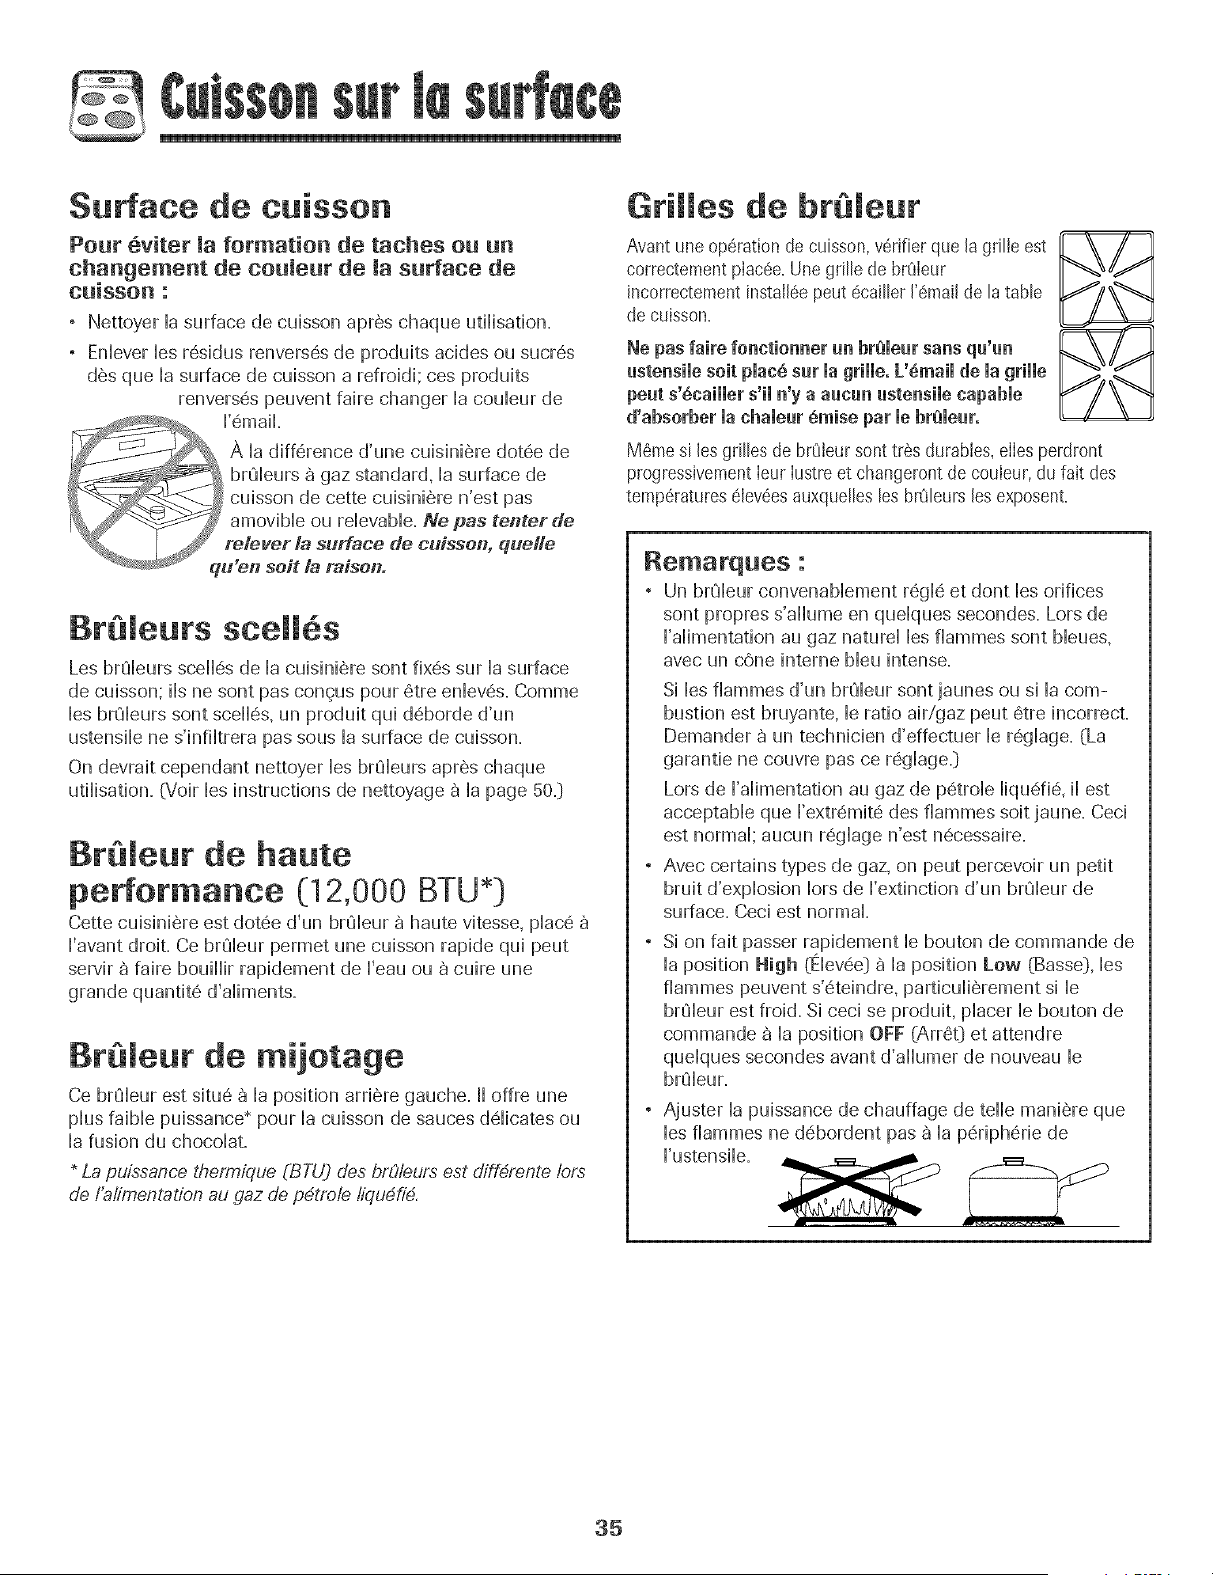
Surface de cuisson
Pour 6viter Ja formation de taches ou un
changement de couleur de la surface de
cu[sson :
, Nettoyer la surface de cuisson aprOs chaque utilisation.
° Enlever les rOsidus renversOs de produits acides ou sucrOs
dos que la surface de cuisson a refroidi; ces produits
renversOs peuvent faire changer la couleur de
UOmaiL
qu'en seit la raison°
Br@leurs scell s
Les br_JleursscellOs de la cuisiniOre sont fixOs sur la surface
de cuisson; ils ne sont pas congus pour 6tre enlevOs. Comme
les br_fleurs sont scellOs,un produit qui dOborde d'un
ustensile ne s'infiltrera pas sous la surface de cuisson.
On devrait cependant nettoyer les br_fleursapr_s chaque
utilisation. (Voir les instructions de nettoyage a la page 50.}
Bt@lew" de halite
performance (:12,000 BTU*}
Cette cuisiniOre est dotOe d'un br_fleur 8 haute vitesse, plac6
Favant droit. Ce br_Jleurpermet une cuisson rapide qui peut
servir 8 faire bouillir rapidement de Feau ou a cuire une
grande quantit6 d'aliments.
Br@lew" de mijotage
Ce brQleur est situ6 a la position arriOre gauche. II offre une
plus faible puissance* pour la cuisson de sauces ddicates ou
la fusion du chocolat.
La p_;_ssancethermique (BTU) des bFOleu'rsest dff4rente /ors
de I'alimentation au gaz de p4trole h_Tu4fi4,
Grilles de br@leur
Avantune operationde cuisson,vOrifierque la grille est
correctementplacOe.Unegrille de brCHeur
incorrectementinstailOepeut 6cailler 1'Omailde la table
de cuisson.
Ne pas faire fonctionner un brele_r sa_a qa'a_
aste_sile soit plac_ s_ la grille. L'_mail de la grille
peut s'_.caiiier s'ii _'y a aaca_ aste_siie capable
d'absorber machame_r8raise par mebreme_r.
MSmesi les grilles de brOleursont tr_s durables,elIesperdront
progressivementIeur lustreet changerontde couleur, du fait des
temperatures_lev_esauxquellesles brOleursles exposent.
_e_arqBe5 :
° Un br_fleur convenablement r_gl_ et dont les orifices
sont propres s'allume en quelques secondes. Lors de
Ualimentationau gaz natural les flammes sont bleues,
avec un cone interne bleu intense.
Si les flammes d'un br6sleursont jaunes ou si la com-
bustion est bruyante, le ratio air/gaz peut 6tre incorrect.
Demander _ un technicien d'effectuer le r6glage. (La
garantie ne couvre pas ce r6giage.}
Lors de I'aiimentation au gaz de p6troie iiqudfi6, ii est
acceptable que I'extrdmit6 des flammes soit jaune. Ceci
est norn_al;aucun r6glage n'est n6cessaire.
, Avec certains types de gaz, on peut percevoir un petit
bruit d'explosion Iors de I'extinction d'un brqleur de
surface. Ceci est normal
° Si on fait passer rapidement le bouton de commande de
ia position High (Eiev6e} _ ia position Low (Basse}, ies
flammes peuvent s'6teindre, particuli6rement si le
brqleur est froid. Si ceci se produit, placer le bouton de
commande _ la position OFF (Arr60 et attendre
quelques secondes avant d'allumer de nouveau le
brqleur.
, Ajuster la puissance de chauffage de telle mani6re que
les flammes ne d6bordent pas 8 la p6riph6rie de
I'ustensile. _ ._
35
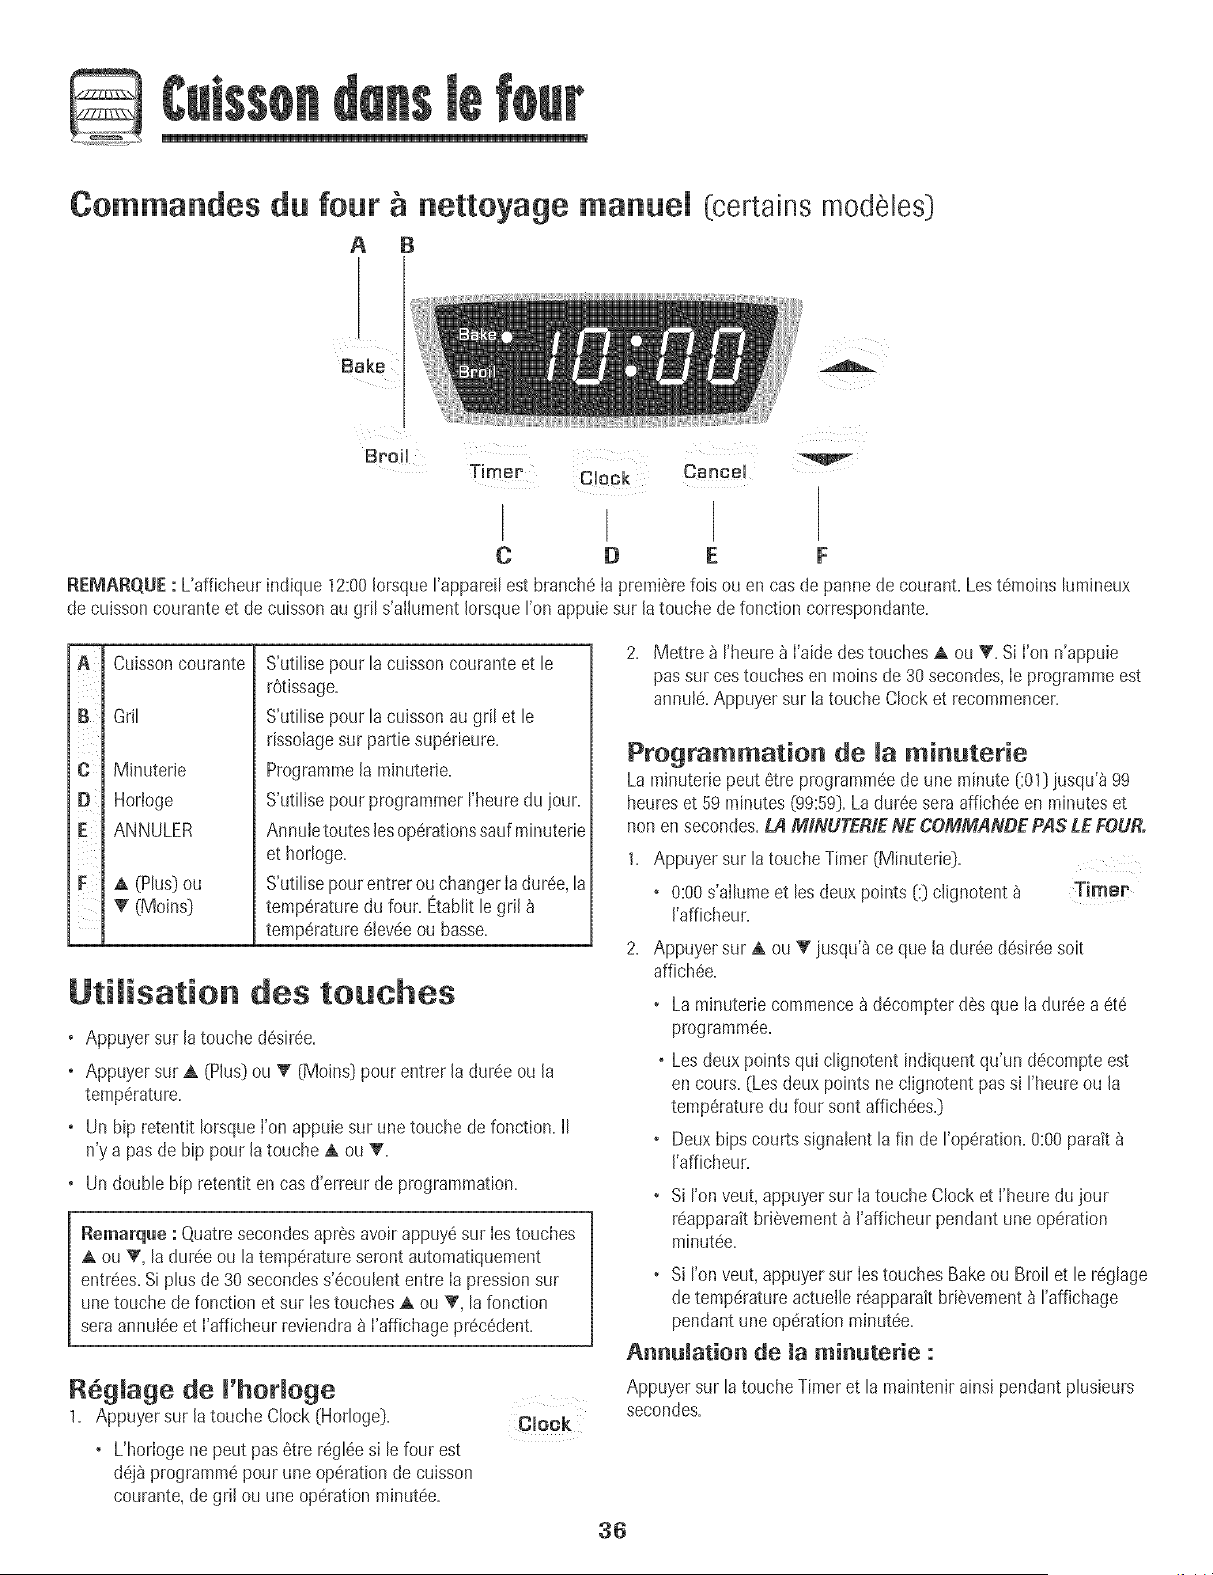
Commandes du four
A B
Bake
netteyage manuel (certains modeles]
A
Broil Timer Clack Cancel
I
O D E F
RE_,_ARQU_:: L'afficheurind+que12:00IorsqueI'appareilestbranche Ia premierefois ou en cas de panne de courant. Lest6moins lumhleux
de cuissoncouranteet decuisson augril s'alhment IorsqueI'on appuiesur latouche de fonction correspondante.
I
iA
ii
t
t
iB
t
ill
il i
ic
i
i l
i E i¸
t
t_
t_
i
i
t
i
Cuisson oourante
Gril
Minuterie
Horioge
ANNULER
A, (Plus]ou
T (Moins]
S'utilisepour la cuissoncourante et le
rOtissage.
S'utilisepour la cuissonau gril et le
rissolagesur pattie sup#rieure.
Programmela minuterie.
S'utilisepour programmerI'heuredu jour.
Annuletouteslesoperationssauf painuterie
et horloge.
S'utilisepourentrerou changerIaduree,la
temperaturedu four.Etablitle gril
temp6rature61ev6eou basse.
Utilisation des touches
o Appuyer sur la touche d6siree.
o Appuyer sur A (Plus)ou T (Moins] pour entrer la dur6eou la
temp_rature.
o Un bip retentit IorsqueI'on appu+esur une touchede fonction. II
n'y a pasde hip pourla touche A ou T.
o Un doublebip retentit en cas d'erreur de programmation.
Remarqae : Quatresecondesapres avoir appuy6sur Iestouches
A ou T, la dureeou la temperatureseront automatiquement
entrees.Si plus de 30secondess'6coulententre Ia pressionsur
une touche de fonction et sur IestouchesA ou _', la fonction
sara annuI6eet I'afficheur reviendra_ I'affichagepr6c6dent.
2. Mettre _ rheure _ I'aidedes touchesA ou Y. Si I'on n'appuie
pas sur cestouches en moins de 30 secondes,Ie programmeest
annule.Appuyer sur la toucheClock et recommencer.
Pregrammatien de la minuterie
La minuterie peut 6tre programmeede une minute (:01] jusqu'_99
heureset 59 minutes (99:59).La dur6e saraaffich6e en minuteset
non en secondes.LA MINUTERtEHE COMMAHDE PAS LE FOUR.
1. Appuyer sur la touche Timer(Minuterie).
• 0:00s'allume et lesdeux points (:) clignotent _ Timer
I'afficheur.
2. Appuyersur A ou T jusqu'_ ce que la dur6e desir6esoit
affich6e,
• La minuterie commence_ d6compterdes que la duree a at6
programm6e.
o Lesdeux pointsqui clignotent indiquentqu'un decompteest
en cours. (Lesdeux pointsne clignotent passi I'heureou la
temp6raturedu four sontaffich6es0
• Deuxhips courts signalent la fin de I'op6ration.0:00parak
I'afficheur.
• Si I'onveut, appuyersur Ia touche Clock et I'heu+edujour
reapparaitbriSvement_ I'afficheurpendant une operation
minut6e.
• Si ron veut, appuyersur Iestouches Bakeou Broil et le reglage
de temp6ratureactueller6apparaitbriSvement_ I'affichage
pendantune operationminut#e.
Ambulation de la min_terie :
R_g_age de I'horloge
1+ Appuyer sur la toucheClock (Horloge)+
• L'horloge ne peut pas etre regimesi le four est
d#j8programm_pour une operationde cuisson
courante,de gril ou uneoperation minut#e+
Clock
Appuyersur la touche Timer et la maintenir ainsJpendant plusJeurs
secondes.
36
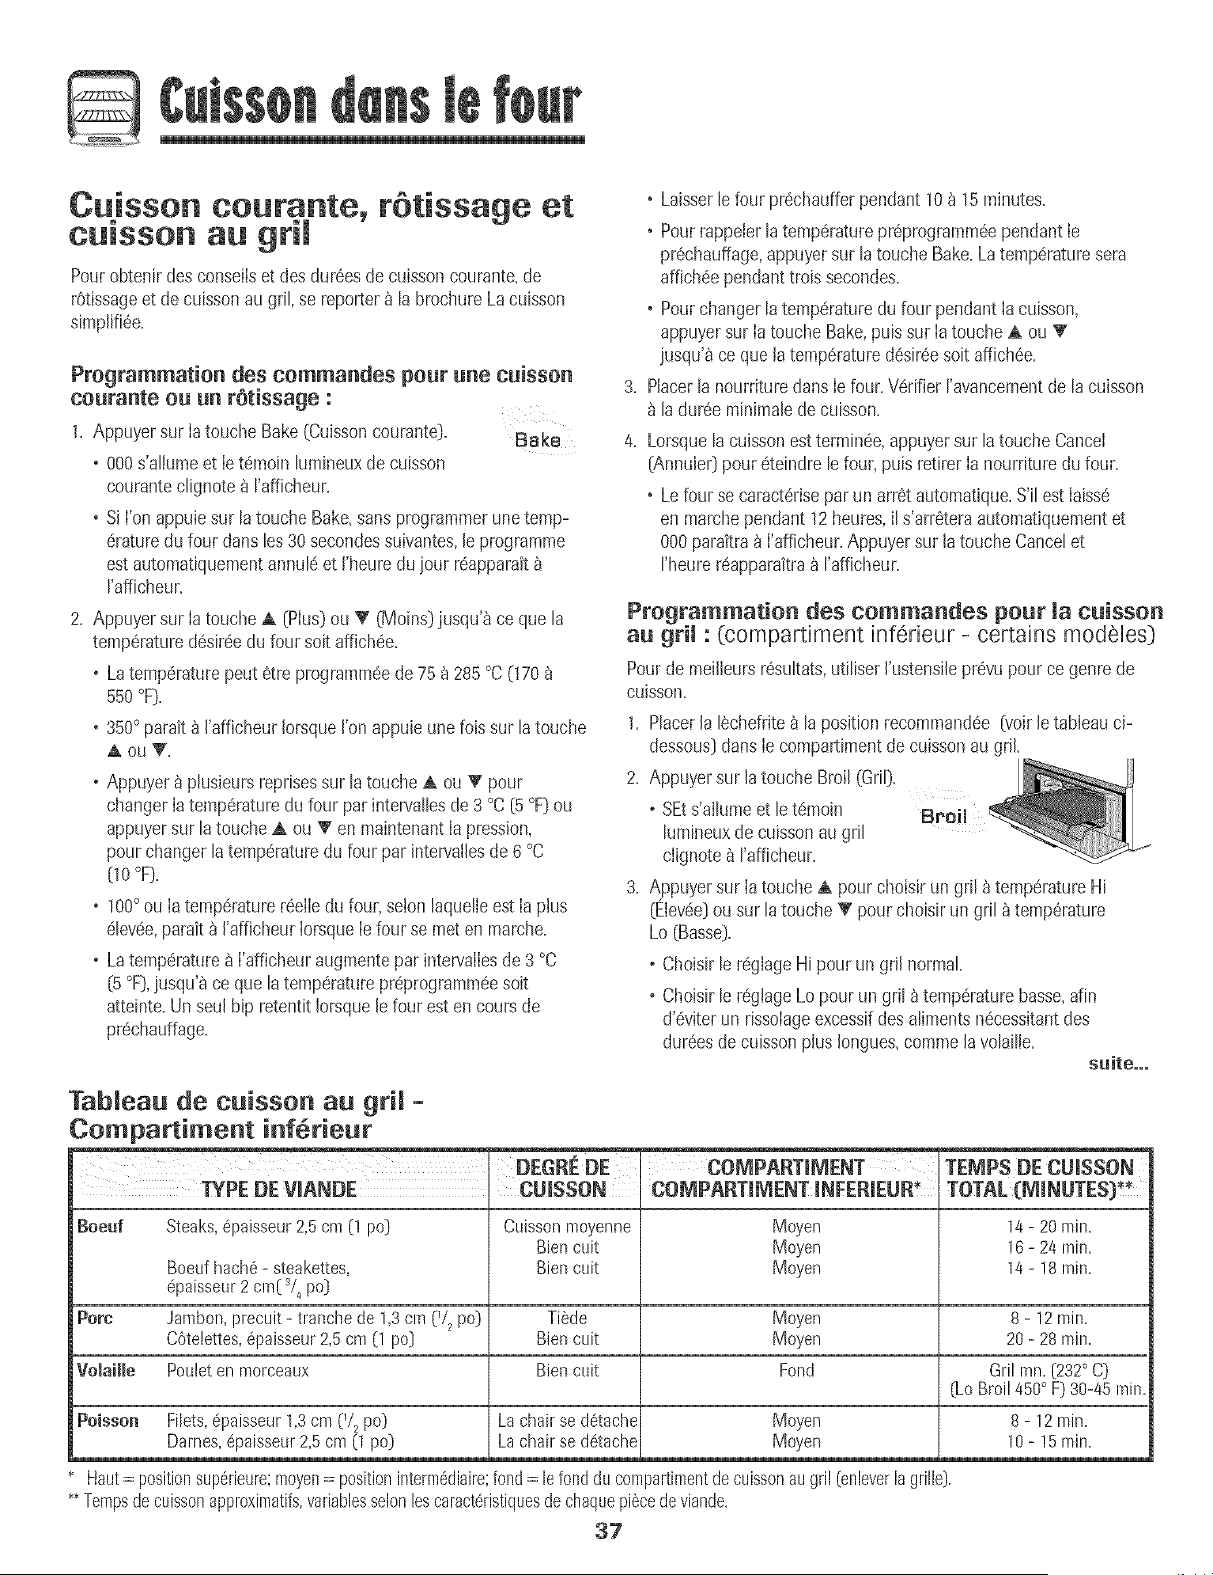
G
Cuisson courante, rStissage et
cumsson au gril
PourobtenirdesconseiIset des dur6esde cuissoncourante,de
r0tissageet decuissonau grit,se reporter_ tabrochureLacuisson
simplJfi6e.
Programmation des commandes pour une cuisson
courante ou un retissage :
1. Appuyersur Iatouche Bake(Cuissoncourante]. Bake
o 000s'aflumeet Iet6moinDmineuxdecuisson
courantec@note8 Fafficheur.
o Si I'on appuiesur la touche Bake,sansprogrammerunetemp-
eraturedu four dartsles 30 secondessuivantes,leprogramme
estautomatiquementannuleet I'heureduiour reapparak
rafficheur.
2. Appuyersur IatoucheA [Plus)ou _' (Moins]jusqu'_ ce quala
temperaturedesireedu four soit aMchee.
o La temperaturepeut etre programmeede 75_ 285 °C (170
550OF).
.350 ° paraK_ I'aMcheurDrsqueI'on appuieunelois sur latouche
AouT.
o Appuyer_ plusieursreprisessur latoucheA ou Y pour
changerD temperaturedu four par intervaIIesde3 °C [5 °F]ou
appuyersur latoucheA ou Ven maintenantIa pression,
pourchangerla temperaturedu four par intervatlesde 6 °C
O0°F),
o 100° ou IatemperaturereeIIedu four,scion laquefleest Ia ptus
elevee,parait_ I'aMcheurIorsqueIe four se meten marche.
. Latemperature_ I'afficheuraugmenteparintervalIesde 3 °C
[5 °F),iusqu'8 ce qua latemperaturepre,,programmeesoit
atteinte.Un sewhip retentit lorsquele four esten coursde
prechauffage.
3.
4.
• Laisserle four prechaufferpendant 10_ 15 minutes.
• PourrappeIerlatemperaturepreprogrammeependantie
prechauffage,appuyersur la touche Bake.Latemperaturesara
afficheependanttrois secondes.
• Pourchangerlatemperaturedu four pendantIa cuisson,
appuyersur Ia toucheBake,puis sur Iatouche A ou T
iusqu'8 ce qua la temperaturedesireesoit affichee.
PlacerlanourrituredensIe four.Verifier I'avancementde la cuisson
laduree minimalede cuisson.
Lorsquelacuissonestterminee,appuyersur la touche Cancel
(Annule0poureteindrele four, puis retirer Ianourrituredu four.
• Lefour se caracterisepar un arretautomatique.S'il estIaisse
en marchependant12heures,il s'arr6teraautomatiquementet
000parakra_ I'afficheur.Appuyersur latoucheCancelet
I'heurer6apparaitra_ I'afficheur.
Programmation des commandes pour ia cuisson
au gril : (compartiment inf6rieur - certains modeles]
Pourde meilleursresultats,utiliser I'ustensilepr@upour ce genrede
CUiSSOn.
1, PDcerla Dchefrite_ lapositionrecommandee[voir le tableauci-
dessous]dens IecompaWmentdecuissonau gri[
2. Appuyersur latoucheBroil (Gril).
o SEts'aIlumeet le temoin
lumineuxde cuissonau gril
ciignotea I'afficheur.
3. Appuyersur Iatouche A pour choisir un gril _temp6ratureHi
(Elevee}ou sur latouche_' pour choisirun gril _ temperature
Lo (Basse).
o Choisirle r6glageHi pourun grfl normal
o Choisirle r6glageLopour un gril _ temperaturebasse,afin
d'6viterun rissoiageexcessifdes alimentsnecessitantdes
dur6esde cuissonplus Iongues,commelavolaille.
suite...
Tableau de cuisson au gril -
Compartiment inf6rieur
TYPE DE COIVIPANTINENT INFERIEUR_ TOTAL [IVIINUTES] _*
Boeuf Steaks,6paisseur2,5cm (! pc] Cuissonmoyenne Moyen 14- 20 rain.
Biencuit Moyen 16- 24 rain.
Boeufbach6- steakettes, Biencuit Moyen 14- 18nnin.
epaisseur2 cm[:_/_,pc]
Porc Jambon,precuit- tranchede 1,3cm [_/2pc) Tiade Moyen 8 - 12rain.
C6telettes,6paisseur2,5cm (1 pc] Biencuit Moyen 20- 28rain.
VeMaille Pouleten morceaux Biencult Fond Gril nnn.[232° C]
(LoBroil450° F] 30-45 rain.
Poisso_ Filets,epaisseur1,3cm C/=pc] Lachairse detache Moyen 8 - 12rain.
Dames,#paisseur2,5cm (1 pc) Lachairse detache Moyen 10- 15rain.
Haut= positionsup6rieure:moyen= positioninterm_diairefond= le fonddu con Fartimentdecuissonaugril (enleverlagrille].
'_*Tempsdecuissonapproximatifs,variablessalonlescaracteristiquesdechequepiecedeviande.
32
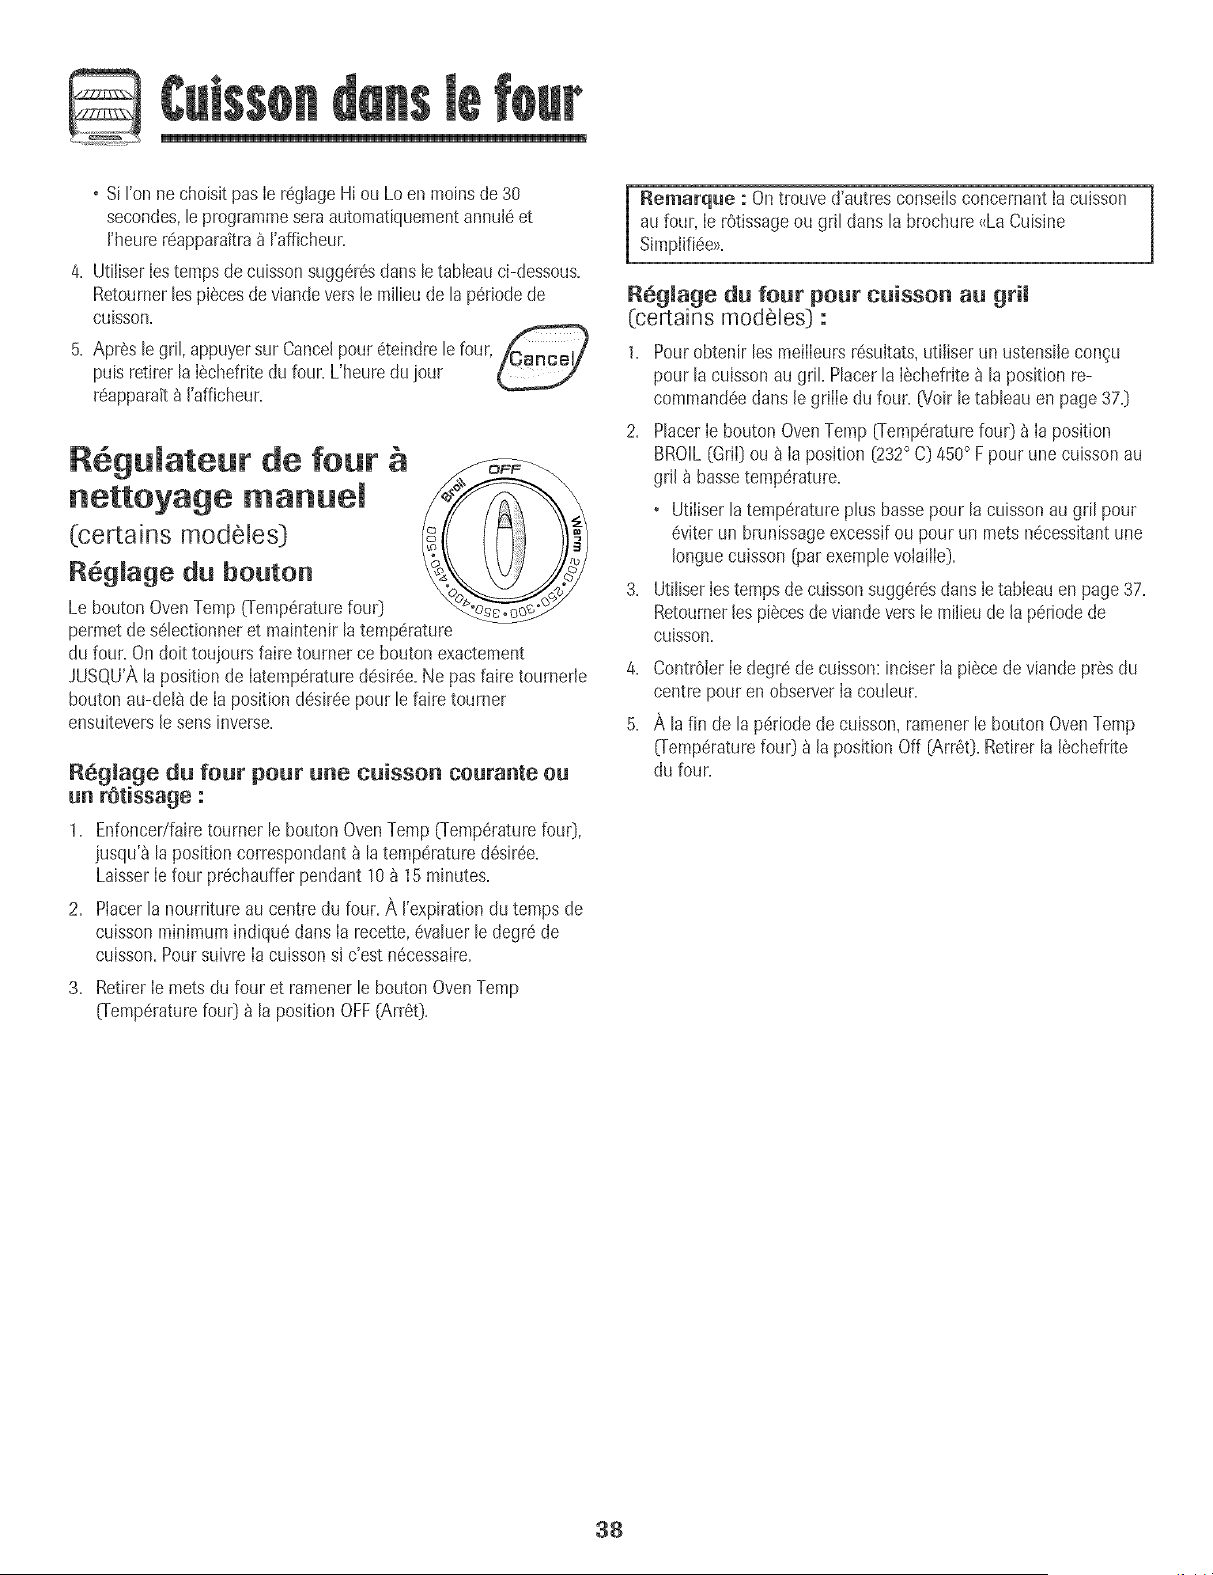
o Si Fonnechoisit pasIe r6glageHi ou Loen moinsde 30
secondes,le programmeseraautomatiquementannul6et
I'heurer6apparaitra_ Fafficheur.
4. Uti+iserIestemps de cuissonsugg6r6sdartsle tableauci-dessous.
RetournerlespJ_cesdeviandevers le milieu dela p@iodede
CtJisson.
5. Apr6s le gril, appuyersur Cancelpour6teindrele four, _.P_ancal/
puis retirer laI6chefritedu four. L'heuredu jour
r@pparait_ I'afficheur.
P,6gulateur de four
nettoyage manuel
(certains modeles)
R6gJage du bouton
Le bouton OvenTemp (Temp@aturefou0
permetde s61ectionneret maintenirla temp6rature
du four. Ondoit toujours faire tourner ce boutonexactement
JUSQU'Ala position de Iatemp@atured6sir6e.Ne pas faire tournerle
bouton au-del_de Ia position d6sir6epour le faire tourner
ensuiteversle sens inverse.
R6glage du four pour uue cuissou courante ou
un r6tissage :
1. Enfoncedfairetourner le boutonOvenTemp(Temperaturefour),
jusqu'_ la positioncorrespondant_ latemp@atured6sir6e.
LaisserIefour pr6chauffer pendant 10_ 15minutes.
2. Placerlanourriture au centre du four./_, I'expirationdu temps de
cuissonminimumindiqu6 dans Ia recette,@aluerle degr6 de
cuisson.PoursuivreIa cuissonsJc'est n6cessaire.
3. RetirerIe mets du four et ramenerle bouton OvenTemp
[Temp6raturefour} _ la positionOFF(Arr6t}.
_ Remarque : On trouve d'autres conseilsconcemant ia cuisson
aufour, Ie rOtissageou gril dans la brochure_LaCuisine
Simplifi6e>_.
Reglage du four pour cuissou au griJ
(certains mod@les) :
1. Pourobtenir JesmeiJJeursr6suJtats,utiJiserun ustensHecon_u
pour la cuissonau gril. Placerla I@chefrite_ la positionre-
command6edartsJegrille du four. Uoir le tableauen page 37.}
2. PlacerIe bouton OvenTemp{Temp@aturefou0 _ Ia position
BROIL[GriI}ou 8 Ia position (232° C} 450° F pour une cuissonau
griJ_ bassotemp@ature.
• Utiliserla temperatureplus bassepour la cuissonau gril pour
@iter un brunissageexcessifou pour un mets n6cessRantune
Jonguecuisson@atexemplevolaiJle}.
3. UtiliserIestemps de cuissonsugg6r6sdansIetableau en page 37.
RetournerJespiscesdeviandevers le milieu de Jap@riodede
ouJsson.
4. Contr6JerIe degr6 de cuisson:inciser lapi@cede viande pr6s du
centre pour en observerIa couleur.
5. A lafin de la p6riode de cuisson, ramenerlebouton OvenTemp
{Temp6raturefou0 _ Japosition Off (Arr6t}. Retirer la J_chefrite
du four.
38

Tableau de eommande au four autonettoyant (certains modeles)
\
\
\
\
\
\
\
\
\
\
\
\
\
A B
?
Bak8
Broil
Cook&
Hold
Clean Delay Clock
Keep
Warm /
1 J
Le tableaude commandeestcongu pour faci[iter [a programmation.La fenStre d'affichageirrdique['heure+[esfonctionsavec minuterie et
fonctionsdu four. Le tableaude commanderepresent6comprendcaract_ristiquesspecifiquesau modete.(Le styte peut verier seton te
modete.}
A
B
Di
E
G
H
/i
Gill
Cuisson courante
A (Plus}ou
_' (lVloins}
Minuterie
Cuisson et
maintlen
Nettoyage
Demarrage
differS.
Horloge
Maintienau
chaud
Annulet
S'utilisepourla cuissonaugril et le rissolage
surpartiesuperieure.
S'utilisepourla cuissoncouranteet le
rOtissage.
S'utilisepourentrerou changerla durGe,la
temperaturedu four.Etablitb gril
terapGratureELEVEEou BASSE.
Programmelaminuterie.
PourcuirependantunedurGepre6tablie,
avecmaintienauchaudpendantuneheure.
S'utilisepourprogramraerle cycle
d'autonettoyage.
Programmelefour pourdebuterunecuisson
plustard.
S'utilisepourprogrammerI'heuredu jour.
S'utilisepourmaintenirau chauddansle four
lesaliraentscults.
Annuletouteslesopdrationssaufminuterie
et horloge.
Utilisation des touches
o Appuyersur ia touche desir_e.
° Appuyersur latouche A (Plus}ou_' (Mains}pourentrer ladureeou
latemperature.
o Un bip retentit Iorsque i'on appuiesur unetouche.
o Un doublebip retentiten cas d'erreur de programmation.
Remarque : O.uatresecondesapres avoirappuy6sur Iestouches
A ou _', ia dureeou iatemperaturesere automatiquemententree.
Si pius de 30secondess'ecoubnt entre lapressionet sur une
touche de fonction sur lestouches A ou T, la fonction sere
[annu eeet affic_eur reviendraa affic_age precedent.
L'hodoge peut etre programmeepour afficher la dureedens un
format de 12 ou 24 heures.L'horloge est programmeeen usinepour
un format de 12heures.
Changement de l'hodoge _ un format de 24 heures :
1. Appuyer sur ies touches Cancel
(Annule0 et Delay (Demarragediff_re} et
mainteniria pressionpendanttrois
secondes.
2. Appuyer sur Ia touche A ou _' pour
programmerun format de 12ou 24
heures.
--Delay
3. ProgrammerI'heureen suivantles instructions
donneesen dessous.
Regiage de I'horioge
1. Appuyer sur la touche Clock (Horloge). Clock
• L'heuredu jour et deux pointsclignotent
I'afficheur.
2. Appuyer sur Ia touche A ou _' pour
programmerJ'heuredu jour.
+ Deux points continuent _ clignoter.
3. Appuyer _ nouveausur latouche Clock ou attendre quatre
secondes.
39 suite,..
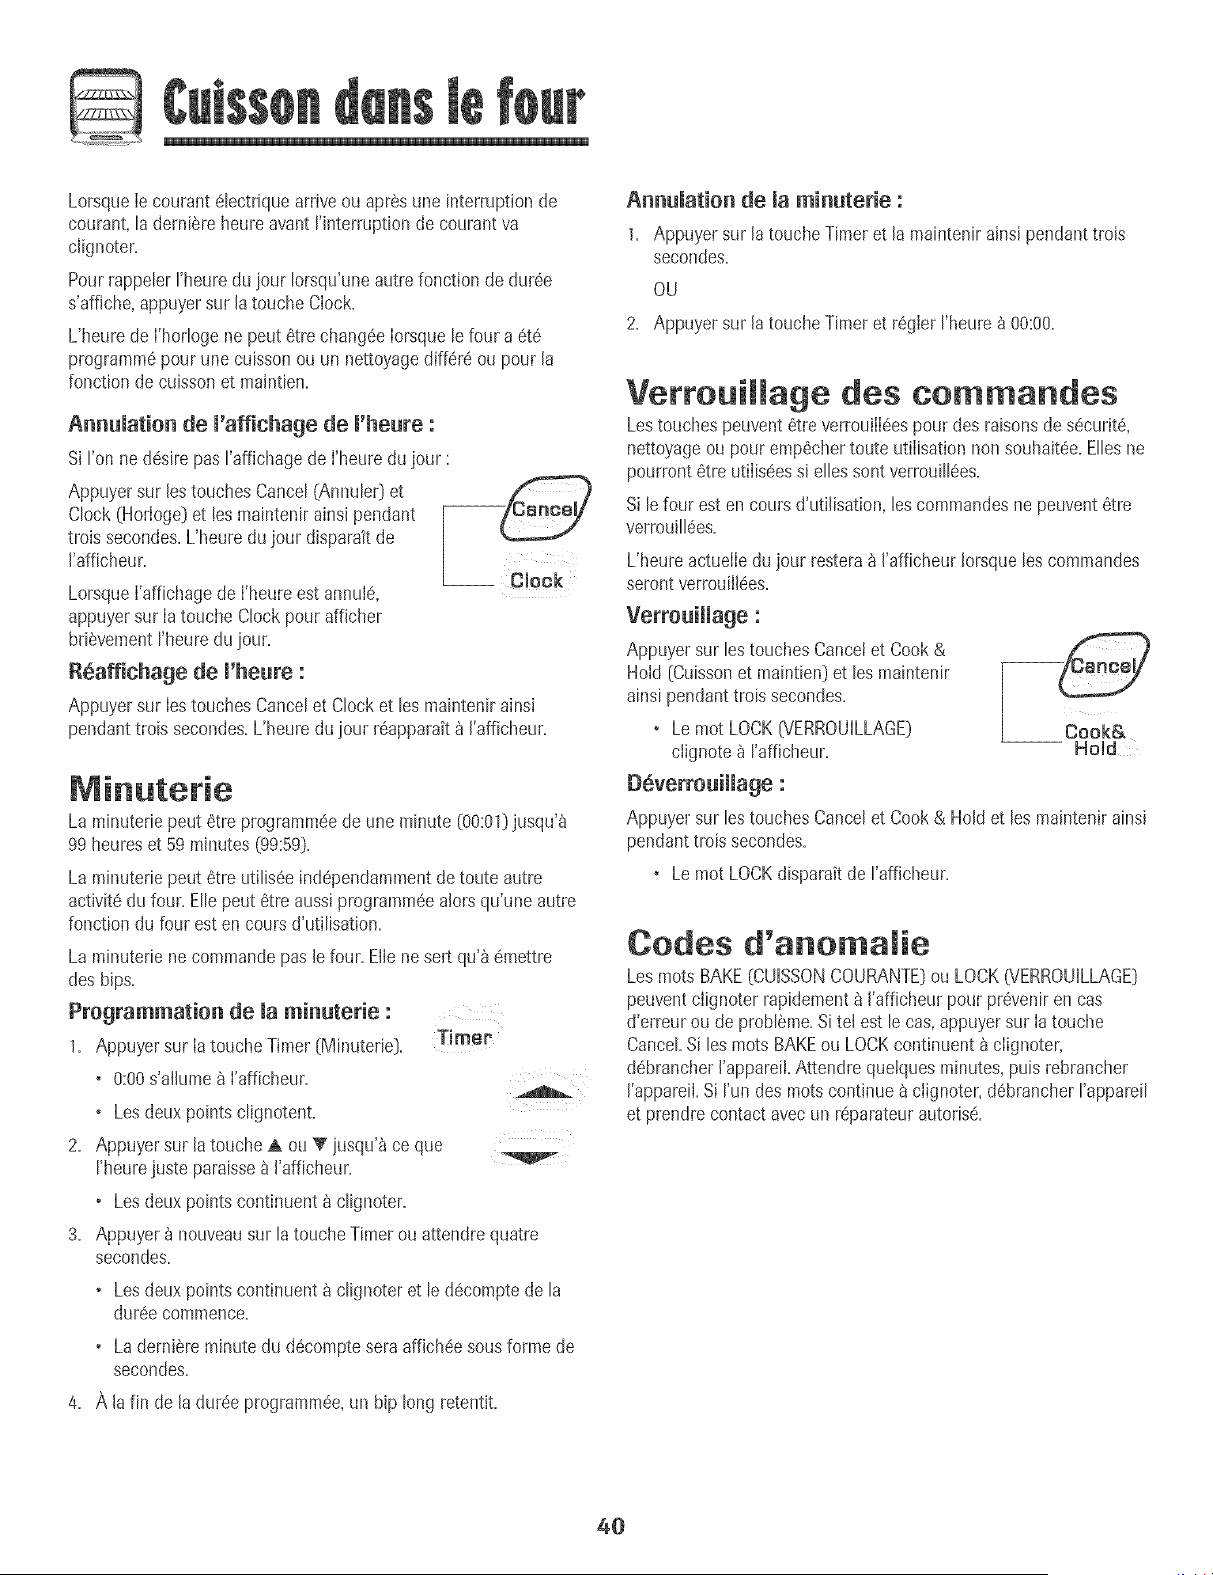
LorsqueIecourant61ectriquearriveouapresune interruptionde
courant,ta derniere heure avant rinterruption de courantva
clignoter.
Pourrappeterrheure dujour torsqu'uneautre fonction de dur6e
s'affiche,appuyersur la touche Ciock.
L'heure de i'hodoge ne peut 6tre chang6eiorsquete four a et6
programm6pour une cuissonou un nettoyagediffere ou pour la
fonction de cuissonet maintien.
Annumation de m'affichage de m'heure:
Si I'onne desire pasI'affichagede I'heuredu jour :
Appuyersur leetouches Cancel[Annuler_et
Clock (Horioge)et leemaintenir ainsi pendant
trois secondes.L'heuredu jour disparakde
I'afficheur.
LorsqueI'affichagede I'heureest annuie,
appuyersur Ia touche Clockpour afficher
brievementrheure du jour.
R6affichage de m'heure :
Appuyersur iestouches Cancelet Clocket les maintenir ainsi
pendanttrois secondes.L'heuredu jour r6apparatt_ I'afficheur.
La minuterie peut 6tre programmee de une minute [00:01] jusqu'_
99 heures et 59 minutes (99:59_.
La minuterie peut 6tre utilisde independamment de toute autre
activite du four. Elle peut 6tre aussi programmee alors qu'une autre
fonction du four est en cours d'utilisation.
La minuterie ne commandepas le four. Elie nesert qu'_ emettre
des hips.
Programmation de la minuterie : ................................
1. Appuyer sur Ia toucheTimer[Minuterie). Timer
+ 0:00s'aihme _ i'afficheur.
+Les deux pointsclignotent.
2. Appuyer sur la toucheA ou V' jusqu'_ ce que
rheurejuste paraisse_ I'afficheur.
•Les deux pointscontinuent _ clignoter.
3. Appuyer _ nouveausur latouche Timerou attendre quatre
secondes.
A
v
+ Lesdeux pointscontinuent _ clignoter et le decomptede la
dureecommence.
• Laderniere minute du d6comptesera affich6esous forme de
secondes.
4. A la fin de ladur6e programm6e,un hip long retentit.
Annumation de maminuterie :
1. Appuyer sur la touche Timeret la maintenir ainsipendant trois
secondes.
OU
2. Appuyer sur la toucheTimeret r6gier I'heureb 00:00.
Verrouimmage des eommandes
Lestouches peuvent6tre verrouiii6espour des raisonsde securit6,
nettoyageou pourempSchertoute utiiisation non souhaitee.Ellesne
pourront 6tre utiiiseessi elles sont verrouill6es.
Si le four est en cours d'utilisation,les commandesne peuvent8tre
verrouill6es.
L'heure actuelIedu jour restera_ [afficheur Iorsqueleecommandes
serontverrouillees.
Verrouillage :
Appuyersur lestouches Cancetet Cook&
Hoid [Cuissonet maintien) et leemaintenir
ainsi pendanttrois secondes.
• Le mot LOCK[VERROUILLAGE) Cook&
clignote _ rafficheur. -- Hold
D6verrouiiiage :
Appuyersur [estouches Cancelet Cook& Hold et [es maintenirains[
pendanttrois secondes.
+ Lemot LOCKdisparaitde I'afficheur.
Codes d'a omalie
LeemoteBAKE[CUISSONCOURANTE_ou LOCK07ERROUILLAGE_
peuventclignoter rapidement8 I'afficheurpour pr6veniren cas
d'erreur ou de probl_me=Si tet est le cas,appuyersur ia touche
Cancel Si les rootsBAKEou LOCKcont+nuent_ ciignoter,
debrancherI'appareiLA[tendre queiquesminutes,puis rebrancher
I'appareiLSi run des rootscontinue_ ciignoter,d_brancherrappareil
et prendrecontactavecun reparateurautoris_=
40
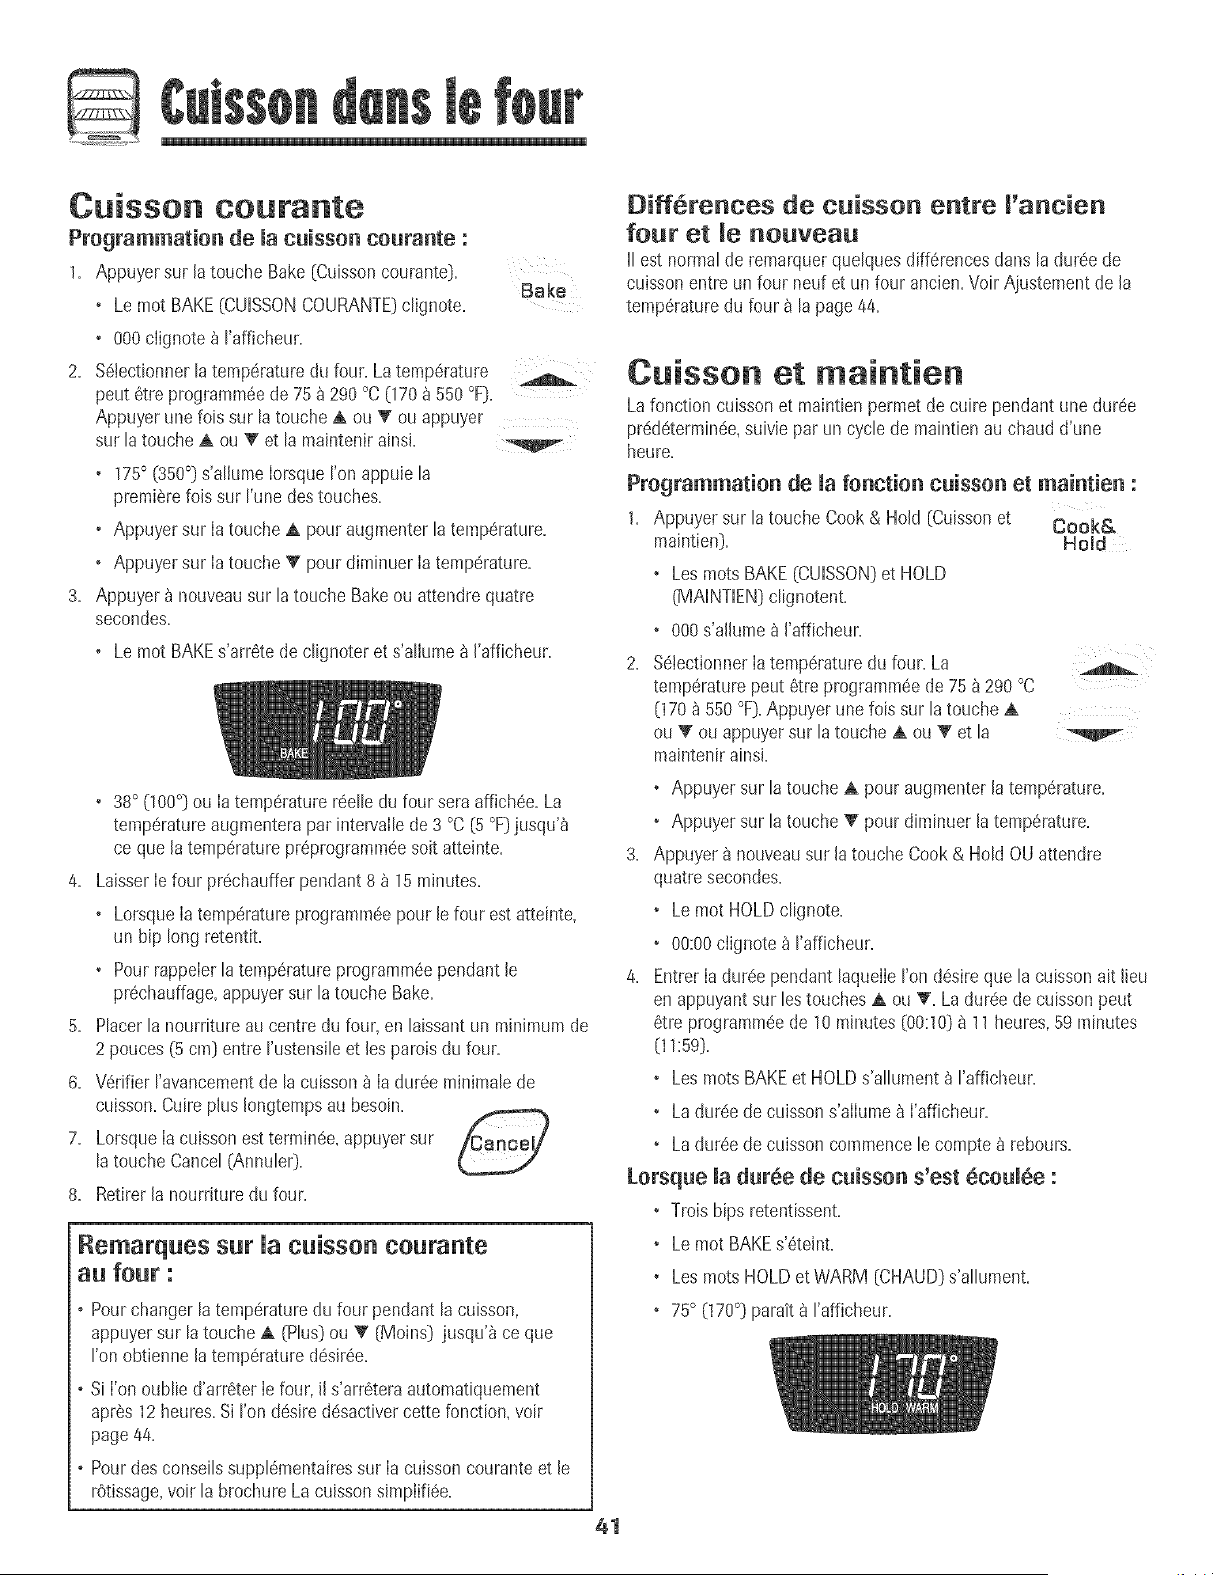
CUiSSOn COUrante
Programmation de macuisson courante :
1. Appuyer sur la touche Bake(CuissoncouranteD.
Bake
• Lemot BAKE(CUHSSONCOURANTE)c@note.
• 000cIignote _ t'afficheur.
2. %tectionner tatemperaturedu four.Latemperature
peut 6tre programmeede75 _ 290°C(170_ 550 °F).
Appuyer unefois sur la touche A ou T ou appuyer
sur latouche A ou _' et la maintenirainsi.
• 175° (350°) s'allumeIorsque ron appuie la
premierefois sur I'unedestouches.
• Appuyer sur Ia touche A pour augmenterla temperature.
o Appuyer sur Ia touche _" pour diminuer Iatemperature.
3. Appuyer _ nouveausur latouche Bakeou attendrequatre
secondes.
o Lemot BAKEs'arretede clignoteret s'aliume_ I'afficheur.
• 38° (100°] ou Ia temperaturereelle du four sera affichee. La
temperatureaugmenterapar intervallede 3 °C (5 °F)jusqu'_
ce que latemperaturepreprogrammeesoit atteinte.
4. LaisserIefour prechauffer pendant8 _ 15 minutes.
• LorsqueIatemperatureprogrammeepour lefour est atteinte,
un hip long retentit.
• Pourrappelerla temperatureprogrammeependant le
prechauffage,appuyersur la touche Bake.
5. Placerlanourriture au centre du four, en laissantun minimum de
2 pouces(5 cm) entre rustensile et lesparoisdu four.
6. Verifier ravancementde la cuisson_ Ia duree minimale de
cuisson.Cuirephs Iongtempsau besoin.
7. LorsqueIacuissonest terminee,appuyer sur /Cancel/
latouche Cancel (Annuler).
8. Retirerla nourriture du four.
Remarques sur Uacuisson courante
au four :
o Pourchanger [atemperaturedu four pendant [acuisson,
appuyersur la touche A (Plus}ou _' (Moins} jusqu'_ ce que
I'onobtienne latemperaturedesiree.
oSi I'onoublie d'arreter Iefour, ils'arreteraautomatiquement
apres 12heures.Si I'ondesiredesactivercette fonction, voir
page44.
o Pourdes consei[ssupp[ementairessur Ia cuissoncouranteet le
retissage,voir [a brochure Lacuissonsimpiifiee.
41
Diff6rences de cuisson entre 'ancien
four et nouveau
IIest normalde remarquerquelques differencesdans ladureede
cuissonentre un four neuf et un four ancien.Voir Ajustement de la
temperaturedu four _ lapage 44.
Cuisson et maintien
Lafonction cuissonet maintien permet de cuire pendantune duree
predeterminee,suiviepar un cyclede maintienau chaud d'une
heure.
Programmation de mafonction cuisson et maintien :
1. Appuyer sur la touche Cook& Hold (Cuissonet Cook&
maintien). Hold
• LesrootsBAKE(CUISSON)et HOLD
(MAINTIEN)clignotent.
• 000s'alhme _ I'afficheur.
2. %tectionner Iatemperaturedu four. La
temperaturepeut etre programmeede 75_ 290 °C
(170_ 550 °F).Appuyerune fois sur la toucheA
ou _" ou appuyersur la touche A ou _' et la
maintenirainsi.
, Appuyer sur la toucheA pour augmenterla temperature.
, Appuyer sur la touche_' pour diminuer latemperature.
3. Appuyer 8 nouveausur latouche Cook & Hold OU attendre
quatre secondes.
, Le mot HOLDclignote.
, 00:00ciignote_ I'afficheur.
4. EntrerIaduree pendant laquelIeron desireque la cuissonait lieu
en appuyant sur lestouches A ou _. La duree de cuissonpeut
etre programmeede 10 minutes(00:10)8 11heures,59minutes
0_:59),
• LesrootsBAKEet HOLDs'allument _ I'afficheur.
• La duree de cuissons'alIume_ I'afficheur.
• La duree de cuissoncommencele compte_ rebours.
Lorsq_e _ad_r_e de c_isso_ s'est _co_Se :
• Troiships retentissent.
• Le mot BAKEs'eteint.
• LesrootsHOLDet WARM (CHAUD)s'allument.
• 75° (170°) parait 8 rafficheur.
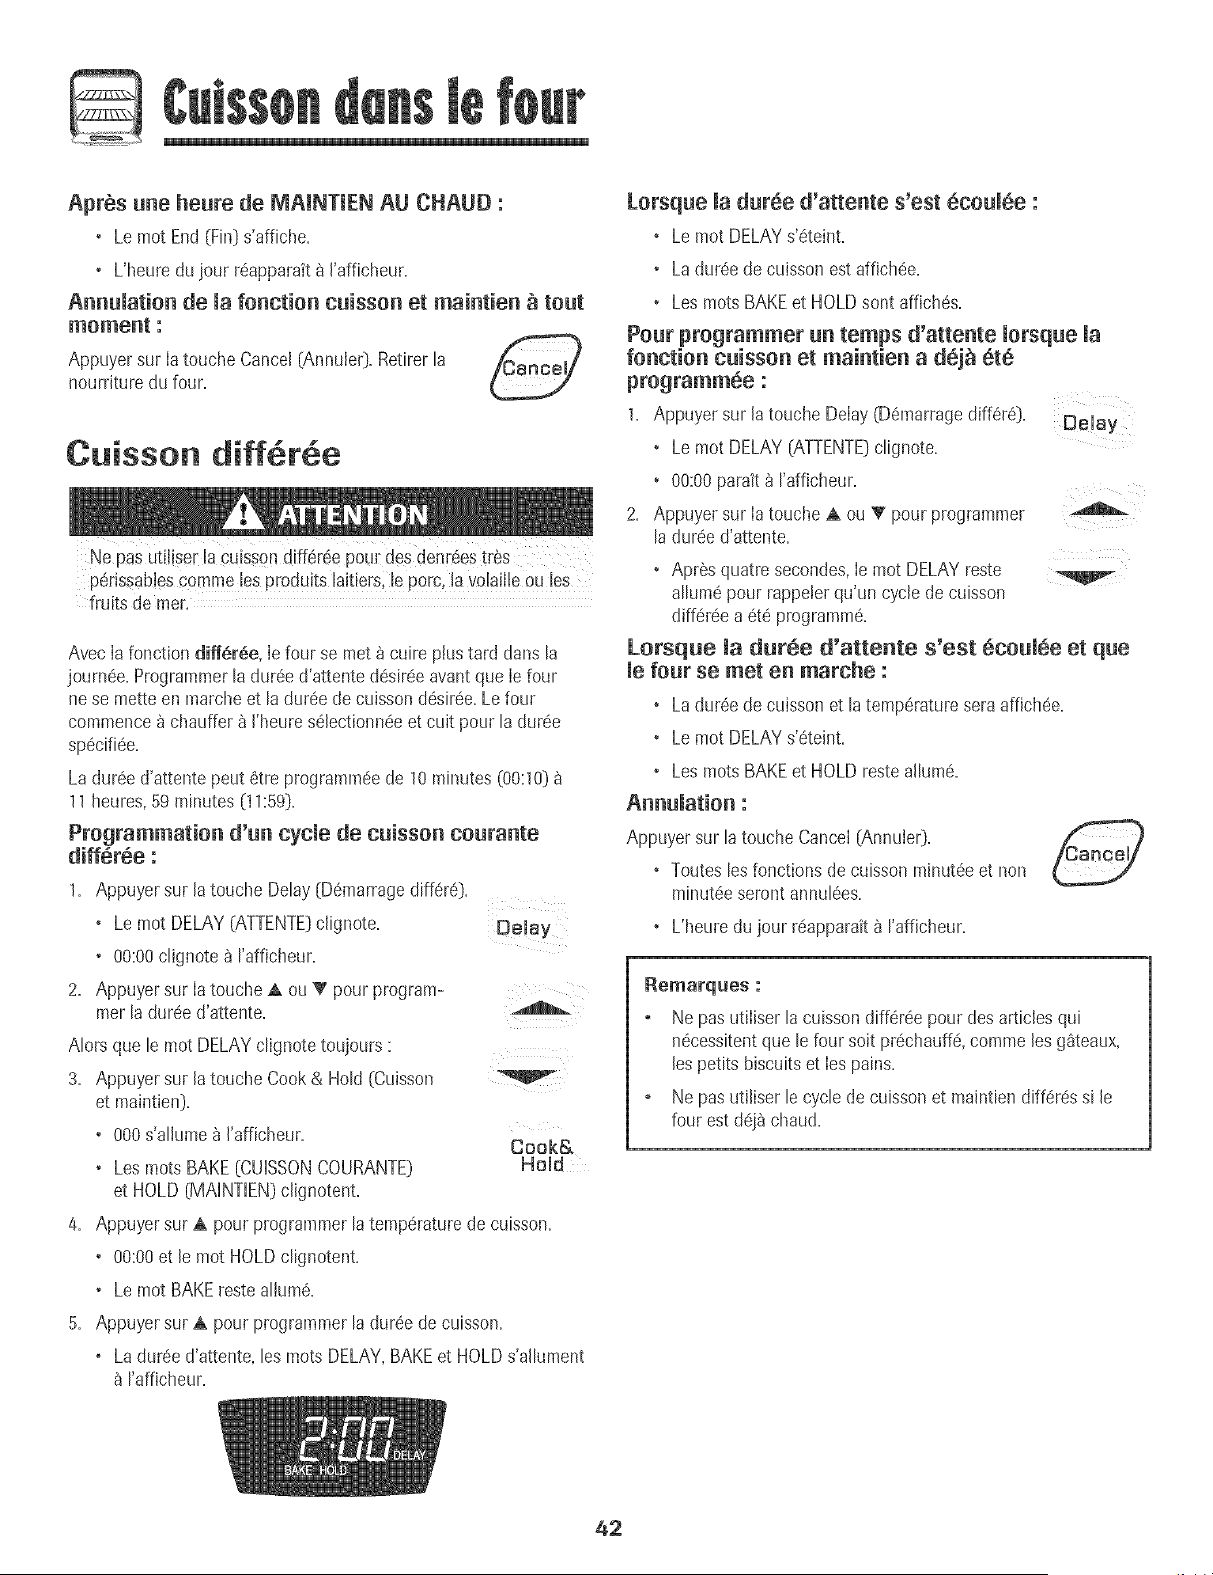
©
Apr@s une heure de MAJNTIEN AU CHAUD :
° Lemot End(Fin]s'affiche.
• L'heuredu iour r6apparait_ I'afficheur.
Annulation de la fonction cuisson et maintien _ tout
moment :
Appuyersur la touche Cancel(AnnubG Retirerla _P,_n_m/
nourrJturedu four.
Cuisson diff6r6e
p6rbsablescomme bs produits laitiersl b porc,la volailb ou les
fruits de rner.
AvecIa fonction di_Sr6e, Ie four se met b cuire plustard dans la
joum6e. Programmerla dur6ed'attented6sir6eavantque Ie four
nese metteen marcheet ladur6e decuisson d6sir6e.Lefour
commence_ chaufferb J'heures61ectionn6eet cult pour la dur6e
sp6cifi6e.
La dur6e d'attentepeut 6tre programm6ede 10minutes(00:10)
11heures,59 minutes (11:59).
Programmation d'un cycle de cuisson courante
differee :
1. Appuyer sur Jatouche Delay(D6marragediff6r6).
• Lemot DELAY(ATTENTE)clignote. Delay
• 00:00clignote _ rafficheur.
2. Appuyer sur Ia touche A ou _' pour program-
mer la dur6e d'attente.
AIorsque le mot DELAYclignotetoujours
3. Appuyer sur la toucheCook& Hold (Cuisson
et maintien).
• 000s'allume _ J'afficheur.
Cook&
, LosrootsBAKE(CUISSONCOURANTE) Hold
et HOLD(MAINTIEN)clignotent.
4. Appuyer sur A pour programmerlatemp6raturede cuisson.
• 00:00et le mot HOLDclignotent.
• Lemot BAKErestealium6.
5. Appuyer sur A pour programmerladur6e decubson.
o Ladur6ed'attente, les rootsDELAY,BAKEet HOLDs'allument
rafficheur.
Lorsque la dur6e d'attente s'est 6coul6e :
• Le mot DELAYs'6teinL
• La dur6e de cuissonestaffJchee.
• LosrootsBAKEet HOLDsont affich6s.
Pour programmer un temps d'attente lorsque la
fonction cuisson et maintien a de]_ 6t6
programmee :
1, Appuyer sur JatoucheDelay (D6marragediff6r6),
, Le mot DELAY[ATTENTE}clignote.
Delay
• 00:00parait b I'afficheur.
2. Appuyer sur ia toucheA ou _' pour programmer
ladur6e d'attente.
• Apr@squatre secondes,ie mot DELAYreste
alluredpour rappeler qu'un cycle de cuisson
diff6reea 6t6 programme.
Lorsque ta dur6e d'atte_te s'est 6coulee et que
le four se met e_ marche :
• La dur6e de cuissonet latemp6ratureseraaffJchee.
• Le mot DELAYs'6teint.
•Les rootsBAKEet HOLDresteaJlum6.
A_ulation :
Appuyersur la touche Cancel[Annuie0.
• Touteslos fonctionsde cuissonmJnut6eet non
minut6eserontannul6es.
• L'heuredu jour r6apparait8 rafficheur.
_emarques :
Ne pasutJiiserla cubson diff6,,r6epour des articlesqui
n6cessitentque le four soit pr6chauff6,comme los g_teaux,
Jespetits biscuitset ies pains.
Ne pasutJliserle cycle de cuissonet maint[endiff6r6ssile
four estd_]_ chaud.
42
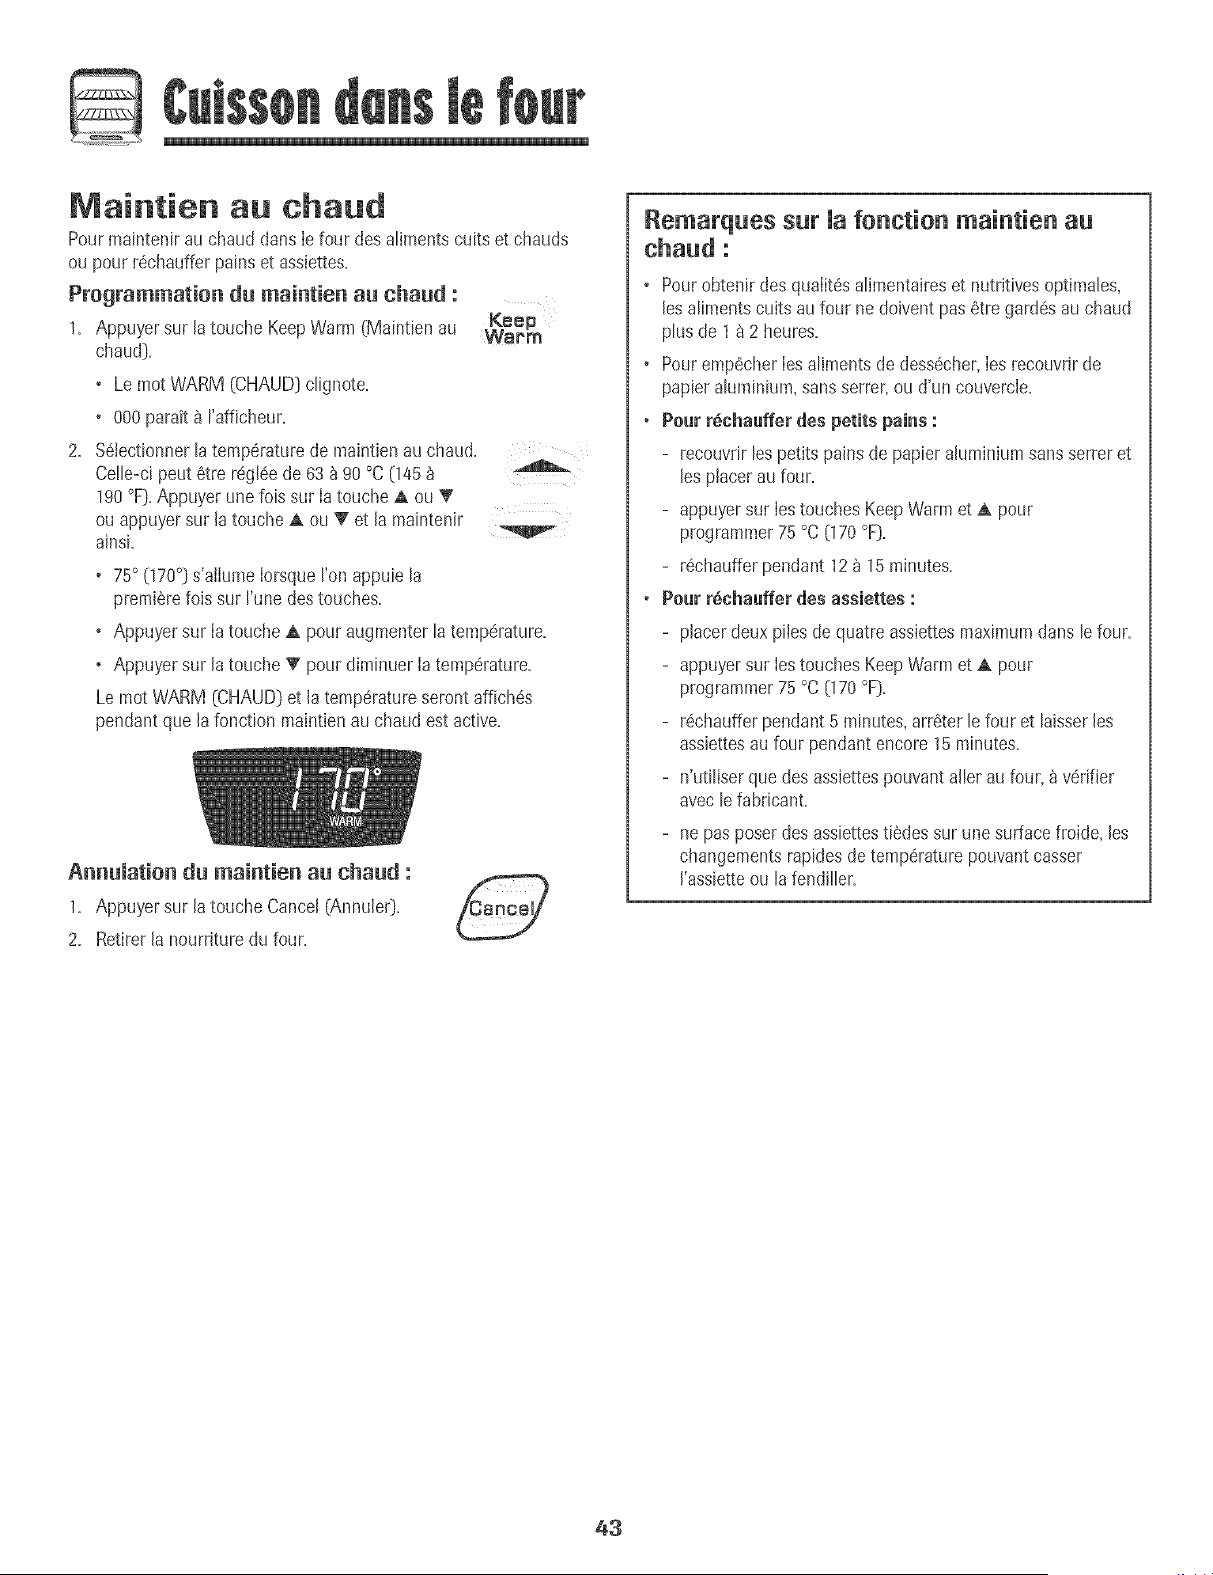
Maintien au chaud
Pourmaintenirau chaud dans[e four desaliments cuits et chauds
ou pour r6chaufferpains et assiettes.
Programmation du maintien au chaud :
Keep
1_ Appuyer sur la touche KeepWarm (Maintien au WaPm
chaud).
, Le mot WARM (CHAUD)ctignote.
• 000parait8 rafficheur.
2. %iectionner latemperaturede maintienau chaud.
Ce!le-cipeut etre reglee de 63_ 90 °C(145 _
190°F).Appuyer unelois sur Ia toucheA ou T
ouappuyersur la toucheA ou T et la maintenir
ainsi.
• 75° (170°] s'ailume lorsqueron appuie la
premierefois sur I'unedestouches.
• Appuyer sur Ia touche A pour augmenterla temperature.
• Appuyer sur la toucheT pour diminuer Iatemperature.
Lemot WARM (CHAUD]et la temperatureseront affiches
pendantque la fonction maintien au chaud est active.
Annumation du maintien an chaud :
1. Appuyer sur la touche Cancel(Annule0.
2. Retirerla nourriture du four.
Remarques sur Uafonction maintien au
chaud :
• Pourobtenir des qualites alimentaireset nutritives optimales,
lesalimentscults aufour ne doivent pas etre gardesau chaud
plus de 1 a 2 heures.
• Pourempecher Iesaliments de dessecher,Ies recouvrir de
papieraluminium,sanssetter,ou d'un couvercle.
• Pour r_chauffer des petits pains :
- recouvrirlespetits pains de papier ahminium sansserrer et
les placerau four.
- appuyersur Iestouches KeepWarm et A pour
programmer75°C [170°F).
- rechaufferpendant 12 _ 15minutes.
• Pour r_chaaffer des assiettes :
- placerdeux piles de quatre assiettesmaximumdans [efour.
- appuyersur Iestouches KeepWarm et A pour
programmer75°C {170°F}.
- rechaufferpendant5 minutes,arreter le four et hisser les
assiettesau four pendant encore 15 minutes.
- n'utiliser quedes assiettespouvantaller aufour, _ verifier
avec le fabricant.
- nepas poserdes assiettestildes sur une surfacefroide, les
changementsrapidesde temperaturepouvantcasser
I'assietteou la fendiller.
43

Arr t auto atique/Mode
Lefour s'arreteautomatiquementapres12heuress'il a 6tO
accidentelbment laisseen marche.Cettecaracteristiquede securite
peut etre arretee.
Pour annuler l'arr_t 12 heures et faire fonctionner le
four en continu pendant 72 heures :
1= Programmerle four pour une cuissoncourante [voir page 41).
2= Appuyer sur la touche Clock [Horlogd}et la
maintenirainsipendant 3 secondes= Olock
• SAb sera affiche et clignotera pendant 5 secondes=
• SAb sera ensuite affiche en continujusqu'_ ce qu'on rarrete ou
iusqu'b ce que ia dureelimite de 72heuressoit atteinte=
• Lemot BAKE(CUISSONCOURANTE)sera aussiaffichesi un
cyciede cuissoncourante esten cours alors que le four est en
modesabbat=
Toutes iesautres fonctions [Minuterie,Maintien au chaud, Nettoyage,
etc=[}sont verrouillees,sauf BAKE,pendantle mode sabbat=
Annumation de macuisson courante amors que mefour
est en mode sabbat :
Appuyersur la touche Cancel(AnnuIe0=
• Lemot BAKEs'eteintb rafficheur=
• Aucun hip sonorene retentit=
Annumation du mode sabbat :
1= Appuyer sur la toucheClock pendant3 secondes= Olock
OU
2. Apres 72 heures,le modesabbatsetermine.
• SAb clignote pendant 5secondes.
• L'heuredu iour revient8 I'afficheur.
Ajustement de temperature
du four
La precisiondes temperaturesdu four a ete soigneusementverifiee
I'usine=lI est normalde remarquerquelquesdifferencesdans la
cuissonentre un four neuf et un four ancien=Au fur et _ mesureque
Iescuisinieressont moins neuves,la temperaturedu four pout varier=
II est possibIed'ajuster latemperaturedu four si I'on penseque Ie
four necuit pasou ne rissolepas correctement=Pourdecider de
I'ajustement_ apporter,regler le four _ une temperaturede 15 °C
(25 °F)pius eleveeou plus bassoque la temperatureindiqueedans
la recette,pub faire cuire Ia preparation=LosresuItatsdu _test >>de
cuissondoivent donner uneideedu nomb_ede degresduquel la
temperaturedoit etre aiustee=
Ajustement de matemp6rature du four :
1. Appuyer sur Ia toucheBake (Cuissoncourante_. Bake
2. Entrer285 °C[550 °F)en appuyantsur la touche A.
3. Appuyer sur la toucheBake et Ia maintenirainsi
pendant ptusieurssecondesou jusqu'_ ceque 0°
paraisse_ I'afficheur.
Si Ia temperaturedu four a ete precedemmentajustee,Ie
changementseraaffiche.Parexemple,si Ia temperaturedu four
a ete reduitede 8 °C (15°F),I'afficheur indiquera -8° (-15°).
4. Appuyer sur Ia touche A ou _' pour ajusterla temperature.
A chaquefob que ron appuiesur unetouche, latemperature
change de3 °C (5 °F).La temperaturedu four pout etre
augmenteeou diminuee de 3 _ 20 °C (5 _ 35°F).
5. L'heuredu jour reapparaitautomatiquement_ I'afficheur.
IIn'est pas necessairede reajusterIatemperaturedu four en cas
de panne ou d'interruption de courant. Lostemperaturesde
cuissonau gril et de nettoyagene peuventetre ajustees.
Remarques sur Uemode sabbat :
• Le modesabbat peut etre misen marche_ tout moment,que
le four soit en marche ou non.
• Le modesabbat ne pout pas etre mben marchesi Ies
commandossont verrouiileesou laporte verrouiIIee.
• SIle four esten mode cuissonIorsque le modesabbatest
programme,le mot BAKE(CUISSONCOURANTE)s'eteint _ la
fin du cycle de cuisson. II n'y aura aucunsignal sonoreaudible.
• Lorsquele modesabbata demarre,aucun hip de prechauffage
ne retentit.
o Tous Ies messages et les bips sont desactives Iorsque le mode
sabbat est actiE
o Si I'onappuiesur latouche Cancel,un cycle de cuissoncourante
au four sera annule.Cependant,le programmateurresteraen
modesabbat.
o Apres unepannede courant,Ie four revienten modesabbat
avec72heuresrestanteset aucuncycle actif.
44
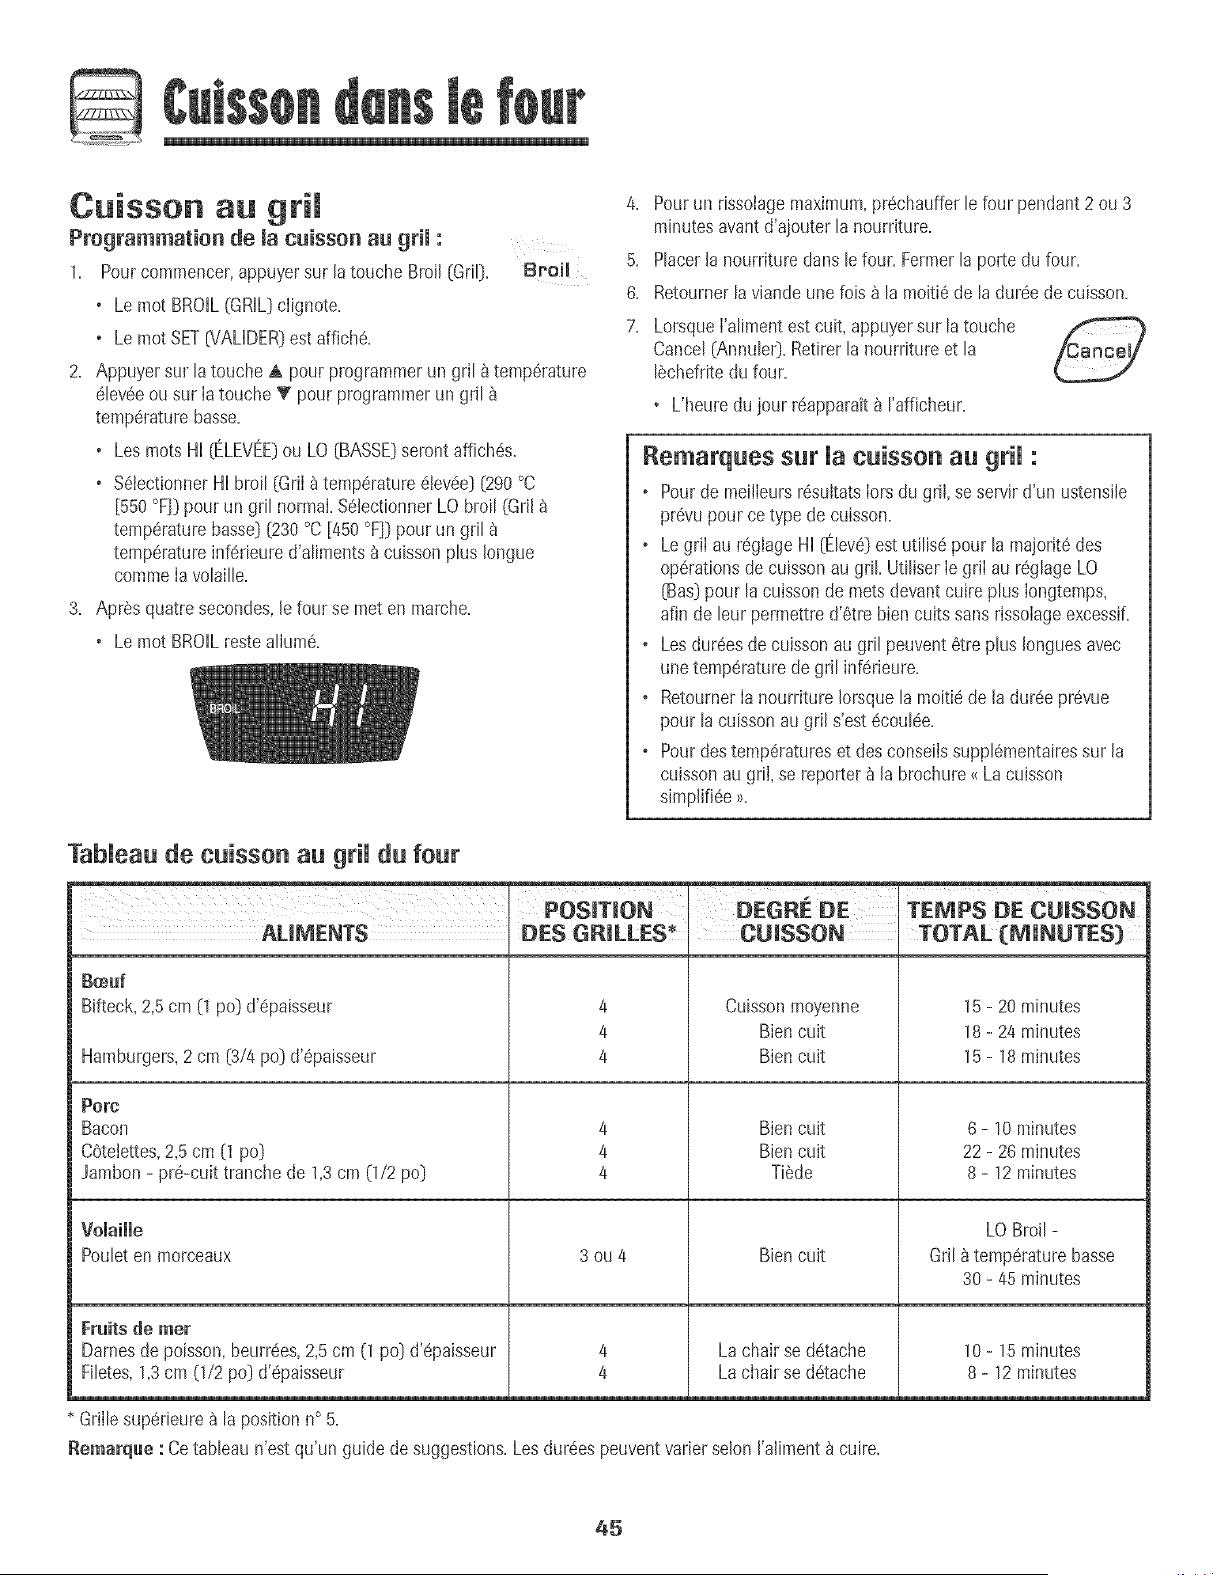
Cuisson au grim
Programmation de la cuisson au grim :
1. Pour commencer,appuyersur la touche Broil [GriD. Broil
o Le mot BROIL(GRIL:clignote.
o Le mot SETUAUDER: est affich6.
2. Appuyersu+latouche A pour programmerun gril 8temp6rature
61ev6eou sur Iatouche T pour programmerun gril
temp6rature basse.
o Les rootsHI (ELEVEE)ou LO (BASSE:serontaffich6s.
o %tectionner HI broil (GriI_ temp6rature6tev6e[[290°C
[550 °F]] pour un gril normal.%lectionner LO broil (Gril
temp6raturebasse)[230 °C[450 °F]: pour un gri!
temp6ratureinf6rieure d'aliments_ cuissonplus Iongue
commeIa volaille.
3. AprSsquatre secondes,le four se meten marche.
o Le mot BROILresteallum&
4. Pourun dssolagemaximum,pr6chaufferle four pendant 2 ou 3
minutesavant d'ajouterla nourrJture.
5. Placer[a nourriture dans le four. Fermerla porte du four+
6. Retoumerlaviande unefois _ la moiti6de ladur6e de cuisson.
7. Lorsquel'alimentest cuit, appuyersur latouche
Cancel(AnnuleO.Retirerla nourriture et la
ISchefritedu four.
• L'heuredu jour r6apparait_ rafficheuL
Remarques sur Uacuisson au grH :
o Pourde meilIeursr6sultats Iorsdu gri+,se servird'un ustensile
pr6vupour ce type de cuisson.
o LegriI au r@glageHI (Elev6Dest utilis_ pour la majorit6des
op6rationsde cuissonau griL Utiliser Ie griI au r6glageLO
(Bas]pour la cuissonde metsdevantcuJreplus Iongtemps,
afin de leur permettred'6tre bien cults sansrissolageexcessif.
o Lesdur6esde cuissonau gril peuvent6tre plus Jonguesavec
unetemp6raturede gdl inf6rieure.
o RetournerIa nourriture Jorsquela moiti6 de Jadur6e pr6vue
pour la cuissonau gril s'est6coul6e.
o Pourdestemp6ratureset des conseiJssuppl6mentairessur Ja
cuissonau griJ,se reporter_ Jabrochure{<Lacuisson
simpli%e _>.
TabUeau de cuisson au griU foBr
POSITION OEGRE OE TEMPS DE CUISSON
AM_ENTS DES G_LLES+
Bifteck, 2,5 cm (1 pod d'#paisseur
Hamburgers, 2 cm (3/4 pod d'6paisseur
Pot'c
Bacon
COtetettes,2,5 cm (1 pod
Jambon- pre-cuit tranche de 1,3cm 0/2 pod
4
4
4
4
4
4
CUISSON
Cuissonmoyenne
Biencuit
Biencuit
Biencult
Biencuit
TiSde
TOTAL (_NUTES)
15 - 20 minutes
18 - 24 minutes
15 - 18 minutes
8 - 10 minutes
22 - 26 minutes
8 - 12 minutes
Volaille
Pouleten morceaux
F_its de me_
Dames de poisson, beurr6es, 2,5 cm (1 pod d'6paisseur
Filetes, 1,3 cm (1/2 pod d'#paisseur
3ou4
4
4
Bien cuit
Lachair se d6tache
Lachair se d6tache
LO Broil-
Gril a temp6rature basse
30 - 45 minutes
10 - 15 minutes
8 - 12 minutes
Grillesuperieure_ la position n° 5.
Remarq_e : Cetableau n'est qu'un guidede suggestions.Lesdur6es peuventvarierselon I'aliment_ cuire.
45
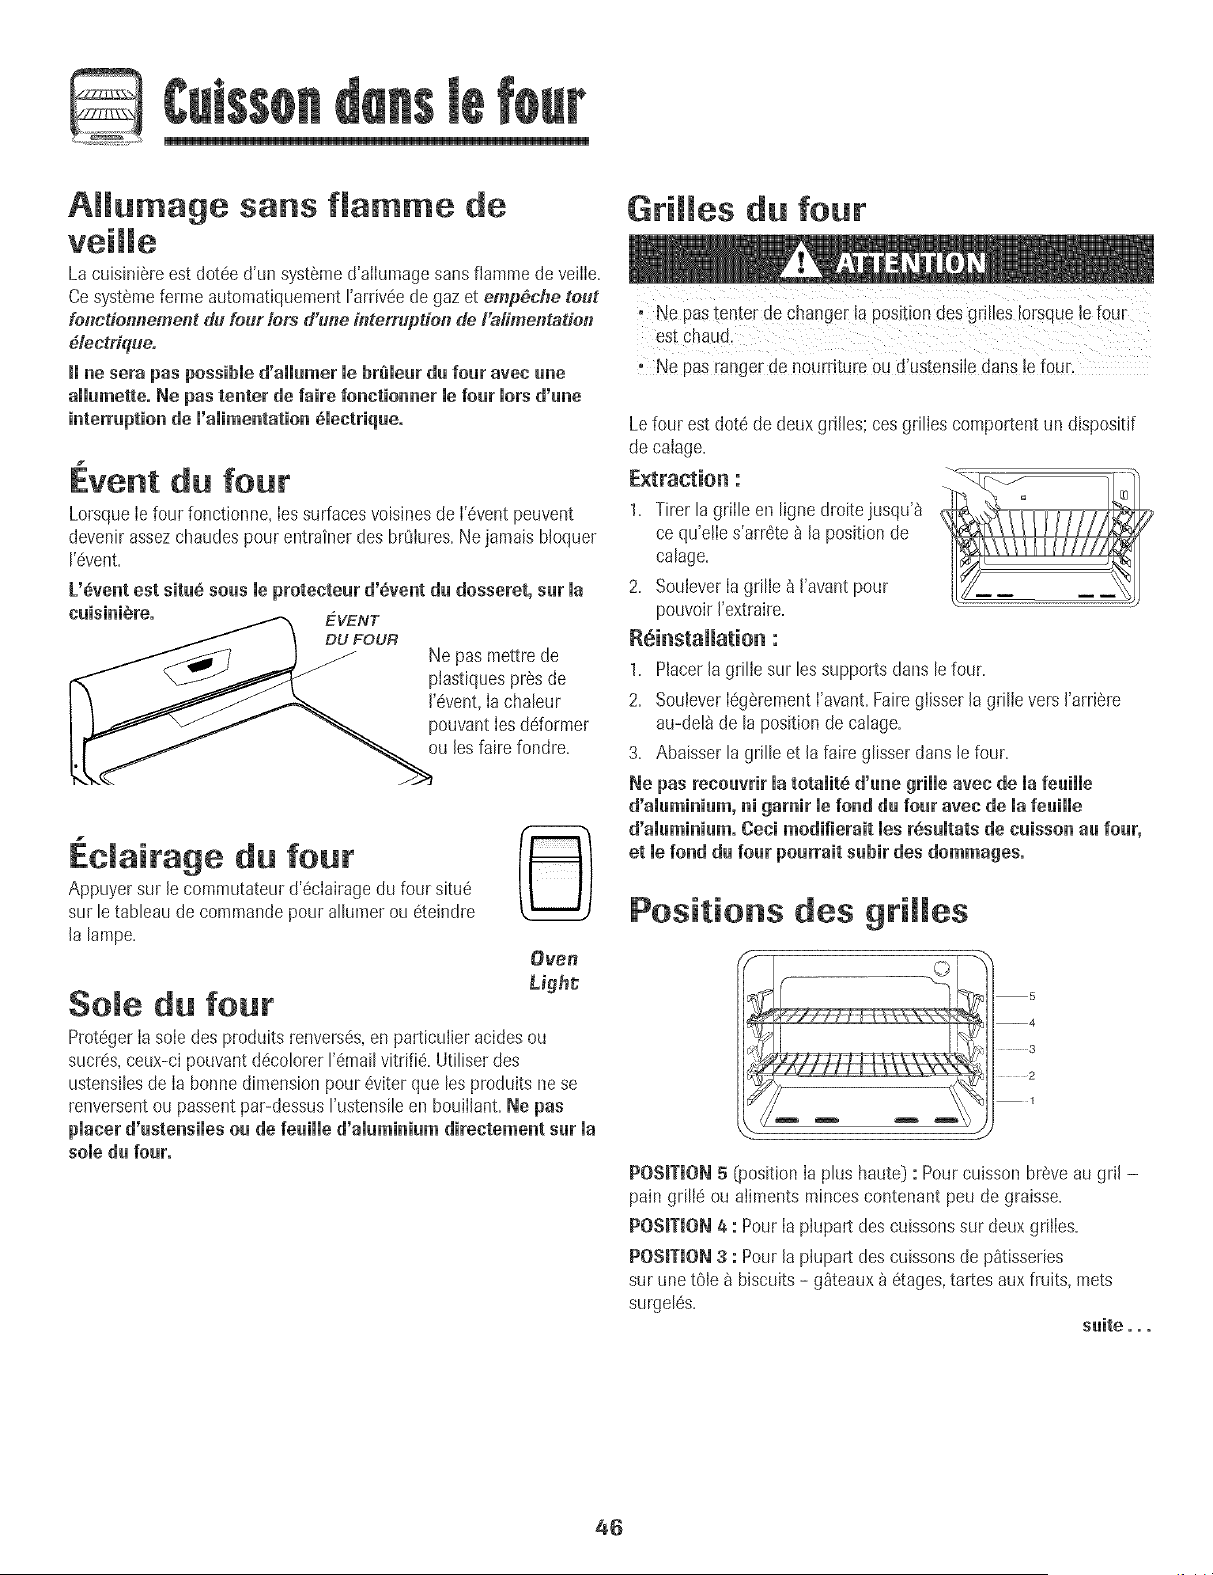
AHumage sans flamme de
Grilles du four
La cuisiniSre est dot6e d'un systSme d'aiIumage sans flamme de veiIIe+
Ce syst_me ferme automatiquement Fardv6e de gaz et emp#cfle tout
fol_cdomleme#t du four/ors d'une i#terruptien de/'a/imentatien
4/ectrique.
_i ne sera pas possible d'aiiemer mebr_ieer de feet even erie
ammemette.Ne pas tenter de faire fonctionner mefeet morsd'ene
interruption de m'emimentetion_mentriqee,
1
Event du four
LorsqueIe four fonctionne, Ies surfacesvoisinesde I'6ventpeuvent
devenirassezchaudes pour entrainer des brQIures+Ne jamais bloquer
1'6vent+
U_vent est site_ sees meprotenteer d'bvent de dosseret, set la
neisini_re. _ EVENT
/ I DU FOUR
/_-j J _ Ne })asmettre de
__" plastiquesprosde
I _ ___ +'+vent,I_ob_+eur
I _ _ _ pouvantIesddormer
LL<j ,o+++++o+
EcJaitage du four
Appuyersur le commutateurd'6cIairagedu four situ6
sur le tableau de commandepour allumerou 6teindre
la lampe+
Sole du four
even
Mght
Prot6gerIasoIedes produitsrenvers6s,enparticu+ieracidesou
sucres,ceux-ci pouvantd6colorer1'6mailvitrifi& Utiliserdes
ustensilesde Ia bonne dimensionpour 6viterque les produits nese
renversentou passentpar-dessusI'ustensileen bouiIlant+Ne pes
placer d'estensimesoe de feeimmed'ameminiemdirectement set me
somede feet,
+ Ne pastenter de changer Japositiondes gdlles Iorsquelefour
estChaud.
+No pas rangerde nourr+tureou d'ustens+Jedans lefour.
Le four est dote de deuxgriJles;cesgrilIescomportentun dispositif
de calage.
1. Tirer la grille en ligne droitejusqu'_ X_'r_ T_FFYFFF_
ce qu'elIes'arr6te_ laposition de _rrrrFF_Frr _
2+ Souleverla grille _ ['avantpour
pouvoir['extraire+
R6installation :
1+ PlacerJagrille sur lessupports clanslefour.
2+ Soulever[eg6rement['avanLFaireglisser [a grilievers ['arrJ_re
au-del_de la positionde calage+
3+ Abaisserla grille et la faire glisser darts [e four.
Ne pes renoevrir la totemit_d'ene grille evec de la feeille
d'alemimem,m gemir mefond de feet evec de la feeille
d'aleminiem. Oeni modifiereit los r6semtetsde neisson ee feet,
et mefond de feet poerreit sebir des dommeges.
Positions des griJJes
POSITION5 _osition Ia plus haute) : Pour cuisson breveau gril -
pain grille ou aliments mincescontenant peu de graisse.
POSITION4 : Pour Ia plupart descuissonssur deuxgrilles.
POSMON 3 : Pour la plupart descuissonsde p_tisseries
sur une t6le _ biscuits- g_teaux _ _tages,tartes aux fruits, mets
surgel_s.
seite o. °
46
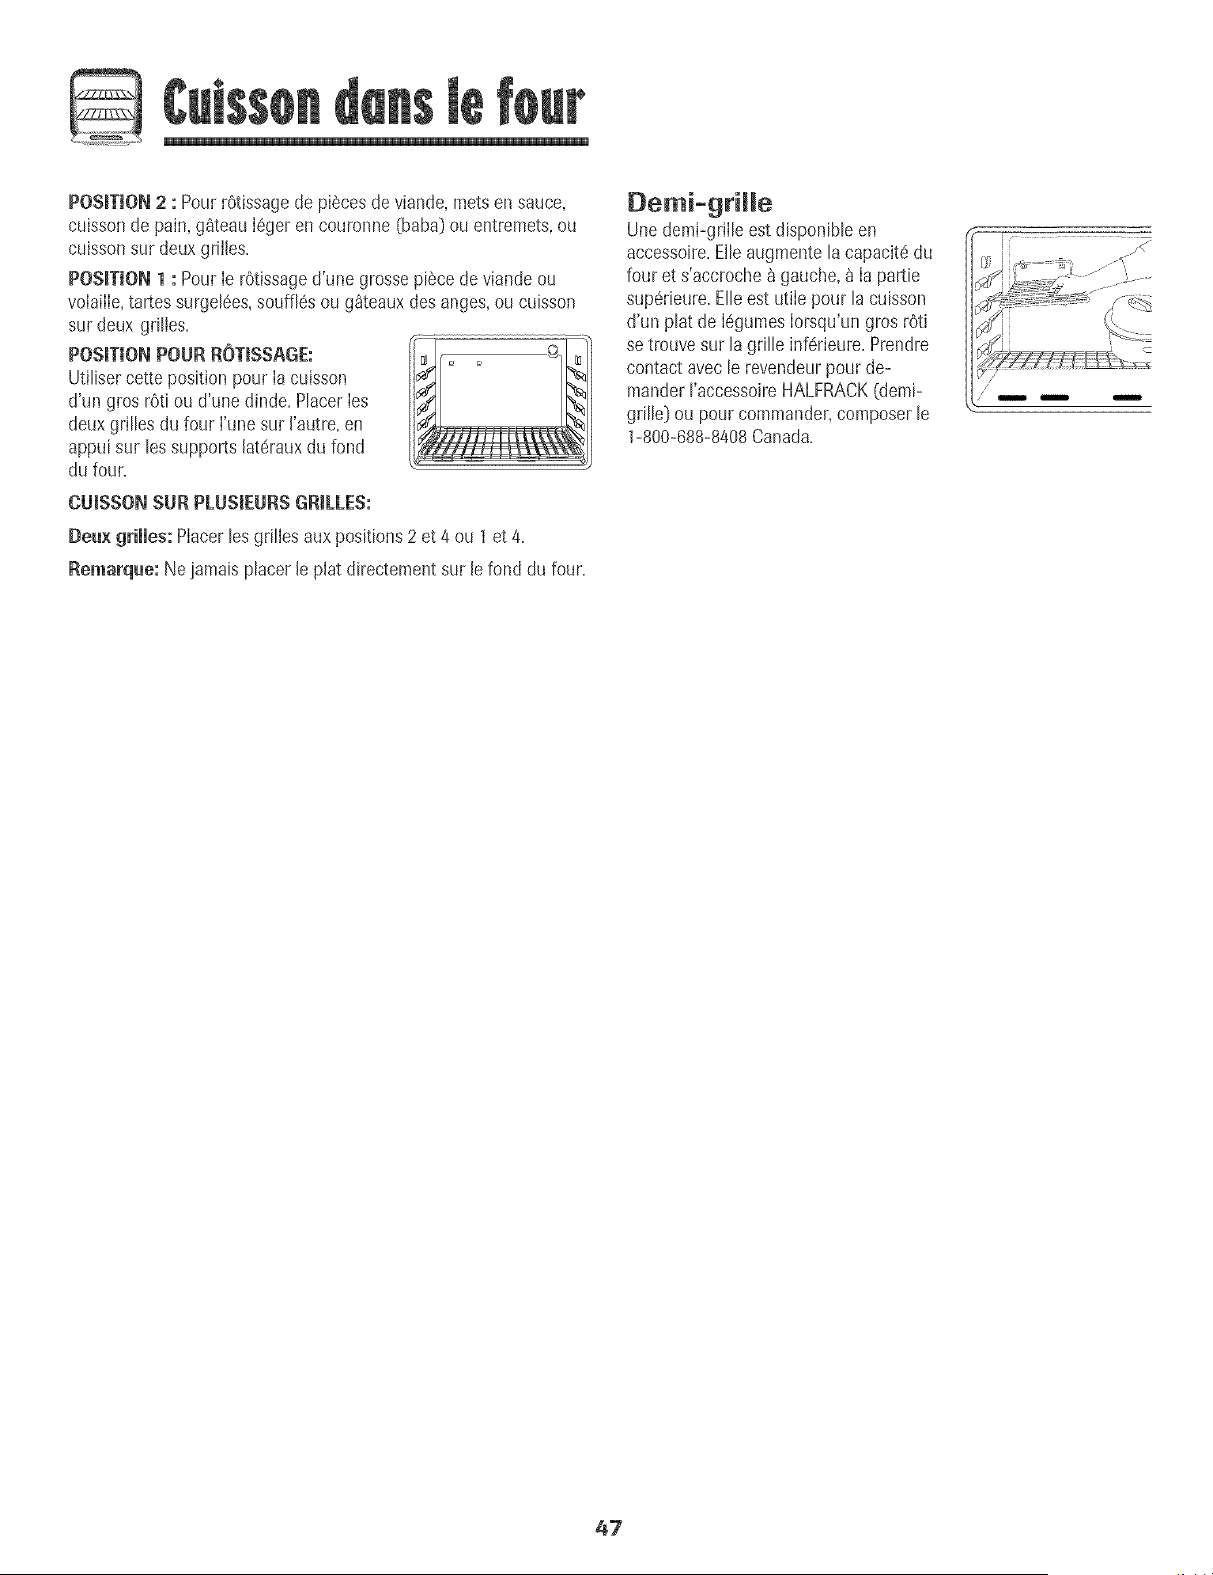
POSmON 2 : PourrOtissagede piecesde viande,mets ensauce,
cuissonde pain,g_teau I6geren couronne [baba)ou entremets,ou
cuissonsur deux grilles+
POSITION1 : PourIe rOtissaged'une grossepiecede viandeou
voIaiNe,tartes surgelees,soufflesou g_teauxdes anges,ou cuisson
sur deux grilles+
POSITIONPOURROTISSAGE: 9
UtiNsercette positionpour Ia cuisson
d'tm gros rOtiou d'une dinde+PlacerIes
deux grilles dufour I'unesur I'autre,en
appuisur [essupports [aterauxdu fond
du four,
CUISSONSUR PLUSIEURSGR+LLES:
Deu× griJJes:PIacerles griNesauxpositions2 et 4 ou 1et 4+
Remarque: Ne jamais placer leplat directementsur lefond du four,
Demi-grille
Une demi-griNeestdisponiNeen
accessoire=ENeaugmentela capacit6du
four et s'accroche&gauche,&Ia pattie
superieure+Elle est utiIe pour la cuisson
d'un plat de I%umes Iorsqu'ungros rOti
se trouvesur la grille inf6rieure+Prendre
contactavecle revendeurpour de-
mander I'accessoireHALFRACK(demi-
grille] ou pour commander,composerle
1-800-688-8408Canada+
4?
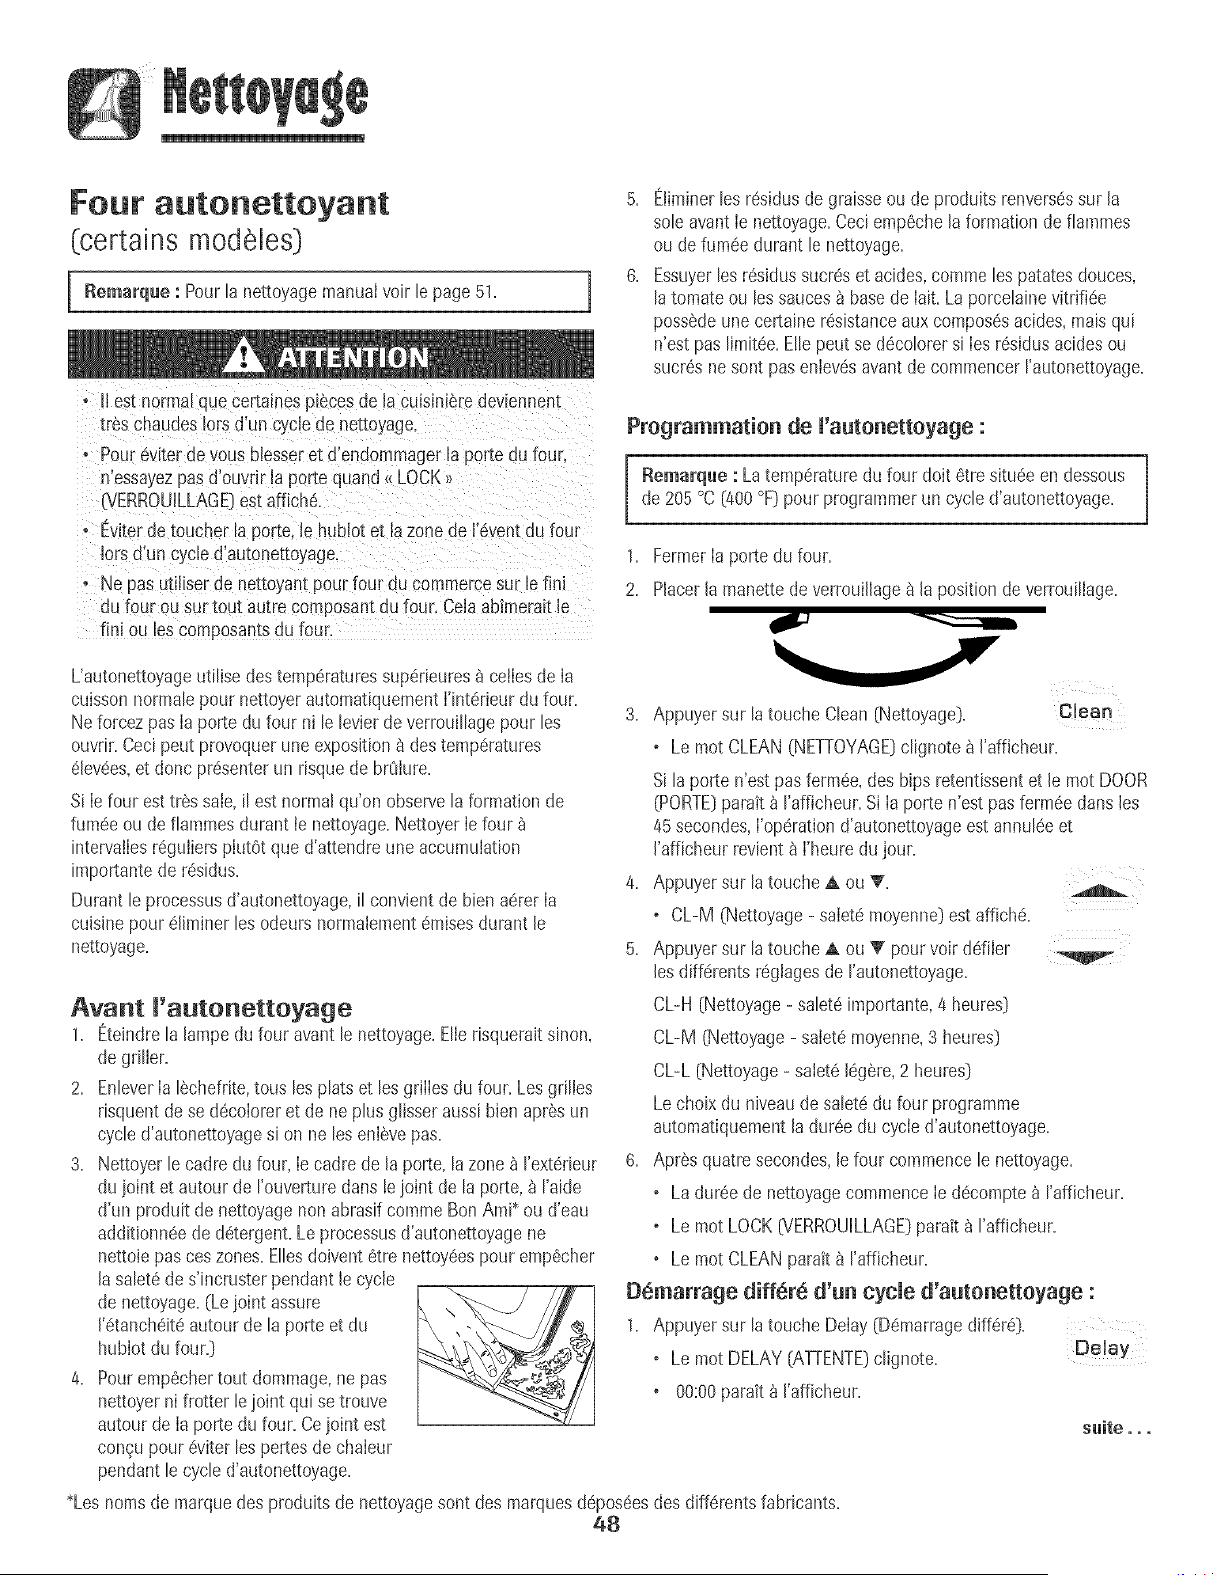
Four autonettoyant
(certains modeles)
Remarque : Pour[a nettoyagemanua[voir [e page 51+
Eliminerlesresldusde graisseou de produitsrenversessur [a
sole avantIe nettoyage+Ceciempechelaformation de fiammes
ou de fumeedurant le nettoyage+
Essuyerles resldussucreset acides,comme lespatatesdouces,
latomate ou les sauces_ basede lait+La porcelainevitrlfiee
possedeune certaine resistanceaux composesacides,maisqui
n'est pas Ilmitee+E!lepeut se decolorersi les resldusacidesou
sucres nesont pas enlevesavant de commencerrautonettoyage+
. 11est normmque certamespiecesde la cuis+ni_redeviennent
Ires chaudeslots d'un cyclede nettoyage.
. Pour evite+de vous blesseret d'endommagerla pore ou Tour.
n'essayezpas d'ouvdr la porte quand _ LOCK..
(VERROUILLAGE)estafliche.
- Ev+terde toucher la porte.[e hublot et [azone de I'evenTdu four
Iorsd'un cycle d'autonettoyage
o Ne pas utiliser de net[oyampour four du commercesur [e fini
du four ou surtout autre composantdu four. Celaabtmeraitle
fini ou les composantsdu four.
L'autonettoyageutilisedes temperaturessuperieures_ celies de Ia
cuisson normalepour nettoyerautomatiquementl'interieurdu four.
Neforcez pas la porte du four nlle levierde verrouillagepour les
ouvnr.Cecipeut provoquerune exposition8 destemperatures
elevees,et donc presenterun risquede brOlure.
Si le four est tres sale,il est normalqu'on observela formationde
fumeeou de flammesdurant Ie nettoyage.Nettoyerle four
intervallesreguliersplutOtque d'attendreune accumulation
importantede residus.
Durantle processusd'autonettoyage,il convlentde bienaerer la
cuisinepour ellminer les odeursnormalementCruisesdurant le
nettoyage.
Programmatien de l'autonetteyage :
[ Remarque : Latemperaturedu four dolt etre situeeen dessous
de 205 °C (400 °F)pour programmerun cycle d'autonettoyage.
1. Fermerla porte du four.
2. Placer la manette de verrouiilage _ la position de verrouiIiage,
3,
Appuyersur la touche Clean (Nettoyage}. Clean
o Le mot CLEAN(NETTOYAGE}cIignote_ ['afficheur.
4,
5,
Si la porte n'est pasfermee,des bJpsretentissentet le mot DOOR
(PORTE}paratt_ I'afficheur.Sila porte n'est pasfermeedans les
45secondes,['operationd'autonettoyageest annuIeeet
I'afficheur revienta l'heure dujour.
Appuyersur [atouche A ou T.
o CL-M (Nettoyage- saletemoyenne}estaffiche.
Appuyersur la touche A ou T pourvoir defiler
les differentsregiagesde rautonettoyage.
Avant ['autonettoyage
1+ Eteindrela lampe du four avant le nettoyage+EIierisqueraitsinon,
de griIier+
2+ EnIever[a Iechefrite,tousles plats et lesgriiies du four. Lesgrilles
risquentdese decoioreret de ne plus gIisseraussi bien apres un
cycle d'autonettoyagesi on ne lesenievepas+
3+ Nettoyer le cadre du four, [ecadre de la porte,la zone_ rexterieur
du joint et autour de rouverturedartslejoint de la porte,_ I'aide
d'un produit de nettoyagenonabrasifcomme BonAmi* ou d'eau
addit[onneede detergent+Le processusd'autonettoyagene
nettoiepas ceszones.EIIesdoivent etre nettoyeespour empecher
lasaIetede s'incrusterpendant le cycle
de nettoyage+(Lejoint assure
I'etancheiteautour de la porte et du
hublot du four.}
4. Pourempechertout dommage,ne pas
nettoyerni frotter lejoint qui se trouve
autour de la portedu four.Cejoint est
congu pour eviter les pertes de chaleur
pendantle cycle d'autonettoyage.
CL-H (Nettoyage- saleteimportante,4 heures}
CL-M (Nettoyage- saletemoyenne,3 heures}
CL-L (Nettoyage- saietelegere,2 heures}
Le choix du niveau desaIetedu four programme
automatiquementla duree du cycle d'autonettoyage.
6. Apres quatresecondes,lefour commencele nettoyage.
o La duree de nettoyagecommencele decompte_ I'afficheur.
o Le mot LOCK6iERROUiLLAGE}parait _ I'afficheur.
• Le mot CLEANparait _ rafficheur.
Demarrage diff_r_ d'un cycle d'autenetteyage :
1. Appuyersur latouche Delay (Demarragediffere}.
o Le mot DELAY(ATTENTE}cIignote. Delay
+ 00:00paratt_ I'afficheur+
suite,,,
*Lesnomsde marquedes produitsde nettoyagesont des marquesdeposeesdes differentsfabricants.
48
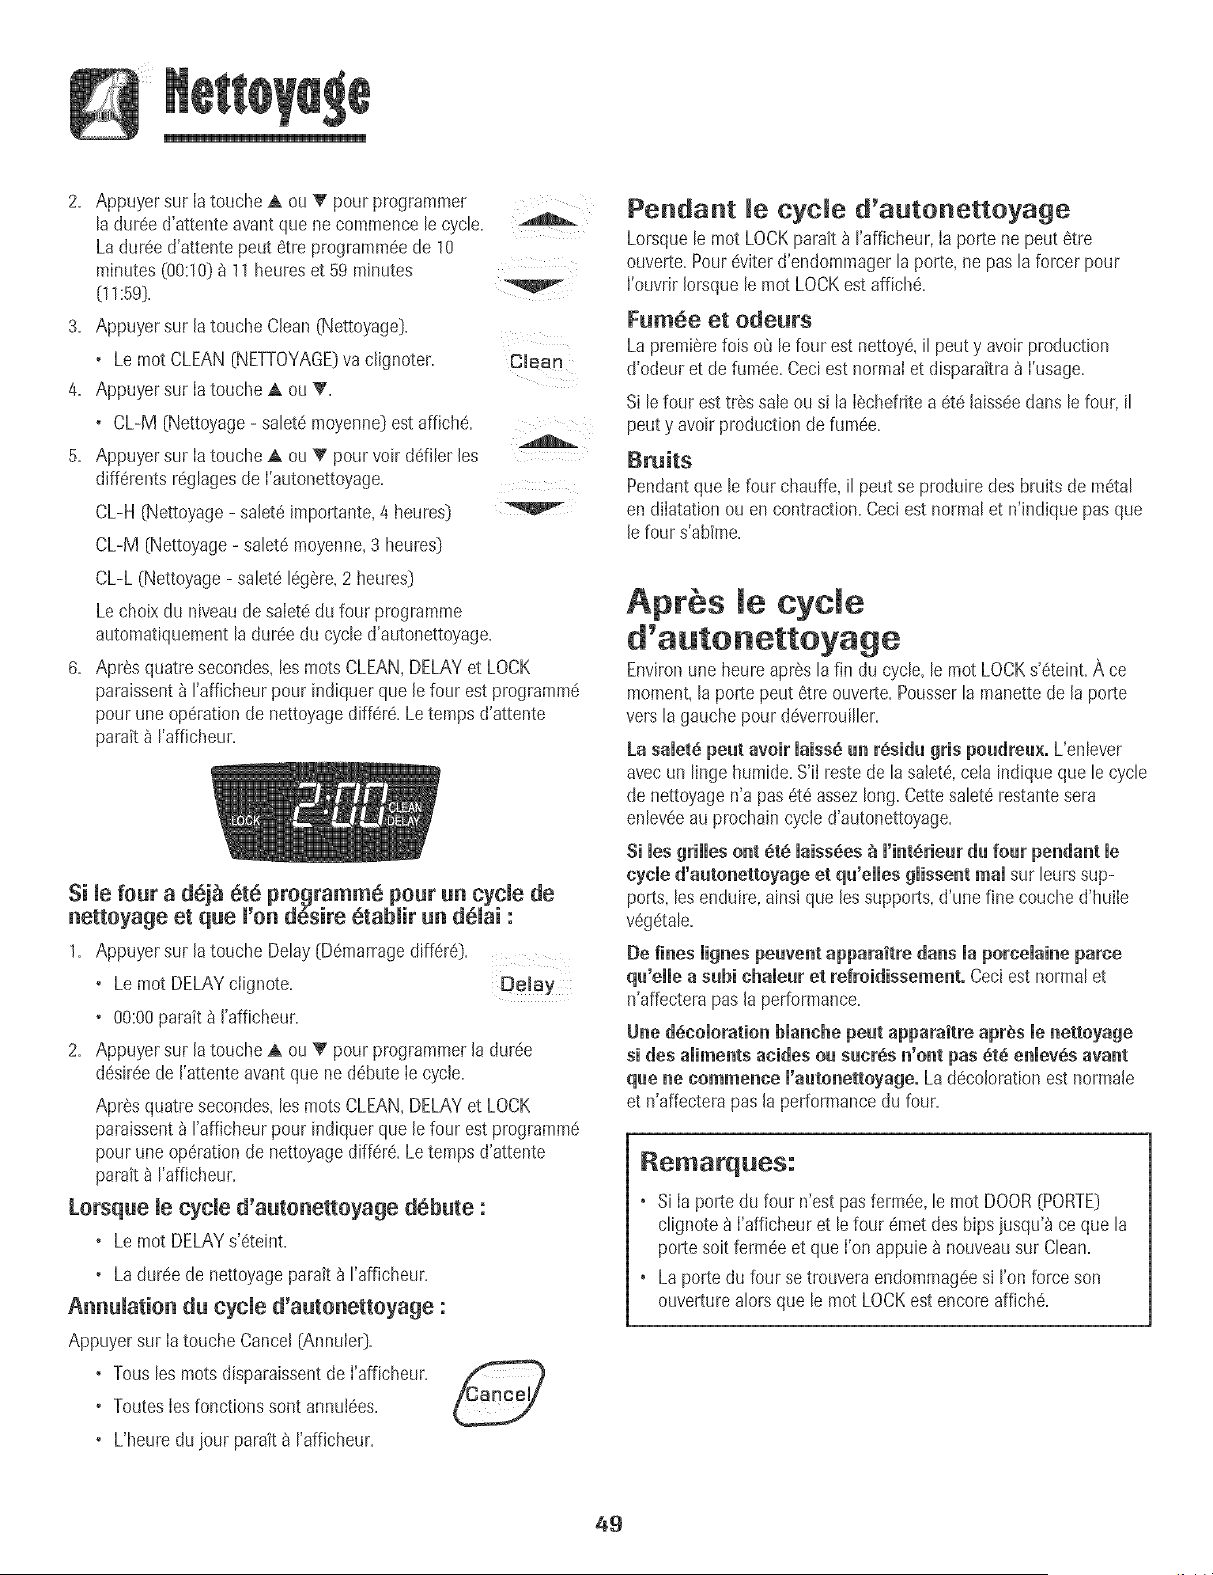
2. Appuyer sur Ia touche A ou T pour programmer
la dur@ d'attenteavantque ne commence b cycle.
Ladur@ d'attente peut 6tre programm@de 10
minutes(00:10}_ 11heureset 59 minutes
[++:59}.
V
3. Appuyer sur Jatouche Cban (Nettoyage}.
+ Le mot CLEAN(NETTOYAGE)va clignoter. Clean
4. Appuyer sur Ia touche a, ou _'.
+ CL-M (Nettoyage- sabt6 moyenne}est affiche.
5. Appuyer sur Ia touche A ou _' pour voir ddJler Jes
diff6rentsr6glagesde I'autonettoyage.
CL-H{Nettoyage- saJet6importante,4 heures}
CL-M (Nettoyage- salet6moyenne,3 heures}
CL-L (Nettoyage- sabt@16g@re+2 heures}
Lechoixdu niveaude salet6du four programme
automatiquementladur6e du cycb d'autonettoyage.
6. Apr@squatre secondes,les roots CLEAN,DELAYet LOCK
paraissent_ rafficheur pour indiquerqua Jefour est programme
pourune op6rationde nettoyagecliff@r6.Letemps d'attente
parait _ I'affJcheur.
Si le four a de]_ eta programme pour un cycle de
nettoyage et qua l'on desire etablir un dalai :
1. Appuyer sur Jatouche Delay(D6marragediff6r@.
• Lemot DELAYciignote. De!aY
+ 00:00parait _ I'afficheur.
2. Appuyer sur Jatouche A ou Y pour programmerJadur@
d6sir@de J'attenteavantqua ne d6bute Ie cycle.
Apr@ quatre secondes,les rootsCLEAN,DELAYet LOCK
paraissent_ rafficheur pour indiquerqua Jefour est programme
pourune op6rationde nettoyagediff6r6. Letemps d'attente
parak _ I'affJcheur.
Lorsque le cycle d'autonettoyage debute :
• Lemot DELAYs'6teint.
+ La dur6e de nettoyageparait _ I'afficheur.
Annulation du cycle d'autonetteyage :
Appuyersur Iatouche Cancel {Annub0+
+ Tous bs rootsdisparaissentde I'afficheur+
+ ToutesIesfonctionssent annul@s+
• L'heuredu jour parait_ rafficheur+
Pendant Je cycle d'autenetteyage
Lorsquele mot LOCKparak _ raffbheur, Ia porte ne peut 6tre
ouverte.Pour@iter d'endommagerla porte, ne pasla forcer pour
l'ouvrJrIorsquele motLOCKest affich6.
Fumee et odeurs
La premierefois o8 lefour est nettoye, peut y avoir production
d'odeur et de fum@. Ceciest normal et disparattraa I'usage.
Si le four est tr6s sab ou si la I@hefritea 6t6 laiss@dans le four, il
peut y avoir productionde rum@.
Bruits
Pendantqua lefour chauffe,[Ipeut se produiredes bruits de m6tal
en diIatationou en contraction.Ceci est normal et n'ind+quepasque
le four s'abime.
Apr s le cycle
Environune heure apr@ [a fin du cycle, [e mot LOCKs'6teint, g,ce
moment,laporte peut 6tre ouverte.Pousserla manettede [a porte
versla gauchepour d@errouiller.
La samet6peat aveir maiss6an r6aid_ gris paadrea×. L'enbver
avecun linge humide.S'ii restede lasalet_,cela indique que le cycb
de nettoyagen'a pas 6t6 assezlong. Cettesalet6 restantesara
enlev@au prochain cycled'autonettoyage.
s+leagHHeaont _t_ maiss_es_ m'i_tSriearda fear pendantme
cycle d'aute_ettoyage et qa'eJJesgmissemreal sur burs sup-
ports, lesenduire,ainsJque les supports,d'une fine couche d'huib
v6g_tale.
De fi_es lig_es peave_t apparaitre da_s la porcelai_e parce
qa'elle a sabi chalear et refraidisseme_to Ceciest normal et
n'affecterapas la performance.
U_e d_camaratia_blanche peat apparaitre apr_s me_etteyage
si des aliments acides oa sacrSs _'o_t pas _t_ e_lev_s avast
qae _e comme_ce l'aate_ettoyage. Lad@oloration est normale
et n'affecterapas la performancedu four+
_emarq_es:
+ si Ia porte du four n'est pas ferm@, le mot DOOR{PORTE}
clignote_ I'affbheur et le four @_etdes bips jusqu'_ ce qua la
porte soitfarm@ et que I'onappuiea nouveausur Clean.
+ La porte du four se trouvera endommag@s+Fenforceson
ouverturealors qua le mot LOCKest encore affbh6.
49
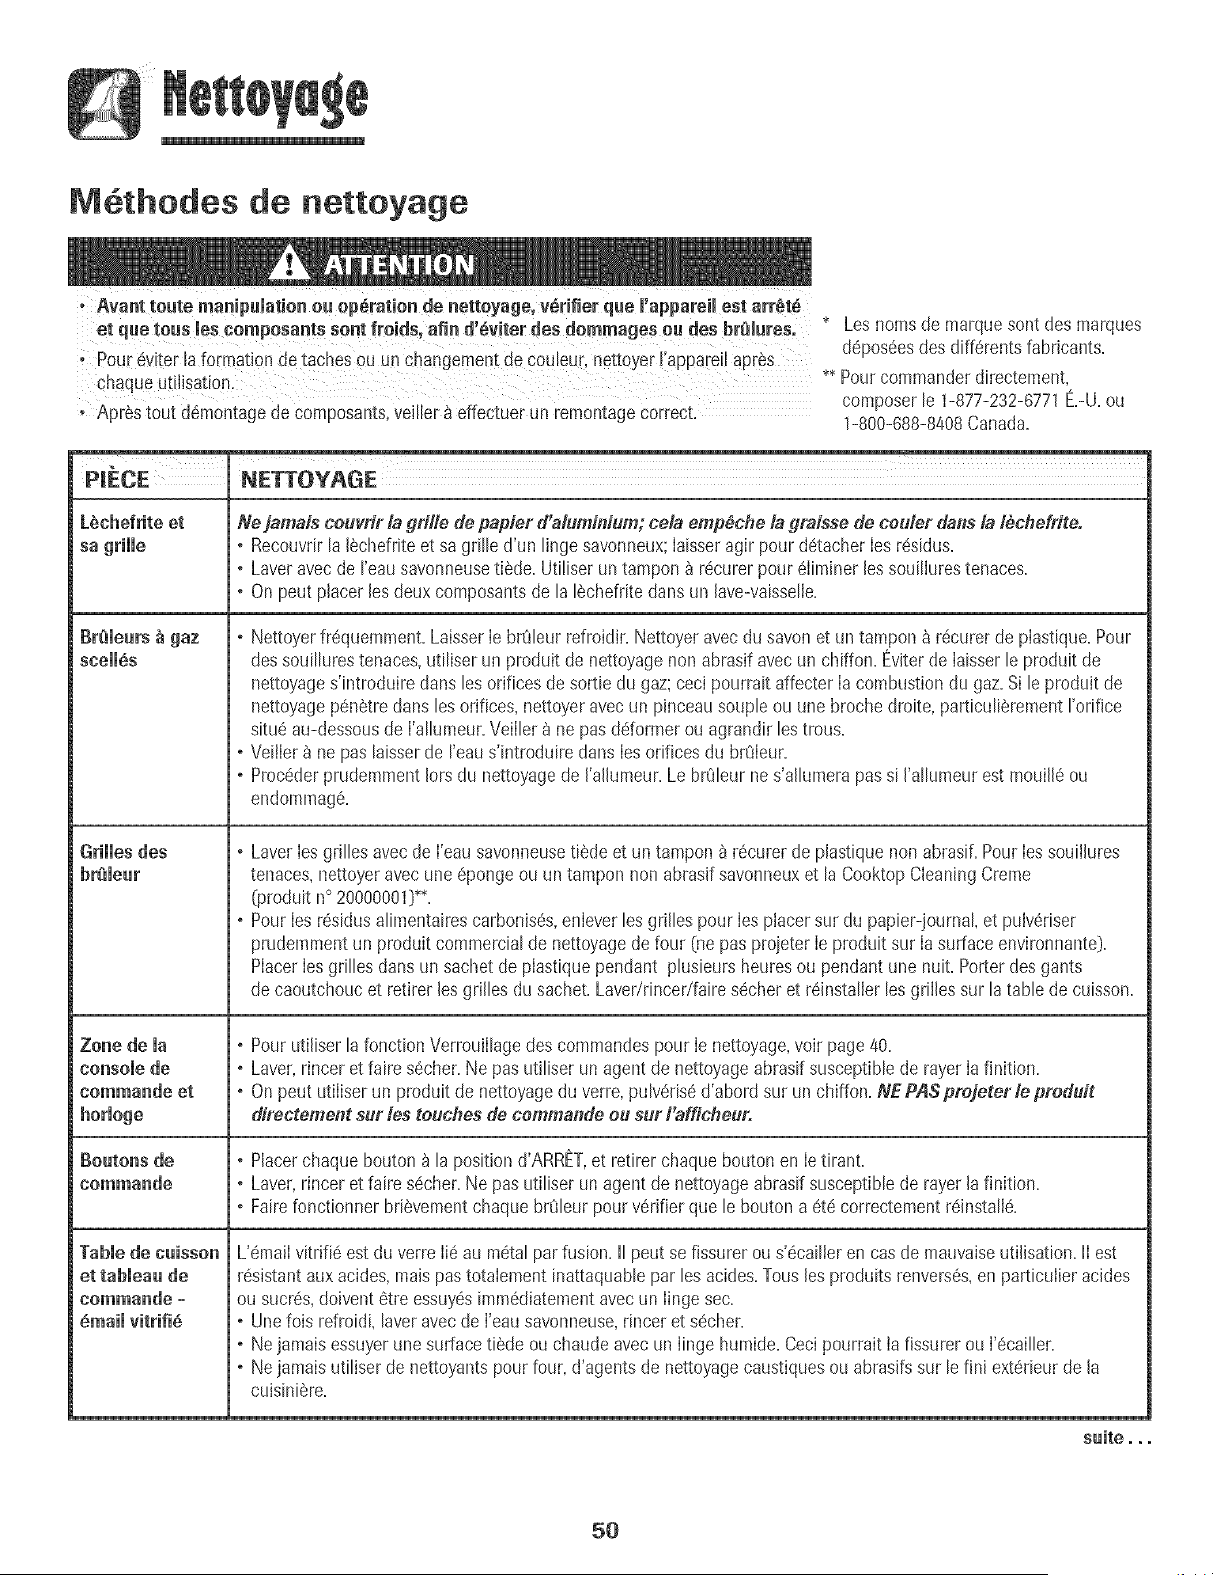
IVl6thodes de nettoyage
_ Avantroute manipumatieneu operation de netteyage, v_rifiet que l,appareil est arr_t_
et que teusles eenlpesants sent freids, afie d,6_itet des demmages eu des brCllures. * Lesnomsde marquesent des marques
' POUr8viter la formation de {aches ou un Ohangementde €ouieur nett0 er i,appareila r_s d6pos6esdes diff6rentsfabricants.
, Y P
chaque utilisation. *_Pour commanderdirectement,
composerle 1-877-232-6771E.-U.ou
, Apr_stout d6montagede composants,vei!ler_ effectuerun remontagecorrect. 1-800-688-8408Canada.
HECE NET[OYAGE
L_ehefriteet He jamafs ceuvrir la grille de papfer d'aiuminium;cela emp_che la ffmisse de ceuler dalls/a f_chefrite.
. Recouvdrla I_chefriteet sa grille d'un linge savonneux;Iaisseragir pour d_tacher Ies r6sid_Js=
o Laveravecde I'eausavonneusetiSde.Uti!iserun tampon _ recurer pour6Iiminer les souillurestenaces.
o On peut placer lesdeux composantsde la 18chefriteclansun lave-vaisselle.
gr_leurs _ gaz o Nettoyer %quemment. LaisserIe brOleurrefroidir.Nettoyeravecdu savon et un tampon & r6curer de piastique.Pour
seell_s des souillurestenaces,utiliser un produit de nettoyagenon abrasif avec un chiffon. Eviterde Iaisserle produit de
nettoyages'introduireclansles orifices desortie du gaz; ceci pourrait affecter Iacomb[Jstiondu gaz.Si le produit de
nettoyagep6netreclansles orifices,nettoyeravecun pinceausouple ou une brochedroite, particulierementI'orifice
situ6 au-dessousde I'allumeur.VeiIler _ ne pasddormer ou agrandirles trous.
o VeilIer_ ne pas hisser de I'eaus'introduire clansIesorifices du br_JIeur.
o Proc6derprudemmentIorsdu nettoyagede I'alhmeur. Le brOleurne s'allumerapas si I'allumeur estmouill6 ou
endommag6.
Grilles des . Lave1Iesgrilles avec de I'eausavonneusetilde et un tampon _ r6curerde plastiquenon abrasif.Pour Iessouilhres
brelear tenaces,nettoyeravecune6pongeou un tampon non abrasifsavonneuxet la CooktopCleaningCreme
(produit n° 20000001_f_.
o Pour Ies r6sidus alimentairescarbonis6s,enleverles grilles pourIes placer sur du papier-journal,et pulv6riser
prudemmentun produit commercialde nettoyagede four (ne pasprojeter Ie produit sur Iasurface environnante).
PlacerIes grilles dansun sachet de plastiquependant plusieursheuresou pendant une nuit. Porterdes gants
de caoutchouc et retirer les grilles du sachet.Laver/rincer/fairesecher et r6installer les grilles sur la table de cuisson.
Zone de la o Pour utiliser la fonctionVerrouillagedes commandespour Ie nettoyage,voir page40.
console de o Laver,rincer et faire s6cher.Ne pas utiliser un agent de nettoyageabrasifsusceptiblede rayer Iafinition.
eommande et o On peut utiliser un produit de nettoyageduverre,pulv6ris_d'abord sur un chiffon.NEPASp_ejeterlepred_it
borlege directeme_t s_r _este_ches de eemma_de e_ sur Faffiche_r.
Beato_s de o Placerchaque bouton_ lapositiond'ARRET,et retirer chaque boutonen Ietirant=
eomma_de o Laver,rincer et faire s_cher.Ne pas utiliser un agent de nettoyageabrasifsusceptiblede rayer Jafinition.
o Fairefonctionner brievementchaquebr_JleurpourvSrifierque le bouton a et_ correctementr_instalIe.
Table de caisse_ L'emaiIvitrifi6 estdu verre Ii_ au metal par fusion. IIpeut se fissurer ou s'_cailIeren casde mauvaiseutilisation,lI est
et tableaa de r_sistantaux acides,maispastotaIement inattaquablepar les acides.Tousles produitsrenvers_s,en particuIieracides
eemraande - ou sucres,doivent _tre essuy_simm6diatementavecun Iinge sec.
_mail vitrifi_ . Une fois refroidi, laveravecde I'eausavonneuse,dncer et s@cher.
o Ne jamais essuyerune surfacetiSdeou chaude avecun Iinge humide.Ceci pourrait Ia fissurerou I'_cailler.
o Ne jamais utiliser de nettoyantspour four, d'agents de nettoyagecaustiquesou abrasifssur le fini ext@rieurde la
cuisini@re.
saite ooo
5O

PIECE NETTOYAGE
Panneau× + Une lois Ies piecesrefroidies,los laver_ Feausavonneusetiede, r+nceret s_cher+Ne jamaisessuyerune surface
Jat@rau×,tiroir ti6de ou chaudeavecun Iinge humide, ceci pouvant endommagerla surface et entrainer une brOlurepar Ia vapeur.
de remisage, . Pourlostaches rebelles,utiliser des agents de nettoyageIegerementabrasifscommeIa p_te au bicarbonatede
porte du four soudeou BenAmi*. Ne pasutiHserde nettoyantsabrasifs,caustiquesou _nergiquescomme Iesnettoyantspour
[certainsmodeles), four ou Iestamponsen Iaine d'acier.Cosproduits raieraientou endommageraientde fagon permanentelasurface.
porte du griJ Remarque : Udliserun linge eu un torehon see pour essuyer los produits relwersds, surtout s'ils sent addes
inferior Ccertains ou sucroseLa surface pourtait se d6eelerer ou se temir si la saiet6 n'6tait pas imm6diatemerlt erdev6e. Ceei
mod_les_, est pardculi_rement important dalts /e cas de surfaces blaltches.
et poign_es
de porte +
. Eviterd'util+sertrop d'eau,qu+risqueraitde s%filtrer sous ou derrierele verreet detacher.
du four en verre . Laver_ I'eauet ausavon.Rinceravec de I'eaupropre et secher.Un produit de nettoyagedu verre pout 8tre utiliseen
[certainsmodeles) le vaporisantd'abord sur un lingo.
. Ne pas utiliserde produits abrasifscommetampons_ rScurer,laine d'acierou produit de nettoyageen poudre qu+
risqueraientde rayer le verre.
IntSrieurdu four Four uutenettoyant:
. Ex6cuterIesinstructionspresenteesaux pages48-49pour I'autonettoyagedu four+
. Nettoyer%quemment avecun tampon de pIastiqueet un produit de nettoyagemoyennementabrasif+
. Ne pas utiliser untampon _ recurer metallique,qui formerait des rayuressur la surface=
. Lors de remploi d'un produit commerciaIde nettoyagede four, appliquer los instruct+onsdu fabricant+
. Eliminerdesque possibleIesproduits acides renvemSs(produits_ basede Iaitou de tomateDavec eau et savon:ces
produitspeuventfaire changer lacouleur de 1'6maillots d'un contact prolong6+
Pour faniliter le netteyuge, on pout enlever lu porte du four° [Voir la section Entretien,page52,_)
Grilles du four . Nettoyeravecde I'eausavonneuse.
. El+minerlossouillurestenacesavecune poudre de nettoyageou un tampon_ r6curer savonneux+Rinceret faire
s_cher+
. SiIes grilles sent Iaiss_esdartsIe four pendantIe cycle d'autonettoyage+ellesse d6coJorentet peuventne plus tres
bien glisser+SJcecise produit, appliquer par essuyageun peu d'huile veg6taJesur lagriJleet sessupportsen relief
pour faciliter Ie mouvement,et enleverJ'excSsd'huiJe+
, NE PAS UTIUSERDE PRODUffS DE NETTOYAGECONTENANTDU JAVELUSANT.
[certainsmodeles_ . NE PAS UTIUSERDE NETTOYANTS+_ORANGE_ OU ABRASIFS.
. TOUJOURSESSUYERDANS LE SENSDE LA TEXTUREDE L'ACtERLORSDU NETTOYAGE.
+ Nettoyage joumumier/salet8l_g_re - EsstJyeravec I'un desproduitssuivants:eausavonneuse,vinaigre bIanc/eau,
produit de nettoyagepourverre et surface Formula409*ou un produit semblablepour verre - avecun lingo souple
et une 6ponge+Rinceret sechen PourpoIir et enleverIesmarquesde doigts,faire suivrepar unevaporisationde
Magic Spray*pour acier inoxydable[produit n° 20000008_**+
. Sulet8 mod_r_e/Spaisse +Essuyeravec I'un des produits suivants:BenArni*,SmartCleanser*ouSoft Scrub*-
I'aided'un lingo soupleou d'une epongehumide+Rincer et sdcher+Lostaches rebeiIespeuvent6tre enIevdesavec
un tampon multi-usagesScotch-Brite*humidi% Frotteruniform6mentdans le sonsdu metal Rinceret s_cher+
Pourredonnerdu lustre et retirer les rayures,faire suivrepar une vaporisationde Magic Spray*pour acier
inoxydable.
. D_eoloration +A raide d'une _pongehumidi%e ou d'un lingo souple,essuyer_ I'aidedu nettoyantCameo*pour
acier inoxydable.Rincerimmediatementet sScher.Pourenleverlos marqueset redonner du lustre,faire suivre par
unevaporisationde MagicSpray*pour acier inoxydable.
* Lesnoms de marquesentdes marquesdeposSesdes diffdrents fabricants.
** Pourcommanderdirectement,composerle 1-877-232-6771E.-U.ou 1-800-688-8408Canada.
51
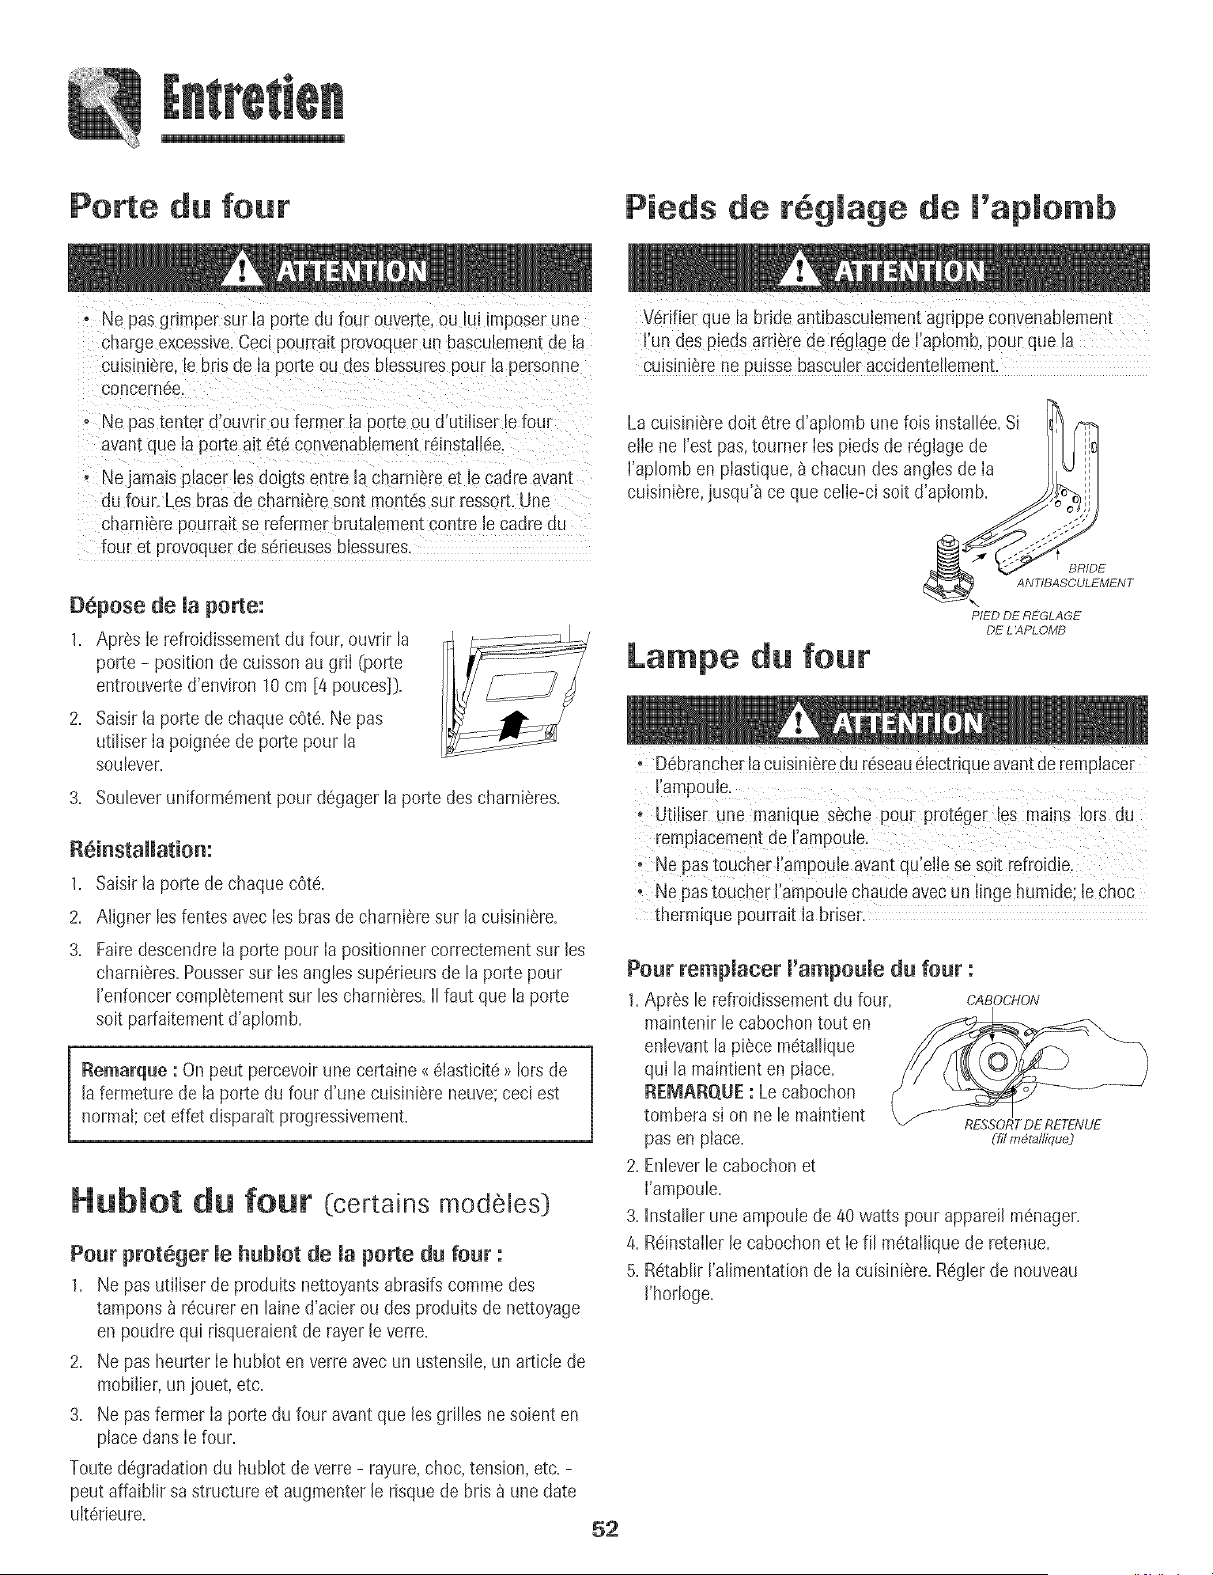
Porte du four
Pieds de r glage de l'aplomb
, Ne pas grimpersur [a por[e du four ouverte,ou [ui imposerune
cnarge excessive.Cecipourrait provoquerun bascu[ementde la
cuismlere [ebds de [a pore ou des blessurespout la personne
concemee.
- Ne pastenter d'ouvdr ou fermer la _omeou d'utfl[ser le four
, avant que la porte ait 6t6 convenablementreinstallee.
Nejamais placerlos doigts entre la charni_reet ie cadre avant
du four. Les brasde charnieresont montessur ressort.Une
charni_re pourraitse reformer brutalementcontre lecadre du
four et provoquerde sdrieusesblessures.
Depose de la porte:
1. Apres Ie refroidissementdu four, ouvrir la
porte - positionde cuissonau griI (porte
entrouverted'environ 10cm [4 pouce@.
2. Saisirla porte de chaquecote. Ne pas
utiliser Iapoigneede porte pour la
soulever.
3. Souleveruniformementpour degagerla porte descharnieres.
1. SaJsirJaporte de chaquecote.
2. Aligner lesfentes avec Ies brasde chamiere sur Jacuisiniere.
3. FairedescendreIa porte pour Ia posit[onnercorrectementsur Jes
charni@res.Poussersur Ies anglessuperieursde la porte pour
I'enfoncercomplStementsur les charniSres.II faut que la porte
soit parfaitementd'aplomb.
l Remarque : On pout percevoirune certaine<<6Iasticite7>lots de
Jafermeture de la porte du four d'une cuisiniSreneuve;ceciest
normal;cet effet disparait progressivement.
Hublot du four (certains modeles )
Pour proteger le hublot de la porte du four :
1. Ne pasutfliser de produits nettoyantsabrasifscommedes
tampons_ recureren lained'acier ou desproduits de nettoyage
en poudre qui risqueraientde rayerle verre.
2. Ne pas heurterIe hublot enverre avecun ustensfle,un articlede
mobilier,un iouet, etc.
3. Ne pasfermer Ia portedu four avant que les grilles ne soient en
place dans Iefour.
Toutedegradationdu hublot de verre - rayure,choc,tension,etc. -
peut affaiblir sastructure et augmenter le risque de bris_ unedate
ulterieure.
52
Ve[!fier que labride antibascu!ementagdppe cQnvenablement
I'un des pieds arriere de reglagede I'aplomb,pour que la
Cuisini_rene Puissebascu!eraccidente!iement,
La cuislniSredolt 6tre d'apiomb unefois installee.Si ¢_
etle ne I'estpas,toumer Ies piedsde reglage de
I'aplomb en plastique,_ chacundes anglesde Ia
cuisiniere,jusqu'_ ce que celle-ci soit d'aplomb. _,;
&_77BASI_IENT
PIED DE REGLAGE
DE L )1PL OMB
Lampe du four
• Debrancheriacuisin!6redu r_seau_[ectriqueavantde remplacer
* Utfliser une manique seche pour proteger los mains lors du
, Nepas toucher Iampoule avantqu eriese soit refroidie.
, Nepastoucher I'ampoulechaudeavecun Iinge humide;le choc
thermiquepourrait la br[ser.
Pour remplacer l'ampoule du four :
1.Apres le refroidissementdu four. CABOCHON
maintenirle cabochontout en
enlevantlapiScemetallique
qui la maint[enten place.
RErdARQUE: Le cabochon
tomberasi on ne le maintient
pas en place.
2. Enleverle cabochonet
I'ampoule.
3. Installerune ampoulede 40 watts pour appareil menager.
4. Reinstallerle cabochonet Ie fil metallique de retenue.
5. RetablirI'alimentationde la cuisiniSre.Reglerde nouveau
I'horloge.
RESSORTDE RETE/VUE
(fLIm_tal/ique)
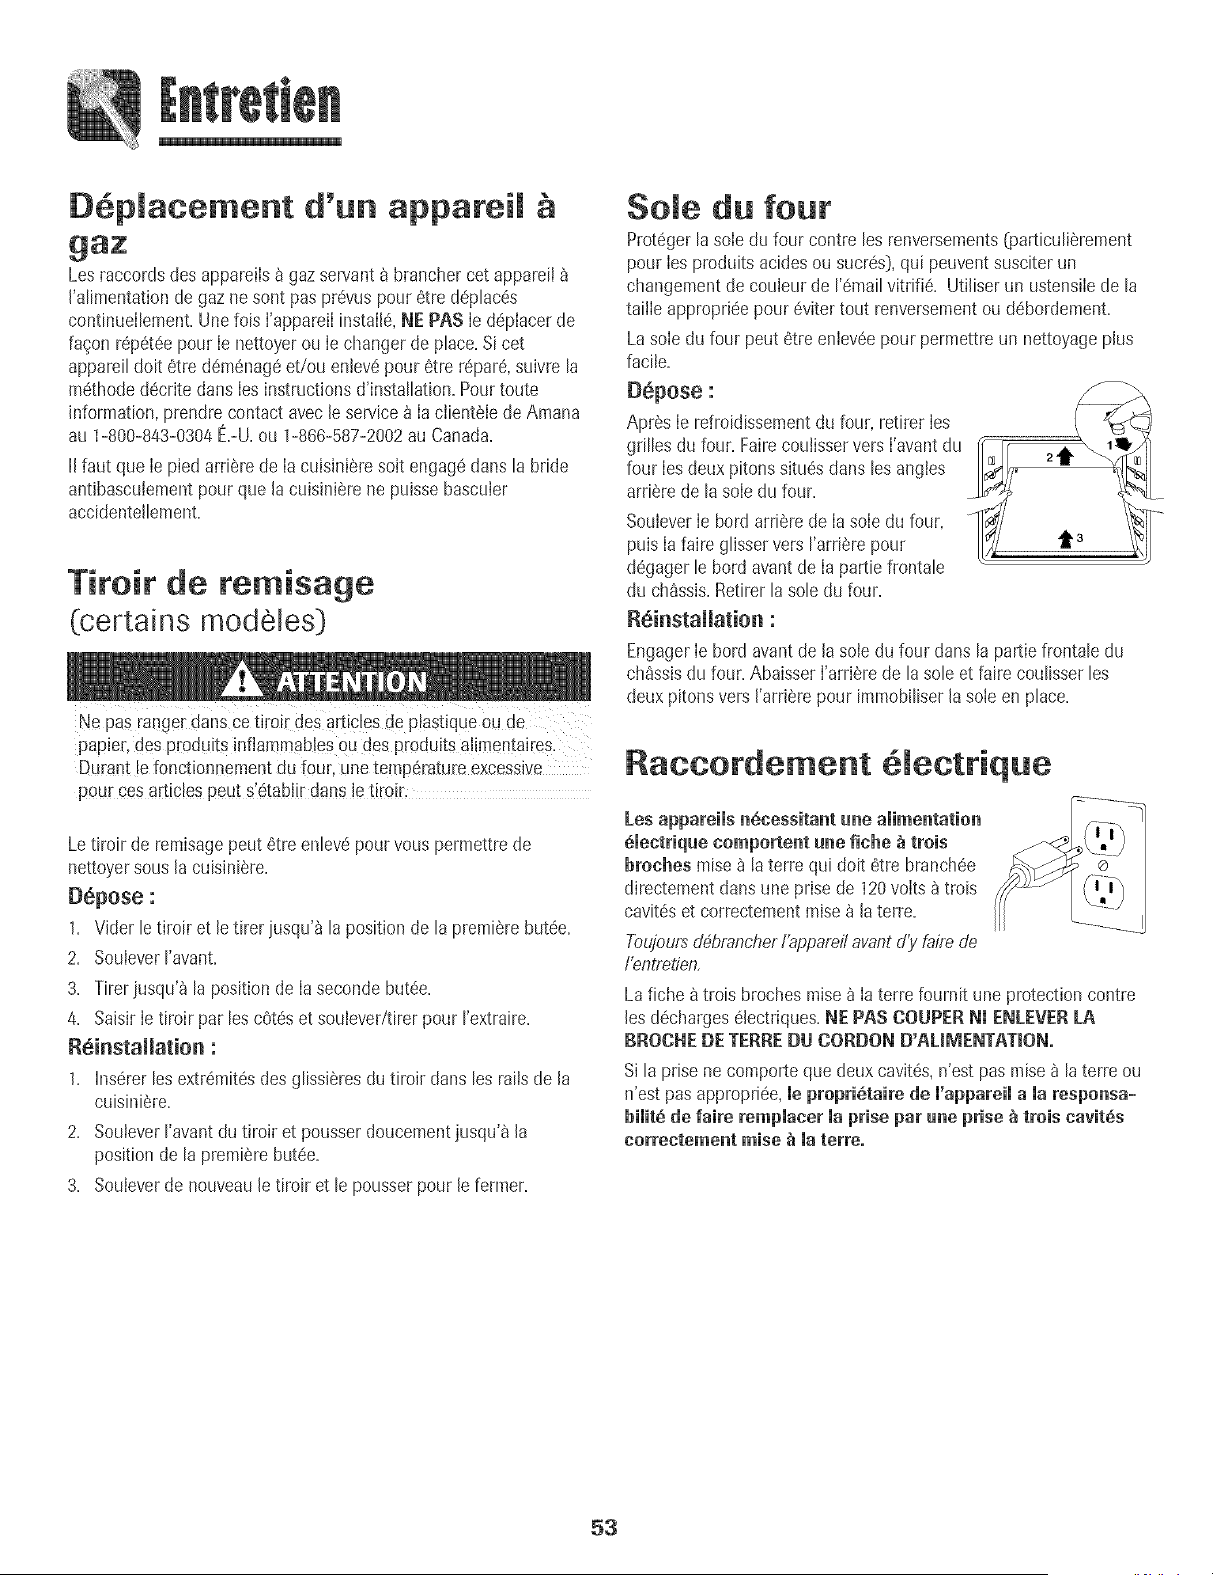
O placement d'un appareil
Les raccordsdes appareils_ gazservant_ brancher cet appareil
J'alimentationde gazne sont paspr@us pour 6tre d@lac6s
cont[nuellement.Unefois I'appareiIinstalJ_,NE PAS Ie d@Iacerde
fwon r@6t6epour Ie nettoyerou Iechanger de place.Sicet
appareildolt 6tre d6m6nag6et/ou entev6pour 6tre r@ar6,suivre la
m6thoded6crite dans Ies instructionsd'installat[on.Pourtoute
information,prendrecontactavecleservice8 Ia clientelede Amana
au 1-800-843-0304E.-U.ou 1-866-587-2002au Canada.
IJfaut que Ie piedarriere de Ia cuisJni_resoit engagedans la bride
antJbasculementpourque Jacuisiniere ne puisse basculer
accidentellement.
Tiroir de remisage
(certains modeJes]
Ne pas ranger dans ce tiroi[ des artic!esde plastiqueou de
papJer,des produitsinflammab!es0udes produitsajimentaires.
Durant !efonctionuementdu _our,une temp@atureexcessive
pour ces articlespeut si6tab
P_OBL_WE iiiiiiiiiiiiiiiiiiiiiiiiiiiiiiiiiiiiiiiiiiiiiiiiiiiiiiiiiiiiii_SOLUT[_NI_
Pourmapmupa desprobm mes
observes, essayer d'aberd mes
semutienspessibmes,_ dreite.
Un br_leur de surface ne s'ammume
pus.
° Verifier que Iescommandesdu four sont correctementreglees.
° Verifier si lafiche est biersinsereedunsIa prise.
° Inspectedrearmerle d[sjoncteur.Inspectedremplacerlesfusibles.
° ContrO[erla sourced'alimentationelectrique.
Verifier que I'appareilestcorrectementraccord6_ [asourced'e[ectrlcite.
Determinersi I'alimentation6Iectriqueest interrompue(fusiblegrilIddisjoncteur ouvert).
Verifier que I'a[[umeurestsec et qu'iI emetdes etince[[es.Lebr0Ieur ne peut s'a%mer si
I'a%meurestendommage,soui[[eoumouilIe.Si['alIumeur negenerepusd%tlncel[es,ramener
Ie bouton de commande_ [aposition OFF(ARRCT_.
Fmammesnon uniformes, , Orificesdu brQleurobstrues.
S_paration entre les flammes et , VeilIer _ placercorrectement['ustensilesur Ia gri[Ie du brOleur.
mebreleur,
R_suitats de cuisson au four
differents des attentes ou de ¢eu×
produits par mefour ant_rieur,
R_sumtats ineerrects morsdemu
cuisson au grim,ou _mission
e×eessive de fum_e,
Verifier que Ia temperaturese[ectionneeest correcte. Veiller a prechaufferle four si
ceciest demand6duns [arecette.
° Determinersi I'_ventdu four estobstrue.Voirson emplacementpage46.
° S'assurerque lacuisiniereest d'ap[omb.
° Les reglagesde temperaturevarientsouvententre un four neuf et te four qu'iI remp[ace.
Onobservesouventune derivedu reg[agede temperatured'un four a mesurequ'iI viei[[it;
il peut devenirplus chaud ou moins chaud.Voir page44 les instructionsd'aiustementde
latemperaturedufour {certainsmode[es)._EMA_@_E:II n'estpusutilede modifier[eregiage
detemperaturesi Iavariation n'affectequ'une ou deux recettes.
° UtiliserIesborisustensi[es.Lesustensilesfoncesdonnentun brunissementde couleurfoncee,
les ustensilesbri[[ants,un brunissementplus clair. Pour d'autres informationsau sujet de [a
cuissonau four,voir Ia brochureLa cuissonsimplifiee.
° Verifier [a position desgrilles et des ustensiles. Lorsde [arepartitionsur deux griI[es,ne pus
superposerIes plats. Veil[era hisser un espacede 2,5a 5 cm (1 _ 2 po} entre [esplatset les
paroisdu four.
° ContrO[er['uti[isationde feuille d'a[uminiumduns le four. Nejamais recouvrircomp[etement
unegrilledufour avecde[afeuil[ed'aluminium.Placerun petitmorceaudefeui[[ed'a[uminium
sur [agrille sous [e plat pourrecuperer [esmatieresrenvers_es.
Determiner[a position des grilles. Lesalimentspeuvent6tre trop pr8sdes flammes.
Utilisationincorrectede feui[[ed'aJuminium.Nejamais garnir [agrille de [echefriteavec
de IafeuiI[e d'a[uminium.
EnJeverI'excesde graissesur Ia piecede viandeavant[acuissonau gall.
UtilisatJond'une lechefrite soui[[ee.
PrechaufferIe four pendant2 _ 3 minutesavantde placer Jeplat duns Jefour.
Portedu four fermeedurant [acuissonau gri[.
suite,,,
54
PROBLEME SOLUTION
_mpossibimit_d'autonettoyage
du four (terrains mod_mes).
Lefour ne se aatonettoie pas
correctement (certains mod_mes).
La porte da four ne se d6verrouimme
(certainsmod_mes)o
o D6terminerque I'appareiln'a pas6t6 pmgramm6pour un autonettoyagediff6r6.Voir
pages48-49.
° V6rifier que [a porte estfermee.
° Verifier si [acommandeesten Mode Sabbat.Voirpage 48.
o Lefour estpeut etre b unetemperaturesuperieureb 205 °C (400°F_.La temperaturedu
four doit etreinferieure_205°C[400°F]pour pouvoirprogrammeruncycied'autonettoya%
° Un tempsde nettoyageplus longpeut etre necessaire.
° Onn'a paseiimineavant['operationd'autonettoyagelesaccumuiationsexcessivesderesidus,
particuiiSrement[esr6sidus d'aiimentsacidesou sucres.
Accumalation d'humidit_ sur le ° Ceciest normal durant [a cuissond'alimentscontenantbeaucoupd'eau.
hubmotou vapeur sorlant de m'6vent. . Utiiisationexcessived'humidit6 [orsdu nettoyagedu hub[ot.
emission d'une for_e odeur ou de
fum6e lots de ia raise en marche
du four.
Codes d'anomalie
(terrains modules).
Des bruits se font entendreo
n'yunihipni affichage.
L'interieurdu four estencore chaud.Attendreenviron une heure aprSsI'achSvementde la
perioded'autonettoyage.I!estpossibled'ouvrir [aporteaprSs[adisparitiondu messageLOCK
G_ERROUILLAGE}sur l'afficheur.
Lescommandeset [aportesontpeut-6treverrouillees.Voirpages40et49pour[edeverrouiIIage
o Ceciest normal pour une cuisJni6reneuveet disparait apres quelquesutilisations.
Un cycled'autonettoyage_<br0lera _>plus rapidementles odeurs.
o Laraiseen marched'un ventilateur aide _ retirer fum6eet odeurs.
o Pr6sencede saIetessur [a sole. Proc6der_ un autonettoyage.
o LesrootsBAKEouLOCKpeuventcJignoterrapidementbI'afficheurpourprevenird'une erreur
ou d'un probJeme.Si[e mot BAKEou LOCKparaitb ['afficheur,appuyersur [atoucheCancel
Si Jemot BAKEou LOCKcontinueb c@noter,debrancherJ'appareiLAttendre queJques
minutes,puis rebrancher['appareiJ.Si Jemot continue_ clignoter,debrancherrappareiJet
prendrecontactavecun reparateurautoris&
o Si[efour est tressaJe,[esfiammSchespeuventproduireun coded'anomaJieaucoursducycJe
d'autonettoyage.Appuyersur [a touche CanceJet [aisser[efour refroidir compJ@tement,
essuyerJasaJeteenexcespuisreprograminerI'autonettoyage.SiJecoded'anomaJiereapparait,
prendrecontactavecun reparateurautorise.
®
Lefour fait plusieurs bruits faibles.IIestpossibled'entendre[es relaisdu four qui se mettent
en marche et s'arr6tent.Ceci est normal
AIorsque[efourse rechauffeetse refroidit,i[ estpossibled'entendredesbruits correspondant
[adilatation et _ [acontractiondespi_cesm6tal[iques.Ceciestnormalet n'endommagepas
['appareiL
• Le four est peut-6tre en Mode Sabbat.Voir page 44.
55

56
m
Gatantie complbte d'une annee - Pi_.ces
et main-d'oeuvre
Durantone p6riode d'un [1) an _ compterde la date
de ['achat initial au d#tai[,toute piecequ[ se r_v6[era[t
ddec[ueuse aans desconditions normalesd'usage
menagersera r@areeou remplac6egratuitement.
R6sidents ca nadieas
Lesgarantiesci-aessus couvrentun appareil install6
au Canada.seulements'il a _t6 agre6par les agences
de [es[ habilitees(v@Jficationde laconformit6_ une
normenat_onaledu Canada),sad si I'appareila 6t_
introduit au Canada_ I'occasJond'un changemen[de
residencedesEtats-Unisvers leCanada.
Garantie limitSe hers des Etats-Unis et
du Canada = Pibces seulement
Pendantune p6riode d'un [1} an a cumpter de la
oa[e de J'achatInitialau de[all,toute piecequi se
r6v61eraitddectueuse dartsdesconditions normales
d'usage menagersera r@ar_eou remplacee
gratultement Cpi_ceseulemen0;le pmpri6ta_reaevra
assumer:ous lesautresfrais,y compnstrois de maJn-
d'ceuvre,ae d@lacement_de [ranspor_.ae
kilumetrageet de diagnostic,le cosr_ch@nt.
Lesgarantiessp4cifiquesformut@scJ-dessussont les
SEULESque le fabricantaccorde.Cesgarantiesvous
cnnf_rentdes 4rnitsjnridiquess#4eifiquese[ vuus
pouvez4galemenLiouird'auttn_droits,van'ablesd'un
dtatb /'autre.dbne province8 une autre.
Ne sont pas couverts par ces
garanties .-
1. Les dummagesou d@angementsdus _:
a. Mise en service,IJvraisonou entretien effectuSsincorrectement.
b. Touter@aration,modification,aJt@ationet tout r6glagenon autorJsSspar
le fabricant uu par un prestatairede serviceapres-venteagree.
c. Accidents,mauvaiseutJIisationou usageabusif ou deraisonnable.
d. Alimentation6lectrique (tensJun,intenslt6) incorrecte.
e. R6glageincorrect d'une commande.
2. Les garantiesne peuvent6tre honor6ess[Iesnum6ros de s6rie d'origine ont
6t6 enlev6s,modi%s oune sont pasfacilementlisJbles.
3. Ampoules.
4. Appareilsachet6sauxfins d'usagecommercialou industrie!.
5. Lesfrais de visited'un prestatairede serviceou de serviceapres-vente
encouruspour les raisonssuivantes:
a. Correctiond'erreursde raiseenservice.
b. Initiation de I'utilisateur_ I'emploide I'appareil.
c. Transportde I'appareiIaux lucauxdu prestatairede service.
6. Dommagessecondairesou indirectssubis partoute personnesuite au non-
respectde cesgaranties.Certains6tatsou provincesne permettentpas
I'exclusionou la limitation des dommagessecondairesou indirects; par
cuns@uent Ies Jimitationsou exclusionsci-dessus peuvent ne pas
s'applJquer_votre cos.
Si l'intervention r parate r est
• Contacter[e d_tai[[antchezqui ['appareila _t@achet_,ou cuntacter
Maytag ServicesS_/service_ laclientelede Amana au 1-800-8_3-0304E.-U.
ou 1-866-587-2002au Canada,pour obtenir Jescoordonn_esd'une agencede
serviceagr_e.
• Veiller_ conserverla facture d'achat pour justifier de Ia valJdit_de la garantie.
Pourd'autres informationsen ce qui concernelesresponsabiiit_sdu
propri_taire _ I'_garddu sewicesousgarantie,vuir Ietexte de la GARANTIE.
• Si le d_taiilant ou I'agencede serviceaprSs-ventene peut resoudreIe
probI6me,8crire _ Maytag ServicessM,attention : CAIR:"Center,P.O.Box
2370,Cleveland,TN 37320-2370ou t_l@honer au 1-800-843-03e_ E.-Uoo_
1-866-587-2802 a_ Canada.
• Lesguides d'utJIisation,Iesmanuelsde serviceet Iesrenseignementssur les
pi_cessent disponiblesauprSsde MaytagServicess_,service_ JaclientSJede
Amana.
Re_atq_es :
Lorsde tout contact concemantun probl_me,fournir I'Jnformationsuivante:
a. Nora,adresseet num_ro det_I@honedu client;
b. Num@ode modeleet num_ro des_rie de I'appareil;
c. Noraet adressedu dStaiIlantou de I'agencedeservice;
d. Descriptionclaire du probI6meobservS;
e. Preuved'achat(facturede vente).
57
Estufa a Gas
Instrucciones Importantes
sobre Seguridad .....................................................59-63
Gocinando en maEstufa ......................................... 64-65
Controles
Quemadores de Gas SeHados
Gocinando en el Homo ......................................... 66-77
Controles del Homo de Limpieza Manual
Reloj Hornear
Temporizador Asar
Control dei Homo Autoiimpiante
Reloj Diferido
Temporizador Mantener Cdiente
Hornear Asar
CocciOn y Mantener ParriHasdd Homo
Cdiente
Cuidado y Limpieza ............................................... 28o81
Homo Autolimpiante
Procedimientos de Limpieza
Mantenimiento ....................................................... 82-83
Locaiizaci6n y Soluci6n
de Averias ................................................................84-85
Garantia y Servicio ....................................................... 87
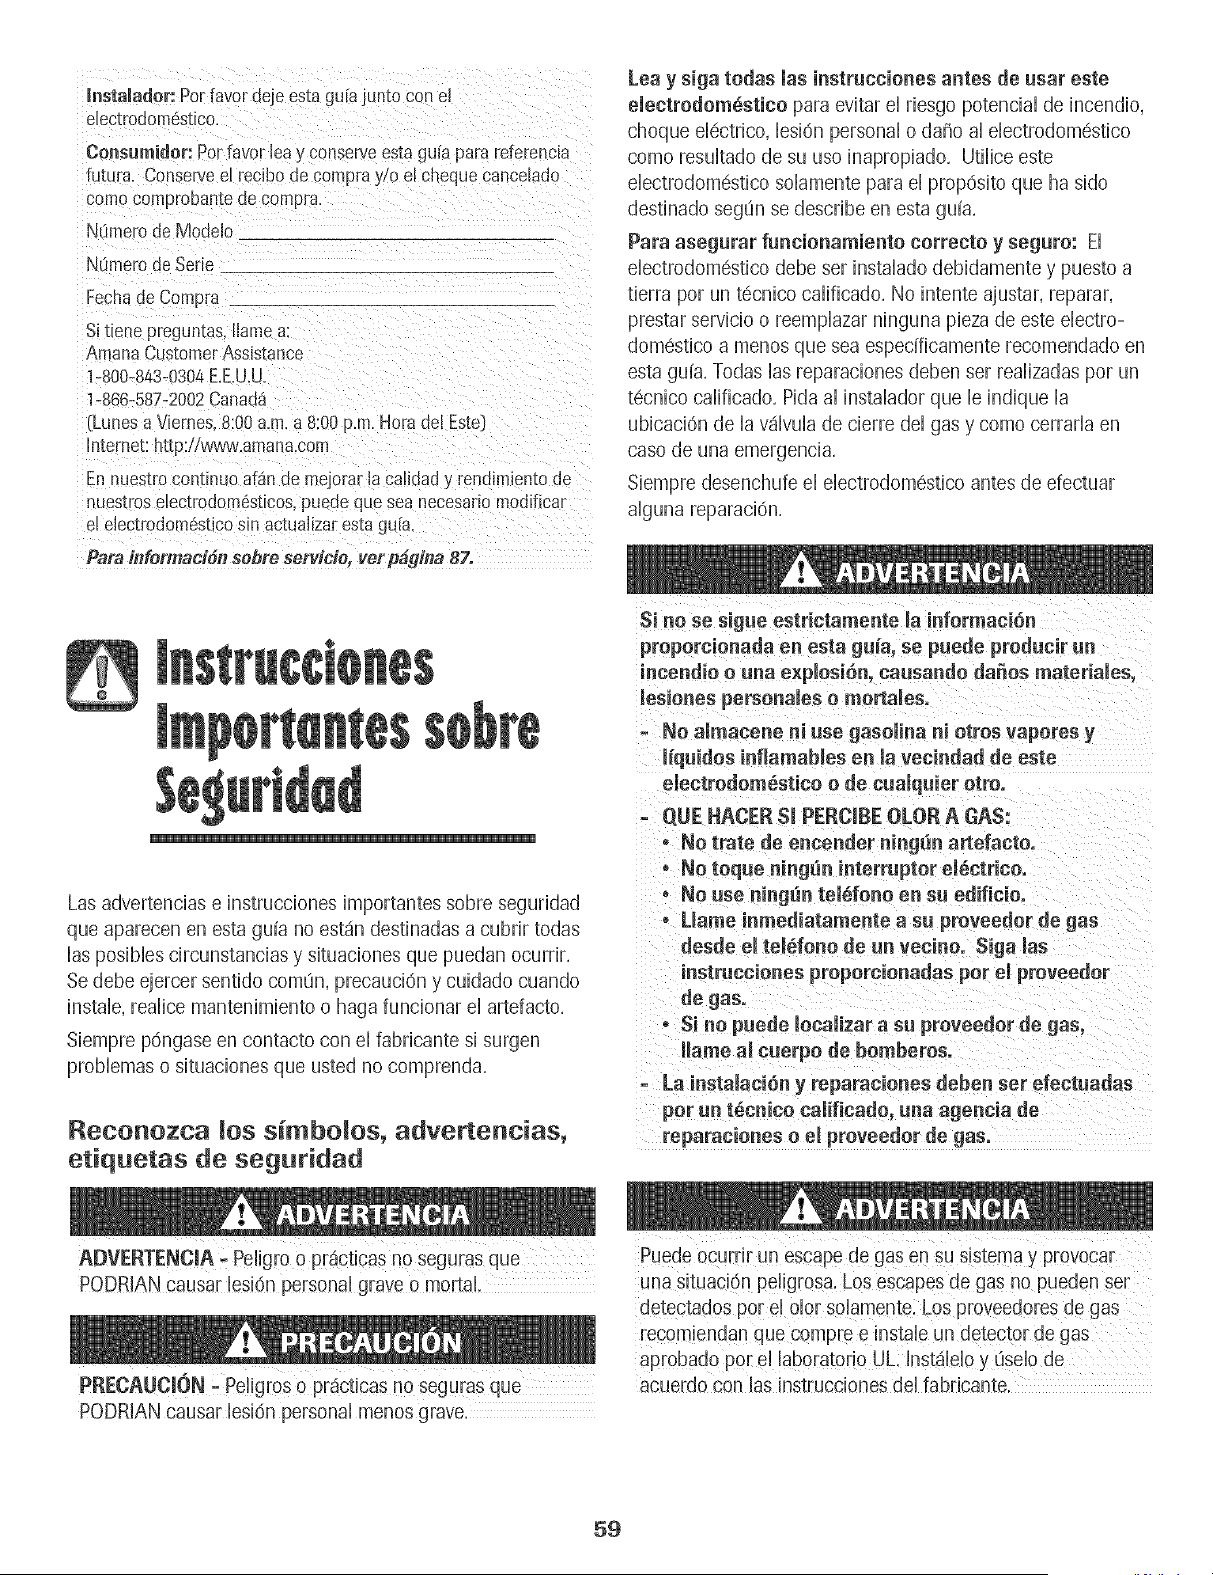
Consumidor:Potfavor leay conserveesta guiapara referencia
futura. Conse_e e[ recibode eorapraY!0e[ cheque eancelado
N(Jmerode Modelo
NOmerodeSene
Fecha de Compra
Amana CustomerAss stance
i }800_843L0304E.E.U.U.
1_866:587-2002Canad_
(Lunes a V[emes,8;00 a.m,a 8:00p.rn. Horade[Este}
Intemet: http:!!wveJv.amana,com
Ennuestr0continuoaf_n de mejorar !aCa!idady r#ndimiontode
nuestroselec_r0dorn6stic0s,puede que sea neeesariom0dificar
Para i#fermaci## sebre servicie, vet pbg#la 87.
Lea y siga todas las instrucciones antes de usar este
eiectrodom6stico para evitar eI rbsgo potential de incendio=
choque el6ctrico= lesion personal o daSo al ebctrodom6stico
como resultado de su uso inapropiado. Utilice este
ebctrodomestico sohmente para el propOsito que ha sido
destinado segQn se describe en esta guia.
Para asegurar funcionamiento correcto y seguro: El
ebctrodom6stico debe sell instalado debidamente y puesto a
tierra poll un tecnico calificado. No intente ajustar, repara
presto servicio o reemplazar nmguna pieza de este ebctro-
dom6stico a menos que sea especdicamente recomendado en
esta guia. Todas las reparaciones deben ser realizadas por un
tecnico cafificado. Pida al instahdor que b indique la
ubicaci6n de la valvula de cierre del gas y como cerrafla en
caso de una emergencia.
Siempre desenchufe el ebctrodom6stico antes de efectua
alguna reparacion.
Las advertencias e instrucciones importantes sobre seguridad
que aparecen en esta guia no est_in destinadas a cubrir todas
las posibbs circunstancias y situaciones que puedan ocurrir.
Se debe ejercer sentido comLin, precauci6n y cuidado cuando
instab, realice mantenimiento o haga funcionar el artefacto.
Siempre p6ngase en contacto con el fabricante si surgen
probbmas o situaciones que usted no comprenda.
Reconozca Ros simbolos, advertencias,
etiquetas de seguridad
Si no se sigue estrictamente la infermaci6n
prepercienada en esta gu_a, se puede preducir un
incendie e una e×plesi6a, causande da_os materiales,
lesieaes persenaies e mertales.
No almacene ai ase gaseliaa ni etres vaperes y
liquides inflamables ea la vecindad de este
electrodo_stico o _e cualquier otroo
QUE HACER SI PERCiBE OLOR A GAS:
o No trate de encen_er _i_gua ar_efacto,
, No toque ni_gu_ i_terrupter el6ctrice.
• No use aing_n tel6fene ea su edifici&
• Llarae iame_iata_eate a su prevee_or _e gas
_es_e el tel6foae _e ua veciae. Siga las
iastruccienes prepercienadas per el _reveeder
_e gas.
o Si no pue_e _ecalizar a su prevee_er _e gas,
_lame a_cuerpe _e he.heros,
- La instalaci6n y reparacieaes deben set efectua_as
pot an t6caico caiifica_e, uaa agencia _e
reparacienes e el prevee_er _e gas.
A[}VERTENC_A _ Pelig[0 0 pi_cticas n0 seguras que
PODR!AN causal !esi6n personal glare e morta!,
Puede ocurr'ir un escape de gas en SUsistema y provocar
una situaci6n peligrosa, Los escapes de gas no Pueden ser
PODRIAN causar lesidn personal menos grave.
acuerdo con las inst[ucciones del [abdcante.
59
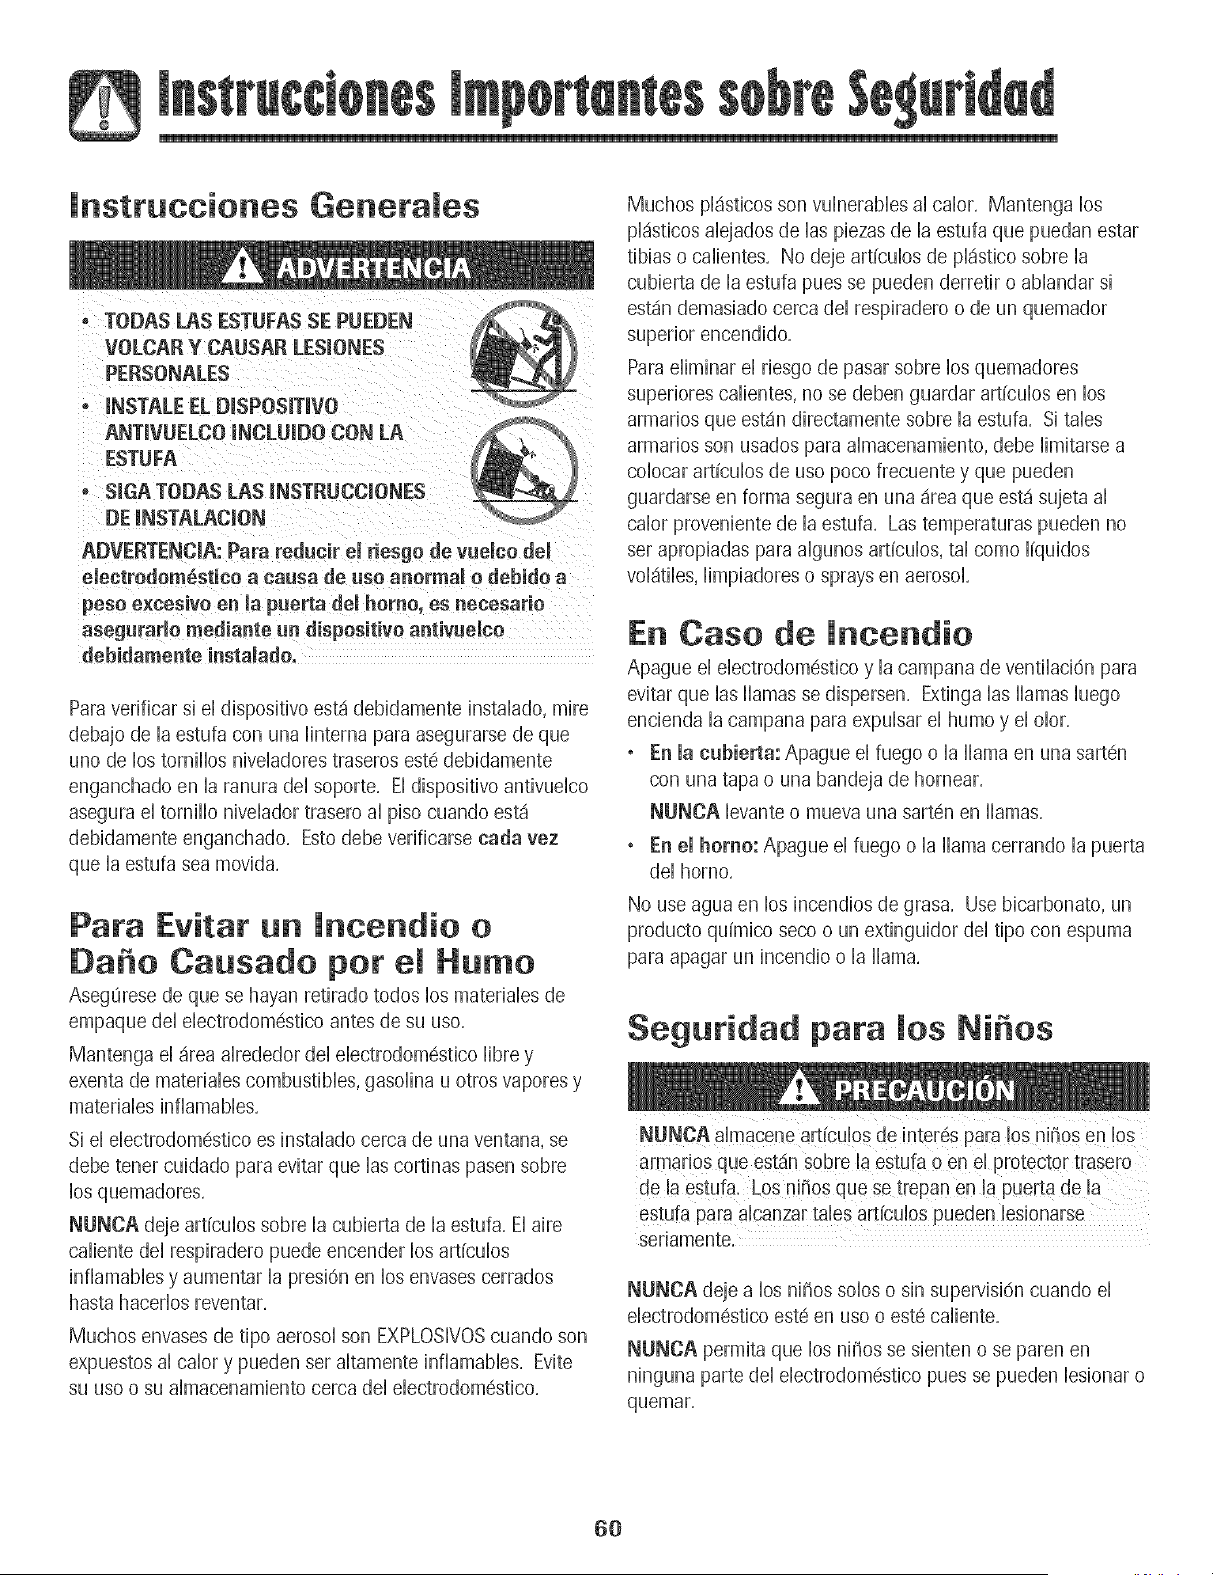
lnstruccienes Generates
o TODAS LAS ESTUFAS SE PUEDEN
VOLCAR Y CAUSAR LESJONES
PERSONALES
° mNSTALEEL DmSPOSffW(}
ANTiVUELCO INCLUIDO CON LA
ESTUFA
o SIGA TODAS LAS mNSTRUCCiONES
DE mNSTALACmON
ADVERTENCIA: Para redueir el desgo de vuelco deU
ebctrodom6stico a eausa de use anormal o debido a
peso e×eesivo en Ja puerta deJ homo, es neoesario
asegurarJo mediante un dispositivo antivueleo
debidamente instalado=
Paraverificar si eI disposidvo est,1debidamente instaBdo, mire
debajo de la estufa con una linterna para asegurarse de que
uno de los tornillos niveladores traseros estd debidamente
enganchado en la ranura del soporte, El dispositivo antivuebo
asegura el tornillo niveBdor trasero al piso cuando estd
debidamente enganchado, Estodebe verificarse carla vez
que la estufa sea movida,
Pata Evitar un it|cot|die e
Da e Causado pet eJ Hume
Asegurese de que se hayan retirado redes los materiabs de
empaque del ebctrodomdstico antes de su use,
Mantenga el drea alrededor del ebctrodomdstico libre y
exenta de materiabs combustibles, gasolina u otros vapores y
materiabs infiamabbs,
Si el ebctrodomestico es instalado cerca de una ventana, se
debe tener cuidado para evitar que Bs cortinas pasen sobre
los quemadores,
NUNCA deje articulos sobre la cubierta de la estufa, El aire
caliente del respiradero puede encender los articulos
infiamabbs y aumentar la presi6n en los envases cerrados
hasta hacerlos reventar,
Muchos envases de %0 aerosol son EXPLOSIVOScuando son
expuestos al crier y pueden ser altamente infiamabbs, Evite
su use o su almacenamiento cerca del ebctrodom6stico,
Muchos pl_sticos son vulnerables al calor, Mantenga los
pl_sticos alejados de las piezas de la estufa que puedan estar
tibias o calientes, No deje art{culos de pl_stico sobre la
cubierta de la estufa pues se pueden derretir o ablandar si
est_indemasiado cerca del respiradero o de un quemador
superior encendido,
Paraeiiminar ei riesgo de pasar sobre los quemadores
superiores calientes, no se deben guardar art{culos en los
armarios que estSn directamente sobre la estufa, Si tabs
armarios son usados para almacenamiento, debe limitarse a
colocar articulos de use poco frecuente y que pueden
guardarse en forma segura en una _rea que est_ sujeta ai
calor proveniente de la estufa, Las temperaturas pueden no
set apropiadas para algunos articulos, tal come liquidos
vol_itiles,limpiadores o sprays en aerosol,
En Case de lncendie
Apague ei eiectrodomestico y ia campana de ventiiaci6n para
evitar que las llamas se dispersen, Extinga las llamas luego
encienda ia campana para expuisar ei humo y ei oior,
• En la eubierta: Apague ei fuego o ia llama en una sart_n
con una tapa o una bandeja de hornear,
NUNCA levante o mueva una sartdn en llamas,
• En el homo: Apague el fuego o la llama cerrando la puerta
dei homo,
No use agua en los incendios de grasa, Use bicarbonate, un
producto quimico seco o un extinguidor dei tipo con espuma
para apagar un incendio o la llama,
Seguridad para Jes Ni es
NUNCA almacene art[cuios de inter6s para !os nih0S en !0S
armar!os que est_n sobre la estufa o en el protecto[ t[asero
de la estufa, LOSn!SoSque se trepan en la puerta de la
sedamente,
NUNCA deje a los niSos solos o sin supervisi6n cuando el
electrodomestico est6 en use o este caliente,
NUNCA permita que los niSos se sienten o se paren en
ninguna parte del electrodom6stico pues se pueden lesionar o
quemar,
6O
Se [es debe ensdiar a los n[_ios que el e[ectrodomdst[co y
los utensfl[os que est_inen dl o sobre 61pueden estar
caHentes, Deje enfr[ar los utensfl[os caHentes en un [ugar
seguro, fuera del dcance de los n[_ios pequdios, Se [es
debe ensdiar a los n[_ios que un e[ectrodom6st[co no es un
juguete, No se debe perm[t[r que los n[_iosjueguen con los
contro[es u otras p[ezas de [a estufa,
NUNCA use la puerta o el cajOn (si viene equipado] de
electrodom6st[co como un pdda_o o as[ento ya que el
musmose puede volcar } ocasionar lesiones graves.
NUNCA use este electrodom6stico como calefactor de area
o para eleva_ la temperatura ae la hab[tac[On.
Esto puede causal envenenamiento por mon6xido de
carbono y el sobrecalentamiento del homo.
NUNCA cubra ninguna rendija, agujero o canal en la parte
inferior del homo o cubra la rejilla completa con materiales
tales como el papal de duminio. Esto evita que el aire fiu_a
a traves del homo y puede causar envenenamiento pot
monoxido de carbono. El papel de aluminio tambien puede
contener el calory producir un riesgo de incendio.
NUNCA obstruya el flujo del aim de combusti6n y de
ventflac[On cubriendo las entradas o salidas de aire del
homo. Esto ouede restringir el acceso del aire a los
quemadores } causar envenenamiento por mon6xido de
desconecte la corriente eldctrica hacia la estufa antes de sacar
el foco para evitar choque electrico,
No use la cubierta o el homo como una area para almacenar
alimentos o utensflios de cocina,
Seguridad Para Coeinar
Siempre coloque un utensflio en un quemador superior antes
de encenderlo, Asegurese de usar la perflla correcta que
controla cada quemador superior, Aseg_rese de encender el
quemador correcto y comprobar de que en efecto el
quemador haya sido encendido, Cuando haya terminado de
cocinar, apague el quemador antes de retirar el utensflio para
evitar exposici6n a la llama del quemador,
Siempre ajuste la llama del quemador superior de modo que
no se extienda mas all4 del borde inferior del utensflio, Una
llama excesiva es peligrosa, desperdicia energia y puede
da_ar la estufa, el utensflio o los armarios que est4n sobre la
estufa,
NUNCA deje sin supervisi6n la cubierta de la estufa cuando
estd cocinando, especidmente cuando usa un ajuste de calor
alto o cuando este usando una freidora, Los reboses pueden
producir humo y los derrames de grasa pueden inflamarse,
Limpie los derrames grasosos tan pronto como sea posible,
No use cdor alto durante periodos de cocci4n prolongados,
NUNCA caliente un envase cerrado en el quemador superior
o en el homo, La acumuhci6n de presi6n puede hacer
explotar el envase causando una lesi6n personal grave o ddio
a la estufa,
carbono. Use tomaolhs secos y gruesos, Los tomaollas hOmedos
pueden causar quemaduras a causa del vapor, Las todlas u
E[ respiradero de[ homo se encuentra en [a base de[ pane[ de
control,
Evite tocar el area del respiradero del homo cuando el homo
este encendido y durante varios minutos despuds de que el
homo haya sido apagado. Algunas piezas del respiradero y
del area cimundante se cdientan Io suficiente como para
causar quemaduras. Despu6s de que el homo haya sido
apagado, no toque el respiradero ni las areas circundantes
hasta que elias hayan tenido tiempo suficiente para enfriarse.
Otras superficies potencialmente calientes induyen la cubierta
de la estufa, las areas dirigidas hacia la cubierta de la estufa,
el respiradero del homo, las superficies cerca de la abertura
del respiradero, la puerta del homo y hs areas alrededor de la
puerta y la ventana del homo.
No toque un foco caliente del homo con un patio huJmedo
pues el foco se puede quebrar. Si se quiebra el foco,
otros sustitutos no deben ser usados como tomaollas porque
ellos pueden quedar colgando a trav6s de los quemadores
superiores y encenderse o enredarse en las piezas de la
estufa,
Siempre deje enfriar la grasa caliente que se ha usado en la
freidora antes de intentar mover o manipularla,
No permita que se acumule grasa u otros materiales
inflamables en la estufa o cema de ella, en la campana o en el
ventflador aspirador, Limpie la campana extractora con
frecuencia para evitar que la grasa u otros materides
inflamables se acumulen en la campana o en el ffltro,
Encienda el ventflador cuando cocine dimentos flameados
debajo la campana,
NUNOA use vestimentas de materNes inflamables, ropa
suelta o de mangas largas cuando est6 cocinando, La
vestimenta se puede encender o enganchar en los mangos de
los utensilios,
61
SbmprecoIoquelasparriihsdeIhomoenlaposbi6ndeseada
cuandoeIhomoest6frio. DesibelaparriihdeIhomohacia
afueraparaagregaro retiraraiimento,usandotomaoiiassecos
yresbtentes.SiempreeviteabanzardentrodeIhomopara
agregaroretiraraiimentos.Siunaparriiiadebesersacada
cuandoest,1todaviacaibnte,useuntomaoiiasseco.Siempre
apagueeIhomo@spudsdehaberterminadodecocinar.
UselasparriiiassoiamenteeneIhomoenquefueron
enviadas/compradas.
TengacuidadocuandoabralapuertadeIhomo.Dejeque
escapeeIaireoeIvaporcaibnteantesdesacarovolver
colocarelalimento.
ADVERTENCIASOBRELOSALIMENTOSPREPARADOS:
Sigalasinstruccionesdelfabricantedelosalimentos.Siun
envasedepldsticodealimentocongeBdoy/osutapase
deforma,secombaoseddiadedgunaotramaneradurante
lacocci6n,descarteinmediatamenteelalimentoy suenvase.
Elalimentopuedeestarcontaminado.
NUNCAusepape[deaiuminioparacubrirunaparriiiade[
homoolaparteinferiordelhomo.Elusoincorrectopuede
resultarenunriesgodechoqueel@trico,incendiooda_oal
ebctrodom6stico.Usepapeldealuminiosolamentecomose
indicaenestaguia.
Utensilios Apropiados
Use sartenes con rondos pBnos y mangos que sean fdcibs de
tomar y que permanezcan frios. Evite usar sartenes u ollas
inestabbs, combadas que se pueden vobar facilmente u olhs
cuyos mangos est6n sueltos. Adem_is evite usar utensilios
especialmente pequdios o sartenes con mangos pesados
pues ellos pueden ser inestabbs y vobarse fdcilmente. Los
utensilios que son pesados de mover cuando estdn Ibnos con
alimento pueden tambi_n ser un peligro.
AseguJresede que el utensilio sea Io suficientemente grande
como para contener en forma debida los dimentos y evitar
derrames. El tama_ioes particuhrmente importante cuando
se utiiizan freidoras. AsegOrese de que e[ utensiiio tiene
capacidad para el volumen de alimentos que se va a agregar
al igual que para la formaci6n de burbujas de la grasa.
Para reducir a un minimo las quemaduras y que los materiales
infiamables y los derrames se enciendan debidos a contacto
no intencional con el utensilio, los mangos no deben
extenderse sobre el quemador superior adyacente. Siempre
gire los mangos de los utensilios hacia el lado o hacia la parte
trasera de la estufa, no hacia la habitaci6n donde puede ser
fdcilmente golpeados o alcanzados por los niffos pequeffos.
Nunca deje que un utensilio hierva hasta quedar seco pues
esto puede da_iar el utensilio y la estufa.
Siga las instrucciones del fabricante cuando use bolsas para
cocinar en el homo.
Solamente ciertos tipos de utensilios de vidrio cer_imico, de
ceramica o glaseados son convenientes para uso en la
cubierta de la estufa o en el homo sin quebrarse debido al
cambio repentino de temperatura. Siga las instrucciones del
fabricante cuando use utensilios de vidrio.
Esteelectrodomestico ha sido probado respecto a su
rendimiento seguro usando utensilios de cocina
convencionales. No use ningun dispositivo o accesorio que no
haya sido espedficamente recomendado en esta guia. No use
tapas para cubrir los quemadores superiores, rejiiias para ia
cubierta de la estufa ni agregue sistemas de convecci6n para
hornos. El uso de dispositivos o accesorios que no son
expresamente recomendados en esta guia, puede crear serios
peligros de seguridad, resultar en problemas de rendimiento y
reducir la vida utii de los componentes de la estufa.
Seguridad de la Limpieza
Apague todos los controies y espere que se enfrien ias piezas
de la estufa antes de tocarlas o limpiarlas. No toque las
rejiiias de los quemadores o ias _reas circundantes hasta que
elias no hayan tenido tiempo suficiente de enfriarse.
Limpie la estufa con cuidado. Tenga cuidado para evitar
quemaduras de vapor si se usa una esponja o un paso mojado
para iimpiar los derrames en una superficie caiiente. Aigunos
iimpiadores pueden producir vapores nocivos cuando se
aplican a una superficie caliente.
Homo Automimpiante
(modelos selectos}
No deje a!imento ni utensilios de COCina,etc. en e! homo
durante e! ciclo de autol!mp!eza.
Limpie solamente las piezas que se indican en esta guia. No
iimpie ia junta de ia puerta. La junta es esenciai para un
sellado herm6tico. No restriegue, da_e, ni mueva la junta de
la puerta. No use limpiadores de homo de ninguna clase en el
homo ni alrededor de cualquier parte del homo autolimpiante.
62
Antesdelaautolimpiezadelhomo,saquelaasadera,las
parrillasdd homoyotrosutensiliosy limpielosderrames
excesivosparaevitarqueseproduzcademasiadohumo,
Ilamaradaso llamas.
Es normal que la cubierta de la estufa se cdiente durante el
ciclo de autolimpieza. Pot Io tanto, se debe evitar tocar la
cubierta durante un ciclo de autolimpieza.
Aviso y Advertencia
lmportante Sobre Seguridad
La Propuesta 65 de la Ley de 1986 del Estado de California
Sobre Seguridad y Contaminad6n del Agua Potable (California
Safe Drinking Water and Toxic Enforcement Act of 1986_}exige
que el Gobemador de California publique una lista de las
sustancias que segun el estado de California causan c_incer o
da_io al sistema reproductivo y exige que hs empresas
adviertan a sus dientes sobre la exposici6n potencid a tales
sustancias.
Se advierte a los usuarios de esta estufa que la combusti6n
del gas puede resultar en exposici6n de bajo nivel a dgunas
de las sustancias publicadas en la lista, induyendo benceno,
formddeh{do y hollin, debido principalmente a la combusti6n
incompleta del gas natural o de los combustibles de petr61eo
licuado. Los quemadores ajustados en forma debida
reducirdn la combusti6n incompleta. La exposici6n a estas
sustancias puede tambi6n set reducida a un minimo
ventilando los quemadores al exterior en forma adecuada.
Se advierte a los usuarios de este electrodomdstico que
cuando el homo est,1funcionando en el cido de autolimpieza,
puede haber exposici6n de bajo nivel a dgunas de las
sustancias indicadas en la lista, induyendo mon6xido de
carbono. La exposici6n a estas sustancias puede set reducida
a un minimo ventilando el homo al exterior en forma
adecuada, abriendo las ventanas y/o la puerta en la habitaci6n
en donde est,1ubicado el electrodomdstico durante el cido de
AVISO mMPORTANTE RESPECTO A LOS PAJAROS
DOMESTmCOS:
Nunca mantenga los pdjaros en la cocina o en las
habitaciones donde puedan Ilegar los humos de la cocina. Los
pdjaros tienen un sistema respiratorio muy sensitivo. Los
humos producidos durante el cido de autolimpieza dd homo
pueden set perjudiciales o mortales para los p_ijaros. Los
humos que despide el aceite de cocina recalentado, la grasa,
margarina y los utensilios antiadherentes recalentados pueden
tambi6n set perjudiciales.
Conserve estas lnstrucciones para Referencia Futura
63
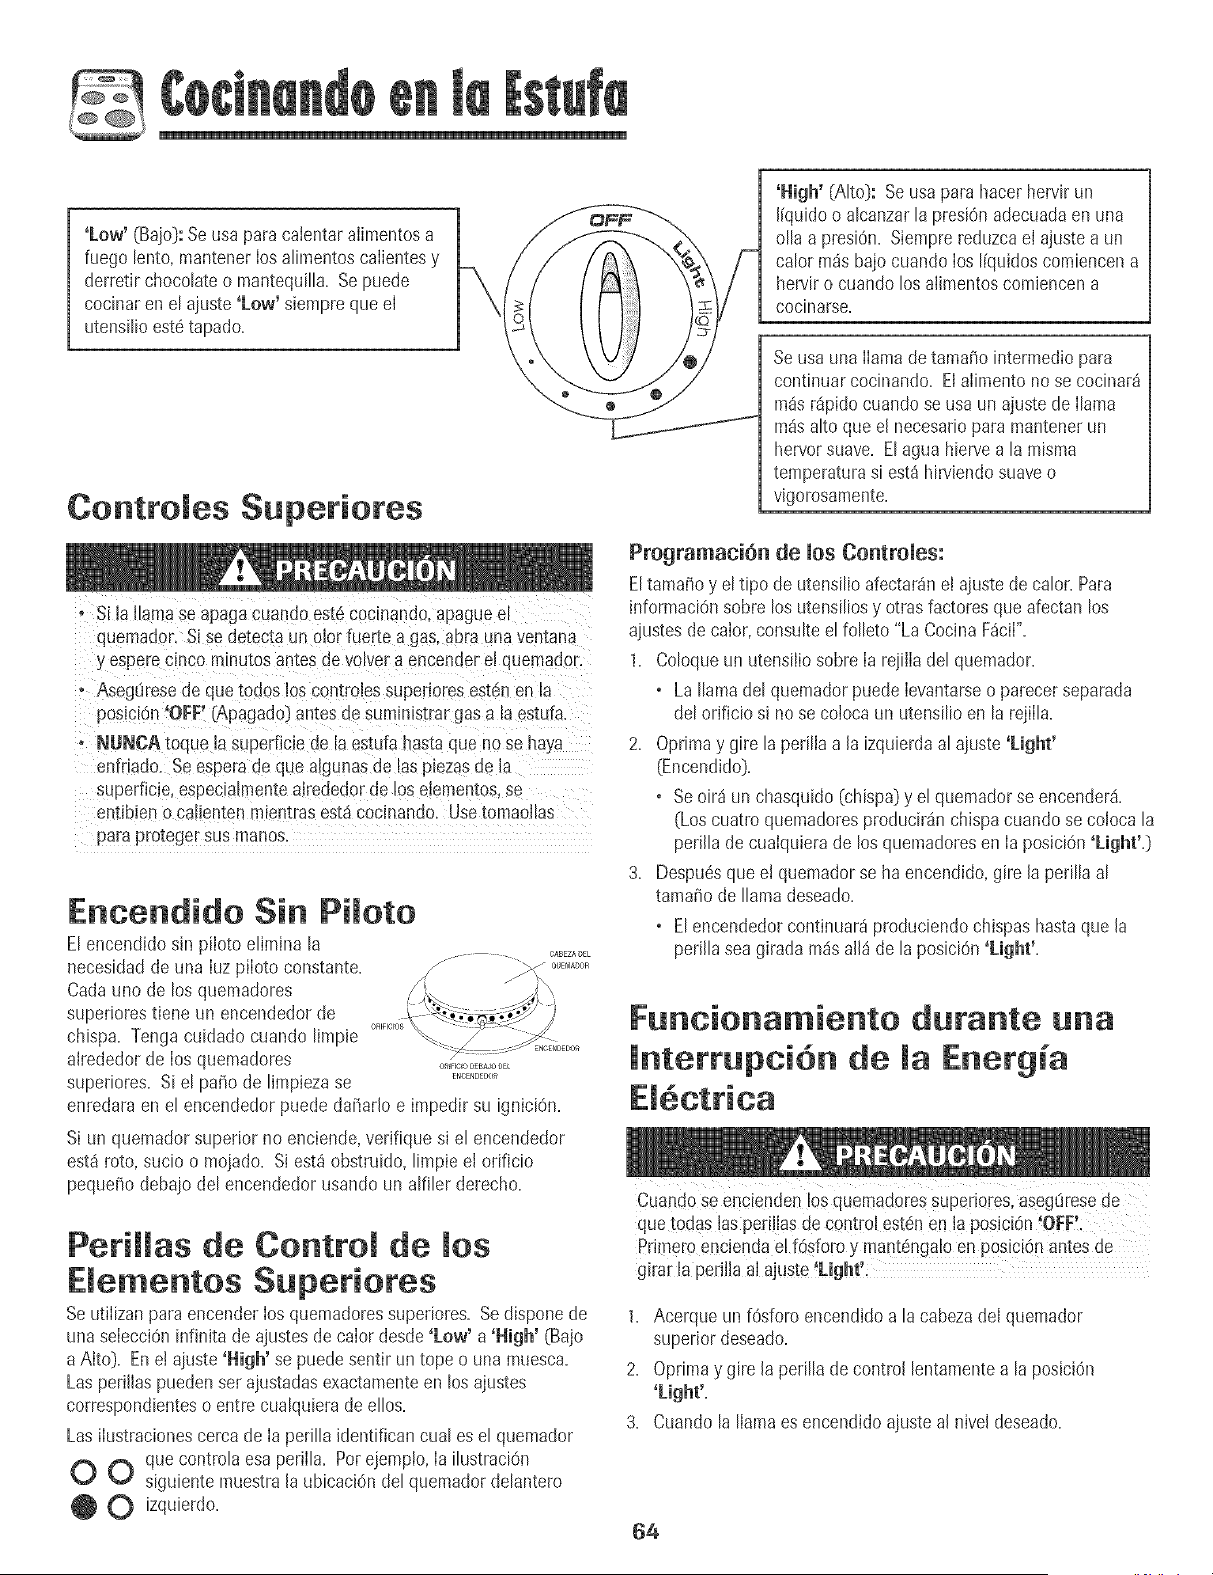
'Low' (Bajo]:Seusa para caientaralimentosa
fuego tento,mantener los atimentoscaiientesy
derretir chocotateo mantequitta+Se puede
cocinaren et ajuste '[Low' siempreque el
utensitioest# tapado+
Controles Superiores
, Si [a llamase apaga cuandoest6cocinando,apaguee[
quemador. Si se detectaun o[orfuerte a gas.aura una venmna
y esperecmco mmutosantesde voiver a encenderel quemador.
, Aseg0resede que Eodoslos controlessuperioresest6nen Ea
pos+ciOn'OFF' (Apagado)antesde summmtrargasa taestufa.
• NUNCA toque lasuperficie de [aestufa hasmque no se haya
enfdado. Se esperadeque aigunasde las pmzasde la
superficie,especialmenteairededorde los elementos,se
entibien o calienten m[entrasesta cocmando. Usetomao[las
paraproteger susmanos.
Encendido Sin Pimote
El encendidosin photo elimina la
necesidadde una [uz piioto constante+
Cada uno de los quemadores
supedorestiene un encendedorde
chispa+Tenga cuidado cuando limpie
airededorde los quemadores ..................
ENCENDEDO_
superiores. Si el paiio de [impiezase
enredaraen el encendedorpuede daffar[o e impedir su igniciOn.
Si un quemador superior no enciende,verifique si el encendedor
est_ roto, sucio o mojado. Si est_ obstruido, limpie e[ orificio
peque_odebajo del encendedorusando un alfiler derecho.
Periiias de Control de los
Eiementos Superiores
Seutiiizanparaencender[os quemadoressuperiores=Sedispone de
una seiecciOninfinita deajustesde caior desde'[Low' a 'High' (Bajo
a Aito)= En e! ajuste 'High' se puedesentir untope o una muesca=
Las peri[laspuedenser ajustadasexactamenteen los ajustes
correspondienteso entre cualquierade ellos=
Las iiustracionescercade [a peril[a identificancual es el quemador
que controla esa periila=Porejemp[o,[a ilustraciOn
OO
siguiente muestra[a ubicaci6n del quemadordelantero
O izquierdo.
'High' (Alto]: Seusa para hacer hervir un
[iquidoo alcanzarla presiOnadecuadaen una
olla a presiOn.Siemprereduzcael ajusteaun
calor m_sbajocuando los I[quidoscomiencena
herviro cuandolos aiimentoscomiencena
oocinarse.
Seusa una llamade tamaffo intermedio para
continuarcocinando. Elalimentono secocinar_
m_sr_pidocuandose usa un ajuste de llama
m_salto que el necesariopara mantenerun
hervorsuave. El agua hiervea [a misma
temperaturasi est_ hirviendosuaveo
vigorosamente.
Programaci6n de los Controles:
Eltamat_oy el %0 de utensilio afectar_inel ajustede calor+Para
informaciOnsobre los utensi[iosy otrasfactoresque afectan los
ajustesde caior,consulteel folleto "La Cocina F_ci["+
1+ Coloqueun utensilio sobre[a rejilia del quemador+
, La llamadel quemadorpuede[evantarseo parecerseparada
del orificio s[ no se coioca un utensilioen la rejiila+
2+ Optimay gire la periliaa [a izquierdaal ajuste 'Ught'
(Encendido].
, Se oir_ un chasquido(chispa]y el quemadorse encender&
(Loscuatro quemadoresproducir_n chispacuando se co[ocala
peri[lade cuaiquierade los quemadoresen [a posiciOn'Light'+]
3+ Despu6sque el quemadorse ha encendido,gire [a perilla al
tamai_ode llama deseado+
, El encendedorcontinuar_ produciendochispashastaque [a
perJllaseagirada m_salia de la posiciOn'[Light'+
Funcionamiento durante una
lnterrupci6n de la Energia
Cuandose enclendenlos quernadoresSuperio[es,aseg0resede
quetodas las perlllasde control est6nen la posici6n'OFF+;
Prlmeroenc+endaelf6sforo y mant6nga[oen posici6n antes de
girar la perilla a[ ajuste'[Light'i
1. Acerque un fOsforoencendidoa la cabezade[ quemador
superior deseado+
2+ Oprimay gire [a perilla de control lentamentea la posici6n
3. Cuando la llamaes encendidoajustea[ nivel deseado.
64
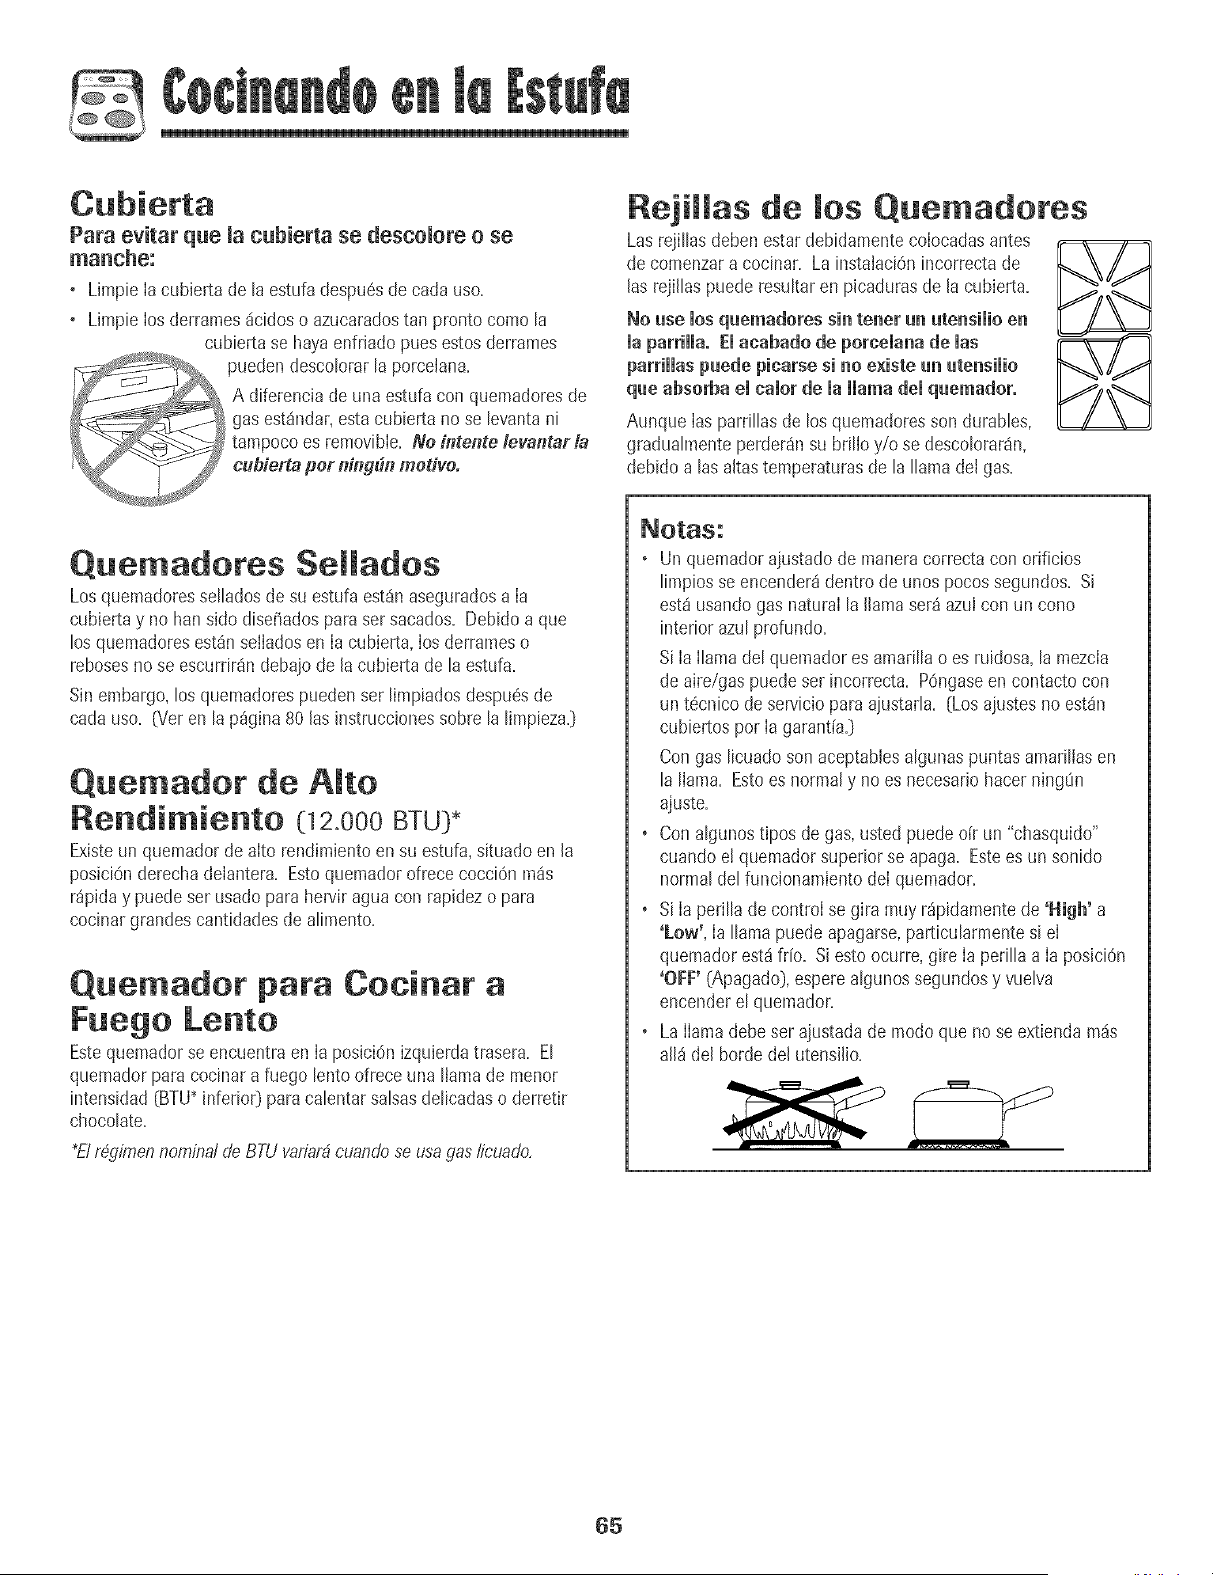
Paraevitar que la cubierta se descomore o se
ma_che:
• Limpie [acubierta de [aestufa despu6sde cada uso+
• Limpie [osderrames_cidoso azucaradostan pronto como ta
cubiertase hayaenfriado puesestos derrames
puedendescotorarta porcelana+
A diferencia de unaestufa con quemadoresde
gas est_ndar,estacubiertano se tevantan[
tampocoes removible. No intettte levalltar la
cubierta per ningt_nmotive.
Rejimmasde ruesQuemadores
Las rejillasdeben estar debidamenteco[ocadasantes
de comenzara cocinar+La instalaciOnincorrectade
[asreji[laspuederesultaren picaduras de [a cubierta+
No use losquemadores sin tenet un utensiiio en
maparrimma.El ucabado de porcemanude mus
purrimmaspuede pinursesi no existe un utensimio
que absorbu el camorde mallama demquemador.
Aunque[asparrillas de losquemadoresson durables,
gradualmenteperderSnsu bril[oy/o se descolorarSn,
debidoalas a[tastemperaturasde la llamade[ gas+
Quemadores Se[mados
Losquemadoressellados de su estufaest_naseguradosa [a
cub+ertay no hart sido dise_adospara set sacados+Debido a que
los quemadoresest_nseliadosen [a cubierta,[osderrameso
rebosesnose escurrirSndebajode [acubierta de laestufa+
Sin embargo,los quemadorespueden ser limpiadosdespuesde
cadauso+ (Vet en lap%ina 80 [asinstruccionessobre la limpiezay
Quemador de Alto
Rendimiento 0 2.000BTU:)*
Existeun quemadorde aito rendimiento en su estufa,situado en [a
posiciOnderechadeiantera. EstoquemadorofrececocciOnross
r_piday puedeset usado para herviragua con rapidezo para
cocinargrandescantidadesde alimento.
Quemador para Cocinar a
Fuego Lento
Estequemadorse encuentraen [a posici6n izquierdatrasera+El
quemadorpara cocinar a fuego lento ofreceuna llama de menor
intensidad(BTU*inferio0paracalentarsalsasdelicadaso derretir
chocolate+
+Ftr6,gimennombd deBTUva,ciarbcuandoseusagas/icuado.
, Un quemadorajustadode maneracorrectacon orificios
limpiosse encender8dentro de unos pocossegundos. Si
est_usandogas natural la llama ser_azul con un cono
interior azulprofundo.
Si [a llamade[ quemadores amarillao es ruidosa,la mezcla
deaire/gaspuedeser incorrecta. POngaseen contacto con
unt6cnico deserviciopara ajustarla. {Losajustesno estan
cubiertospor [a garant[a.}
Congas licuado sonaceptab[esalgunaspuntas amarillasen
la llama. Estoes normaly no es necesar[ohacerningOn
ajuste.
, Conalgunost[pos de gas,usted puede oir un "chasquidd'
cuandoe[ quemadorsuperiorse apaga. Estees un sonido
normaldel funcionamientode[ quemador.
, Si [a perillade control se gira muyr_pidamentede 'High' a
'Low', [a llamapuede apagarse,particularmentesi el
quemadorest_frio. Si esto ocurre, gire [a perilla a [a posiciOn
'OFF' {Apagado},esperealgunossegundosy vue[va
encenderel quemador.
, La llama debe ser ajustadade modo que nose extiendam_s
a[l_del hordede[ utensi[io.
65
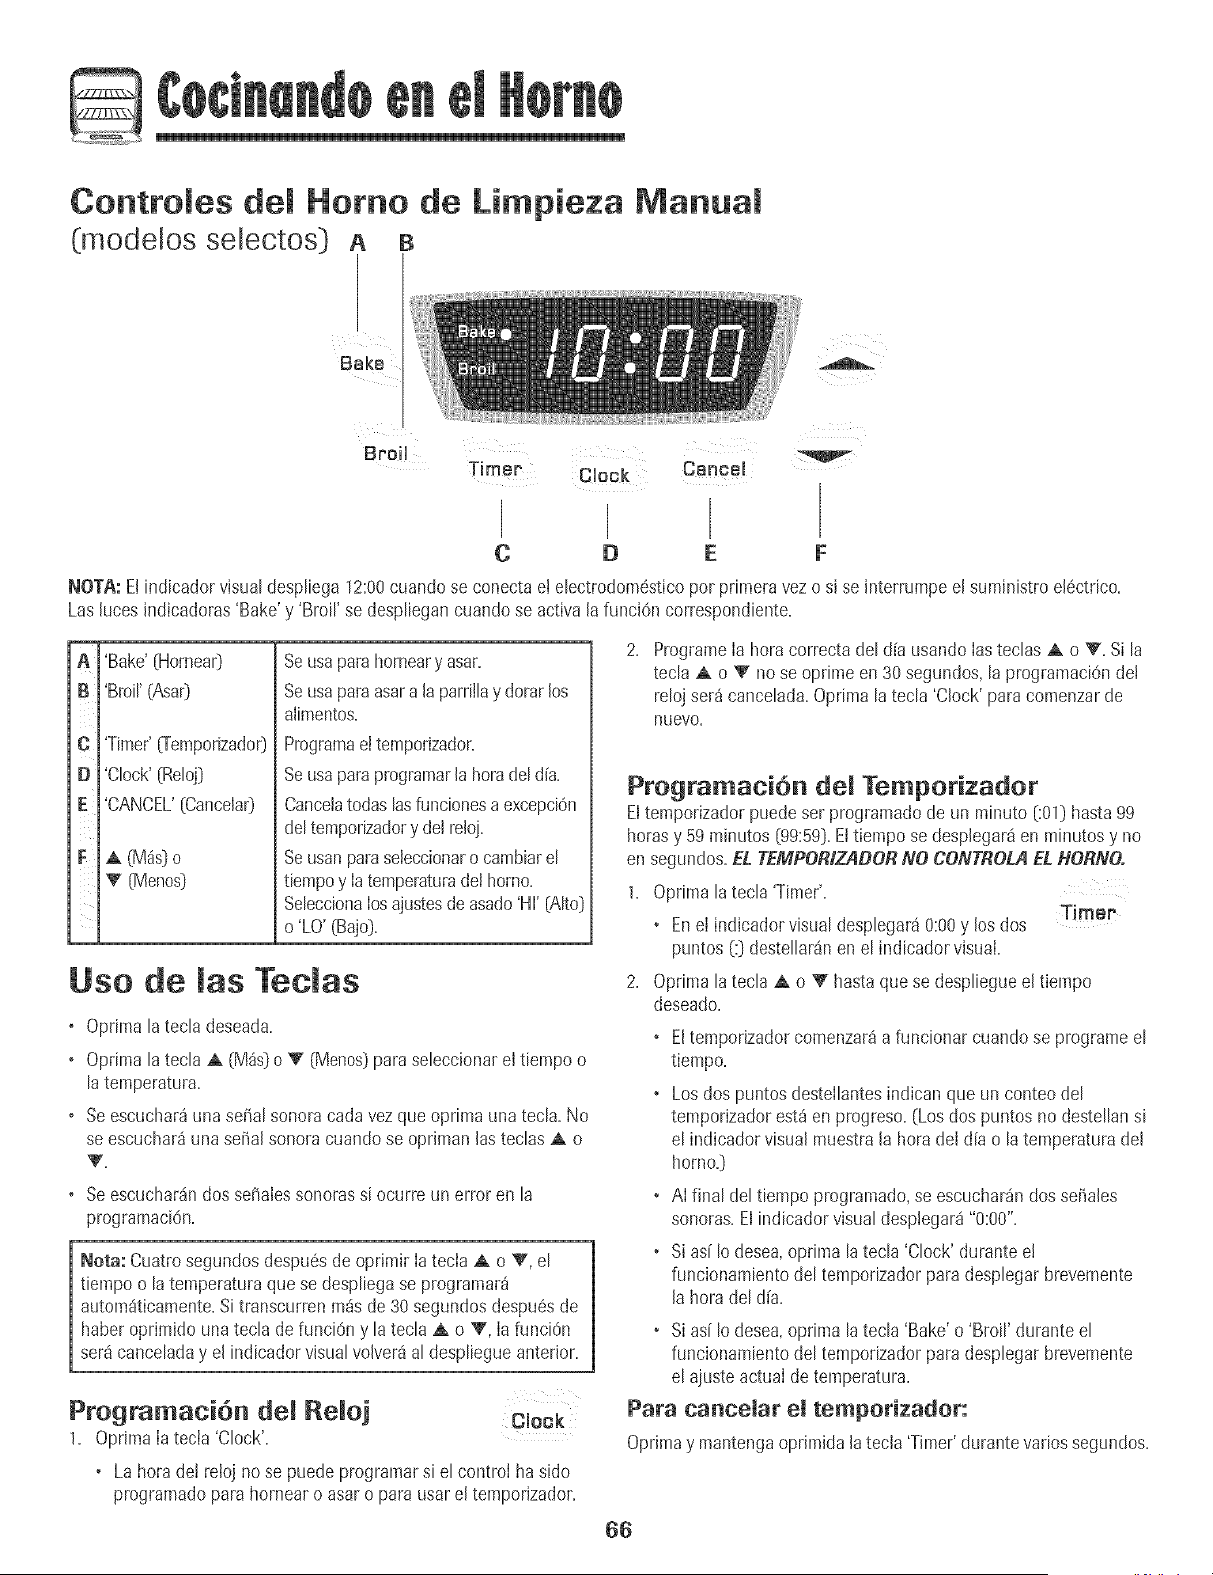
Brai]
Timer Clock Cancel
C D E F
NOTA: Etindicadorvisualdespliega 12:00cuando se conectael electrodom6sticopar pdmeravez o s[ se interrumpeelsuminbtro eJectrico.
Lashces indicadoras'Bake'y 'Broit' se desptiegancuandose activa la funci6n correspondiente.
A
B
C
D
E
F
'Bake'(Hornea0
'Brair(Asa0
'Timer'_Temporizado0
'Clock'(Reloj)
'CANCEL'(CanceIa0
Seusapara horneary asar.
Seusapara asara la parrillay dorar los
alimentos.
Pragramael temporizador.
Seusapara programarla horadeld[a.
Cancelatodaslasfuncionesaexcepci0n
deltemporizadory del reloj.
Seusanparaseleccionaro cambiarel
tiempoy Iatemperaturadel homo.
Seleccionalosajustesde asado'HI' (Alto]
o 'LO'(Bajo).
Use de las Teelas
, Oprima la tecla deseada.
o Optima la tecla A (M_s)oV (Menos)para seleccionarel tiempo o
la temperatura.
o Seescuchar_unaserial sonoracada vezque oprima unatecla. No
se escuchar_una serialsonoracuandose oprimanlasteclas A o
, Se escuchar_ndos sefialessonorassi ocurre un error en la
programaciOn.
Nora: Cuatro segundosdespu6sde oprimir Iatecla A o V, el
tiempoo la temperaturaque sedespliegase programar_
autom_gticamente.Sitranscurrenm_sde 30 segundosdespu6sde
haberoprimido unatecla de funciOny la tecla A o _', Ia funci6n
ser_canceladay el indicadorvisual volver_al despliegueanterior.
Programaci6n del Reloj
1. OprimaIatecia 'Clock'.
Clock
+ La hora de! reioj no se puedeprogramarsi elcontrol ha sido
programadoparahornearo asar o para usar el temporizador.
ProgrameIa horacorrectadel dia usandoIas teclas A o V. Si la
tecla A o V nose oprime en 30segundos,la programaciOndei
relojser_ cancelada.Oprima latecla 'Clock'paracomenzarde
n U eva.
Programaci6n del Temporizador
Eltemporizadorpuedeset programadode un minuto (:01)hasta 99
horasy 59 minutos [99:59).Ettiempo sedesplegar_en minutosy no
en segundos.EL TEMPORtZADORNO CONTROLAEL HORNO,
1. Optima latecla 'Timer'.
Timer
• EneI indicadorvbua[ despbgara 0:00y [asdos
puntos(:[ destellar_nen el indicadorvisual.
2. Opnma [atecla A o V hastaque se despliegueel tiempo
deseado.
+ Eltemporizadorcomenzar_a funcionar cuandose programeel
tiempo.
+ Losdos puntos destellantesindican que un conteodel
temporizadorest_ en progreso. (Losdos puntosno destellansi
el indicadorvisualmuestraJaheradel d[a o latemperaturadel
homo.}
• Ai final del tiempo programado,se escuchar_ndos sefiales
sonoras.El indicadorvisualdespJegar4"0:00".
+ Si as[Io desea,optima latecla 'Clock' durante e!
funcionamientodel temporizadorparadesplegarbrevemente
Jahoradel d[a.
• Si asi Io desea,optima la tecla 'Bake' o 'Broil' durante el
funcionamientodel temponzadorparadesplegarbrevemente
el ajuste actual detemperatura.
Para cancelar el temporizador:
Oprimay mantengaoprimidalatecla 'Timer'durantevariessegundos.
66
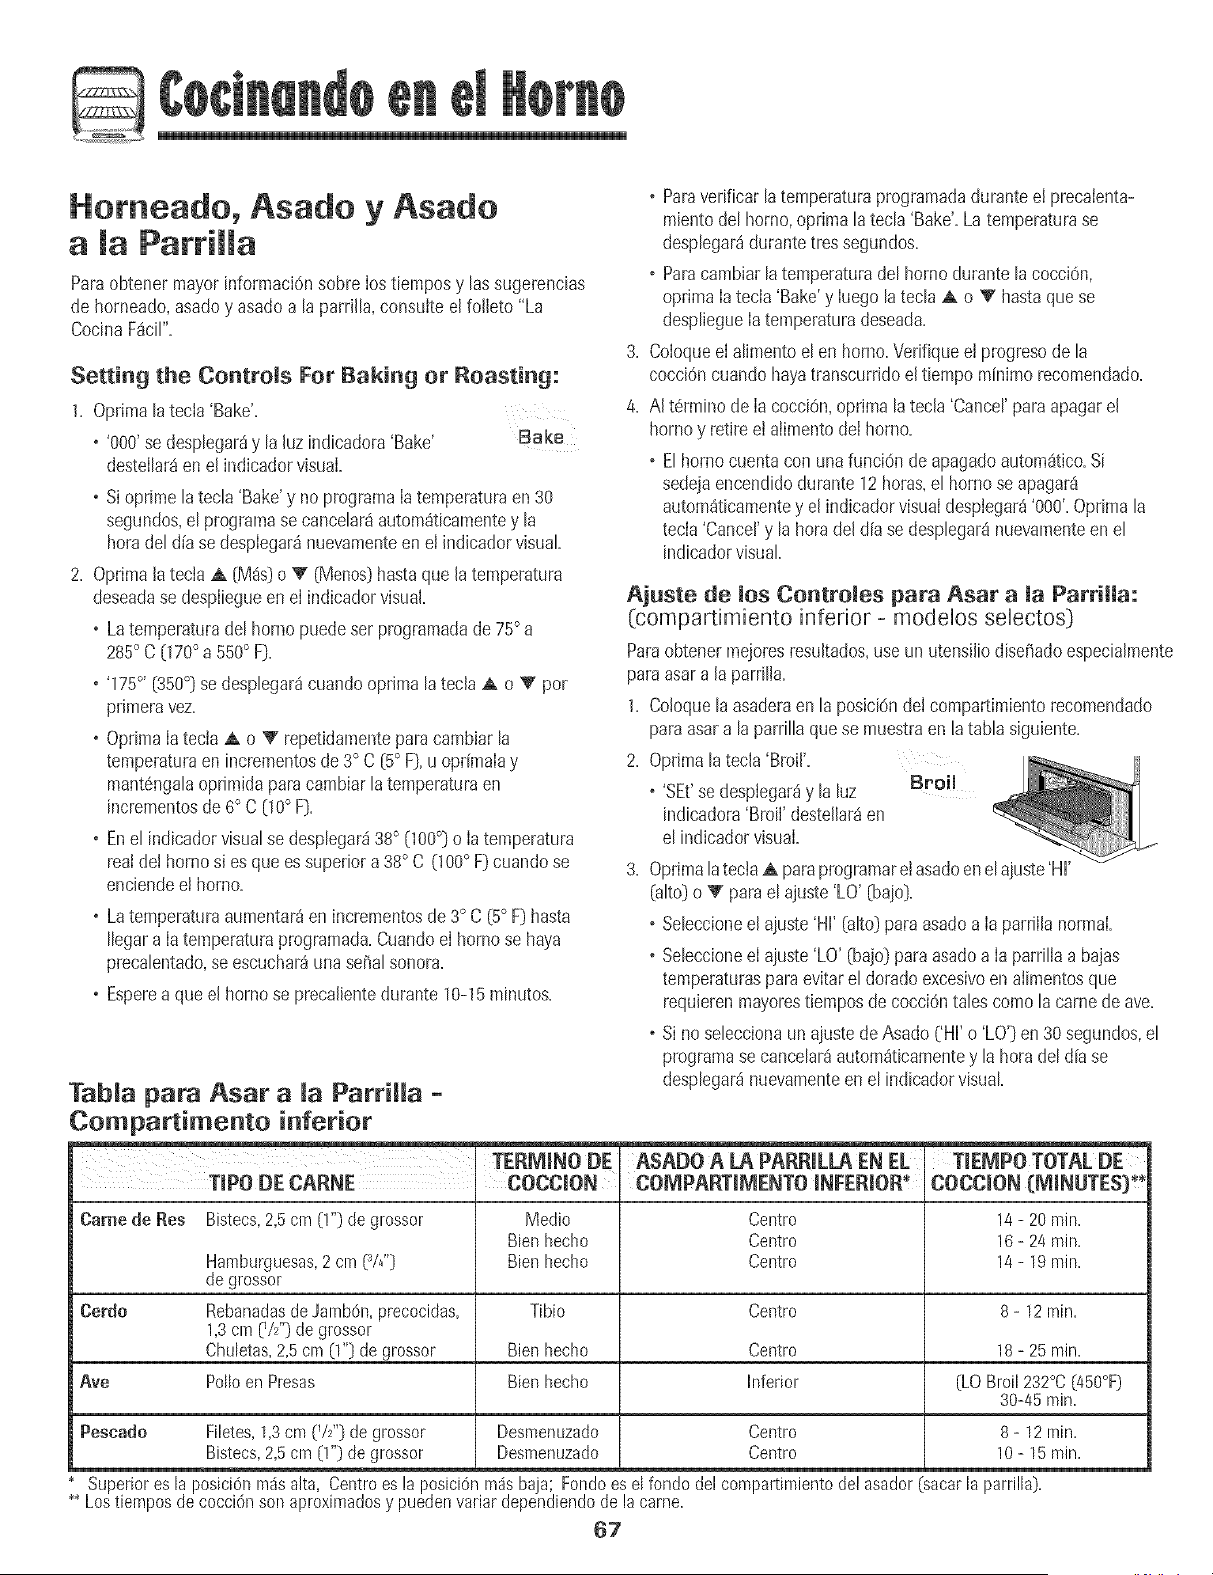
@
Homeado, Asado y Asado
a PatriHa
Paraobtener mayor informaci6nsobre [ostiemposy las sugerencias
de horneado,asadoy asado a la parrilh, consuiteel folleto "La
CocinaF_ciF'.
Setting the Controls For Baking or Roasting:
1. Optimalatecla 'Bake'.
o '000'se desplegar_y la hz indicadora'Bake' Bake
desteIlar_en el indicadorvisuaI.
o Si oprime la tecla 'Bake'y noprogramaIatemperaturaen30
segundos,el programasecancelar_autom_ticamentey la
horadel d[ase despIegar_nuevamenteenei indicadorvisual
2. Optimalatecia A [Mds)o V (Menos)hastaque latemperatura
deseadasedespIiegueen eI indicadorvisual.
o La temperaturadel homo puedeser programadade 75° a
285° C 070 ° a 550° FD.
o '175°' [350°Dsedesplegar_cuandooptima la teclaA o V por
pHmeravez.
o OprimaIatecia A o V repetidamenteparacambiarla
temperaturaenincrementosde3° C [5° FD,u oprimaIay
mant6ngalaoprimidaparacambiarlatemperaturaen
incrementosde 6° C [10° F).
o En el indicadorvisualse desplegard38° [100°Do Iatemperatura
reaidei homosi esque essuperiora 38° C (100° F)cuandose
enciendeei homo.
o La temperaturaaumentar_en incrementosde 3° C (5° F)hasta
Ilegara Iatemperaturaprogramada.CuandoeI homo se haya
precalentado,se escuchar_una sepalsonora.
o Esperea queel homo se precalientedurante 10-15minutos.
3,
4.
o Paraverificar la temperaturaprogramadadurantee! precalenta-
mientodelhomo,oprimala tecla 'Bake'.La temperaturase
desplegar_durantetres segundos.
o Paracambiarla temperaturadel homo durantelacocciOn,
optimaIatecla 'Bake'y Iuegolatech A o V hastaquese
despliegueIatemperaturadeseada.
ColoqueeI alimentoel en horno.Verifiqueei progresode la
cocci6ncuandohayatranscurridoel tiempo minimorecomendado.
AI t6rminodeIa cocciOn,oprimalatecla 'Cancel'para apagarel
homo y retireet alimentodeIhomo.
o El homo cuentacon unafunci6n deapagadoautomStico.Si
sedejaencendidodurante 12horas,el homo seapagar8
autom_ticamentey elindicadorvisualdesplegar_'000'.Optimala
tecla'Cancel'y la hora del aliase desplegar8nuevamenteen el
indicadorvisual
labia para Asar a la ParriHa -
Compartimento inferior
TERMINOD_ ASADO A LA PAP,RmLLAEN EL_
TIPO DE CAP,NE COCCION COJ_PAP,TiMENTO INFERIOP,* COCCION (MINUTES)*'
Camede Res Bistecs,2,5cm(!") de grossor Medio Centro 14-20rain.
Bienhecho Centro 16- 24rain,
Hamburguesas,2 cm (V#':} Bienhecho Centro 14- 19rain.
degrossor
Cerdo RebanadasdeJamb6n,precocidas, Tibio Centro 8- 12rain.
1,3cm (VZ'}degrossor
Chuletas,2,5cm (1":}degrossor Bienhecho Centro 18-25 rain.
Ave Polioen Presas Bienhecho Inferior [LOBroil232°C(450°F)
30-45rain.
Pescade Filetes,1,3cm (VZ')degrossor Desmenuzado Centro 8- 12 rain.
Bistecs,2,5cm0") de grossor Desmenuzado Centro 10- 15rain.
Ajuste de los Controles para Asar a la Parrilla:
(compartimiento inferior - modelos selectos:)
Paraobtenermejoresresultados,use un utensiliodiseSadoespecialmente
paraasara laparrilla.
1. Co!oquela asaderaen la posici6ndeicompartimientorecomendado
paraasara laparrilla que se muestraen la tabh siguiente.
2. Optimalatecla 'Broil'.
o 'SEt'sedesplegar_y la luz Broil
indicadora'Broil' destellar_en
el indicadorvisual.
3. OprimalateciaA paraprogramarelasadoen el aiuste'HI'
(alto)o V parael ajuste'LO' [baio).
o Seleccioneel aiuste'HI' (alto)paraasadoa Ia parrilla normal.
o Seleccioneel ajuste'LO' (bajo) paraasadoa Ia parrillaa bajas
temperaturasparaevitarel dorado excesivoen alimentosque
requierenmayorestiemposde coccidntalescomolacame de ave.
o Si no seleccionaun aiustedeAsado ('HI'o 'LO'Den 30 segundos,el
programase cancelar_autom_ticamentey lahoradel d[ase
desplegar_nuevamenteenel indicadorvisual
Superiores la posici6nrodsalta, Centroes la posici6ninasbaja; Fondoesel rondodel compartimientodelasador(sacarlaparrilla).
_ Lostiemposdecoccidnsonaproximadosy puedenvariardependiendodela came.
67
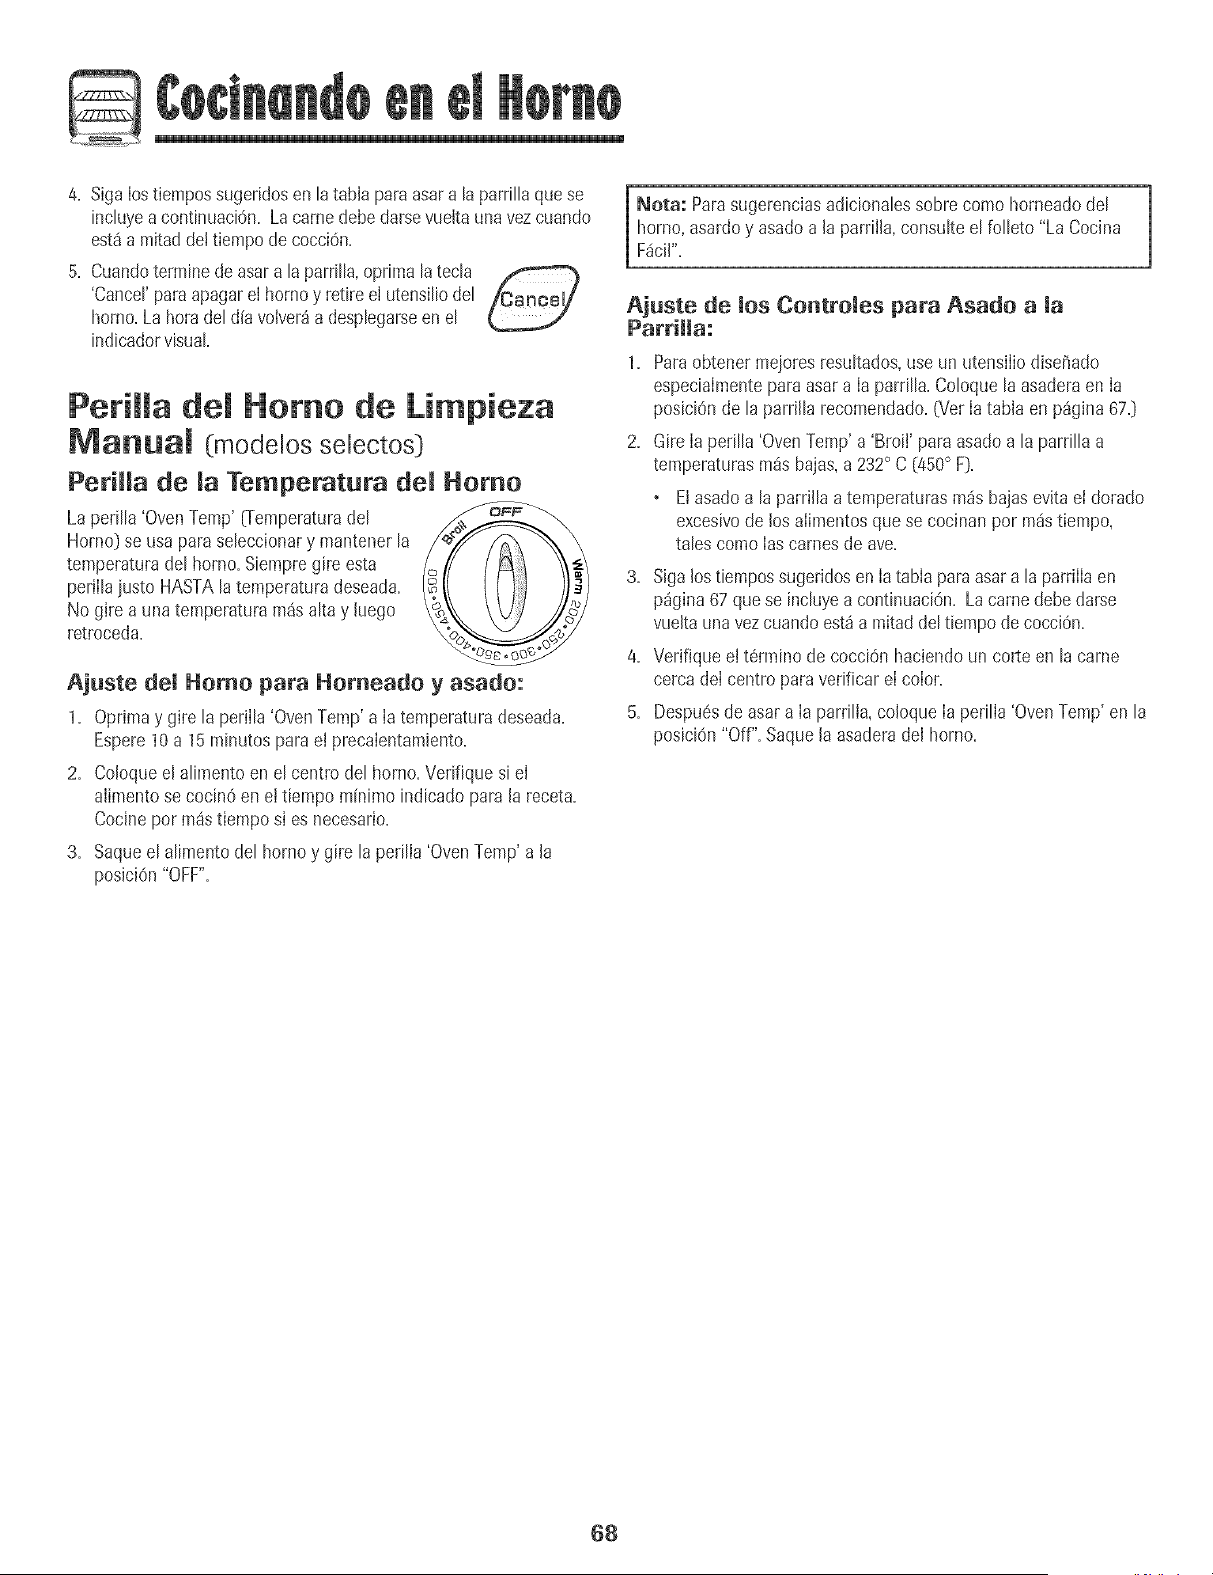
4.Sigalostiempossugeridosen[atab[aparaasara[aparri[[aquese
inctuyeacontinuaci6n.Lacamedebedarsevue[taunavezcuando
est8amitadde[tiempodecocci6n.
5.Cuandoterminedeasara[aparritta,oprimatatecta
'Cancer paraapagareI homo y retiree[ utensitiodet
homo.La horadet dia volver_a desptegarseenet
indicadorvisuat.
Periiia dem Homo de Limpieza
Manual (mode[os se[ectos)
Perilla de la Temperatura del Homo
La peri[[a 'OvenTemp' O-emperaturade[ _ _
Homo) se usa para seteccionary mantenerla
temperaturade[ homo. Siempregire esta l_(( (
perillajusto HASTAla temperaturadeseada. _ _
No gire a unatemperaturam4s alta y [uego
retroceda. _.________Jo_
Ajuste del Homo para Homeado y asade:
1. Oprimay gire la perilla 'OvenTemp' a Ia temperaturadeseada.
Espere10a 15minutospara el precalentamiento.
2. Coloqueel alimentoen el centro del homo.Verifique si el
alimentose cocin6en et tiempo minimo indicado para la receta.
Cocinepor mastiempo si es necesario.
3. Saqueel alimentodel hornoy gire la perilia'OvenTemp'a [a
posiciOn"OFF".
Nora: Parasugerenciasadiciona[essobre comohomeadode[
homo,asardoy asadoa [a parrii[a,consulteel folleto "La Cocina
F_cil".
Ajuste de los Controies para Asado a [a
Parrilla:
1. Paraobtenermeioresresu[tados,use un utensilio dise[_ado
especialmentepara asar a [a parrilla.Coloquela asaderaen [a
posiciOnde la parri[la recomendado.(Vet [a tab[aen p_gina67.}
2. Gire [aperilla 'OvenTemp' a 'Broil' para asadoa la parrillaa
temperaturasm_sbajas,a 232° C (450° F}.
• El asadoa [a parri[laa temperaturasm_s bajasevitael dorado
excesivode los alimentosquese cocinanpor m_stiempo,
tales como [as carriesde ave.
3. Siga lostiempossugeridosen [atabla para asara la parrilla en
p_gina67 que se incluyea continuaciOn.Lacamedebedarse
vueltaunavezcuandoest_ a mitad del tiempo de cocciOn.
4. Verifiqueel t6rmino de cocciOnhaciendoun corte en la carne
cercade[ centro para vedficar el coior.
5. Despu_sde asar a [a parrilla,coloque [a perilla'OvenTemp'en la
posiciOn"Off". Saque[a asaderade[ horno.
68
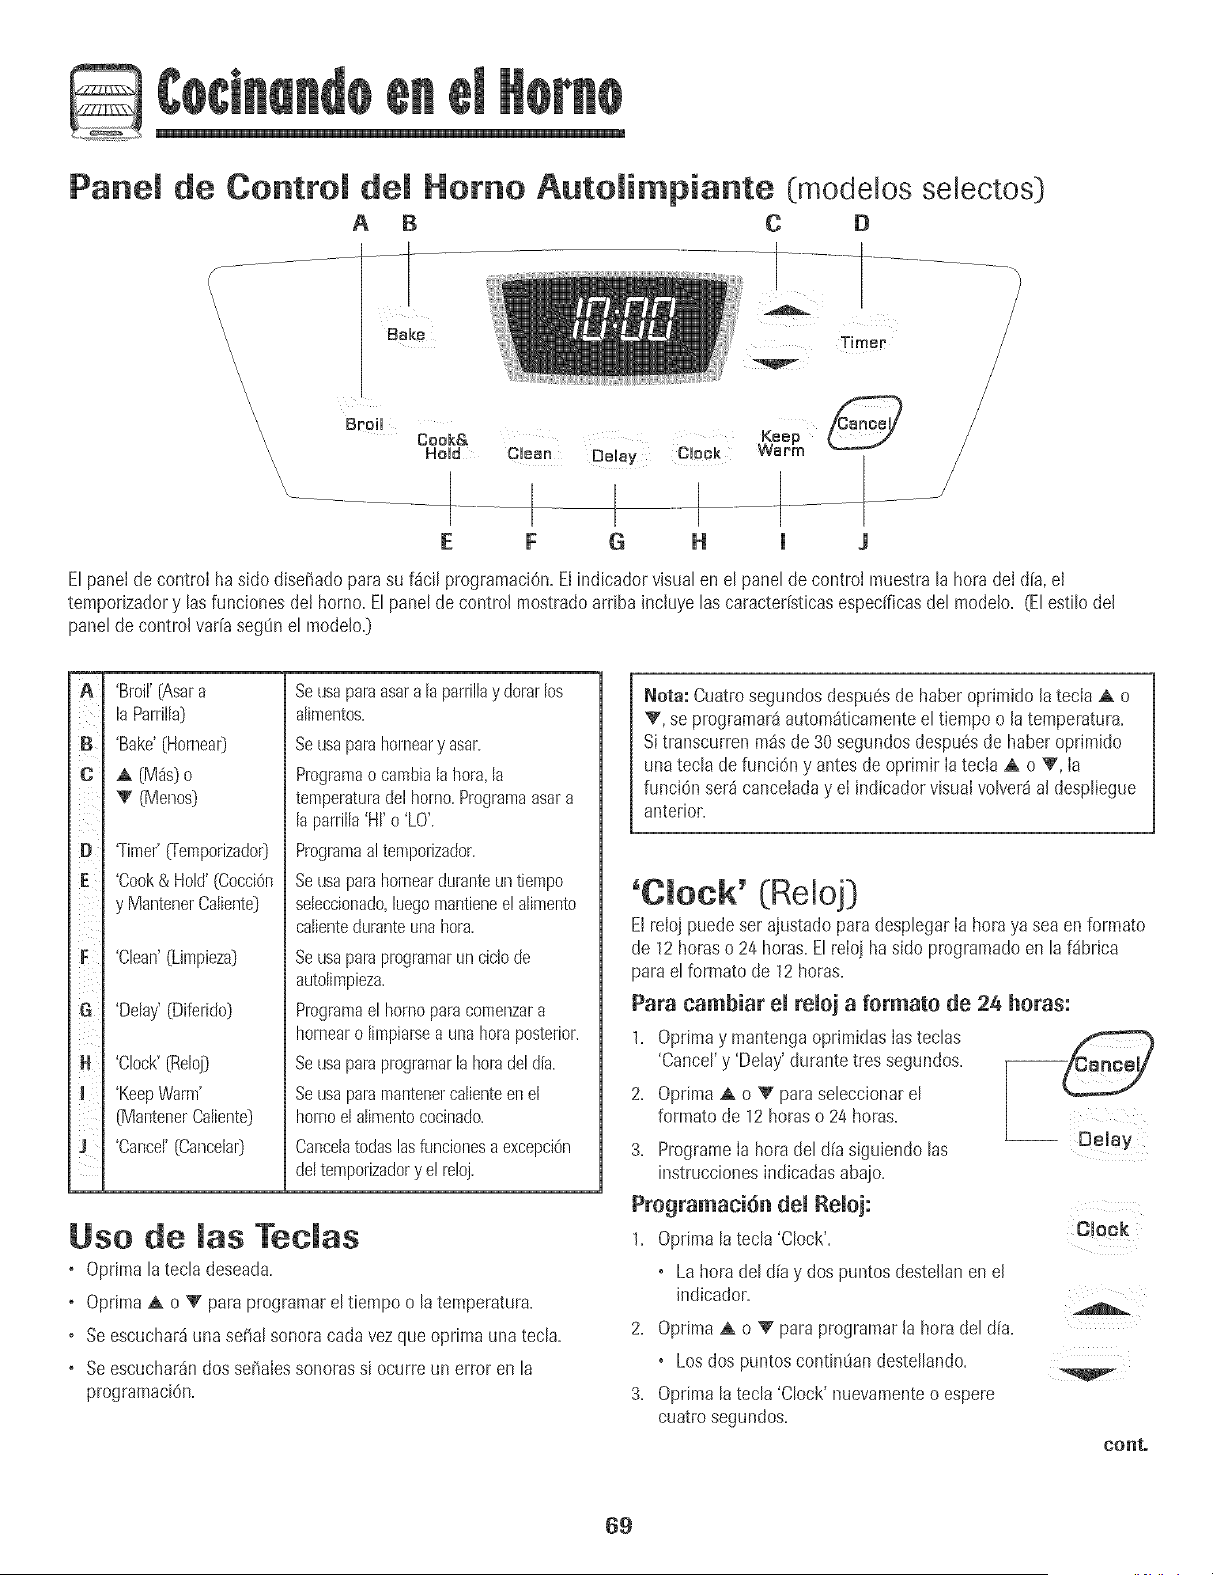
Panel de Control del
A B
\
\
\
\
\
\
\
\
\ Broil
\
\
\
\
Homo AutoJimpiante (:modelos selectos)
C D
Cook& Keep
Hold CUean Delay CHOCk W_rm
E F G H 1 J
Elpanelde control haside diseffadopara su f_ci[ programaciOn.Elindbador visualen el panelde controi muestra[a hera de[ d[a,el
tempodzadory tasfunciones de! borne.Elpanelde control mostradoarriba inc[uyelas caracter[sticasespedficas del modelo. (Elestilo del
panelde control var[a segOnel mode[o.}
A
B
C ¸
D
E
!i_iiI
G ¸
H
I
m
'Broil'(Assra
IsParrilla}
'Bake'(Horrlea0
A (M_is}o
V (Mer!os}
'Timer'_emporizado0
'Cook& Hold'(Cocci6n
y MantenerCaliente}
'Clean'(Limpieza}
'Delay'(Diferido}
'Clock'{Reloj}
'KeepWarm'
[MantenerCal[ente)
'Cancel'[Carlcelar}
Seusaparaasara lapanillay dorarlos
alimentos.
Seusaparshorneary asar.
ProgramsocambiaIshera,la
temperaturadel horno.Programsasara
laparrilla'HI'o 'LO'.
Programsa!temporizador.
Seusaparshomearduranteuntiempo
sebccionado,luegomantienee!alimento
calienteduranteunahera.
Seusaparsprogramaranciclode
autolimpieza.
Programselhomoparscomenzara
homearo limpiarsea unaheraposterior.
SeusaparsprogramarIsheradeldis.
Seusaparsmantenercalienteen et
homoelalimentococinado.
CancehtodaslasfuncionesaexcepciOn
deltemporizadory e!reloj.
Use de las Tedas
o Oprima latecla deseada.
o Oprima,A o V pars programarel tiempo o latemperatura.
o Seescuchar_unaseSalsonoracads vezgue oprima una tecla.
o Seescuchar_ndos serialessonorassi ocurre un error en la
programaciOn.
Nets: Cuatrosegundosdespu6sde haberoprimido la tecla A o
V, se programar_autom_ticamenteel tiempoo latemperatura.
Si transcurrenm_sde30 segundosdespu6sde haberoprimido
unatecla de funci6n y antesdeoprimir Iatecia A o '_, Ia
funci6n ser_ canceladay el indicadorvisual velvets al despliegue
anterior.
'Clock' (Reloj)
El reloj puede ser ajustado pars desplegarIa heraya seaen formate
de 12 betas o 24 betas.El reIoi ha side programadoen la f_brica
pars el formate de 12horas.
Pars cambiar ei reioj a formate de 26 betas:
1. Opnmay mantengaoprimidaslas teclas
'Cancel'y 'Delay'durante tres segundos.
2. OprimaA o V para sebccionar el
formate de 12 horaso 24 horas.
3. ProgrameIa hera del d[a siguiendolas
instruccionesindicadasaba}o.
Programaci6n dei Reioj:
1. Oprimala tecla 'Clock'.
• Lahera del d[ay dos puntosdestellanenel
indicador.
2. Optima ,A o V pars programarla heradel d[a.
• Losdos puntoscontin8andestellando.
3. Oprimala tecla 'Clock' nuevamenteo espere
cuatrosegundos.
-- Delay
Oloek
V
eonto
69
©
Cuandose conectaenerg[ae!6ctricaa[ horno o despudsdeuna
interrupci6nde la energfaei6ctrica,Ia _ltima hora del reloj previaa
la interrupcidn destellar8en ei indicador.
Paradesplegarla horadeI dia cuando ei indicadorest6 mostrando
otra funcidn de tiempo, optima latech 'Clock'.
La hora deI reloj no puede ser cambiadacuandoel hornoha sido
programadopara 'DelayCook','Clean'o 'Cook& Hold'.
Para canceiar el despiiegue dei reioj:
Si no deseaque eI indicadorvisualmuestre lahora del dia:
Oprimay mantengaoprimida Iasteclas
'Cancel'y 'Clock' durantetres segundos+La
horadel d[a desaparecer_en el indicador+
Cuandose cancelael desplieguedeI reloj,
oprima IatecIa 'CIock' paradesplegar
brevementela hora del dia+
Para restaurar el despiiegue dei reioj:
Oprimay mantengaoprimida Iastechs 'Cancel'y 'CIock'durante
tres segundos+La horadel d[a reaparecer8en el indicador+
__ Clock
'Timer' (Temporizador}
E!temporizadorpuede set programadode un minuto {00:01]hasta
99 horasy 59 minutos {99:59]+
Eltemporizadorpuedeset usado independientementede cualquier
otra actividaddel homo+Adem_spuede ser programadocuando otra
funciOndel homo est6 en funcionamiento+
El temporizador no controla el horno, Solamente controla una se5al
sollot&
Para programar el temporizador:
1+ OprhTmIatecla 'Timer' 0-emporizador)+
+ '0:00'destetlaen eI indicadorvisual
+ Losdos puntosdestellar_n.
2. OprimaIatecla A o V hastaque et tiempo
correctoaparezcaen el indicadorvisual
• Losdos puntos contimian destellando.
"FimBr
3. Optima nuevamentela tecla 'Timer'o esperecuatm segundos.
+ Losdos puntoscontin_an destellandoy comienzala cuenta
regresivadel tiempo.
• El_ltimo minutode Ia cuenta regresivadel temporizadorse
desplegar_ensegundos.
4. A! final del tiempo programado,se escuchar_una serialsonora
larga.
Para canceiar el temporizador:
1+ Optimay mantengaoprh_aidala tecla'Timer' durantetres
segundos.
U
2. Optima latecla 'Timer'y coIoque la hora a 00:00.
Bloqueo de ruesContromes
Eltec[adopuede ser b[oqueadoparaseguridad,[impiezao evitar e[
uso no autorizado+No funcionar_n cuandoest6n bloqueados+
Siel homo estd en uso+los controIespueden bloquearse+
La hora actual del aliapermanecer_en el indicador cuando los
controlesest6n bloqueados+
Para bioquear:
Oprimay mantengaoprimidas lastecIas
'Cancel'y 'Cook & Hold'durante tres
segundos+
'LOCK'desteliaenel indicadorvisual
Para desbioquear:
Cook&
-- Homd
Oprimay mantengaoprimidas hs teclas 'Cancel'y 'Cook & Hold'
durantetres segundos.
'LOCK'desaparecedel indicador visual
C6digos de Errores
'BAKE'o 'LOCK'puedendestellarr_pidamenteparaadvertirleque
hay un error o un problem& Si 'BAKE'o 'LOCK'destellanen eI
indicadorvisual,optima la tecla 'Cancel'. Si'BAKE'o 'LOCK'
continOandestellando,desconectela corrienteel6ctrica haciael
artefacto.Espereunos pocos minutosy vuelvaa conectarIa
corrienteel6ctrica.Si las palabrasa0n contin0andesteilando,
desconecteJacorrienteel6ctdcahacia el artefactoy Jlamea un
t6cnico deservicioautorizado.
?O
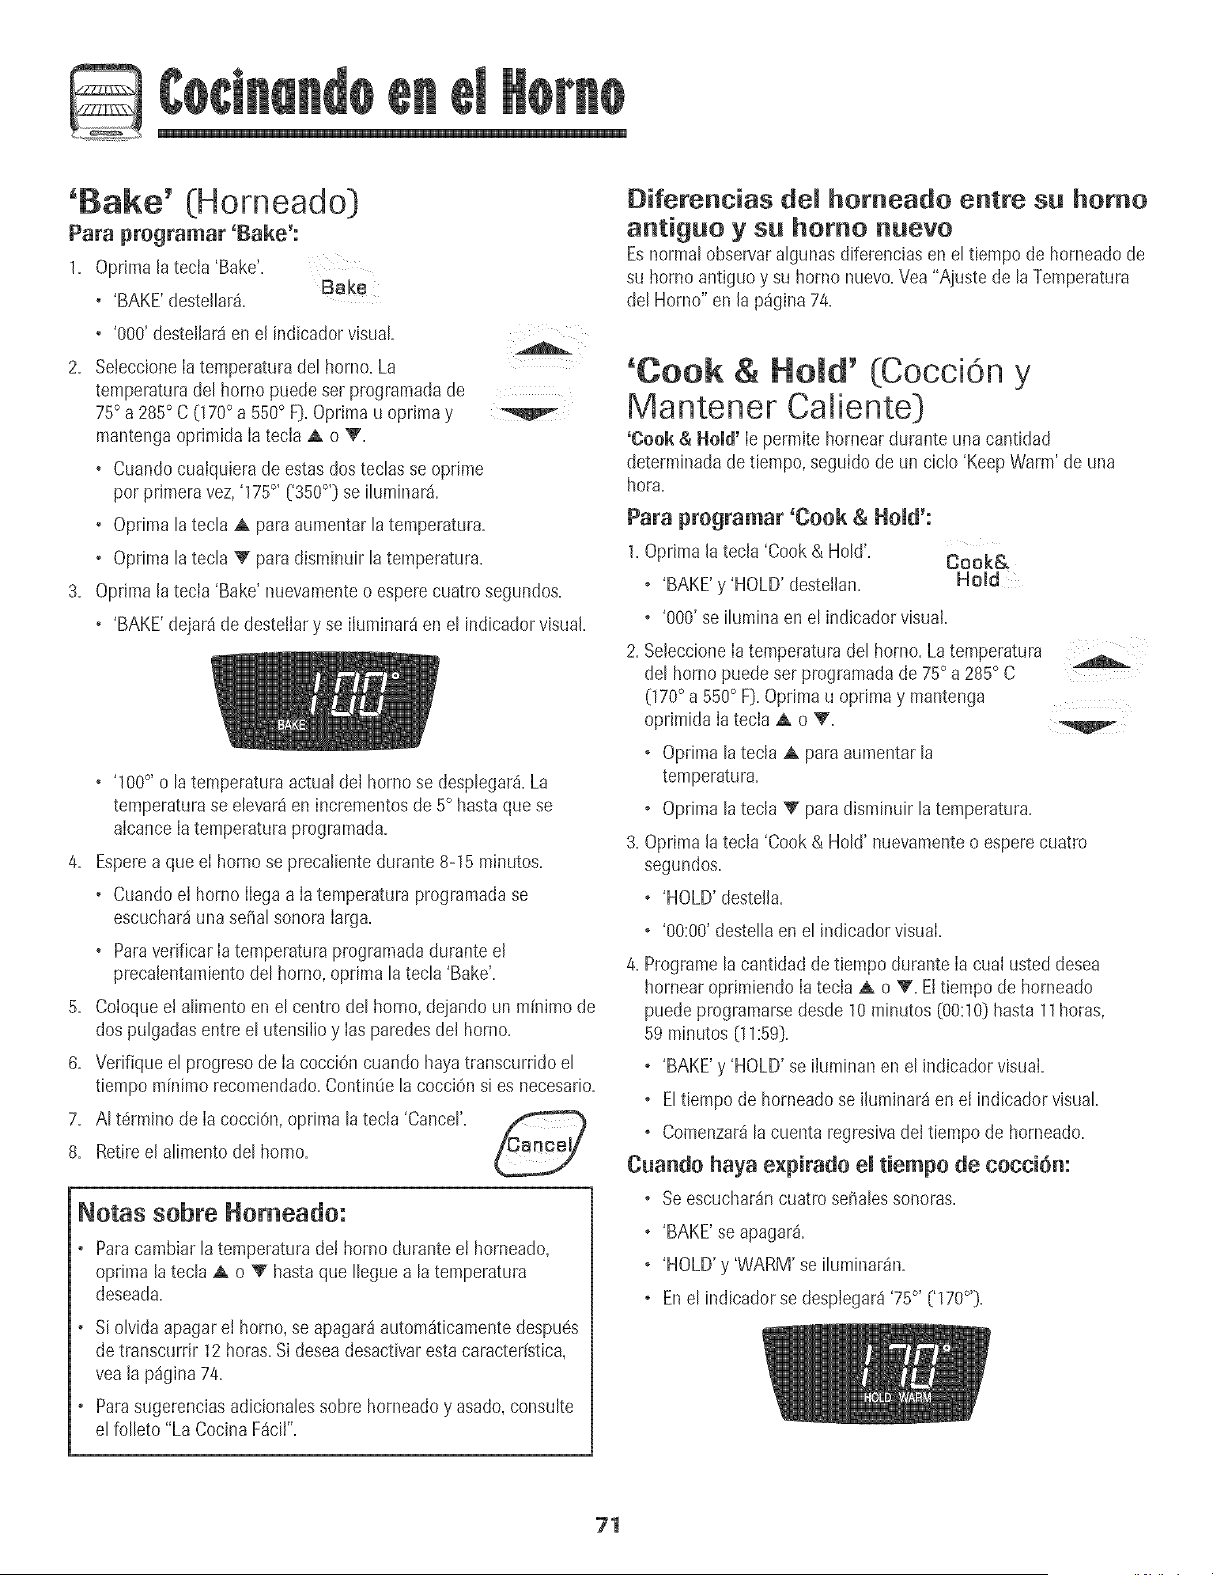
©
'Bake' (Horneado}
Para programar 'Bake':
1. Oprima[atecia 'Bake'.
+ 'BAKE'desteihr_.
• '000'destellaraen el indicadorvisual.
2. SeleccioneIatemperaturadel horno. La
temperaturadel horno puedeser programadade
75° a 285° C (170° a 550° FD.Oprimau oprima y
mantengaoprimida Iatecia A o V.
+ Cuandocuaiquierade estasdos techs se oprime
por primeravez,'175°, ['350°'} se iluminar_i.
+ Optima la tecla A para aumentar la temperatura.
+ Optima la tecla V para disminuir la temperatura.
3. Optima la tecia 'Bake' nuevamenteo esperecuatro segundos.
+ 'BAKE'dejar_de deste!Iary se iluminar8en el indicadorvisual.
+ '100°' o latemperaturaactual del homose desplegar_.La
temperaturase elevar_en incrementosde 5° hasta que se
alcanceIa temperaturaprogramada.
4. Esperea que eI homo se precalientedurante 8-15 minutos.
+ CuandoeI horno Ilegaa Iatemperaturaprogramadase
escuchar_unasei_alsonoraIarga.
+ ParaverificarIa temperaturaprogramadadurante el
precalentamientodel horno,optima la tecla 'Bake'.
5. ColoqueeI alimento en el centrodel horno, dejando un m[nimode
dospulgadasentre el utensiIioy Iasparedesdel horno.
6. Verifique el progresode Ia cocciOncuando hayatranscurridoel
tiempo minimo recomendado.ContinUela cocci0n si es necesario.
7. AI t6rmino de Ia cocciOn,optima la tecla 'Cancel'.
8. Retireel alimentodel horno.
Notas sobre Homeado:
Paracambiarlatemperaturade! homo duranteet horneado,
optima la tecla A o '_' hastaque Ileguea la temperatura
deseada.
+ Si olvida apagarel homo,seapagar8 autom_ticamentedespu6s
detranscurrir 12horas.Sideseadesactivarestacaracteristica,
yea la p%ina 74.
+ Parasugerenciasadicionalessobre horneadoy asado,consulte
el folleto "La Cocina F_ciI".
Diferencias del homeado entre su homo
antiguo y su homo nuevo
Esnormal observaralgunas diferenciasen el tiempode horneadode
su horno antiguoy su homo nuevo.Vea "Ajustede laTemperatura
del Horno" on la p%ina 74.
'Cook & Herod' (Cocci6n y
Mantener Caliente}
'Cook & Hold' Ie permite hornear durante una cantidad
deterrninadadetiempo, seguidode un ciclo 'KeepWarm' de una
hora.
Para programar 'Cook & Homd':
1.Oprimala tecla 'Cook& Hold'.
Cook&
, 'BAKE'y 'HOLD'destetlan. Hold
, '000' se iluminaen el indicador visual.
2. SeleccioneIa temperaturadel horno.Latemperatura
del horno puede set programadade 75° a 285° C
(170° a 550° F). Opdmau optima y mantenga
oprimida Iatecla A o V.
, Optima latecla A paraaumentarla
temperatura.
, Oprima [atecla '_' paradisminuir [atemperatura.
3. Oprimala tecla 'Cook& HoW nuevamenteo esperecuatro
segundos.
, 'HOLD'destella.
, '00:00'destella enel indicadorvisual.
4. Programela cantidad de t+empodurante Ia cuaI usted desea
hornearoprimiendoIa tecia A o V. EIt+empode horneado
puedeprogramarsedesde 10minutos (00:10)hasta 11horas,
59 minutos (11:59).
, 'BAKE'y 'HOLD'se iIuminan en el indicadorvisual.
, El tiempo de horneadose ihminar_ en eI indicadorvisual.
, Comenzar_la cuenta regresivadeItiempo de horneado.
Cuando haya e×pirado emtiempo de cocci6m
, Se escuchar_ncuatro so,ales sonoras.
, 'BAKE'se apagar&
, 'HOLD'y 'WARM' se iluminar_n.
, En el indicadorse despiegar8'75°' ['!70°').
71
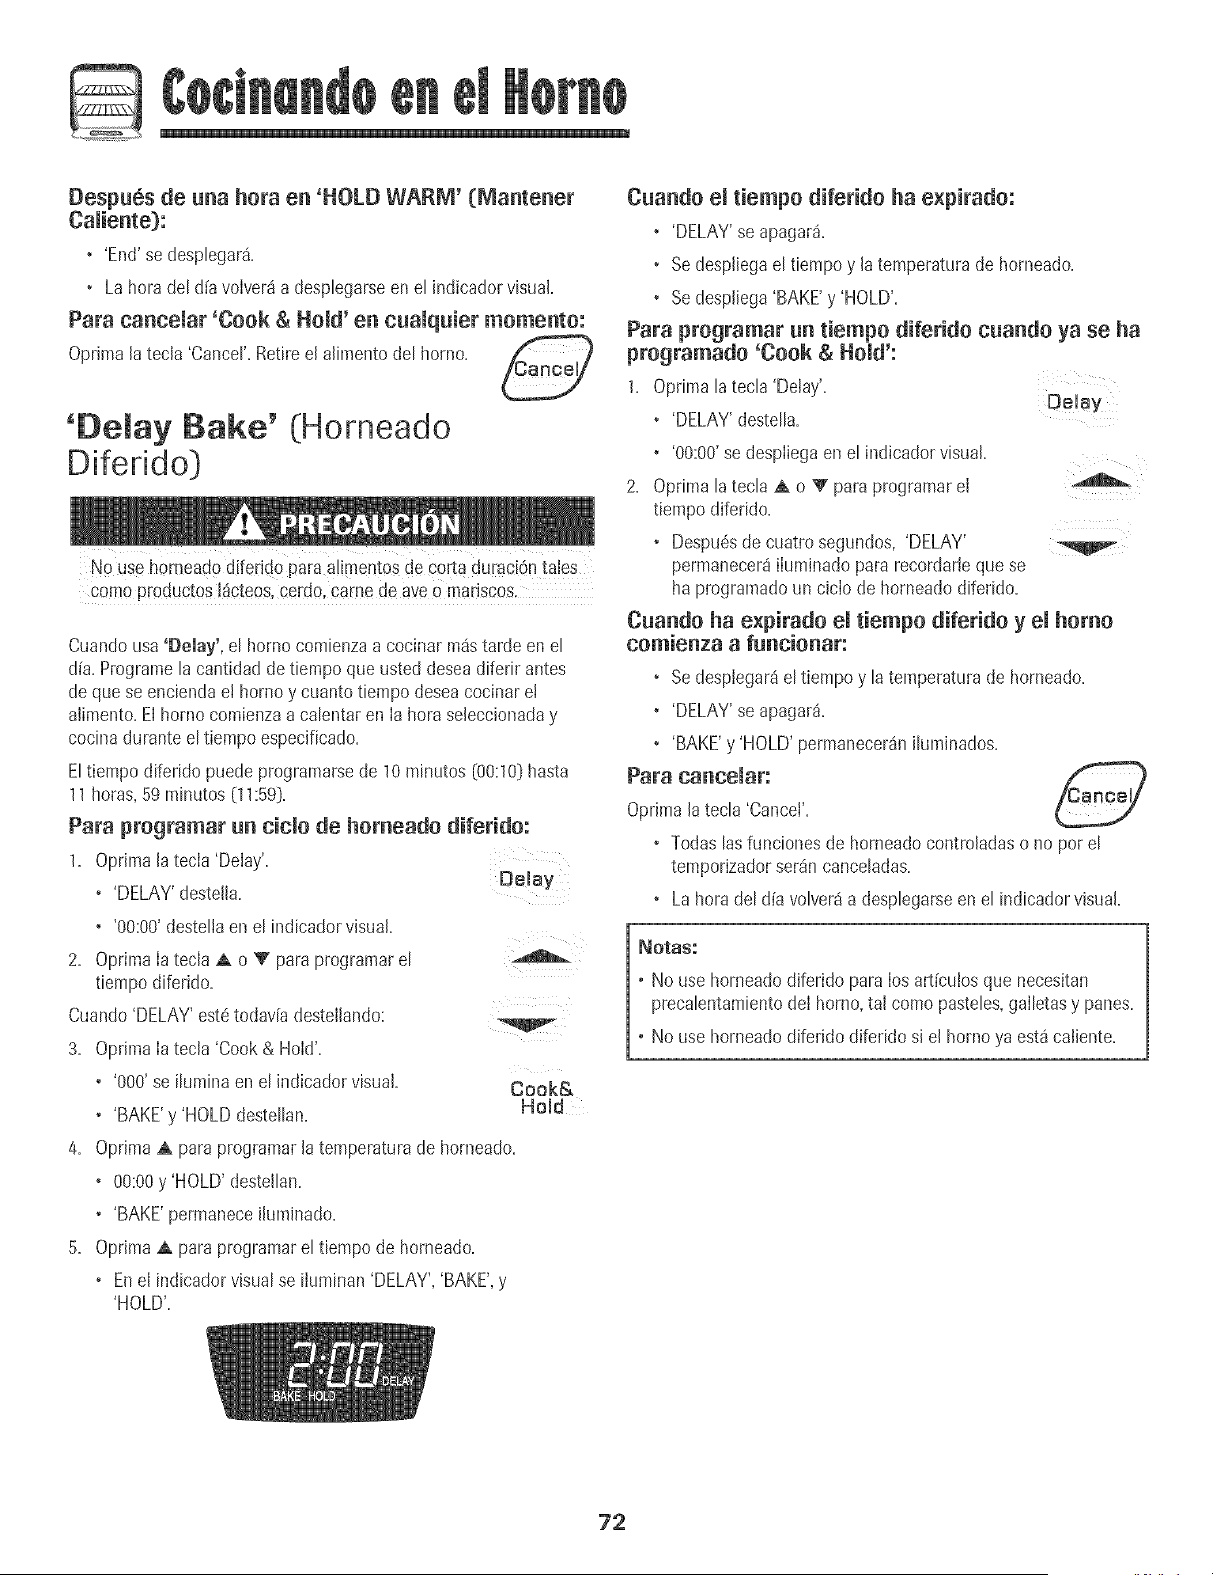
Despubsde una hora en 'HOLD WARM' (Mantener
• 'End'se desplegar4.
• La horadel d[avolver4a desplegarseen el indicadorvisual.
Para cancelar 'Cook & Hold' en cualquier momento:
OprimaJatecla 'Cancer Retireel alimentodot homo. C_anoe)
'Demay Bake' (Horneado
Diferido)
No usehomeado d[ferido para alimentosde corta duractOntales
comoproductos [4cteos,cerdo,came ae aveo mariscos.
Cuandousa 'Delay', et homo comienzaa cocinar m4starde en e[
d[a.Programeta cantidaddetiempo que usted deseadiferir antes
de que se enciendaet hornoy cuantotiempo deseacocinaret
aiimento.El homo comienzaa calentaren [a hora seleccionaday
cocinadurante eltiempo especificado.
Eltiempo diferido puede programarsede 10minutos (00:10]hasta
11horas,59minutes (11:59].
Para programar un ciclo de homeado diferido:
1. OprJmalatecla 'Delay'.
• 'DELAY'destella. Deley
• '00:00'destellaen el indicadorvisual.
2. OprimaIatecla ,A o V para programarel
tiempo diferido.
Cuando'DELAY'est_todav[adestellando:
3. Optima Iatecla 'Cook & Hold'.
• '000'se ilumina en el indicadorvisual.
• 'BAKE'y 'HOLDdestellan.
V
Cook&
Hold
4. OprJma A para programar Jatemperatura de horneado.
• 00:00y 'HOLD' destellan.
• 'BAKE'permaneceihmJnado.
5. OprJma,A para programarel tiempo de homeado.
• Enel indicadorvisualse iluminan 'DELAY','BAKE',y
'HOLD'.
Cuando el tiempo diferido ha e×pirado:
• 'DELAY'se apagar4.
• Sedespliegael tiempoy latemperaturade horneado.
• Sedespiiega'BAKE'y 'HOLD'.
Para programar un tiempo diferido cuando ya se ha
programado 'Cook & Hold':
1, Oprima lateela 'Delay',
Delay
• 'DELAY'destella.
• '00:00'sedespliegaen el indicadorvisual
2. Optima latecla ,A o V paraprogramarel
tiempo diferido.
° Despu6sde cuatrosegundos, 'DELAY'
permanecer4iluminadopara recordarJeque se
haprogramatic un ciclo de horneadodiferido.
Cuando ha e×pirado el tiempo diferido y el homo
comienza a funcionar:
• Sedesplegar4el tiempoy la temperaturade horneado.
• 'DELAY'se apagar4.
• 'BAKE'y 'HOLD' permanecer4niluminados.
Para cancelar:
OprJmala tecla 'Cancel'.
• Todaslasfuncionesde horneadocontroladaso no parel
temporizadorser_n canceladas.
• La hora del aliavolver4a desplegarseen el indicadorvisual
Notaa:
• No use homeadodiferido para los art(culosque necesitan
precalentamientodeI horno,tal como pasteles,galletasy panes.
• No use horneadodiferJdodiferido si el homo ya estacaliente.
72
'Keep Warm' (Mantener
Caliente:)
Paramantenercatientesen forma seguraalimentoscalienteso para
calentarpanesy phtos.
Para pregramar 'Keep Warm':
1. Optima Iatecla 'Keep Warm'. Keep
_apm
+ 'WARM'destefla.
+ '000'se despiiegaenet indicadorvisual.
2. SeleccioneIatemperaturade 'KeepWarm'.La
temperaturapara 'KeepWarm' puedeser
programadade 63° a 90° C [145° a 190° F_.
Oprimau oprimay mantengaoprimida la tecia
AoV.
+ Cuandocualquierade estasdos tectasse oprime per primera
vez,'75°, ['170°') se ituminard+
+ Optima la tecla A para aumentar la temperatura+
+ Optima [atec[a '_' paradisminuir [a temperatura+
'WARM'y Iatemperaturase desplegar_nen el indicador cuando
el ciclo 'Keep Warm' est6active.
Para oa_oemar 'Keep Warm':
1. Oprima[atecla 'Cancer P_,mnR_.l]
2. Retireel alimentodel horno.
Notas sobre 'Keep Warm':
, ParacaIidadOptimade los alimentos,losal+mentoscocinados
en e! borne debenser mantenidoscalientesper no m_s de 1 a
2 horas+
+ Paraevitarque losalimentosse sequen,cObraloslevemente
con papelde aluminioo una tapa.
, Para caientar panecimmos:
- cubra Ievementelos panecilloscon papel de ahminio y
colOquelosen el homo+
- oprima 'KeepWarm' y latecla A para programar
75° C [170° F].
- calientedurante 12a 15 minutes.
+ Para calentar plates:
- coloque 2 pilas de cuatro platoscada unaen el borne.
- oprima 'KeepWarm' y latecla A para programar
75° C [170° F].
- caliente los platosdurante cinco minutes,apagueel homo y
deje los piatos en eI bornedurante 15minutesm_s.
- use soiamenteplates resistentesal horno,verifique con el
fabricante.
- nocoloque Iosplatescalientessobreuna superficiefr[a
pues ei cambio r_pido de temperaturapuedecausarfisuras
superficiales.
73
Cierre Aute tico/Mode
Ajuste de temperature
Elhornose apagar_autom_ticamentedespu6sde 12 boressi ustedIo
dejaaccidentalmenteencendido. Estacaracteffsticade seguddad
puedeset desactivada.
Pare cancemar emcierre autem_tice de 12 heras y
dejar que el home funciene centinuamente durante
72 horas:
1. Programeel homo para hornear (verp%ina 71}.
2. Optimay mantengaoprimida Ia tecia 'Clock' Clock
durantetres segundos.
• 'SAb'se desplegar_y destellar_durantecinco segundos.
• 'SAb'se desplegar_continuamentehastequese desactiveo
hasteque transcurrael I[mite de 72bores.
• 'BAKE'tambi6n se desplegar_si se est_ usando un ciclo de
horneadocuandoel borneest8en mode sab_tico.
TodasIasotrasfunciones EXCEPTO'BAKE'('Timer','KeepWarm',
'Clean',etc.) est_nbloqueadasduranteel Mode Sab_tico.
Pare caneemar 'Bake' cuande emMode Sab_tieo
est_ active:
Oprimala tecla 'Cancer.
• 'BAKE'se apagar_en el indicadorvisual
• No se oir8 ningunaseriaisonora.
Pare cancemar emMode Sab_tice:
1. Optima JatecJa'CLOCK'durantetres segundos. CJock
0
2. Despu6sde 72bores,el Mode Sab4ticoterminar4.
• 'SAb'destellar_durante 5 segundos.
• Lahera deldie reaparecer4en eJindicadorvisual
La exactitudde las temperaturesdel homo es cuidadosamente
probadaen Iaf_brica. Esnormal rioter alguna diferencia entre la
temperaturede homeado, entre un bornenuevoy un homo antiguo.
Conel correrdel tiempo, Iatemperaturedel homo puede cambiar.
Ustedpuede aiustar Ia temperaturedel homo, si consideraque su
borne no est_ horneandoo dorando en forma correcta. Paredecidir
cuantodebecambiarIa temperature,programela temperaturedeI
bornea 15° C _25° F) m_salta o m_s baia que la temperatula
indicadaen sus recetas,luego hornee. Los resultadosde la
"prueba" puedendarleuna ideade cuanto aiustar la temperature.
Ajuste de la temperature del home:
1. Optima latecla 'Bake'. Bake
2. Programe550° opdmiendolatecla A.
3. Optima y mantengaoprimida la tecla'Bake'
durante variessegundoso haste que 0°
aparezcaenel indicadorvisual.
Si Ia temperaturedel homo haside previamenteajustada,ei
cambioaparecer_en el [ndicadorvisual Pereiemplo,si Ia
temperaturedel bornefue reducidaen 8° C (15° F) el indicador
mostrar_'- 8°' ('-15°'}.
4. Optima latecla A o V pare ajustar la temperature.
Cadavez que se oprimeuna tecla, la temperaturecambiaen
3° C (5° F). LatemperaturedeI homo puedeser aumentadao
disminuidaen 3° a 20° C (5° a 35° F).
5. La hera del die reaparecer_autom_ticamenteenel indicador
visual
No necesitareaiustarla temperaturedet borne si hayuna falla o
interrupciOnde energ[ael6ctrica. Lastemperaturesdeasar ala
parrilla y limpiezano puedenset aiustadas.
Notes Sobre et Mode Sab tico:
• ElMode Sab_tico puede seractivadoen cualquier memento,
est8o no el homo encendido.
• ElMode Sab_tico no puedeset activadosi lasteclas est_n
bloqueadaso cuando la puerta est_ bloqueada.
• Siel homo est_homeandocuando el Mode Sab_ticoes
programado, 'BAKE'se apagar_al final del ciclo de horneado.
No se emitir_nse_alessonoras.
• Cuandocomienzael Mode Sab_tico,nose emitir_ la sepal
sonorade precalentamiento.
o Cuandoel Mode SabSticoestaactive,todos los avisos,
mensajesy se_alessonorasest_ndesactivadas.
o Sioprime la tecla 'Cancel'se canceler8 un ciclo'Bake',sin
embargoel control permanecer_en Mode Sab_tico.
o Sifalla Iacorriente electrica, cuandovuelva Ia energ[ael borne
se activar_en Mode Sab_ticocon 72 boresrestantesy ningOn
ciclo active.
74
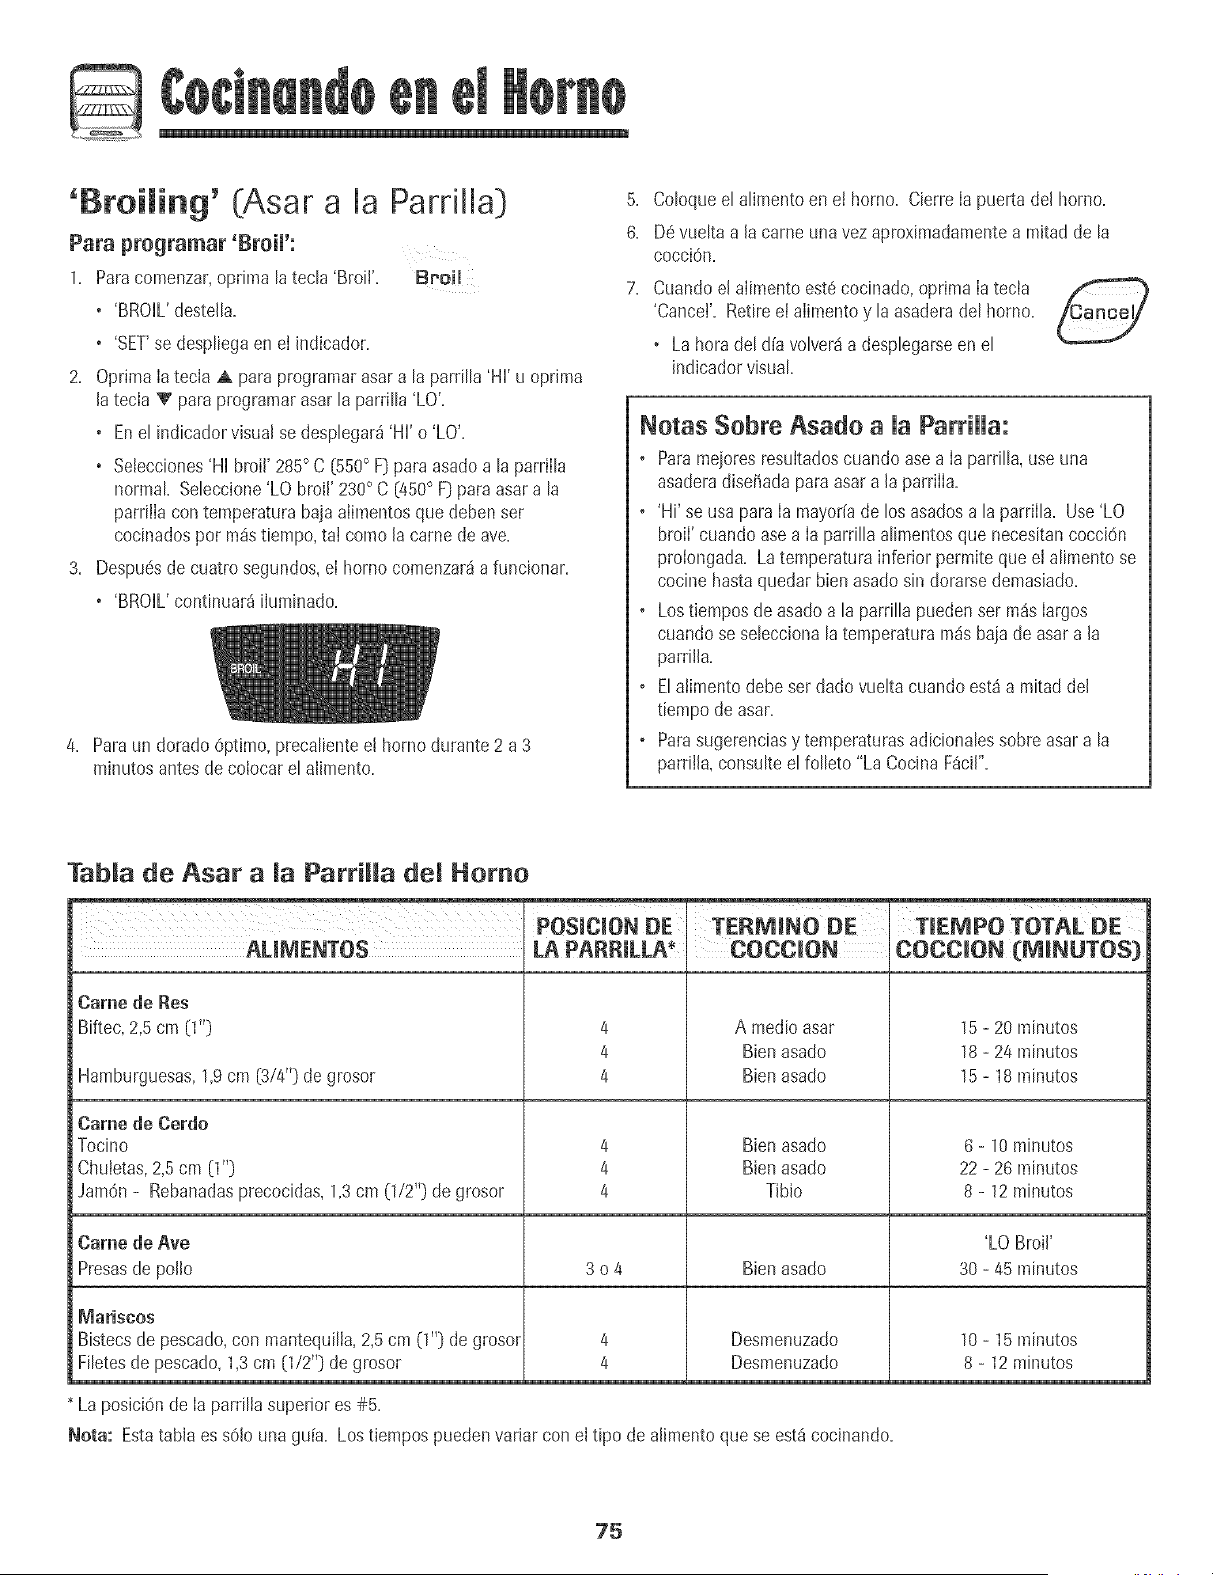
1. Paracomenzar,oprima la tech 'Broil'.
o 'BROIL'desteHa.
'[Broiling' (Asar a la Pardlla}
Para programar 'Broil':
Broil
o 'SET'se despliegaen et indicador.
2. OprimaIatecla A paraprogramarasar a la parrilla'HI u oprima
la tecla V paraprogramarasar la parrilh 'LO'.
o Enel indicadorvisualse desplegar_'HI' o 'LO'.
o Selecciones'HI broil'285° C [550° F)para asadoa la parrilh
normal Seleccione'LO broil' 230° C [450° F)para asar a la
parrillacon temperaturabaja alimentosque debenset
cocinadosper rodstiempo,tai come la came de ave.
3. Despuesde cuatrosegundos,el borne comenzarda funcionar.
o 'BROIL'continuardiluminado.
4. Para un doradoOptimo,precaliente et horno durante 2 a3
minutes antesde colocar el alimento.
5. Coloqueel alimento en ei homo. CierreIa puerta del homo.
6. Devueltaa lacame unavez aproximadamentea mkadde la
coccien.
7. Cuandoel alimento este cocinado,oprima Iatecla
'Cancer Retireei aIimentoy laasaderaeel homo+
+ Laheraeel aliavolver_a desplegarseen el
indicadorvisual
Notas Sobce Asado a UaPacciHa:
o Paramejoresresultadoscuando asea Ia parrilla, useuna
asaderadiseriadapara asara la parriIIa.
o 'Hi' se usa para Ia mayoffade los asadosa laparriIla. Use'LO
broiI'cuando asea Ia parrilla alimentosque necesitancoccien
proiongada. Latemperaturainferior permite queei alimento se
cocine hastaquedar bienasadosin dorarsedemasiado.
o Lostiemposde asadoa la parrilla puedenser rodsIargos
cuando se seleccionala temperaturapadsbajade asara la
parriiJa,
o Elatimentodebe set dado vueJtacuandoest_ a mitaddel
tiempo de asar.
o Parasugerenciasy temperaturasadicionalessobre asara la
parriila, consulteel folleto "La Cocina F_cil".
Tabla de Asar a la Parrilla tier Homo
POSICION DE: TERM_NODE T_EMPOTOTALDE:
COCC Om COCC Om[M NUTOS)
Came de Res
Biftec,2,5 cm [1") 4 A medio asar 15 - 20minutes
4 Bienasado 18- 24 minutes
Hamburguesas,1,9cm [3/4") de grosor 4 Bienasado 15- 18 minutes
Came de Cerdo
Tocino 4 Bienasado 6 - 10 minutes
Chuietas,2,5cm [1") 4 Bienasado 22 - 26minutes
JamOn- Rebanadasprecocidas,1,3cm (1/2") de grosor 4 Tibio 8 - 12 minutes
Came de Ave 'LO Broil'
Presasde polio 3 o 4 Bienasado 30 - 45 minutes
Mariscos
Bistecsde pescado,con mantequilia,2,5 cm (1") de grosor 4 Desmenuzado 10- 15minutes
Filetesde pescado,1,3cm [1/2"} de grosor 4 Desmenuzado 8 - 12minutes
Laposiciende Ia parrilia superior es #5.
Nora: Estatabla es s6Jounagu[a. Lostiempospuedenvariar con el tipo de aJimentoque se est_ cocinando.
75
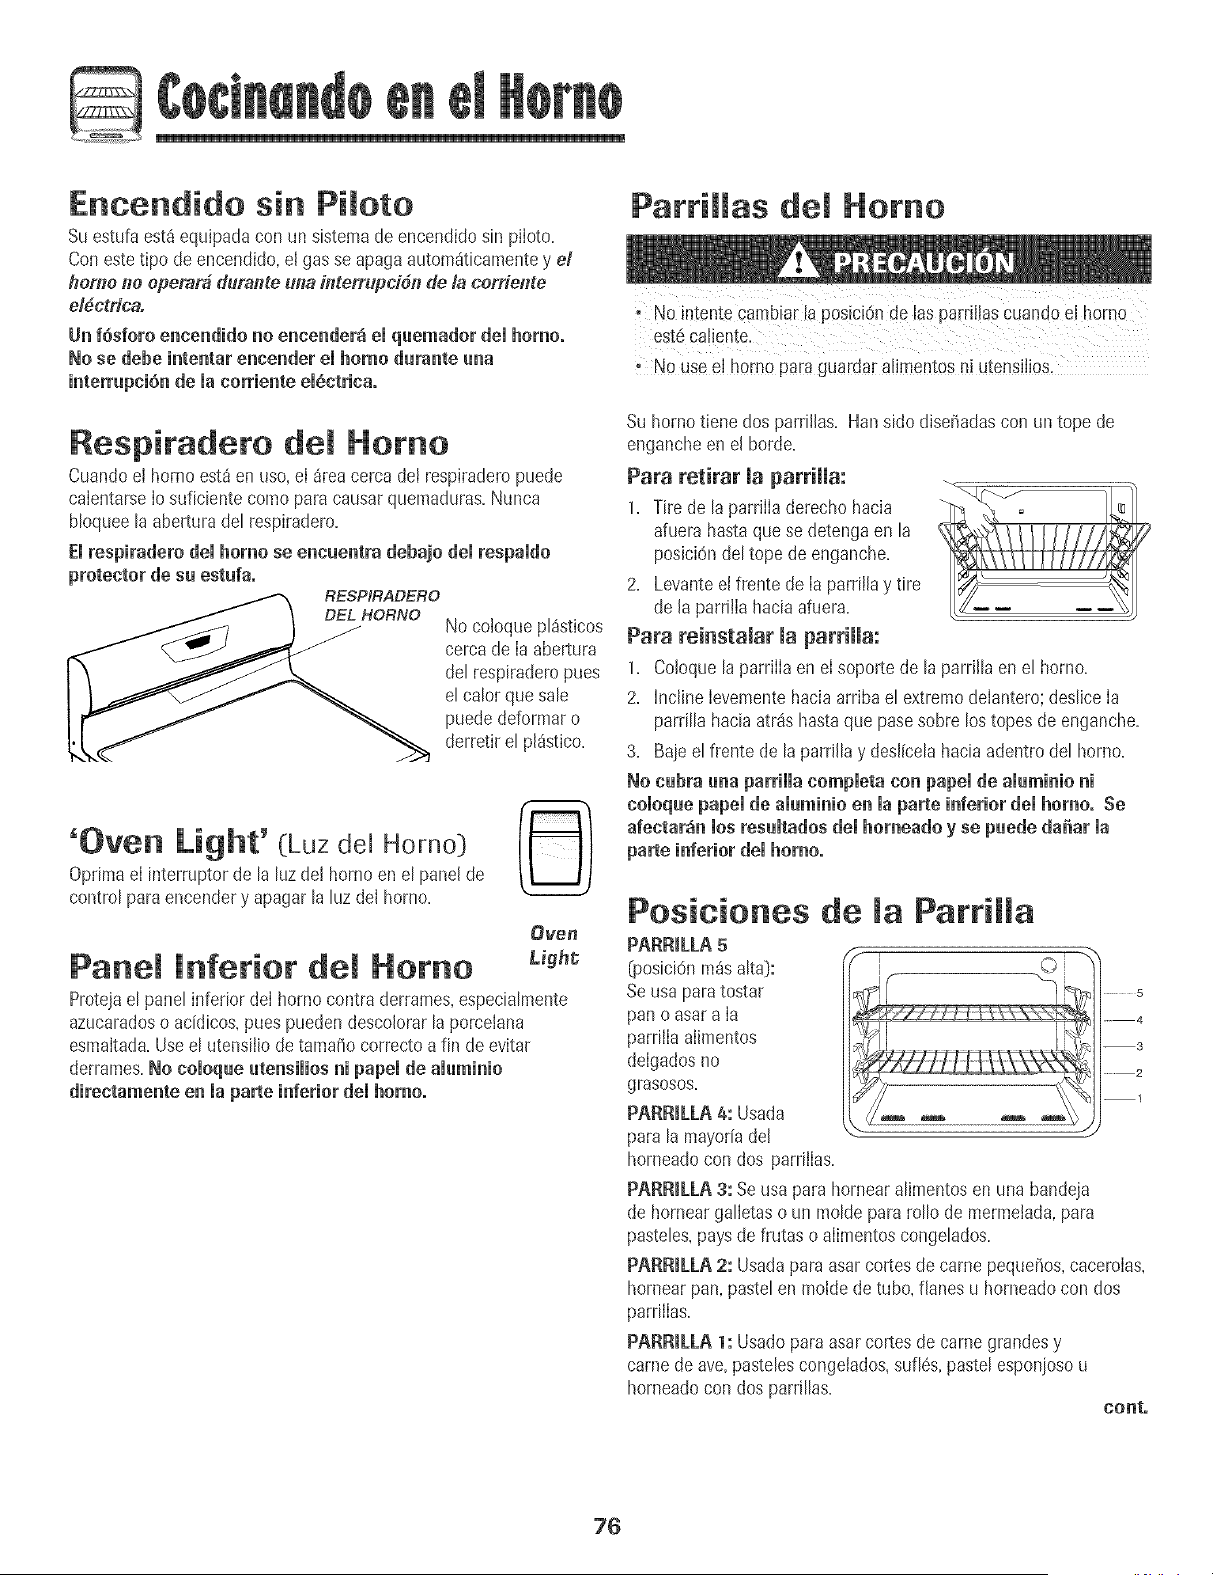
D
Encendido sin Pimoto
Suestufa est8equipadacon un sistemade encendidosin piioto.
Con estetipo de encendido,e[ gas seapagaautomSticamentey e/
berne no epemr_ durante u#a interrupcidn de ?acerriente
el#etric&
Un f6sforo eaceadido no eacender_ el qaemador dei homo°
No se debe intentar encender el homo durante aria
interrupci6nde la eorriente emSctriea.
Respiradero de[ Homo
CuandoeI horno est_ enuso,el _reacercadet respiraderopuede
caientarse1osuficiente como paracausarquemaduras=Nunca
bIoqueela aberturadel respiradero=
Elrespiraderodei homose eccuectra debajodei respaldo
protector de su estufao
RESPIRADERO
No coloquepI_sticos
cercade [a abertura
del respiraderopues
el eaIorque sale
puededeformaro
derretir el pl_stico=
'Oven Light' (Luz del Hornol)
Oprima e[ interruptorde la luz de[ hornoon el panel de
control para encendery apagarla luzde[ homo=
Pane[ inferior de[ Homo
Oven
Light
Protejael pane[inferior del horno contra derrames,especialmente
azucaradoso acidicos,pues puedendescolorar la porcelana
esmaltada.Useel utensilio de tama_ocorrectoa fin de evitar
derrames.No coloque utecsilios ci papel de alumicio
directamecte ec ia parte icferior dei homo°
Parri[[as del Homo
• No [ntentecambiar [aposici6nde [as parrfliascuand0 e[ homo
' NO usee[ homo para guardar a[irnentesni utensflios.
Su hornotiene dos parrii[as=Hansido diseffadascon un tope de
engancheen e[ horde=
Para retirar [a parrilla:
1= Tire de [a parrilladerecho hacia
afuera hastaquese detengaen [a
posici6nde[ tope de enganche=
2= Levanteel frente de la parrii[ay tire
de [a parriila haciaafuera=
Para reinstalar [a parrilla:
1= Co[oque[aparriiia en e[soportede [a parr[Haen e[ homo=
2= Incline levementehacia arriba e[ extremodelantero;desIicela
parriIIahacia atrSshastaque pasesobre los topes de enganche=
3= Bajee[ frente de [a parri[Iay desi[ceIahacia adentrode[ homo=
No cubra uca parrilla compmetacoc pal}el de amumicioci
comoquepapemde amumicioec maparte inferior demhomo° Se
afectar_c mosresumtadosdemhomeado y se puede da_ar ma
parte icferior dei homo°
Posiciones de [a ParriHa
PARR[LLA5
_osici6n m_s a[ta):
Seusa paratostar
pan o asara [a
parriiia aiimentos
deigadosno
grasosos=
PARRiLLA4: Usada
para la mayoriadel
horneadocon dos parriiias=
\ , i .... 5
_' --3.... 4
..... 2
PARR[LLA3: Se usa para hornear alimentosen unabandeja
de hornear gailetaso un moide para rollo de mermelada,para
pasteles,pays de frutas o aiimentoscongelados=
PARRiLLA2: Usadapara asarcortesde came pequeffos,caceroias,
hornearpan, paste[en too[de de tubo,f[anesu horneadocon dos
parriiias=
PARRILLA1: Usado para asarcortes de came grandesy
came de ave,pastelescongelados,sufi6s,paste[esponiosou
horneadocon dos parrillas=
cocto
76
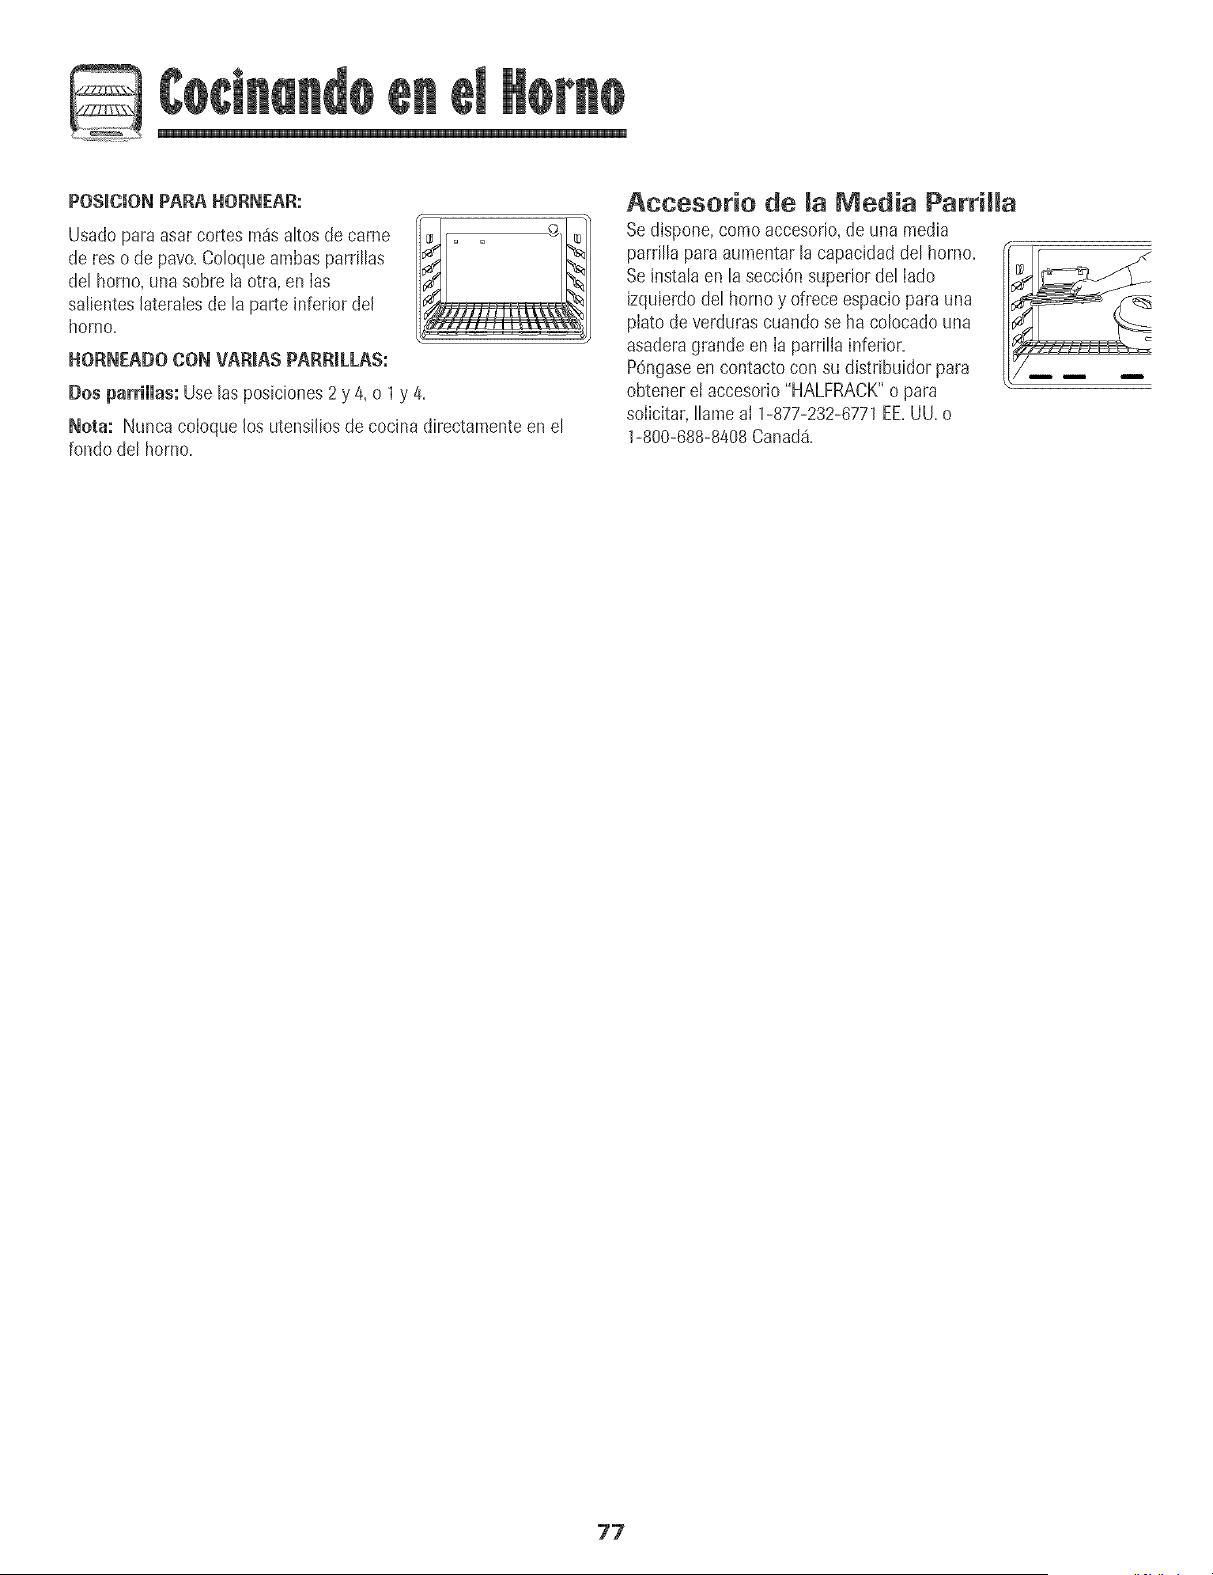
POS+CION PARA HORNEAR:
Usadoparaasarcortes rossaltos de came
de res o de pavo+Co[oqueambasparri[[as
det homo,una sobre taotra,en [as
satientes[ateralesde taparte inferior del
homo,
HORNEADO CON VAR+AS PARR+LLAS:
Dos parHllas: Use hs posiciones2y 4, o 1y 4,
Nora: Nuncaco[oquelos utensi[iosde cocina directamenteen et
rondodet homo,
Aeeesorio de [a Media Parri[[a
Sedispone,comoaccesorio,de una media
parri[[aparaaumentar[acapacidadde[ homo,
Seinstalaen [asecciOnsuperiordel lado
izquierdode[ horno y ofrece espaciopara una
plato de verdurascuandose hacolocadouna
asaderagrandeen la parrilla inferior,
P6ngaseen contactocon su distribuidor para
obtener elaccesorio"HALFRACK"o para
solicitar,Ilameal 1-877-232-6771EE+UU+o
1-800-688-8408Canad&
??
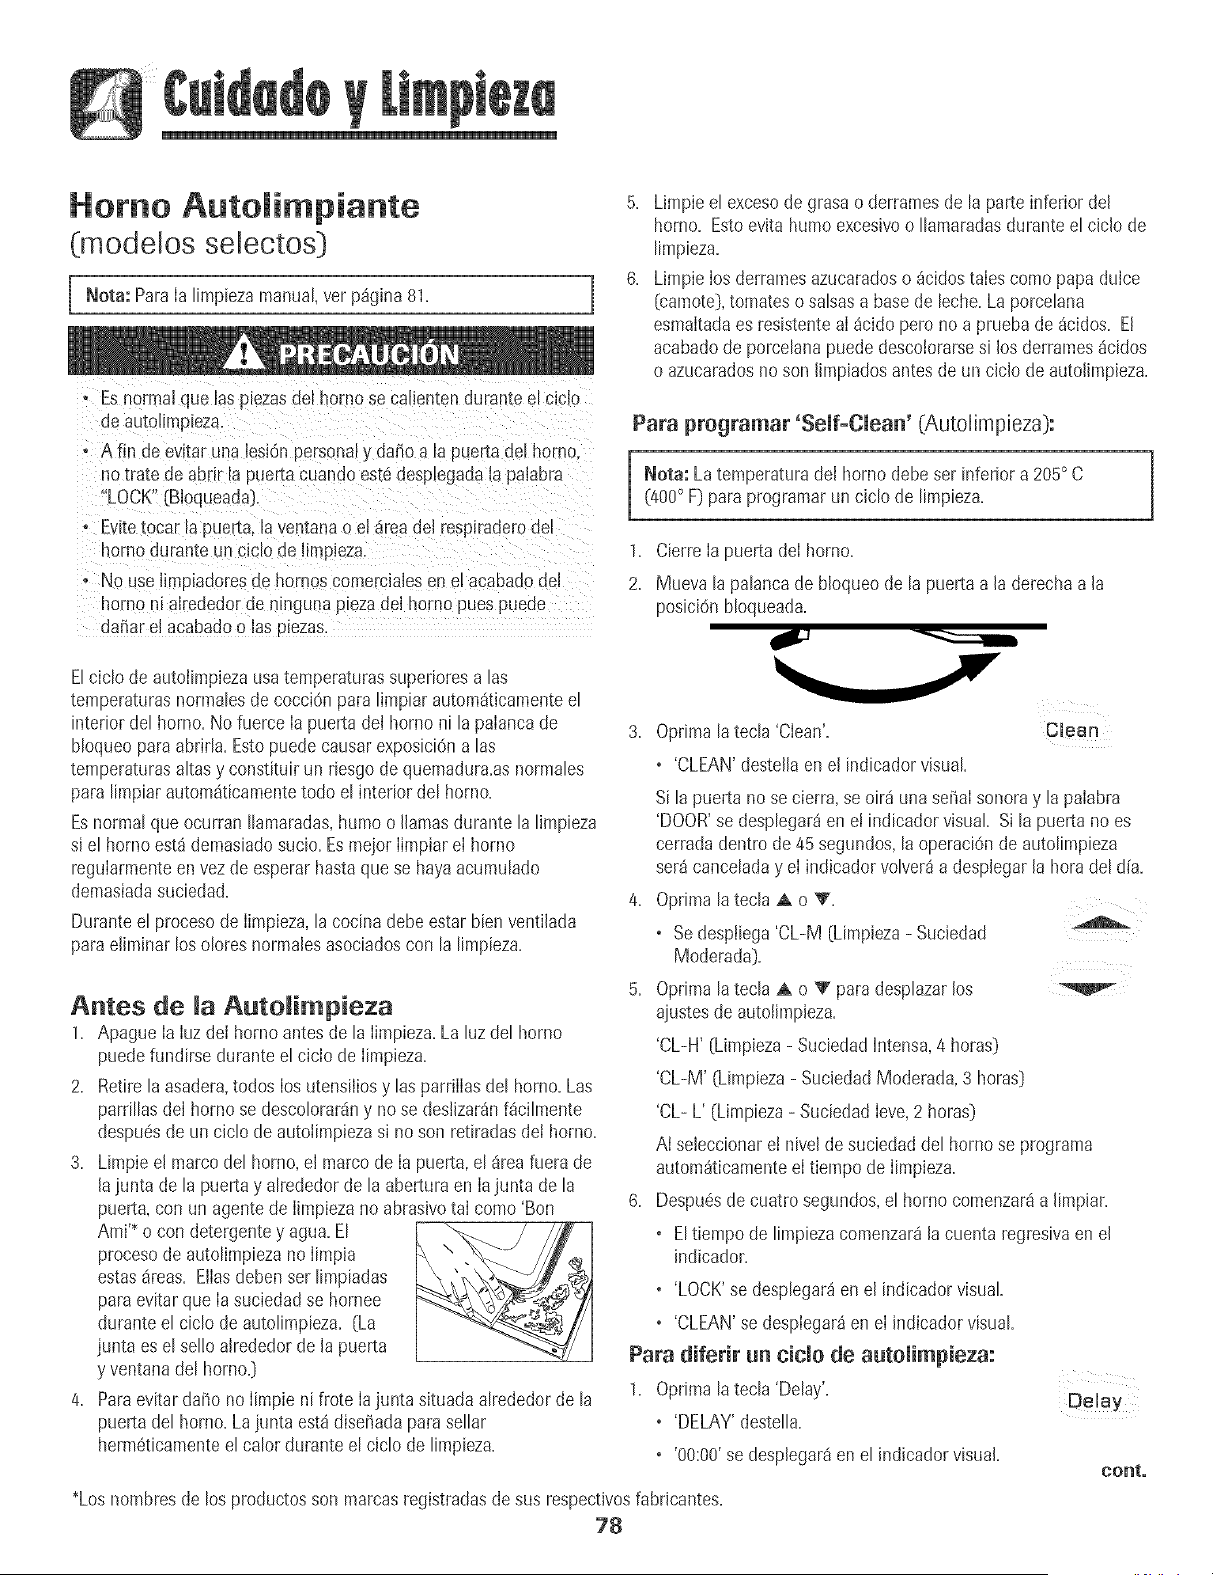
Homo Automimpiante
(modelos selectos}
[ Nota: Para Ia limpiezamanual,ver p_gina 81.
+ Esnormal que las plezasdel homo se caiientenduranteel c+(:lo
de autolimpLeza
- A fin de ev+taruna iesiOnpersona_y da_o a la puerta de! homo.
no trate de abnr la puertacuando est6desp_egadala paiabra
+LOCK"(B+oqueada_.
, Evite_ocarla puerta.[a yentunao el _rea del resp+raderodel
norno durante un ciclo de iimp+eza
- No use limpiadoresde hornos comercialesen el acaDaaode[
homo ni airededorde mngunaplezade[ homo pues pueoe
da_arei acabadoo [as p+ezas.
Elciclo de autolimpiezausatemperaturassuperioresa las
temperaturasnormatesde cocci6npara timpiar autom_tlcamenteet
interiordel homo. No fuerce Ia puertadeI horno ni la palancade
bloqueoparaabrirla. Estopuedecausarexposicignalas
temperaturasaltasy constituir un riesgode quemadura.asnormales
para limpiarautomaticamentetodo el interior del homo.
Esnormal que ocurran Ilamaradas,humo o llamasdurante la limpieza
si el homo est_ demasiadosucio.Esmejor Iimpiar el horno
regularmenteen vezde esperarhastaquese hayaacumulado
demasiadasuciedad.
Duranteel proceso de Iimpieza,la cocina debe estarbien ventilada
para eliminarlos olores normalesasociadoscon la limpieza.
Antes de la Autol+mpieza
1. Apague Ia Iuz deI horno antesde la Iimpieza.La luz del horno
puedefundirse duranteel ciclo de Iimpieza.
2. Retire la asadera,todos los utensiliosy las parrilIasdel homo.Las
parrillasdel homo se descolorardny no se destizar_nf_cilmente
despugsde un ciclo de autoiimpiezasi no son retiradasdet homo.
3. Limpieel marcodel homo,el marco de Ia puerta,el 8reafuera de
lajunta de la puertay alrededorde laaberturaen Iajunta de la
puerta,con un agentede IimpiezanoabrasivotaI como'Bon
Ami'+o con detergentey agua.El
procesode autolimpiezano Iimpia
estas_reas. Eliasdebenser Iimpiadas
paraevitarque Iasuciedadse hornee
durante el ciclo de autolimpieza. (La
junta es el sello alrededorde la puerta
y ventanadel homo.}
4. Paraevitar dafio no Iimpie ni frote Iajunta situadaalrededorde la
puertadel homo.Lajunta estddisefiadaparasellar
hermgticamenteel calor durante el ciclo de limpieza.
Limpieel excesode grasa o derramesde la parteinferior del
homo. Esto evita humo excesivoo Ilamaradasduranteel ciclo de
limpieza.
Limpielos derramesazucaradoso _cidostalescomo papadulce
{camote},tomates o salsasa base de leche.La porcelana
esmaltadaes resistenteaI _cido pero no a prueba de _cidos. Et
acabadode porcelanapuede descotorarsesi los derrames_cidos
o azucaradosno son limpiadosantesde un ciclo de autolimpieza.
Para programar 'Self-Clean' (Autolimpieza}:
Nota: Latemperaturadel horno debe ser inferior a 205° C
(400° F} para programarun ciclo de limpieza+
1+ CierreIa puerta deI homo+
2+ Mueva la palancade bloqueode la puertaa la derechaa la
posicignbloqueada+
3. Optima la tecla 'Clean'. Clean
, 'CLEAN'destellaenel indicadorvisual.
Sila puerta no secierra,se oir_ una seriaI sonoray lapaIabra
'DOOR'se desplegar_en e! indicadorvisual. Si la puerta no es
cerradadentro de 45segundos,la operaciOnde autolimpieza
ser_canceladay el indicador volver_a desplegarla hora del d[a.
4. Oprimalatecla A o _'.
, Se desptiega'CL-M (Limpieza- Suciedad
Moderada}.
5. Oprimalatecla A o V para desplazarlos
ajustesde autolimpieza.
'CL-H' (Limpieza- SuciedadIntensa,4 horas}
'CL-M' (Limpieza- SuciedadModerada,3 horas}
'CL- L' (Limpieza- SuciedadIeve,2 horas}
AI seJeccionareJnivel desuciedaddel homo se programa
autom4ticamenteel tiempo de Iimpieza.
6. Despugsde cuatro segundos,el homo comenzar4a Jimpiar.
, Eltiempo de limpiezacomenzar4Jacuentaregresivaen eJ
indicador.
, 'LOCK'se desplegar_enel indicadorvisual.
, 'CLEAN'se desplegar_en el indicadorvisual.
Para diferir un ciclo de autolimpieza:
1+ Optima latecla 'Delay'+
, 'DELAY'destella+
, '00:00'se desplegar_enel indicadorvisual+
Delay
cont.
+Losnombresde los productosson marcasregistradasde sus respectivosfabricantes.
78
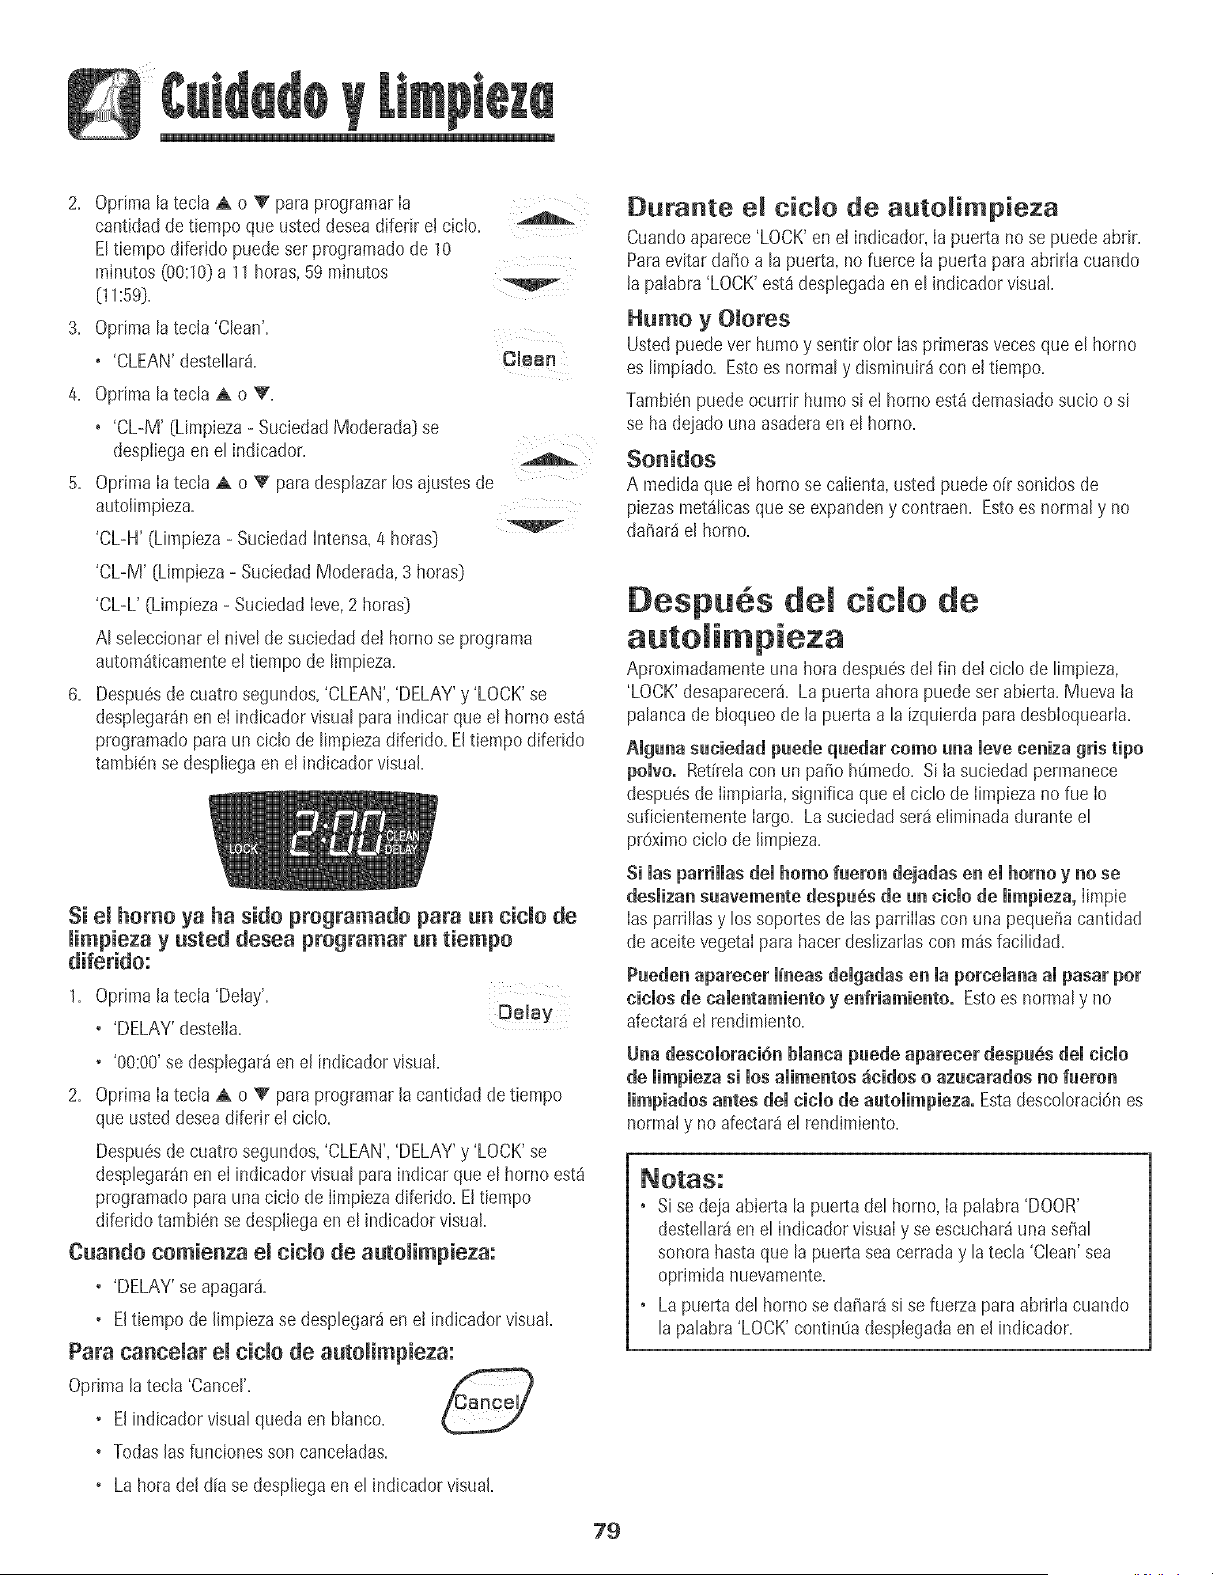
2+ Oprima [atec[a A o V para programar[a
cantidadde tiempo que usted deseadiferir el cic[o+
Ettiempo diferido puede set programadode 10
minutos(00:10)a 11horas,59 minutos
[1+:59)+
3+ Optima tatecJa'Ctean'+
• 'CLEAN'destettar4+
4+ Optima tatecta A o V+
Clean
+ 'CL-M' [Limpieza- SuciedadModerada)se ...................
despiiegaen el indicador+
5+ Optima [atecia ,A o V paradespJazartosajustesde
autoJimpieza+
'CL-H' (Limpieza- SuciedadHntensa+4 horas)
'CL-M' (Limpieza- SuciedadModerada,3 horas)
'CL-L' (Limpieza- Suciedad[eve,2 horas]
AI seleccionarel nivel de suciedadde[ homo se programa
autom4ticamenteel tiempo de limpieza+
6.
Despu6sde cuatro segundos,'CLEAN','DELAY'y 'LOCK'se
desplegar4nen el indicadorvisual para indicar que el homo esta
programadopara un ciclo de limpiezadiferido. Eltiempodiferido
tambi@nse despHegaen el [ndicadorvisual
S[ el home ya ha sido programado para un title de
limpieza y usted desea programar un tiempe
diferido:
1+ Oprima[atecia 'Delay'+
DeLay
+ 'DELAY'destel[a+
+ '00:00'se desplegar_en eLindicadorvisual
2+ Optima [atecia A o V para programar[a cantidaddetiempo
queusteddeseadiferir e[ ciclo+
Despu6sde cuatro segundos+'CLEAN','DELAY'y 'LOCK'se
desplegar_nen e[ indicadorvisualparaindicar que el homo est_
programadopara una cic[o de [impiezadiferido+Eltiempo
diferidotambi6n sedesp[iegaen el [ndicadorvisual+
Cuando comienza el cido de autolimpieza:
• 'DELAY'se apagar&
+ Eltiempo de [[mpiezase desplegarden ei indicadorvisual
Para canceiar el cicio de autolimpieza:
Oprimala tecla 'Cancel
• Elindicadorvisualquedaen blanco.
+ Todas [asfuncionesson canceladas.
+ La hora de[aliase desp[iegaen el [ndicadorvisual
Durante el cic[o de autolimpieza
Cuandoaparece'LOCK'enei indicador,[a puerta no se puedeabrir+
Paraevitarda_o a la puerta, no fuerce [a puertapara abrirla cuando
[a palabra'LOCK'est8desplegadaen el [ndicadorvisual
Humo y Omores
Ustedpuede vet humoy se+_tirolor Iasprimerasvecesque el homo
es limpiado+Estoes normal y disminuir_ con el tiempo+
Tambi6npuedeocurdr humosi e! homo est_ demasiadosucio o si
se ha dejado una asaderaen el homo+
Sonidos
A medidaque el hornose caIienta,usted ptJedeoir sonidosde
piezasmet_licasquese expandeny contraen+Estoes normaly no
da_ar_el homo+
[}espu s demcic o de
automimpieza
Aproximadamenteuna hora despu6sde+fin del ciclo de limpieza,
'LOCK'desaparecer_i+Lapuerta ahora puede set abierta+MuevaIa
palancade bloqueode la puerta a la izquierdaparadesbIoquearia+
Amgunasuciedad puede quedar eemo una mereeeniza gris ripe
pelvo° Retirelacon un paso ho_aedo.Si la suciedadpermanece
despuesde Iimpiaria,significa que e! ciclode Iimpiezano rueIo
suficientementeIar9o+La suciedadser_eliminada duranteel
proximociclo de limpieza+
Si masparHHasdemhomofueron dejadasenel homoy no se
deslizan suavemente despu_s de ml ciclo de limpieTa, Iimpie
Iasparrillasy los soportesde lasparrilIas con una pequeriacantidad
de aceJtevegetalpara hacerdesJJzarlascon m4s facilidad+
Pueden apareeer iJneasdeigadas en ia porceianaai pasarper
eielos de eaJentamiento y enfriamiento° Estoes normaly no
afectar4el rendimiento+
Una deseoloraei6n blanca puede apareeer despu6s del cielo
de mimpiezasi mosamimentos_icidos o aziiearados no fueron
mimpiadosantes demcicmode automimpieza.Estadescoloraci6nes
normaly no afectar_el rendimiento+
• Si se dejaabierta la puertadel horno,Ia palabra 'DOOR'
destellar_enel indicadorvisuaIy se escucharauna se5al
sonora hastaque la puertasea cerraday la tecla 'Clean' sea
oprimidanuevamente+
• Lapuerta del homo se dafiar_ si se fuerzaparaabrirla cuando
la palabra'LOCK' continOadespiegadaen el indicador.
79
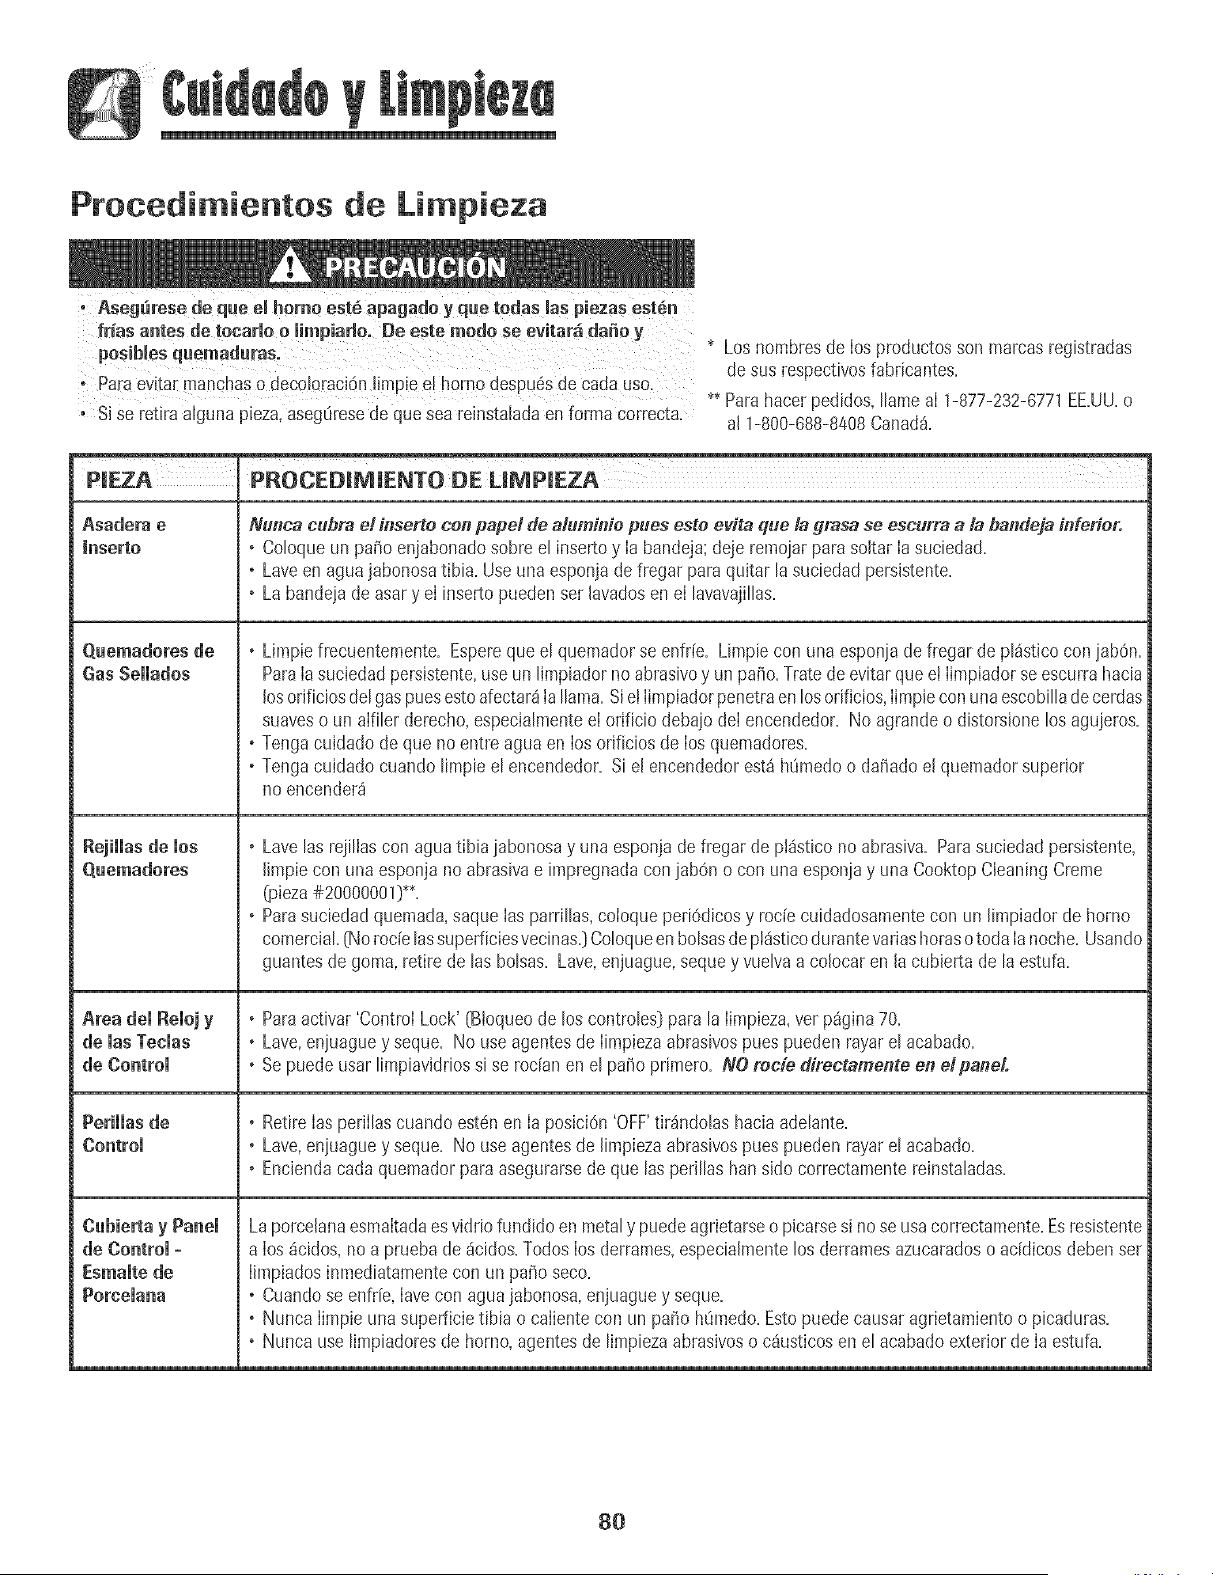
Procedi ientos de Li pieza
Ase rose,eq.eel,ore0est6.pa .,oyq°ot0,aS p e.asest n
frgasantes de t0cario o fimpiar[o. De este mode se evitar_ daSey
posiblesquemaduras. * Losnombresde los productosson marcasregistradas
Paraevitarrnanchaso dec0!oraciSn[impie e[ homo desPu6sde carla uso. de sus respectivosfabricantes=
•* Para hacerpedidos,IIameal 1-877-232-6771EEUU=o
, Si se retira aigunapieza,aseg0resede que seareinstaladaenforma correcta, al 1-800-688-8408Canada=
P[EZA
Asadera e Nonca cobra ei inserto con papel de aluminie poes este evita que la gmsa se escurra a la bandeja inferior.
[nserto o Co[oqueun patio enjabonadosabreel insertoy [a bandeja;deje remoiar para soitar [a suciedad=
o Laveen aguajabonosatibia. Useuna esponjade fregar para quitar [a suciedadpersistente=
• La bande]ade asary el inserto pueden ser [avadasen el [avavajiIIas=
quemadores de
Gas Seiiados
Rejiiias de los
Quemadores
Area dei Reioj y
tie ias Tecias
de Control
Cubierta y Panel
de Control -
Esmaitede
Poreelana
o Limpiefrecuentemente. Espereque el quemadorse enfr[e. Limpiecon una esponiade fregar de pl_sticocon iabOn.
ParaIasuciedad persistente,use un limpiadorno abrasivoyun paffo.Trate de evitarqueeI Iimpiadorseescurrahacia
losorificiosdelgaspunsestoafectar_iIa IIama. SIe!Iimpiadorpenetraenlosorificios,IimpieconunaescabiIIadecerdas
suaveso un alfiIer derecho,especiaImenteel orificio debaio deI encendedor. No agrandeo distorsionelos aguieros.
o Tengacuidado de que no entreagua en los orificios de los quemadores.
o Tongacuidado cuando limpie el encendedor.Si el encendedorest_h_medoo da5adoel quemadorsuperior
no encender_
o Lave[asrejiliascon agua tibia jabonosay unaesponjade fregar de pi_stico noabrasiva. Parasuciedadpersistente,
limpie con una esponjano abrasivae impregnadacon jabdn o con unaesponjay una CooktopCleaningCreme
(pieza#20000001)**.
o Parasuciedadquemada,saque[asparriihs, coioque periOdicosy rode cuidadosamentecon un limpiador de homo
comercial.(Norode lassuperficiesvecinas.)Coloqueenboisasdep!_sticodurantevariashorasotoda [anoche. Usando
guantesde goma, retire de las boisas. Lave,enjuague,sequey vueivaacolocaren la cubierta de la estufa.
o Paraactivar 'Control Lock' [Bioqueode los contro[es]para[a limpieza,ver p_gina 70.
o Lave,eniuaguey seque. No useagentesde [impiezaabrasivospunspueden rayare[ acabado.
o Se puede usar [impiaviddossi se rocianen e[ pa_o primero. NO retie directamente en elpaneL
o Retire las perillascuandoest_n en la poslci6n'OFF'tir_ndo[ashaciaadelante.
o Lave,eniuaguey seque. No useagentesde [impiezaabrasivospunspueden rayare[ acabado.
o Enciendacada quemadorparaasegurarsede que [asperiIIashartsido correctamentereinstaIadas.
Laporcelanaesmaltadaesviddo fundido en metaly puede agrietarseo picarsesi no se usacorrectamente.Esresistente
a los _cidos,no a pruebade_icidos.Todos los derrames,especia[mente[as derramesazucaradoso acidicos debenset
[[mpiadosinmediatamentecon un paffo seco.
o Cuandose enfffe,lavecon agua jabonasa,enjuaguey seque.
o Nunca [impie unasuperficietibia o calientecon un pa_oh_medo.Estopuedecausar agrietamientoo picaduras.
• Nuncause [impiadoresde horno,agentesde [impiezaabrasivoso c_usticosen e[ acabadoexterior de [a estufa.
8O
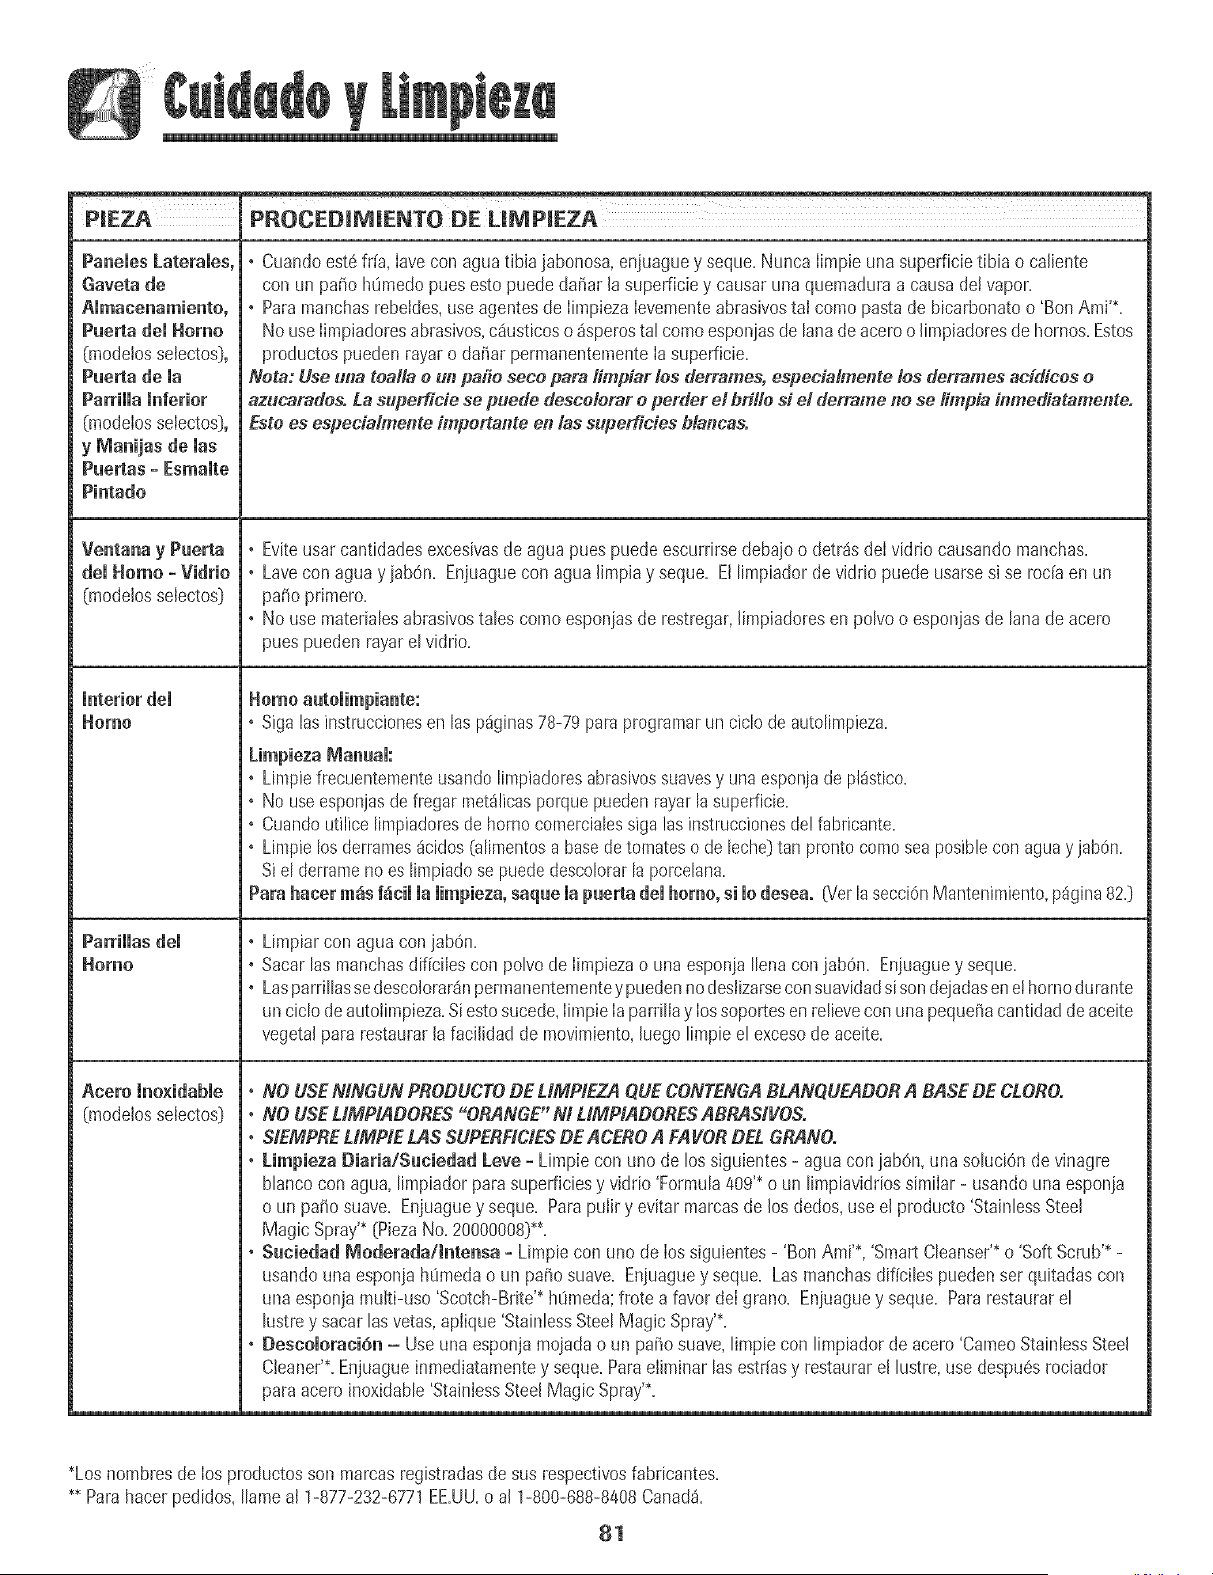
PIEZA PROCEDIMIENTO DE UMPIEZA
Paneles Laterales • Cuandoest6fffa, lave con aguatibia jabonosa,enjuaguey seque.Nunca Iimpie una superficietibia o caliente
Gaveta de con un patio h0medopues esto puede dafiar la supefficie y causaruna quemaduraa causade! vapor.
+ Paramanchasrebeides,use agentesde IimpiezaIevementeabrasivestal comepastade bicarbonateo 'BenAmi'*.
Paerta del Homo No useIimpiadoresabras+vos,c4usticoso _sperostal comeesponjasde lanade acero oJimpiadoresde hornos.Estos
(rnode!osselectos), productospuedenrayaro dafiar permanentementeIa superficie.
Paerta de la Neta; Use ui_a teaila e unparle sece para limpiar los derrames,especialmente tes dermmes acid/ces e
Parriiia inferior azucaradesoLa superficie se peede desceterar e perder el bri!le si el defame no se I/mpia inmediatamente.
(modeIosselectos}, Este es especiaimente /mpertante en /assuperficies btancas.
y Manijas de las
Paertas + Esmaite
Pintado
Ventana y Puerta • Eviteusar cantidadesexcesivasde aguapues puedeescurrirsedebajoo detr_sdeI vidrio causando manchas.
del Homo - VidHe • Lavecon agua y jabOn. Enjuaguecon agua Ih_piay seque. Ellimpiador devidrio puede usarsesi se roda en un
(rnodelosseiectos) patio primero.
• No use materialesabrasivestales come esponjasde restregar,limpiadores en polvo o esponjasde lana de acero
pues puedenrayarel vidrio.
mnterinrdem
Heron • Sigalasinstruccionesen las p_ginas78-79paraprogramarun ciclo de autolimpieza.
kimpinzaManaaJ:
+ Limpiefrecuentementeusandolimpiadoresabrasivessuavesy una esponjade pl_stico.
. No useesponjasde fregar met_iicasporquepuedenrayarla superficie.
° Cuandoutilice limpiadoresde homo comercialessiga las instruccionesde!fabricante.
° Limpielos derrarnes_cidos(alimentosa basede tomateso de leche)tan prontocome seaposiblecon aguay jab0n.
Siel derrameno es limpiadose puede descolorarla porcelana.
Para hater m_s f4nil la limpieza,saque la puetta del heine, si In desea. Bier lasecci0nMantenimiento,p4gina820
ParHllas dei . Limpiarcon agua con jabOn.
Homo • Sacar[asmanchasdiffcilescon po[vo de limpiezao una esponja[lenacon jab6n. Enjuaguey seque.
• Lasparrillassedescolorar_npermanentementey puedennodes[izarseconsuavidadsisondejadasene[bornedurante
unciclo de autolimpieza.Si estosucede,[impie[aparrillay [ossoportesen relievecon unapequeta cantidaddeaceite
vegetalpara restaurar[a faci[idadde movimiento,[uego limpie el excesode aceite.
Acero lne×idable • NO USENINGUN PBODUCTODE LIMPIEZA QUECONTENGABLANQUEADOBA BASEDE CLOBO.
(modelosselectos) • NO USELIMPtADOBES ORANGE Nt LIMPIADOBESABRASIVES.
• SIEMPRELIMPIE LAS SUPERFiCiESDE ACEBOA FAVORDEL ORANO°
• Eimpieza Diaria/SacieSad [.eve + Limpie con uno de los siguientes- agua conjabOn,una soluciOnde vinagre
blancocon agua,limpiador parasuperficiesy vidrio 'Formula409'*o un limpiavidriossimilar - usandouna esponja
o un patio suave. Enjuaguey seque. Parapuiir y evitar marcasde los dedos,use e[ producto 'StahllessSteel
Magic Spray'*(PiezaNo. 20000008)**+
• Saciedad Moderada/lntensa + Limpiecon uno de [oss+guientes- 'Ben Ami'*, 'SmartCleanser'*o 'Soft Scrub'* -
usandouna esponja h0medao un patio suave. Enjuaguey seque. Lasmanchasdificiles puedenser quitadas con
una esponjamulti-use 'Scotch-Brite'*h0meda;frote a favorde[ grano. Enjuaguey seque. Pararestaurarel
lustrey sacar lasvetas,aplique'StainlessSteelMagic Spray'*.
• gescoioraci6n - Useuna esponjamojadao un patio suave,limpie con limpiador de acero'CameoStainlessSteel
Cleaner'£Enjuagueinmediatamentey seque.Paraeliminar lasestriasy restaurarel lustre,use despu6srociador
paraacero inoxidable'StainlessSteelMagic Spray'*.
*Losnombresde los productosson marcasregistradasde sus respectivosfabricantes.
** Parahacer pedidos,Ilameal 1-877-232-6771EE.UU.o al 1-800-688-8408Canada.
81
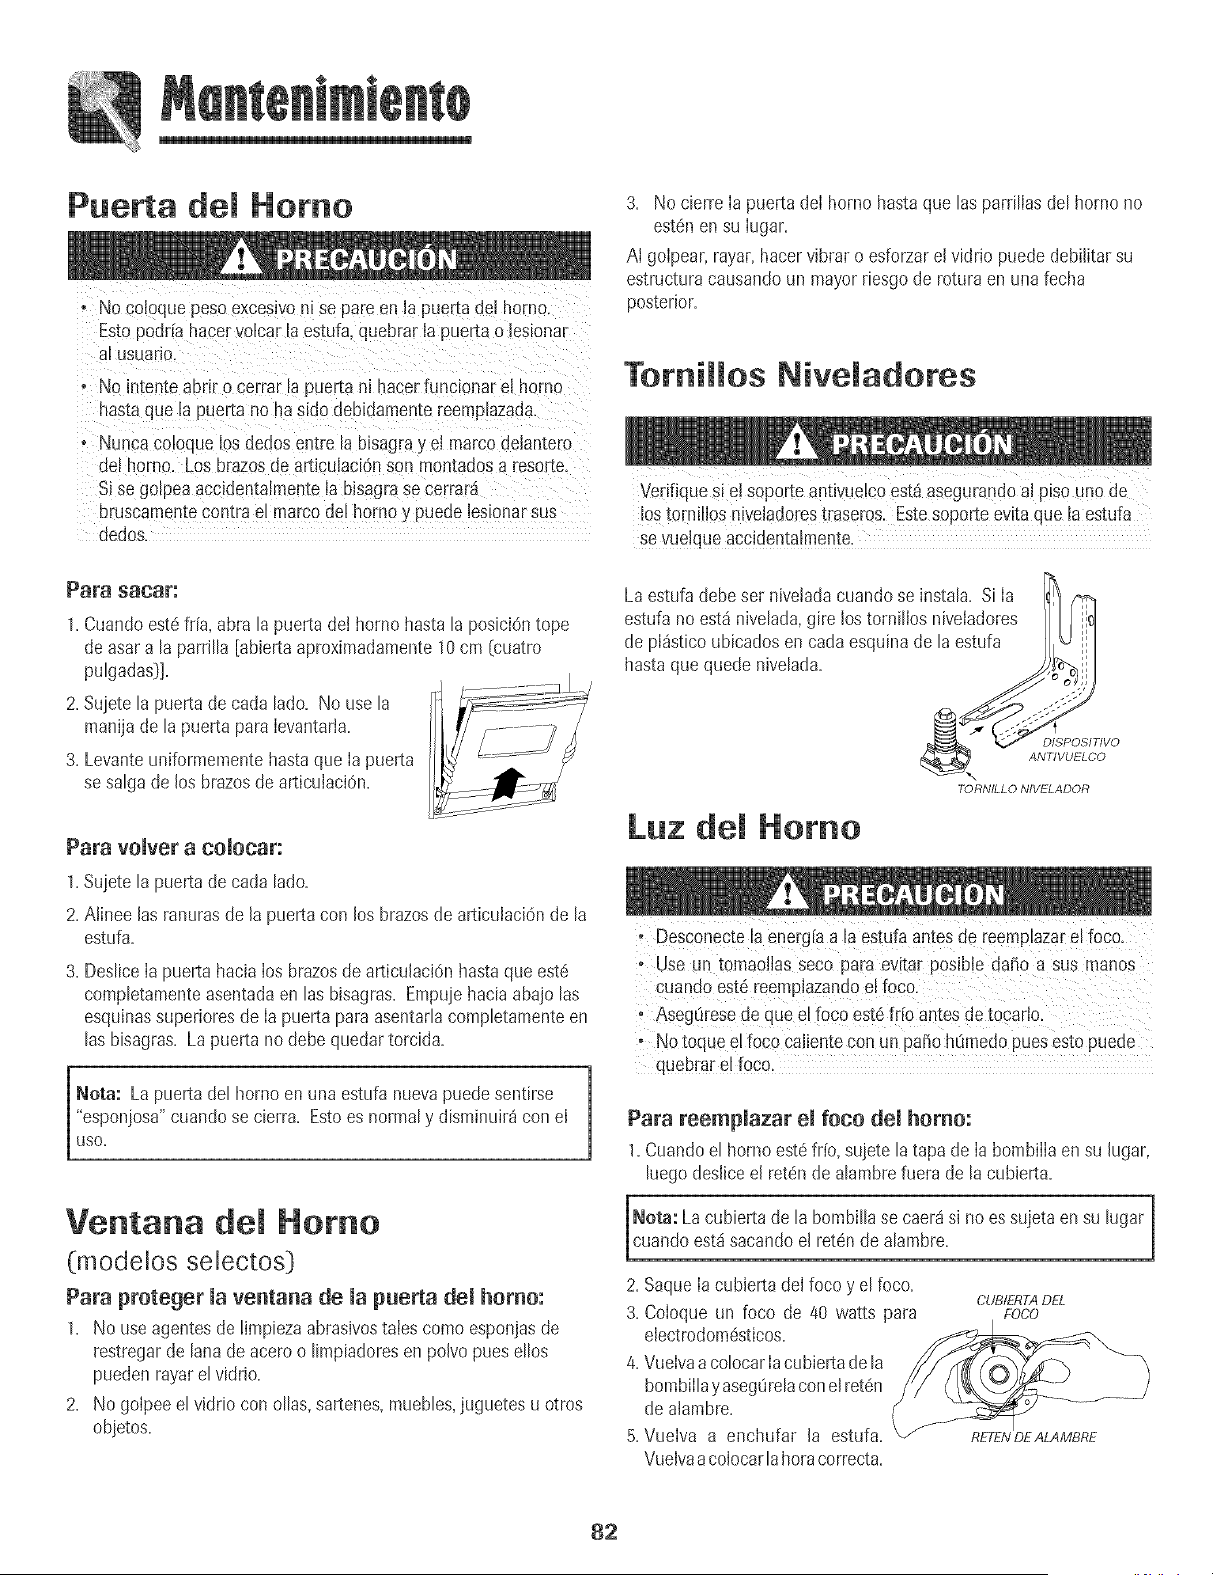
Puerta del Homo
, No coloquepeso exceslvom se pare en ia puer[a dei homo.
Estopodffahacervolcar la estufa,quebrarla puerta o lesionar
a[ us Jano.
o No intenseabnr o cerrar [a puerta n[ hacerfuncLonarel homo
hastaque [a puerta no hasido debiaamemereempiazada
, Nunca co[oque los dodos entre la b_sagray el marco deJantero
de[ homo. Los brazo_de artJcuiacionson montadosa resor_e.
Sise golpeaaccidenta[menteJabisagrase corral
bruscamentecontrae[ marcode[ homo y puede[esionarsus
_Jedos.
Para sacsr:
1. Cuandoest_ fffa, abra la puertadei horno hasta la posici6ntope
de asara la parriHa[abJertaaproximadamente10cm (cuatro
pulgadas)].
2. Sujetela puertade cada [ado. No usela
manijade lapuerta para Ievantarta.
3. Levanteuniformementehastaque Ia puerta
sesaIga de los brazosde articulaciOn.
Para voJver a co[ocar:
1=Sujete[a puertade cada [ado=
2=Aiinee[asranurasde [a puerta con los brazesde articuiaci6n de la
estufa=
3=Desiicela puerta hacia los brazosdearticulaci6n hastaque est6
completamenteasentadaen las bisagras=Empuiehacia abajolas
esquJnassuperioresde la puertapara asentarlacompletamenteen
las bisagras=La puerta no debequedartorcida=
Nora: La puertade[ hornoen una estufa nuevapuedesentirse
1"esponjosa"cuandose cierra. Estoes normaly disminuir_con el
_USO.
Ventana de[ Homo
(modelos selectos )
Para proteger la ventana de la puerta dei homo:
1. No use agentesde limpiezaabrasivostaies come esponjasde
restregarde lana de acero o limpiadoresen poJvopuesellos
pueden rayarelviddo=
2= No golpee el vJdriocon ollas, sartenes,muebles,juguetes u otros
obietos=
3. No cierre la puerta del hornohastaque [as parriHasdel homo no
est6nen su Iugar.
At golpear,rayar, hacervibrar o esforzarel vidrio puede debilitarsu
estructuracausandoun mayor riesgode rotura en unafecha
posterior.
Torniiios Niveiadores
Vedfique S!el sop0rte antivue[coest4 asegurandoa[ piso uno de
[0S tomil!0S niveladorestraseres. Estesoporte evita que la estufa
se vue!queaccidenta!raente_
La estufadebeser nJveladacuandose insta[a. Si [a
f_
estufa noest4 nivelada,gire los torni[los niveiadores J _
de pl_sticoubicadosen carlaesquinade [a estufa
hastaquequede hive[aria= pii
TORNILLO NIVELADO8
Luz del Homo
° Desconecte[aenerg[aa !a es[ufa antesde reemP[azare[foco.
° Use un tomaoHasseco pa[a ev[tar p0sible dW_oa sus manos
cuand0est6 reemp[azand0e[f0c0.
o Notoque e[ foc0 calientecon un paffohOmedopuesesto puede
quebrare!foco,
Para reemplazar el foco de[ homo:
1=Cuandoe[ horno est6 fifo, suiete [a tapa de [a bombiiiaen su [ugar,
luegodes[icee[ retdnde alambrefuera de la cubJerta.
1
Nora: La cubierta de [a bombiHase caer4si no essujetaen su [ugar
[cuando est4sacando e[ ret6nde alambre=
2=Saque[a cubJertade[ foco y el foco=
CUBfERTA DfaL
3=Co[oqueml foco de 40 watts para Foco
e[ectrodom6sticos=
4=WJeivaa colocar[acubierta de la
bombiilay asegOrelacone[ret6n
de alambre= _.
5=Vuelva a enchufar [a estufa= RET£NDEALAMBRE
Vueivaacolocarlahorncorrecta=
82
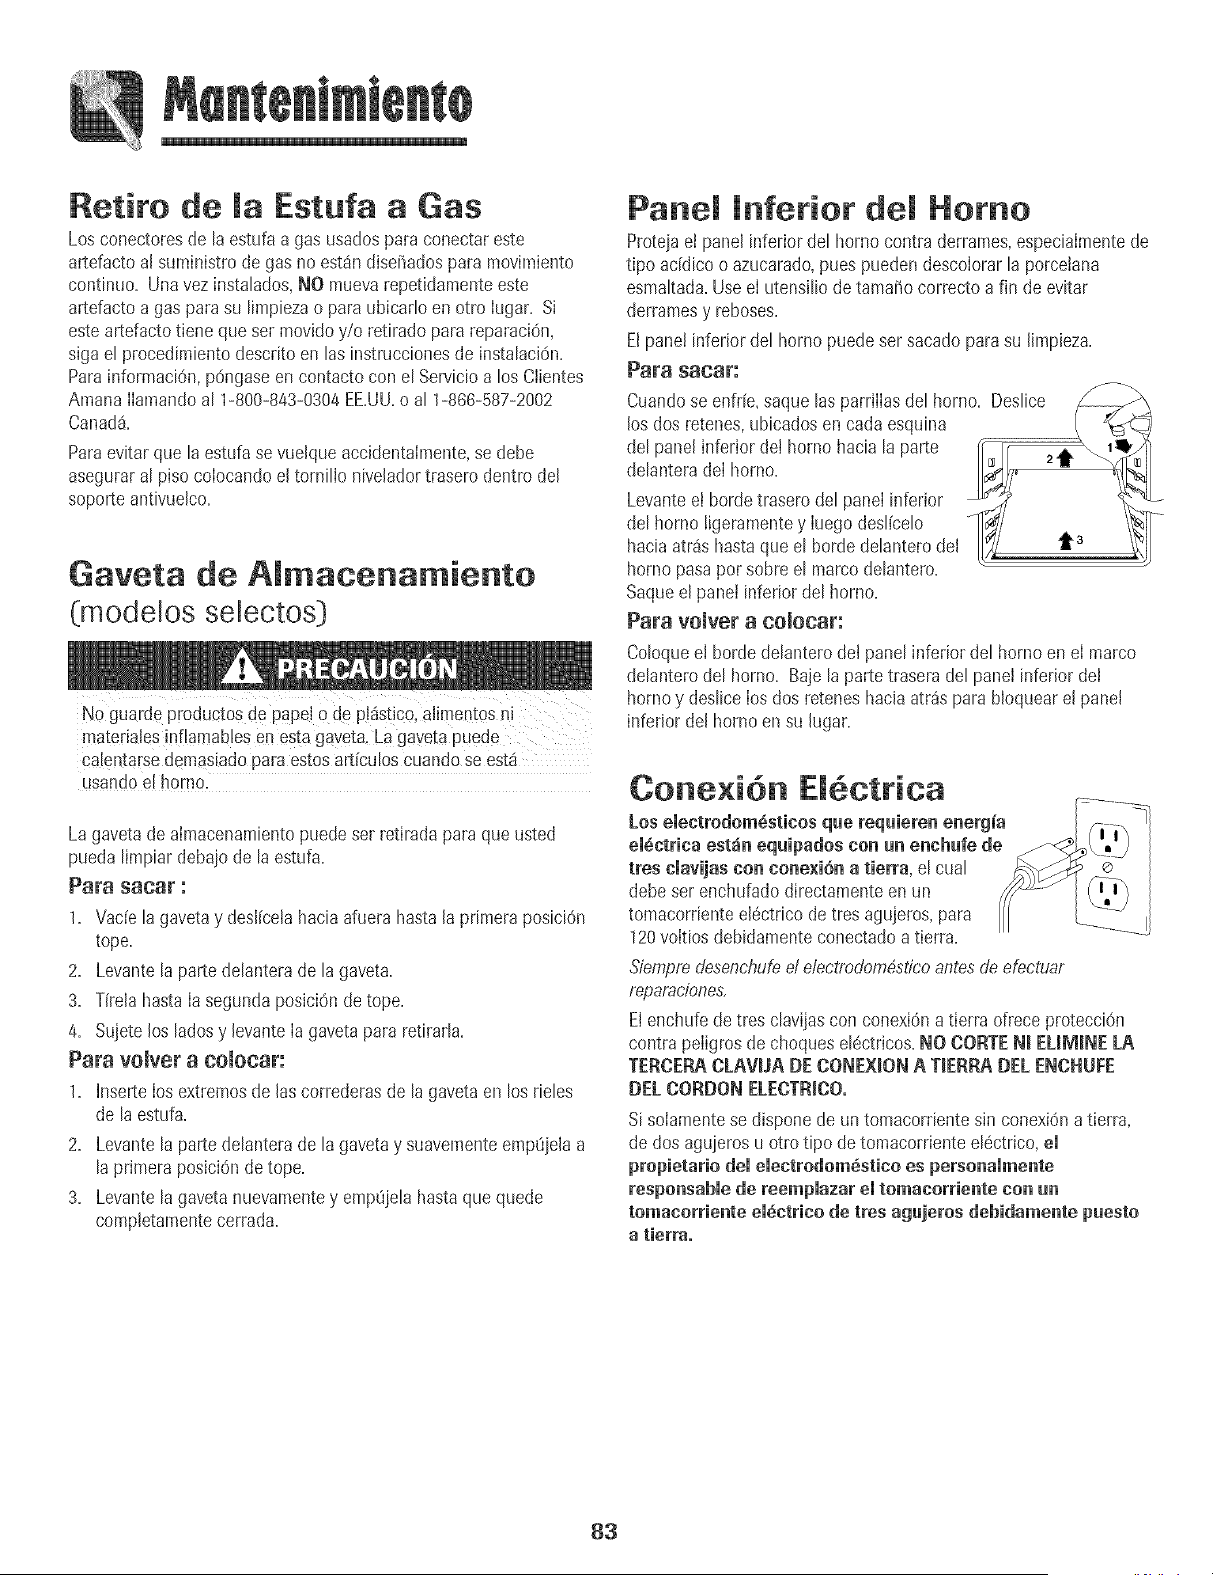
Retiro de Ja Estufa a Gas
Los conectoresde [aestufa a gas usadospara conectareste
artefactoal suministrode gas no estan dise_adospara movimiento
continuo+Unavez insta[ados,NO muevarepet+damenteeste
artefactoa gas para su Hmpiezao paraubicadoen otto Iugar+Si
esteartefactotiene queser movidoy/o retiradopara reparaci6n,
s+gae[ procedimientodescrito en [as instruccionesde instahci6n+
ParainformaciOn,p6ngaseen contacto con el Servicioa los Clientes
Amana[[amandoa[ 1-800-843-0304EE.UU.o a[ 1-866-587-2002
Canad&
Paraevitarque la estufase vuelqueaccidentaimente,se debe
aseguraral piso coIocandoel tornilio niveladortrasero dentro del
soporteantivuelco+
Gaveta de Ammacenamiento
(modelos selectos[}
NO guardeproductos de pape+0 de p!_st!co,alimentosn+
matedales+nflamablesenesta gaveta+La gayetaPUede
catentarsedemasiadopara estosart[culoscuando se est_
usandoel homo.
La gavetade almacenamientopuedeset retiradaparaque usted
puedalimpiar debajode la estufa.
Para sacar :
1+ Vade la gavetay desl[celahaciaafuera hasta la primeraposiciOn
tope+
2+ Levantela partedelanterade la gaveta+
3+ T(relahastaIasegundapos+ci0nde tope.
4+ Sujete los ladosy levanteIa gavetapara retirarla+
Para vomvera comocar:
1. InserteIosextremosde las correderasde la gavetaen los rieles
de la estufa.
2. Levantela partedelanterade la gavetay suavementeemp8je[aa
la primeraposici6ndetope.
3. Levantela gaveta nuevamentey empt_jelahasta que quede
comp[etamentecerrada.
Pane inferior Homo
Protejaet panel inferior del horno contraderrames,especiaImentede
tipo addico o azucarado,pues pueden descoIorarla porcetana
esmaltada.Use eI utensiliodetama_ocorrecto a fin de evitar
derramesy reboses.
Elpane! inferiordel hornopuedeser sacadoparasu limpieza.
Para sacar:
Cuandose enfrie,saque las parrilIasdel homo. Deslice _X_
los dos retenes,ubicadosen cadaesquina
del panel inferior det homo hacia la parte
delanteradeI homo.
Levanteei horde trasero del panelinfer+or
del horno ligeramentey Iuegodeslicelo
hacia atr_shastaque el hordedehntero del _s
horno pasaporsobre el marcodelantero+
Saqueel panei inferiordel homo+
Para vomvera comocar:
Co[oqueel borde de[anterode[ pane[inferior de[ horno en el marco
de[anterodel horno. Bajela partetrasera del panel inferior del
homo y deslicelos dos reteneshacia atr_sparabloqueare[ pane[
inferior de[ homo ensu [ugar.
Cone×i6n El ctrica
LoseJectrodom6sticos que requieren energia
el6etriea est_in equipados con un enehufe de
tres ciavijas con eone×i6n a tierra, el cual
debeser enchufadodirectamenteenun
tomacorrientee+6ctricode tres agujeros,para
120voItiosdebidamenteconectadoa tierra+
Siempredesenchufed efeetrodom4stieoantesde efeetuar
reparaeiones.
Elenchufede tres clavijascon conexi6na tierra ofreceprotecci6n
contrapeligros de choqueselectricos+NO CORTENJEUM+NELA
TERCEP_CLAVUA DE CONE×+ONA T+ERRADEEENCHUFE
DEECORDON ELECTR_CO.
SisoIamentese dispone de un tomacordente s+neonexiOna tierra,
de dos agujerosu otto tipo detomacorrienteel_ctrico,el
propietario 4emeJectrodom6stieo es personammente
responsablede reemplazar el tomacorriente con un
tomaeorriente em_ctricode ires agujeros debidamente puesto
a tierra.
83
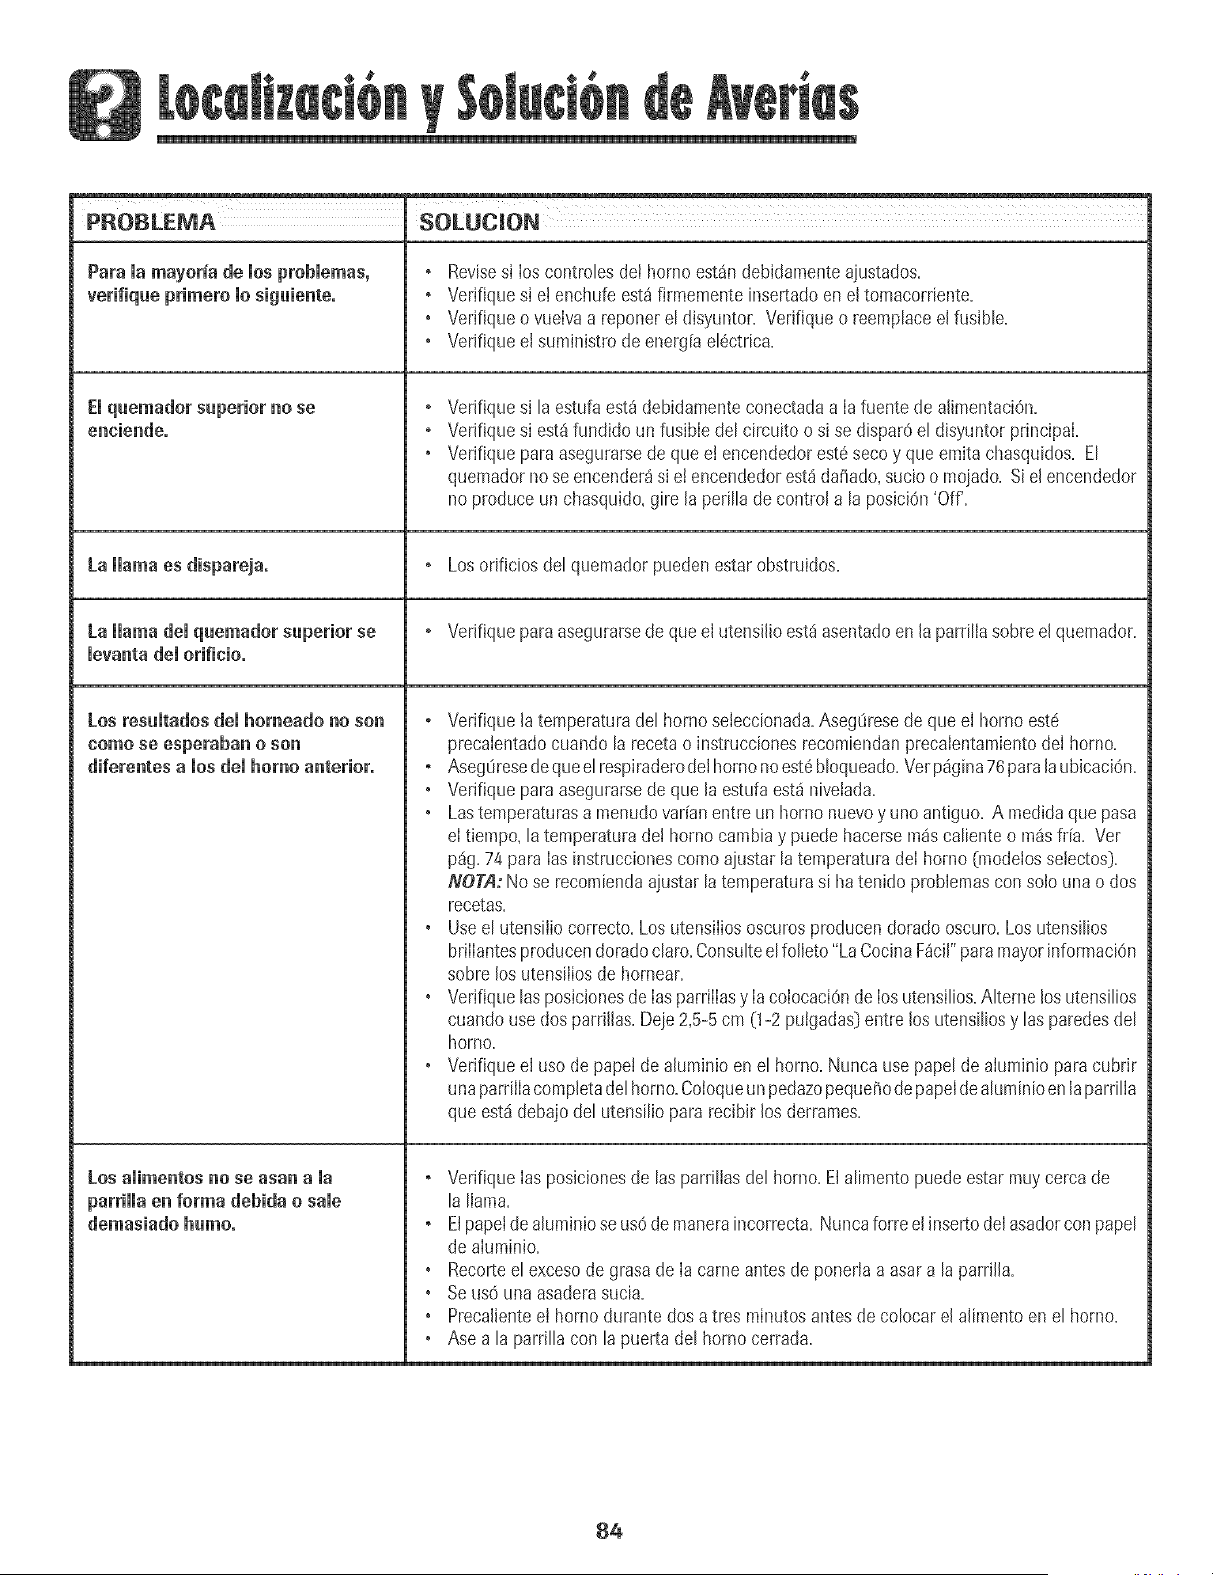
m
PROBLEMA SOLUC_ON
Para mamayor_ade moaprobmemas, ° Revisesi Ios controbs dei hornoest_n debidamenteaiustados.
verifique primero Josigaiente, , Verifique si et enchufe est_ firmemente insertadoen eltomacorriente.
• Verifique o vuelva a reponer el disyuntor. Verifique o reempBceel fusible.
• Verifique el suministro de energ[ael@trica.
EJquemador superior no se , Verifique si la estufaest_ debidamenteconectadaa Ia fuente de alimentaciOn.
eneiendeo ° Verifique si est_fundido un fusibledel circuito o si se dispar6el disyuntor principal
• Verifique para asegurarsede queel encendedorest_secoy que emita chasquidos. El
quemadorno seencender_si e! encendedorest_dai_ado,sucioo moiado. Siel encendedor
no produceun chasquido,gire la perillade control a la posbi6n 'Off'.
La llama es dispareja. , Losorificios del quemadorpuedenestar obstruidos.
La llama del quemador aaperior se , Verifique paraasegurarsede que el utensilio est_asentadoen [aparrilla sobre el quemador.
ievantadei oHfieio.
Losresumtadosdemhomeado no son , Verifique Jatemperaturadel homo seJeccionada.Aseg_iresede que eJhorno est_
come se esperaban o son precalentadocuando la recetao instmcciones recombndan precabntamiento deI homo.
diferentes a los deJhomo anterior° , AsegOresedequeelrespiraderodelhomo noest6 bloqueado.Vet p%ina 76paraJaubbaci6n.
• Verifique para asegurarsede que la estufaest_nivelada.
• Lastemperaturasa menudovar[anentre un horno nuevoy uno antiguo. A medidaque pasa
eItiernpo, la temperaturade! horno cambiay puede hacersem_s caliente o m_isfda. Ver
p%. 74 para Ias instruccionescomo ajustar la temperaturadeI horno (modelossetectos}.
NOTA:No se recombnda ajustarla temperaturasi ha tenido probbmas con solo unao dos
recetas.
• Useel utensiliocorrecto.Los utensiliososcurosproducendoradooscuro.Los utensilios
brilIantesproducendoradoclaro.Consulteelfolbto "LaCocinaF_cil"paramayorinformaci6n
sobre los utensiliosde hornear.
• Verifique lasposicionesdeIasparrilIasy Iacoiocaci6ndeIos utensilios.AIterne losutensilios
cuandouse dosparriflas.Deje2,5-5cm (1-2pulgadas}entre los utensiliosy las paredesdel
homo.
• Verifique eJuso de papei de ahminio en el homo. Nunca use papelde aluminio para cubrir
unaparriJlacompletadelhomo.Coloqueun pedazopequeriode papeIdealuminioenlaparrilJa
queest_debajodel utensilio para recibir los derrames.
Lea aJimentos no se asan a la , Verifique las posbiones de las parrillasdel homo. Elalimentopuedeestarmuycerca de
parrillaen forma debida o sale la liama.
demasiado humo° ° Elpapeide ahminio se us6demaneraincorrecta. Nuncaforreel insertodel asadorcon papel
deaIuminio.
° Recorteel excesode grasade Ia came antesde ponerla a asar a la parrilla.
° Seus6 una asaderasucia.
° Precalienteel horno durante dos a tres minutosantes de colocarel alimentoenel homo.
• Ase a la parrilla con la puerta del horno cerrada.
84
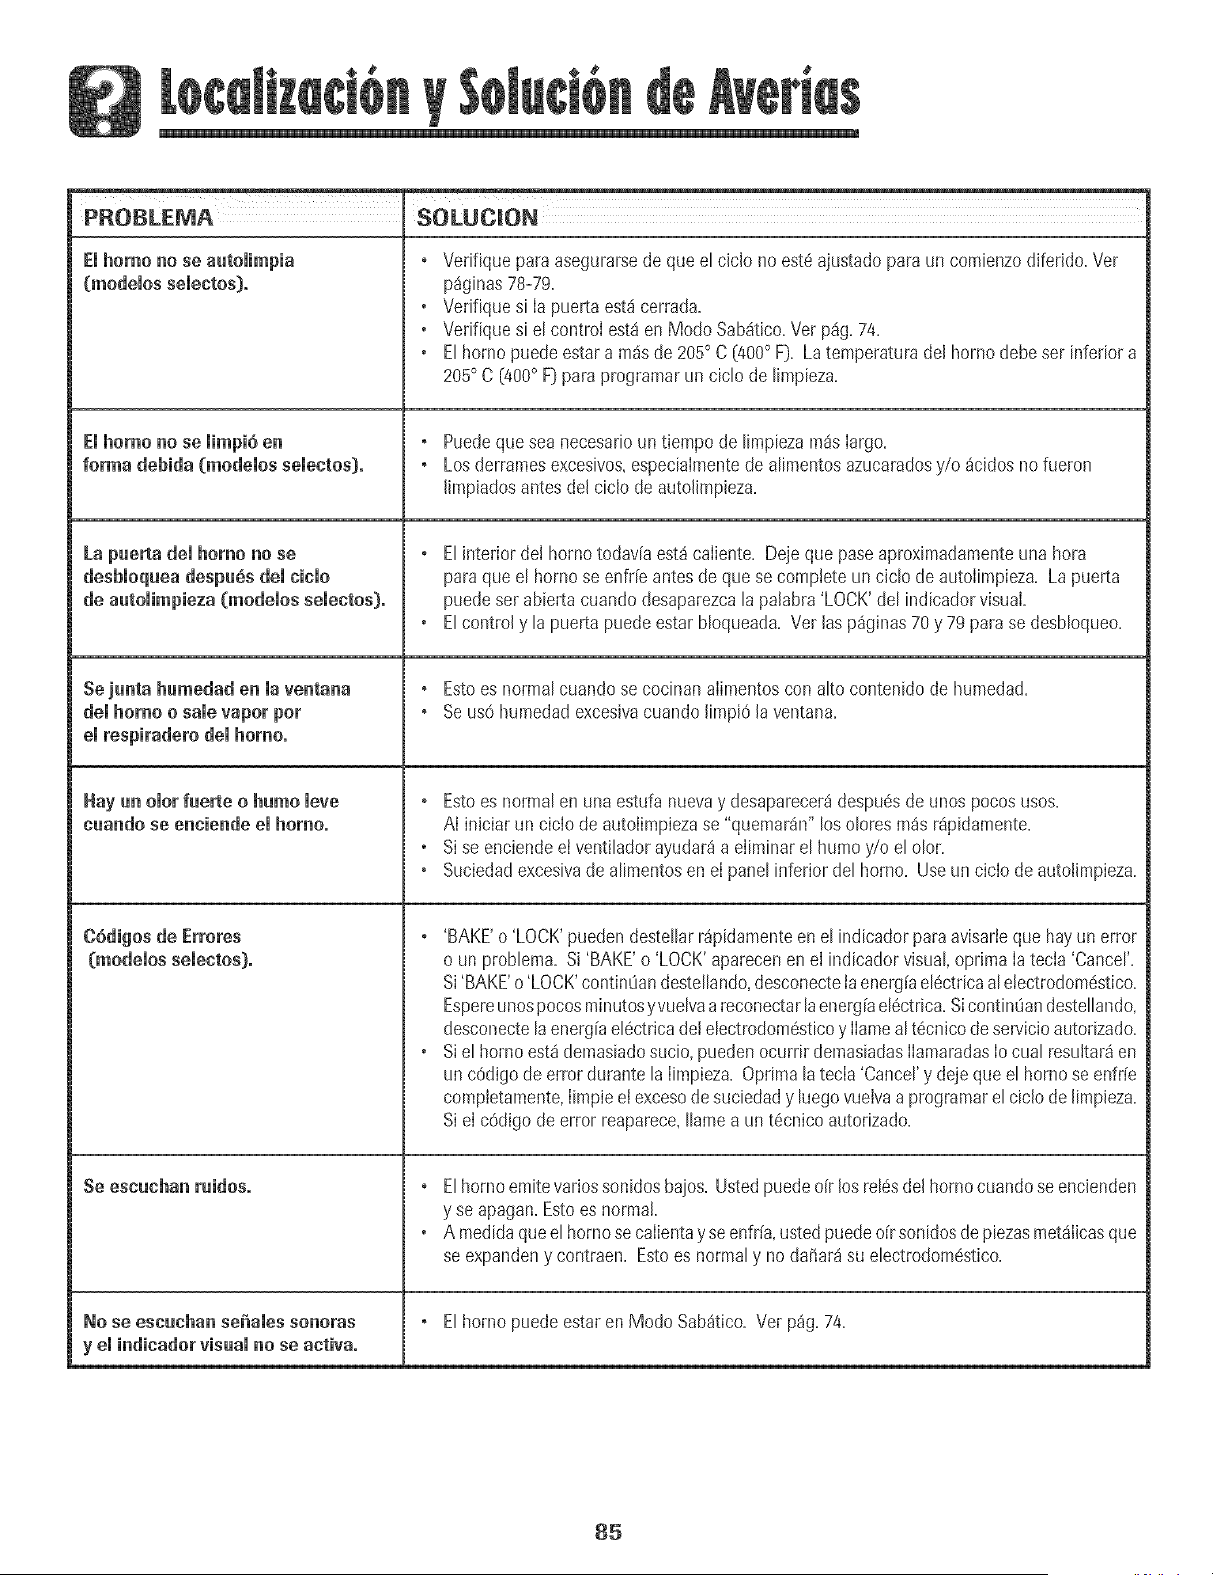
m
PROBLEMA SOLUC[ON
Emhomono se autoiimpia
(modemossemectos_.
Emhomono se mimpi6en
forma debida (modeJos seiectos_.
Lapue_ademhomonose
desbmoqueadespu_s demcido
de automimpieza(modemossemectos).
sejuntahumedadenmaventana
demhomoo samewpor pot
emrespiradero demhomo°
Hayunomorfuerte o humo mere
cuando se enciende emhomo°
C6digos de Errores
(modemossemecto÷)o
Se escuchan ruidos.
NO Se escuchan se_amGssonoras
y ei indicadorvisualnose activa.
®
®
®
Verifique paraasegurarsede que el ciclo noest6 ajustadoparaun comienzodiferido=Ver
p%inas 78-79=
Verifiquesi Ia puerta est_ cerrada=
Verifiquesi el controi est8 en Modo Sab_itico=Vet p%=74=
Elhornopuedeestara m_sde 205° C [400° F_=La temperaturadel hornodebeset inferiora
205° C [400° F[}paraprogramarun ciclo de limpieza=
° Puedeque sea necesarioun tiempo de limpiezarnSslargo.
° Losderramesexcesivos,especialmentede alimentosazucaradosy/o _cidosno fueron
limpiadosantesdel ciclo deautolimpieza=
° Elinterior del homo todavia est_ caliente. Deje que paseaproximadamenteuna hora
paraqueel homo se enfrfeantes deque se completeun ciclo de autolimpieza. La puerta
puedeser abierta cuandodesaparezcala palabra'LOCK'del indicadorvisual.
o Elcontrol y la puerta puedeestarbloqueada. Vet las p%inas 70y 79para se desbloqueo.
, Estoes normalcuando se cocinan alimentoscon alto contenidode humedad.
, Seus0 humedadexcesivacuando limpi6 la ventana.
° Estoes normalen una estufa nuevay desaparecer_despu6sde unos pocosusos.
AI iniciar un ciclo de autolimpiezase "quemaran"losolores m_s r_pidamente.
o Sise enciendeei ventilador ayudar_a elirninarel humo y/o el olor.
• Suciedadexcesivade alimentosen eI panelinferior del horno. Useun ciclo deautolimpieza.
° 'BAKE'o 'LOCK'puedendestellarr4pidamenteen el indicadorparaavisarJeque hayun error
o un problema. Si 'BAKE'o 'LOCK'apareceneneI indicadorvisual,oprima Iatecla 'Cancer.
Si'BAKE'o 'LOCK'contint_andestellando,desconecteJaenerg[ael6ctricaaleJectrodom6stico.
Espereunospocosminutosyvuelvaa reconectarlaenergFael6ctrica.Sicontim_andestellando,
desconectelaenergFael6ctricadeJelectrodom@sticoy Ilamealt6cnJcode servicioautorizado.
o Siel homo est4demasiadosucio, puedenocurrir demasiadasIlamaradasIocual resultar4en
unc6digo de error durante la Iimpieza.Oprirnala tecla 'Cancel'y de]equeel homose enfr[e
completamente,IimpieeI excesodesuciedady luegovueJvaa programarel ciclo deJimpieza.
Si eI c6digo de error reaparece,Ilamea un t6cnico autorizado.
, E[homo emitevariossonidos bajos. Ustedpuedeo[r losre[6sde[hornocuandose encienden
y se apagan.Estoesnormal
o A medidaqueelhomo secalientay seenfr[a,ustedpuedeo[r sonidosdepiezasmetalicasque
se expandeny contraen. Estoes normaly no da_ar_ su electrodom6stico.
° Elhornopuedeestaren Modo Sab_tico. Ver p%. 74=
85

86
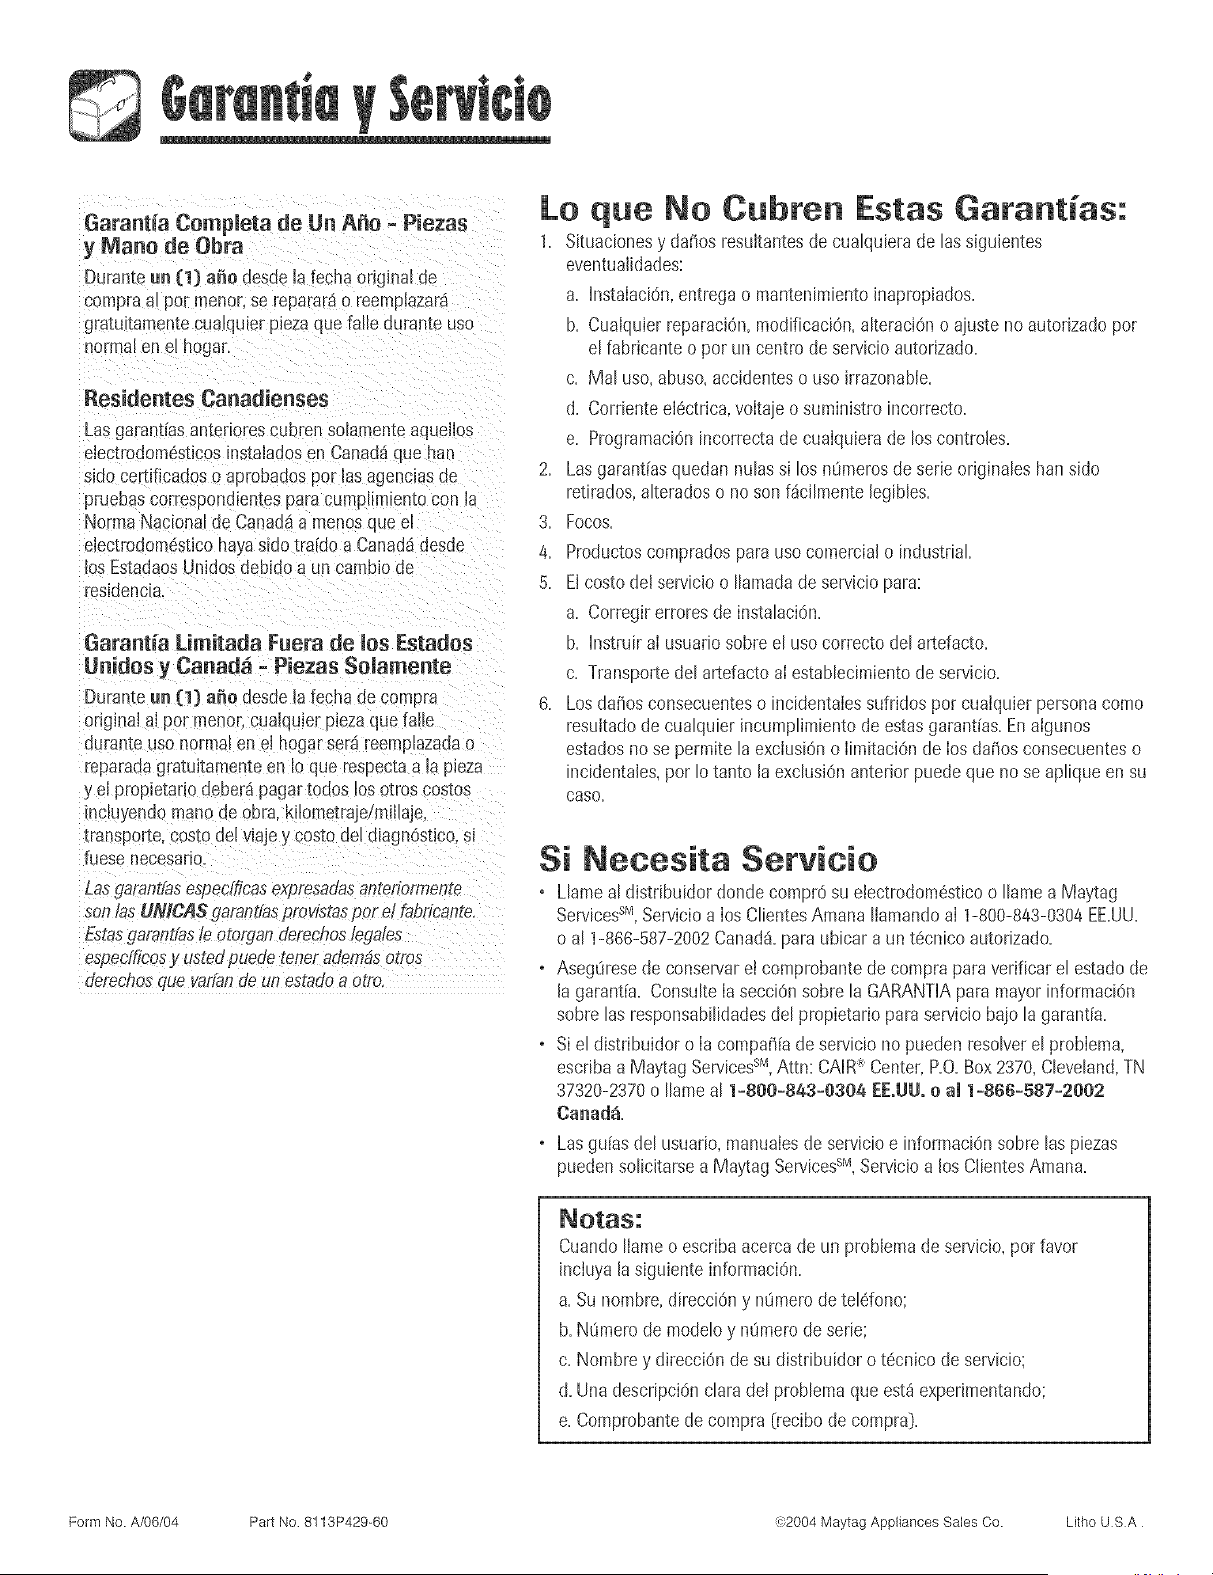
Garantia Completa de Un A_o = Piezas
y Mane de Obra
Duranteun (t) a_o desde[a fechaorigina_de
compraa_pot menor,se reparar_o reempiazarg
gratutamente cualqu_erp_ezaque [aHeaarante uso
normalen e_hogar.
Residentes Canadienses
LasgarandasantedorescubrensoIamenteaqueiios
eiectmdom6sticosinstaladosen Canaddque ban
sldo certificadoso aprobacas pot ias agenciasue
pruebascorrespondientespara cumpiimientocon la
NormaNacionaide Canadaa menosqde el
eiectmdom6sticohayasidotraido a Canad_desde
los EstadaosUnidosdebidoa un cambio de
residencta.
Garantia Limitada Fuera de ruesEstades
Unities y Canad_ - Piezas Soiamente
Durame _n [1) a_o desdeia fecha de compra
originalal por menor,cuaiquler plezaque falie
duranceuso normalen e[ hogarsera reemp_azadao
reparadagratuitamenteen 1oque respec[aa la pleza
y el propietariodeberdpagartodos los otros cosmos
mcluyendomanode obra.K_lometrajeimiliaje.
[ranspor_e.cos[ode[ viajey costo de[ diagnOstico,sl
fuese necesario.
Lasgarantiasespecfflcasexpresadasantefiormente
sonlas UHICAS garantiaspmvistaspot el fabricante.
Estasdamntiasle otorganderechoslegates
espedficosy ustedpuede tenet ademb_otro_
derechosque vaffande un estadoa otro,
Lo que No Cubren Estas Garantgas:
1. Situacionesy daffosresuitantesde cuaiquierade lassiguientes
eventualidades:
a. Instalaci6n,entregao mantenimientoinapropiados.
b. CuaiquierreparaciOn,modificaciOn,aiteraciOno aiuste noautorizadopor
el fabricanteo pot uncentro de servicioautorizado.
c. Mal uso,abuso,accidenteso uso irrazonabie.
d. Cordenteei6ctrica,voitaieo suministroincorrecto.
e. Programaci6nincorrectade cuaiquierade los controles.
2. Lasgarant[asquedan hulassi los nOmerosde serieoriginales hartsido
retirados,aiteradoso no son f_ciimente legibles.
3. Focos.
4. Productoscompradosparausocomercial o industrial
5. El costodel servicioo liamadade serviciopara:
a. Corregirerroresde instalacidn.
b. Instruir ai usuariosobre el usocorrecto del artefacto.
c. Transportedel artefacto a[estabiecimientode servicio.
6. Losdaffos consecuenteso incidentaiessufridospot cuaiquier personacomo
resultadode cuaiquier incumpiimientode estasgarant[as.En aigunos
estadosno se permite la exciusi6no [imitaciOnde [osdaffosconsecuenteso
incidentaies,pot Io tanto [a exciusiOnanterior puedeque no se apiique en su
08SO.
Si Necesita Servieio
• Liameal distribuidor dondecompr6su eiectrodom6sticoo Ihme a Maytag
ServicessM,Servicioa [os CiientesAmana Ilamandoa[ 1-800-843-0304EEUU.
o al 1-866-587-2002Canada.para ubicar aun t6cnico autorizado.
o Aseg0resede conservarei comprobantede compraparaverificarel estadode
[agarant[a. Consuite[asecciOnsobre la GARANTIApara mayor informaci6n
sobre las responsabilidadesdel propietariopara servicio baio la garant[a.
o Si el distribuidor o [a compaff[ade serviciono pueden resoiverel probiema,
escribaa MaytagServicessM,Attn: CAIR Center,P.O.Box2370,Cleveland,TN
37320-2370o [lamea[ 1_800_843_e304 EE.UU.o ai 1_866_587_2002
Canada.
o Las gu[asde[ usuario,manuaiesde servicioe informaciOnsobre [as piezas
puedensolicitarsea Maytag ServicessM,Servicioa los CiientesAmana.
Cuando[lame o escribaacercade un prob[emade sewicio,porfavor
inciuya[a siguienteinformaciOn.
a. Suhombre,direcciOny n_merode teidono;
b. NOmerode mode[oy nOmerode serie;
c. Nombre y direcciOnde su distribuidor o t6cnico de servicio;
d. Una descripci6nclarade[ probiemaque est_ experimentando;
e. Comprobantedecompra [recibo de compra).
Form No. A/06/04 Part No 8113P429-60 _::2004 Maytag Appliances Sales Co. Lithe USA