Loading ...
Loading ...
Loading ...
English I
40 39
414/ 47
43 44 45 46
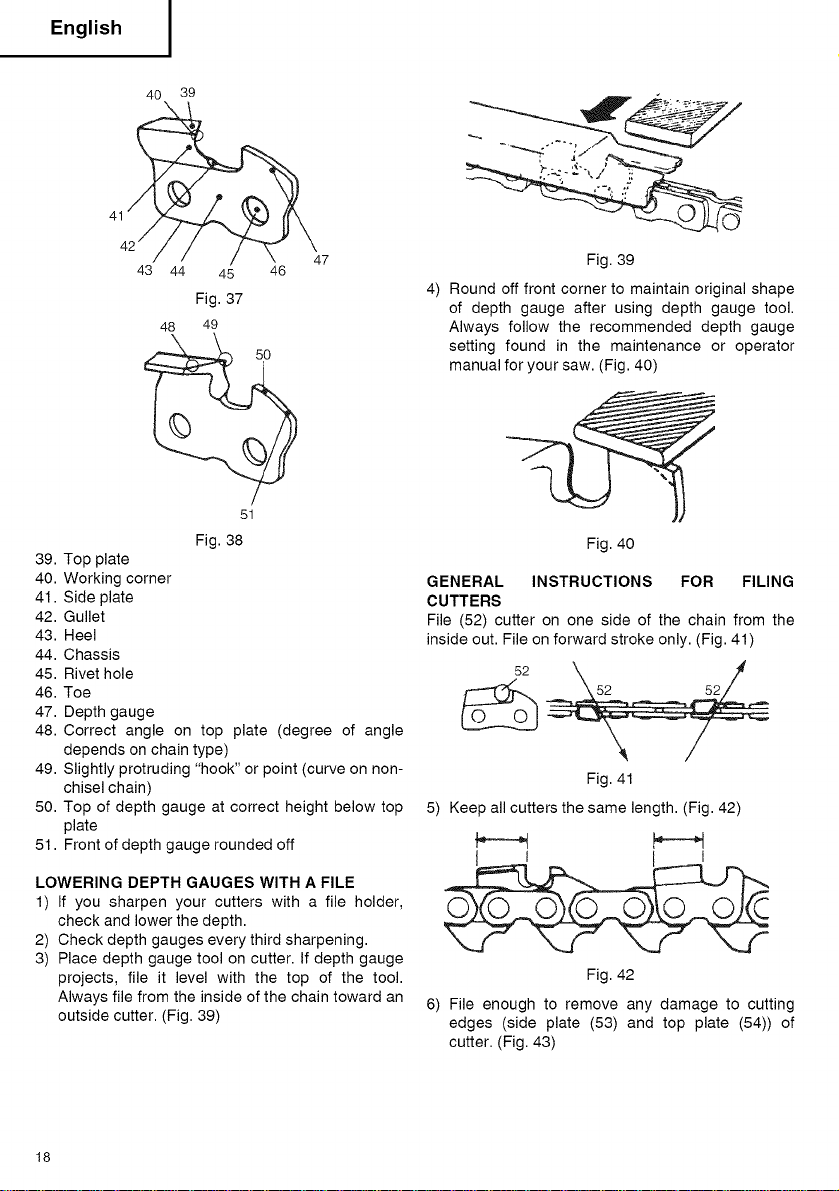
Fig. 37
48 49
51
39. Top plate
40. Working corner
41. Side plate
42. Gullet
43. Heel
44. Chassis
45. Rivet hole
46. Toe
47. Depth gauge
Fig. 38
48. Correct angle on top plate (degree of angle
depends on chain type)
49. Slightly protruding "hook" or point (curve on non-
chisel chain)
50. Top of depth gauge at correct height below top
plate
51. Front of depth gauge rounded off
LOWERING DEPTH GAUGES WITH A FILE
1) If you sharpen your cutters with a file holder,
check and lower the depth.
2) Check depth gauges every third sharpening.
3) Place depth gauge tool on cutter. If depth gauge
projects, file it level with the top of the tool.
Always file from the inside of the chain toward an
outside cutter. (Fig. 39)
Fig. 39
4) Round off front corner to maintain original shape
of depth gauge after using depth gauge tool.
Always follow the recommended depth gauge
setting found in the maintenance or operator
manual for your saw. (Fig. 40)
Fig. 40
GENERAL INSTRUCTIONS FOR FILING
CUTTERS
File (52) cutter on one side of the chain from the
inside out. File on forward stroke only. (Fig. 41)
Fig. 41
5) Keep all cutters the same length. (Fig. 42)
I___! L i
Fig. 42
6) File enough to remove any damage to cutting
edges (side plate (53) and top plate (54)) of
cutter. (Fig. 43)
18
Loading ...
Loading ...
Loading ...