Owner's Manual Sewing Machine for Kenmore 38515512000
Table of contents
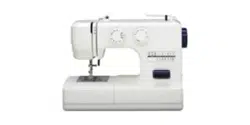
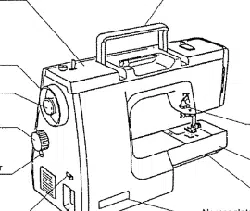
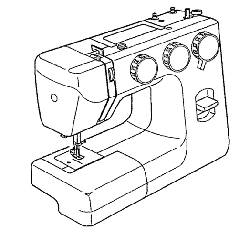
Names Of Parts
Cabinet And Tote Bags
Names Of Parts
Available Accessories And Attachments
Getting Readyto Sew
Connecting Machine To Power Supply
For Your Safety
Operating Instructions
Controlling Sewing Speed
Setting Spool Pins
Presser Foot Lifter
Thread Cutter
Accessory Box
Free-Arm Sewing .
Stitch Selector
Stitch Length Control
Adjusting Stretch Stitch Balance
Reverse Stitch Control
Straight Stitch Sewing
Straight Stitch .
Use The Seam Guides
Turn A Square Corner
Topstitching
Zipper Sewing
Zigzag Stitches
Basic Zigzag
Satin Stitch
Monogramming
Applique
Bar Tacking
Button Sewing
Overcasting Stitch
Utility Stitches And Decorative Stitches
Blind Hem Stitch
Lace Work
Multiple Zigzag Stitch
Shell Stitch
Stretch Stitches
Straight Stretch
Rick*Rack Stretch
Overcast Stretch Stitching .
Serging
Buttonhole
Buttonhole
Care Of Your Machine
Replacing The Light Bulb
Cleaning The Feed Dogs
Cleaning The Shuttle Race
Oiling The Machine
Troubleshooting
Threading the Machine
Threading the machine - Raise the thread take-up lever to its highest position by turning the handwheel counterclockwise, toward you. Raise the presser foot lifter. Place a spool on the spool pin, with thread coming off as shown.
Draw the end of thread around the upper thread guide
While holding the thread near the spool, draw the end of the thread down around the check spring holder,
Firmly draw the thread up from right to left over the take-up lever and down into the take-up lever eye.
Slide the thread behind the needle bar thread guide on the left [] Thread the needle from front to back or use a needle threader. We recommend using the convenient needlethreader (#200262101), included with your machine.
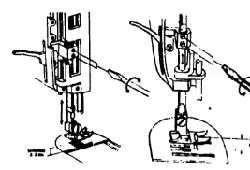
Drawing up bobbin thread
Raise the presser foot. Hold the needle thread lightly with your left hand and rotate the handwheel counterclockwise, toward you, for one complete turn.
Bring the bobbin thread up by pulling the needle thread up.
Pull both threads under and to the back of the presser foot, leaving 4 to 6 inches (10 cm to 15 cm) of thread clear.
Care Of Your Machine
Replacing the Light Bulb
CAUTION: As the light bulb could be HOT, protect your fingers when you handle it.
Unplug the machine and open the face cover. While pushing the bulb up, turn it counterclockwise to remove, Put in a new bulb by pushing it up and turning it clockwise
Cleaning the Feed Dogs
Unplug the machine and remove the presser foot and needle with a screwdrive
Remove the needle plate with a screwdriver.
Use a lint brush to clean the feed dogs
Replace needle plate and tighten with a screwdriver