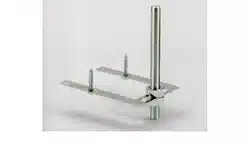
Tap support bracket
The tap stabilising bracket is designed to brace the tap to the worktop underside, there by
helping to reduce the movement of tall or heavy taps on stainless steel sinks. Please check
compatibility before ordering.
Note: This product is supplied with components to fix M8 one stud and M6 two stud taps. The
step below outline the procedure to fit the bracket to taps with one M8 fixing stud. For taps with
two M6 stud substitute (A1 & B1) for (A2 & B2).
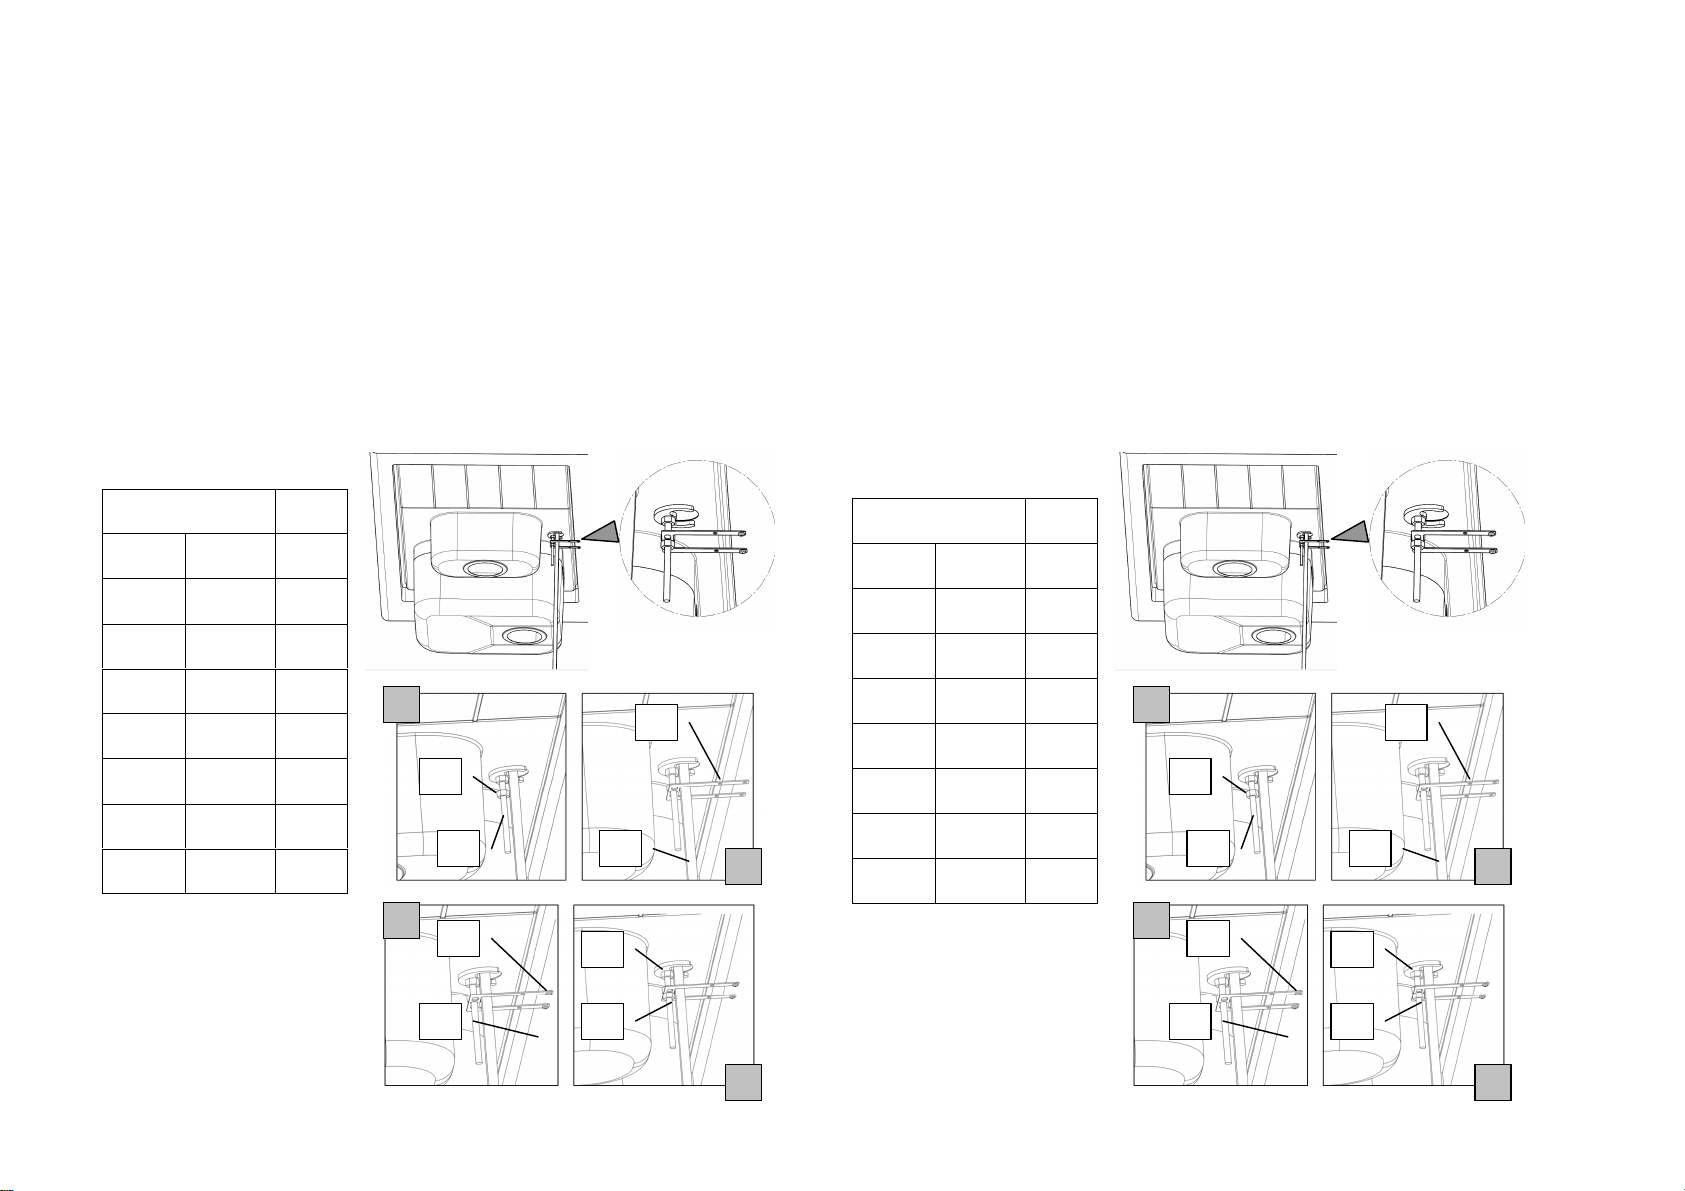
Installation
1. If not fitted already, fit the tap as instructed by the manufacturer.
2. Screw M8 nut (A1) over the tap’s M8 fixing stud (B1).
3. Place the support bracket (C) over the fixing stud (B1) and around the tail pipes (D).
4. Adjust the height of the nut (A1), so that the support bracket (C) lays parallel with the
underside of the worktop (E). Note: If the length of the tap’s studded rod is too short
then use the M8 studded rod provided (B1).
5. Fix the open end of the bracket (C) to the underside of the worktop (E) using the
supplied self tapping screws (F). Note: Before screwing the bracket to the worktop,
ensure the provided screws are correct for the worktop material and thickness.
6. Tighten nut (A1) over the fixing stud (B1) to secure the tap in place.
Stabilizzatore miscelatore
La staffa stabilizzatore miscelatori è stata progettata per bloccare il miscelatore sul lato inferiore
del top, al fine di ridurre il movimento di rubinetti alti o pesanti su lavelli in acciaio inox. Si prega
di verificare la compatibilità prima di ordinare.
Nota: Questo prodotto viene fornito con componenti adatti a fissare sia miscelatori con perno
M8 che miscelatori con perno M6. La procedura descritta sotto, si riferisce al montaggio su un
perno filettato M8. Per rubinetti con perno M6 i particolari A1 e B1 vanno sostituiti con A2 e B2.
Montaggio
1. Se non ancora installato, montare il miscelatore in base alle istruzioni del produttore..
2. Avvitare il dado M8 (A1) sul perno M8 del miscelatore (B1).
3. Posizionare la staffa (C) sul perno (B1) attorno I tubi flessibili (D).
4. Regolare l’altezza del dado (A1), in modo che la staffa (C) sia parallela al piano
inferiore del top (E). Attenzione: se il perno filettato del miscelatore risultasse troppo
corto, utilizzare il perno M8 fornito (B1).
5. Bloccare il lato libero della staffa (C) sotto il top (E) utilizzando le viti autofilettanti
fornite (F). Attenzione: Prima di avvitare la staffa al top, assicurarsi che le viti in
dotazione siano adatte al tipo di materiale e spessore del top..
1. Serrare il dado (A1) sul perno (B1) per fissare il miscelatore in posizione.
PARTS Qty
A1 M8 nuts 2
A2 M6 nuts 2
B1
M8 fixing
stud
1
B2
M6 fixing
stud
2
C
Stabilising
bracket
1
D Tail pipes n/a
E Worktop n/a
F
Self tapping
screws
2
Parti Qtà
A1 Dado M8 2
A2 Dado M6 2
B1
Barra
filettata M8
1
B2
Barra
filettata M6
2
C Staffa 1
D
Tubi
flessibili
n/a
E Top n/a
F
Viti auto-
filettanti
2
A1
B1
C
D
F
E
A1
B1
1
2
4
3
A1
B1
C
D
F
E
A1
B1
1
2
4
3
Cod. 1343032