Loading ...
Loading ...
Loading ...
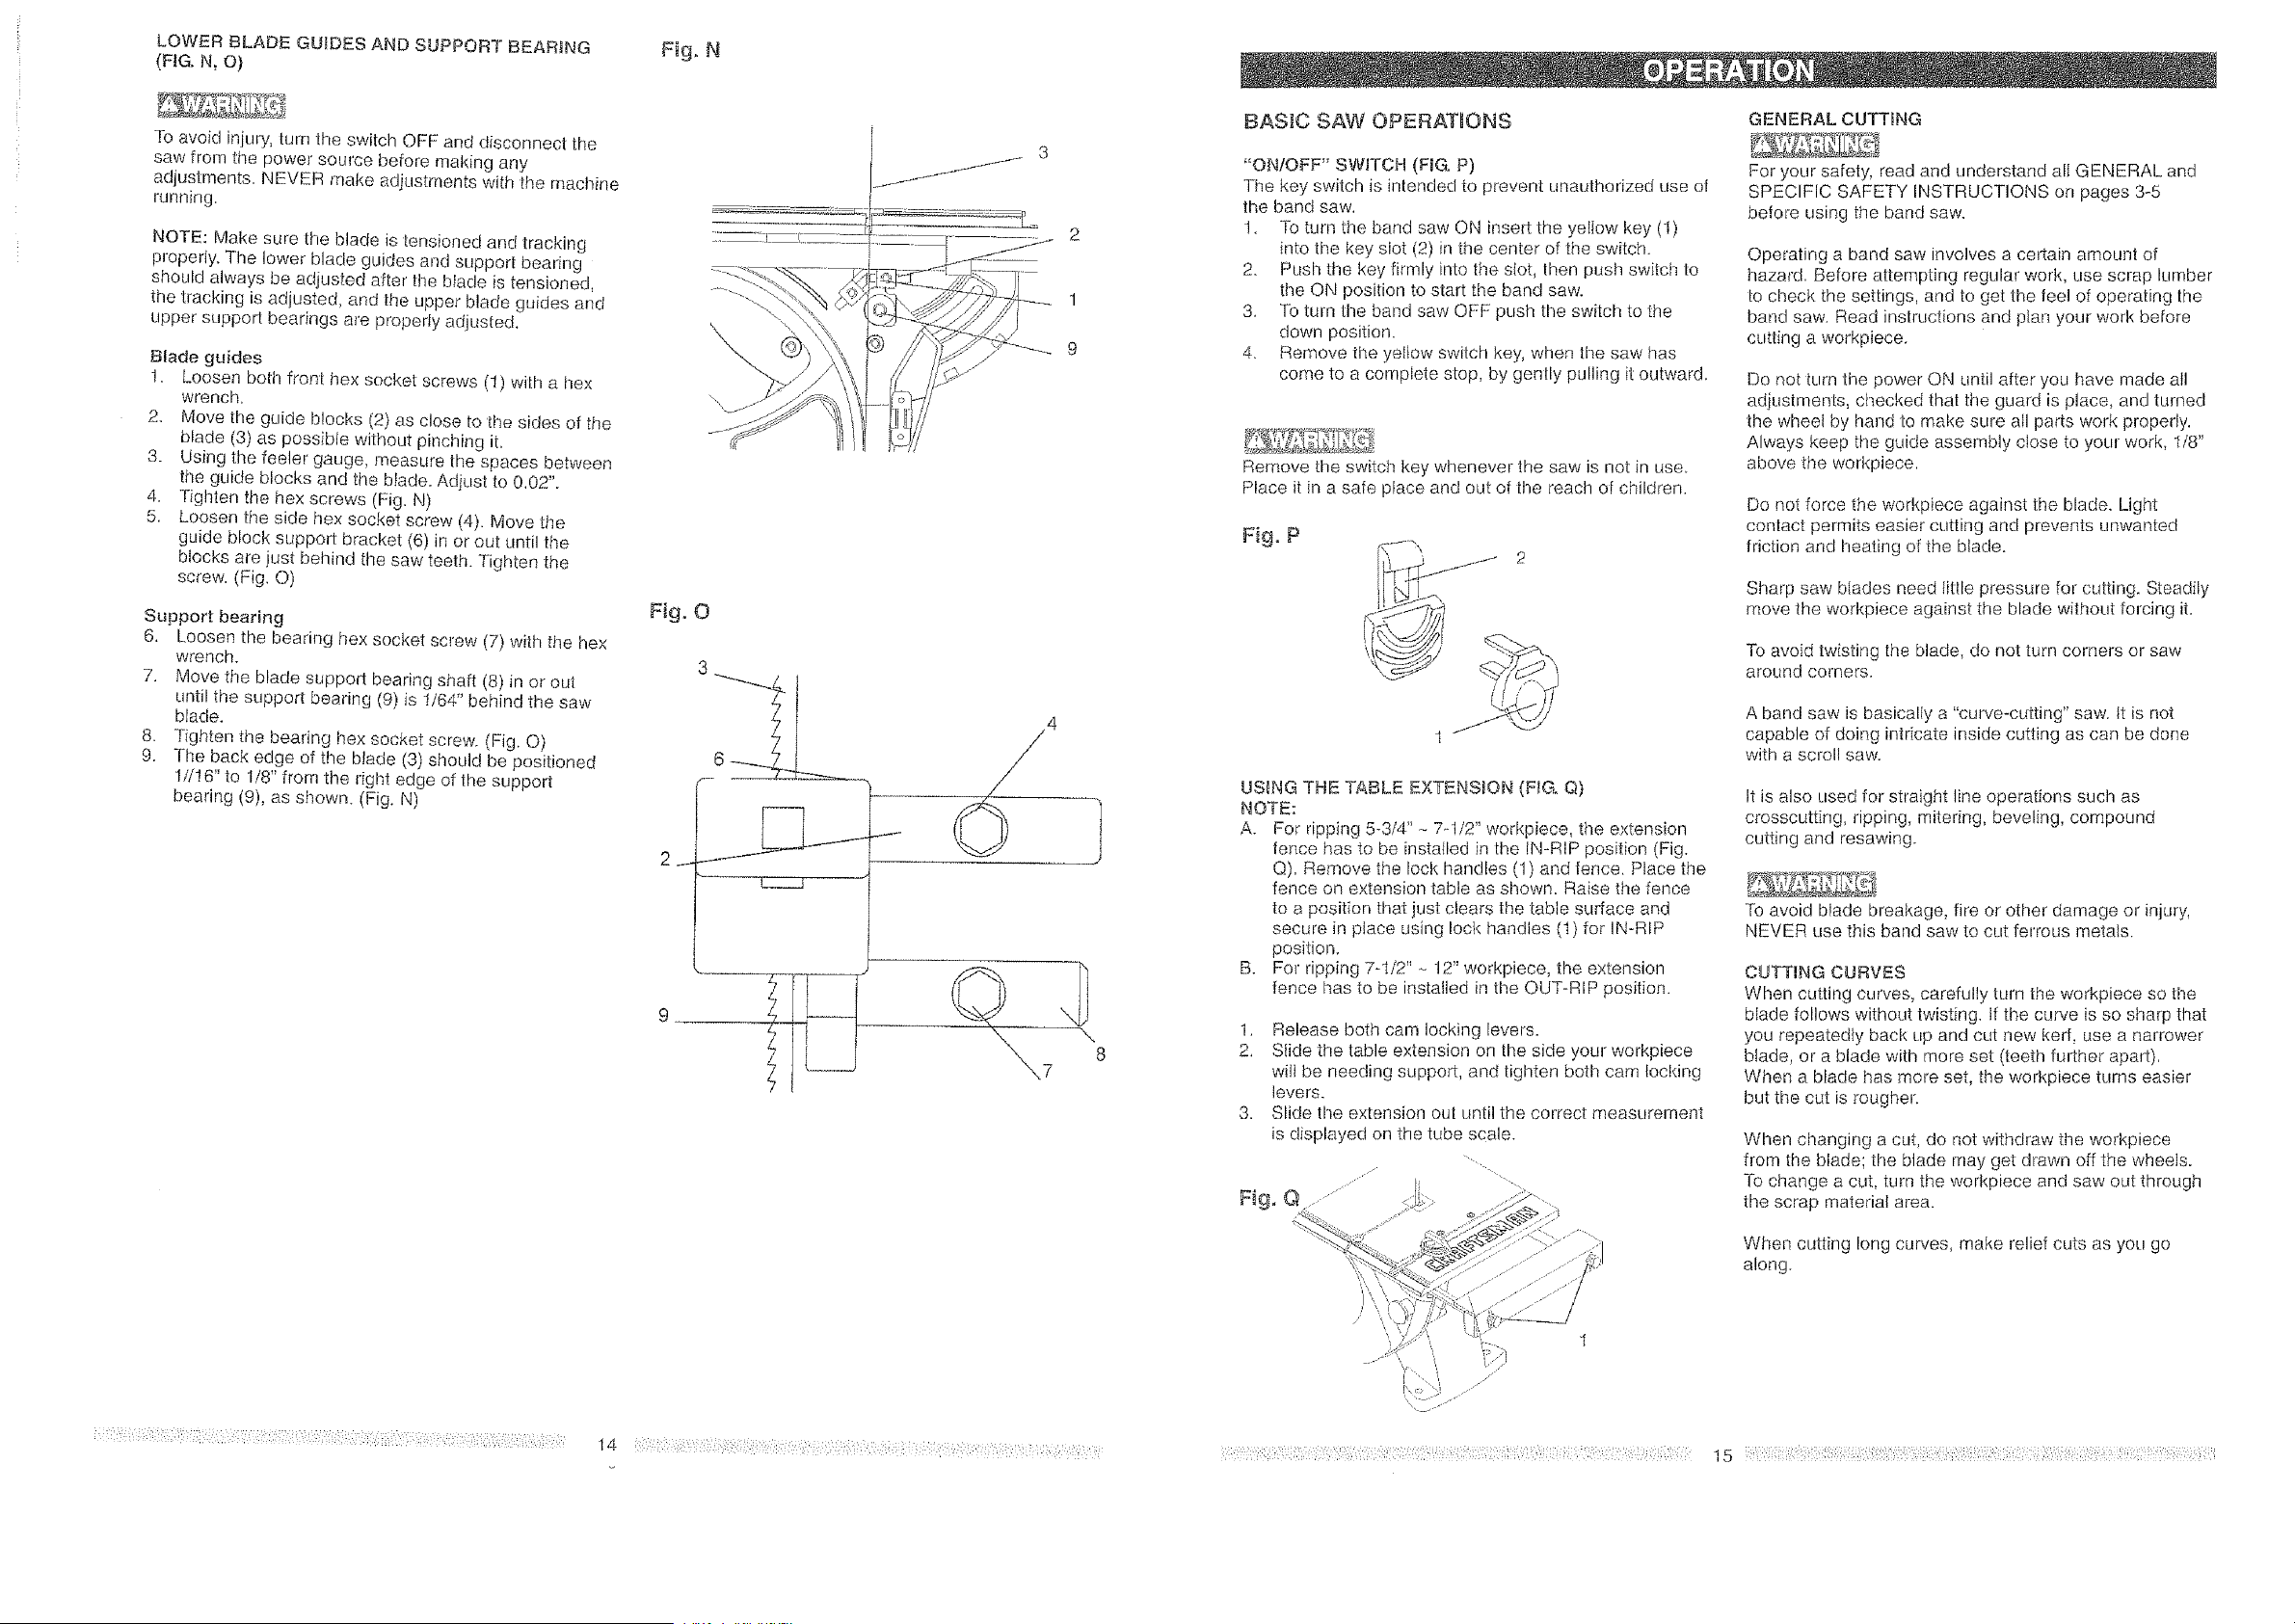
LOWER BLADE GUIDES AND SUPPORT BEARING Fig, N
(FIG. N, O)
To avoid injury, turn the switch OFF and disconnect the
saw from the power source before making any
adjustments. NEVER rnake adjustments with Ihe machine
running.
NOTE: Make sure the blade is tensioned and tracking
property. The lower blade guides and support bearing
should always be adjusted after the blade is tensioned,
the tracking is adjusted, and the upper blade guides and
upper support bearings are properly adjusted.
Blade guides
!. Loosen belb fron_ hex socket screws (1) with a bex
wrench.
2. Move the guide blocks (2} as close to the sides of the
blade (3) as possible without pinching it.
3. Using the feeler gauge, measure the spaces between
the guide blocks and tbe blade. Adjusl to 0.02".
4. Tighten the hex screws (Fig. N)
5. Loosen _he side hex socket screw (4). Move the
guide block support bracket (6) in or out until _he
blocks are just behind the saw teeth. Tighten the
screw. (Fig. O)
Support bearing
6. Loosen the bearing hex socket screw (7) with the hex
wrench.
7. Move the blade supped bearing shaft (8) in or out
until the support bearing (9) is 1/64" behind the saw
blade.
8. Tighten the bearing hex socket screw. (Fig. O)
9. The back edge of the blade (3) should be positioned
1//16" to 1/8" from lhe right edge of the support
bearing (9), as shown. (Fig. N)
Fig, O
4
/
\
8
,,7
BASIC SAW OPERATIONS
"ON/OFF" SWITCH (FIG. P)
The key swiLch is inlencled to prevent unauthorized LISBOf
the band saw.
1. To turn the band saw ON insert the yelIow key (1)
into the key slot (2) in the center of the switch.
2. Push the key firmly into the stot, then push switch Io
the ON position to slart the band saw.
3. To turn the band saw OFF push the switch to the
down position.
4. Remove the yellow switch key, when the saw has
come to a complete stop, by gently pulling it outward.
Remove the switch key whenever [he saw is not inuse,
Place it in a safe place and our of the reach or children.
Fig° P
USING THE TABLE EXTENSION (F_G. Q)
NOTE:
A. For ripping 5-3/4" _ 7_t/2" workpiece, the extension
fence has to be installed in the IN-RIP position (Fig.
Q). Remove the Iock handles (1) and fence. Place the
fence on extension table as shown. Raise the fence
to a position that just clears the table surface and
secure in ptace using loci< handles (1) for IN-RIP
position.
B. For ripping 7-It2" _ 12" workpiece, the extension
fence has to be installed in the OUT-RIP position.
1. Release both cam locking levers.
2, Slide the table extension on tlqe side your workpiece
will be needing support, and tighten both cam loctdng
levers.
3. Slide the extension out until the correct measurement
is displayed on the tube scale.
Fig. Q • ....
GENERAL CUTTING
For your safety, read and understand all GENERAL and
SPECIFIC SAFETY INSTRUCTIONS on pages 3-5
before using the band saw.
Operating a band saw involves a certain amount of
hazard. Before attempting regular work, use scrap lumber
!o check the settings, and to get the feel of operating Ihe
band saw. Read instructions and plan your work before
cutting a workpiece.
Do not turn Iine power ON until after you have made all
adjusImenIs, checked that the guard is place, and Iurned
the wheel by hand to make sure all parts work properly.
Always keep the guide assembly close to your work, It8"
above the workpiece.
Do not force the workpiece against the blade. Light
contact permits easier cutting and prevents unwanted
friction arid heating el the blade.
Sharp saw blades need little pressure for cutting. Steadily
move the workpiece against the blade without forcing it.
To avoid twisting the blade, do not turn corners or saw
around corners.
A band saw is basically a "curve-cutting" saw. It is not
capable of doing intricate inside cutting as can be done
with a scroll saw.
It is also used for straight line operations such as
crosscutting, ripping, mitering, beveling, compound
cutting and resawing.
To avoid blade breakage, fire or other damage or injury,
NEVER use this band saw to cut ferrous metals.
CVTTING CURVES
When cutting curves, carefully turn the workplace so the
blade follows without twisting. If the curve is so sharp that
you repeatedly back up and cut new kerr, use a narrower
blade, or a blade with more set (teeth further apart),
When a Made has more set, [he werkpiece turns easier
but the cut is rougher.
When changing a cut, do not withdraw the workpiece
from the blade; the blade may get drawn off the wheels.
To change a cut, turn the workplace and saw out through
the scrap material area.
When cutting long curves, make relief cuts as you go
along.
Loading ...
Loading ...
Loading ...