Loading ...
Loading ...
Loading ...

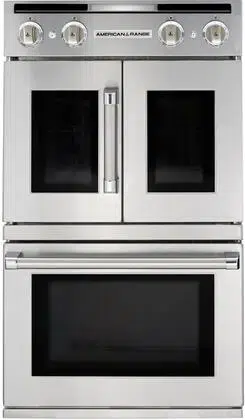
Oven Racks: Each oven is supplied with two heavy chrome-plated adjustable oven racks.
Rack Supports: On each side of the oven, heavy chrome-plated rack supports allow ve positions, numbered from the bottom up.
Oven Control Knob: The oven control knob is used to set the Baking temperature or to select the Broil function. During baking, the convection fan may be activated.
GAS OVENS
Bake: The Bake element or burner is located on the bottom of the oven, below the oor and is activated by the Oven Control Knob.
Ceramic Tile Infrared Broil Burner: Positioned in the oven ceiling, burning gas heats the ceramic tile to a temperature of 1,550ºF – creating searing heat similar to the glowing
coals of a wood re.
Broil Burner Igniter: The igniter glows a very hot, bright red-orange color, reaching proper ignition temperature to light the Ceramic Tile Infrared Broil Burner.
ELECTRIC OVENS
Broil: Ribbon element located in the oven ceiling, becomes red hot in just a few seconds.
Bake: A ribbon element, below the oor of the oven when the element cycles "ON."
Selector Switch and Indicator Light: Rotate this knob from the OFF position and select Convection Bake, Standard Bake, Fan-Only, or Broil modes. In any mode position,
the Indicator Light glows indicating the Oven is ready to operate. When you’re done, always rotate the knob to the OFF position.
Oven Thermostat Knob: Thermostat Temperature Selection - Select your desired temperature.
On Indicator Light: Whenever an oven heat source is activated (either Bake or Broil), the “on” indicator will glow. It is normal for the indicator light to cycle off and on
during baking or broiling – showing that more heat is being applied.
Door Gasket: The door gasket is made from high temperature materials and creates a seal between the hot oven and the cool kitchen.
Convection Fan and Switch: Operated by the front panel switch, the convection fan circulates oven air, removing the “thermal boundary layer” on items being baked – and
in doing so – speeding up heat transfer and cook time by as much as 25%. Convection is active only during baking.
Oven Light and Switch: A single lamp is provided in the oven to illuminate baked and broiled food items, as well as shed some light on the wall to help during clean-up
– activated by the front panel switch.
OVENS 101
The oven is a temperature controlled cooking cavity which is highly insulated to keep the kitchen cool and the food hot. The oven contains two heat
sources: Bake, positioned below the oven oor, and Broil, located in the ceiling of the oven. Bake and Broil are very different cooking operations and the
burners are designed to deliver energy in a way appropriate to the task.
There are two types of baking - called Standard Bake (or conventional) and Convection Bake. Standard baking make the best use of Grandma’s cookie,
cake or pie recipes – such as Bake at 350ºF for forty-ve minutes – to get the job done. These recipes are tried and true – conventional or standard bake
will deliver wonderful performance for roasting.
In convection cooking, not only is the cook time faster, but also, the oven temperature is more even, top to bottom and side to side - so cookies on several
racks will have the same brown color and texture. Food does not need to be rotated to get uniform color. However, to best take advantage of convec-
tion, use low, shallow bake ware so that moving air can get over the sides and up to the food surface.
16 www.americanrange.com
GAS OVEN OPERATION
To start the oven, push in and turn the thermostat to the desired operating temperature On a gas oven, you may be able to see a bright glow from the sides of the oven
bottom - this is normal and indicates the hot surface igniter is activated. Once the igniter is hot enough for ignition, the gas valve will open, allowing the ow of gas into the
bake burner. This may take up to one minute.
During the rst few minutes of operation, a mild condensation may appear on the interior glass pane of the door window. Water vapor is a normal by-product of combus-
tion, and the condensation will disappear as the oven warms. Allow the oven to preheat before use. The control panel light will turn off when preheat is complete. After pre-
heat, the light will cycle on and off whenever the oven is heating. Never place any pan or food item on the bottom of the oven, always use an oven rack. To use the Broil feature
of the range, rst consider what type of broiling you would like to perform. The closer you are to the broil burner, the faster you will evaporate moisture from the surface of
food and the quicker the surface will brown. In a similar fashion, the further away you place the food (on the lowest rack, for example) the slower you will evaporate surface
moisture and the longer it will take for the surface to brown. A good rule of thumb is to start about 6” away from the broiler and watch for how quickly the food is browning.
BROILER OPERATION
To begin broiling, push in and turn the thermostat to the position labeled BROIL on the control knob. In about twenty seconds, you will see a bright glow in the oven - this is
the hot surface igniter. Once the igniter is hot enough for ignition, the gas valve will open, allowing the ow of gas into the broil burner. This may take up to one minute. The
broiler will have a blue ame that covers the ceramic tiles – after a few minutes, the tiles will glow bright red/orange and radiate infrared energy. Remember the red surface
is over 1600ºF in temperature and can be a source of serious burns or injury. On an electric oven, you can see the ribbon element glow on the roof of the oven cell. This
takes just a few seconds. The Bake burner and Broil burner will not operate at the same time; the convection fan will not operate during Broiling.
USE & CARE MANUAL
LEGACY WALL OVENS
Loading ...
Loading ...
Loading ...