Loading ...
Loading ...
Loading ...
CAREAND CLEANING
Cleaning/Removable Parts
_ CAUTION: You must
disconnect electdcal
power to the oven at
the main circuit
k)reakeror fuse box before
attempting to replace oven light
bulbs. Do not touch the light
bulbs with bare hands. The bulbs
get very hot very quickly. Wrap
foam rubber from bulb package
around bulb when installing.
When removing the bulb, wait
until the bulb has cooled and
use a dry cloth.
i, j
Togive youthe best lighting available,
your ovenhastwo halogenbulbs. Both
lightsareon the ceilingofthe oven cavity.
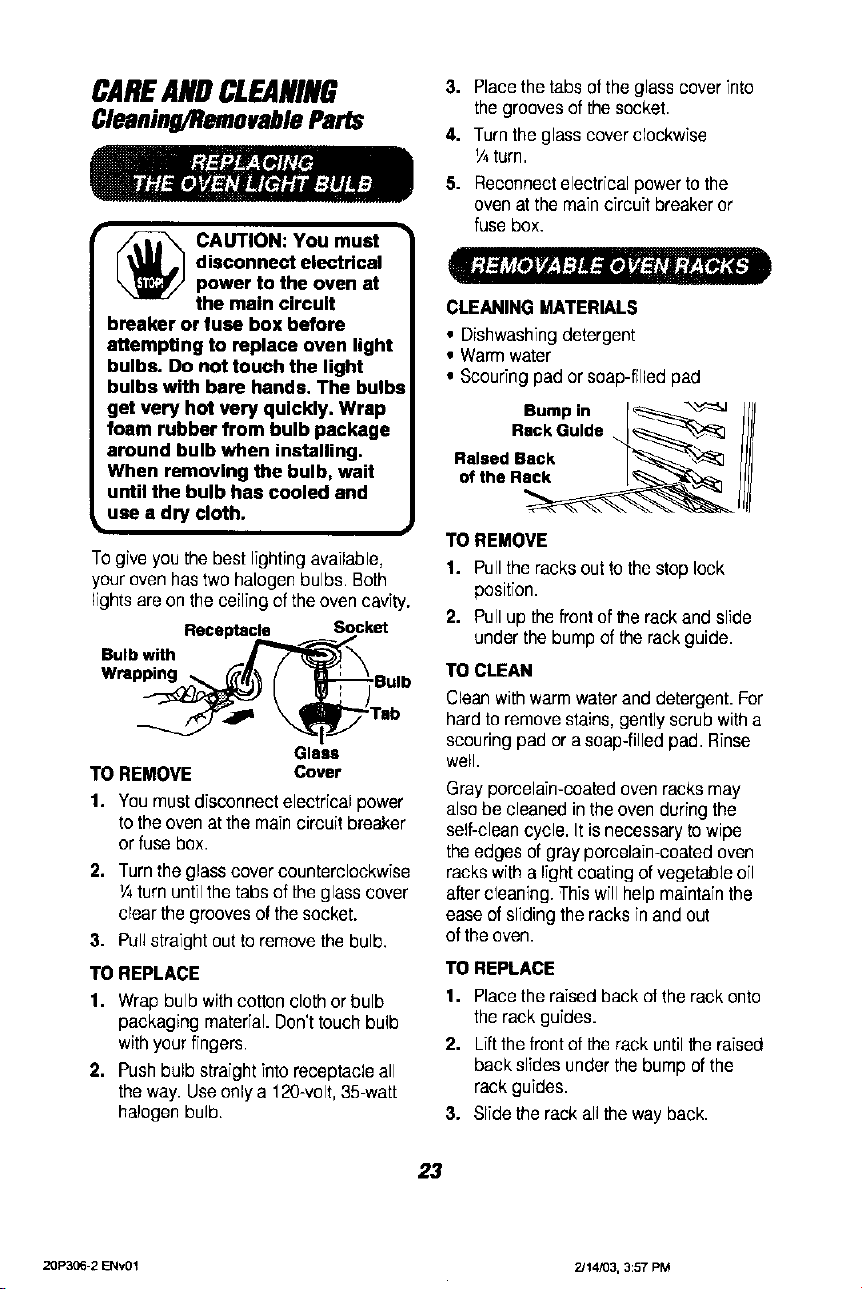
Receptacle Socket
Glass
TO REMOVE Cover
1. You must disconnect electrical power
to the oven at the main circuit breaker
or fuse box.
2. Turnthe glasscovercounterclockwise
V4turnuntilthe tabsof the glasscover
clearthe groovesof thesocket.
3. Pullstraight outtoremovethe bulb.
TO REPLACE
1. Wrapbulb withcotton clothor bulb
packagingmaterial.Don'ttouchbulb
withyourfingers.
2. Pushbulb straightintoreceptacle all
theway. Use onlya 120-volt,35-watt
halogenbulb.
3. Placethe tabsof the glasscoverTnto
thegrooves ofthe socket.
4. Turnthe glasscoverclockwise
V4turn.
5. Reconnectelectricalpowertothe
ovenat the maincircuit breakeror
fusebox.
CLEANINGMATERIALS
• Dishwashingdetergent
• Warmwater
• Scouringpad or soap-filledpad
Bump in
..o.Ou,°e
Bs,se.Bsc. IIll
TO REMOVE
1. Pullthe racks outto thestop lock
position.
2. Pullup the frontof _qerack and slide
underthe bumpof the rackguide.
TO CLEAN
Cleanwithwarmwateranddetergent. For
hard toremovestains,gently scrubwith a
scouring pad or asoap-filled pad. Rinse
well.
Grayporcelan-coated ovenracks may
alsobe cleaned intheoven during the
self-cleancycle. Itisnecessaryto wipe
the edgesof grayporcelain-coatedoven
racks witha Ifghtcoating ofvegetableoil
aftercleaning. Thiswill helpmaintaTnthe
easeof slidingthe racks in and out
ofthe oven.
TO REPLACE
1. PlacetheraTsedback ofthe rack onto
the rack guides.
2. Liftthe frontofthe rack untilthe rafsed
backslides underthebump of the
rack guides.
3. Slidethe rack all the wayback.
23
213p306-2 ENv01 2J14/O3, 3:57 PM
Loading ...
Loading ...
Loading ...