Loading ...
Loading ...
Loading ...
_tk WARNING: Disconnect power
source before performing maintenance.
GEN ERAL RECOMMEN DATIONS
The warranty on this unit does not cover items
that have been subjected to operator abuse
or negligence. To receive full value from the
warranty, the operator must maintain unit as
instructed in this manual. Vanous adjust-
ments will need to be made periodically to
properly maintain your unit.
BEFORE EACH USE
CHECK FOR LOOSE
FASTENERS AND PARTS
• Housing Screws
• Assist Handle
• Debris Shield
• Edge Guide
CHECK FOR DAMAGED OR
WORN PARTS
Contact an authorized service dealer for re-
placement of damaged or worn parts.
• Trigger Switch - Ensure switch functions
properly by pressing and releasing the trig-
ger switch. Make sure motor stops.
• Debris Shield - Discontinue use of unit if
debris shield is damaged.
AFTER EACH USE
INSPECT AND CLEAN UNIT AND DE-
CALS
• After each use, inspect complete unit for
loose or damaged parts. Clean the unit us-
ing a damp cloth with a mild detergent.
• Wipe off unit with a clean dry cloth.
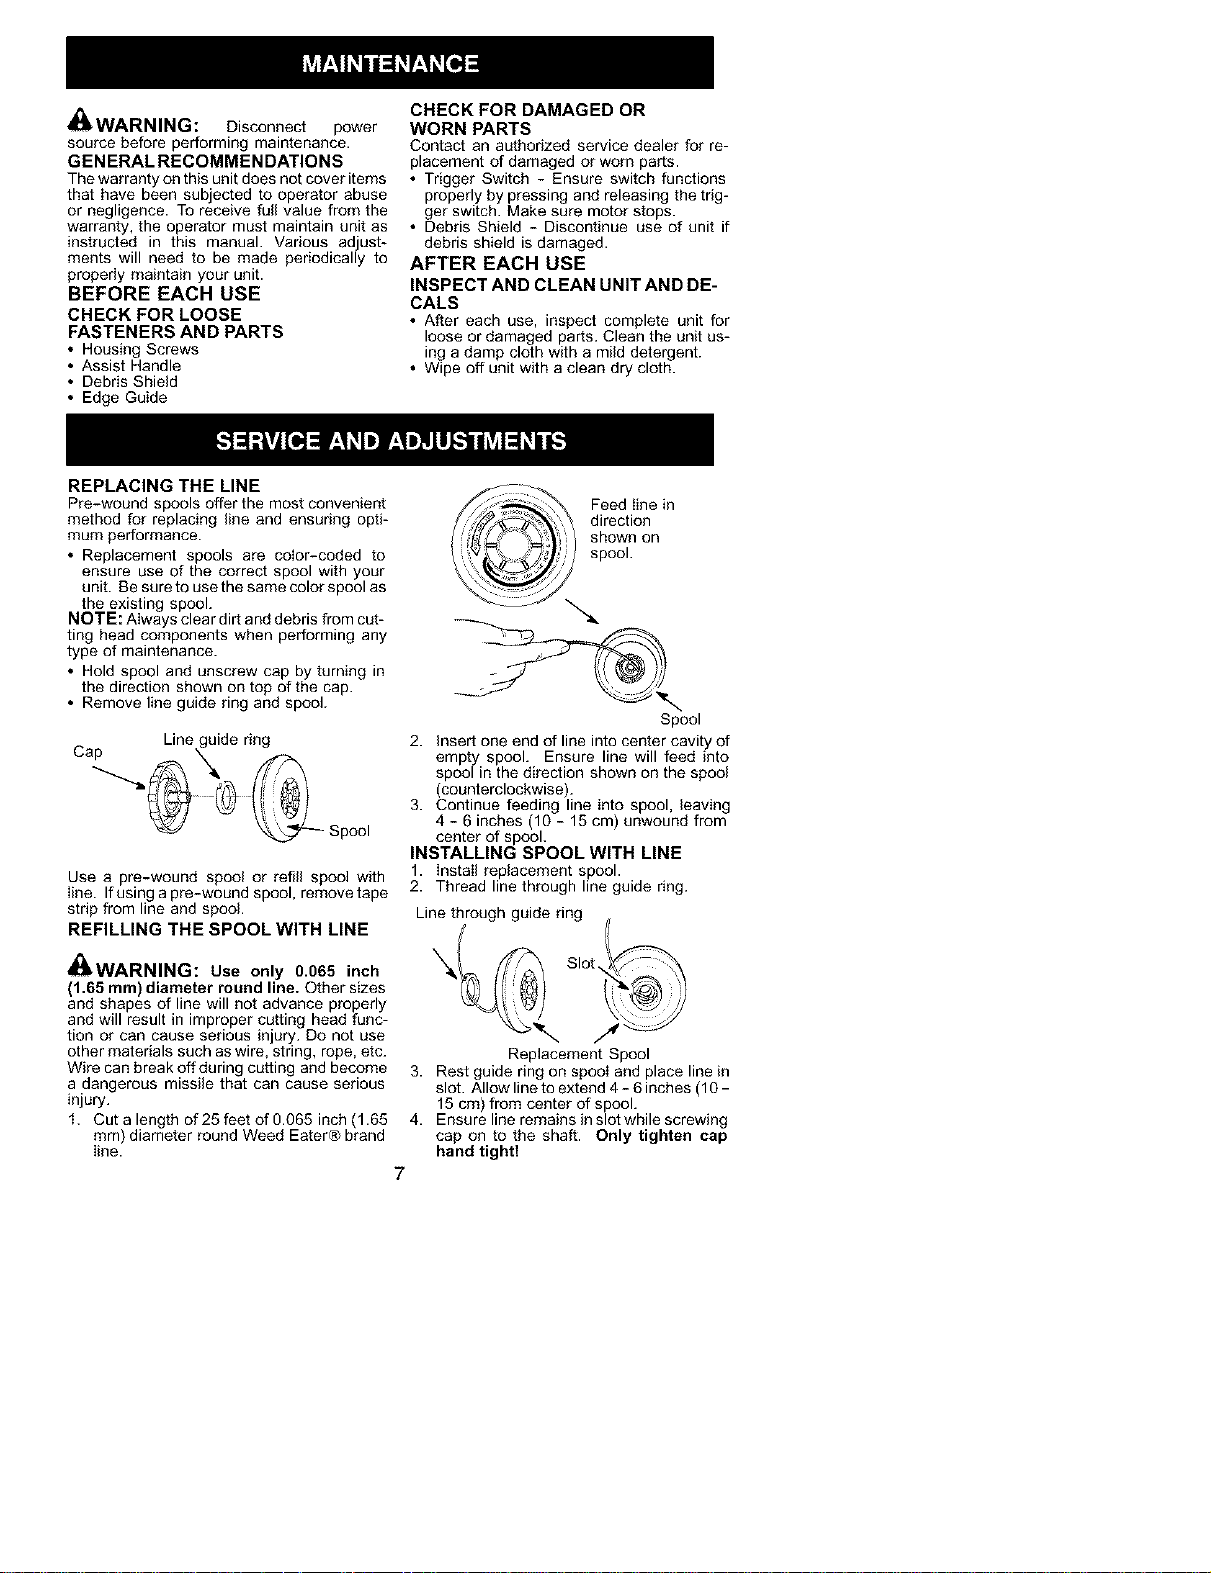
REPLACING THE LINE
Pre-wound spools offer'the most convenient
method for replacing line and ensuring opti-
mum performance.
• Replacement spools are color-coded to
ensure use of the correct spool with your
unit. Be sure to use the same color spool as
the existing spool.
NOTE: Always clear dirt and debris from cut-
ting head components when performing any
type of maintenance.
• Hold spool and unscrew cap by turning in
the direction shown on top of the cap.
• Remove line guide ring and spool.
Use a pre-wound spool or refill spool with
line. If using a pre-wound spool, removetape
stnp from line and spool.
REFILLING THE SPOOL WITH LINE
Spool
2. Insert one end of line into center cavity of
empty spool. Ensure line will feed into
spool in the direction shown on the spool
(counterclockwise).
3. Continue feeding line into spool, leaving
4 - 6 inches (10 - 15 cm) unwound from
center of spool.
INSTALLING SPOOL WITH LINE
1. Install replacement spool.
2. Thread line through line guide ring.
Line through guide ring
aubWARNING: Use only 0.065 inch
(1.65 mm) diameter round line. Other sizes
and shapes of line will not advance properly
and will result in improper cutting head func-
tion or can cause serious injury. Do not use
other materials such as wire, string, rope, etc.
Wire can break off during cutting and become
a dangerous missile that can cause serious
injury.
1. Cut a length of 25 feet of 0.065 inch (1.65
ram) diameter round Weed Eater@ brand
line.
Replacement Spool
3. Rest guide ring on spool and place line in
slot. Allow line to extend 4 - 6 inches (10 -
15 cm) from center of spool.
4. Ensure line remains in slot while screwing
cap on to the shaft. Only tighten cap
hand tightt
7
Loading ...
Loading ...
Loading ...