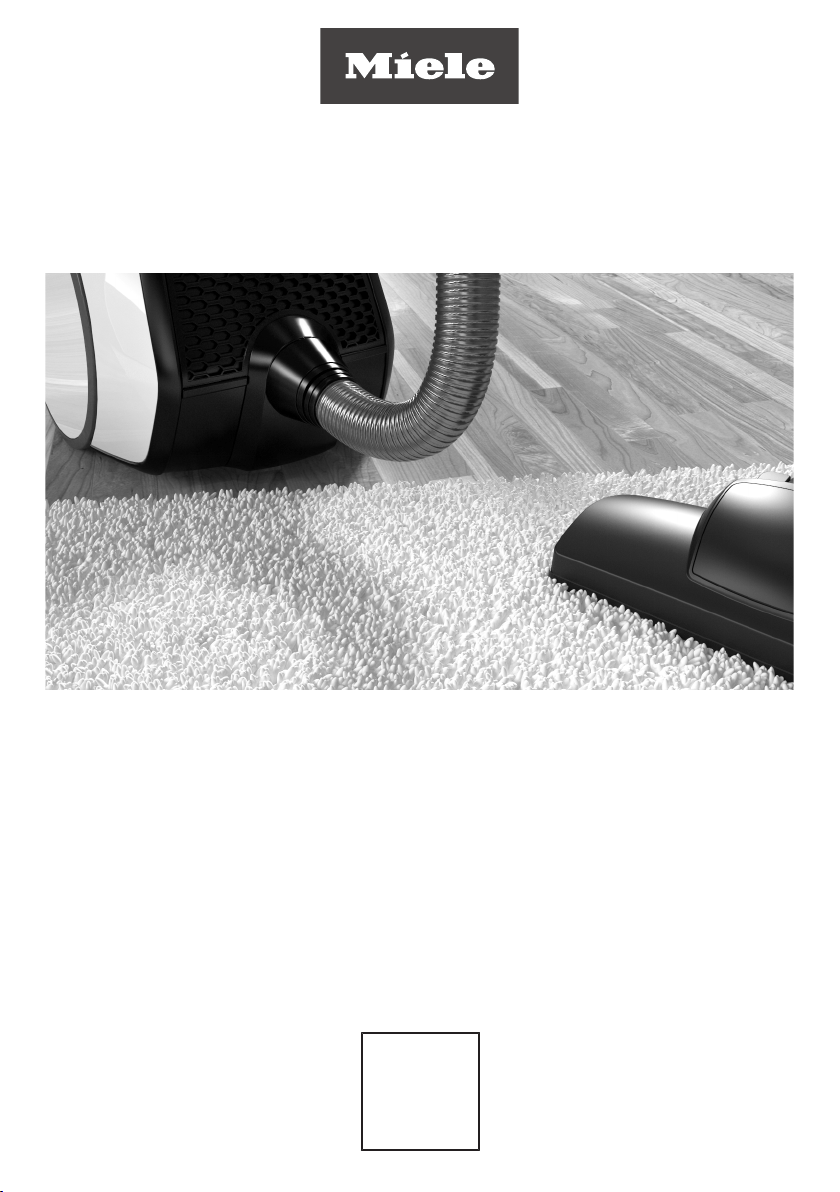
Vacuum cleaner
Operating instructions
AUS, NZ
M.-Nr. 11 646 821
HS20

Contents
2
Warning and Safety instructions ..................................................................... 3
Guide to the appliance...................................................................................... 8
Caring for the environment .............................................................................. 10
Connection......................................................................................................... 11
Using the supplied accessories ....................................................................... 14
Use...................................................................................................................... 14
Setting down and storing the vacuum cleaner............................................... 18
Maintenance ...................................................................................................... 18
Emptying and cleaning the dust container.......................................................... 18
Cleaning the fine dust filter.................................................................................. 19
Putting the fine dust filter and the filter mat together.......................................... 22
Cleaning the filter frame and pre-filter................................................................. 22
When to replace the exhaust filter....................................................................... 24
Replacing the exhaust filter ................................................................................. 25
Replacing the thread lifters ................................................................................. 26
Cleaning and care ............................................................................................. 27
Problem solving guide ...................................................................................... 28
Service................................................................................................................ 29
Contact in case of malfunction ........................................................................... 29
Warranty .............................................................................................................. 29
Optional accessories ........................................................................................ 29
Purchasing accessories ...................................................................................... 29
Electrical connection ........................................................................................ 30

Warning and Safety instructions
3
It is essential to read these instructions.
This vacuum cleaner conforms to current safety requirements. In-
appropriate use can lead to personal injury and damage to prop-
erty.
Please read the operating instructions before using the vacuum
cleaner for the first time. They contain important information on the
safety, use and maintenance of the vacuum cleaner. This will pre-
vent both personal injury and damage to the appliance.
In accordance with standard IEC60335-1, Miele expressly and
strongly advises that you read and follow the instructions in the
“Connection” chapter as well as the safety instructions and warn-
ings.
Miele cannot be held liable for injury or damage caused by non-
compliance with these instructions.
Keep these operating instructions in a safe place and pass them
on to any future owner.
Always disconnect the vacuum cleaner from the power supply
when you have finished using it, before changing any accessories,
as well as for maintenance work, cleaning and troubleshooting.
Switch off at the wall socket and unplug it.
Correct application
This vacuum cleaner is intended for cleaning flooring in domestic
households and similar residential environments. This vacuum
cleaner is not suitable for use on construction sites.
This vacuum cleaner is not intended for outdoor use.
This vacuum cleaner can be used for all normal cleaning of car-
pets, rugs and robust hard flooring.

Warning and Safety instructions
4
This vacuum cleaner is intended for use at altitudes of up to
4000m above sea level.
The vacuum cleaner must only be used to vacuum dry floor sur-
faces. Do not vacuum people or animals. Any other types of use,
modifications or alterations are not permitted.
The vacuum cleaner can only be used by people (including chil-
dren) with reduced physical, sensory, or mental capabilities, or lack
of experience or knowledge, if they are supervised whilst using it or
have been shown how to use it in a safe way and understand and re-
cognise the consequences of incorrect operation.
Safety with children
Danger of suffocation. Packaging, e.g. plastic wrappings, must be
kept out of the reach of babies and children. Whilst playing, children
could become entangled in packaging or pull it over their head and
suffocate.
Young children must be kept away from the vacuum cleaner un-
less they are constantly supervised.
Older children may only use the vacuum cleaner without supervi-
sion if they have been shown how to use it in a safe manner. Chil-
dren must be able to understand and recognise the possible dangers
caused by incorrect operation.
Children must not be allowed to clean or maintain the vacuum
cleaner unsupervised.
Please supervise children in the vicinity of the vacuum cleaner and
do not let them play with it.
Technical safety
Before using the vacuum cleaner and its accessories, check for
any visible signs of damage. Do not use a damaged appliance.

Warning and Safety instructions
5
Compare the connection data on the data plate of the vacuum
cleaner (mains voltage and frequency) with that of the mains electri-
city supply. This data must match exactly. Without modifications, the
vacuum cleaner is suitable for 50Hz or 60Hz.
The mains electrical outlet must be fitted with an appropriate cir-
cuit breaker.
Temporary or permanent operation with a self-sufficient or non-
mains synchronous energy supply system (e.g. isolated networks,
back-up systems) is possible. A requirement for the operation is that
the energy supply system complies with all current local and national
requirements that apply to stand-alone, solar and/or battery sys-
tems.
The protective measures provided in the domestic installation and in
this Miele product must also be assured in their function and opera-
tion in isolated operation or in non-mains synchronous operation, or
replaced with equivalent measures in the installation.
Do not pull or carry the vacuum cleaner by the cable, and be care-
ful not to damage the cable when withdrawing the plug from the
socket. Keep the cable away from sharp edges and do not let it get
squashed, for example, under a door. Avoid running the vacuum
cleaner over the cable. This could damage the cable, plug or socket.
The appliance must not be used if any of these have suffered dam-
age.
Do not use the vacuum cleaner if the cable is damaged. If the
cable is damaged it must be replaced together with a complete
cable rewind. For safety reasons this must only be done by Miele
Service or a Miele authorised service technician.
Repairs should only be undertaken by a Miele authorised service
technician. Otherwise the warranty will be invalidated.
Repairs and other work by unqualified persons can cause consid-
erable danger to users.

Warning and Safety instructions
6
Miele can only guarantee the safety of the appliance when genu-
ine Miele replacement parts are used. Faulty components must only
be replaced with genuine Miele replacement parts.
The packaging material protects the vacuum cleaner from trans-
port damage. We recommend you keep the packaging for transport
purposes.
Cleaning
Do not immerse the vacuum cleaner or any accessories supplied
with it in water.
Clean the vacuum cleaner and accessories only with a dry cloth or
slightly damp cloth and mild washing-up liquid.
Exception for fine dust filter:
if the dust filter is heavily soiled, you can rinse the pleated side of the
filter and the filter mat under cold running water.
Do not use washing-up liquid or cleaning brushes. Do not use sharp
or pointed objects. After cleaning, allow the fine dust filter and the fil-
ter mat to dry in a well ventilated room for a minimum of 24hours,
placing the filter with the pleated side facing up.
Correct use
Do not use the vacuum cleaner without the dust container, fine
dust filter with filter mat, filter frame, pre-filter, dust compartment
seal and exhaust filter.
Do not vacuum up anything which has been burning or is still
glowing e.g. cigarettes, ashes or coal, whether glowing or apparently
extinguished.
Do not use the vacuum cleaner to vacuum up any water, liquid or
damp dirt. Wait until any freshly cleaned or shampooed rugs or car-
pets are completely dry before attempting to vacuum.
Do not use the vacuum cleaner to vacuum toner dust. Toner, such
as that used in printers and photocopiers, can conduct electricity.

Warning and Safety instructions
7
Do not vacuum up any inflammable or combustible liquids or
gases and do not vacuum in areas where such substances are
stored.
Do not vacuum at head height and do not let the suction get any-
where near a person's head.
Accessories
It is not advisable to vacuum directly with the handle, i.e. without
an accessory attached as the rim could get damaged and you could
hurt yourself on sharp edges.
Only use genuine accessories with the “ORIGINAL Miele” logo on
the packaging. The manufacturer cannot otherwise guarantee the
safety of the product.
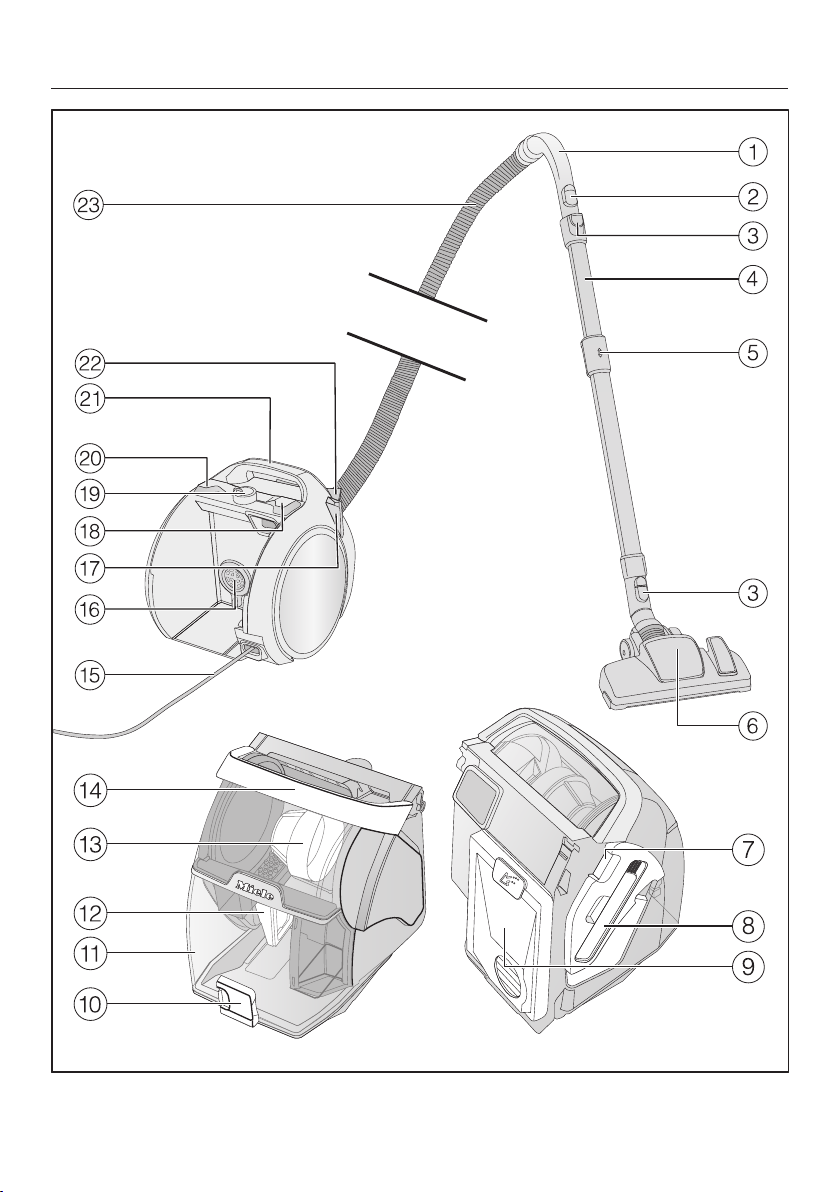
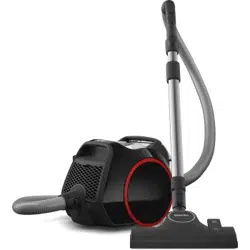
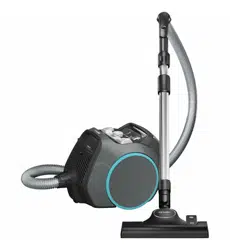
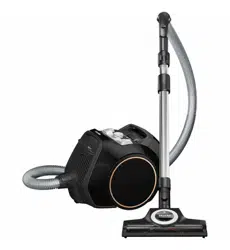
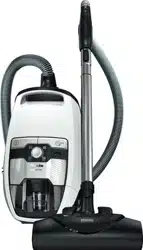
Guide to the appliance
8

Guide to the appliance
9
a
Handle
b
Air inlet valve
c
Release catches
d
Comfort telescopic tube
e
Release catch for Comfort telescopic tube
f
Floorhead*
g
Side flap release catch (to gain access to the filter frame and the pre-filter)
h
Cleaning tool
i
Fine dust filter with filter mat
j
Dust container release catch
k
Dust container
l
Filter frame
m
Pre-filter
n
Dust container carrying handle
o
Connection cable
p
Dust compartment seal
q
Park system
r
Footswitch for cable rewind
s
Suction power selector
t
On/Off footswitch
u
Vacuum cleaner carrying handle
v
Exhaust filter compartment flap
w
Suction hose
* These special features depend on the model and may vary or may not be avail-
able on your vacuum cleaner.
Caring for the environment
10
Disposing of sales packaging
The packaging material protects the va-
cuum cleaner from transport damage.
The packaging materials used are se-
lected from materials which are environ-
mentally friendly for disposal and can
therefore be recycled.
Recycling the packaging material re-
duces the use of raw materials in the
manufacturing process and also re-
duces the amount of waste in landfill
sites. Ensure that any plastic wrap-
pings, bags, etc. are disposed of safely
and kept out of the reach of babies and
young children. Danger of suffocation.
Disposing of your old appli-
ance
Before disposing of your old appliance,
remove the fine dust filter including the
filter mat and the exhaust filter and dis-
pose of them with your household
waste.
Electrical and electronic appliances
contain many valuable materials. They
also contain certain materials, com-
pounds and components which were
essential for their correct functioning
and safety. These could be hazardous
to human health and to the environment
if disposed of with household waste or
if handled incorrectly. Please do not,
therefore, dispose of your old appliance
with household waste.
Please dispose of it at your local com-
munity waste collection / recycling
centre for electrical and electronic ap-
pliances, or contact your dealer or
Miele for advice. Please ensure that
your old appliance poses no risk to chil-
dren while being stored prior to dis-
posal.
11
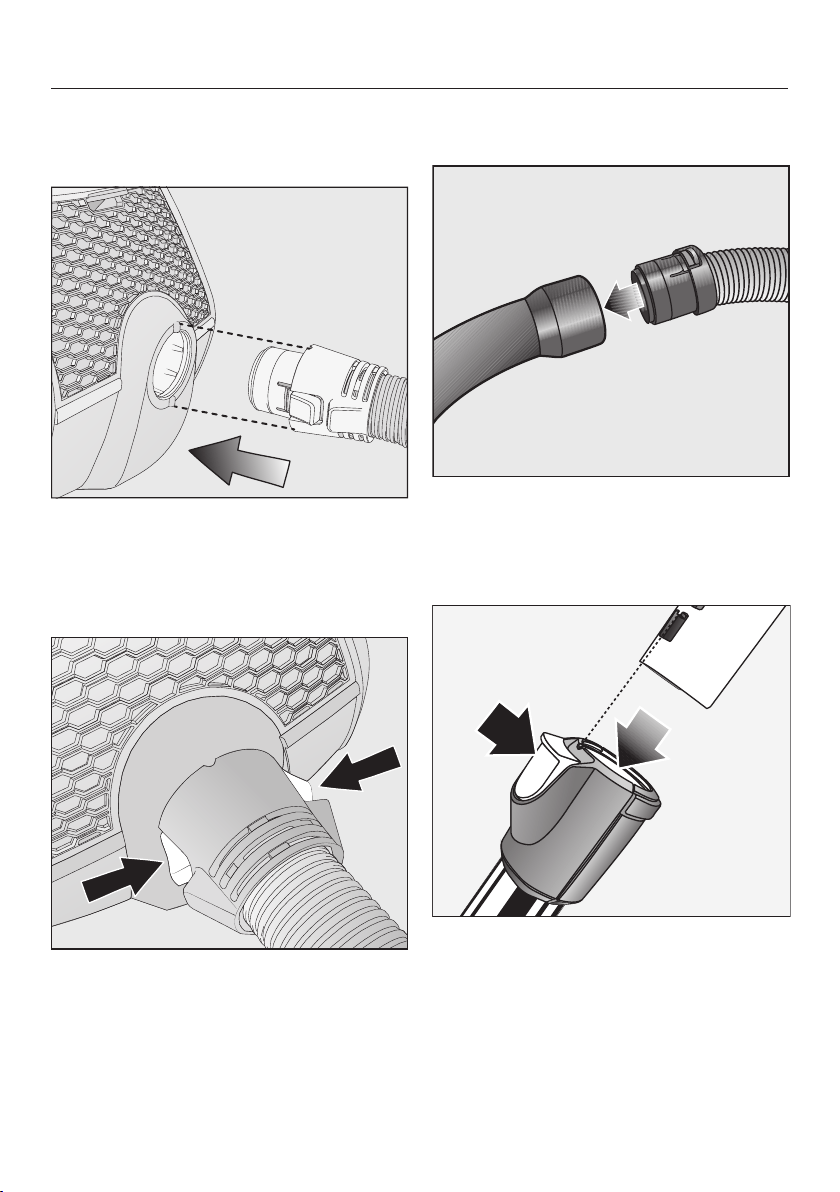
Connection
Attaching the suction hose
Insert the hose connector into the
suction opening on the vacuum
cleaner until it clicks into position. To
do this, line up the guides on the two
pieces.
If you want to separate the pieces
again, press the release catches at
the side of the hose connector, and
pull the suction hose out of the suc-
tion opening.
Connecting the suction hose to the
handle
Insert the suction hose into the
handle until it clicks into position.
Connecting the handle to the suction
tube
Insert the handle into the suction tube
until it clicks into position. To do this,
line up the guides on the two pieces.
To detach the handle from the suction
tube, press the release catch and pull
the handle out of the suction tube,
twisting it slightly as you do so.

12
Connecting the telescopic tube to
the floorhead
Push the telescopic tube into the
floorhead and turn it clockwise or
anti-clockwise until it clicks into posi-
tion.
To detach the floorhead from the suc-
tion tube press the release button
and pull the suction tube away from
the floorhead, twisting it slightly as
you do so.
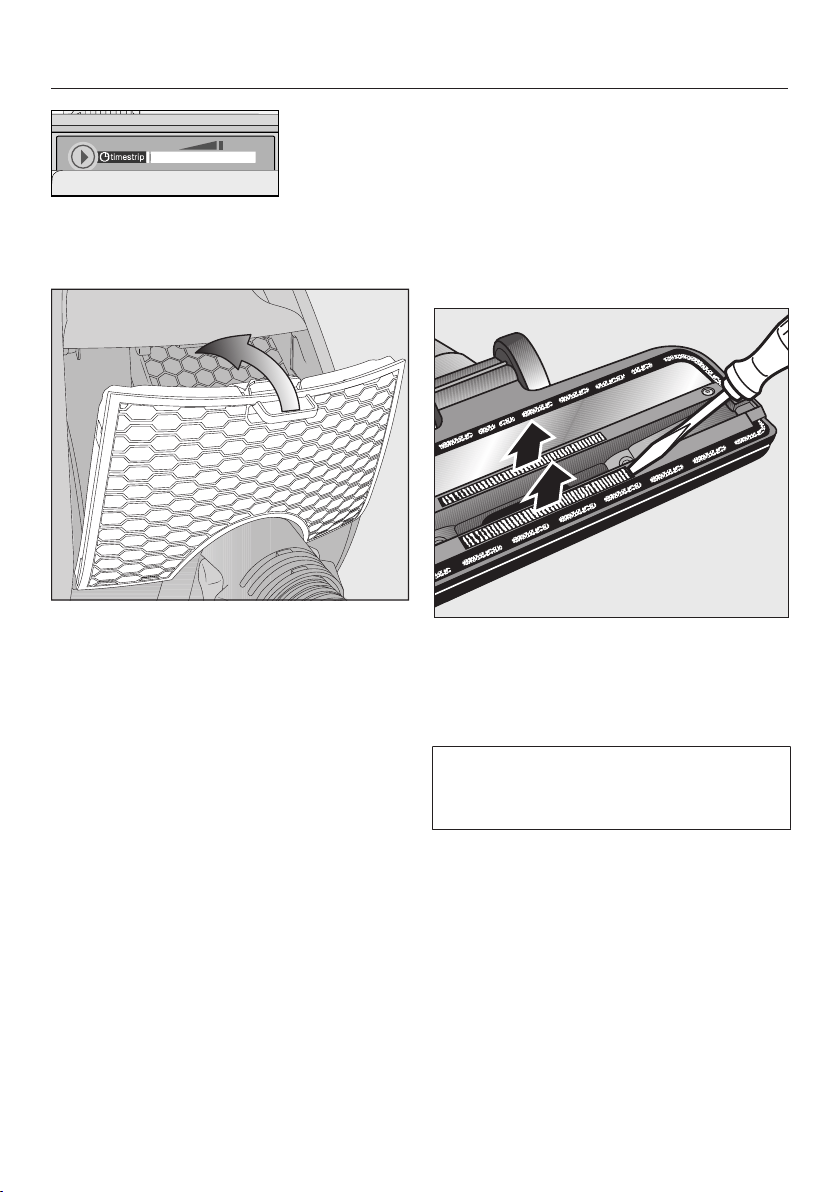
Activating the timestrip® filter
change indicator on the
HEPAAirClean exhaust filter
Depending on the model, your vacuum
cleaner will be fitted as standard with
one of the following exhaust filters:
- HygieneAirCleanSF-HY60 (tur-
quoise)
- HEPAAirCleanSF-HA60 (white)
If your vacuum cleaner is fitted with a
HEPAAirClean exhaust filter, you need
to activate the timestrip® filter change
indicator.
You will recognise that the
HEPAAirClean exhaust filter is fitted to
the appliance by an indicator strip
hanging out of the exhaust filter com-
partment.
Press the release catch on the ex-
haust filter compartment flap and re-
move the flap.
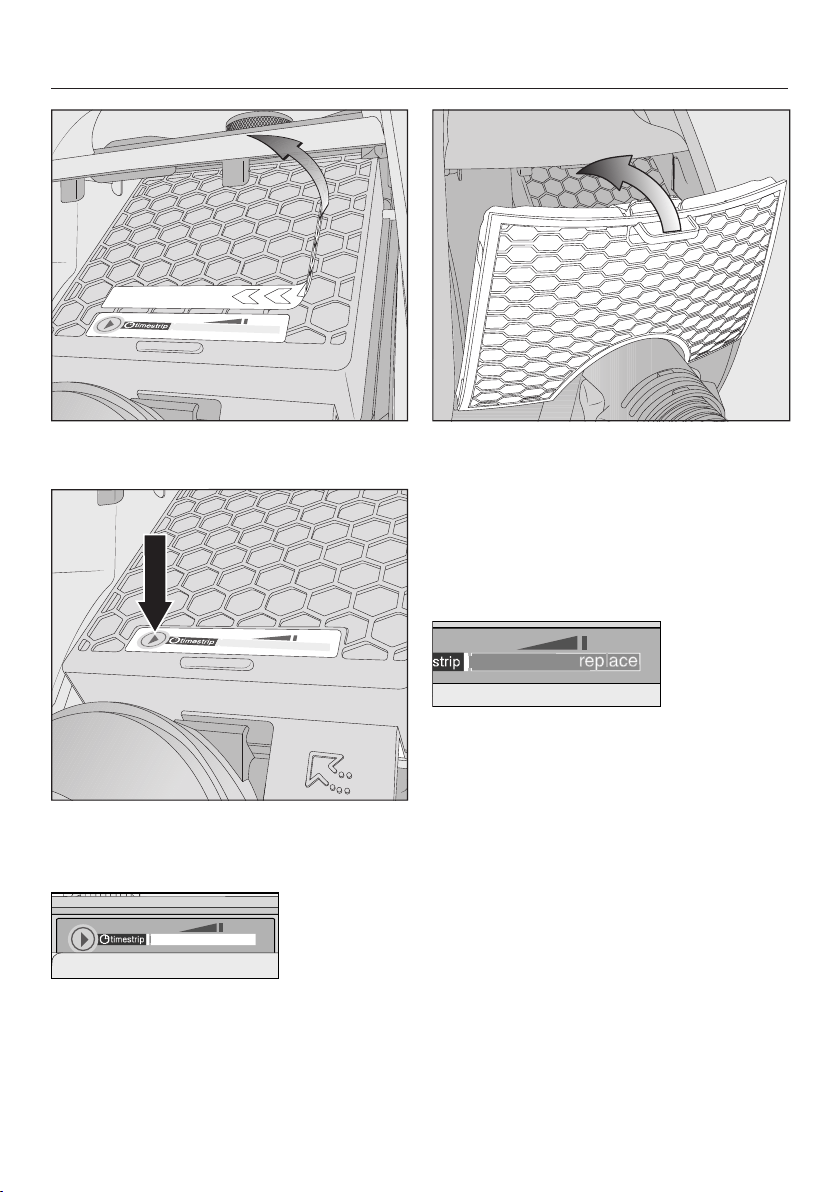
13
Remove the indicator strip from the
HEPA AirClean exhaust filter.
Press the timestrip® filter change in-
dicator on the HEPA AirClean exhaust
filter.
After approx. 10–15 seconds, a thin red
line will appear in the left-hand side of
the display.
Fit the exhaust filter compartment
flap carefully in the bottom of the ex-
haust filter compartment and close
the flap, making sure it clicks into po-
sition.
How the exhaust filter timestrip®
change indicator works
The exhaust filter timestrip® change in-
dicator shows the remaining functional
life of the exhaust filter. After approx. 50
operating hours the display will be com-
pletely filled with red. 50 operating
hours equates to approximately one
year of use.
14
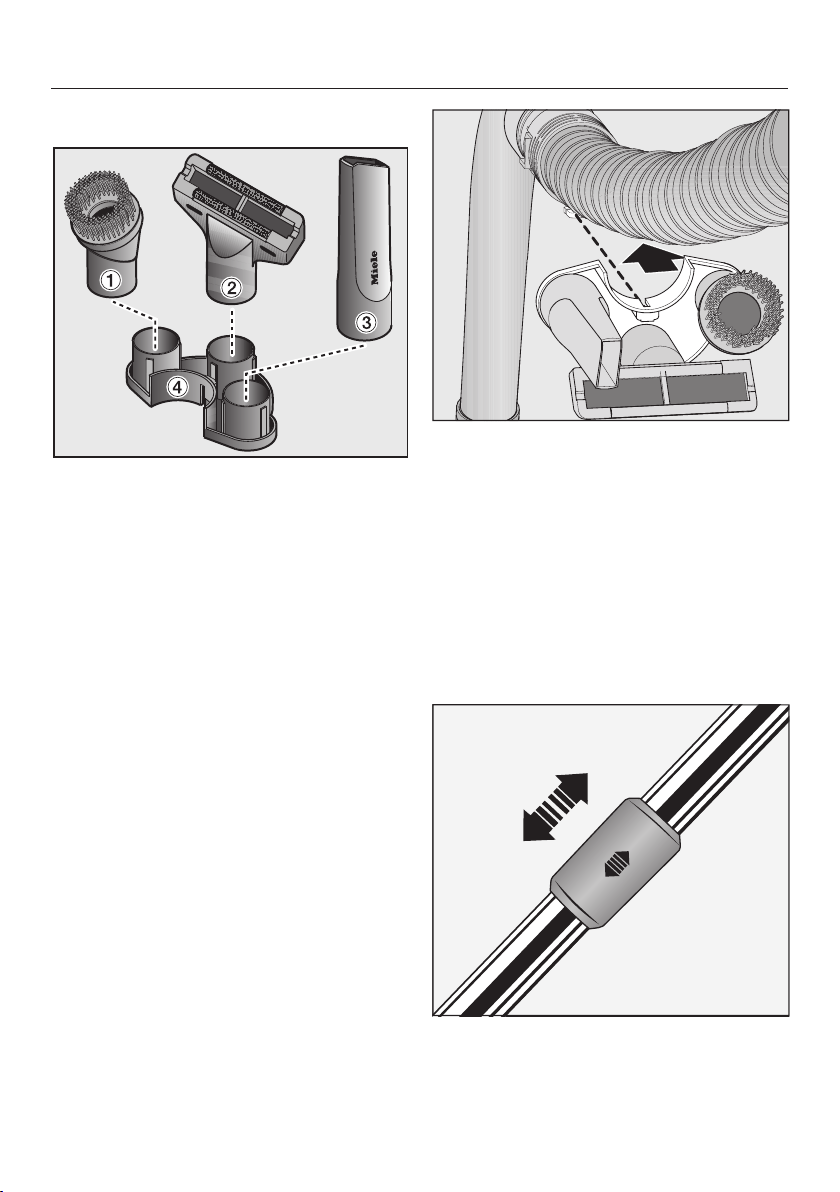
Using the supplied accessories
Dusting brush
For cleaning skirting boards, as
well as ornate, carved or particu-
larly delicate objects.
The head can be swivelled to ad-
just the angle.
Upholstery nozzle
For cleaning upholstery, mat-
tresses, cushions, curtains, etc.
Crevice nozzle
For cleaning in folds, crevices or
corners.
Accessories holder for the
above accessories
Symbols on the holder show
where to attach the different ac-
cessories.
Attach the accessories holder to the
connector on the handle if required.
Make sure it clicks into position.
Use
Adjusting the telescopic suction tube
One part of the telescopic suction tube
is packed inside the other, and it can be
adjusted to suit your height for comfort-
able vacuuming.
Grasp the release mechanism and
adjust the telescopic suction tube to
the required length.
15
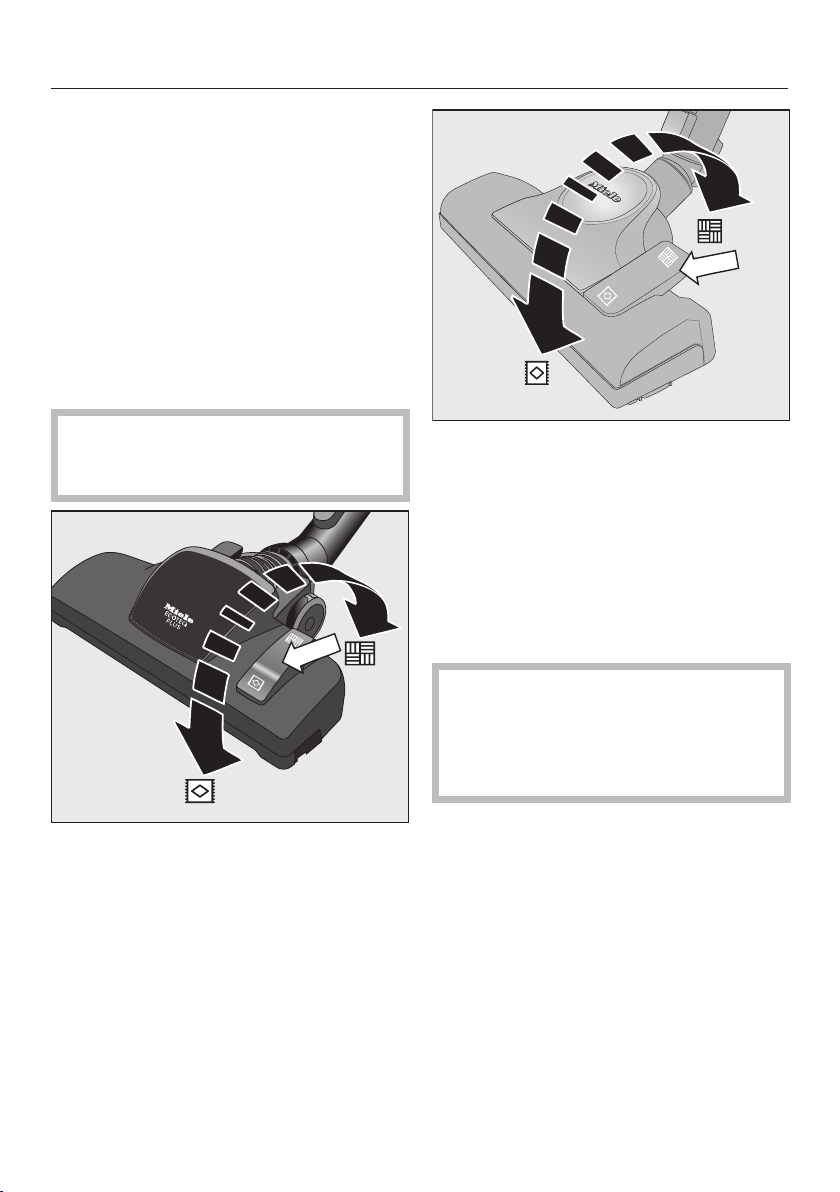
Adjusting the floorhead
Depending on the model, your vacuum
cleaner will be fitted as standard with
one of the floorheads illustrated.
This vacuum cleaner can be used for
daily cleaning of carpets, rugs and ro-
bust hard flooring.
Miele offers a range of other floorheads,
brushes and accessories for other types
of flooring and special applications (see
“Optional accessories”).
Please observe the flooring manu-
facturer’s cleaning and care instruc-
tions.
Clean even hard flooring which is not
susceptible to scratching, as well as
flooring with gaps or deep crevices in it
with the brush protruding:
Press the footswitch.
Vacuum carpets and rugs with the
brush retracted:
Press the footswitch.
If the suction power of the adjustable
floorhead seems too high, reduce the
suction until the floorhead is easier
to manoeuvre (see “Use” – “Regulat-
ing the suction power”).
16
Adjustable floorhead
The adjustable floorhead can also be
used for vacuuming the stairs.
Risk of injury caused by falling
vacuum cleaner.
You may be injured if the vacuum
cleaner should fall from the stairs.
When vacuuming stairs, it is best to
start at the bottom of the stairs and
move upwards.
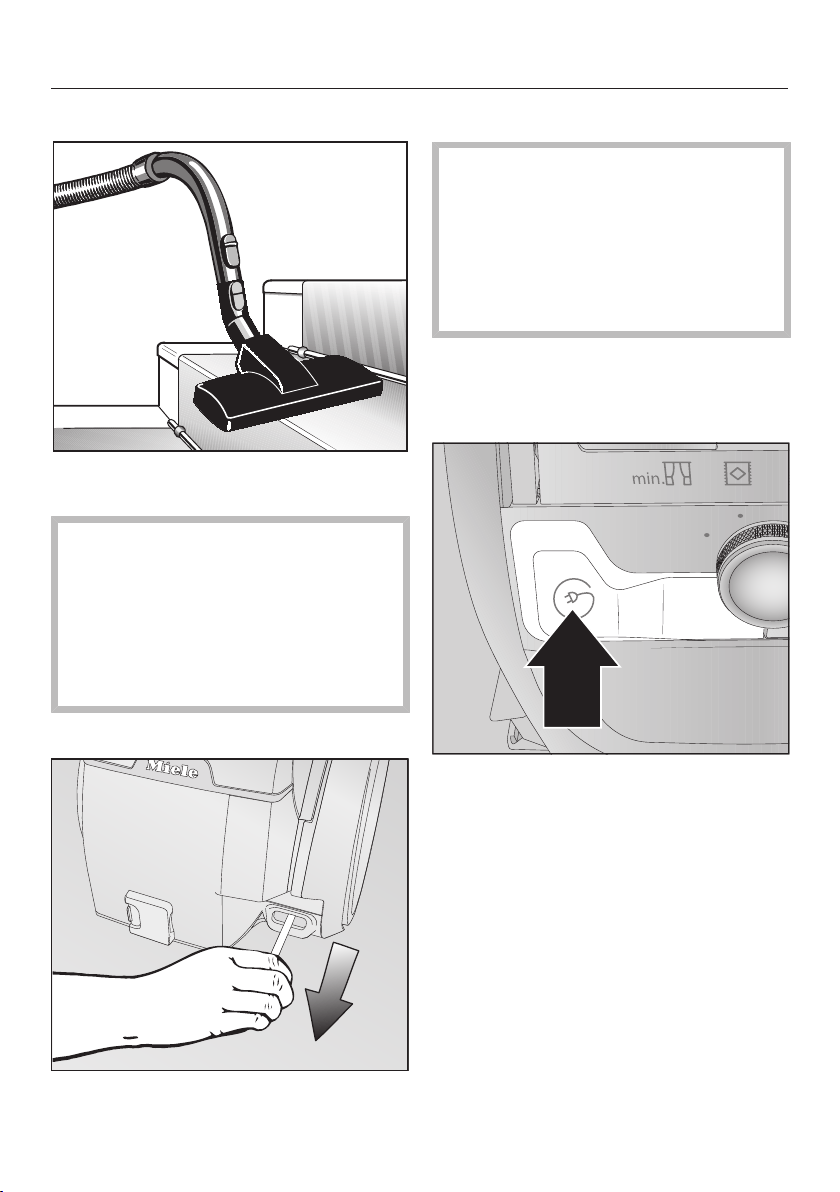
Unwinding the mains cable
Pull the mains cable out to the re-
quired length.
Insert the plug into the socket.
Risk of damage due to overheat-
ing.
The mains cable may overheat after
a long period of use.
If vacuuming for longer than
30minutes, the cable must be pulled
out all the way.
Rewinding the cable
Switch off at the wall socket and un-
plug it.
Press the rewind foot switch. The
cable will rewind automatically.
17
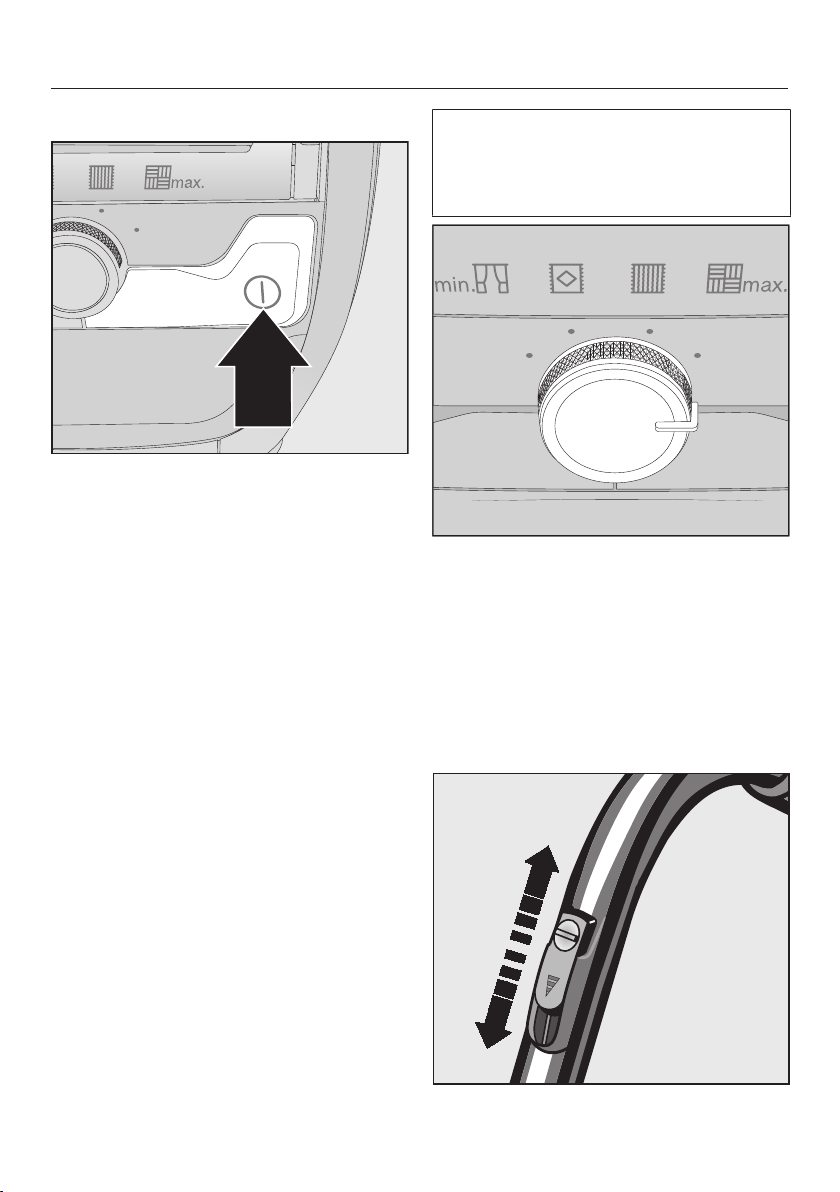
Switching on and off
Press the On/Off footswitch.
During vacuuming
During vacuuming, pull the vacuum
cleaner behind you like a sledge.
To regulate the suction power
The suction power can be regulated to
suit the type of flooring being cleaned.
Reducing the suction power reduces
the amount of effort required to man-
oeuvre the floorhead.
The vacuum cleaner has symbols on
the controls which indicate the type of
use the settings are suitable for.
Curtains, fabric
Cut pile carpets, rugs and runners
Loop pile carpet and rugs
Hard flooring and heavily soiled
carpets and rugs (also for clean-
ing upholstery and mattresses
with the upholstery nozzle)
When using the adjustable floorhead,
if the suction seems too high, reduce
the suction power until the floorhead
is easier to manoeuvre.
Turn the suction power selector to the
power level you require, making sure
it clicks into position.
Opening the air inlet valve
It is easy to reduce the suction power
for a short time, e.g. to prevent rugs or
other textile flooring being sucked into
the vacuum cleaner.

18
Open the air inlet valve on the handle
far enough to reduce the suction
power.
The floorhead will be easier to man-
oeuvre.
Setting down and storing the
vacuum cleaner
Risk of electric shock from mains
voltage.
The mains voltage is applied to the
appliance even if it is switched off.
After use, switch the appliance off at
the wall socket and unplug it.
Park system
Retract the telescopic tube fully.
Slot the floorhead or floorbrush into
the park system from above.
Do not lift the vacuum cleaner by the
dust container carrying handle when
transporting it.
Always use the vacuum cleaner car-
rying handle.
Maintenance
Risk of electric shock from mains
voltage.
The mains voltage is applied to the
appliance even if it is switched off.
Before carrying out any maintenance
work, switch the appliance off at the
wall socket and unplug it.
We recommend using only genuine
Miele accessories bearing the “ORI-
GINAL Miele” logo on the packaging.
Only these will guarantee the optimum
performance of your vacuum cleaner
and the best possible cleaning results.
Please note that faults and damage
caused by use of accessories which
do not bear the “ORIGINAL Miele”
logo on the packaging are not covered
by the vacuum cleaner warranty.
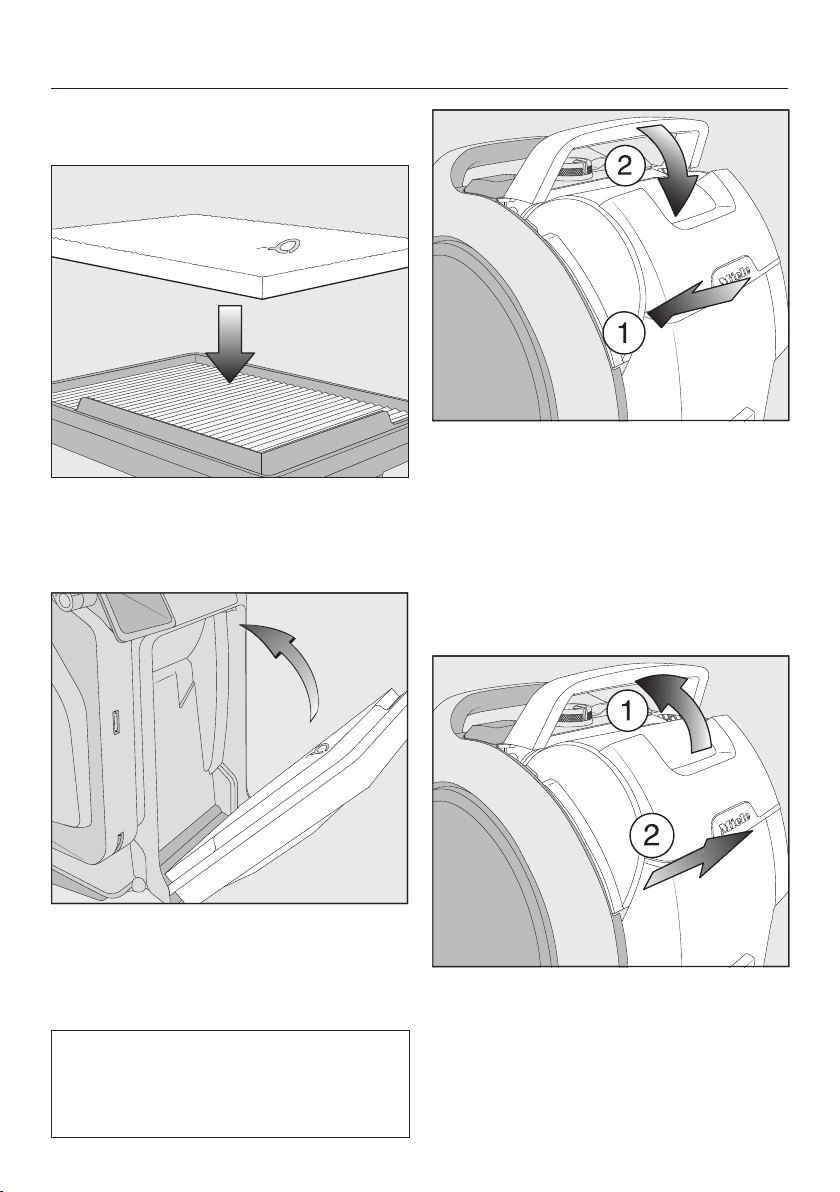
Emptying and cleaning the dust con-
tainer
Empty the dust container before the
dust reaches the max marking on the
dust container.

19
Unlatch the dust container by lifting
the handle upwards.
Remove the dust container.
The contents of the container can be
disposed of with normal household
waste, providing they consist of gen-
eral household dust only.
Hold the dust container close to the
bin to prevent dust from billowing out.
Press the release catch on the bot-
tom of the dust container.
The flap will open and the dust will fall
out.
Clean the dust container using a
slightly damp cloth and mild wash-
ing-up liquid if necessary.
Dry the dust container thoroughly.
Close the flap making sure it clicks
into place.
Insert the dry dust container back
into the vacuum cleaner at an angle
with the handle lifted up.
Latch the dust container into place by
pushing the handle back down.
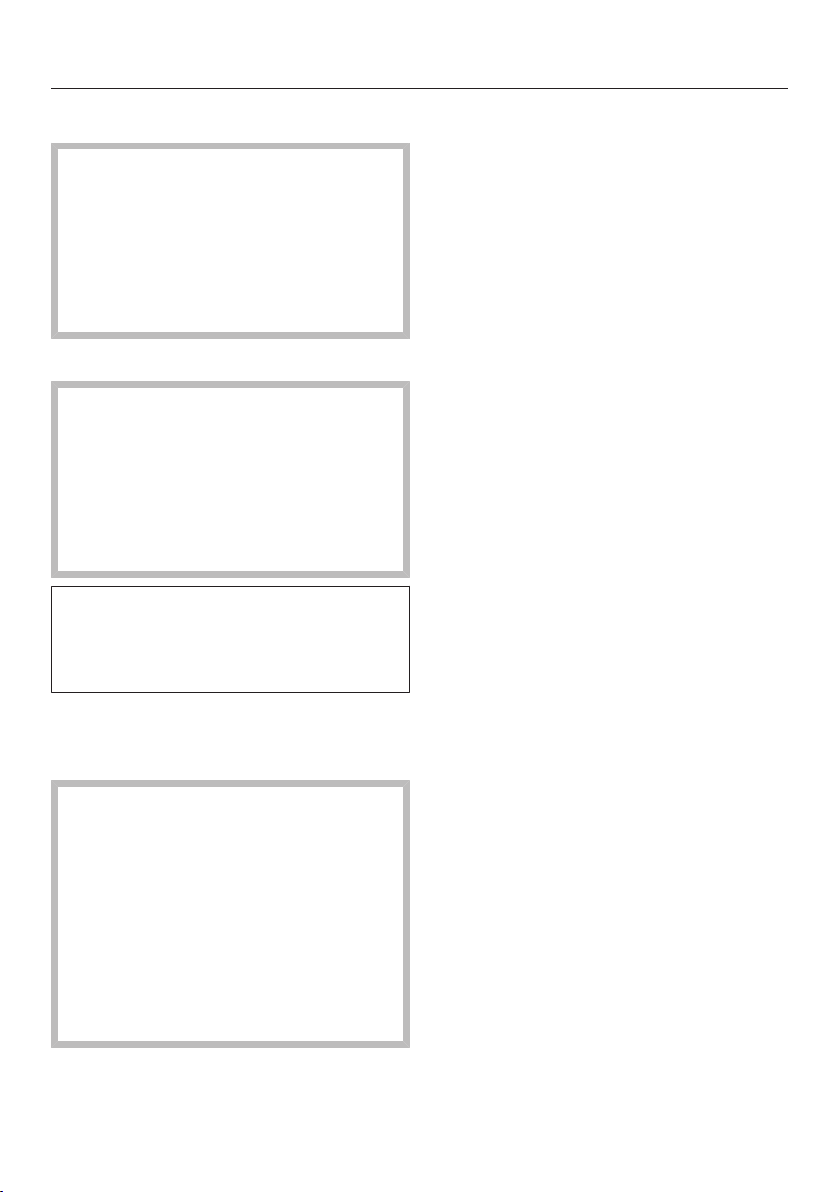
Cleaning the fine dust filter
The fine dust filter is located on the rear
side of the dust container. It is
equipped with a filter mat.
Both parts should be cleaned when ne-
cessary, and should also be cleaned
should suction power start to weaken.
Clean both filters once a month with
water and allow 24hours for the filters
to dry.

20
Remove the dust container.
The fine dust filter is located at the rear
of the dust container.
Remove the fine dust filter in the dir-
ection of the arrow.
Remove the filter mat from the fine
dust filter.
Carefully knock the dust out of both
filters over a bin.
Take the cleaning tool out of the side
flap on the dust container.
21
Clean the pleated side of the fine
dust filter with the long brushes on
the cleaning tool.
Risk of damage caused by incor-
rect cleaning.
The fine dust filter and the filter mat
can become damaged and be less
effective as a result.
Do not use pointed or sharp-edged
objects to clean the fine dust filter
and the filter mat.
Clean the pleated side of the fine dust
filter and the filter mat with water once a
month.
Rinse the pleated side of the fine dust
filter under cold running water.
Rinse the filter mat under cold run-
ning water.
Risk of damage caused by incor-
rect cleaning.
The fine dust filter and the filter mat
can become damaged and be less
effective as a result.
Do not use washing-up liquid or
cleaning brushes when cleaning the
pleated side of the fine dust filter and
the filter mat with water. After clean-
ing, allow the fine dust filter to dry in
a well ventilated room for a minimum
of 24hours with the pleated side fa-
cing up. The filter mat must also be
left to dry for at least 24 hours.
22
Putting the fine dust filter and the fil-
ter mat together
Attach the dry filter mat to the dry fine
dust filter so that the soft side of the
filter mat is pointing up and the loop
used to remove it is visible.
Fit the fine dust filter carefully in the
dust container.
Press the fine dust filter firmly into
position.
In order to continue to achieve the
best possible cleaning results replace
the CX FSF fine dust filter with a new
one after approx. 3years.
Refit the dust container to the va-
cuum cleaner.
Cleaning the filter frame and pre-fil-
ter
There is a removable filter frame on the
rear side of the dust container side flap.
Behind the side flap is a pre-filter.
Clean both parts if required.
Remove the dust container.
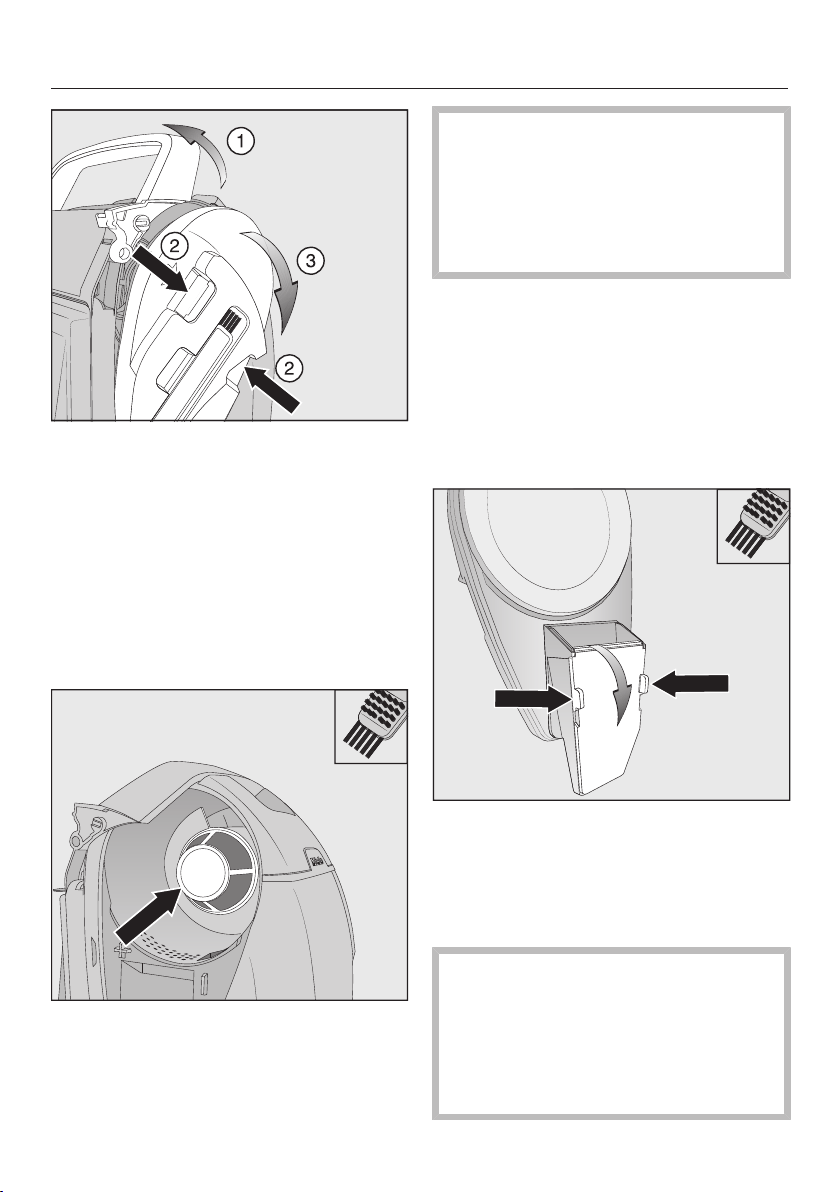
23
a Lift up the dust container handle and
hold it in this position.
b Press the release catch on the side
flap. There is a cut-out on the oppos-
ite side to make it easier to remove
the side flap.
c Remove the side flap.
Once the side flap has been removed,
the pre-filter inside can be accessed.
Clean the pre-filter and the side walls
on the inside using the cleaning tool.
Risk of damage caused by incor-
rect cleaning.
The pre-filter can become damaged
and be less effective as a result.
Do not use pointed or sharp-edged
objects to clean the pre-filter.
Clean the interior side walls using a
slightly damp cloth and mild wash-
ing-up liquid if necessary.
Dry the interior side walls carefully.
The filter frame is located on the rear
side of the removed side flap at the bot-
tom.
Press the two release catches on the
side of the filter frame and remove the
filter.
Clean the filter using the cleaning
tool.
Risk of damage caused by incor-
rect cleaning.
The filter can become damaged and
be less effective as a result.
Do not use pointed or sharp-edged
objects to clean the filter.

24
Clean the filter frame and the side
flap using a slightly damp cloth and
mild washing-up liquid if necessary.
Clean the filter frame and the side
flap carefully.
Refit the filter at the bottom of the dry
filter frame and close it, making sure
it clicks into position.
a Carefully fit the dry side flap with the
filter frame at the bottom of the dust
container.
b Lift up the dust container handle and
hold it in this position.
c Press the side flap firmly into posi-
tion.
Refit the dust container to the va-
cuum cleaner.
When to replace the exhaust filter
Depending on the model, your vacuum
cleaner will be fitted as standard with
one of the following exhaust filters:
- HygieneAirCleanSF-HY60 (tur-
quoise)
Replace this exhaust filter after ap-
prox. oneyear. Make a note of the
date on the exhaust filter.
- HEPAAirCleanSF-HA60 (white)
Replace this exhaust filter if the
timestrip® filter change indicator is
completely red.
The display will be completely filled
with red after approximately 50 oper-
ating hours; this corresponds to ap-
proximately one year of average use.
You can continue vacuuming when
the light comes on. However, the
suction power will be reduced as will
the effectiveness of the filter if it is
not replaced in good time.

25
Replacing the exhaust filter
Press the release catch on the ex-
haust filter compartment flap and re-
move the flap.
Pull the exhaust filter removal tab up-
wards and pull the exhaust filter for-
wards to remove it.
a Place the insertion aids that are loc-
ated on both sides of the new ex-
haust filter into the guides on the ex-
haust filter compartment.
b Push the exhaust filter back and up.
c Press the exhaust filter firmly into po-
sition until it clicks into place.
If you have fitted your vacuum
cleaner with a HEPAAirClean exhaust
filter, press the timestrip® filter
change indicator.
26
After approx. 10–15 seconds, a thin red
line will appear in the left-hand side of
the display.
Fit the exhaust filter compartment
flap carefully in the bottom of the ex-
haust filter compartment and close
the flap, making sure it clicks into po-
sition.
Replacing the thread lifters
(not possible on models with Eco-
TeQPlus floorhead)
The thread lifters on the suction inlet to
the floorhead can be replaced. Replace
the thread lifters if the pile has worn
down.
Lever the thread lifters from the slots.
To do so use a suitable tool, e.g. a flat
blade screwdriver.
Fit new thread lifters.
Replacement parts are available from
your Miele dealer or from the Miele
Spare Parts Dept.
27
Cleaning and care
Risk of electric shock from mains
voltage.
The mains voltage is applied to the
appliance even if it is switched off.
Before cleaning, switch the appli-
ance off at the wall socket and un-
plug it.
Vacuum cleaner and accessories
Risk of electric shock from mains
voltage.
If moisture gets into the vacuum
cleaner, there is a risk of electric
shock.
Do not let the vacuum cleaner get
wet.
Follow the special cleaning instruc-
tions for the fine dust filter and the fil-
ter mat (see “Maintenance” – “Clean-
ing the fine dust filter”).
The vacuum cleaner and all plastic ac-
cessories can be cleaned with a propri-
etary cleaner suitable for plastic.
Damage due to unsuitable clean-
ing agents.
All surfaces are susceptible to
scratching. Contact with unsuitable
cleaning agents can alter or discol-
our the external surfaces.
Do not use abrasive cleaning agents,
glass cleaning agents, all-purpose
cleaners or oil-based conditioning
agents.
28
Problem solving guide
With the help of the following guide, minor faults in the performance of the appli-
ance, some of which may result from incorrect operation, can be remedied without
contacting Miele. This will save you time and money because you won't need a
service call.
Please note that a call-out charge will be applied to unnecessary service visits
where the problem could have been rectified as described in these operating in-
structions.
Risk of electric shock from mains voltage.
The mains voltage is applied to the appliance even if it is switched off.
Before dealing with any problems, switch the appliance off at the wall socket
and unplug it.
Problem Cause and remedy
The vacuum cleaner
switches off automatic-
ally.
A temperature limiter switches the vacuum cleaner
off automatically if it gets too hot. This can occur
when the airways are blocked by bulky objects.
Switch the vacuum cleaner off immediately using
the On/Off footswitch. Switch off at the wall
socket and unplug it.
After removing the cause, wait for approximately 20–
30 minutes to allow the vacuum cleaner to cool
down. It can then be switched on again.
The cleaning perform-
ance is poor.
The dust container is full.
Empty and clean the dust container (see “Mainten-
ance” – “Emptying and cleaning the dust con-
tainer”).
Cleaning performance
is reduced.
The fine dust filter is soiled.
Clean the fine dust filter and the filter mat (see
“Maintenance” – “Cleaning the fine dust filter”).
The filter frame/pre-filter is soiled.
Clean the filter frame/pre-filter (see “Maintenance”
– “Cleaning the filter frame and pre-filter”).
29
Service
Contact in case of malfunction
In the event of any faults which you
cannot remedy yourself, please contact
Miele.
Contact information for Miele can be
found at the end of this document.
Please note that telephone calls may be
monitored and recorded for training
purposes and that a call-out charge will
be applied to service visits where the
problem could have been resolved as
described in this booklet.
Warranty
The manufacturer's warranty for this ap-
pliance is 2 years.
For more information about country
specific warranty terms and conditions,
please contact Miele.
Optional accessories
Follow the flooring manufacturer’s
cleaning and care instructions.
We recommend using only genuine
Miele accessories bearing the “ORI-
GINAL Miele” logo on the packaging.
Only these will guarantee the optimum
performance of your vacuum cleaner
and the best possible cleaning results.
Please note that faults and damage
caused by use of accessories which
do not bear the “ORIGINAL Miele”
logo on the packaging are not covered
by the vacuum cleaner warranty.
Purchasing accessories
Original Miele accessories are available
from the Miele webshop, the Miele Cus-
tomer Service Department and from
your Miele dealer.
Original Miele accessories are identified
by the “ORIGINAL Miele” logo on the
packaging.
With 3D4U, Miele also offers free ac-
cessories to download for your 3D
printer (www.miele.com, Service,
3D4U).
Certain models are supplied with one or
more of the following accessories as
standard.
Floorheads / brushes
(only available in selected countries)
TurboTeQ Turbobrush (STB 305-3)
This brush is ideal for cleaning cut pile
carpet.

30
Parquet Twister floorbrush with
swivel action (SBB 300-3)
With natural bristles for vacuuming
smooth hard floors and small gaps.
Parquet Twister XL floorbrush with
swivel action (SBB 400-3)
With natural bristles for quickly vacu-
uming smooth hard floors and small
gaps.
Other accessories
(only available in selected countries)
Turbo Mini hand turbobrush (STB
101)
For vacuuming upholstery, mattresses
or car seats, etc.
Universal brush (SUB 20)
For dusting books, shelves, etc.
Radiator brush (SHB 30)
For dusting radiators, narrow shelves
and crevices.
Mattress nozzle (SMD 10)
For vacuuming upholstery, mattresses,
cushions, curtains, covers etc.
Crevice nozzle, 300mm (SFD 10)
Extra long crevice nozzle for cleaning in
folds, crevices and corners.
Crevice nozzle, 560mm (SFD 20)
Flexible crevice nozzle for vacuuming
hard to reach places.
XL upholstery nozzle (SPD20)
Wide upholstery nozzle for cleaning up-
holstery, mattresses and cushions.
Electrical connection
All work should be carried out by a suit-
ably qualified and competent person in
strict accordance with national and
local safety regulations. The voltage
and rated load are given on the data
plate located underneath the vacuum
cleaner. Please ensure that these match
the household mains supply. The char-
ger is supplied with a cable and moul-
ded plug ready for connection to a
230V/50Hz AC single phase supply.
Test Marks Electrical safety
RCM Mark
Electrically sup-
pressed
according to
CISPR 14.1


Miele Head Office Melbourne:
Level 4, 141 Camberwell Road
Hawthorn East, VIC 3123
Miele Experience Centre South Melbourne:
206-210 Coventry Street
South Melbourne, VIC 3205
Miele Experience Centre and Office Sydney:
3 Skyline Place
Frenchs Forest, NSW 2086
Miele Experience Centre and Office Brisbane:
Tenancy 4C, 63 Skyring Terrace
Newstead, QLD 4006
Miele Experience Centre and Office Perth:
83-85 Sir Donald Bradman Drive
Hilton, SA 5033
Miele Experience Centre and Office Adelaide:
Miele Australia Pty. Ltd. Miele New Zealand Limited
Miele Global Headquarters
Germany
Miele & Cie. KG
Carl-Miele-Straße 29
33332 Gütersloh
Federal Republic of Germany
IRD 98 463 631
ACN 005 635 398
ABN 96 005 635 398
Miele Experience Centre Gold Coast:
131 Ferry Road
Southport, QLD 4215
Miele Experience Centre
and Head Office Auckland:
8 College Hill
Freemans Bay, Auckland 1011
Miele Experience Centre
Wellington:
183 Featherston Street
Wellington 6011
0800 464 353 (0800 4 MIELE)
www.miele.co.nz
205-207 Stirling Highway
Claremont, WA 6010
1300 464 353 (1300 4 MIELE)
www.miele.com.au
Miele Experience Centre Doncaster:
1136/7 Doncaster Shopping Centre
619 Doncaster Rd, Doncaster, VIC 3108
SNxxx - 4121 M.-Nr. 11 646 821 / 00