ge.com(U.S.)
wvvvv.GEApp/iances.ca(Canada)
Safety Instruc_ons ............ 2-7
Operating Instruaions
Baking or Roasting .............. 11
Broiling, Broiling Guide ......... 14
Clock and Timer . .............. 15
Control Lockout ............... 15
Convection ................. 18-22
Cookware ...................... 9
Oven ...................... 10-30
Probe ........................ 17
Proofing ...................... 23
Sabbath Feature ................ 30
Self:Cleaning ............... 25, 26
Special Features ............. 2%29
Surfi_ce Burners .............. 8, 9
Thermostat .................... 24
Timed Baking & Roasting ........ 16
V\anning ...................... 23
Care and Cleaning
Burner Assembly' ............... 31
Burner Grates and
Vent Grille .................... 32
Control Panel ................. 35
Door ......................... 34
Floor . ........................ 35
Glass Cooktop .............. 36, 37
I_obs ........................ 31
ycs96s
PGS 968
Lift-Off Oven Door ............. 34
Light Bulbs .................... 32
Packagdng %_pe ................ 31
Painted Surfi_ces ................ 35
Racks ........................ 33
Stainless Steel Surfi_ces .......... 35
Storage Drawer . ............... 33
Vent ...................... 32, 35
Troubleshooting Tips ,:8-42
Accessories ................... 47
Cons_mer Support
Consumer Support ..... Back Co_r
Product Regdstration
(Canada) .................. 45, 46
Product Regdstration (U.S.A.) . 43, 44
V\.wrantv fbr Customers
in Canada .................... 51
_\arranty for Customers
in the U.S.A ................... 50
Write themodel and serial
numbers here:
Model #
Serial #
You can find them on a label
behind the open oven door
on the lower left corner of the
range ti'ame.
49-80496 07-07 JR
IMPORTANTSAFETYINFORMATION.
READALLINSTRUCTIONSBEFOREUSING.
WARNING!
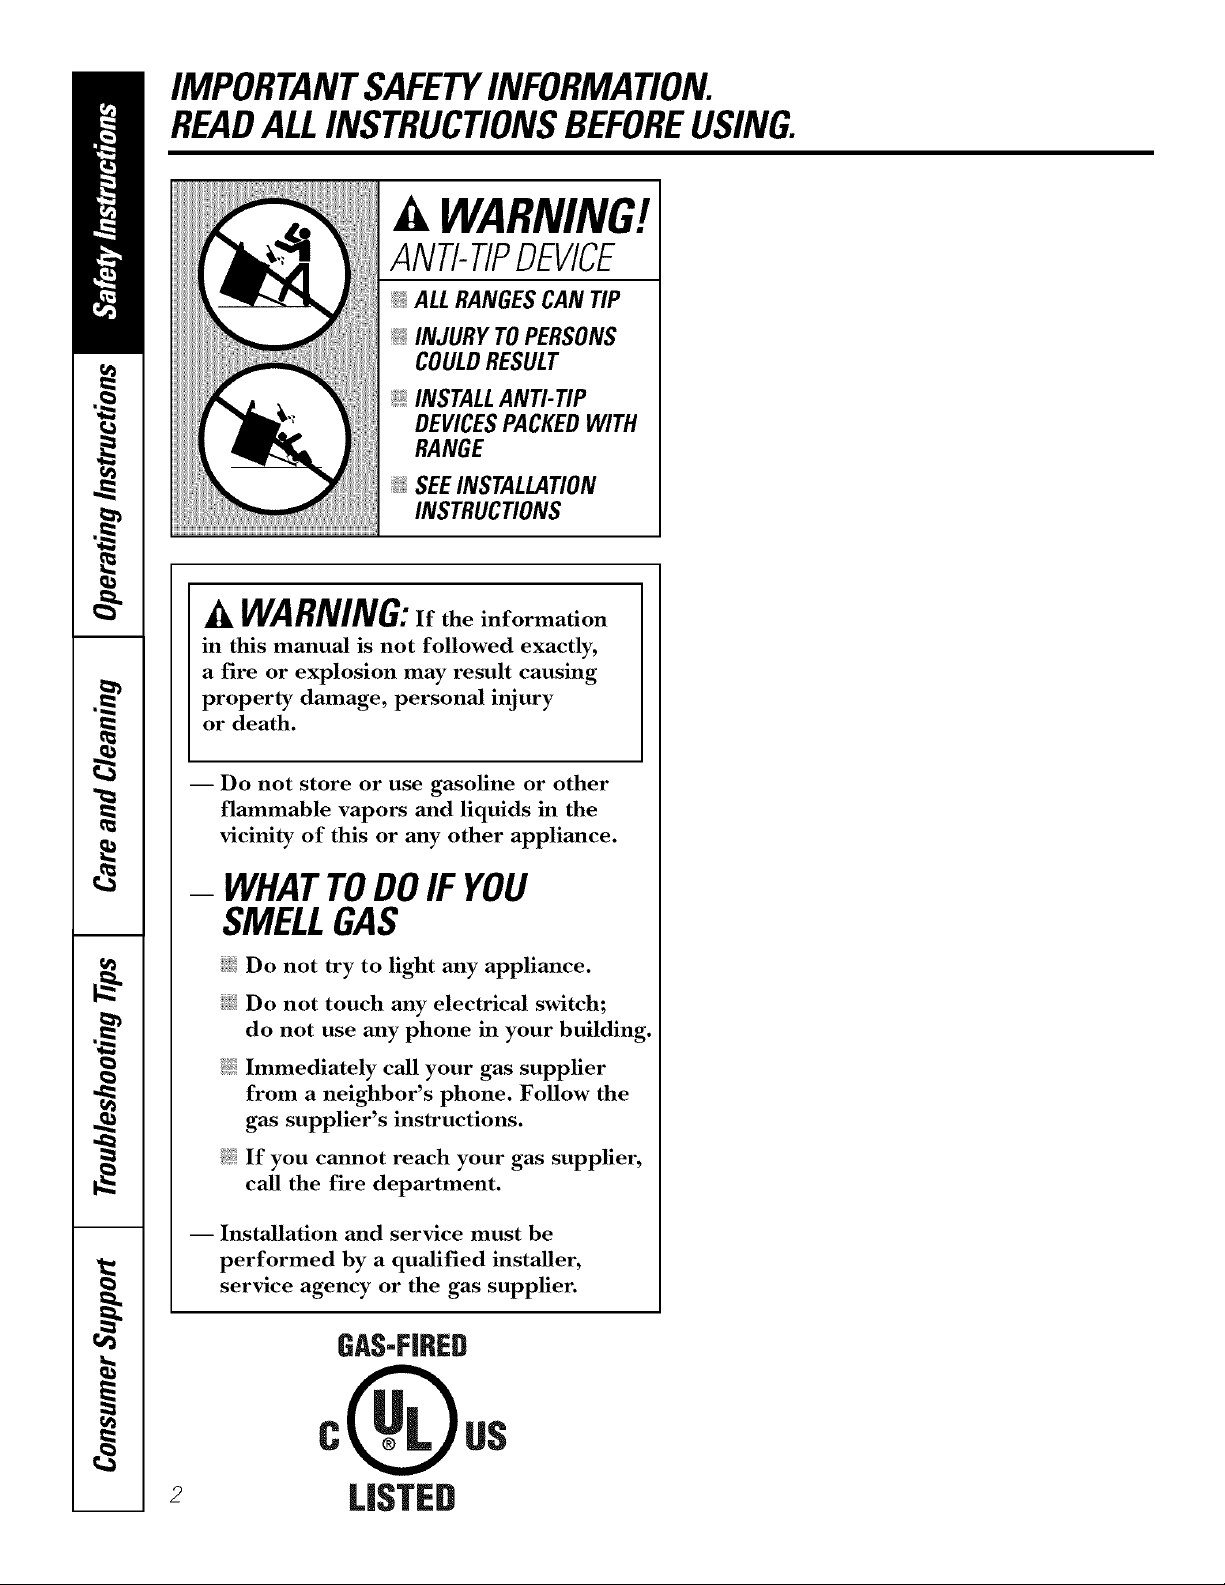
ANTI-TIPDEVICE
_!_ALL RANGESCANTIP
_ INJURY TOPERSONS
COULDRESULT
@ INSTALLANTI-TIP
DEVICESPACKEDWITH
RANGE
_ SEEINSTALLATION
INSTRUCTIONS
A WARNING:If the information
in this manual is not followed exactly,
a fire or explosion may result causing
property damage, personal injury
or death.
2
I Do not store or use gasoline or other
flammable vapors and liquids in the
vicinity of this or any other appliance.
- WHATTODOIF YOU
SMELLGAS
iJ_:illDo not try to light any appliance.
i_i:iDo not touch any electrical switch;
do not use any phone in your building.
Immediately call your gas supplier
from a neighbor's phone. Follow the
gas supplier's instructions.
If you cannot reach your gas supplier,
call the fire department.
-- Installation and service must be
performed by a qualified installer,
service agency or the gas supplier.
GAS-FIRED
LI_;TED
ge.com(U.S.)
vvvvw.GEAppliances.ca(Canada)
WARNING!
Foryour safety, theinformation in this manual must be followed to minimize therisk of fire or
explosion, electric shock, or toprevent property damage, personal injury, or loss oflife.
ANTI-TIPDEVICE
All ranges can tip and injurycould result.
Toprevent accidental tipping of therange, attach it tothe wall or floor byinstalling theAnti--tip device
supplied.
If theAnti--tip device supplied with the range does not fit this application, use the universal Anti--17p
device WB2X7909.
To check if the device isinstafled and engaged properly, remove the storage drawer and inspect the
rear leveling leg.Make sure #fits securely into theslot.
If yOUpull tile range otlt flom tile wall for ally reason, mal_.e stlie the device is properly
engaged when you push tile rang_ back against file wall. If it is not, there is a possible risk of
the rang_ tipping oxer and causing iIlju]_] ifYOUor a child stand, sit or lean on an open door
Please refer m the And-Tip device infounafion in tiffs manual. Failure m rake fills precaution
could result in tipping of the rang_ and iIIjm>
IMPORTANTSAFETYNOTICE
TheCalifornia SafeDrinking Water and Toxic Enforcement Act requires the Governor of California to
publish a list ofsubstances known to thestate tocause birth defects or other reproductive harm, and
requires businesses to warn customers ofpotential exposure tosuch substances.
Gasappliances can cause minor exposure to four of these substances, namely benzene, carbon
monoxide, formaldehyde and soot,caused primarily by theincomplete combustion ofnatural gas or
LP fuels. Properly adjusted burners, indicated by a bluish rather than a yellow flame, will minimize
incomplete combustion. Exposure to these substances can be minimized by venting with an open
window or using a ventilation fan or hood.
Thefiberglass insulation in self-clean ovens gives off a very small amount of carbon monoxide during
the cleaning cycle. Exposure can be minimized by venting with an open window or using a ventilation
fan or hood.
3
IMPORTANTSAFETYINFORMATION.
READALLINSTRUCTIONSBEFOREUSING.
WARNING!
SAFETYPRECAUflONS
When using electrical appfiances, basic safety precautions should be foflowed, including the
following:
_:; Use this appliance only tbr its intended
• {_
purpose as described ill tins )wner s
Mannal.
_t{:;Be sure your appliance is properly installed
and grounded by a qualified technician in
accordance with the provided installation
instrnctions.
_{:_Before perfo_ning any service, disconnect
the range power supply at the household
disu-ibufion panel by removing the fl_se or
switching off the circuit breaken
;fi:,iHaxe the installer show you tile location of
tile circuit breaker or fl_se. Mark it for easy
reference.
;f; Do not leme children alone----r'hildren
should not be left alone or unattended in
all area where all appliance is ill use. They
should nexer be allowed to sit or stand on
ally part of the appliance.
;f; Haxe the installer show you the location
of the range gas shut-offxahe and how to
shut it off if necessa U.
_i:,:Hax> your rang_ installed and pioperly
grounded by a qualified installei; in
accordance with tile Installation
Instructions. Ally' adjusunent and se_Mce
should be perfomled only by qualified gas
range installers or service technicians.
_{::i,ocate the range out of kitchen tral_c path
and out of dr_fftv locations to prexent poor
air circulation.
_:: Be sure all packaging materials are
removed from rite rang_ before operating
it to pre\ent fire or smoke damage should
the packaging mamrial ignite.
;f; Do not leme children alone or nnattended
where a range is hot or in operation. They
could be seriously burned.
Do not attempt to repair or replace ally
part of your range unless it is specifically
recommended in this manual. All other
service should be refelTed to a qualified
technician.
Be sure your range is con-ecfly adjusted
by a qualified se_Mce mchnician or installer
for tile type of g_s (natural or I,P) that is
to be used. Your rang_ call be comermd
for use with either type of gas. See the
Installation Instructions packed with
the rang_.
_:: Plug your range into a 190=\olt grounded
outlet only. Do not remove tile round
g_ounding prong from the plug. If in
doubt about the grounding of the home
elecuical system, it is your personal
responsibility and obligation m haw
all ungrounded outlet replaced with a
properly gTonnded, three-prong onflet ill
accordance with flae National Electrical
(',ode (U.S.). Do not use all exmnsion cord
with fl)is appliance.
-& WARNING:Theseadjustments
must be made bya qualified service
technician in accordance with the
manufacturer's instructions and aft codes
and requirements ofthe authority having
jurisdiction. Failure tofollow these
instructions could result in serious injury or
property damage. Thequalified agency
performing this work assumes
responsibility for the conversion.
_:: KeeI) the hood and grease filters clean to
maintain good xenting and to axoid grease
fires.
_:: Teach children not to play with tile
controls or ally other part of the rang>.
_::Always kee I) dish towels, dish cloths, pot
holders and other linens a satb distance
fronl vonr rangP.
4
ge.com(U.S.)
vvvvw.GEAppliances.ca(Canada)
SAFETYPRECAUTIONS
;_?:,:Always kee I) wooden and plastic utensils
and canned tbod a safe distance fiom your
range.
_i:,iAlways kee I) combnsdble wall coxetings,
curtains or drapes a safe distance fiom
yonr range.
_{::Do not clean tile rang_ with flammable or
x_latile cleaning fluids.
_i:,:After prolong>d use of a range, high floor
mmperautres may result and many floor
coxelJng3 will not withstand this kind of q?{::
use. Nexer insta]l tile range oxer vinyl tile
or linoleum that cannot wifllsmnd such
type of use. Nexer install it directly over _::
inmrior Mtchen caq)efing.
;f?:':Avoid scratching die glass cooktop widt
sharp instruments, or wifl3 tings and other
jeweh T.
;_i:,:Do not allow anyone to climb, stand or
hang on die oxen door; storage drawer or
cooktop. They could damag> the rang>
and even tip it oxel; causing sexere
personal ilIjmT.
CAUTION:Itemsinteresttochildren
shouldnot be storedin cabinetsabovea rangeor
on the backsplashofa range--children climbing
on the rangetoreachitems could be seriously
injured.
WARNIN&NEVERusethis
appliance as a space heater to heat or
warm the room. Doing so m W result
in carbon monoxide poisoning and
oxedteafing of the cookmp or oxen.
_i:,:For your safety, hexer use your appliance
for wanning or heating the room.
;_?:':Large scratches or impacts to glass doors
can lead to broken or shatmred glass.
mamfial could be ignimd if brought in
contact with flame or hot oxen surtZaces
and may cause sexere b/li-/ls.
;_?:':Do not clean fire rang_ when the appliance
is in use.
_i:,:Nexer wear loose-fitting or hanging
gammnts while using the appliance.
Be carefifl when reaching for imms stored
in cabinets oxer the range. Flammable
Do not store flammable materials in an
oxen, a range storag> drawer or near a
cooktop.
Do not store or use combnsuble mamrials,
gasoline or other flammable vapors and
liquids in the vicinity of this or any other
appliance.
Do not let cooking grease or other
flammable mamrials accumulam in or
near the rang>.
Do not use wamr on grease fires. Nexer
pick up a flaming pan. Turn dm conuols
off: Smother a flaming pan on a surfi_ce
burner 1)5'coxering tile pan complemly
with a well-fitting lid, cooMe sheet or fiat
tr W. Use a multi-pml)ose d U chemical or
foam-type rite extinguisher
Flaming grease outside a pan can be put
out by covering it with baking soda or;
if available, by using a multi-pm])ose d U
chemical or foam-type fire extinguisher
Flame it3die oxen can be smodtered
completely by closing the oxen door and
turning tile control to off or 1)5'using a
nmlti-pm])ose d_T chemical or foam-type
fire extinguisher
q_{::Let tile burner g_ates and other surtZaces
cool before touching them or leaving
then3 where children can reach them.
_?_::Nexer block dte xents (air openings) of
the range. They provide die air inlet and
oudet fllat are necessa U for the range to
operam properly with cotwect combustion.
'Air openings ate located at rite teat of the
cooktop, at tile top and bottom of file
oxen door; and at tile 1)oUom of the rang>
under the storage drawer or kick panel.
_7_::Do not lift tile cooktop. Lifting the
cooktop can lead to damag> and improper
operation of the rang>.
IMPORTANTSAFETYINFORMATION.
READALLINSTRUCTIONSBEFOREUSING.
WARNING!
SURFACEBURNERS
Useproperpan size--avoid pansthat are unstableor easilytipped. Selectcookware havingflat bottomslarge
enoughtocoverburner grates. Toavoid spillovers,makesure cookwareislargeenoughtocontain the food
properly, Thiswill both save cleaningtime andprevent hazardousaccumulationsof food,since heaw spattering
or spilloversleft on rangecanignite. Usepans with handlesthat can be easilygraspedand remaincooL
_i)!Ahvays use dm LifE position when igniting
the top burners and make sure the burners
hme ig_dted.
!_'Never leme the surface btuners unattended
at high flame settings. Boilovers cause
smoking and greasy spillovers that may
catch on fire.
!_'Adjust the top burner flame size so it does
not extend 1)eyond the edge of the cookware.
Excessive flame is hazardous.
!_:Use only dry pot holders--moist or damp pot
holders on hot surPaces may resuh in burns
flom smam. Do not let pot holders come
near open flames when lifting cookware. Do
not use a towel or other 1)ulky cloth in place
of a pot holder:
!_'X_\hen using glass cookware, make sure it
is desig_md for top-of-_',mge cooking.
!:_'To minimize dm possibili_, of 1)urns, ignition
of flammal)le mate_Jals and spillage, turn !:_'
cookware handles toward the side or back of
the range without extending over adjacent !:_,
btlI'IleI's.
_i_!Careflflly watch foods 1)eing flied at a high
flame setting.
_i_!Ahvays heat fat slowly and watch as it heats.
!_:Do not lea\e any imms on the cooktop. The
hot air flom the vent may ig_im flammable
imms and will increase pressure in closed
containers, which may cruise them m burst.
_i)!If a coml)ination of oils or _lts will be used
in fl"dng stir together before heating or
as _lts meh slowly.
_i_!Use a deep flit thermometer whenever
possible to prevent oxeflmating _t 1)eyond
the smoking point.
_i)!Do not operate the 1)tHner wid_out all 1)tHner
parts in place.
the pan too flfll of_u can cause spillovers
when food is added.
_i_;X&qmnprepa_Jng flaming foods under the
hood, turn the fan on.
_i_:Do not use a wok on dm cooking sur£1ce
if the wok has a round metal _Jng that is
placed o\er the burner g_'am m support the
wok. This dng acts as a heat m_p, which may
damage the burner g_v_mand N_rner head.
Also, it mWcm_se the N_rner m work
improperly. This may cause a cad)on
monoxide level above that allowed by current
standards, resulting in a heahh hazard.
_i?!Foods for flTing should be as dry as possible.
Frost on flozen foods or moisture on flesh
foods can cause hot l_ltto 1)ul)l)le up and over
the sides of the pan.
!_'Never u), to move a pan of hot Pat especially
a deep _lt flyer. X'\hit until the _t is cool.
Do not leme plastic items on tim cooktop--
they may meh ifleft too close to the vent.
J J
Kee I)all plastics mvay flom the surPace
1)tlI'Ile I'S.
To moid the possibility of a burn, ahvays be
certain that the conuols for all burners are
at the OFFposition and all g_'ates are cool
before attempting to remove them.
If _ange islocated near a window, do not
hang long curtains that could 1)low over the
surface burners and create a fire hazard.
!_' If you smell gas, turn off the g_s to the range
and call a qualified service technician. Nexer
use an open flame to locate a leak.
_i_!Ahvays turn the stHJ_ce burner conuols off
before removing cookware.
_i)!Use the least possible amount of£u for
efl>ctive shallow or deep-Set flying. Filling
ge.com(U.S.)
vvww.GEAppliances.ca(Canada)
COOKMEATANDPOULTRYTHOROUGHLY...
(Cookmeatandpoultrythoroughly--meattoat leastanINTERNALtemperatureof160°F(71°C)andpoultrytoat leastan
0 0
INTERNALtemperatureofI80F(82 C_Cookingtothesetemperaturesusuallyprotectsagainstfoodbomeillness.
A WARNING!
OVEN
Stand awayfrom therange when opening the ovendoor.Hot air or steam which escapes can cause
bums to hands, face and/or eyes.
!_:Do not heat unopened fbod containets.
Pressure could 1)uild up and the container
could buL_t, causing an inju U.
!_i:!Keep the oven vent unol)stmcted.
ij;_:Kee I)the oven flee from grease buildup.
iJii:iPlace the oven ,'ack in the desired position
while the oven is cool. If rocks must be handled
when hot, do not let pot holder contact the
heating elements.
iJii:iWhen using cooking or roasting bags in the
oven, follow the manufi_ctuter's directions.
!_:Pulling out the tack to the stop-lock isa
convenience in lifting heax3 fbods. Itis also a
precaution against 1)urns flom touching hot
surfilces of the door or oven walls.
iJii:iDo not use the oven to dU newspape,s.
If overheated, the) can catch on fire.
iJii:iDo not use the oven for a stot'age area. Items
stored in an oven can ignite.
Do not leave paper products, cooking utensils
or food in the oven when not in use.
A WARNING:N WRcove,
any slots, holes or passages in the oven bottom
or cover an entire rock with materials such as
alulninuln fioil.Doing so blocks air flow
through the oven and may cause carbon
inonox]de poisoning. Ahllninuln foil linings
may also map heat, causing a fire hazard.
Do not use aluminum f0il to line oven 1)ottoms.
hnproper installation of aluminum foil ma,
result in a risk of electric shock or fire.
Make sure a broiler pan is in place correctl) to
reduce the possibilit} of grease fires.
If)ou should have a grease fire in a broiler
pan, press the C/,fAR/0FFpad and keep the
oven door closed to contain fire until it
btlI'ns OUt.
SELF-CLEANINGOVEN
Do not use oven cleaners.Nocommercialoven cleaner or ovenliner protective coatingof any kind shouldbe
usedin or aroundany part ofthe oven.Residuefrom ovencleaners willdamagethe inside of the oven when the
self-clean cycle is used.
!'_;:Do not clean the door gasket. The door gasket !'_;:
is essential for agood seal. Care should be
token not to ml), damage or move the gasket. !:_:
!:_:Be%re selfZcleaning the oven, ,emove shin),
siDe>colored oven mcLs (on some Inodels) and
all other cookware.
Be sure to xOpeup excess spillage be%re
starting the selfkleaning operation.
Ifthe selfqleaning mode malflmctions, turn the
oven off and disconnect the power suppl): Have
it serviced 1)xa qualified technician.
!_:Clean only parts listed in this Owner's Manual.
READANDFOLLOWTHISSAFETYINFORMATIONCAREFULLY.
SAVETHESEINSTRUCTIONS 7

Using the gas surface burners.
Throughout this manual, features and appearance may vary from your model.
Pushthe control knobin and turn it
tothe LITEposition.
How toLight a Gas Surface Burner
Push tile control knob in and mrn it to
tile tirE position.
You will hear a little clicking noise_
tile sotmd of the electric spark igniting
the burne_:
?dter the flame lights, turn the knob to
at!just tile flame size./f the knob stays at
t/rE, it will continue to click.
When one burner is turned to LITE, all
the burners spark. Do not attempt to
disassemble or clean around anv bm'ner
while another burner is on. An electric
shock may result, which could cause you
to knock over hot cookware.
Sealed Gas Burners
The smaller burner (right rear position)
will give the best simmer results fin.
delicate toods, such as sauces or fi)ods
which need to cook over low heat fin" a
hmg time. It can be turned down to a very
low setting.
The largest, burnei_ are hi,*her,_ I)°wered
than the others and will bring lkluids to
a boil qtficke_;
How toSelect Flame Size
Forsafe handh}_gof cookware,neverlettheflames
extendupthesides of thecookware.
_A'atch tim flame, not tile knob, as you
reduce heat. The flame size on a gas
burner should match the cookware
VOII aI'e rising.
An} flame larger than the bottom of the
cookware is wasted and oiflv ser\ es to heat
the handle.
In Case ofPower Failure
In case ot a power fililure, you can light
the gas surtilce burners on your range
with a match. Hold a lit match to the
burner, then push in and mrn the control
knob to the L/TEposifion. Use extrelne
caution when lighting burne_ this way:
Smtilce burners in use when an electrical
power tililure occms will continue to
operate nommllv.
Before Lightinga Gas Burner
!;_:Make sure ;111grates on the range are in
place befin'e tlsino,b [IIIV, bt/rner
After Lightinga Gas Burner
_: Do not operate the burner for an
extended period ot time without
cookware on the grate. The finish on
the grate may chip without cookware
to absorb the heat.
::Ji::Be sure the burners and grates are
cool betore you place your hand,
a pot holder; cleaning cloths or
other materials on them.
8
ge.com(U.S.)
vvww.GEAppliances.ca(Canada)
Top-of-Range Cookware
Aluminum: Medium-weight cookware is
recommended because it heats quickly
and evenly: Most fi)ocls brown evenh' in
an ahuninum skillet. Use saucepans with
tight-titling lids when cooking with
IllinillltlI// alllO/ints el watei:
Cast-#on: If heated slowly, most skillets
will give satisti_cto_ T results.
Enamelware: Under some conditions,
tile enalllel of SOllle cookwaI'e Ill}IV
inelt. Follow cookware ill_lilt/lilCttli'eY's
recommendations tot cooking methods.
Glass: There are two t)pes of glass
cookware--those tor o;'en/ise only
and those tot toi>otZrange cooking
(saucepans, coffee and teapots).
Glass conducts heat ve_wslowly.
HeatproofGlassCeramic: Can be used
for either SUltilce or oven cooking. It
con(hlcts heat velw slowly and cools velw
slowh'. Check cooJ_waI'e illanttlilCttli'er's
directions to be sure it can be used on gas
ranges.
Stainless Steel'. This metal alone has
poor heating properties and is usually
combined with coI)pe_; aluminum
or other metals for improved heat
distribution. Combination metal skillets
usually work safisli_ctofilv if they are used
with medium heat as tile manufi_cmrer
i'ecoi/lillends.
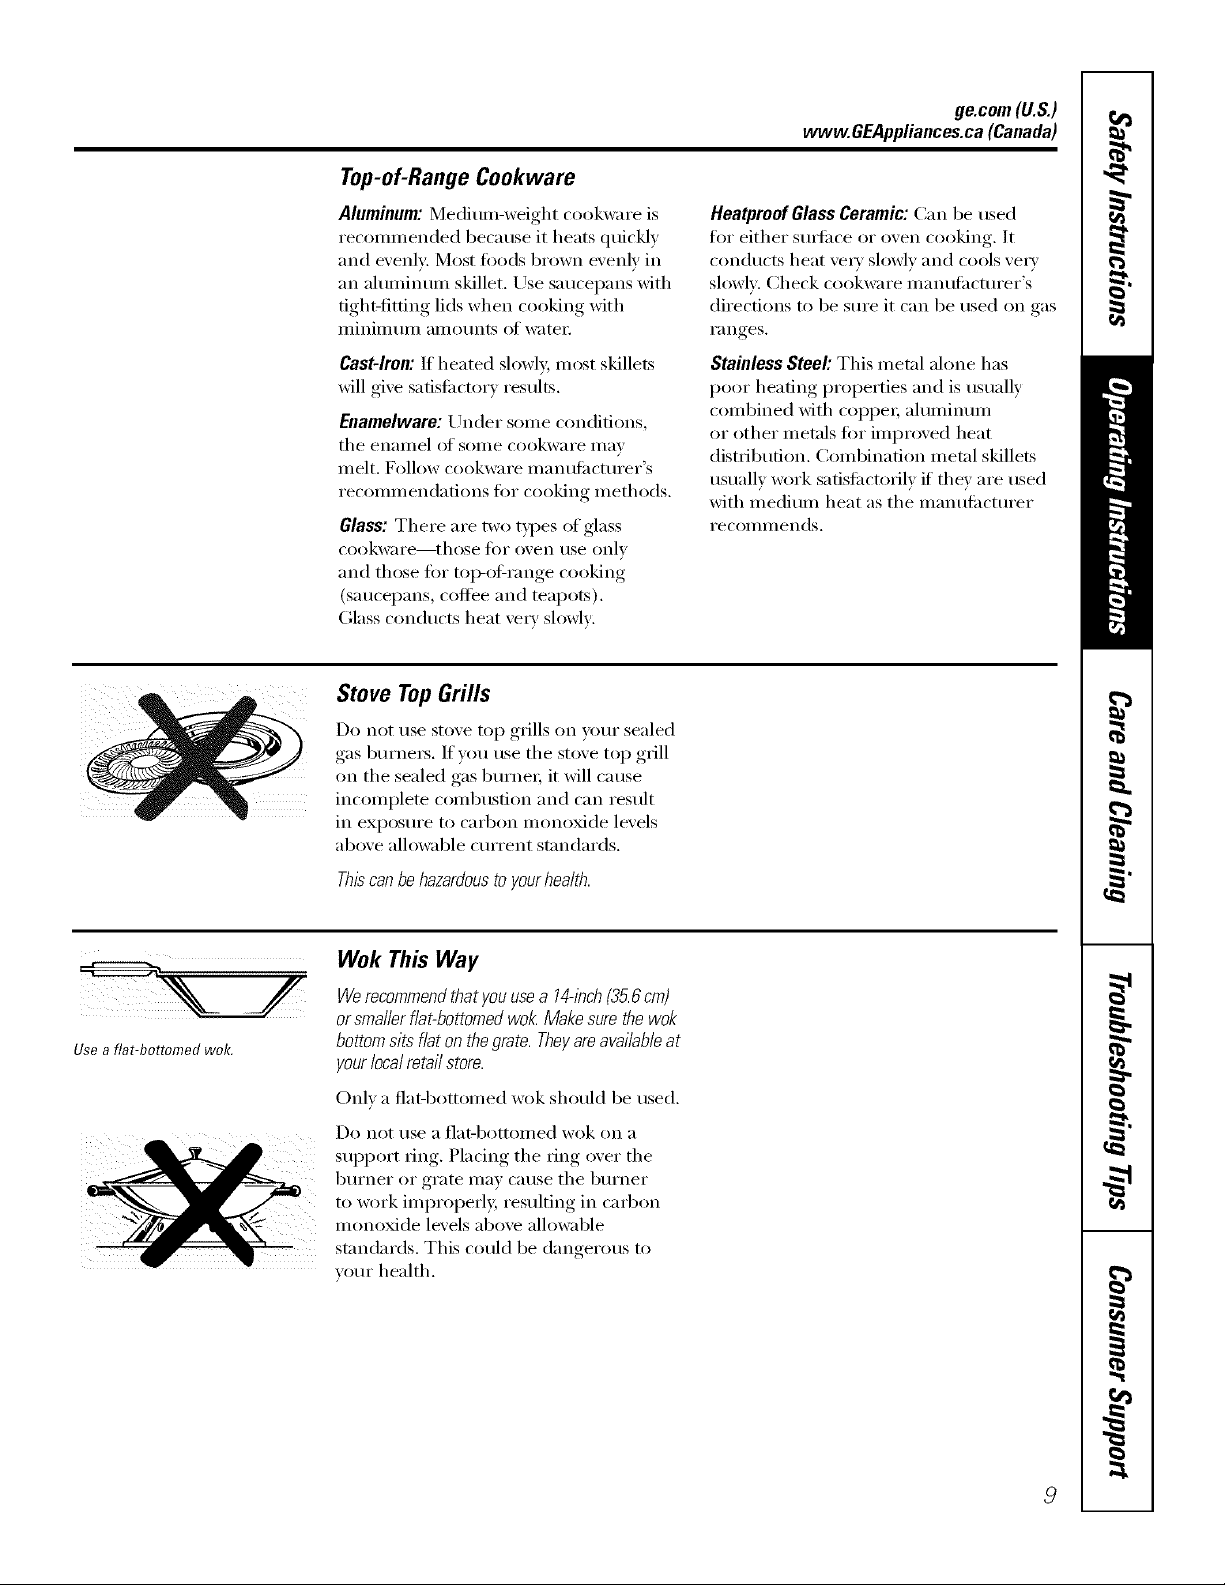
Stove TopGrills
Do not use stove top giills on your sealed
gas burners. If' you use tile st_)ve top grill
on tile sealed gas burne_; it will cause
incomplem combustion and can result
in exposure to carbon monoxide levels
above allowable current standards.
Thiscanbehazardousto yourhealth.
Use aflat-bottomed wok.
Wok This Way
Werecommendthatyouusea 14-inch{35.6cm)
orsmallerflat-bottomedwok Makesurethewok
bottomsits flat on thegrate.Theyareavailableat
yourlocalretailstore.
Onh a fiat-bottomed wok should be used.
Do not rise a []at-bottoi//ed wok on a
support _ing. Placing tile ring over tile
burner or grate inay cause tile burner
to work improperly, resulting in carbon
monoxide levels abo_e allowable
standards. This could be dangerous to
veto" health.
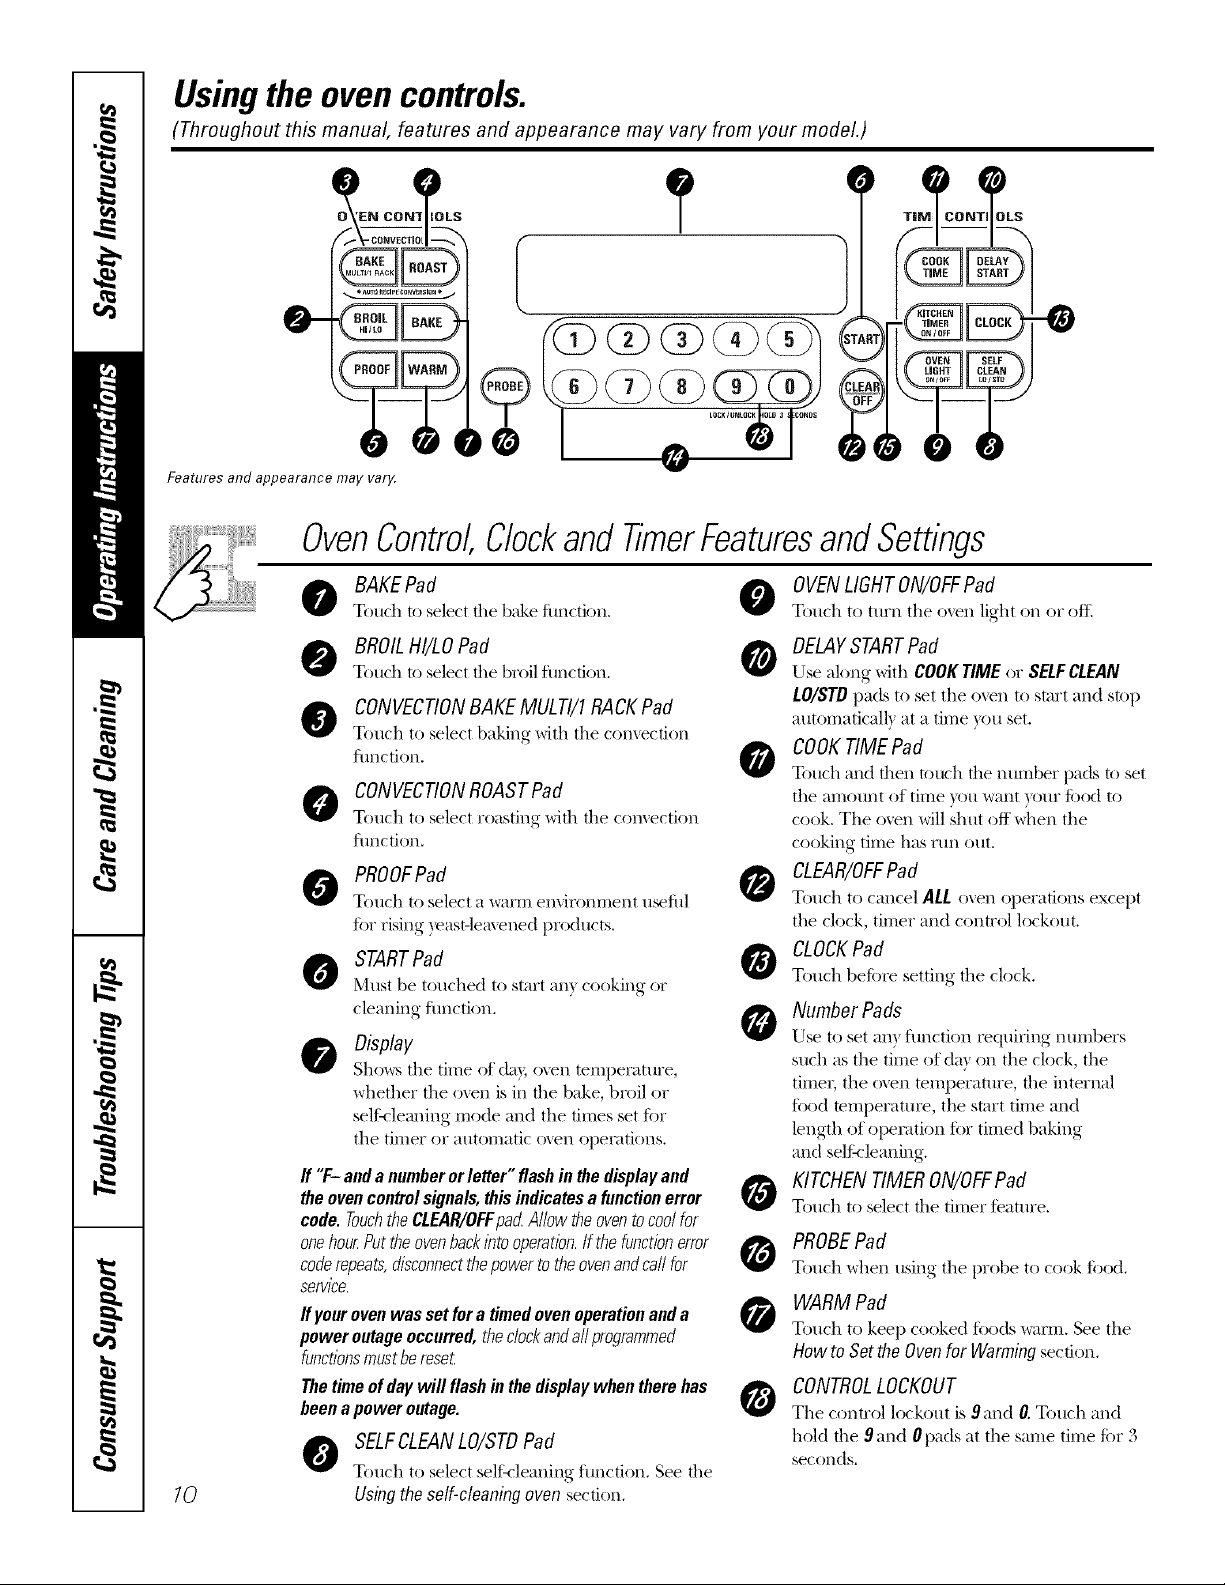
Usingthe ovencontrols.
(Throughout this manual, features and appearance may vary from your model.)
elO_'EN CO NI_O LS t_
_ AUI_ _CIPE CO_ERSlQN *
Features and appearance may var_¢
-0
10
OvenControl,Clockand TimerFeaturesand Settings
BAKEPad 0
Touch to select tile b;&e fimction.
@ BROILHI/LOPad 0
Touch to select tile broil function,
CONVECTIONBAKEMULTI/1RACKPad
Touch to select baking with the comection
function,
CONVECTIONROASTPad
Touch to select roasting with tile comection
function,
PROOFPad
Touch to select a warm en'dronment u_ful
fi)r rising,, veast-lemened,.... [)roducts,,
STARTPad
M_tlst be totwhed to start an} cooking or
cleaning function,
Display
Sho_,_s tile time of da); oven teillperattlre,
whether the oven is in the bake, broil or
self:_'lemfing mode and the times set fi)r
the timer or autonaatic oxen opeiatk)ns.
O
ff "F- and a number or letter" flash in thedisplay and
the oven controlsignals, thisindicates afunctionerror
code.Touchthe CLEAR/OFFpa_ Allow the oventocool for
onehour.Puttheovenbackintooperation,ifthe functionerror
coderepeats,disconnectthepower to theovenandcallfor
service.
ffyour oven was set for atimed oven operationanda
poweroutageoccurred, theclockandallprogrammed
functionsmustbe rese_
Thetime of day will flashin the display when there has
been a power outage.
SELFCLEANLO/STDPad
Touch to select selik-leaning fimction. See tile
Using the self-cleaning oven section.
OVENLIGHTON/OFFPad
Touch to tm'n tile oven light on or oftl
DELAYSTARTPad
Use along with COOKTIME or SELFCLEAN
LO/STD I/ads to set the o',_n to start and stop
automatical b at a time you set.
COOKTIME Pad
Touch and then touch the nunlber pads to set
the amount of time you want your food to
cook. The ()veil will shut off when the
cooking time has Yt]n ()hit.
CLEAR/OFFPad
Touch to cancel ALL oven oilerafions except
tile clock, timer and control lockout.
CLOCKPad
Touch befi)re setting the clock.
Number Pads
Use to set an} flmction requiring nmnbers
such as the time of da) on the clock, the
timei; the o_en temperatm'e, the internal
filed temperatm'e, the start time and
length of opeiation fi)r timed baking
and sellqleaning.
KITCHEN TIMERON/OFFPad
Touch to select the timer teatm'e.
PROBEPad
Touch when using tile probe to cook fbod.
WARMPad
Touch to keep cooked tbods warm. See tile
How to Setthe Ovenfor Warmingsection,
CONTROLLOCKOUT
The control lockout is 9and O.Touch and
hold the 9 and 0 pads at the same time for 3
seconds,
ge.com (U.S.)
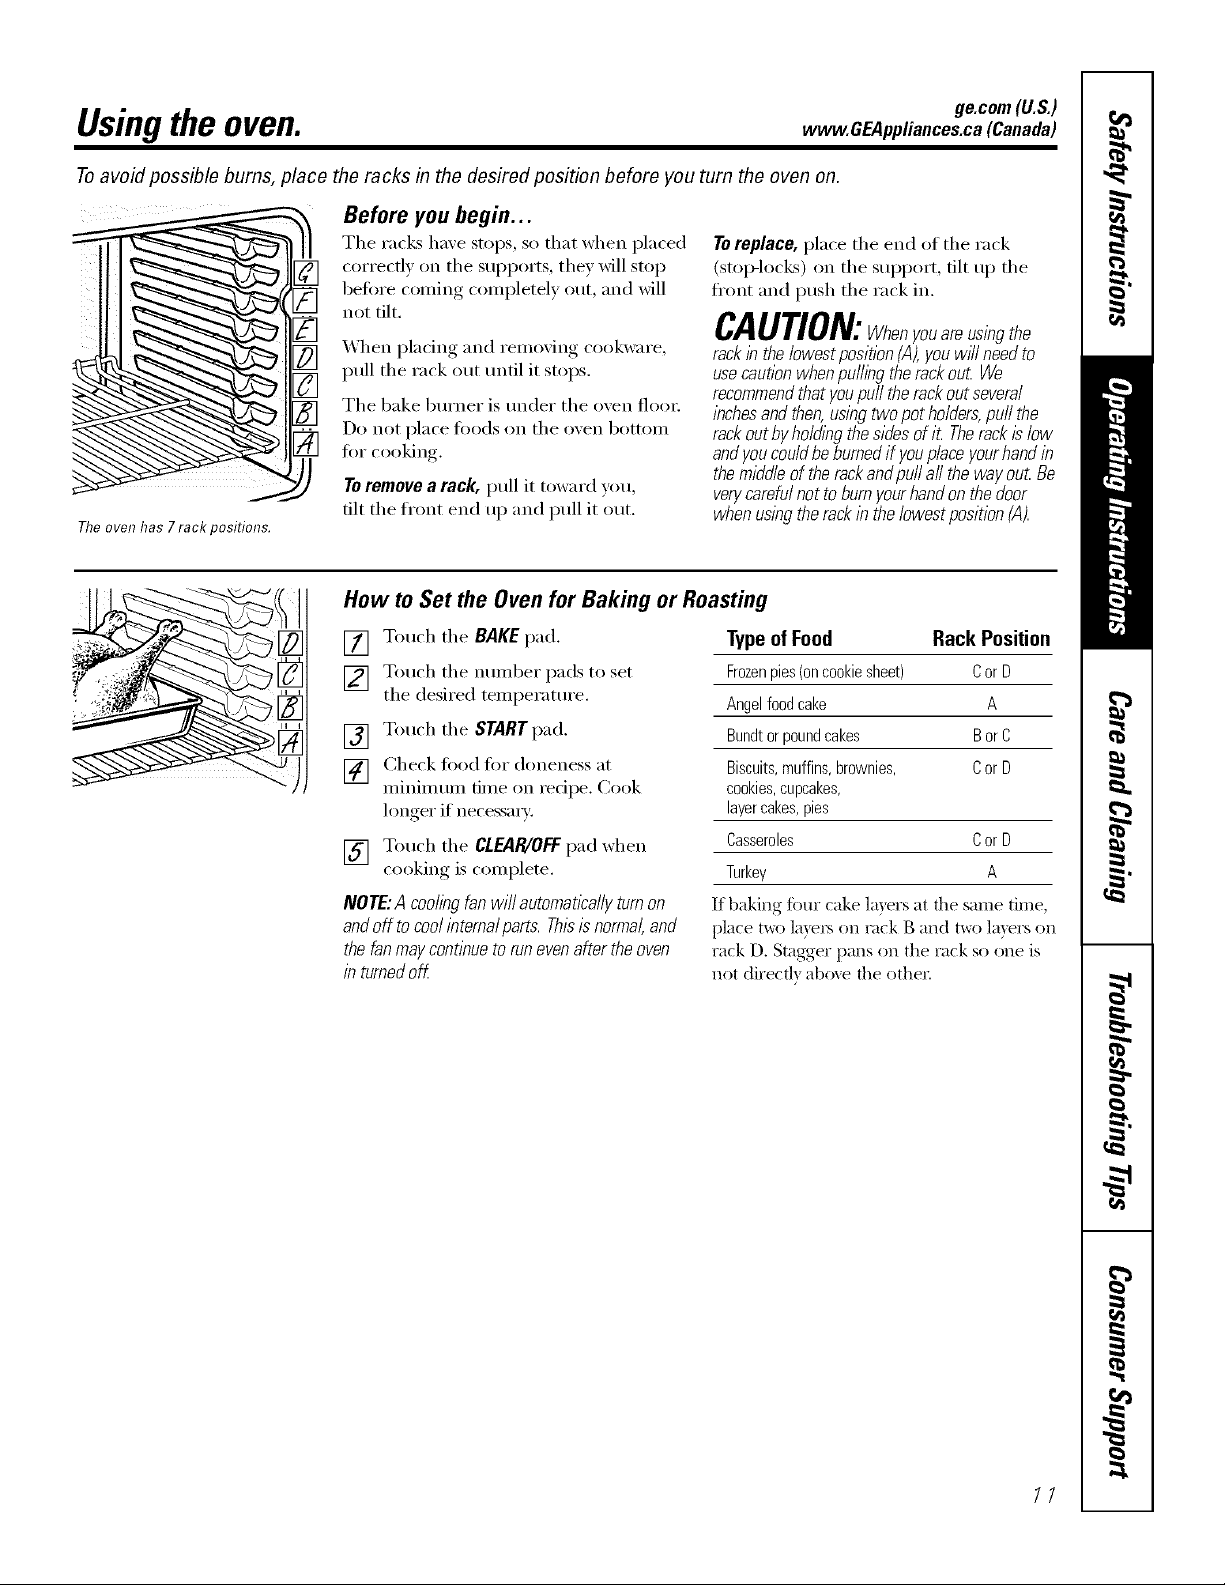
Using the oven. vvvvw.OEAppliances.ca(Canada)
Toavoid possible bums, place the racks in the desired position before youturn the oven on.
Theovenhas 7 rack positions.
Before you begin...
The racks have stops, so that when placed
correctly on the supports, they will stop
before coming completely out, and will
not tilt.
_A]/en placing and removing cookware,
pull the rack out until it stops.
The bake burner is under the oven floo_:
Do not place toods on the oven bottom
fi)r cooking.
Toremove a rack, pull it toward you,
tilt the ti'ont end up and pull it out.
To replace, place the end of the rack
(stop-loci<s) on the support, tilt up the
fl'ont and push the rack in.
CAUTION:Whenyouareusingthe
rackin thelowestposition (,4),you wffl need to
use cautionwhenpulling therackout We
recommendthatyou puff the rackoutseveral
inchesand then, using two pot holders,puff the
rackoutby ho/dingthe sides ofit The rackislow
and youcouldbeburned if you placeyourhandin
the middle of therack and pu// a//the way out Be
verycarefulnot to burn your hand onthe door
when using therackin the/owestposition (A).
How to Set the Oven for Baking or Roasting
[] Touch the BAKEpad.
[] Touch the numl)er pads to set
the desired temperature.
[] Touch the START pad.
[] Check fi)od fin" doneness at
minimum time on recipe. Cook
longer if necessmT:
[] Touch the CLEAR/OFFpad when
cooking is complete.
NOTE:A coolingfanwill automaticallyturnon
andoff tocoolinternalparts.Thisisnormal,and
the fanmaycontinueto runevenaftertheoven
in turnedoff
Typeof Food RackPosition
Frozenpies(oncookiesheet) CorD
Angelfoodcake A
Bundtorpoundcakes BorC
Biscuits,muffins,brownies, CorD
cookies,cupcakes,
layercakes,pies
Casseroles CorD
Turkey A
If baking fi)ur cake layers at the same time,
place two la)'e_ on rock B and t_ layers on
rack D. Stagger pans on the rack so one is
not (tirect]} ab_)_e the othe_:
77
Usingthe oven.
Do not place foods directly on tlTe
oven floo_
Preheating and Pan Placement
Preheat the oven if the redpe calls fin" it.
Preheating is necessm T for good results
when baking cakes, cookies, past_T and
breads.
Topreheat,setthe ovenat the correcttemperature.
Thecontrolwill beepwhenthe ovenispreheated
and thedisplay will show yoursettemperature.
Thepreheat time will vary dependingonthe
temperaturesetting.
Baking results will be better if baking
pans are centered in the oven as much
as possible. If baking with more than one
pan, place the pans so each has at least 1"
(2.5 cm) to 1½" (3.8 cm) of air space
around it.
Aluminum Foil
Donotusealuminumfoilon thebottom
of the oven.
Never entirely cover a rack with
ahlIl/intlIll toil. This will disturb tile heat
circulation and result in poor baking.
A smaller sheet of fifil may be used to
catch a spillover b)' placing it on a lower
rack several inches below the fi_od.
Oven Moisture
_&svour oven heats uI), tile temperature
change of the air in the oven may cause
water droplets to titan on tile door glass.
These droplets are hamfless and will
eV[ll)OI'ilte lie tile oven contintles to
heat up.
/2
ge.com(U.S.)
www.GEAppliances.ca(Canada)
Oven Vent
Y_)ur oven is vented through one vent
located toward the rear ot the range, Do
not block this vent when cooking in the
oven--it is important that the flow oI hot
air fl'om the oven and fl'esh air to the
oven burner be uninterrupted, Avoid
touching the vent openings or nearby
surfaces duringoven or broiler operation--
they may become hot
_ Handlesofpots andpansonthecooktopmay
becomehotifleft toodose to thevenL
_ Donot leave plasticitems onthe cooktop--
theymaymelt if left too close tothe venL
;;Ji::Donot leave anyitems onthecooktop. Thehot
air from the vent mayignite flammableitems
and will increasepressure in closed containers,
which may cause them to burst.
_ Metal itemswill become veryhotif theyare
leftonthe cooktop,and could cause burns.
Power Outage
CAUTION: Do not make any attempt to operate
the electric i_?nition oven during an electrical
power failure.
The oven or broiler cmmot be lit dtwing a
power fifilm'e, Gas will not flow tmless the
glow bar is hot.
If the oven is in use when a power fifilm'e
occm_, the oven bm'ner shuts off and
cannot be re-lit tmfil power is restored.
This is bec;mse the flow of gas is
automatically stopped and will not resume
when power is restored tmtil the glow bar
has reached operating temperattu'e.
13
Usingthe oven.
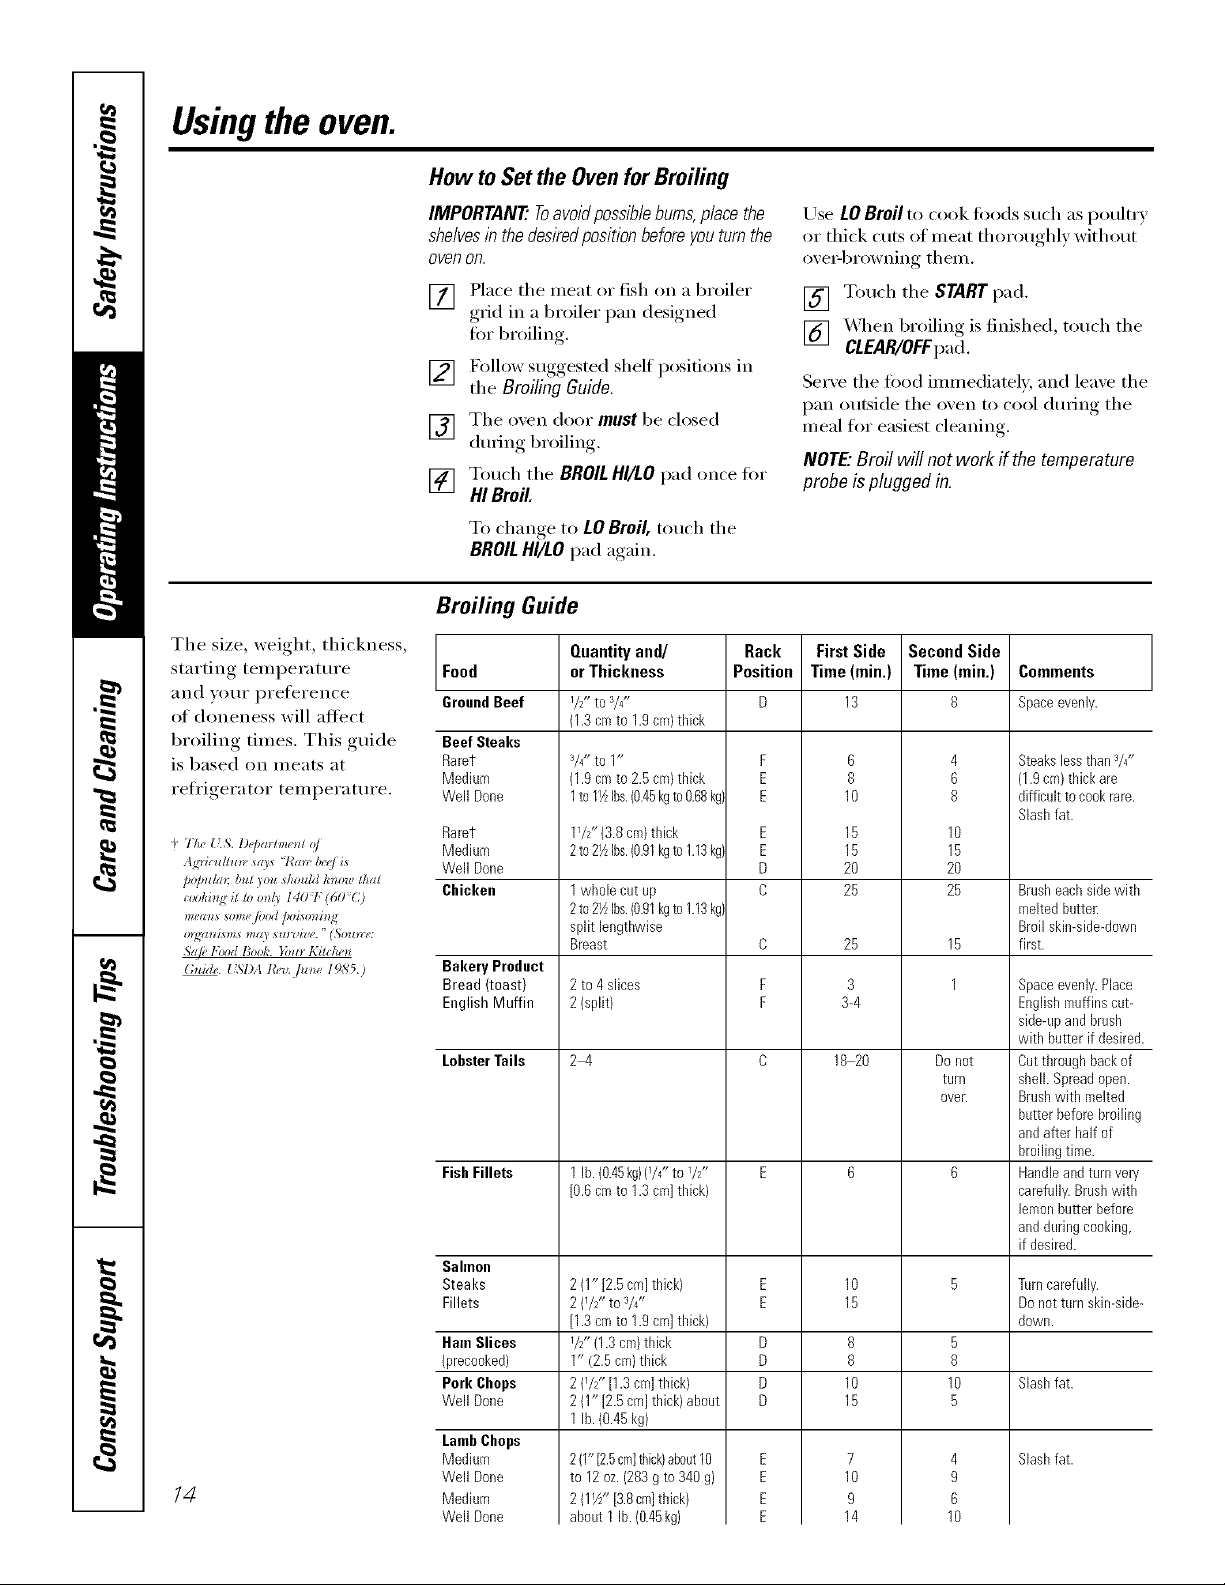
How to Set the Oven for Broiling
IMPORTANT'.Toavoidpossibleburns,placethe
shelvesinthedesiredpositionbeforeyouturnthe
oven on.
[] Place the meat or fish on a broiler
,grid in a broiler I_an designed,
fin" broiling.
[] Folh)wsuocestedshelfposifionsin.,_,_ ....
the Broiling Guide.
[] The o_en door must be closed
dtwing broiling.
[] Touch the BROILHI/LOpad once fin.
HIBroil.
Use LO Broil to cook fi)ods such as poultr}
or thick cuts of meat thoroughl)without
ox e>browning them.
[] Touch the START pad.
[] _,_q_en broiling is finished, touch the
CLEAR/OFFpad.
Serve the fi)od immediately, and leave the
pan outside the oxen to cool dufim*_ the
meal for easiest cleaning.
NOTE'.Broil willnot work ff thetemperature
probeispluggedin.
To change to LOBroil, touch the
BROILHI/LO pad again.
Broiling Guide
The size, weight, thickness,
starting temperature Food
}lIld _OtlI" preference GroundBeef
of doneness will affect
broiling times. This guide Beef Steaks
is based on meats at Rarer
Medium
refrigerator temperature. Well Done
+ 77w{L';. l)@a_lm_l o/
tg'dcuflun, *((/* '7{awb*'_Jis
po/mlm; but )ou shouM /mow thai
ciJi)lli_gitloon/3 140<T(60%)
means *ome/vM poisonin,<
19_{_1721SItlS ltl(ll S_LI'IJ_P('. ' (*%l)_tt_':
Sdf!, l,'_d Book. }bu_ Kilche_
Guide. [ SI)A t&l,.flz_** 19,S'5.)
Rarer
Medium
Well Done
Chicken
Bakery Product
Bread (toast)
English Muffin
LobsterTails
FishFillets
Sahnon
Steaks
Fillets
HamSlices
(precooked)
Pork Chops
Well Done
LambChops
Medium
Well Done
Medium
Well Done
/4
Quantityand/
or Thickness
l/z- to a/4"
(1.3cmto 1.9cm}thick
3/4"to 1"
(1.9cmto 2.5 cm)thick
1to 1_ Ibs.(0.45kgto0.68kg)
11/2"(3.8cm)thick
2 to21AIbs.(0.91kgto1.13kg)
1 wholecut up
2 to21_Ibs.(0.91kgto1.13kg)
spilt lengthwise
Breast
2to 4 slices
2(split}
2_
1 lb. (0.45kg}(1/4"to I/2"
[0.6 cmto 1.3 cm]thick)
2(1" [2.5 cm]thick)
2 (1/2" toV4"
[1.3 cmto 1.9 cm]thick)
1/2"(1.3ca/)thick
1" (2.5 cm)thick
2(72" [1.3cm]thick)
2(1" [2.5 cln] thick} about
1 lb. (0.45kg)
2 (10[2.5cmlthick)about10
to 12oz.(283 g to 340 g)
2 (11//' [3.8cm]thick)
about 1lb.(0.45kg)
Rack
Position
F
E
E
E
E
D
D
C
F
F
D
D
D
D
FirstSide
Time (min.)
13
6
8
10
15
15
2O
25
25
3
3-4
18 20
8
8
10
15
7
10
9
14
Second Side
Time (rain.)
8
4
6
8
10
15
2O
25
15
1
Do not
turn
OVer.
5
8
10
5
4
9
6
10
Comments
Spaceevenly.
BteakslessthanS/4"
(1.9cm)thickare
difficultto cookrare.
Slashfat.
Brusheachsidewith
meltedbutter.
Broilskimsidedown
first.
Spaceevenly.Place
Englishmuffins cat-
side-@and brush
with butter if desired.
Cut throughback of
shell. Spreadopen.
Brushwith melted
batter beforebroiling
and afterMf of
broilingtime.
Handleandtam very
carefully.Brushwith
lemonbutterbefore
and daringcooking,
if desired.
Turncarefully.
Donot turnskin-side-
down.
Slashfat.
Slashfat.
ge.com (U.S.)
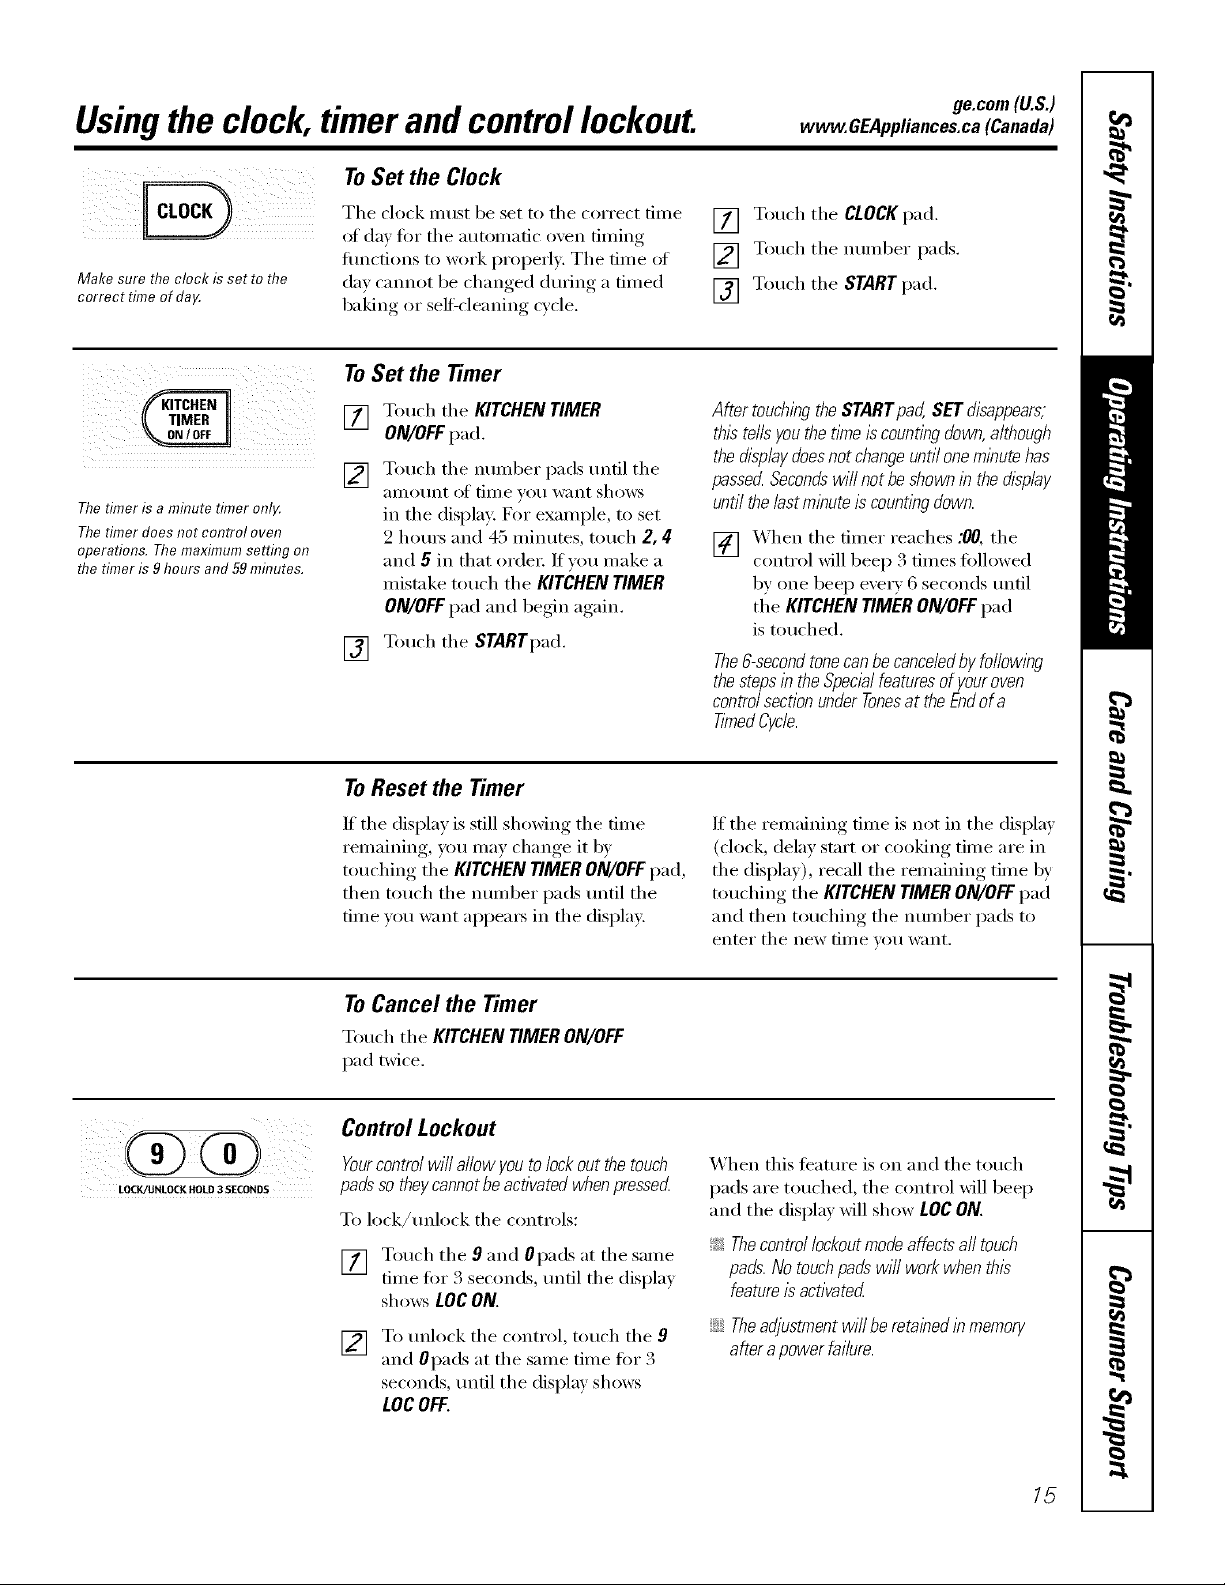
Using the clock, timer and control lockout, www.GEAppliances.ca(Canada)
iii ili i Iii
Make sure the clock is set to the
correct time of da_
ToSet the Clock
The dock must be set to tile correct time
of day fin" tile autonmfic oven tinting
flmctions to work properly. Tile time ot
da)' cannot be changed during a timed
baking or self:cleaning cycle.
[] Touch tile CLOCK pad.
[] Touch tile number pads.
[] Touch the START pad.
[]
Thet#ner is aminutetimer onl_
Thetimer doesnot control oven
operations. Themaximumsetting on
the timer is9 hours and 59mhTutes.
ToSet the Timer
Touch tile KITCHENTIMER
ON/OFFpad.
Touch tile nmnber pads tmfil tile
_lIIlO//nt of time yet] want shows
in tile display: For example, to set
2 hems and 45 minutes, touch 2, 4
and 5 in that order: If you make a
mistake touch tile KITCHEN TIMER
ON/OFFpad and begin again.
[] Touch tile STARTpad.
AftertouchingtheSTARTpad,SETdisappears,
thistellsyouthetl_neis countingdown,although
thedisplaydoesnot changeuntiloneminutehas
passedSecondswi//notbe shownin thedisplay
untilthe/astmbute iscountbgdown.
[] _'_hen tile timer reaches :00, tile
control will beep 3 times fbllowed
by one beep eve_ T 6 seconds tmtil
tile KITCHENTIMERON/OFFpad
is touched.
The&secondtonecanbe cance/edby fo//owlbg
thestepsin theSpecialfeaturesof youroven
controlsectionunderTonesattheEndofa
TimedCycle.
ToResetthe Timer
If tile display is still shoMng tile time
remaining, you may change it by
touching tile KITCHEN TIMERON/OFF pad,
then touch tile number pads tmtil tile
time you want appea_ in tile display.
If tile remaining time is not in tile display
(dock, delay start or cooking time are in
tile display), recall tile remaining time by
touching tile KITCHEN TIMER ON/OFFpad
and then touching tile number pads to
enter tile new [lille VO/I want.
ToCancel the Timer
Touch tile KITCHENTIMERON/OFF
pad twice.
LOCK/UNLOCK HOLD 3 SECONDS
Control Lockout
Yourcontrolwillallowyoutolockout thetouch
padsso theycannotbeactivatedwhenpressecL
To lock/tmlock tile controls:
[] Touch tile 9 and Opads at tile same
time fin 3 seconds, tmtil tile displa)
shows LOCON.
[] To unlock tile control, touch tile 9
and 0pads at tile same time for 3
seconds, until tile display shows
LOCOFF.
When this teatm'e is on and tile touch
pads are touched, tile control will beep
and tile display will show LOCON.
_: Thecontrol lockoutrnode affects all touch
pads. No touchpads will workwhen this
feature isactivated
iJi::Theadjustmentwill beretabedlnmemory
afterapowerfailure.
15
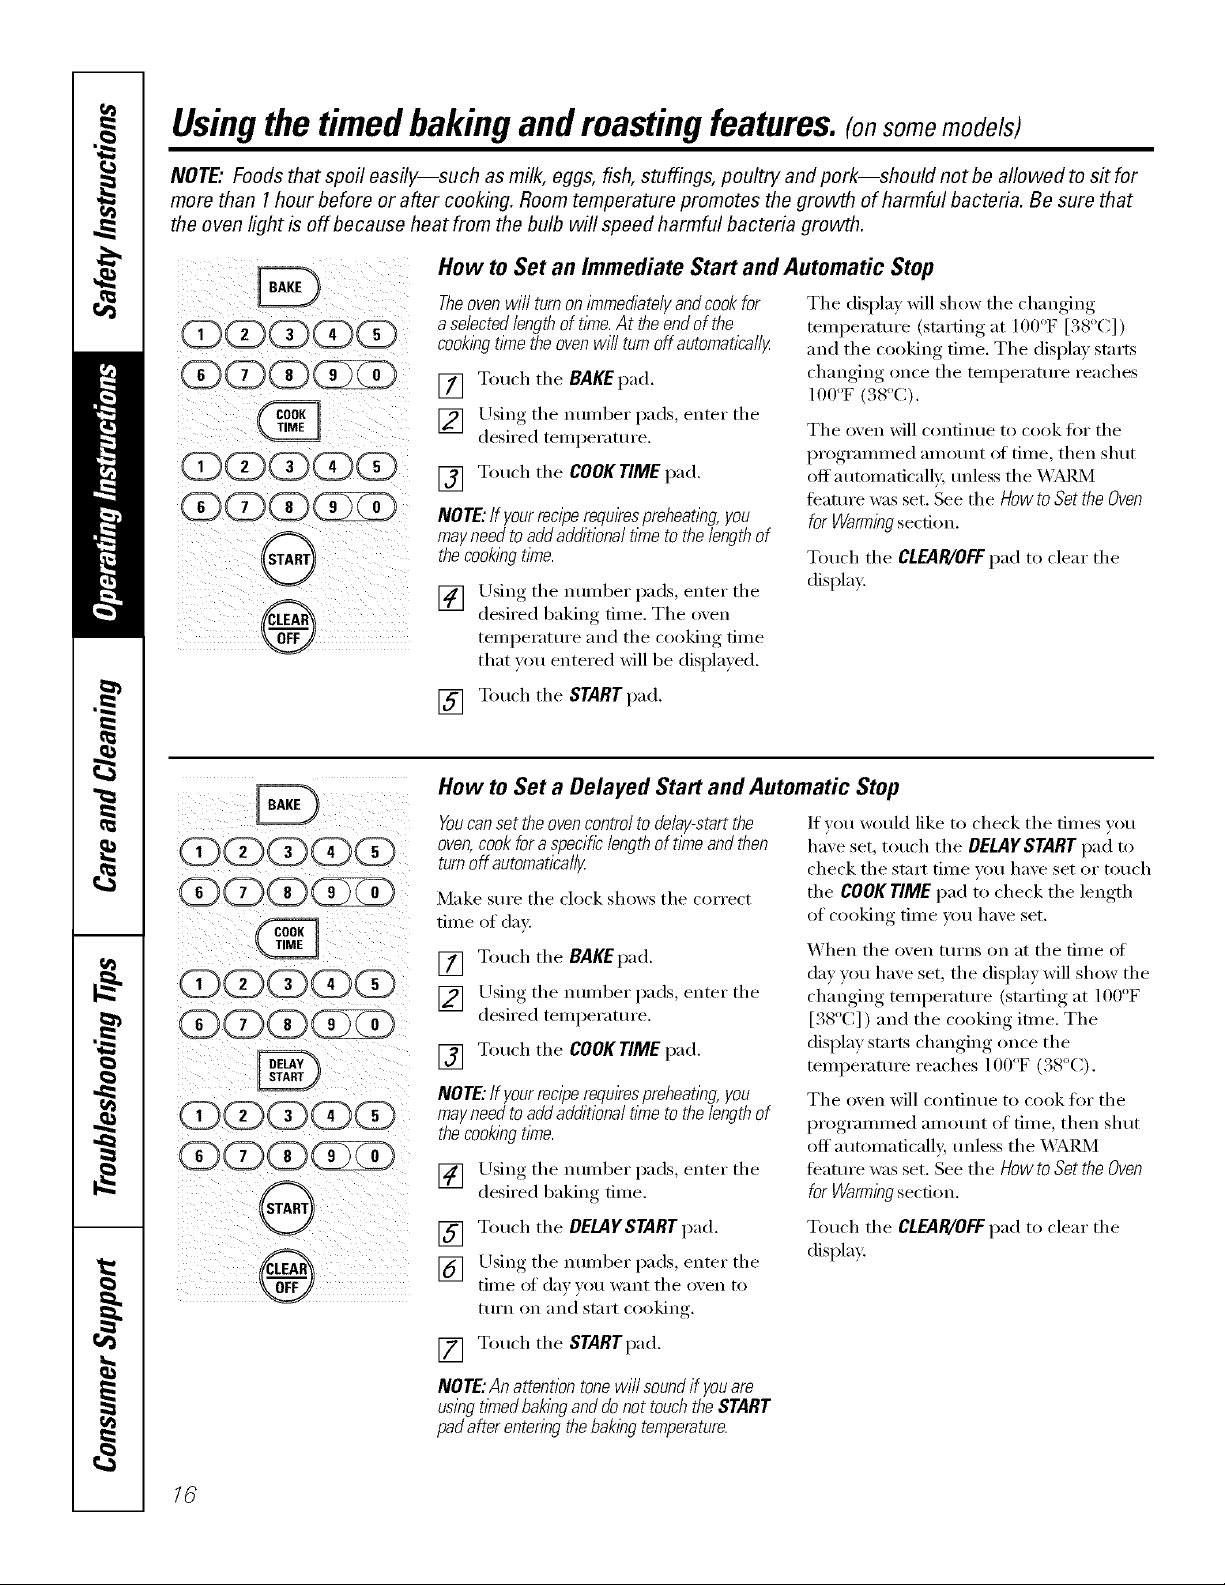
Usingthe timed baking and masting features.(onsomemodels)
NOTE."Foods that spoil easily--such asmilk, eggs, fish,stuffings, poultry and pork--should not be allowed tosit for
more than 1 hour before or after cooking. Room temperature promotes the growth ofharmful bacteria. Be sure that
the ovenlight isoff because heat from the bulb will speed harmful bacteria growth.
How toSet an Immediate Start and Automatic Stop
Theoven will turn on immediately andcookfor
a selectedlength of tlYne.At theend ofthe
cooking t/me theoven wi// turn off automatica//y
[] Touch tile BAKE pad.
[] Using tile number pads, enter tile
desired temperature.
[] Touci/tile COOK TIME pad.
NOTE:/f your recipe requkespreheating,you
may need toaddadditional time to the lengthof
thecooking t/me.
[] Using tile munl)er pads, enter tile
desired baking time. Tile oxen
temperatm'e and tile cooking time
that you entered wiii be dispiayed.
Tile dispiay wiii si/ow tile ckmging
temperature (starting at ] 00°F [38°C])
and tile cooking time. Tile dispiay starts
cimnging once tile temperatm'e reaci/es
IO0°F(.%°C).
Tile oven wili continue to cook tot tile
programmed amo/mt of time, ti/en simt
offautomaficaliy, tmiess the _&]M/M
teature was set. See the How to Set the Oven
for Warming section.
Touci/tile CLEAR/OFFpad to ciear tile
dispiay:
[] Touci/tile STARTpad,
iQ Q00i
How toSet a Delayed Start and Automatic Stop
Youcansettheoven controltodelay-start the
oven, cookfor a specifc lengthoftimeand then
turn offautomafical/g
Make sm'e tile ciock si/ows tile correct
time of day:
[] mouci/tile BAKEpad.
[] Using tile nmnber pads, enter tile
desired temperature.
[] Touci/tile COOKTIME pad,
NOTE:If yourreciperequkespreheating,you
mayneedto addadditionaltimetothelengthof
thecookingrime.
[] Using tile nmnber pads, enter tile
desired baking time.
If _ou wouid like to ci/eck tile times )ou
im',e set, tou(i/tile DELAYSTARTpad to
ci/eck tile stnrt time you im\'e set or tou('i/
tile COOKTIME pad to ci/eck tile iengti/
of COOkiIl_ time VO/I h_l_,e set,
_'_i/en tile o_en ttlrns on at tile time of
(ia) you im_e set, tile dispia)wiil si/ow tile
changing temperatm'e (stnrting at i00°F
[. 8 C] ) and the cooking itme. The
dispim stnrts chanoino once the
temperature reaches i00"F (38°C).
The oxen wili continue to cook for the
programmed amotmt of time, then shut
off automaticali), tmiess the _4 kl_d_/l
teature was set. See the How to Sot the Oven
for Warming section.
[] Touci/tile DELAYSTARTpad.
[] Using tile number pads, enter tile
time of (ia))ou want tile o_en to
[tlI'n on [lIl(i st;Irt cooking,
Touci/tile CLEAR/OFFpad to ciear tile
dispiay:
[] Touci/tile STARTpad.
NOTE: Anattention tone wi// sound if youare
using t/_nedbaking and donottouch the START
pad afterentering thebaking temperature.
16
ge.com (U.S.)
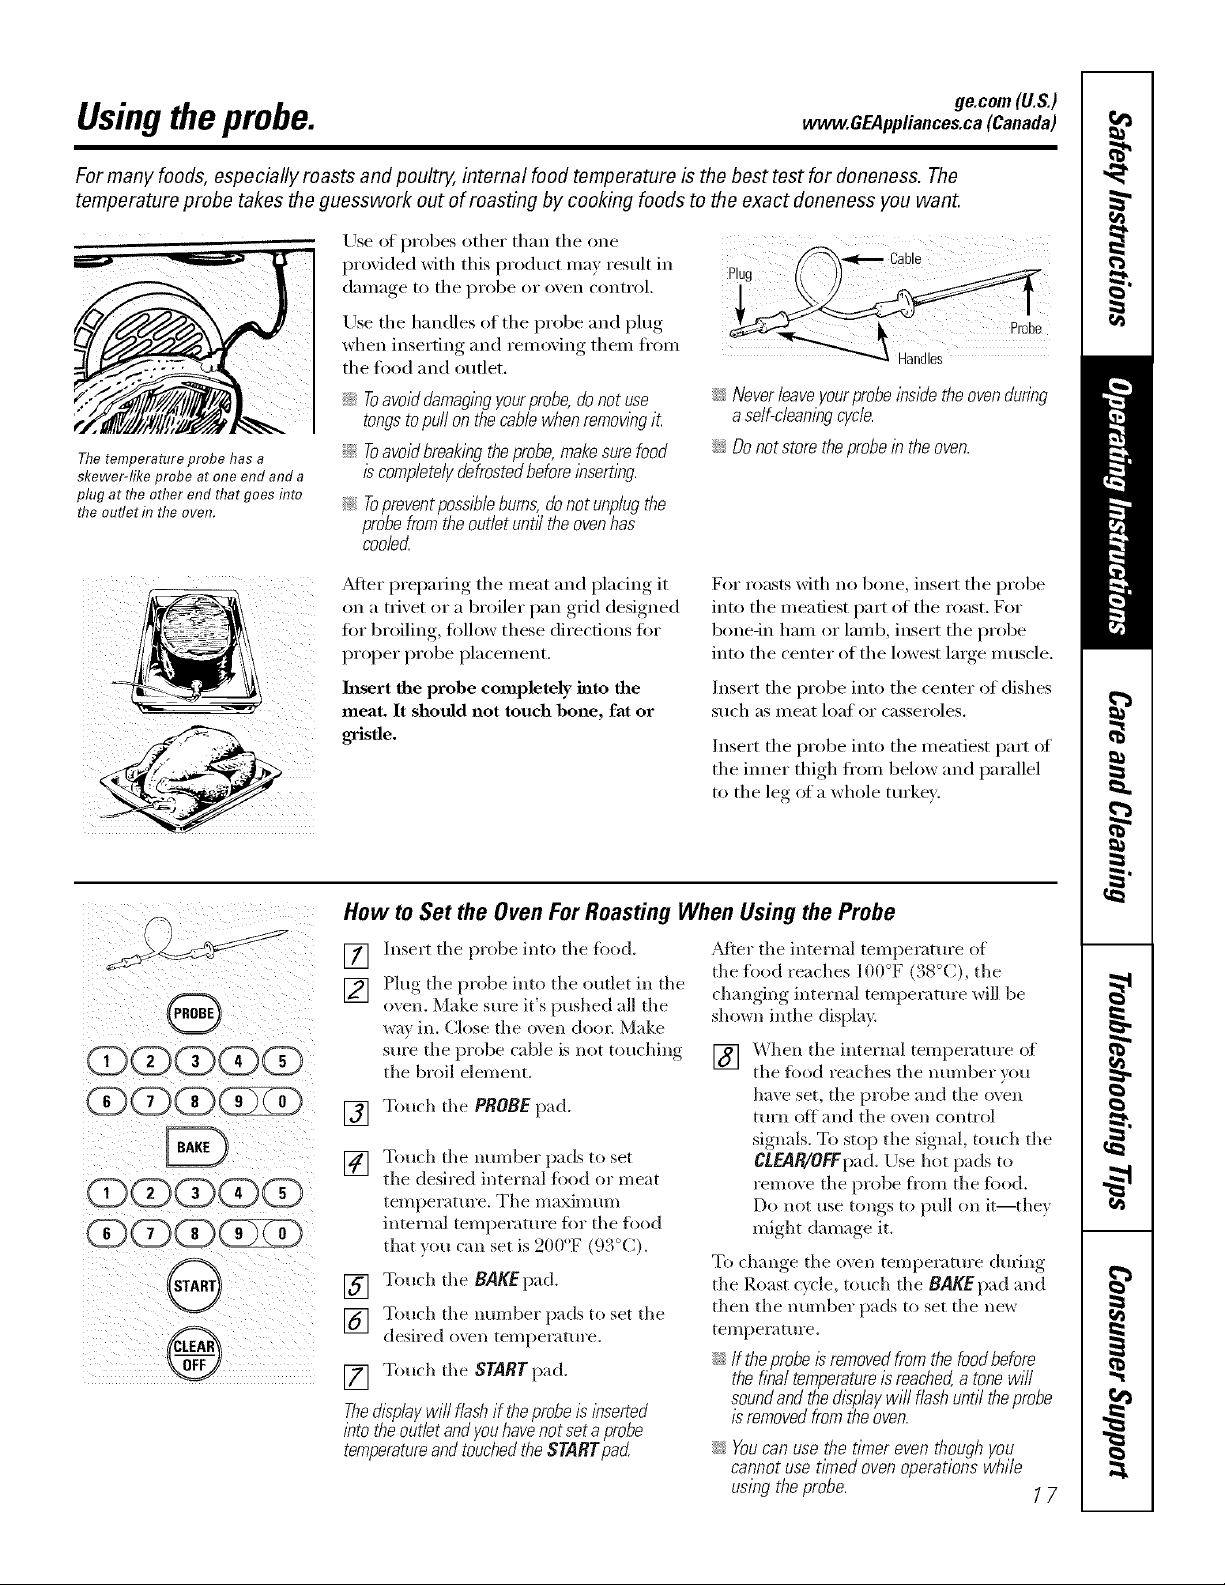
Using theprobe, www.GEAppliances.ca(Canada)
Formany foods, especially roasts and poultry, internal food temperature isthe best test fordoneness. The
temperature probe takes theguesswork out ofroasting bycooking foods to theexact doneness you want.
Thetemperature probe has a
skewer-like probe at one end and a
plug atthe other end that goes flTto
the outlet f17the oven.
Use of probes other than the one
proxided xdth this product ma) result in
daIllage to the pi'obe or o_,en conti'ol,
Use the handles of the probe and plug
when inserting and remoxim* them fl'om
the fi)od and outlet.
::Ji::Toavoiddamagingyourprobe,donot use
tongstopuffonthecablewhenremovingiL
_ilToavoidbreakingtheprobe,makesurefood
iscompletelydefrostedbeforeinserting.
Toprevent possible bums, do not unplug the
probe fromthe ouflet unt/7theovenhas
cooled
_ Cable
iJi::Neverleaveyourprobe /bs/detheovenduring
a self-cleaning cycle.
iJi::Donot storetheprobe in theoven.
_Mter preparing the meat and placing it
on a trivet or a broiler pan grid designed
tor broiling, follow these directions for
proper probe placement.
Insert the probe completely into the
meat. It should not touch bone, fat or
For masts with no bone, insert the probe
into the meatiest part of the roast. For
bone-in ham or lamb, insert the probe
into the center of the lowest lmge muscle.
Inse_t the probe into the center of dishes
Stlch as Illeat loat or casseroles.
Insert the probe into the meatiest part of
the inner thigh fi'om below and parallel
to the leg of a whole turkey.
O
cv'j(Z)(Z)O)(Z)
How to Set the Oven For Roasting When Using the Probe
[]
[]
]nsell the probe into the fi)od.
Plug the probe into the oudet in the
oven. Make sure it's pushed all the
*_av in. Close the o\en do(n: Make
sure the probe cable is not touching
the broil element.
[] Touch the PROBEpad.
[]
Touch the munber pads to set
the desired internal fi)od or meat
temperature. The maximum
internal temperatm'e fi)r the food
that }ou can set is 900°F (93°C).
[] Touch the BAKEpad.
] Touch the mlmber pads to set fl_e
desired oven temperature.
[] Touch the START pad.
Thed/sp/aywi// f/ash if the probe/s/bserted
/bto theoutletand you have notseta probe
temperatureand touched theSTARTpad
_Mter the internal temperature of
the food reaches 100°F (38°C), the
changing internal temperature will be
shown inthe display.
] _hen the internal temperature of
the fi)od reaches the mlmber ",ou
have set, the probe and the o\ en
turn off and the oven control
signals. To stop the signal, touch the
CLEAWOEEpad.Use hot pads to
remove the probe ,q'om the fi)od.
Do not use tongs to pull on it--fl_ey
might damage it.
To change the oven temperatm'e during
the Roast cycle, totuh the BAKEpad and
then the number pads to set the new
temperature.
iJi::If theprobe/s removedfrom the food before
the tim/temperature is reached,a tone w///
soundand thedisplaywi// flashuntiltheprobe
is removed fromthe oven.
iJi::Youcan usethe timereventhoughyou
cannotuset/Ynedovenoperationswhile
usingtheprobe. 7 7
Usingthe convectionoven.
Convection Fan
in a convection oven, a fancirculates hot air
over,under and around the foocL
This cimulating hot air isevenly distributed
throughout the oven cavity. As a result, foods
are,evenly cookedand browned--often in less
time with convection heat.
NOTE:The convection tim will cycle on
and off while cooking to best distribute
hot air in the oven.
The convection oven tim shuts offwhen
the oven door is opened.
1-Rack Convection Baking
Tile comection tim circulates tile heated
air evenl_ oxer and around the food.
When convectionbaking with only7 rack,
usetherackpositions recommendedinthe Using
the oven section.
;;Ji::Idealforevenlybrownedbakedfoodscooked
on Irackand forlargefoods.Additionally,
sometimesawbgsmaybenoticed
_ Goodresultswith cookies,biscuits,muffins,
brownies,cupcakes,creampuffs,sweetrails,
angelfoodcakeandbreacL
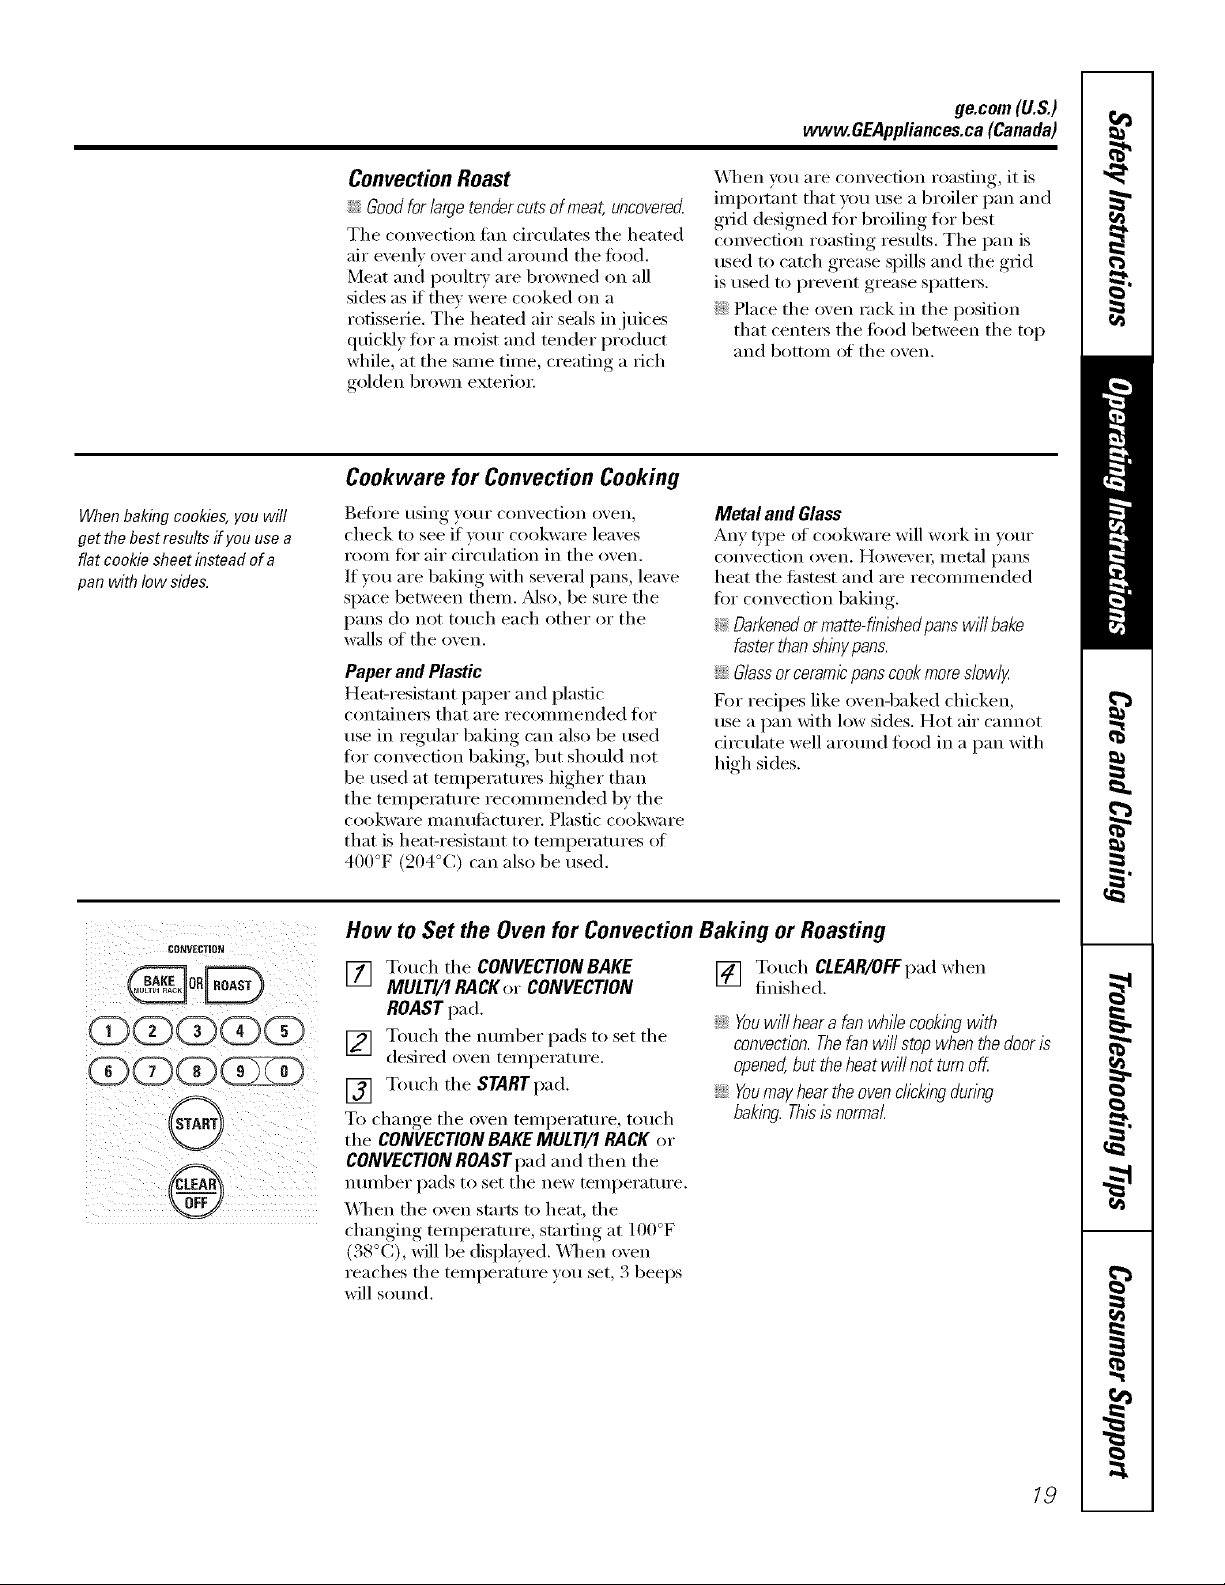
Multi-rack position.
Multi-Rack Convection Baking
Because heated air is circulated evenly
throughout tile oven, foods can be
baked with excellent results using
multiple racks.
Multi-rack baking may increase cook times
slightly fin"some fi)ods, but tile overall
result is time saved. (_ookies, mttflins,
biscuits, and other quick breads give
good results with m ulfi-mck baking.
_A]/ell baking on 3 racks, place one
rock in the fimrth (D) position, one
in the fifth (E) position and one in
the sixth (F) position. Ifpans will not
fit, use rack positions B, D and E
Adapting Recipes...
Ym can use }our fi_xmite recipes in tile
con_, ection o'_ en.
\\qlen convection baking, tile Auto
Recipe '_ Conversion feature automatically
reduces the set reg-ular baking
teml)erature by tile recommended 25°F
(l 4°C), See Auto Recipe '_ Conversion in
tile Special Features section.
_ Usepan sl2e recommendecL
::Ji::Somepackageibstructions for frozen
cassera/esor main disheshave been
developedusing commercialconvectionovens.
Forbest resultsinthisoven,preheat theoven
and use the temperature onthepackage.
18
Be.corn(U.S.)
www.GEAppliances.ca(Canada)
Convection Roast
_Ji::Goodfor largetender cuts ofmeat,uncovered
Tile convection tim circulates tile heated
air evenly over and around tile fi)od.
Meat and poulti T are browned on all
sides as if they were cooked on a
rotisserie. The heated air seals in juices
quickly fin" a inoist and tender product
while, at the sanie tinie, creating a rich
golden brown exteIJoI:
\4lien x_)u are convection roasting, it is
iinpoitant that you use a broiler pan and
grid designed fi)r broiling fl)r best
convection roasting results. Tile pan is
used to catch grease spills and the grid
is used to prevent grease spattei_.
_Ji::Place the oven rack in the position
that centei_ tile fi)od between tile top
and bottoIll 01' tile ()veil,
When baking cookies, you will
get the best results if you use a
flat cookie sheet instead of a
pan with Iow side&
Cookware for ConvectionCooking
Bet(ii'e rising yo/II" convection oven,
check to see if vour cookware leaves
rodin fi)r air d_'culafion in tile ()veil.
Ifyou are baking with several pans, leave
sp_ce between thein. _Mso, be sure tile
pans do not touch each other or tile
walls ot the ()veil.
Paper and Plastic
Heat-resistant paper and plastic
containei_ that are reconiinended fl)r
use in regular baking can also be used
fi)r convection baking, but should not
be used at teniperatuies higher than
tile teinperature recoinnlended by tile
cookwaI'e ii/[llltililCttli'eY. Plastic cookware
that is heat-resistant to tenlperatuI'es ot
400°F (204°C) can also be used.
Metal and Glass
Any _'pe of cookwai'e will work in w)ur
convection (wen. Uowe\'ei; Illetnl I)}lns
heat tile fi_stest and are reconiinended
fi)r convection baking.
_ Darkenedor matte-finishedpans will bake
fasterthan shiny pans.
;;Ji::Glassorceramicpanscook more s/ow/)z
For recipes like ovenq)aked chicken,
use a pan with low sides. Hot air cannot
drculate well around fi)od in a pan with
high sides.
C81_VECTiOR
(D(Z)C (3)@
@
®
How to Set the Oven for Convection Baking or Roasting
[] Touch tile CONVECTION BAKE
MULTI/1 RACK or CONVECTION
ROASTpad.
[] Touch tile nuinber pads to set tile
desired men teinperature.
[] Touch tile START pad.
To change tile oven teniperature, touch
tile CONVECTIONBAKE MULTI/1 RACK or
CONVECTIONROASTpad and then tile
nuniber pads to set tile new teniperature.
When tile oven starts to heat, tile
changing tenlperature, starting at 100°F
(38°(;), will be displayed. X4]/en oven
reaches the teniperature you set, 3 beeps
will sound.
[] Touch CLEAR/OFFpad when
finished.
;;Ji::Youwill heara fanwhilecookingwith
convection.Thefan will stopwhenthedoor Is
opened,but theheatwill not turnoK
;;J_::Youmayheartheovencrickingdunbg
baklbg.Thisis normal
19
Usingthe timed featuresfor convectioncooking.
Youwill hear a fan while cooking with these features. Thefan will stop when the door& opened, butthe heat
will not turn off.
NOTE: Foods that spoil easily--such asmilk, eggs, fish,stuffings, poultry and pork--should not be aflowed to
s# formore than 1 hour before or after cooking. Room temperature promotes thegrowth ofharmful bacteria.
Be sure that the oven light isoff because heat from thebulb will speed harmful bacteria growth.
CQNVECTION
(D (5) (5)
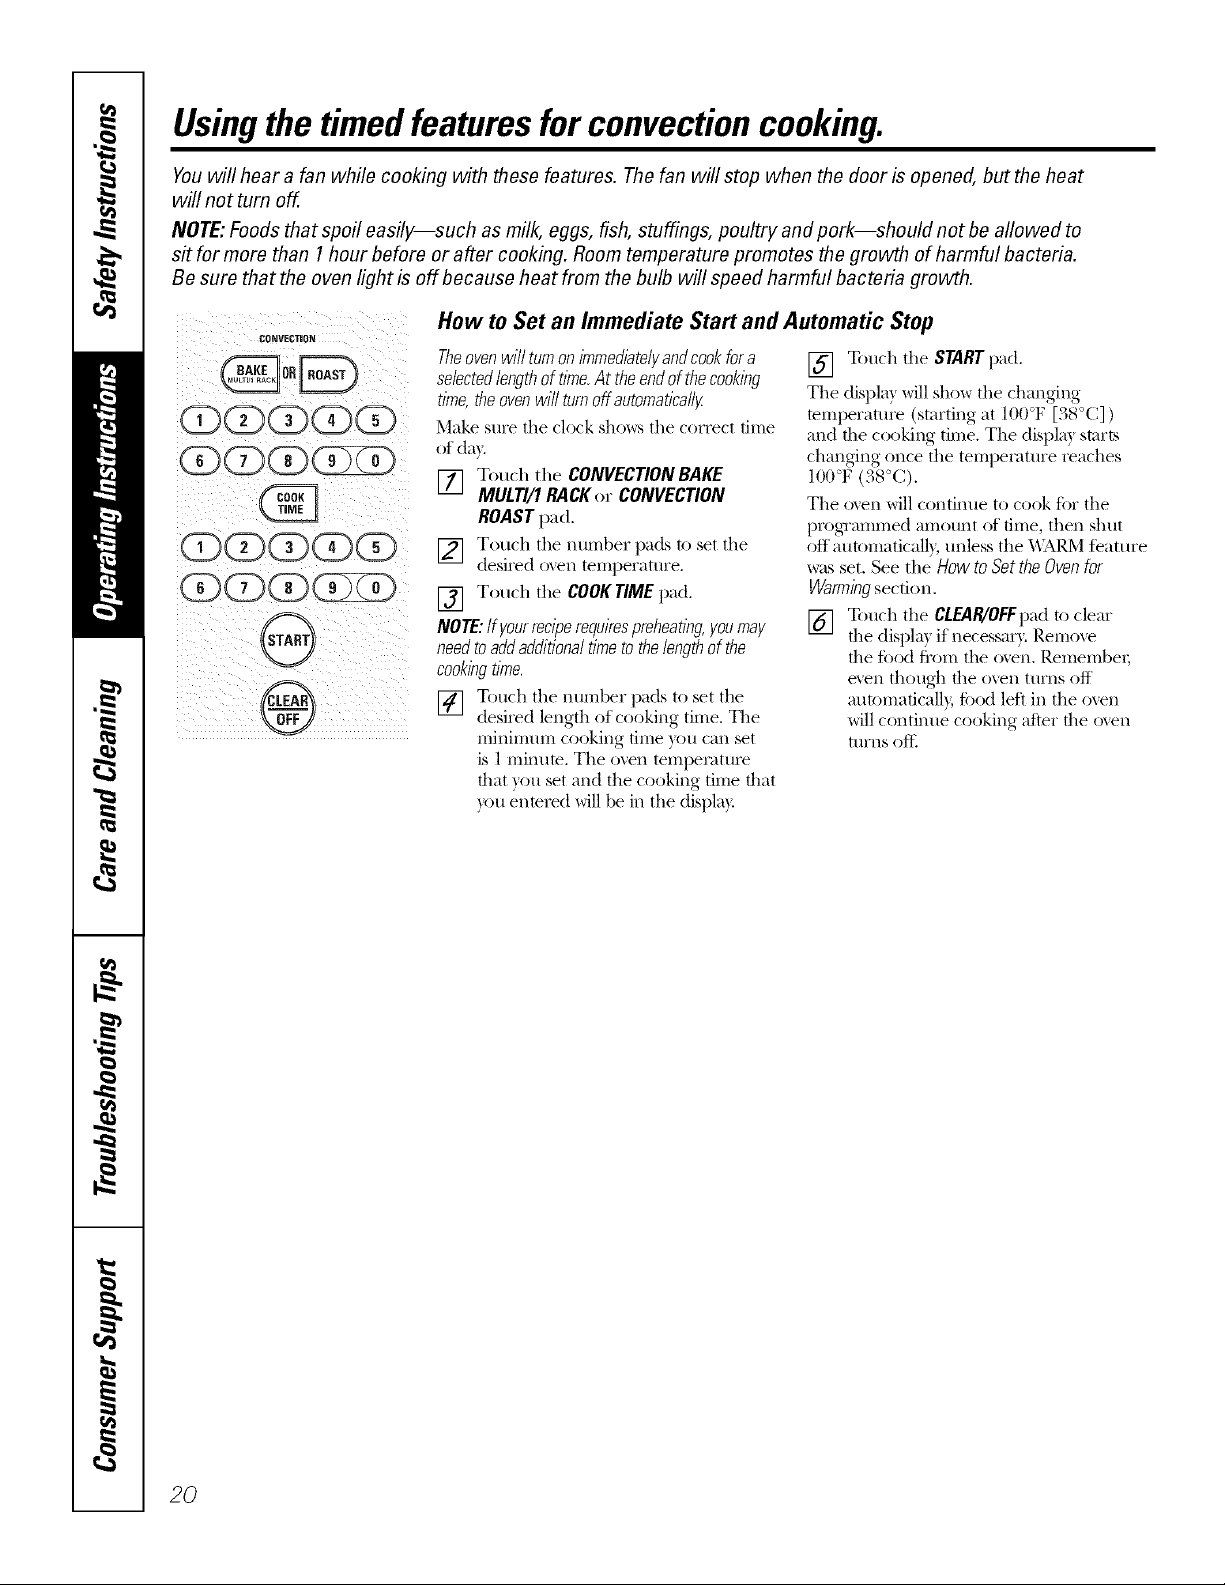
How toSet an Immediate Start and Automatic Stop
Theoven wilfturnon immediate/I/andcook for a
selectedlengthof time.Attheendof thecooking
time,theovenwill turnoffautomatically
Make sure tile clock sho_,_:stile correct time
of day.
[] Touch the CONVECTIONBAKE
MULTI/1RACKor CONVECTION
ROASTpad.
[] Touch tile number pads to set tile
desired o'_en temperattu'e,
[] Touch tile COOK TIME pad.
NOTE: ffgourreciperequirespreheating,you may
need to add additional time to the lengthof the
cookingtime.
[] Totlch tile ntln-lber pads to set tile
desired length of cooking time. Tile
mininmm cooking dine you can set
is 1 minum. Tile oven tempemtm'e
that you set and tile cooking dine that
you enmred will be in tile displa):
[] Touch tile STARTpad,
Tile displa) will show tile changing
temperattwe (starting at 100°F [38°C] )
and file cooking time, Tile displa) starts
changing once tile temperatm'e reaches
100°F (38°C),
Tile o_en will continue to cook ti)r tile
[/i'ogTammed amotmt of time, then shut
off autonmticalb; mlless tile _\IM_,M t_'atm'e
was set. See the How to Set the Oven for
Warmingsection.
[] Touch tile CLEAR/OFFpadto clear
the displa) if necessai T. Remo_e
the ti)od fl'om tile oxen. RemembeI;
e'.en though the ()veil ttlFns off
autonmficall}, ti)od left in tile ()veil
will continue cooking after the o_en
turns oft_
2()
C0_VECTION
G(D(5)(?)(5)
(DG(5)(?
(i)OOOO
G)O(5)
ge.com(U.S.)
www.GEAppliances.ca(Canada)
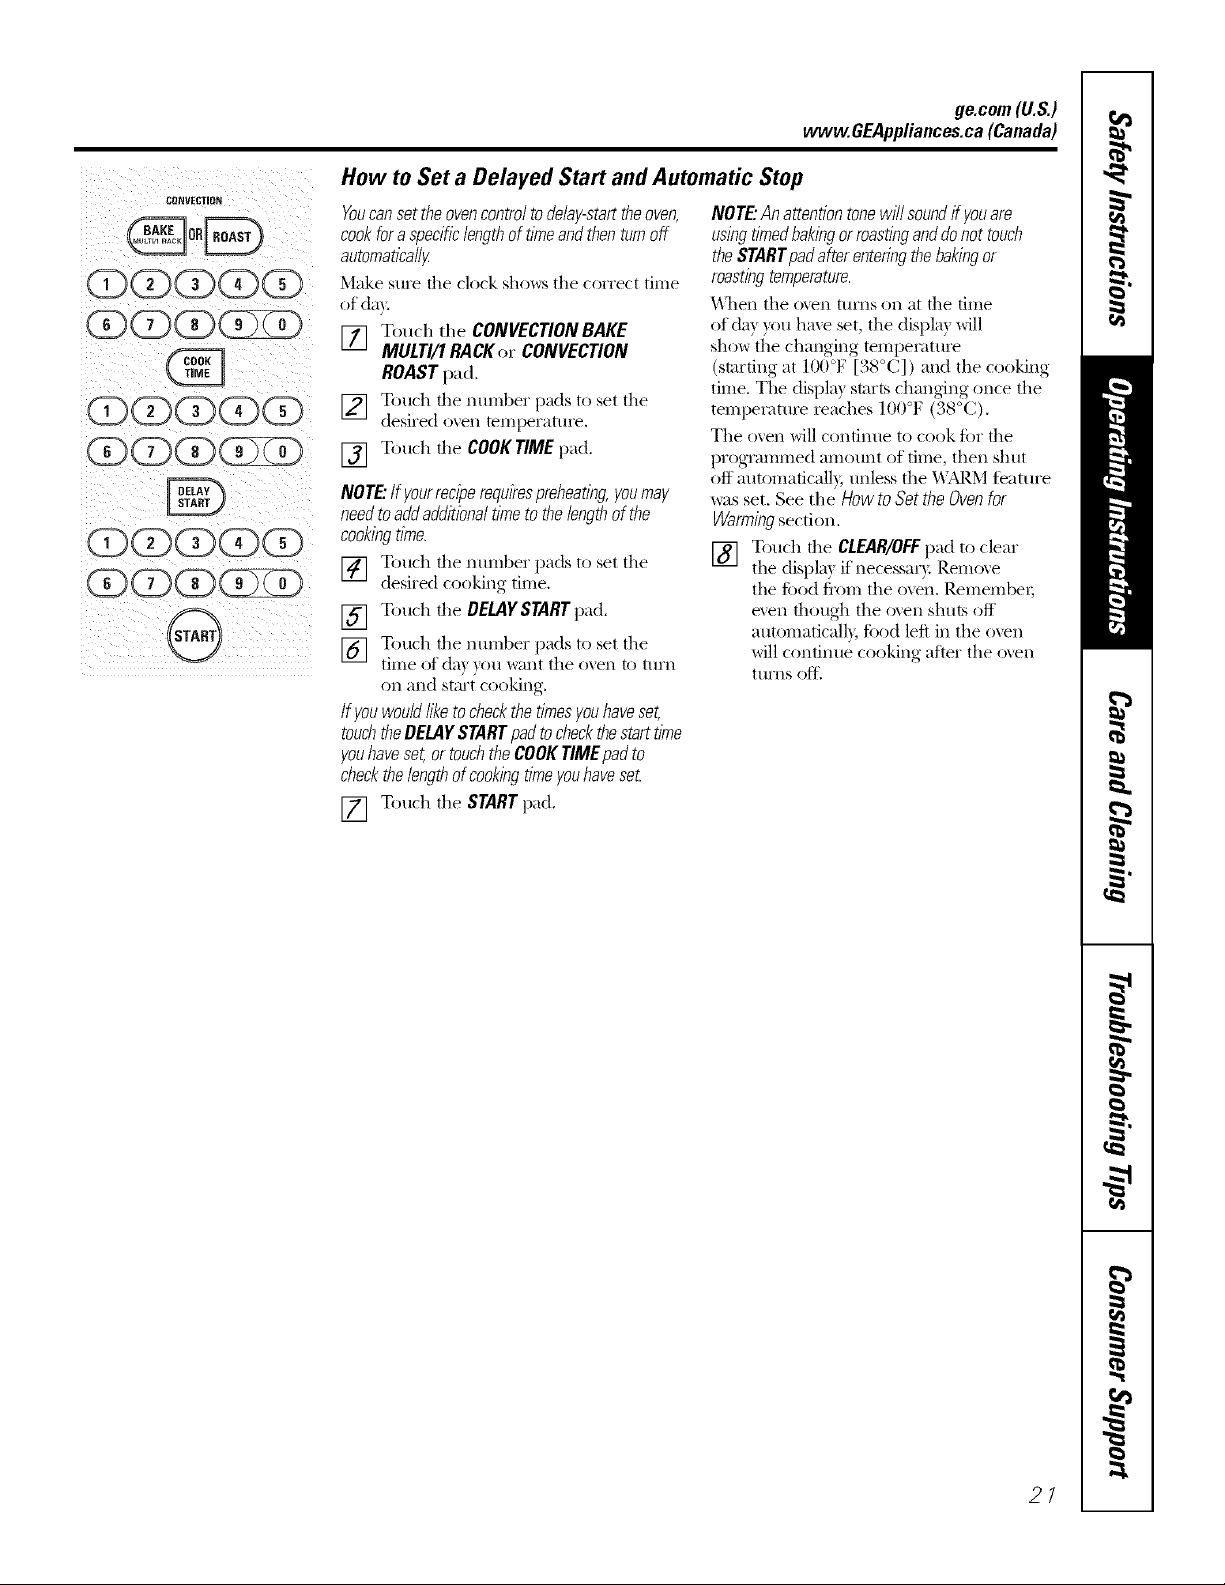
How toSet a Delayed Start and Automatic Stop
Youcanset theovencontrol to delay-startthe oven,
cook fora specificlength of timeand then turnoff
automatically
Make SllI'efile clock sho_s file correct time
of day.
[] Touch the CONVECTIONBAKE
MULTI/1 RACK or CONVECTION
ROAST pad,
[] Touch the nmnber pads to set the
desired oven temperatm'e.
[] Touch the COOKTIMEpad.
NOTE"If yourreciperequirespreheating,youmay
needto add additionaltime to thelengthofthe
cookingtime.
[] Touch the nmnber pads to set the
desired cooking time.
[] Touch the DELAYSTARTpad.
[] Touch the nmnber pads to set the
time of de} )ou want the ()',el1 to tllI'n
on mid stm't cooking.
If youwould like to checkthe timesyouhaveset,
touchtheDELAYSTARTpadto checkthestart time
youhaveset, or touchthe COOKTIMEpad to
checkthelength of cookingtimeyouhavese_
NOTE."Anattention tonewill soundff youare
usingtimedbakingorroastingand do nottouch
the STARTpadafterenteringthebakingor
roastingtemperature.
_'\llen file oven turns on at file tillle
of de)you hme set, the displa)will
show the changing tempemtm'e
(starting at 100°F [38°C]) mid the cooking
time. The displa) starts chinning once the
tempetatm'e reaches 100°F (38°(:).
The oven will confintle to cook tbr the
programmed amount of time, then shut
oft automaficall}, unless the _'\;M_.Mteatm'e
_:ls set. See the How to Set the Oven for
Warming section.
[] Touch the CLEAR/OFFpad to clear
the displa) if necessa_?: Remove
the food fl'om the oven. Remember;
even though the o',en shuts off
automaticalb, ,ti)od left in the oven
will continue cooking after the o',en
ttlrns oII_
[] Touch the START pad.
21
Usingthe convectionoven.
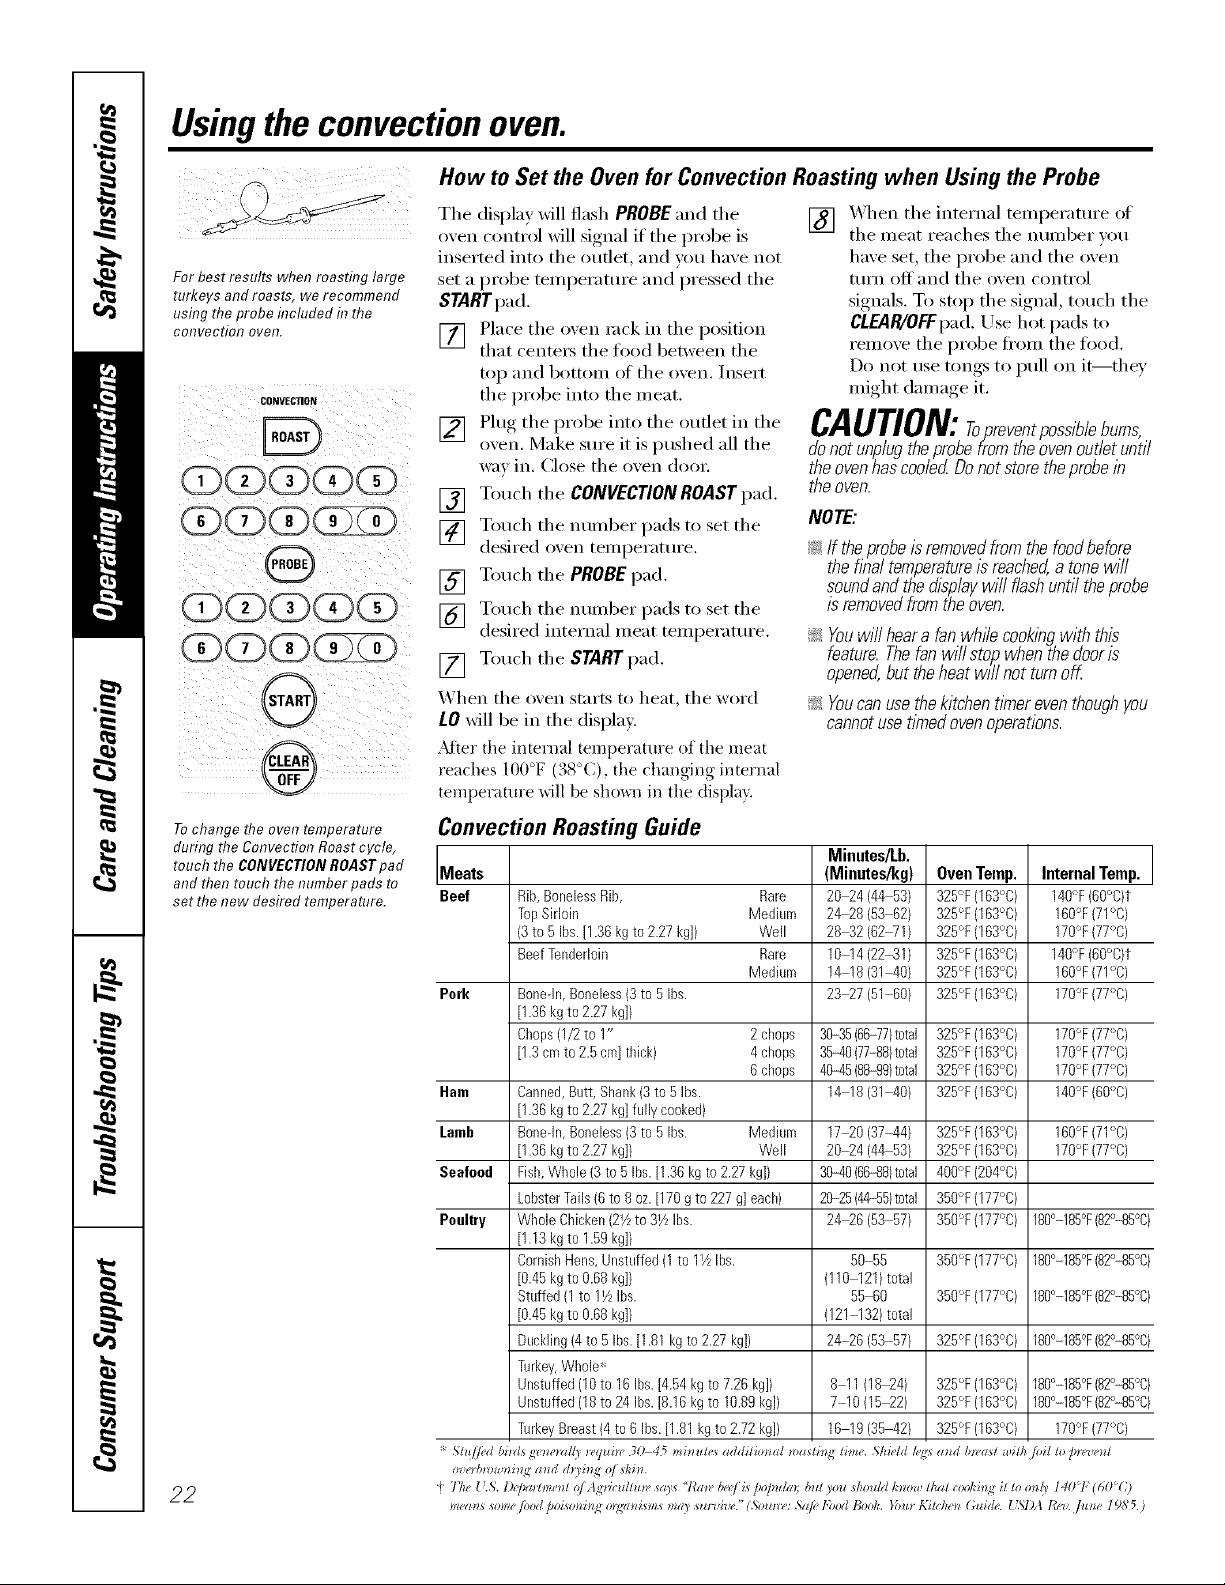
For best results when roasting large
turkeys and roasts, we recommend
usflTg the probe flTcluded t7 the
convection oven.
CONVECTI00
(3X3X3 (
OCGOO
QC(3 (3ZD
®
,®
Tochange theoventemperature
during the ConvectionRoast cycle,
touch the CONVECTIONROASTpad
and then touch the number pads to
set the new desired temperature.
22
How to Set the Oven for Convection Roasting when Using the Probe
The display will flash PROBE and the
oven control will signal if the probe is
inserted into the outlet, and you have not
set a probe temperature and pressed the
STARTpad,
[] Place the oxen Im'k in the position
that centei_ the food between the
top and l)ottom ot the oven. Insert
the probe into the meat.
[] Plug the probe into the outlet in the
oxen. Make sure it is pushed all the
way in. Close the oven dooi:
[] Touch tile CONVECTION ROAST pad,
[] Touch tile munber pads to set tile
desired oxen temperature.
[] Touch tile PROBEpad.
[] Touch tile numl)er pads to set tile
desired internal meat temperature.
[] Touch tile STARTpad.
When tile oven starts to heat, tile word
lO will be in the display.
.Mter the internal temperatm'e of the meat
reaches IO0°F (38°C), the changing internal
temperature will be sho_al in the displa}.
[] X._q/en tile internal temperature of
tile meat reaches tile number xou
have set, the probe and the oven
tuI'n off }lIl(l tile oven conti'ol
signals. To stop the signal, touch the
CLEAR/OFFpad. Use hot pads to
remove tile probe ti'om tile too(l.
Do not use tongs to pull on it--they
might damage it.
CAUTION:ropreventpossiblebums,
donotunplugtheprobefromtheovenoutletuntil
the oven has cooled Do not store the probe/b
the oven.
NOTE:
!i>If theprobeisremovedfromthe foodbefore
thef/haltemperature/sreached,a tonewill
soundandthed/2playwillflashuntil theprobe
is removedfromtheoven.
!i>Youwill heara fanwhffecookingwith this
feature.Thefanwill sto/_whenthedooris
opened,but theheat will notturnoK
!i>Youcanusethekitchent/_nereventhoughyou
cannotusetimedovenoperations.
Convection Roasting Guide
Minutes/Lb.
Meats (Mieutes/kg) Oven Temp. Internal Temp.
Beef Rib,BonelessRib, Rare 20_4 (44 53) 325°F (163°C) 140"F(60°C)t
TopSirloin Medium 24_8 (53 62) 325°F (163°C) 160°F(71°C)
(3to 5Ibs.[1.36kgto2.27 kg]) Well 28_2 (62WI[ 325°F (163°C) 170°F(77°C)
BeefTenderloin Rare 10 14 (2241) 325°F (163°C) 140°F(60°C)t
Medium 14 18 (31_0) 325°F (163°C) 160°F(71°C)
Pork Bonedn,Boneless(3to 5 Ibs. 23_7 (51 60} 325°F (163°C) 170"F(77°C)
[1.36 kgto2.27kg]/
Chops(1/2to 1" 2chops 3035 (66-77)total 325°F (163°C) 170°F(77°C)
[1.3 cmto 2.5 cm]thick) 4chops 36-40(77-88)total 325°F (163°C) 170°F(77°C)
6chops 4%45(88-99)total 325°F (163°C) 170°F(77°C)
Ham Canned,Butt, Shank(3to 5 Ibs. 14 18 (31_0} 325°F (163°C) 140°F(60°C)
[1.36 kgto2.27kg]fully cooked)
Lomb Bonedn,Boneless(3to 5 Ibs. Medium 17_0 (37_4) 325°F (163°C) 160°F(71°C)
[1.36 kgto2.27kg]) Well 20_4 (44 53) 325% (163°C) 170°F(77°C)
Seafeed Fish,Whole(3to5 Ibs.[1.36 kgto 2.27kg]) 36-40(66-88)total 400%(204°C)
LobsterTails(6 to8 oz.[170 g to227g]each) 2025 (4455)total 350°F (177°C)
Poultry Whole Chicken(2Yzto31/LIbs. 24_6 (53 57) 350°F (177°C) 180°-185°F(82°-85%)
[1.13 kgto1.59kg]/
CornishHens,Unstuffed (1to 11/LIbs. 50 55 350°F (177°C) 180°-185°F(82°-85%)
[0.45 kgto0.68kg]) (110121)total
Stuffed(1to11/zIbs. 55 60 350°F (177°C) 180°-185°F(82°-85%)
[0.45 kgto0.68kg]/ (121132)total
Buckling(4to 5Ibs.[1.81kgto2.27 kg]) 24_6 (53 57) 325% (163°C) 180°-185°F(82°-85%)
Turkey,Whole*
Unstuffed (10to 16 Ibs.[4.54 kgto7.26 kg]) 8 11(18_4) 325°F (163°C) 180°-185°F(82°-85%)
Unstuffed (18to24 Ibs.[8.16 kgto 10.89kg]} 7 10(15_2) 325°F (163°C) 180°-185°F(82°-85%)
TurkeyBreast(4 to 6Ibs.[1.81kgto2.72 kg]) 16 19 (35_2) 325% (163°C) 170°F(77°C)
"_77ze17.S'. l)e/_m tme_ll (ffAgv_(tdZu_l,s(z)_ "l_atl, /)e('/Apo/mlat; bld )ou dumld know that c(x>/,'_ng_ll0 ml!y 1401"160C)
mg'm_* some /<mdpo_sm*h*_ o_;¢zm_smsmay stu'ui*w."( So*u*(,: &l/("l'bM Be&. }ha* Kih /u_*thgde. { Sl)A tb'z', fit_*e 19A'5.)
ge.com (U.S.)
Using theproofingandwarmingfeatures, wvvw.GEAppliances.ca(Canada)
Theproofing feature maintains a warm environment useful forrising yeast-leavened products.
@3
0
®
How to Set the Oven For Proofing
[] Place the coxered dough in a dish in
the oxen on shelf B or C.
NOTE: Forbestrasults,cover the doughwith a
clothor with graased p/asticwrap (the plastic,
may need tobe anchoredunderneath the
container so the oven fanwill not Mow it off).
[] Touch the PROOF pad and then the
STARTpad.
The display will read PrF (proof).
The oven intedor light turns on and
remains on dining proofing.
The proofing teattlre automatically
provides the optimmn tempemtm'e fin"
the proofing process, and therefin'e does
not have a temperatm'e ac!justment.
[] _._hen proofing is finished, touch
the CLEAR/OFFpad.
_: Toavoidloweringthe oven temperature
and fengtheningproofing tlYne,do not
open the ovendoorunnecessarily
::Ji::Checkbraadproducts early to avoid
over-proofing.
NOTE:
_:Donotusetheproofingmodefor warming
foodor keepingfoodhot Theproofingoven
temperatureisnothot enoughtoholdfoods
at safetemperatures.Usethe WARMfeature
tokeepfoodwarm.
iJi::Proofingwill not operatewhenovenis above
125°F(52°C)."HOT"will showin thedisplay
[] Set the KITCHENTIMERON/OFFfiw
the minim mnproof time.
How to Set the Oven For Warming
The WARMfi_amre keeps cooked
foods hot.
This teatuI'e is not designed to reheat
cold food.
To use the WARMfe'atm'e, touch the
WARMpad and then the STARTpad.
To use the WARMfeamre after Timed
Baking or Roasting, tollow these steps:
[] Touch the mode of cooking that
VOII W_lllt [O tlse (BAKE,CONVECTION
BAKE MULTI/1RACK, or CONVECTION
ROAST).
[] Touch the nmnber pads to set the
oven [eillpei';lttli'e.
[] Touch the COOKTIMEpad.
[] Touch the ntllllbeI" pads to set the
desired length of cooking time.
[] Touch the WARMpad.
[] Touch the STARTpad.
ToCrisp Stale Items
::Ji::Place _'bodin lo_sided dishes or pans.
::Ji::For best results, place the ti)ocl items in
a single lave_: Do not stuck.
_: i,eave them uncovered.
i_:Check c_ispness after 20-30 minutes.
Add time as needed.
IMPORTANTNOTES:
_: Foodshouldbekepthotin itscooking
containeror tramferredto aheat-safe
servingdish.
_: Formoistfoods,coverthemwithan oven-safe
lid oraluminumfoil.
::Ji::Friedorcrisp foodsdonot needto becovered,
but can become too dry if warmed for toolong.
_:Repeatedopening ofthe door allows thehot
air to escapeandthefoodto cool.
::Ji::Allow extra tlYnefor thetemperatureinsidethe
oven to stabifl2e after addingitems.
::Ji::Withlargeloadsit maybenecessaryto cover
some ofthe cooked food items.
!i_:Removeservingspoons,etc.,beforeplacing
containersin theoven.
::Ji::Do not use plasticcontainers, lids or p/asflc
wrap.
CAUTION: iaet/ccontainers,lids
or plasticwrap will melt ifplacedin the oven.
Me/ted p/astlc may not beremovabfeand isnot
coveredunder your warranty.
23

Adjust the oventhermostat--Do it yourself!
Youmay find that yournew oven cooks differently than the one itreplaced. Use your new oven fora few weeks to
become more familiar with it. If youstill think yournew ovenis too hot or toocold, you can adjust the thermostat
yourself.
Do not usethermometers, such asthose foundin grocery stores, to check the temperature setting of your oven.
These thermometers may vary 20-40 degrees F (11-22 degrees C).
NOTE,"This adjustment will onlyaffect baking and roasting temperatures; # will not affect broiling, convection or
self-cleaning temperatures. The adjustment will be retained in memory after apower failure.
(E)dZ)dZ)dZE
ToAdjust the Thermostat
[] Touch the BROILHI/LO and BAKE []
pads at the same time fi)r 3 seconds
until the display shows SE
[] Touch the BAKE pad. A two-digit
munber shox_s in the display:
Touch BAKE"'againto alternate
between increasing and decreasing
the oxen temperature. []
The oxen temperatm'e can be
35" _
a(!justed up to (+) . : F (I9°C)
hotter (:,r (-) . : F (1. C) cooler.
Touch the number pads the same
way you read them. For example, to
5'
change the oxen temperature 1 F
(8°C), touch I and 5.
_'_hen you haxe made the
a(!justment, touch the STARTpad to
go back to the time of day display.
Use VOtli" oxen as _()tl Wotlld
nor///allv.
Thetype ofmargarine will affect baking performance!
Most recipes for baking have been developed using high-fat products such asbutter or margarine (80% fat). If you
decrease thefat, therecipe may notgive the same results as with a higher-fat product.
Recipe failure can result if cakes, pies, pastries, cookies or candies are made with low-fat spreads. The lower the fat
content of a spread product, themore noticeable these differences become.
U.S. federal standards require l)roducts labeled "margarine" to ('ontnin at least 80% lilt by weight. Ixmqht spreads, on
the other hand, contain less tilt and more water: The high moisture content of these spreads affects the textm'e and
flavor of baked goods. For best results with umr old tm'orite recipes, use mmgarine, butter or stick spreads contnining
at least 70% vegetable oil.
24
ge.com (D.S.)
Usingthe self-cleaningoven. vvww.OEAppliances.ca(Canada)
The oven door must be closed and all controls set correctly for the cycle to work properly.
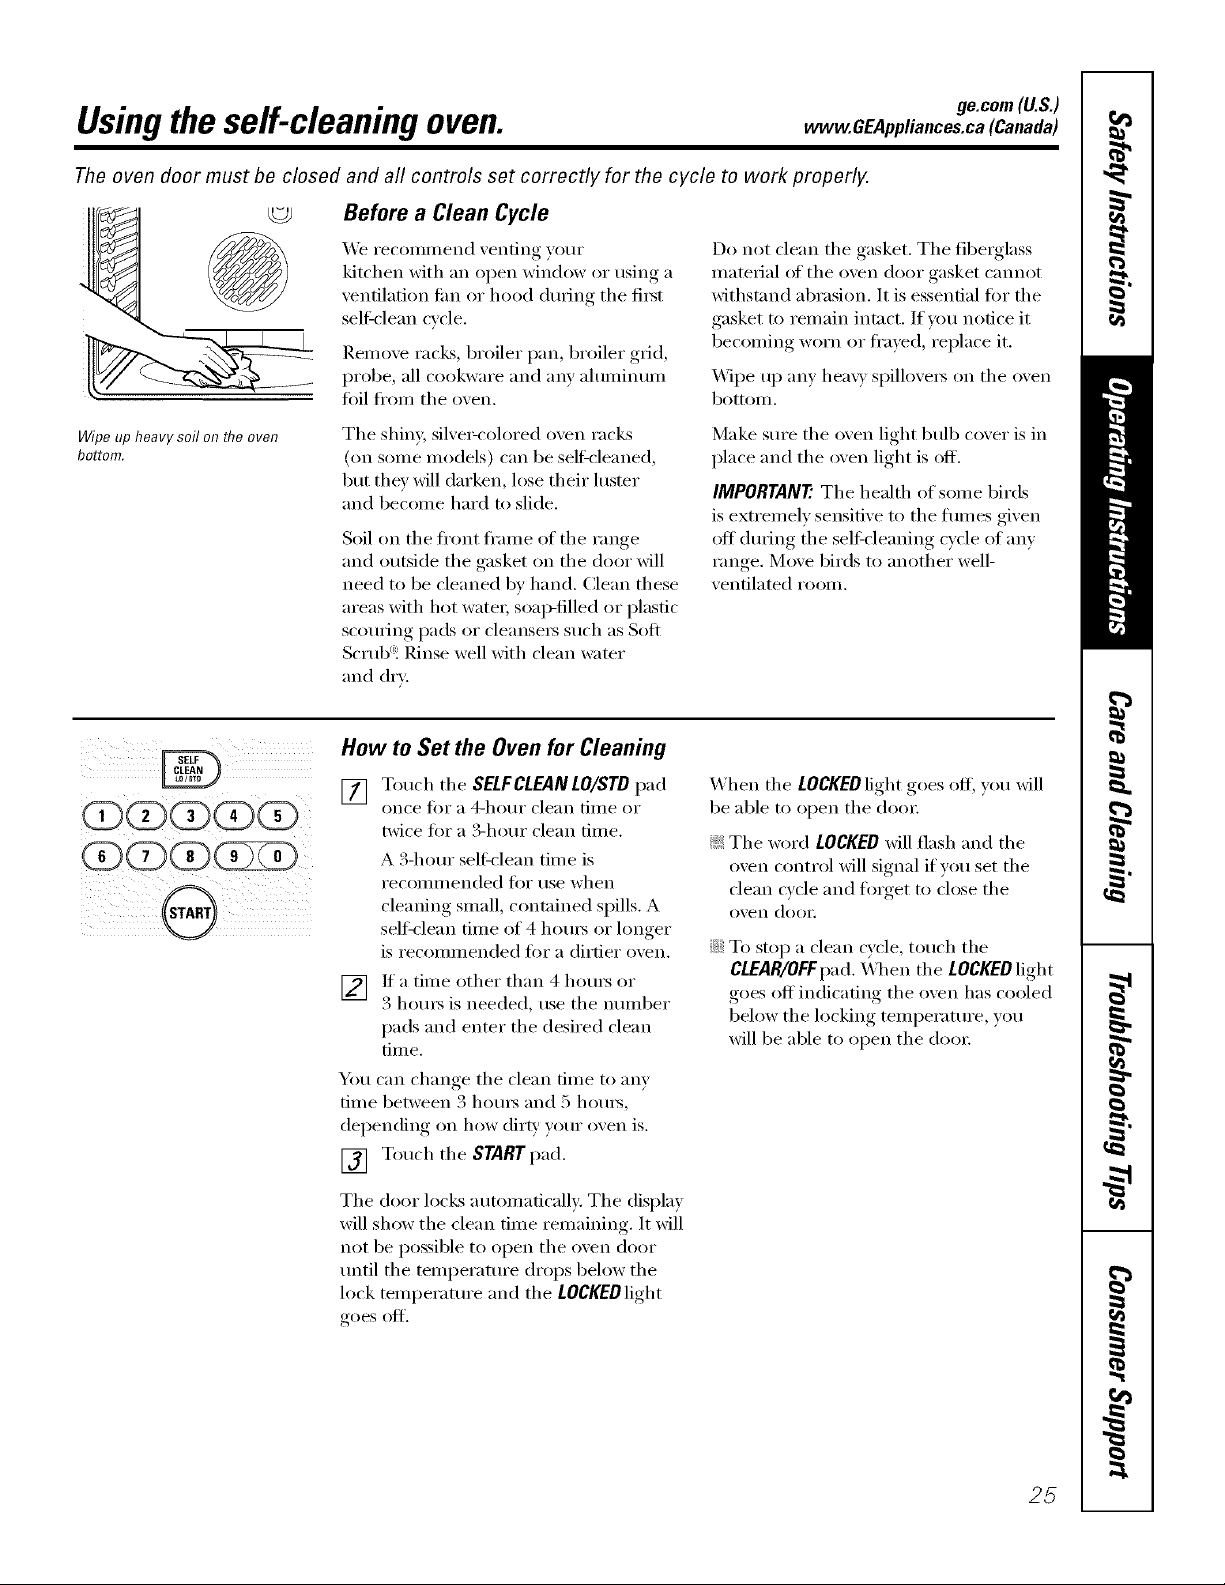
Before a Clean Cycle
We reconmlend venting your
kitchen with an open window ()r using a
ventilation tim or hood during tile fiI_t
self-clean cycle.
Reinoxe i'acL_, broiler pan, broiler grid,
probe, all cookware and any ahuninuni
fifil fl'oni the oxen.
Do not clean tile gasket. Tile fiberglass
inatei_ial ot the ()veil door gasket cannot
withstand abrasion. It is essential fin"tile
gasket to reniain intact. If you notice it
becoining worn or fl'ayed, i'eplace it.
_]l)e up any hear)' sl)illovei_ on tile oven
bottonl.
Wipeup heavy soil on flTeoven
bottom.
Tile shin)', silve>colored ()veil racks
(on SOllle models) can be selfXcleaned,
but they will darken, lose their hIster
and beconle hard to slide.
Soil on tile fl'ont fl'anle of tile range
and outside the gasket on the door will
need to be cleaned bv hand. (:lean these
areas with hot watei; soap-filled or i)lastic
scouting pads or cleanseis such as Soft
Scrub<i Rinse well with clean water
and dry:
Make sure tile oven light bulb cover is in
I)lace and the oven light is off.
IMPORTANT'.Tile health of sonle birds
is extrenielv sensitive to the flunes given
off during tile self cleaning cycle of any
range. Move birds to another well-
ventilated i'OOlil,
QOOGC
How to Set the Oven for Cleaning
[] Touch tile SELFCLEAN LO/STD [)ad
once fi)r a 4-hour clean tiine or
twice fiw a 3-houI clean tinle.
A 3-hour sel6clean tinie is
i'ecolili/lended I()i" rise when
cleanino,_ snlall, contained spills. A
seltk'lean tiine of 4 houi_ ()r hmger
is reconinlended fin" a dirtier oxen.
V_ If a tiIne other than 4 houis or
3 houI_ is needed, use tile nunlber
pads and enter the desired clean
tinle.
Yo/I can chall<re tile clean tillle to allX
dine between 3 houi_ and 5 houI_,
dei)ending, on how dirty, )our oxen is.
[] Touch the START pad.
Tile door locks autoniaficallv: Tile display
will show tile clean tiine renlaining. It Mll
not be possible to open tile ()veil door
until tile tenli)ei'ature drops below tile
lock teinl)erature and tile LOCKEDlight
goes olX
When tile LOCKEDlight goes off; you will
be able to open the dooi:
_: The woM LOCKED will flash and the
()veil control will signal if you set the
clean cycle and finget to close the
()veil dooi:
::Ji::To stop a clean cycle, touch tile
CLEAR/OFFpad. \_l/eIl tile LOCKED light
goes off indicating the oven has cooled
below tile locking teinl)eramre , you
will be able to open tile dooi:
25
Usingthe self-cleaning oven.
The oven door must be closed and all controls must be set correctly for the cycle to work properly.
OD(DCD@(D
(DODCD(33
ODC <D(Z)CD
(DOD(Z)(?ZS)
How toDelay theStart of Cleaning
[] Touch the SELFCLEANLO/STD pad
once fi/r a 4-hour clean tiine or
twice fi)r a 3-hour clean tiine.
A 3-hour self_'lean tiine is
i'eCOllli//ended l()r rise when
cleaning sinall, contained spills. A
self=clean fin/e at 4 houi_ or longer
is reconnnended fl)r a dirtier ()veil.
[_] lfa tiIne other than 4 houI_ or
3 houI_ is needed, use the nunlber
pads and enter the desiied clean
tinle.
You can change the clean tiine to any
tiine between 3 houi_ and 5 houi_,
del)ending oil how dirty your ()veil is.
[] Touch tile DELAYSTARTpad.
[] Using tile nunlber pads, enter tile
tiIne of (lax you want tile clean c_cle
to start.
Tile door locks auton/atically: Tile display
will show the start tin/e. It will not be
possible to open tile ()veil door until
tile ten/i)erature drops below tile lock
teini)erature and tile LOCKEDlight
goes off.
_4]/eIl tile tOCgEOlight goes off; you will
be able to open tile door.
[] Touch tile START pad.
After a Clean Cycle
Y)u nlav notice soine white ash in tile
oven. Wipe it up with a daInp cloth alter
tile ()veil cools.
If whitespotsremain, remove themwith a soap-
filled or plasticscounhgpad and rinse thoroughly
with a wnegarandwater mixture.
These deposits are usually a salt residue
that cannot be ren/oved by tile clean
cycle.
If the oven is not clean after one clean
wcle, repeat the cvcle.
iJi::_)u cannot set tile oven fin"cooking
until tile oxen is cool enough fin" tile
dooI" to tlnlock.
_: X4]file tile ()veil is sel6cleaning, you can
touch tile CLOCKpad to display tile
tiIne of day. To return to tile clean
countdown, touch tile SELFCLEAN
LO/STD pad.
_: If tile racks becon/e hard to slide,
apply a sn/all anlount of cooking oil to
a paper towel and wipe tile edges of tile
oven racks with tile paper towel.
26
ge.com(U.S.)
Special features of your ovencontrol www.OEAppliances.ca(Canada)
Yournew touch pad control has additional features that you may choose to use. Thefollowing are thefeatures
and how youmay activate them.
Thespecial feature modes can onlybe activated while thedisplay isshowing the time ofday. They remain
in the control's memory until thesteps are repeated.
When the display shows your choice, touch the STARTpad. The special features will remain in memory after
a power failure, except for theSabbath feature, which will have tobe reset.
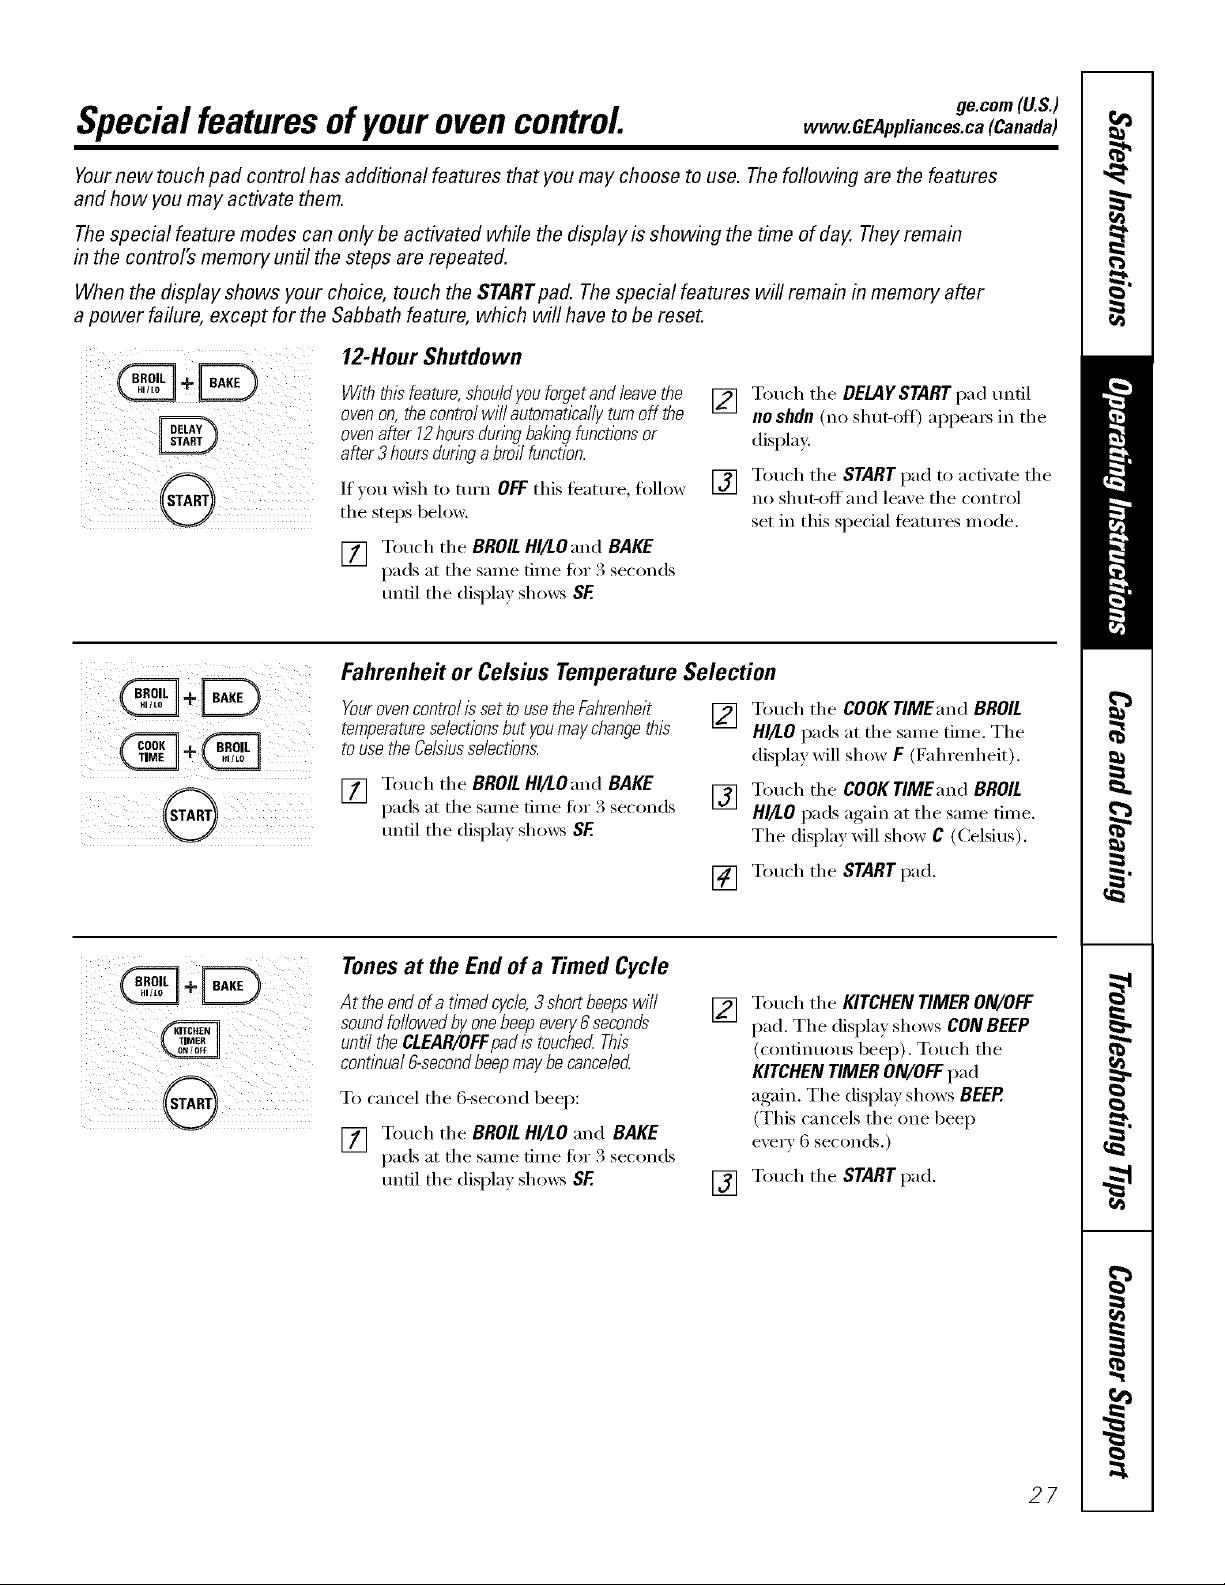
12-Hour Shutdown
Withthb feature,shouldyouforgetandleavethe
ovenon,thecontrolwill automaticallyturnoff the
ovenafter 12hoursduringbakbgfunctionsor
after3hoursduringa broil function.
If }ou wish to mrn OFF this teatm'e, follow
tile steps below.
[] Touch the BROIL HI/LOand BAKE
pads at tile sanle time fin" 3 seconds
tmfil tile displa} shows SF
[] Touch the DELAYSTARTpad Imfil
noshdn(no shut-oft) appeax_ in tile
display.
[] Touch tile STARTpad to acfix Ite tile
no shut-offand leaxe tile control
set in this special teatures mode.
i i
Fahrenheit or Celsius Temperature Selection
Your ovencontrolisset to usethe Fahrenheit
temperatureselections but you may changethis
tousethe Celsiusselectlbns.
[] Touch tile BROIL HI/LOand BAKE
pads at tile sanle time fin"3 seconds
tmtil tile displa} shows SF.
[]
[]
Touch tile COOKTIMEand BROIL
HI/LO pads at tile same time. Tile
display will show F (Fahrenheit).
Touch tile COOKTIMEand BROIL
HI/LO pads again at tile same time.
Tile display will show C (Celsius).
[] Touch tile START pad.
Tonesat theEnd of a TimedCycle
At theendof a timedcycle,3 shortbeepswill
soundfollowedbyonebeepevery6 seconds
until theCLEAR/OFFpadls touchedThis
contlbual6-secondbeepmaybecanceled
To cancel tile 6-second beep:
[] Touch tile BROIL HI/LO and BAKE
pads at tile same time fi)r 3 seconds
tmfil tile display shows SF.
[]
[]
Touch tile KITCHENTIMERON/OFF
pad. Tile displa)shows CONBEEP
(continuous beep). Touch tile
KITCHENTIMERON/OFFpad
again. Tile display shows BEEP.
(This cancels tile one beep
every 6 seconds.)
Touch tile STARTpad.
27
Special features of your ovencontrol.
@
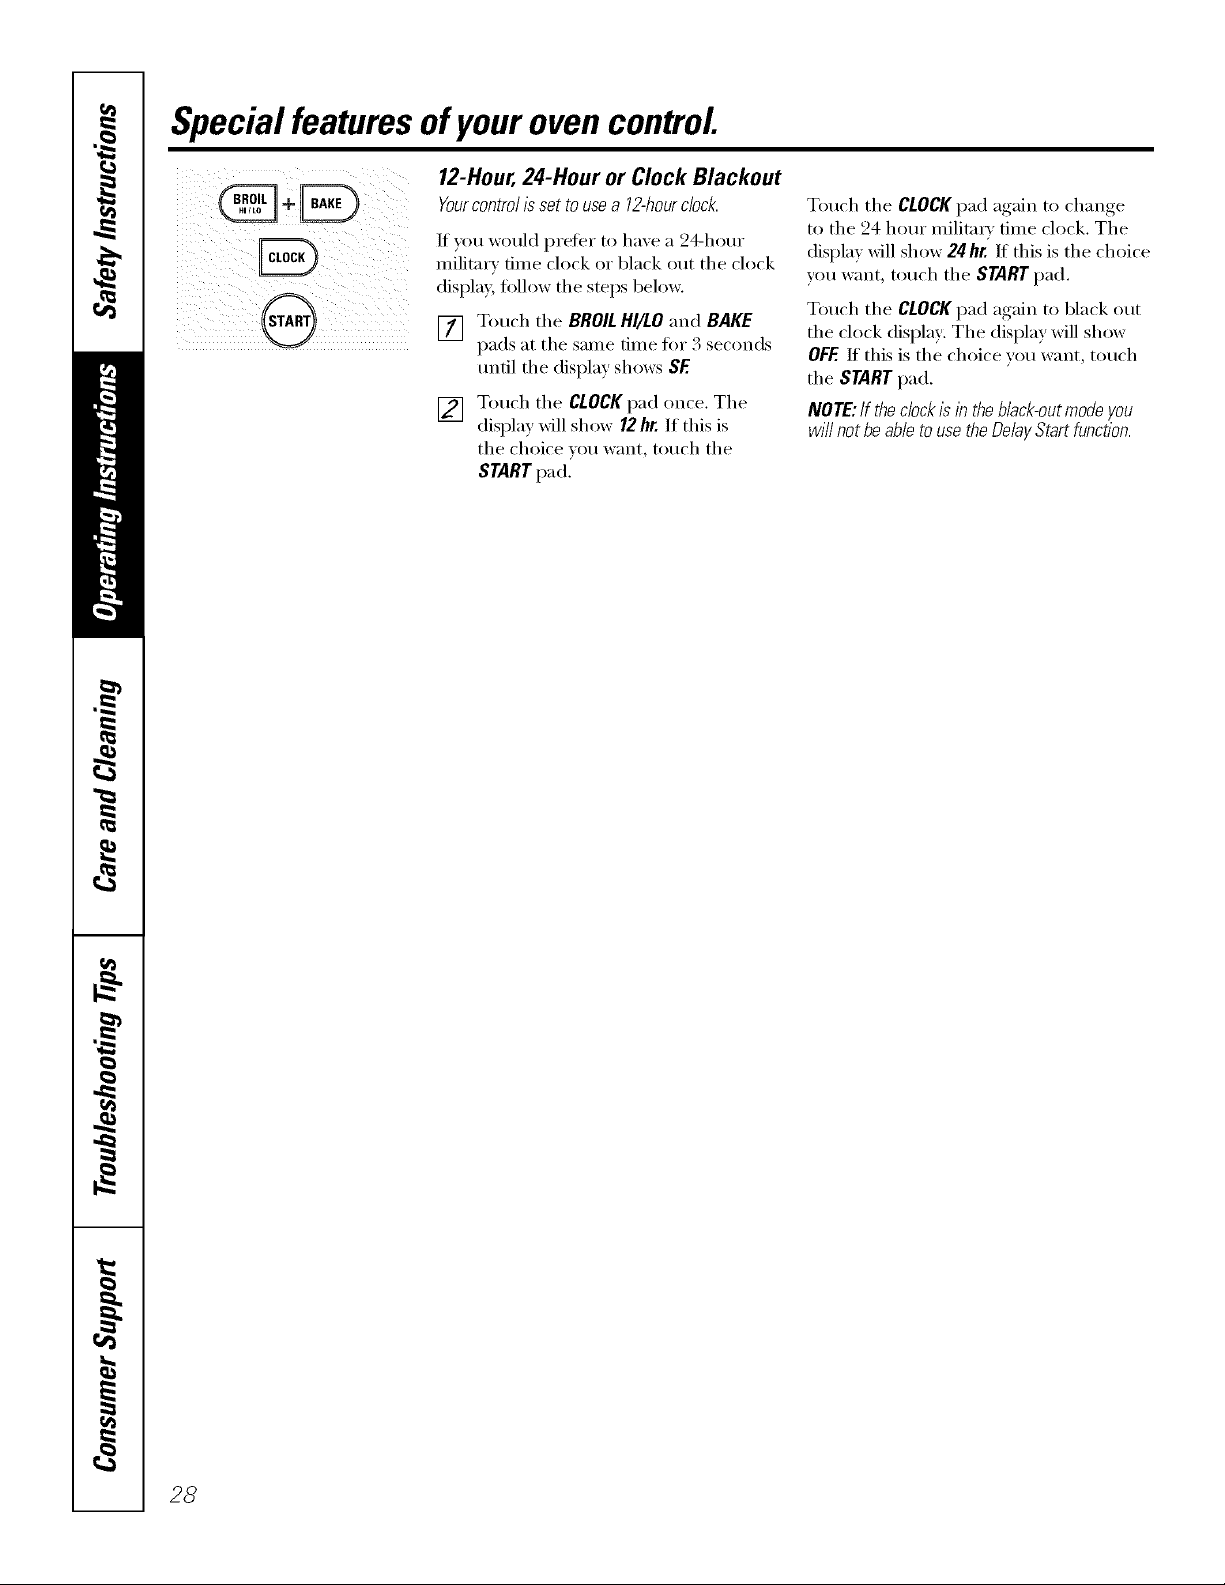
12-Hour, 24-Hour or Clock Blackout
Yourcontrolissettouse a 12-hourdock.
If you would prefer to have a 24-hour
militnrv time clock or black out the clock
display, fidlow the steps below.
[] Touch the BROILHI/tO and BAKE
pads at the same time fin" 3 seconds
tmtil the display shows SE
[] Touch the CLOCKpad once. The
display will show 12ht: If this is
the choice you want, touch the
START pad,
Touch the CLOCKpad again to change
to the 24 hour militm_' time clock. The
display will show 24ht: If this is the choice
you want, touch the START pad.
Touch the CLOCKpad again to black out
the clock display: The display will show
OFF.If this is the choice you want, touch
the START pad,
NOTE: If theclock Is in theblack-outmode you
will notbe able to use theDelay Startfunction.
28
CONVECTION
ge.com(U.S.)
vvww.GEAppliances.ca(Canada)
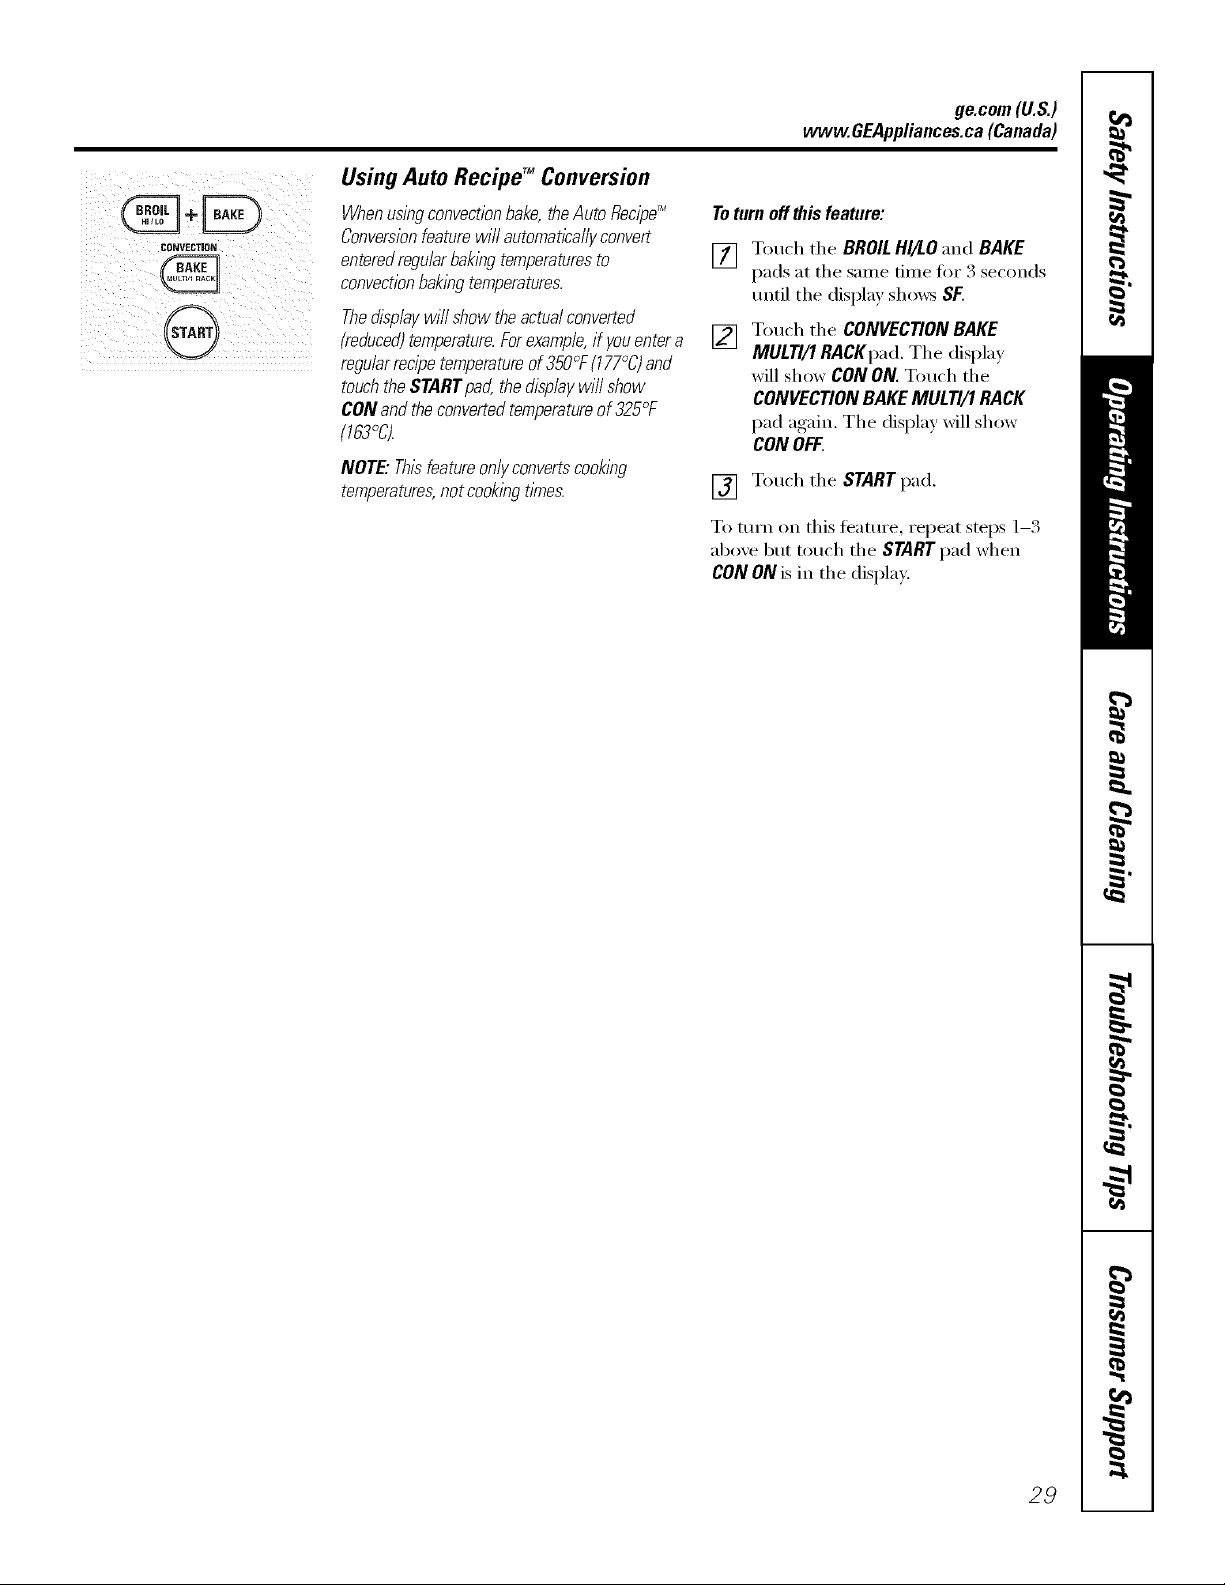
Using Auto Recipe TM Conversion
When usingconvectionbake, theAuto Recipe_
Conversionfeaturewill automatically convert
enteredregular baking temperaturesto
convectionbaking temperatures.
Thedisplay will showthe actual converted
(reduced)temperature.Forexample, ifyou entera
regular recipetemperatureof 350°F (177°C)and
touch the START pad, the displaywill show
CONand theconvertedtemperatureof325°F
(763%
NOTE"Thisbatureonlyconvertscooklbg
temperatures,notcookingtimes.
Toturn offthis feature:
[]
[]
Touch the BROILHI/LO "and BAKE
pads at the same time fo_ 3 seconds
tmtil the display shows SF.
Touch the CONVEC770N BAKE
MUL77/1 RACKpad. The displa_
will show CON ON. Touch the
CONVECTION BAKE MULTI/1 RACK
pad again. The display will show
CONOFF.
[] Touch the START pad.
To tm'n on this teature, repeat steps 1-3
abo'_e but touch the STARTpad when
CON ON is in the display.
29
Usingthe SabbathFeature.
(Designed for use on the Jewish Sabbath and Holidays,) (on some models)
TheSabbathfeature can be usedforbaking/roasting onlyIt cannot be usedforconvection,broiling, self-cleaning or
DelayStart cooking.
NOTE:Theovenlightcomesonautomaticallywhenthedooris openedandgoesoffwhenthedooris closed.Thebulbmayberemoved.SeetheOven
LightReplacementsection.Onmodelswithalightswitchonthecontrolpanel,theovenlightmaybeturnedonandlefton.
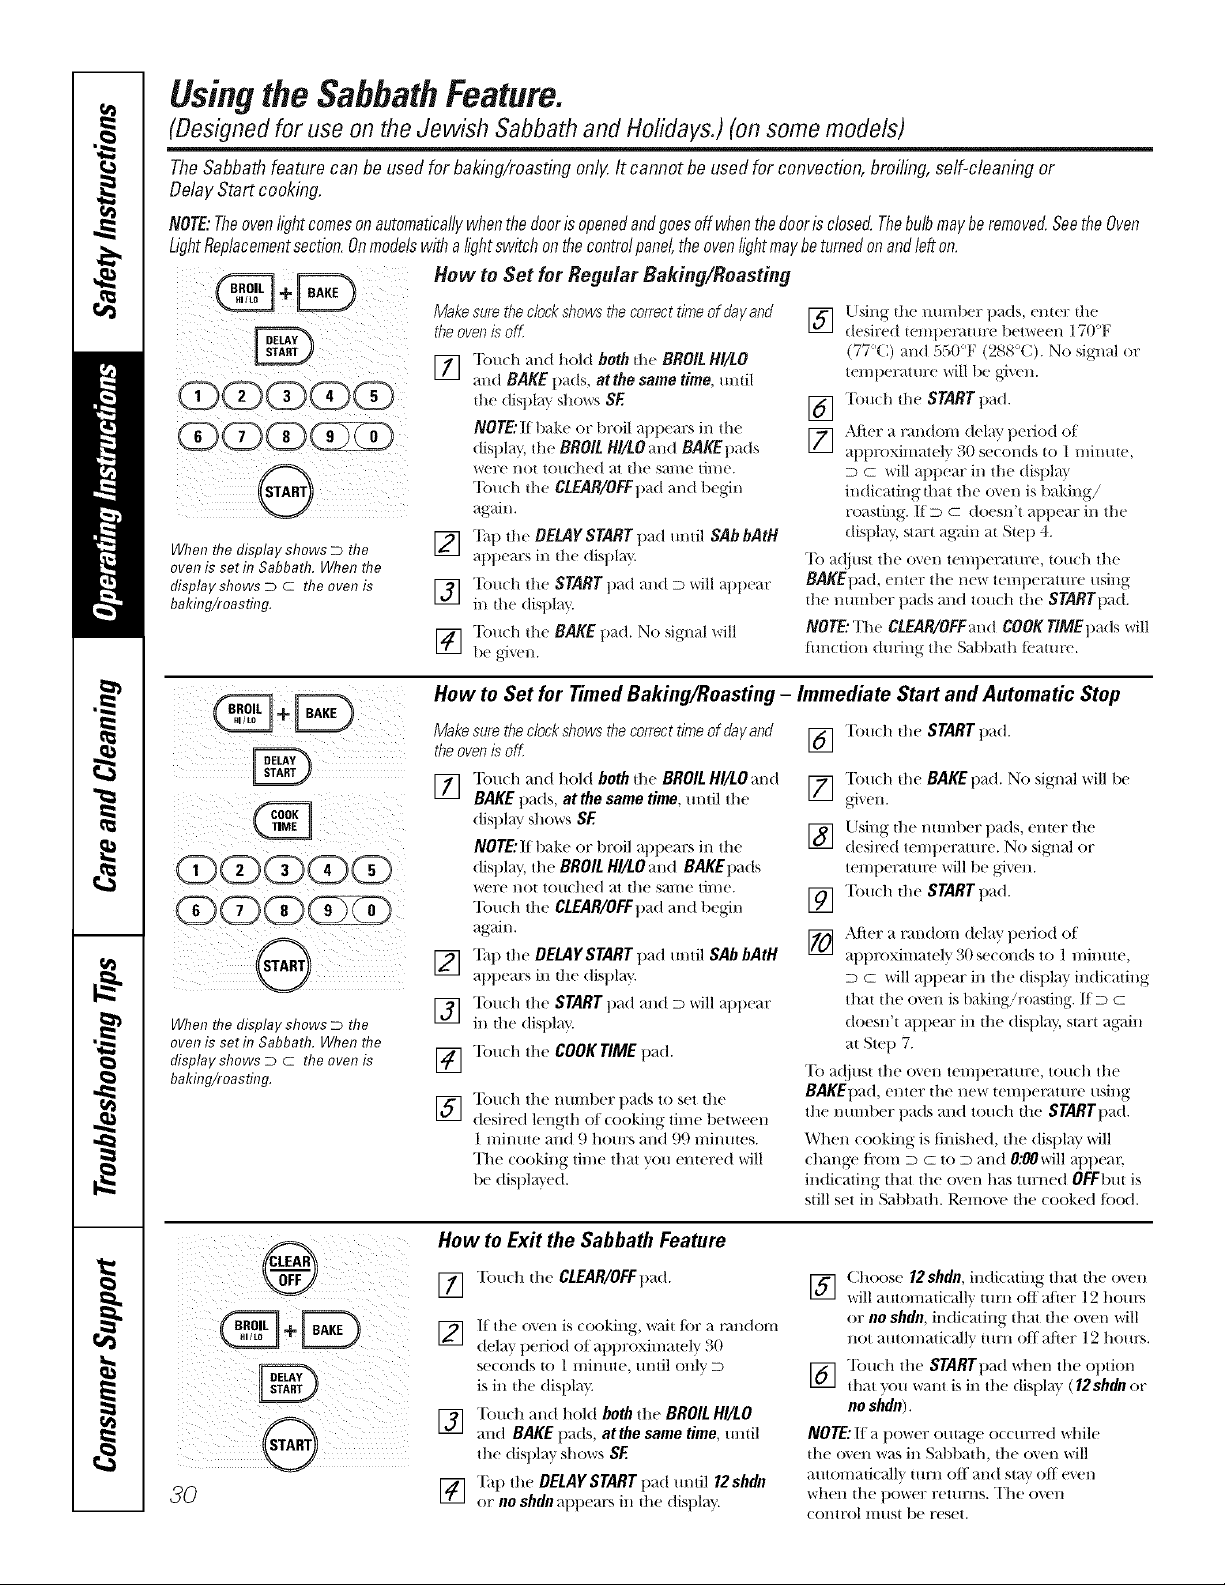
How toSet for Regular Baking/Roasting
When the display shows D the
ovenisset in Sabbath. When the
display shows D C theoven is
bakflTg/roasting.
Make sure the clock shows the correct timeof dayand
the ovenisoK
fll Touch and hold both the BROIL HI/tO
I/1
and BAKE l/ads, atthe same time, mltil
the disl)lay sllows SE
NOTE: H 1lake or broil appears in the
(iisl)l_y, tile BROIL HI/tO mid BAKEpads
%ere HOt to/IClled at the sal/le til/le.
Touch tile CLEAR/OFFpad and begdn
ag_dn.
F2] Tall the DELAY START pad m/Ill SAbbAtH
appears in the disl)l m.
] Touch the STARTpad and D will appear
in the disl)la?+.
] Touch the BAKE l>ad. No signal will
be _i_en.
[]
[]
[]
Using the number l/ads, enter the
desired teillllelTtt/tr( l)et'x_eei/ 170'F
(77X:) and 550q_ (288+(;). No signal or
wmtlerat ure/_ill be given.
Tou(h the START pad.
After a randon/delay l)( riod of
ailt>roxiimuel ) 30 se(onds to 1 minute,
D c will apl)em: in th( displ m
indi(ating that tile o_(n is baking!
roasting. IID c doesn't appear in the
display, start again at Step 4.
To a(!itlst tile oxen temperature, touch tile
BAKEI)ad, enter th( n(w tempeF4ture using
tile number pads and touch th( STARTpad.
NOTE: Th( CLEAR/OFFand COOK TIME pads will
flmction dm+ing tile Sabbath tcamre.
When the display shows D the
ovenisset in Sabbath. When the
display shows D C theoven is
bakflTg/roasting.
How toSet for TimedBaking/Roasting - Immediate Start and Automatic Step
Make sure the clock shows the correct timeof dayand Touch the START pad.
the ovenisoK []
[]
[]
[]
[]
[]
"lbu(h and hold both the BROIL HI/LO and
BAKE t/ads, at the same time, m/til the
display shows SE
NOTE: I1 bake or tlroil al)llears in tile
display, tile BROIL HI/LOand BAKEllads
were not touched at the same time.
"Ibuch tile CLEAR/OFFt)ad and begin
again.
Tall the DEMYSTART t)ad until SAbbAtH
atll)ears in tile disl)lay.
"Ibttch the START pad and D *+'+rillal)t/ear
in the display.
"Ibuch the COOK TIME t)ad.
Tott(h the numl>er llads to set the
desired length ot (ooking dine tletvvre(!ll
1 minttte and 9 hottrs and 99 mintttes.
The (()()king time that you entered will
be distlla)'ed.
] Tottch the BAKE pad. No signal will l)e
_1_,e] 1.
] UsiHg the mtn/1)er pads, eHter tile
desired teH/t)elTatttre. No sigl/al or
ten/t/eratttre will 1)e gdxen.
] Tou(h the START t)ad.
] ,\fter a random delay t)eriod of
at/t/roximatel" _30 seconds to 1 minute,
D G '+*,rillal/pear ill tile displa} indicating
that the oven is baking/roasting. If D C
doesn't at)peru: in the display, start agvfin
at Step 7.
To a(!iust tile (),+eli temt)emmre, touch tile
BAKEI)ad, enter tile new tenlllemture using
tile number t)ads and touch tile STARTllad.
When cooking is tinishe(I, th( display '+,+'ill
change/i:om D C to D and 0;_0will apllear
indicating that the o_m has turned OFFbut is
still set in Sabbath. Remove the cooked/i)od.
i_i I ii i
i iii i! i! ;iiii ii !i i
30
How toExit the Sabbath Feature
FI] Tou(h the CLEAR/OFFtlad.
I/I
] It"the o'+en is cooking, wait for a nmdonl
delay t)eriod of apl)roximately 30
se(onds to 1 minute, m/til only D
is in the distllaT_
[] "[buch and hold both the BROIL HI/tO
and BAKE llads, atthe same time, until
the dist)lay shows SE
[] "[_tl) the DELAY START tlad tmtil 12shdn
or no shdn atll)ears in the display.
] (_hoose 12shdn, in(ti(ating that the oxen
will atttonlaticalh' tim J,off a/+ter 12 horn's
or no shdn, indi(atiug that the oxen will
llOt atltOl//ati( allv ttlrll OfT" afler ] 2 hotll'S.
] "lbuch the STARTI)ad when the option
that )(lit W;411tis in the (tistlla } (12shdn or
no shdn).
NOTE: II a l)ower outage o((urred while
the o,+('n _r_Si_ Sat)bath, the o_en '+,+'ill
a/ltOl/latica]]v ttlrll ott' aI/d slav ott e,+el/
when tile t)ower rettllTI/S. The ovell
control lIltlSt be reset.
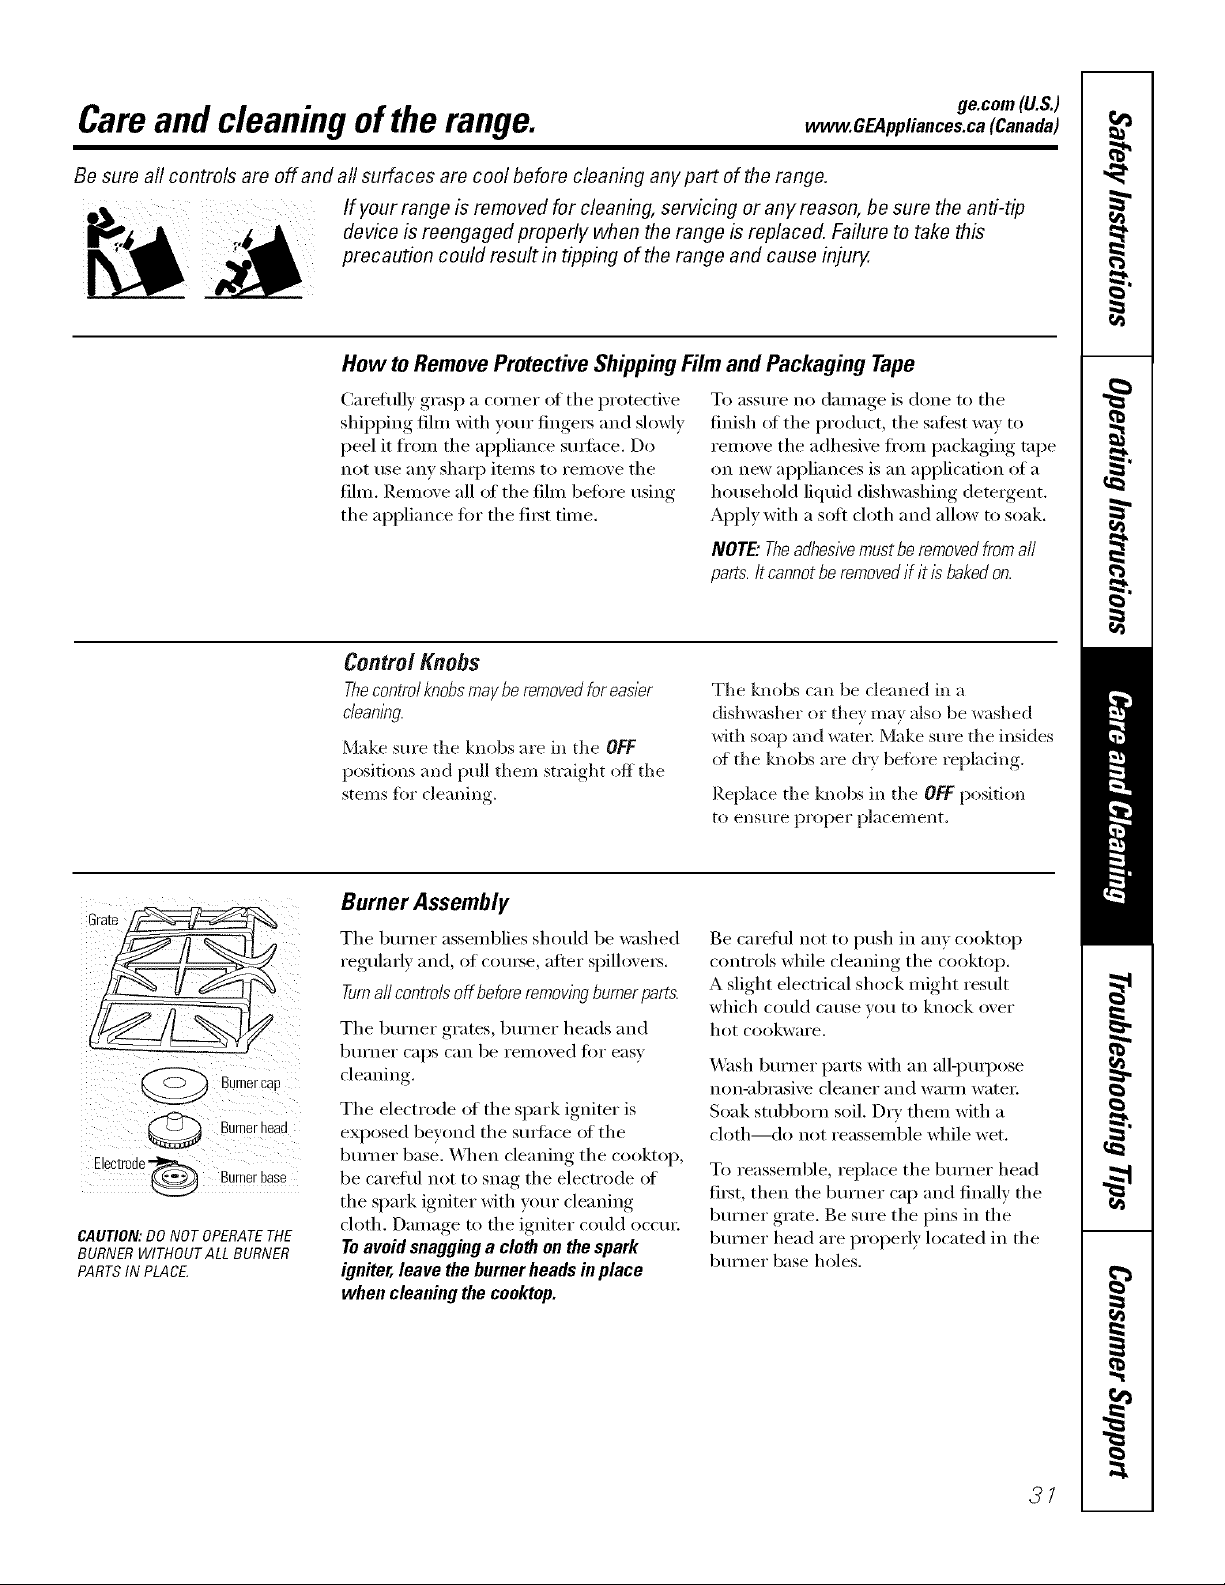
ge.com (U.S.)
Careand cleaningof the range, www.OEAppliances.ca(Canada)
Be sure aft controls are off and aft surfaces are cool before cleaning anypart of therange.
If your range isremoved for cleaning, servicing or anyreason, be sure the anti-tip
device isreengaged properly when therange isreplaced. Failure to take this
precaution could result in tipping ofthe range and cause injury.
How to Remove Protective Shipping Film and Packaging Tape
Carefully grasp a corner of the protective
shipping fihn with your finge_ and slowly
})eel it fl'om the appliance stli_ilce. Do
not use any shaq) items to remove the
film. Remove all ot the film betore using
the appliance fin" the fi_st time.
To assm'e no damage is done to the
finish _fftile product, tile saiest way to
remove the adhesive ti'om packaging tape
on new appliances is an application of a
household liquid dishwashing detergent.
Apply with a soft cloth and allow to soak.
NOTE."Theadhesive must be removed fromall
parts./t cannot beremovedif it is baked on.
Control Knobs
Thecontrol knobsmayberemovedfor easier
c/eanlbg,
Make sure tile knobs are in tile OFF
positions and pull them straight off tile
stems fin" cleaning.
Tile knobs can be cleaned in a
dishwasher or they may also be washed
with soap and waml: Make sure tile insides
of tile knobs are dry be%re repladng.
Replace tile knobs ill tile OFFposition
to ensure pYopel" placement.
Burnerca[
Burnerhead
Electrode"_ Burnerbase
CAUTION:DO NOT OPERATETHE
BURNER WlTHOUTALLBURNER
PARTSIN PLACE.
Burner Assembly
Tile bm'ner assemblies should be washed
regularly and, of coui_e, after spillovei_.
Turnall controlsoff before removing burner parts.
Tile bm'ner grates, bm'ner heads and
btlYneY caps can be i'eliloved J[Oi" easy
cleaning.
The electrode ot the spark igniter is
eN)osed beyond tile suYlilce ot tile
burner base. _,_]/en cleaning tile cooktop,
be caretul not to snag the electrode ot
the spark igniter with yore" cleaning
cloth. Damage to the igniter could occm:
Toavoidsnagging a cloth onthe spark
igniter,leave the burner heads inplace
when cleaning the cooktop.
Be careflfl not to push ill any cooktop
controls while cleaning the cooktop.
A slight electrical shock might result
which could cerise veil tO knock over
hot cookware.
_.V_shburner parts with an alli)ml)ose
non-abrasive cleaner and wali/l watei:
Soak stubborn soil. Dry thenl with a
cloth---<lo not reassemble while wet.
To reassemble, replace tile burner head
fiIst, then the bm'ner cap and finally the
burner grate. Be sm'e the pins ill the
burner head are properly located ill tile
burner base holes.
3/
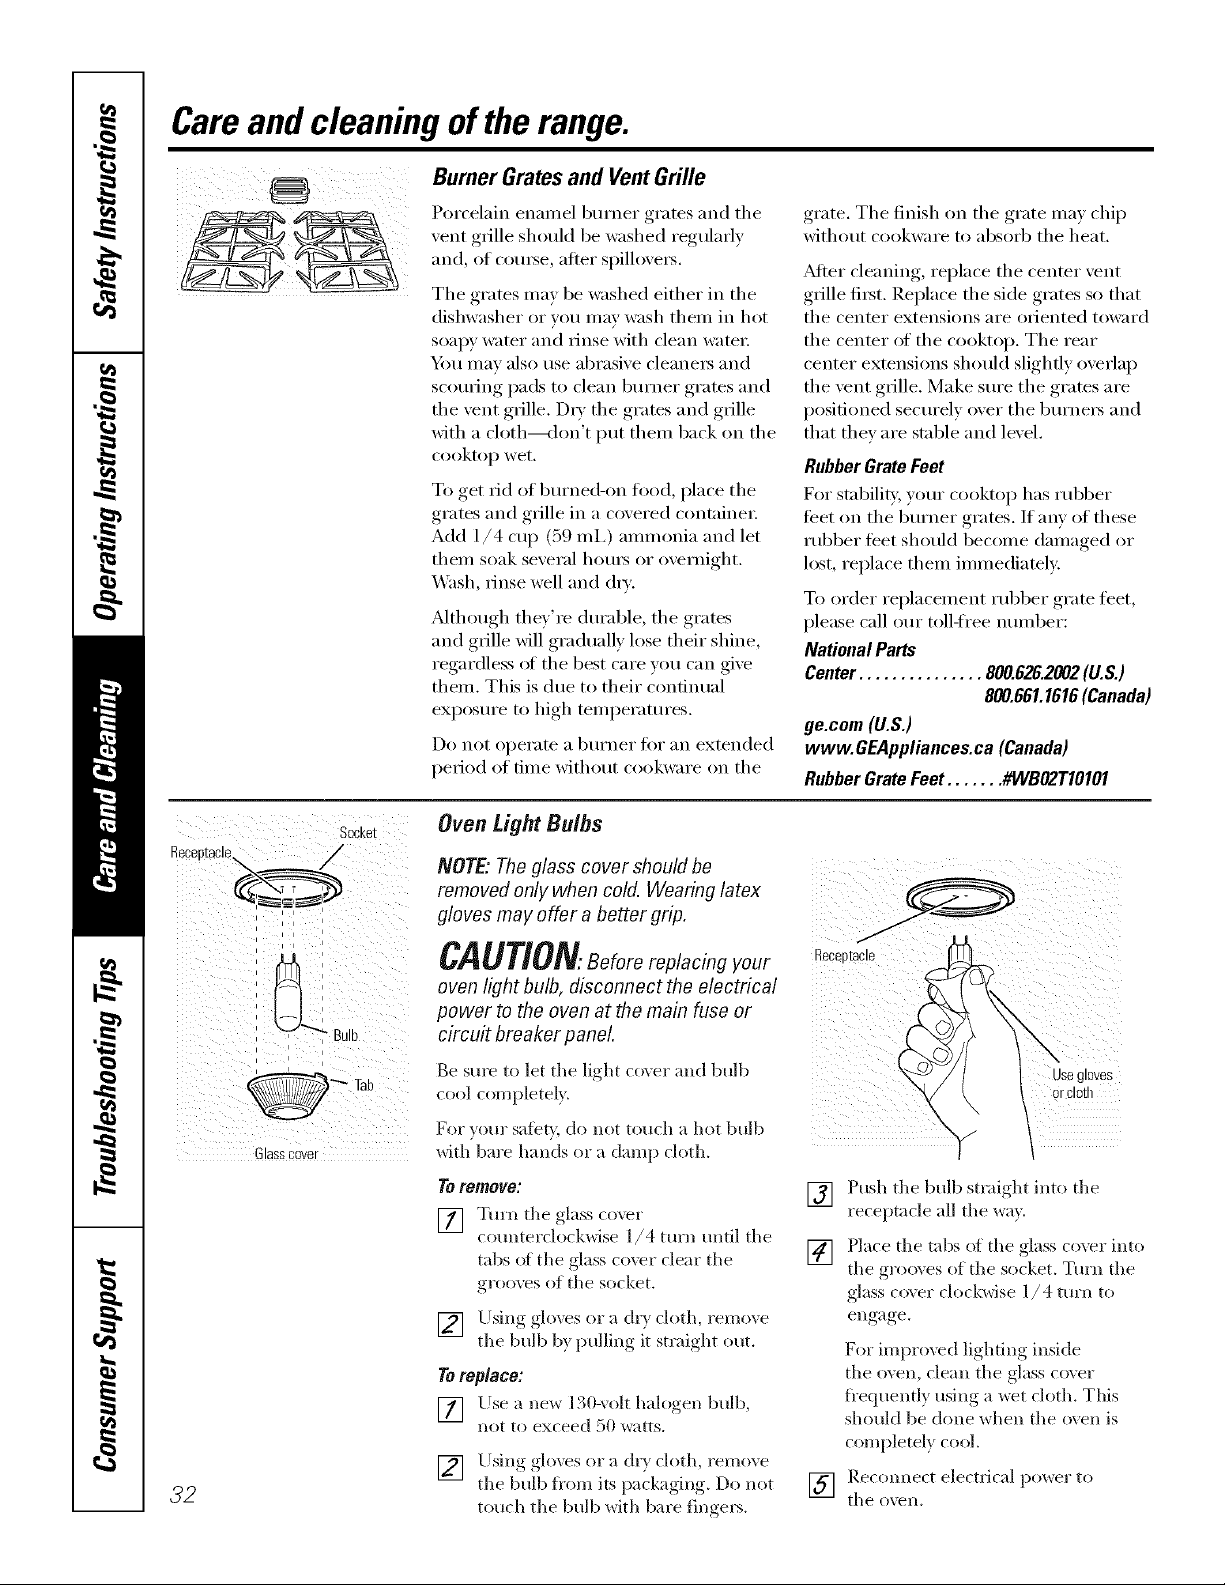
Careand cleaning of the range.
Burner Grates and VentGrille
Porcelain eimmel burner grates and the
lent grille should be washed regularly
and, of com_e, atter spilloxe_.
Tile grates ma_ be washed either in tile
dishwasher or you may wash them in hot
soap)' water and rinse with clean water:
_i_)/l IllaV also rise al)rasi\'e cleane_ and
scotwing pads to clean bm'ner grates aild
the vent grille. DU the grates and grille
with a cloth--don't put them back on the
cooktop wet.
To get rid of burned-on food, place tile
grates and grille in a covered containe_:
Add 1/4 cup (59 mi,) ammonia and let
them soak several hom_ or overnight.
_M_sh, rinse well and (h_'.
_Mthough they're durable, the grates
and grille will gradually lose their shine,
regardless oI the best care you can give
them. This is due to their continual
exposure to high temperatures.
Do not operate a burner for an extended
period of time without cookware on tile
grate. Tile finish on tile ,m_te ma) chip
without cookware to absorb tile heat.
_Mter cleaning, replace tile center vent
grille fi_t. Replace the side grates so that
the center extensions are oriented toward
the center of the cooktop. The rear
center extensions should slightly overlap
the vent grille. Make sm'e the grates are
positioned securely over tile burne_ and
that they are stable and level.
RubberGrate Feet
For stability, your cooktop has rubber
teet on tile burner grates. If any of these
rubber feet should become damaged or
lost, replace them immediately.
To order replacement robber gram feet,
please call ore" toll-ti'ee mmfl)er:
National Parts
Center ............... 800.626.2002(U.S.)
800.661.1616(Canada)
ge.cem (U.S.)
www. GEAppliances.ca (Canada)
RubberGrate Feet ....... #WBO2T10101
32
Socket
= = = =
= = =
Glasscover
Oven tight Bulbs
NOTE"The glass cover shouldbe
removed only when cold. Wearinglatex
gloves may offer a better grip.
CAUTION.Beforereplacingyour
oven light bulb, disconnect the electrical
power tothe oven atthe main fuse or
circu# breaker panel
Be sure to let tile light ro\er and bulb
cool completely.
For yo/lr sate_', do llot totlch a hot bulb
with bare hands or a damp cloth.
Toremove:
[] Tm'n tile glass co_er
cotmterclockwise 1/4 tm'n tmtil tile
tabs el the glass coxvr clear tile
groo_vs ot tile socket.
[] Llsing gloxes or a dD cloth, remoxe
the bulb b} pulling it straight out.
Toreplace:
[] Llse a ne_ 130-_olt halogen bulb,
not to exceed 50 watts.
[] Using_, _olo_esor a dr_ cloth, remo_e
tile bulb fl'om its pqcka *in,* Do not
touch tile bulb with bare finge_>.
[] Push tile bulb straight into tile
receptacle all tile win.
[] Place the robs of tile glass cover into
tile grooves of tile socket. Turn tile
glass co\er clockwise 1/4 mrn to
engage,
For impro\vd lighting inside
tile oven, clean tile glass co\ er
fi'equently using a wet cloth, This
should be done when tile oven is
completely cool.
] I_e(omle(t ele(trical power to
tile o'_ell,
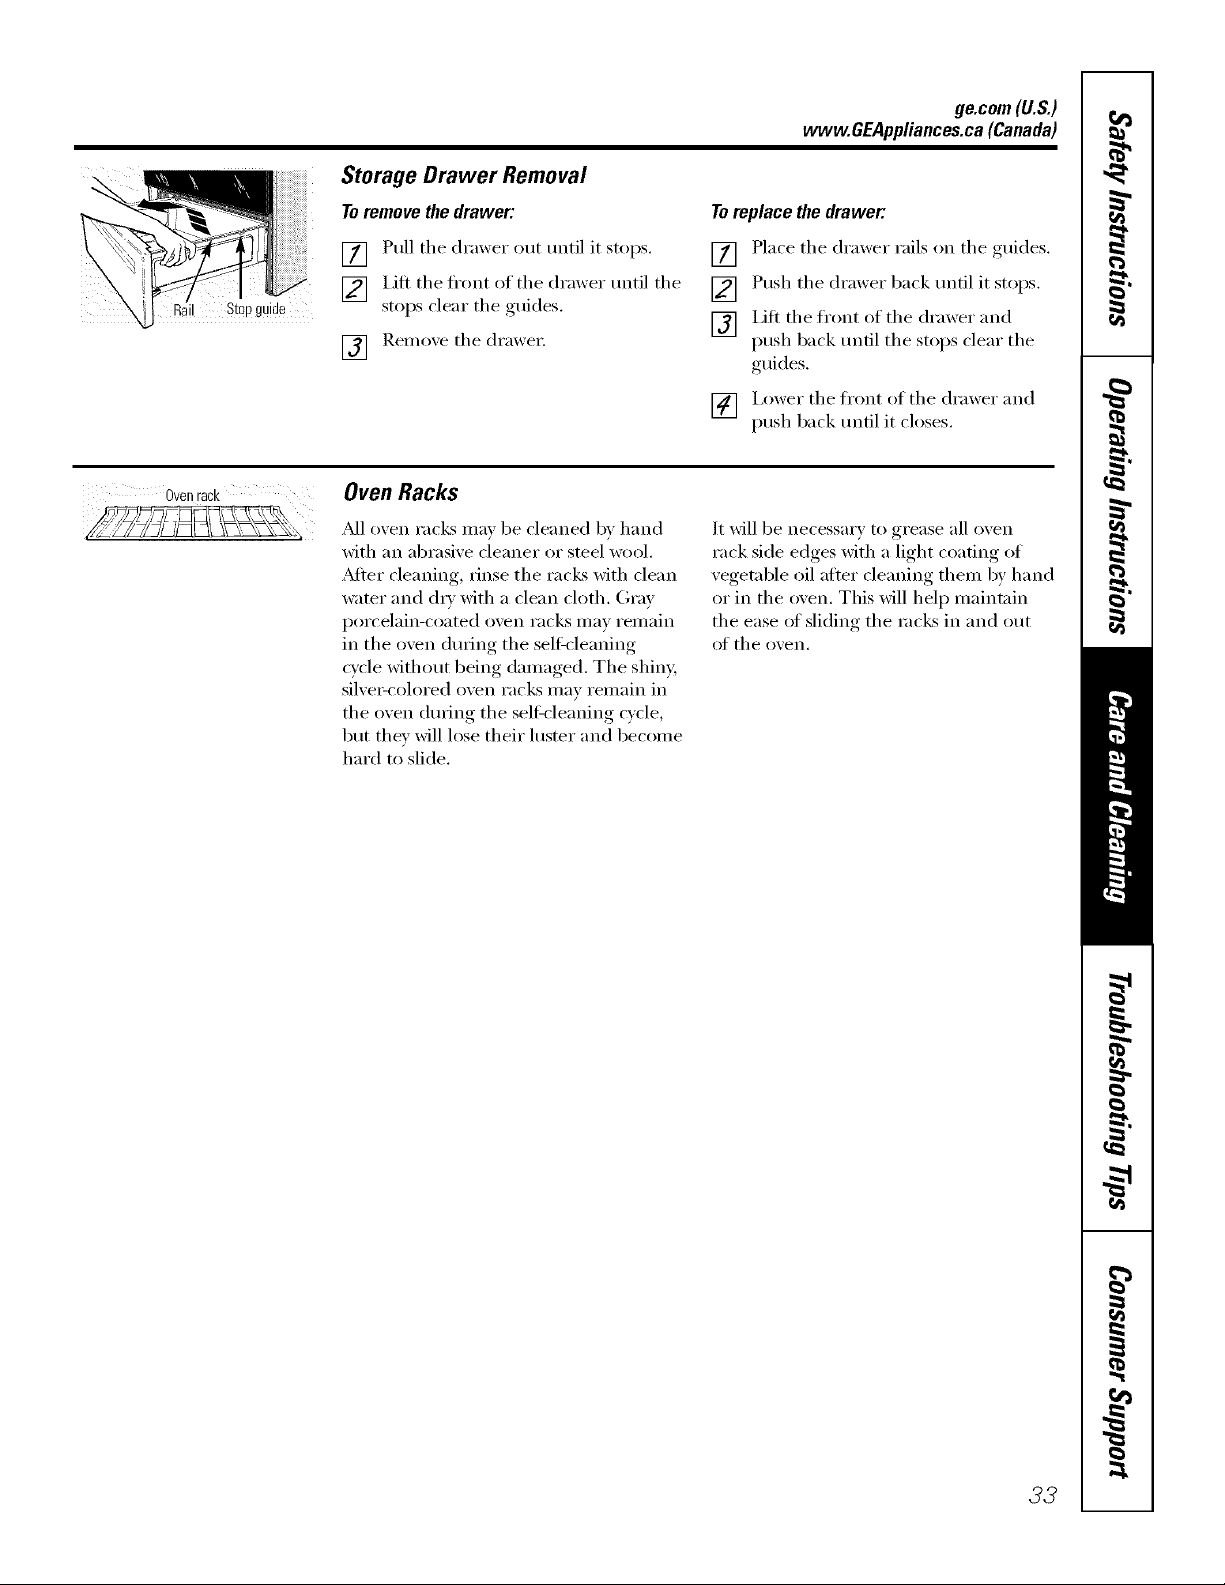
il Stopguide
ge.com(U.S.)
www.GEAppliances.ca(Canada)
Storage Drawer Removal
Toremove thedrawer:
[] Pull the drmver out until it stops.
[] Lilt the fl'ont of the drmver until the
stops clear the guides.
[] Remo',e the drmve_;
To replace the drawer:
[] Place the drawer rails on the guides.
[] Push the drmver back until it stops.
[] Lift the front of the drawer and
push back until the stops clear the
guides.
[] I,ower the front of the drawer and
push back until it closes.
Ovenrack OvenRacks
_dl oven raclcs may be cleaned by hand
with an abrasive cleaner or steel wool.
_Mter cleaning, rinse the raclcs with clean
water and d_' with a clean cloth. Gray
porcelain-coated oven racks ii/_lV i'eiil_lin
in the oven during the seltZcleaning
c)'cle without being damaged. The shiny,
silve>colored oven racks may remain in
the oven during the self:cleaning cycle,
but they will lose their luster and become
hard to slide,
It will be necessax T to grease all oven
rack side edges with a light coating of
vegetable oil atter cleaning them by hand
or in the oven. This will hel I) maintain
the ease ot sliding the rocks in and out
ot the oven.
33
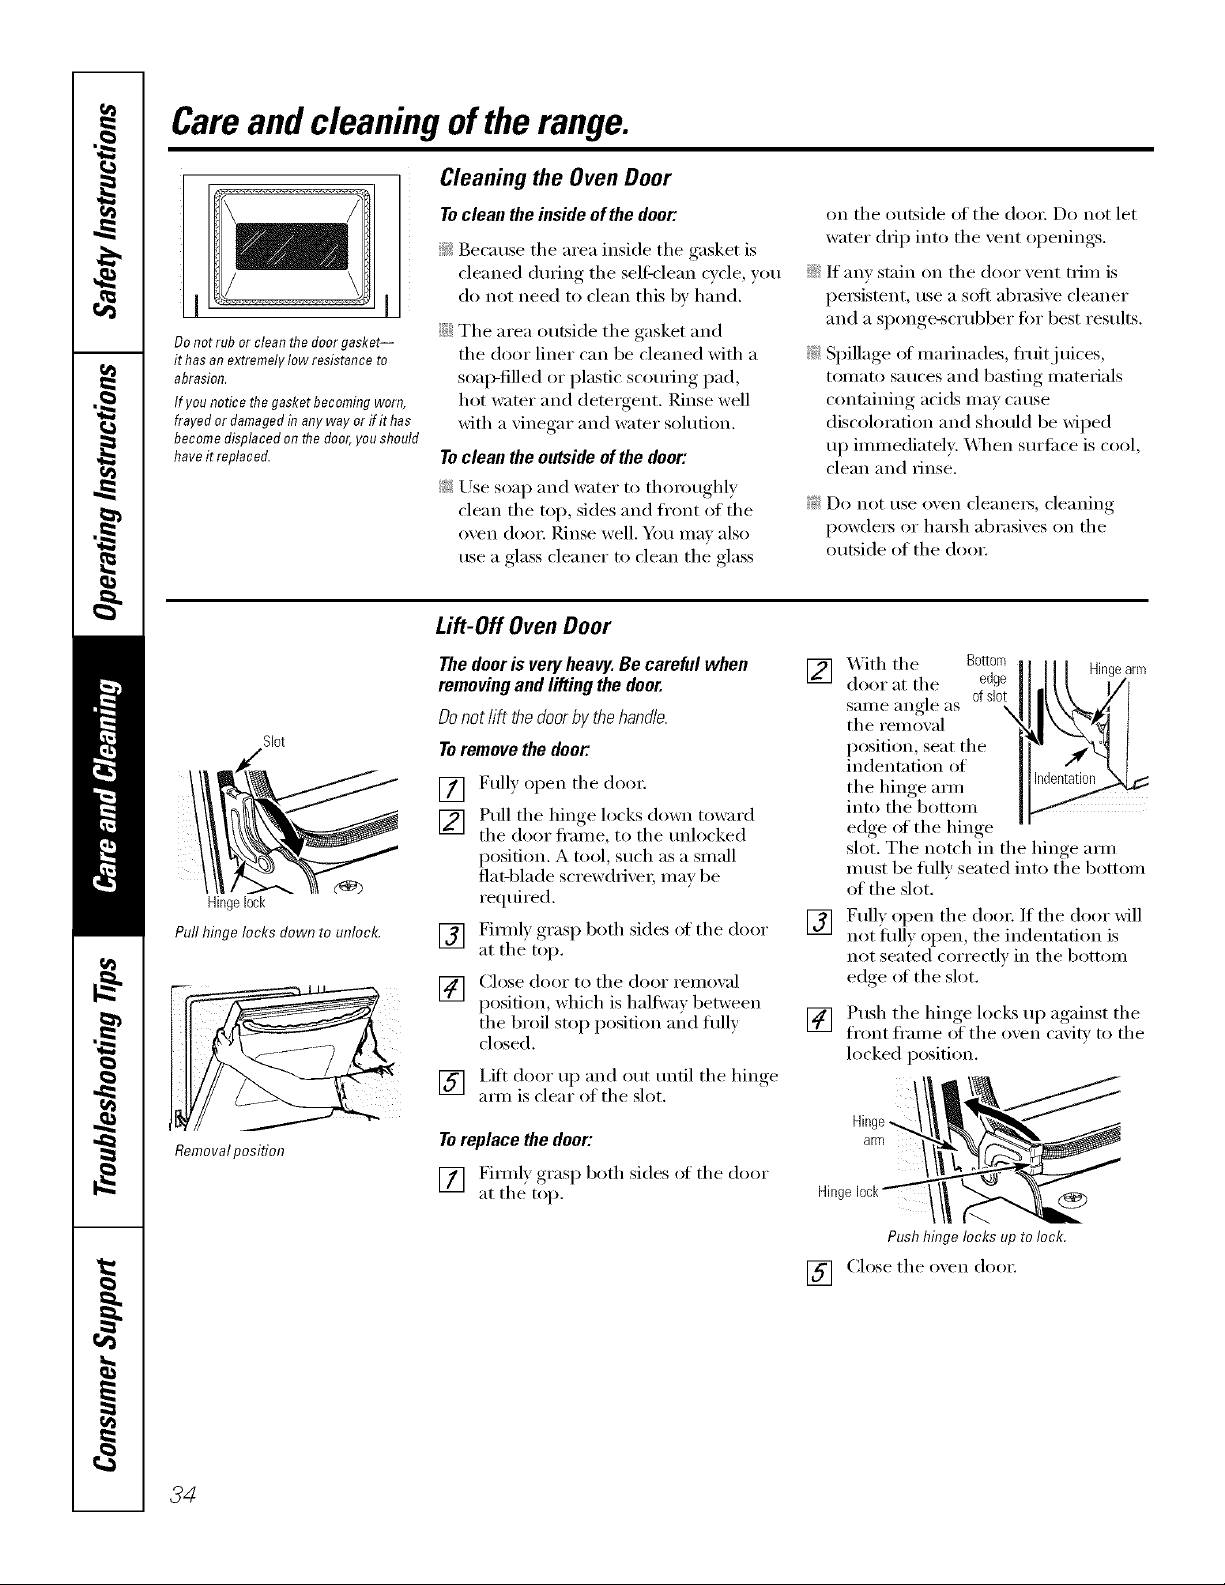
Careand cleaning of the range.
Do not ruborcleanthe door gasket--
it hasan extremelylow resistance to
abrasion.
If you notice the gasketbecomingworn,
frayed ordamagedin any wayorif it has
become displacedon the door,youshould
haveit replaced.
Cleaning the Oven Door
Toclean theinside of thedoor:
_ Because the area inside the gasket is
cleaned during the selt_'lean c_cle _ou
do not need to clean this by hand.
::Ji::The area outside the gasket and
the door liner can be cleaned with a
soap-filled or plastic scotwing pad,
hot water and detergent. Rinse well
with a vinegar and water solution.
Toclean the outside of the door:
_; Use soap and water to thoroughly
clean tile rap, sides and fl'ont of tile
oven dooi: ]_dnse well."_)/I Ill,IV also
use a glass cleaner to clean the glass
on tile outside ot tile doo_: Do not let
water drip into tile vent openings.
If anv stain on tile door vent trim is
persistent, use a soft abrasive cleaner
and a sponge-scrubber for best results.
Spillage oI marinades, fl'uitj uices,
tomato sauces and basting materials
containing acids may cause
discoloration and should be wiped
up immediately. _,_]/en surti_ce is cool,
clean and _inse.
Do not t/so o_,en cleanei3, cleaning
powde_ or hm_h abrasixes on tile
outside of the doo_:
Slot
Hingelock
Pull hingelocks down tounlock.
Removal position
Lift-Off Oven Door
Thedooris veryheavy.Be carefulwhen
removingand lifting thedoor.
Donotlift thedoorby thehandle.
Toremovethe deer."
[] Fully open tile dora:
[] Pull tile hinge locks down toward
tile door ti'ame, to tile tmlocked
position. A tool, such as a small
fiat-blade screwdriver; may be
required.
[] Fimflv,_,,ras,).l both sides of tile door
at tile top.
[] Close door to tile door remoxal
position, which is haltwm between
tile broil stop position m'M flflly
closed.
[] I,ifl door up and out tmfil tile hinge
am_ is clear of the slot.
Toreplace the door:
[] Fimflv,_oraso,t both sides ot tile door
at tile top.
[]
[]
X&qthtile Bottom
door at tile edge
same angle as 0fsl0t
X
the removal
position, seat the
indentation of
the hinge am/
into tile bottom
edge of the hinge
Hinge arm
.€
slot. Tile notch in tile hinge am/
must be flfllv seated into tile bottom
of tile slot.
Full) open the dora: If the door will
not fifll) open, the indentation is
not seated correctly in tile bottom
edge ot the slot,
[] Push the hinge locks u } aoainst tile
front fl'ame of tile oxen caxitv to tile
locked position.
Hinge
arm
Hinge10ck_
Pushhingelocks up tolock.
F_ Close tile oxen doo_:
34
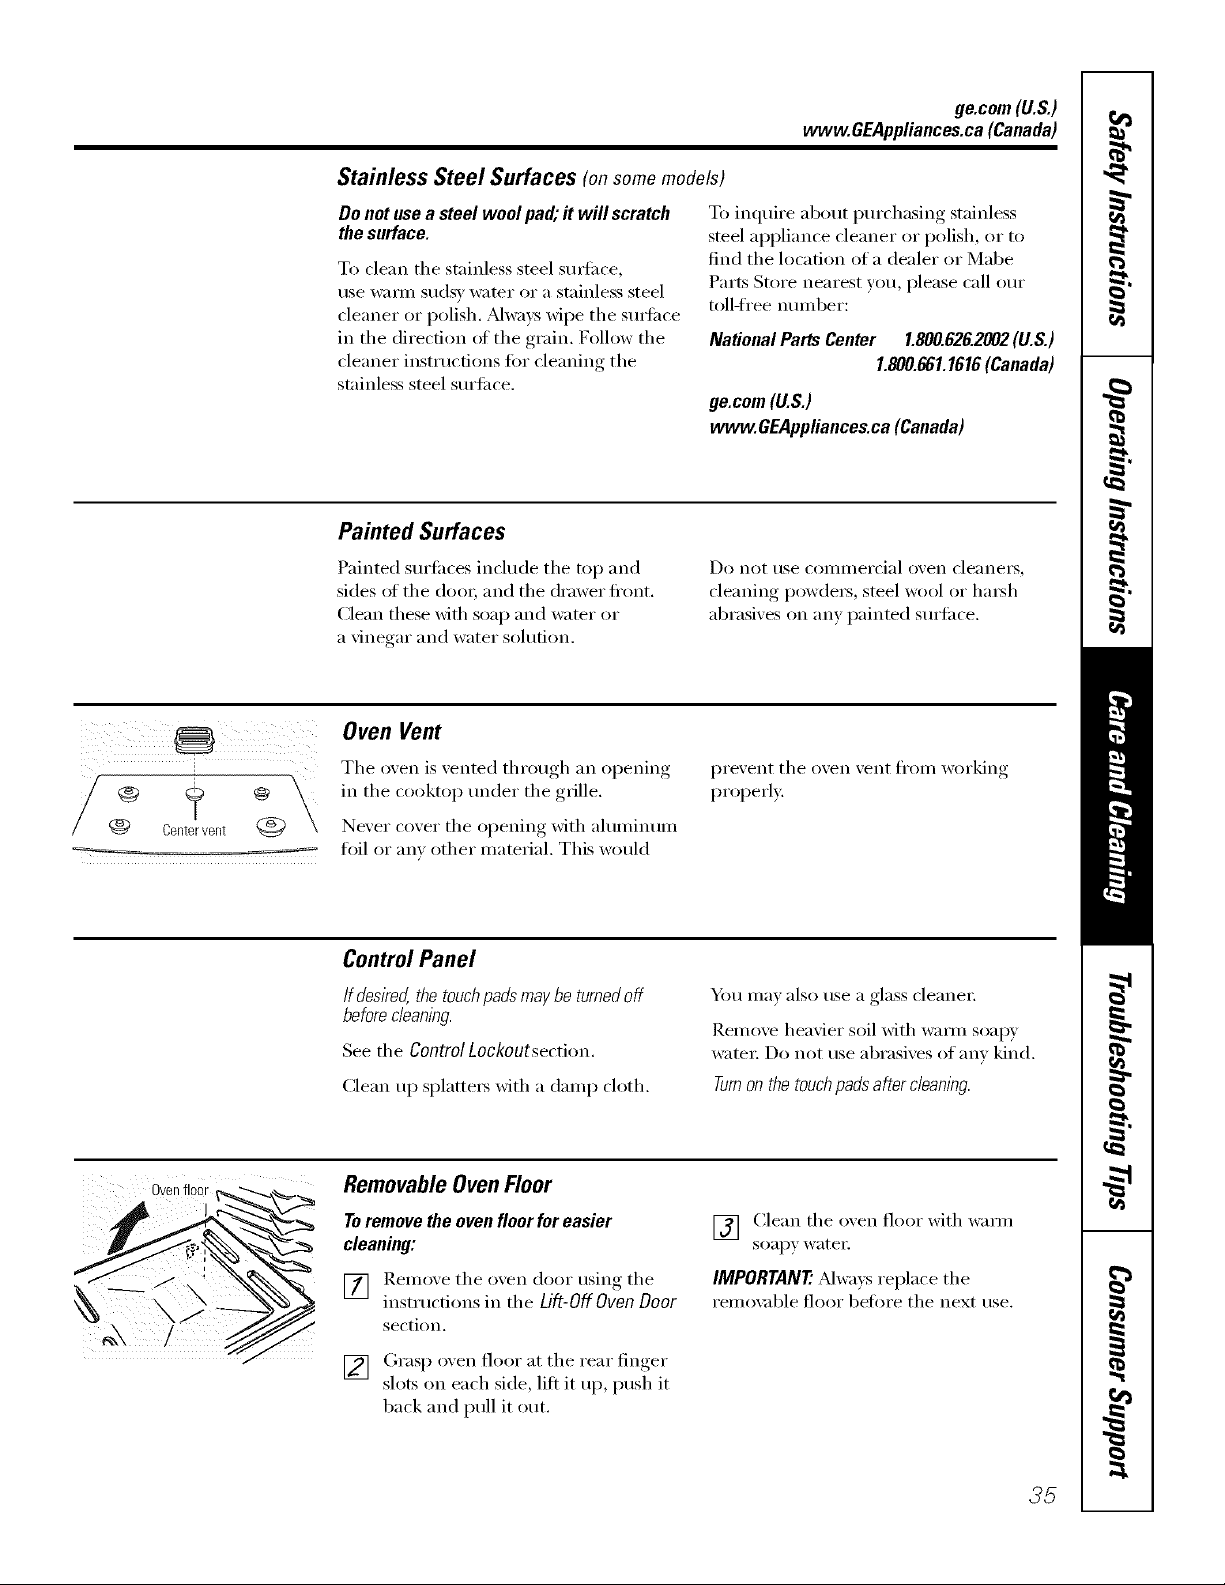
ge.com(U.S.)
www.GEAppliances.ca(Canada)
Stainless Steel Surfaces (onsomemodels)
Donot usea steel wool pad;itwill scratch
thesurface.
To clean the stainless steel smti_ce,
use w;mn sudsy water or a stainless steel
cleaner or polish. Mwa)_s wipe the smti_ce
in the direction of the grain. Follow the
cleaner instructions fiw cleaning the
stainless steel surfi_ce.
To inquire about i_urchasing stainless
steel appliance cleaner or polish, or to
find the location of a dealer or Mabe
Parts Store nearest you, please call our
toll-free number:
NationalPartsCenter 1.800.626.2002(U.S.)
1.800.661.1616(Canada)
ge.com(U.S.)
www.GEAppliances.ca(Canada)
Painted Surfaces
Painted surfi_ces include the top and
sides _ff the (loo_; and the drawer fl'ont.
Clean these _fl_ soap and water or
a \'inegar and water solution,
Do not tlse COillillei'cial o_,en cleaneis,
cleanino_ powde_, steel wool or hm_h
abrasixes on any painted surti_ce.
Centerverlt @
Oven Vent
The oven is vented through an opening
in the cooktop under the gillie.
Ne\'er cover the opening with ahmfinum
foil or any other material. This would
prevent the oxen xent from working
properly.
Control Panel
If desired,the touchpads may be turned off
before cleaning.
See the ControlLockoutsection.
Clean up splatte_ with a damp cloth.
_i_)tl II/_ly also rise a glass cleaner
Remove heavier soil with warn/soap)'
_te_: Do not use abrasives of any kind.
Turnonthe touchpadsaftercleanbg.
Ovenfloor
Removable OvenFloor
To remove the oven floor for easier
cleaning:
[] Remoxe the oxen door using the
instructions in the Lift-Off Oven Door
section.
[] (;rasp oxen floor at the rear finger
slots on each side, lift it up, push it
back and pull it Otlt.
V_ Clean the oven floor with warn/
soapy wateI:
IMPORTANT'.Mwa)s replace the
remox d)le floor befi)re the next use.
35
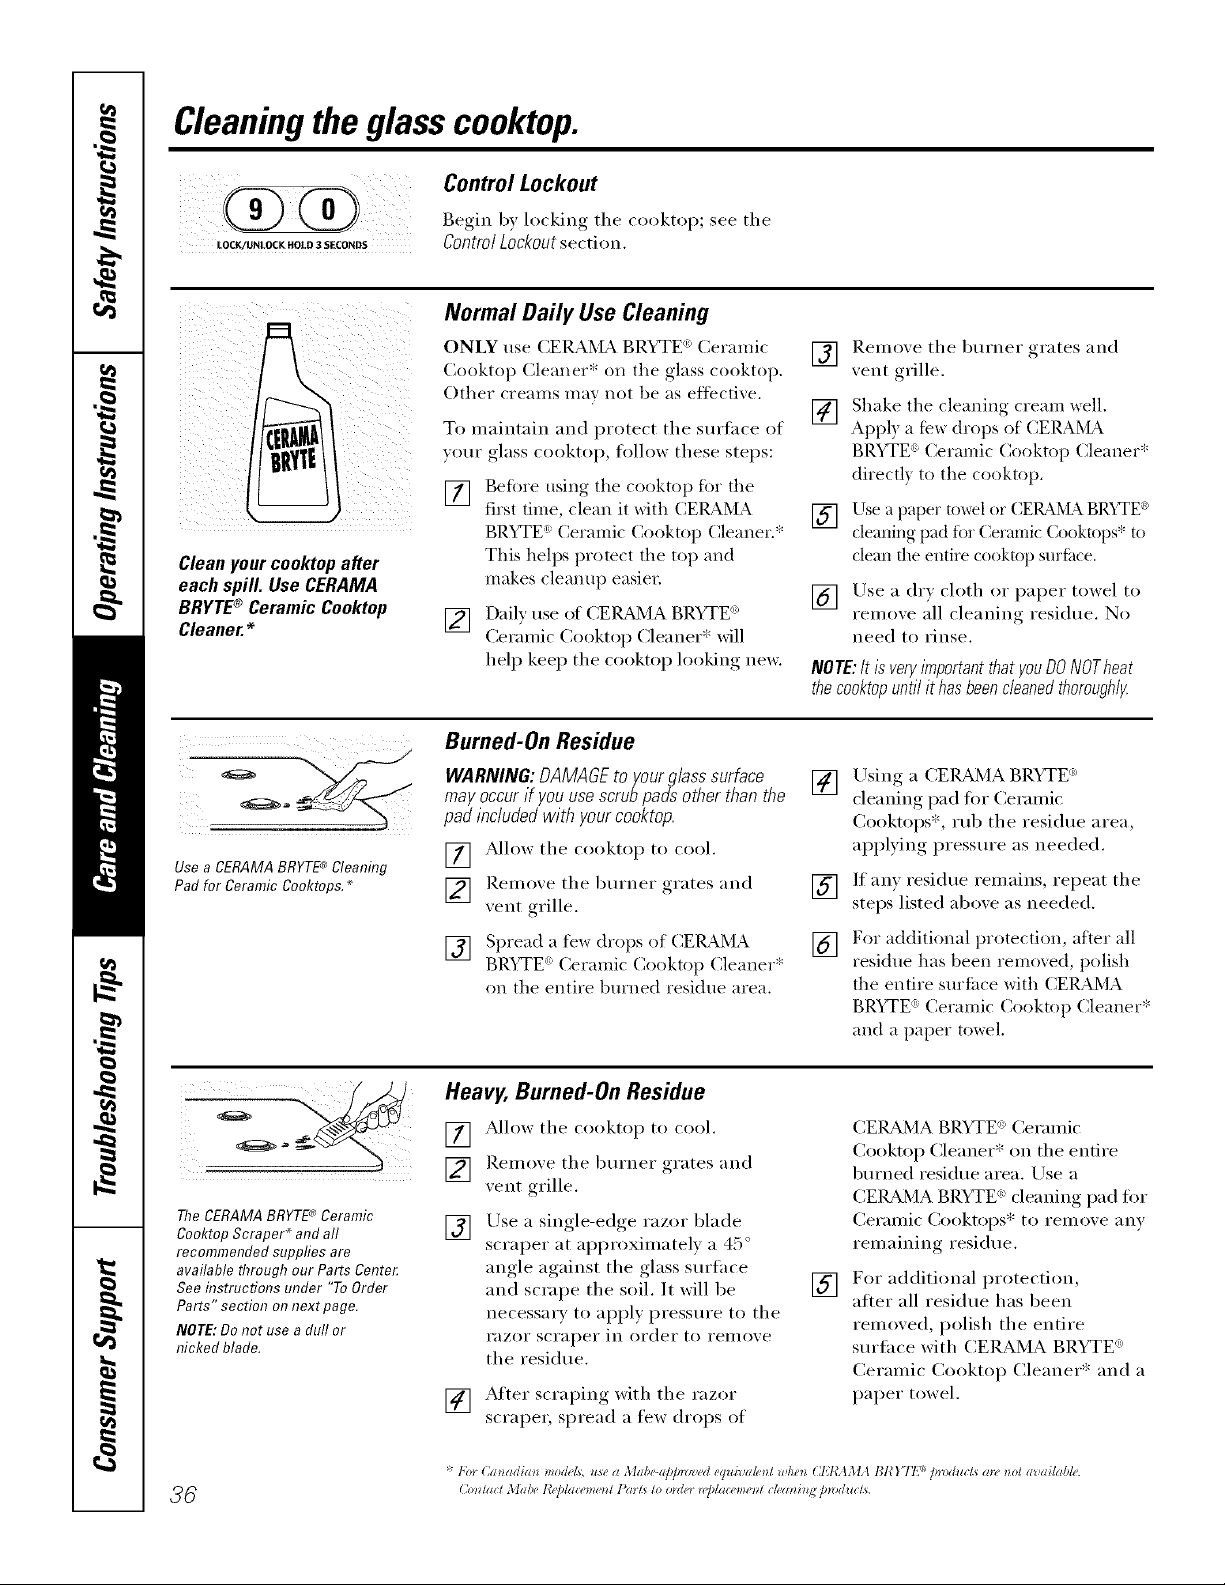
Cleaningtheglass cooktop.
Control Lockout
Begin by locking tile cooktop; see tile
LOCK/LINL(KK HOLD a SECONDS Centre/Lockoutsection.
Cleanyour cooktopafter
each spill.Use CERAMA
BRYTE® CeramicCooktop
Cleaner.*
Normal Daily Use Cleaning
ONLY use CERAI_,£_BRYTE_Ceramic
Cooktop Cleaner* (in the glass cooktop.
Other creams may not be as effective,
To maintain and protect tile surtace of
yore" glass cooktop, fl)llow these steps:
[] Before using tile cooktop for tile
first tinle, clean it with CERAMA
BRYTE:' Ceramic Cooktop Cleaner.*
This helps protect tile top and
makes cleanup easien
, {f CEI_IA BRYTE
] Daih'/lSe )" _ ' (a)
Ceramic Cooktop Cleaner* will
help kee I) the cooktop looking ne_:
[] Remove tile burner grates and
vent grille.
[] Shake tile cleaning cream _ell,
App1) a fb_ drops of CERAI%-_
BRYTE" Ceramic Cooktop Cleaner*
directl) to tile cooktop.
[] Use a paper towel or CERAi_,L_BR)rTE®
cleaning, llad ibr Ceramic Cooktops* to
clean the entire cooktop surfl_ce.
[] Use a dry cloth or paper towel to
remove all cleaning residue. No
need to rinse.
NOTE:/t is veryirgportantthatyouDONOTheat
thecooktopunti/it has beenc/eanedthorough/y
Use aCERAMA BRYTE_ Cleaning
Pad for Ceramic Cooktops._
Burned-OnResidue
WARNING:DAMAGEtoyourg/asssurface
mayoccurifyou usescrubpadsother than the
pad includedwith yourcooktop.
] _Mlow tile cooktop to cool,
[] Remoxe tile bm'ner grates and
xent ,Tille
[] Silread ,afew drotls of CEI_MA
BRYTE (' Ceramic Cooktop Cleaner*
on tile entire bm'ned residue area,
[] Using a CEILZ_d_4ABRYTE _>
cleaning pad fi)r Ceramic
Cooktops*, iub tile residue area,
applying pressm'e as needed.
[] If any residue remains, repeat the
steps listed above as needed.
[] For additional protection, after all
residue has been renloved, i/olish
tile entire sm'tace with CERAMA
BR'_TE:' Ceramic Cooktop Cleaner*
and a paper towel.
j
TheCERAMA BRYTE*_Ceramic
CooktopScraper* and all
recommended suppfies are
available through ourParts Cente_
See itTstructions under "To Order
Parts" section on next page.
NOTE:Do not useadull or
nicked blade.
Heavy, Burned-On Residue
[] _Mlow tile ('ooktop to cool.
[] Remove tile burner grates and
vent grille,
[] Use a single-edge razor blade
scraper at approximately a 45 °
angle against the glass sm'tace
and scrape the soil. It will be
necessa_ T to apply pressure to tile
I'HZOf SCI'[IpeI" iI1 oYder to YeIllOVe
the residue.
' l _ razor
] _Mter scra )ino- with tile
scraper, spread a few drops of
[]
CEIU_d_IA BRYTE ) Ceramic
Cooktop Cleaner* on the entire
burned residue area. Use a
CEILZ_d'vlABRYTE e_cleaning pad flit
Ceramic ())oktops* to remove any
remaining residue.
For additional protection,
alter all residue has been
removed, polish tile entire
sm'iace with CERAMA BRYTE ')
Ceramic Cooktop Cleaner* and a
paper towel.
'_l'b_ Canadian modds, t¢sea Mabe-@/mn ed eq_¢i-_,ak_nlwll_m CI IL L'_IA i}l_ Y77__ tm)(ha ¢smy no! (v_aikzbl_.
ge.com(U.S.)
Glasssurface--potential forpermanent damage, www.GEAppliances.ca(Canada)
Sugaryspillovers(suchas
jellies, fudge,candy,syrups)
ormeltedplasticscan cause
pitting ofthesurfaceofyour
cooktop(notcoveredby the
warranty)unlessthespillis
removedwhile stillhot.
Specialcare shouldbe taken
whenremovinghotsubstances.
Besuretousea new,sharp
razorscraper.
Donotusea dullornicked
blade.
Damage fromSugarySpills and Melted Plastic
[] Turn off all suI_Ii_ceunits and, _fith
}lIl ()veil mitt, reillove hot p}lils and
grates.
[] An) renlaining spilloxer sh(iuld be
left until the sui'ti_ce of the cooktop
has cooled,
] _,Vearhlo an o_en Initt:
a. Use a single-edge razor blade
scraper (CEI_dMA BRYTE_
(_eramic (:ooktop Scraper*) to
inove the spill to a cool area oil
the cooktop,
b, Reinove the spill with
paper t()wels,
] Don't use the stii_i_ce units again
until all of the residue has been
completely rein()ved.
NOTE:/fp/tting or indentationin the glass
surfacehas already occurred,the cooktopglass
will have to bereplacedInthis case, service will
be necessa_/
To Order Parts
To order (:EI_dMA BRYTE '_C.ei'ainic
(:ooktop Cleaner and the cooktop
scraper (or Mabe-approved equi\:dent
product in Canada), please call our t(>ll-
fl'ee nuniber:
NationalParts
Center .............. 800.626.2002(U.S.)
800.661.1616(Canada)
ge.com (U.S.)
www.GEAppliances.ca(Canada)
CERAMABRYTE®Ceramic
CooktopCleaner ........... # WXIOX300
CERAMABRYTE_ Ceramic
CooktopScraper........... # WXIOX0302
Kit ........................ # WB64X5027
(Kitincludescreamandcooktopscraper)
CERAMABRYTE_ CleaningPadsfor
CeramicCooktops* ........ # WX10X350
37
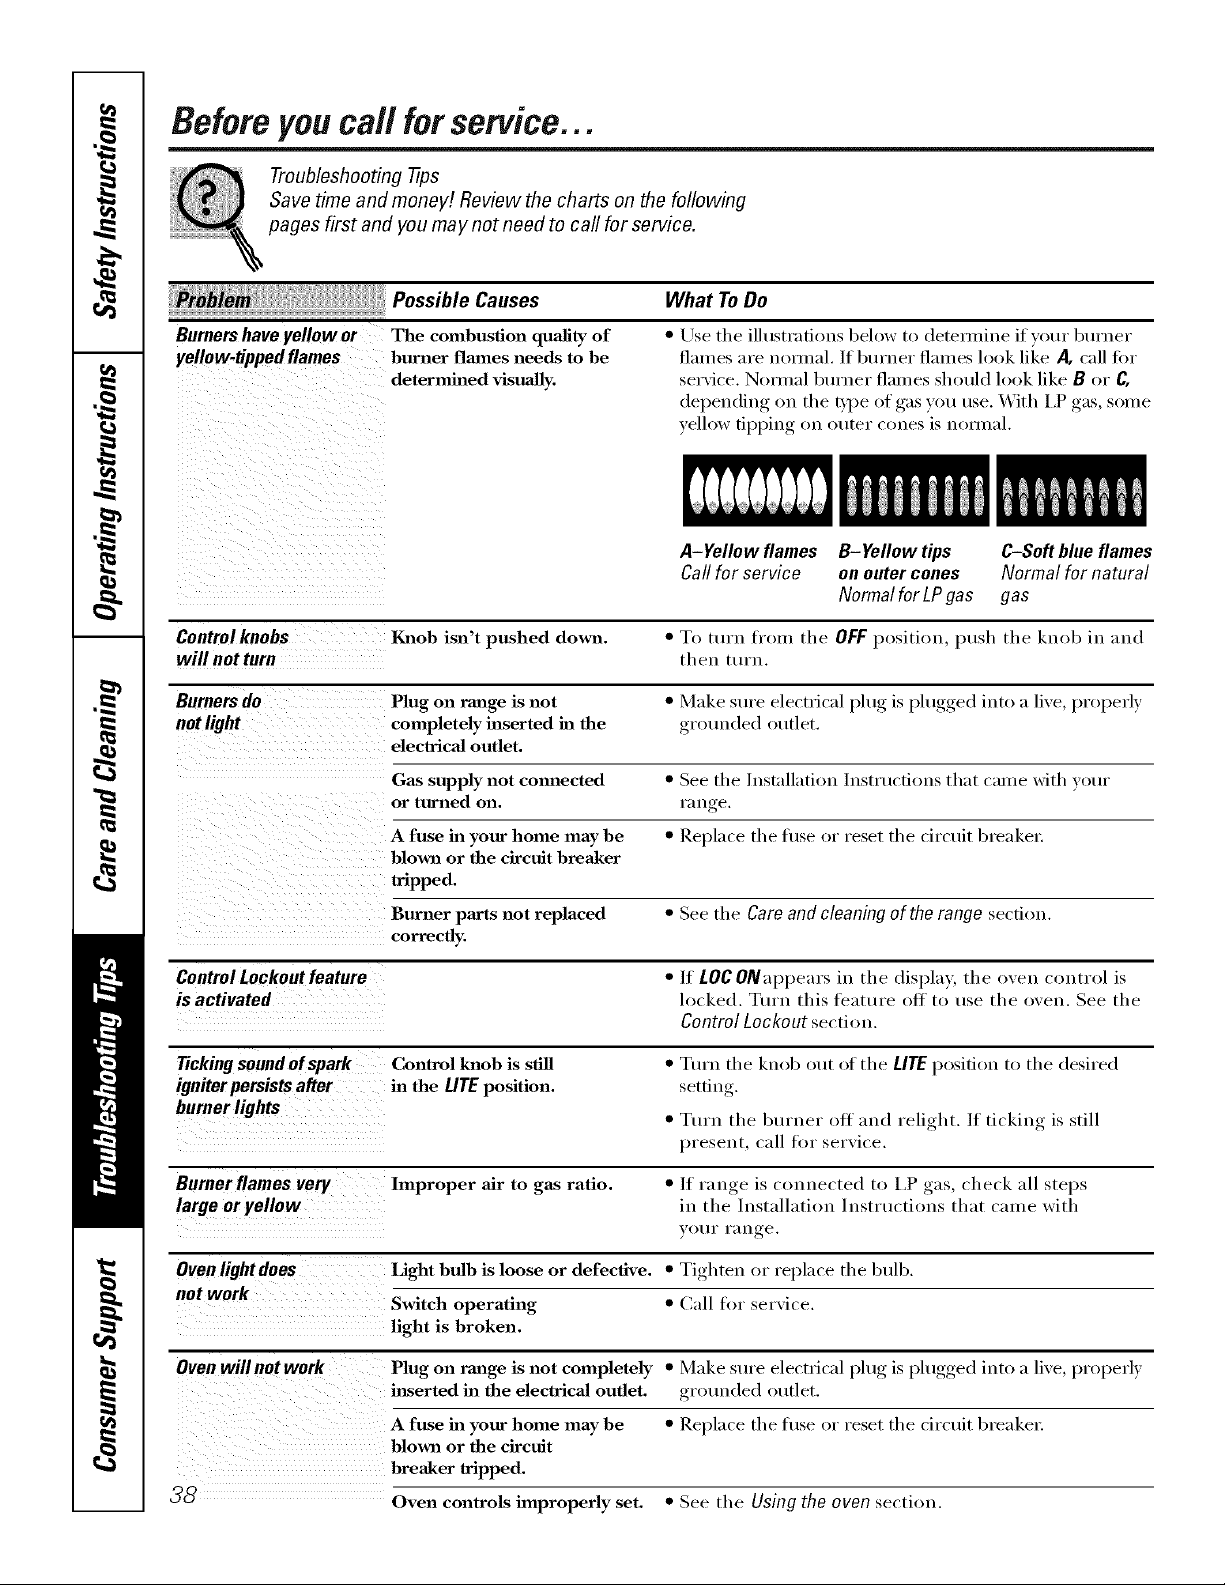
Beforeyou call forservice...
Troubleshooting -tips
Save time and money! Review the charts on the following
pages first and you may not need to call for service.
Possible Causes
Burnershave yellow or The combustion quality of
yellow-tipped flames burner flmnes needs to be
determhled visuaJly.
What ToDo
• Use the ill ustrafions bel()w to detemfine if vour burner
flaxnes are nomml. If burx]er flames look like _ call fin"
sex'\'ice. Nomml burner flames should look like B or C,
depending on the Dpe of gas you use. With I,P gas, some
yellow tipping on outer cones is nomml.
A-Yellow flames B-Yellow tips C-Soft blue flames
Call for service onouter cones Normal for natural
Normal for LPgas gas
Controlknobs Knob isn't pushed down. • To turn from the OFF l)osition, push the knob in and
will notturn then turn.
Burners do Plug on range is not • Make sure electrical l]lug, is l)lugged,, into a live, l)roperly
not light completely inserted in the grounded outlet.
electrical outlet.
Gas supply not commcted • See the Installation Instructions that came with your
or turned on, X';II] re
A fuse in your home may be • Replace the tuse or reset the circuit breakex:
blown or the circuit breaker
tripped.
Burner parts not replaced • See the Careand cleaning of the range secdon.
correctly,
Control Lockout feature •/t LOC ONal)l)ears in the display, the oven control is
is activated locked. Turn this teature off to use the oven. See the
Control Lockout section.
Ticking seund of spark Control knob is still • Turn the knob out of the LITEposition to the desired
igniter persists after in the LITE position, settiu
burner lights • Turn the burner ott and relight. If ticking is still
l)reseut, call tot service.
Burner flames very hnproper air to gas ratio. •/f range is connected to l,P gas, check all steps
large or yellow in the h]stallation Instructions that came with
VOlXX" X';IX] _e
Oven light does Light bulb is loose or defective. • Tighten or tel)lace the btflb.
not work
Switch operating • Call li)r service.
light is broken.
Oven willnot work Plug on range is not completely • Make sure electrical l)lug, is l)lugged,, into a live, l)rol)erly
inserted in the electrical outlet, grotmded outlet.
A fuse in your home may be • Replace the tuse or reset the circtfit breakex:
blown or the circuit
breaker tripped.
_ Oven controls improperly set. • See the Using the oven section.

ge.com(U.S.)
www.GEAppliances.ca(Canada)
Possible Causes What ToDo
Food does notbake Oven controls hnproperly set. * See tile Usingthe oven section.
or roast properly
Rack position is incorrect * See tile Usingthe oven section.
or the rack is not level.
Incorrect cookware or * See tile Using the oven section.
cookware of improper
size being used.
Oven thermostat needs * See tile Adjust the oven thermostat - Do it yourself[
adjustment, section.
Food does not Oven controls improperly set. * Make sure v(>u t(>ttch tile BROIL HI/LO pad.
broil properly
hnproper rack position * See the Broiling Guide.
being used.
Cookware not suited * For best results, use a pan designed fin" broiling.
for broiling.
The probe is plugged into the * Unplug and remove the probe from the oven.
outlet ha the oven.
In some areas the power * Preheat the broil element fin" 10 minutes.
(voltage) may be low.
• Broil lot the longest period of time recommended in
the Broiling Guide.
Oven temperature Oven thermostat • See the Adjust the oven thermostat - Do it yourself[
too hot or too cold needs adjustment, section.
Oven door is crooked The door is out of position. • Because the oven door is removable, it sometimes
gets out of position dm'ing installation. Remove and
replace the oven door. See the Lift-Off Oven Door
section.
Storage drawer Rear drawer support is • Reposition the drawer. See the Storage Drawer
is crooked on top of the guide rail. Removalinstructions in the Care and cleaning of your
range section.
Storage drawer Power cord may be • Reposifi(m the drawer and power cord. See the
won't close obstructhag drawer Storage Drawer Removal instrucfi_>ns in the Care and
in the lower back cleaning of your range section.
of the range.
Rear drawer support is
on top of the guide rail.
• Reposition the drawer. See the Storage Drawer
Removalinstmctions in the Care and cleaning of
your range section.
39
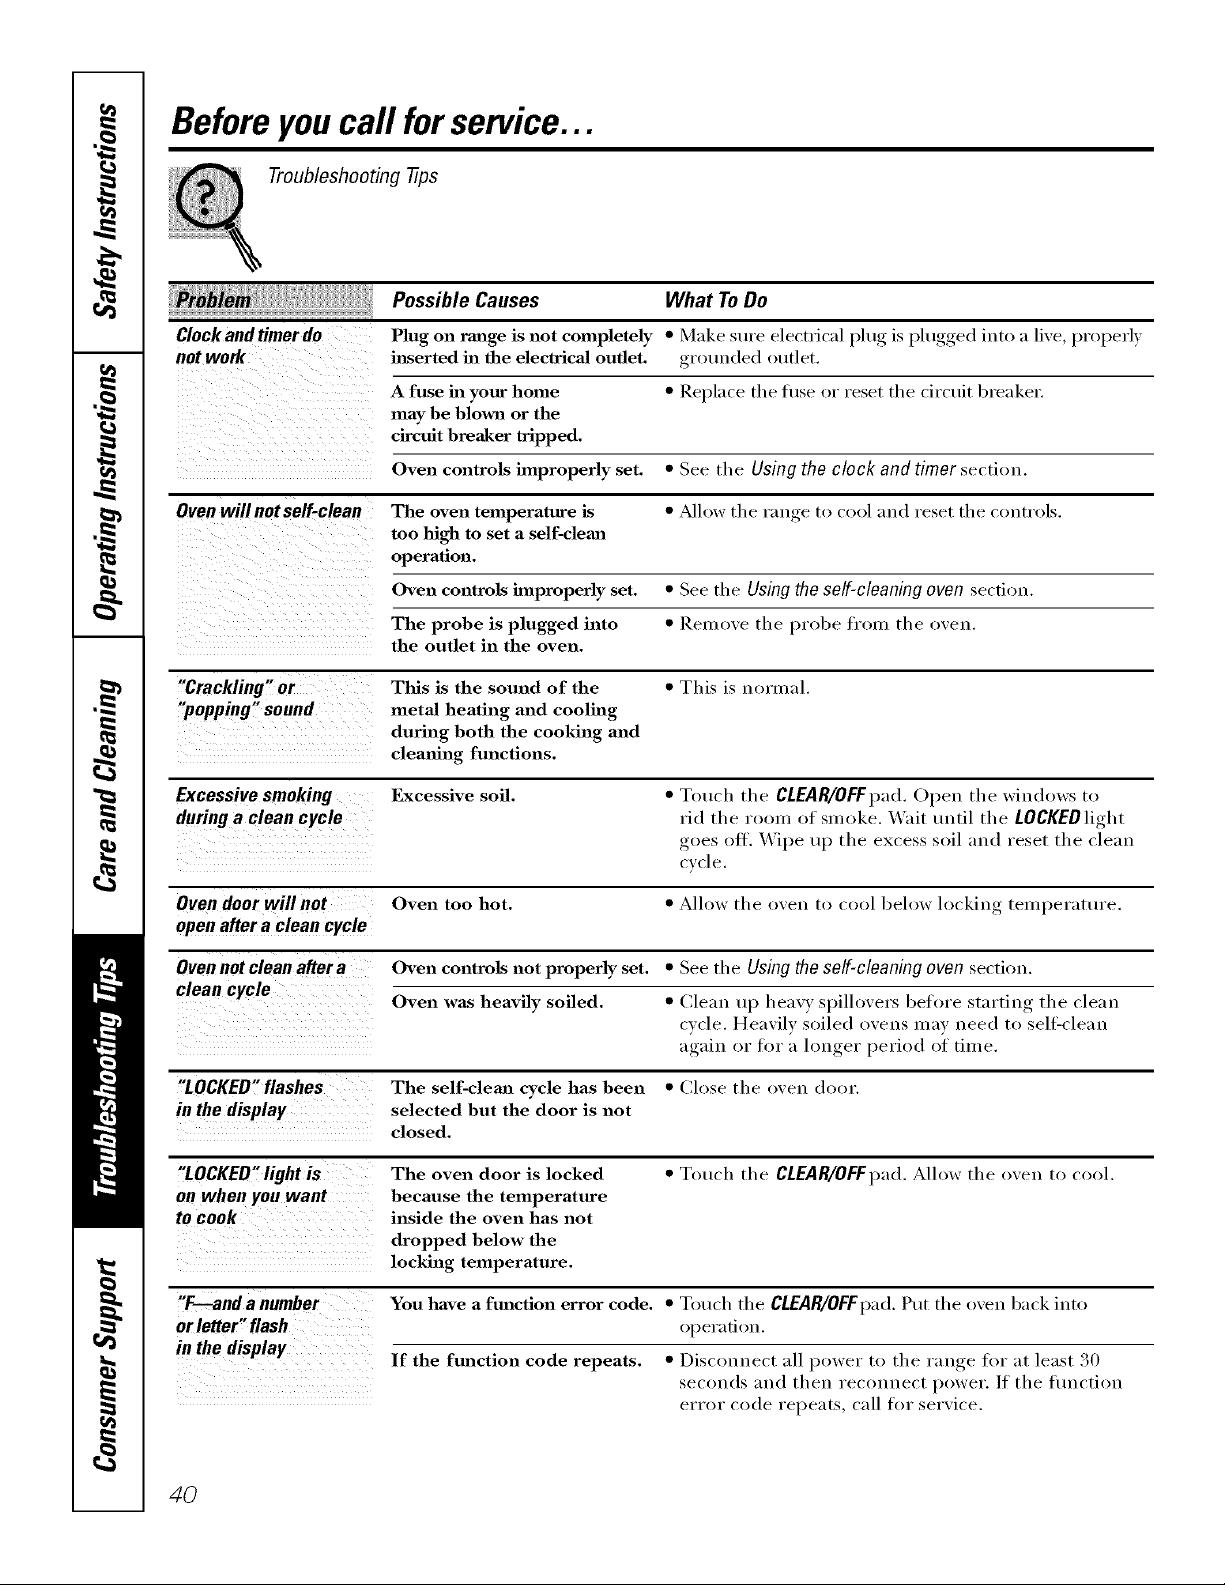
Before you call for service...
Troubleshooting tips
Possible Causes What ToDo
Clockand timerdo Plug on range is not completely * Make sure electrical l)lug, is l)htgged,, into a live, properly
not wok inserted ha the electrical outlet, grounded ot/tlet.
A fuse in your home * Replace tile fl/se or reset tile circuit breaker:
may be blown or the
circuit breaker tripped.
Oven controls improperly set. * See tile Using the clock and timer section.
Oven will not self-clean The oven temperature is * _Mlow the range to cool aud reset the controls.
too high to set a self-clem_
operation.
Oven controls improperly set. * See the Using the self-cleaning oven section.
The probe is plugged into * Rel//ove the probe fl'om the oven.
the outlet in the oven.
"Crackling" or This is the sound of the • This is normal.
"popping" sound metal heating and cooling
during both the cooking and
clemfing functions.
Excessive smoking Excessive soil. * Touch the CLEAR/OFFpad. Open the windows to
during a clean cycle rid the room of smoke. _'ait tmtil the LOCKEDlight
goes off. _,Vil)e tq) the excess soil and reset the (leau
cvcle.
Oven door will not Oven too hot. * Allow the oven to cool beh)w locking temperattu'e.
open after a clean cycle
Oven notclean after a Oven controls not properly set. * See the Using the self-cleaning oven section.
Oven was heavily soiled. • (',leau tip heavy spillovers before startiug the cleau
cycle. Heavily soiled ovens u/av need to sell_cleau
again, or for a lon,_er,, period of tiu/e.
"LOCKED"flashes The self-cleml cycle has been • Ch)se the oven door.
in the display selected but the door is not
closed.
"LOCKED"light is The oven door is locked • Touch the CLEAR/OFFpad. Allow the oven to cool.
on when you want because the temperature
to cook inside the oven has not
dropped below the
locking temperature.
"F--and a number
orletter"flash
in thedisplay
You have a fm_ction error code. • Touch the CLEAR/OFFpad. Put the ovela back into
operation,
If the fm_ction code repeats. • Discom_ect all power to the range for at least 30
seconds and then reconnect power. If the flmction
error code repeats, call for serxice.
40

ge.com(U.S.)
www.GEAppliances.ca(Canada)
What ToDo
Control signals after You forgot to enter a * Touch tile BAKE pad mad desired temperature or
entering cooking time bake temperature or tile SELF CLEAN LO/STD l)ad and desired clean time.
or start time cleaning time.
Display goes blank A fuse ha your home may * Rel)lace tile fl/se or reset tile circuit breaker:
be blown or the circuit
breaker tripped.
The clock is in the * See tile Special features of your oven control section.
black-out mode.
Display flashes Power failure. * Reset the clock.
Unable to get the Oven control pads were * The BROIL HI/LO and BAKE pads InUSt be touched at
displayto show "SF" not touched properly, the same time and held for 5 seconds.
"Probe" appears in This is reminding you to * Enter a larobe teInl_erature.
the display enter a probe temperature
after plugging ha the probe.
Power outage, Power outage or surge. * Reset the clock./f the oven was in use, you ultlst reset
clock flashes it by. touching, the CLEAR/OFFpad, ,settiu*_ the clock
and resetting an) cooking flmctiou.
Steam from the vent When using the convection * This is normal.
feature, it is normal to see
steam coming out of the oven
vent. As the number of racks
or amount of food being
cooked increases, the amount
of visible steam will increase.
Possible Causes
"Burning" or "oily"
odoremitting from
thevent
This is normal in a new oven * To speed the process, set a self-clean cycle for a
and will disappear in time. minimmn of 3 hem's. See the Using the self-cleaning
()x, eil section.
Strongodor
An odor from the insulation * This is tempora_ T.
around the inside of the oven
is normal for the first few times
the oven is used.
Fannoise
A cooling fan or a convection
fan (depending on the
function you axe using) may
automatically turn on mad off.
• This is normal. The cooling £m will turn off and
on to cool internal parts. It may mn after the oven is
turned OFF. The convection tim will cycle on and off
until the flmction is over or the door is opened.
4/
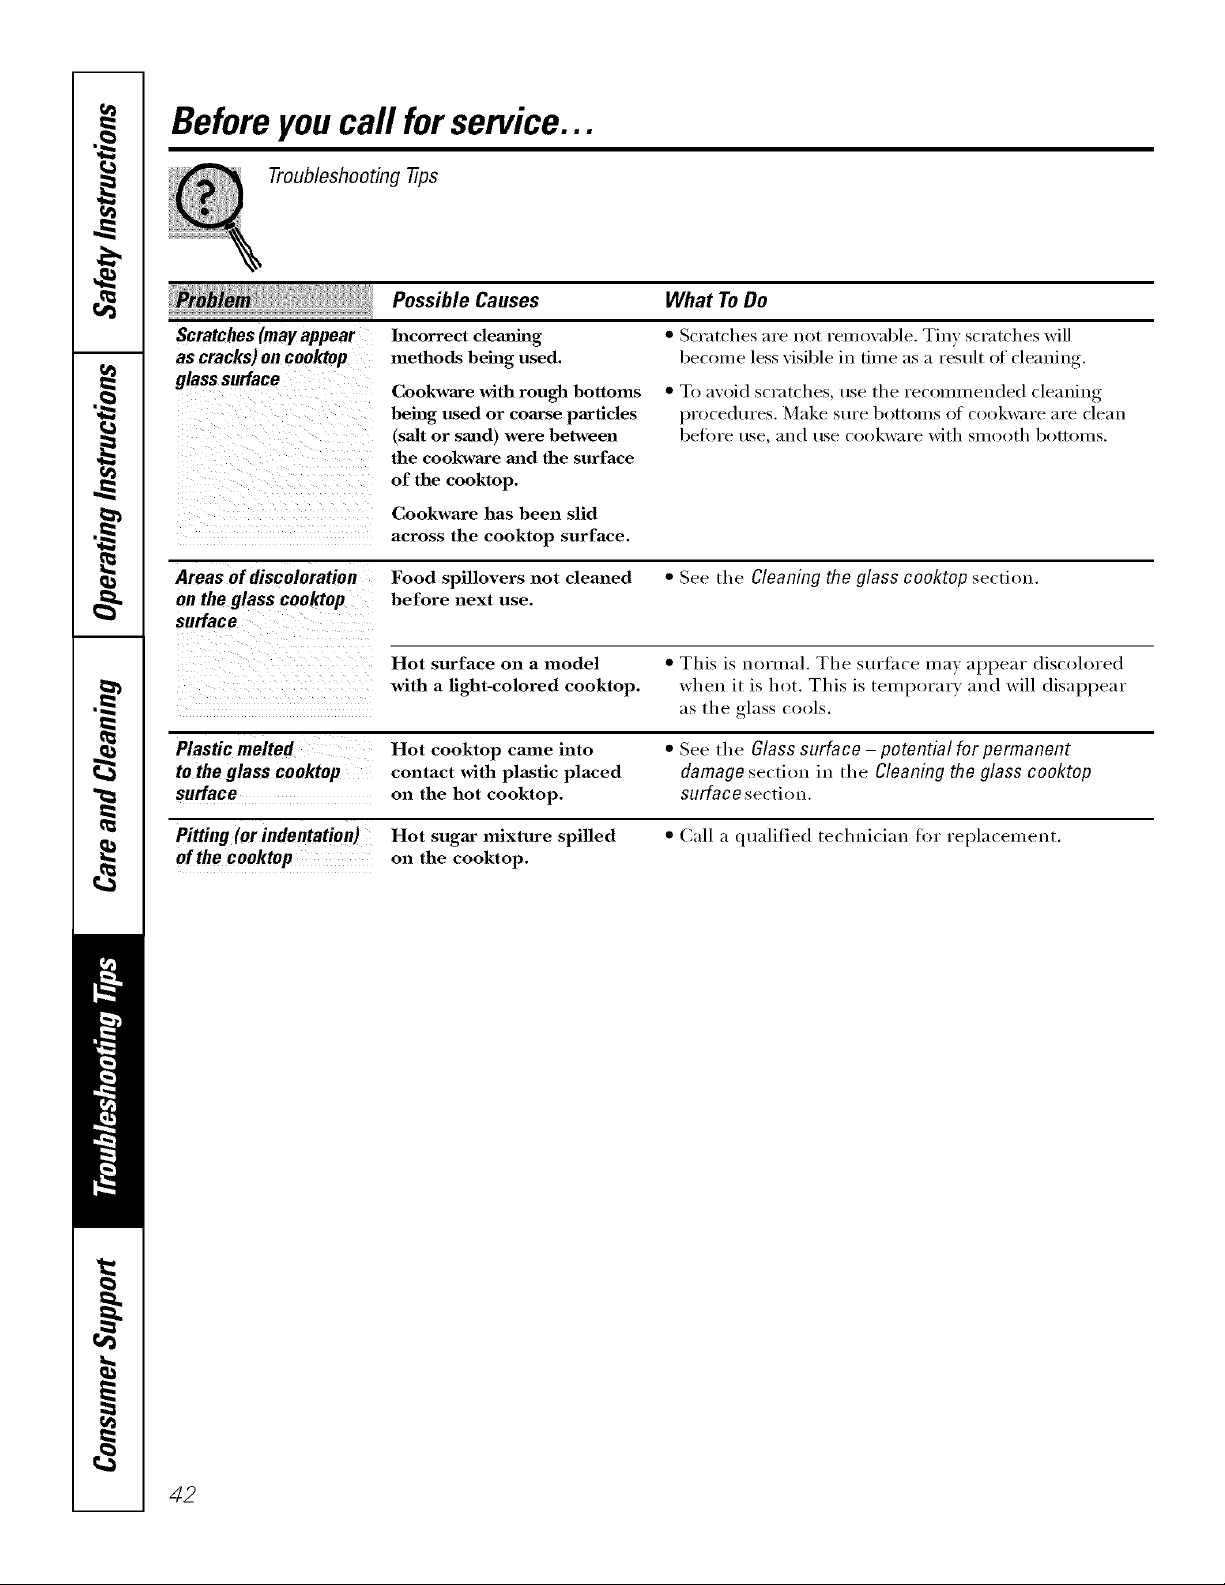
Before you call for service...
Troubleshooting tips
Scratches(mayappear
as cracks)oneooktop
glasssurface
Areas ofdiscoloration
onthe glass cooktop
surface
Possible Causes What To Do
Incorrect clemfiug
methods being used.
Cookware with rough bottoms
being used or coamse particles
(salt or sand) were between
the cookwaxe mid the surface
of the cooktop.
Cookware has been slid
across the cooktop surface.
• Scratches are not remo_al)le. Tin) scratches will
becon/e less xisible in time as a result of cleaning.
• To axoid scratches, use tile recommended cleaning
l)rocedures. Make s/Ire bottolns of cookware are clean
betore use, and use cookware with slnoot]/bottolns.
Food spillovers not cleaned • See tile Cleaning the glass cooktop section.
before next use.
Hot surface on a model • This is normal. Tile surtace ma) appear discolored
with a light-colored cooktop, when it is hot. This is temporary and will disappear
as tile o-lass cools.
Plastic melted Hot cooktop came into
to the glass cooktop contact with plastic placed
surface on the hot cooktop.
Pitting (orindentation) Hot sugar mixture spilled
of the cooktop on the cooktop.
• See the Glass surface- potential for permanent
damage section in tile Cleaning the glass cooktop
surface section.
• Call a qualified technician for replacement.
42
FOR CONSUMERS IN THE UNITED STATES
GE Service Protection Plus 'M
GE, a name recognized worldwide ff)_"quality' and dependability'; offers y'ou
Sevvice Protection Plus'_'--compvehensive wotection on all your appliances--
No Matter What Brand!
Benefits Include:
• Backed by GE
• All brands covered
• Unlimited service calls
• All parts and labor costs included
• No out-of-pocket expenses
• No bidden deductibles
• One 800 number to call
We TI Cover Any Appliance.
Anywhere. Anytime. *
You will be completel} satisfied x_ith our service protection or }o/[ ma} request }our mone} back
(m tile remaining value of }our contract. No questions asked. It's that simple.
Protect yore" refrigerator, dishwashe* _,washer and dryei _,range, TV, VCR and much more--aaay brand!
Plus there's no extra charge [or emeigency service and low monthly financing is available. Even icemaker
coverage and toed spoilage protection is o_tbred. You call rest eas> knowing that all your valuable
household pr()ducts are protected against expensive repairs.
Pl{l(e }()/[[" (Olltl(lell(e ill (_E and (all [As ill tile t!,S, toll-free at 800.626.2224
tor n/ore intorI/]atioll.
:_\11brands coxeFed, tip to 20 )ears old, in the (ontin<nl d [_.S.
Please place in envelope and mail to:
General Electric Company
Warranty Registration Department
P.O. Box 32150
Louisville, KY 40232-2150
43
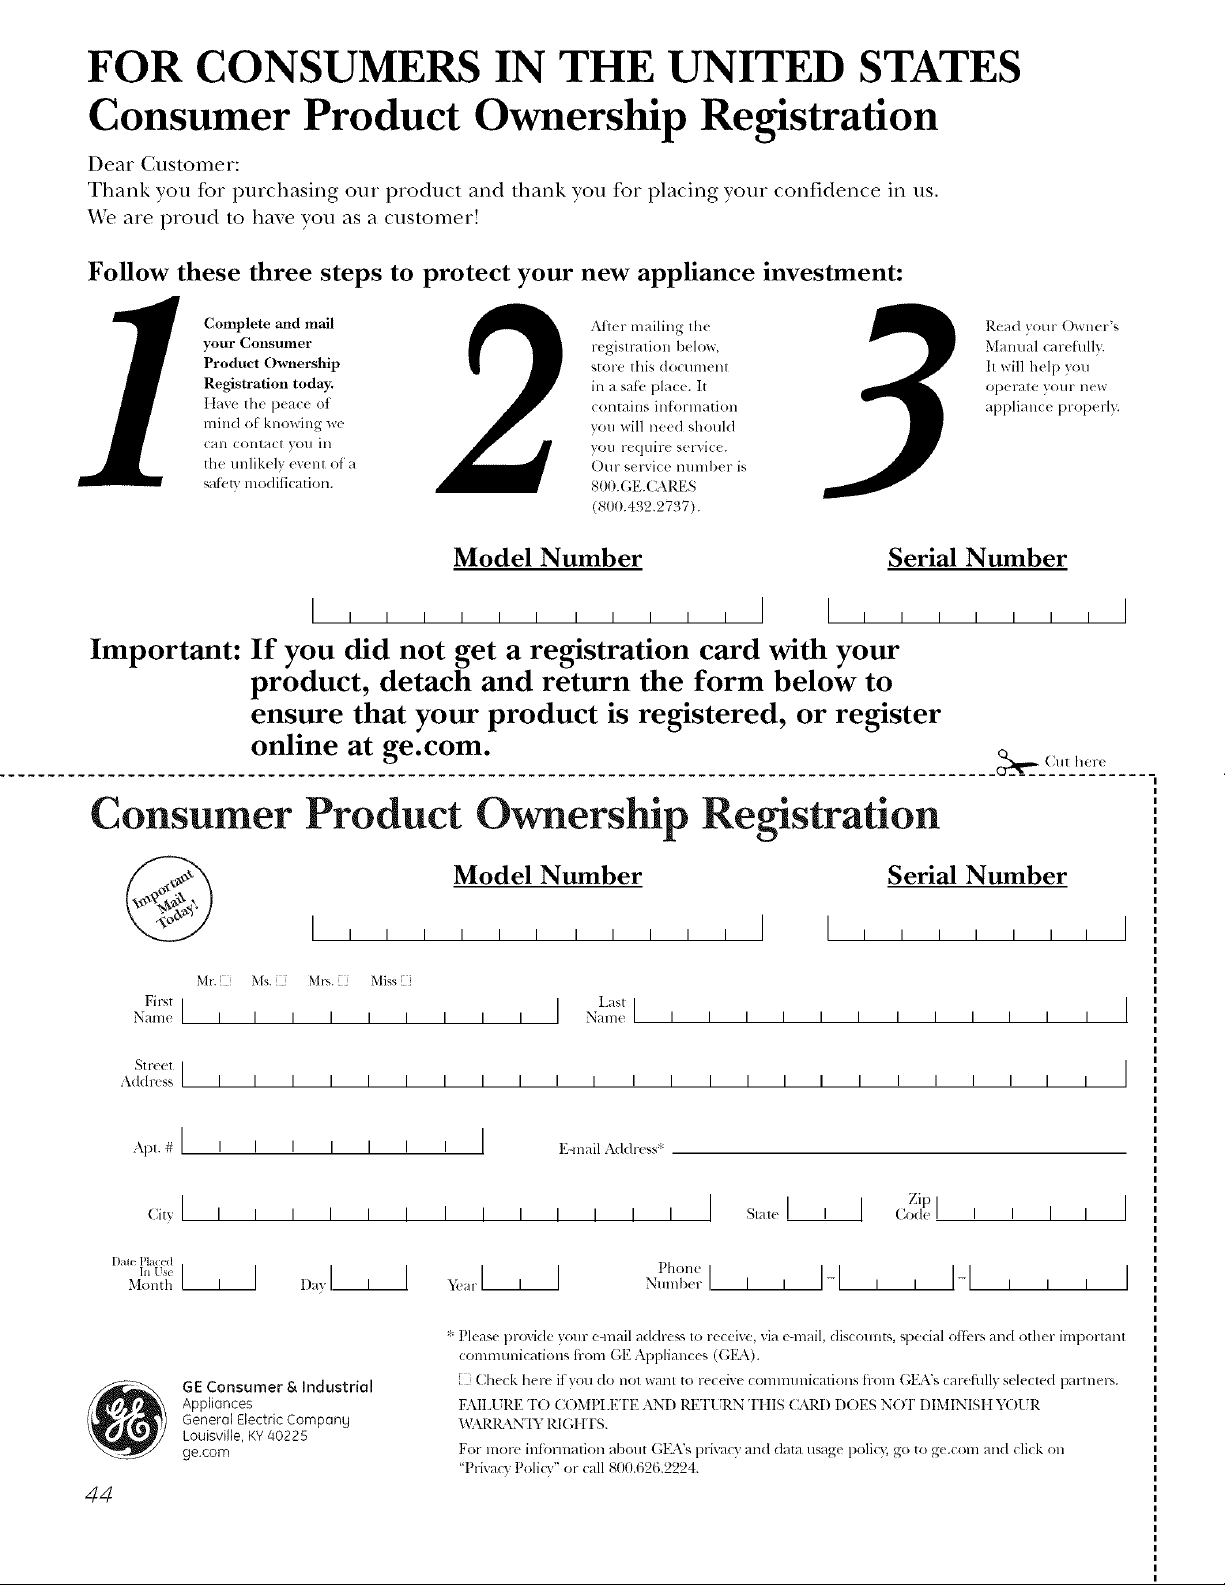
FOR CONSUMERS IN THE UNITED STATES
Consumer Product Ownership Registration
Dear Customer:
Thank you for purchasing our product and thank you for placing your confidence in us.
_:e are proud to haxe you as a customer!
FoHow
these three steps to protect your new appliance investment:
Complete and mail
your Consumer
Product Ownership
RegJstra|ion today:
IIavc the peace ot
nlind of knowing we
Call COlllaCt VOll ill
the unlikel_ event of'a
sat}:tv modification.
After mailing the
registration below,
store this (IOClllnellt
in a saf;:'place. It
contains information
vou will need should
you require service.
Our service number is
800.GE.CARES
(80(t.432.2737).
Re_l(] vo/ir ()wller'g
Mamml careftflly.
It will hel l) you
operate yore- new
appliance properl>
Model Number Serial Number
I I
Important: If you did not get a registration card with your
product, detach and return the form below to
ensure that your product is registered, or register
online at ge.com.
I I
_Cut her_
Consumer Product Ownership Registration
Model Number Serial Number
I
Mr. Ms. Mrs. Miss
Filet I I L'stl I
Nam< I I I I I I I I I Nam< I I I I I I I I I I I I
Stre<t I I
Address I I I I I I I I I I I I I I I I I I I I I I I I
Al)l. #I , , , , , , , I f_:-mailA<l<lr._'
CityI I I
Dam Placed
hi Use 111
Month
I I I I I I I I I I I I S,a.,I
Pholle
f)a,' I I I xt,,_l l- ] I ] Nil Ill )(T I I
Zip
GEConsumer& Industrial
Appliances
GeneralElectric Company
Louisville, KY/40225
ge.com
44
* Please provide your e-mail addr,t._,,,to receiv% ",ia e-mail, discounts, special ott_ 1"_and other important
communications fl-om GE Appliances (GK\).
Check here ifw)u do not want to receive conlmunicaIions from (;EA's careliflly selected partnel'_.
FAIL/RE TO COMPI.ETE AND RET[ rRN Tt tlS C,M)d) DOES NOT DIMINfSt th_)l JR
_,V.\RI_ \NTY RI GtITS.
For lnore infimnation about (;l_\'s privacy and data usage polk?; go to ge.com and click on
'Privacy Poli_y" or call 800.626.2224.
Please place in envelope and mail to:
Veuillez mettre dans une enveloppe et envoyez a :
OWHERSHIPREGiSTRATiON
P,O. BOX1780
MISSISSAUGA,ONTARIO
L4Y 461
(FOR CANADIANCONSUMERSONLY)
45
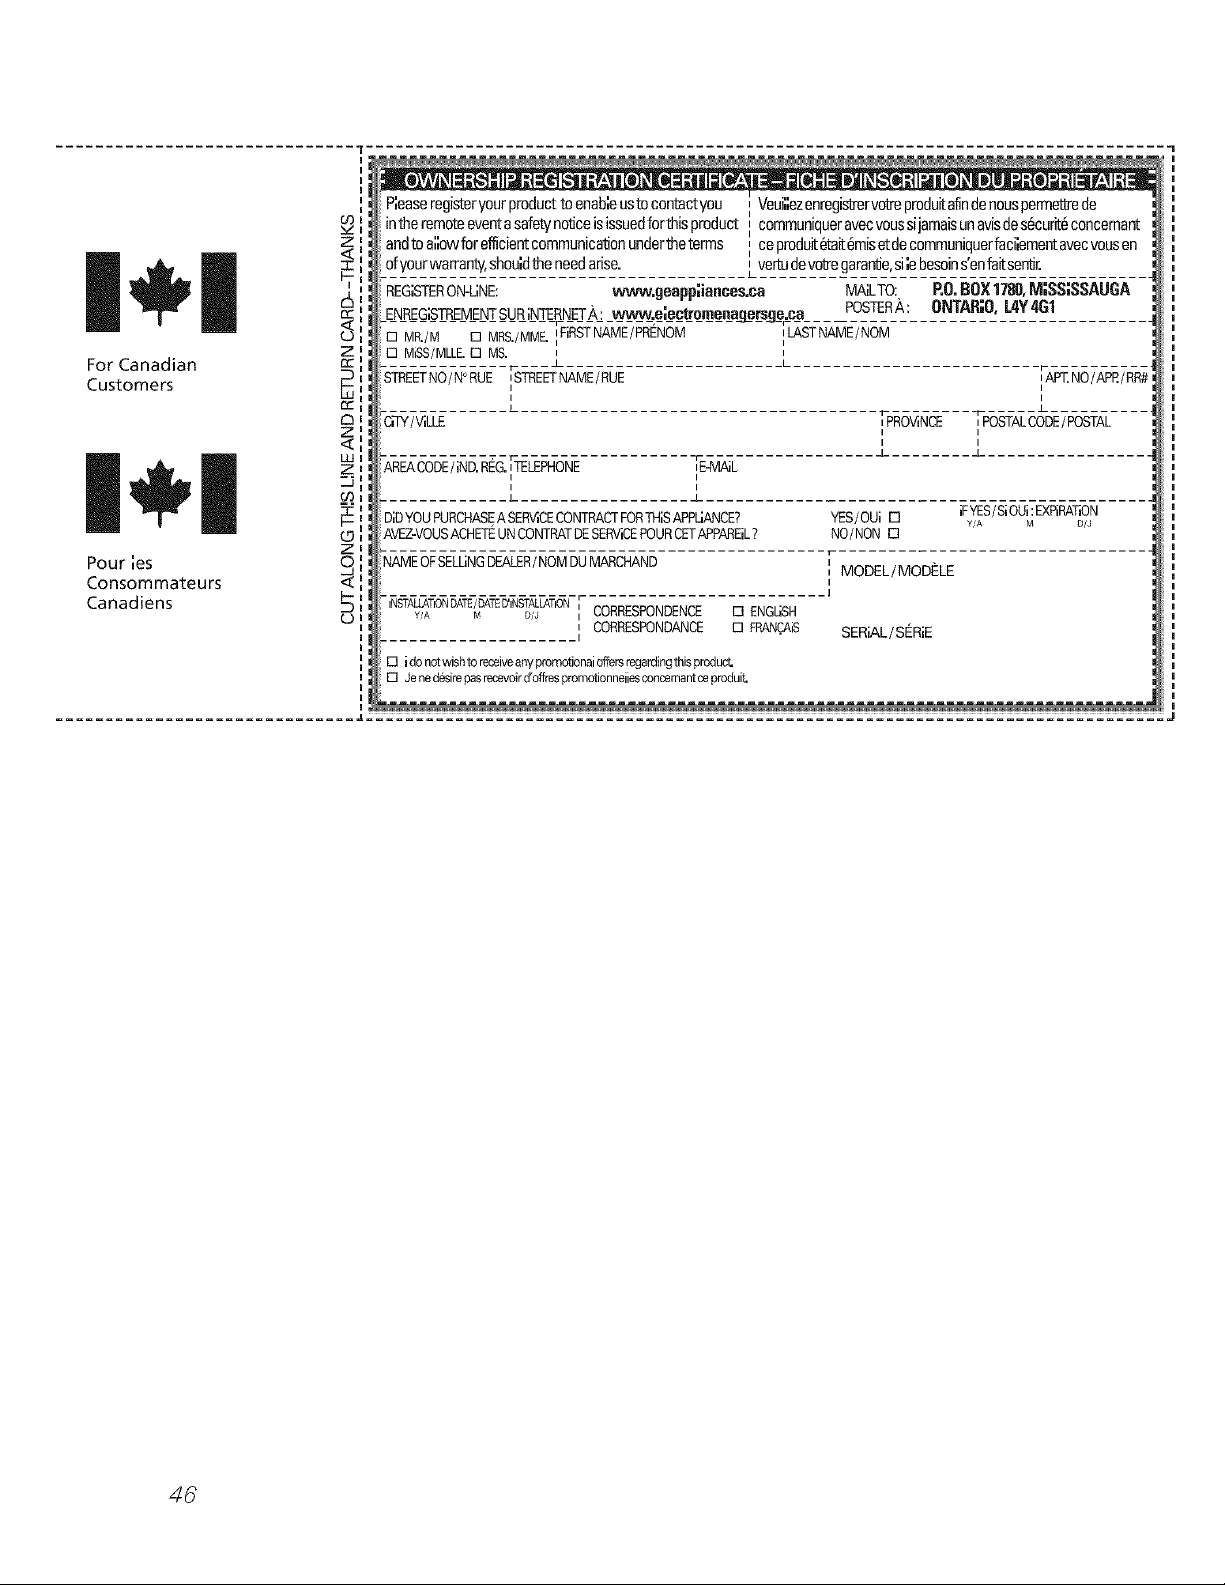
z
z
For Canadian
Customers ,_,
z
C.9
Z
Pour ;es 0
Consommateurs <
Canadiens
L_
Pleaseregisteryourproductto enab;eustocontactyou
intheremoteeventasafetynolJceisissuedforthisproduct
andtoa;;owforefficientcommunicationundertheterms
ofyourwarranty,shou;dtheneedarise.
REGISTERON-LINE: _Nwv.geapp_iances.ca MAiLTO:
ENREGISTREMENTSURINTE.,RNET_,:wwvv_e;ectramenager_sg_e,.caPOSTER/k:
[] MR./M [] MRS./MME.=FiRSTNAME/PRENOM =LASTNAME/NOM
[] MiSS/MLLE.[] MS. i i
2 .I
1 "1
STREETNO/N° RUE _STREETNAME/RUE _AP_.NO/APR/RR#
I I
I I
Ce-FY/ VILLE rpROVINCE, _POSTALC /POSTAL
L ±
AREACODE/IND. REG.I_LEPH-O-NE __M-Ai-L,
I I
J J_
DIDYOU PURCHASEA SER¼CECONTRACTFORTHISAPPLIANCE? YES/OUi [] iFYES/ SiOUi:EXPiRATiON
Y/A M D/J
AVEZ-VOUSACHE11_UNCONTRATDESERVICEPOURCETAPPAREiL? NO/NON []
NAMEOFSELLINGDEALER/NOM DU MARCHAND i
MODEL /MODI_LE
I
l
Veui;ezenl_egistrervotreproduitafindenouspermetlTede
communiqueravecvoussijamaisunavisdes6curit_concemant
ceproduiL6tait6misetdecommuniquerfaci[ementavecvousen
ve_ dev_e garan'de,si;ebesoins'enfaitserrdr.
RO,BOX1780,M;SS;SSAUGA
ONTAR;O,L4Y4G1
tNSTALLATtONDATE/DATED'tNSTALLATtON[ CORRESPONDENCE [] ENGLISH
Y/A M D/J I
CORRESPONDANCE [] F_NC_iS SERiAL/SERiE
I
[] idonotwish to receiveanypromotionaloffersregardingthisproduct.
[] Jenedesirepasrecevoird'offrespromotionneiiesconcemantceproduit.
48
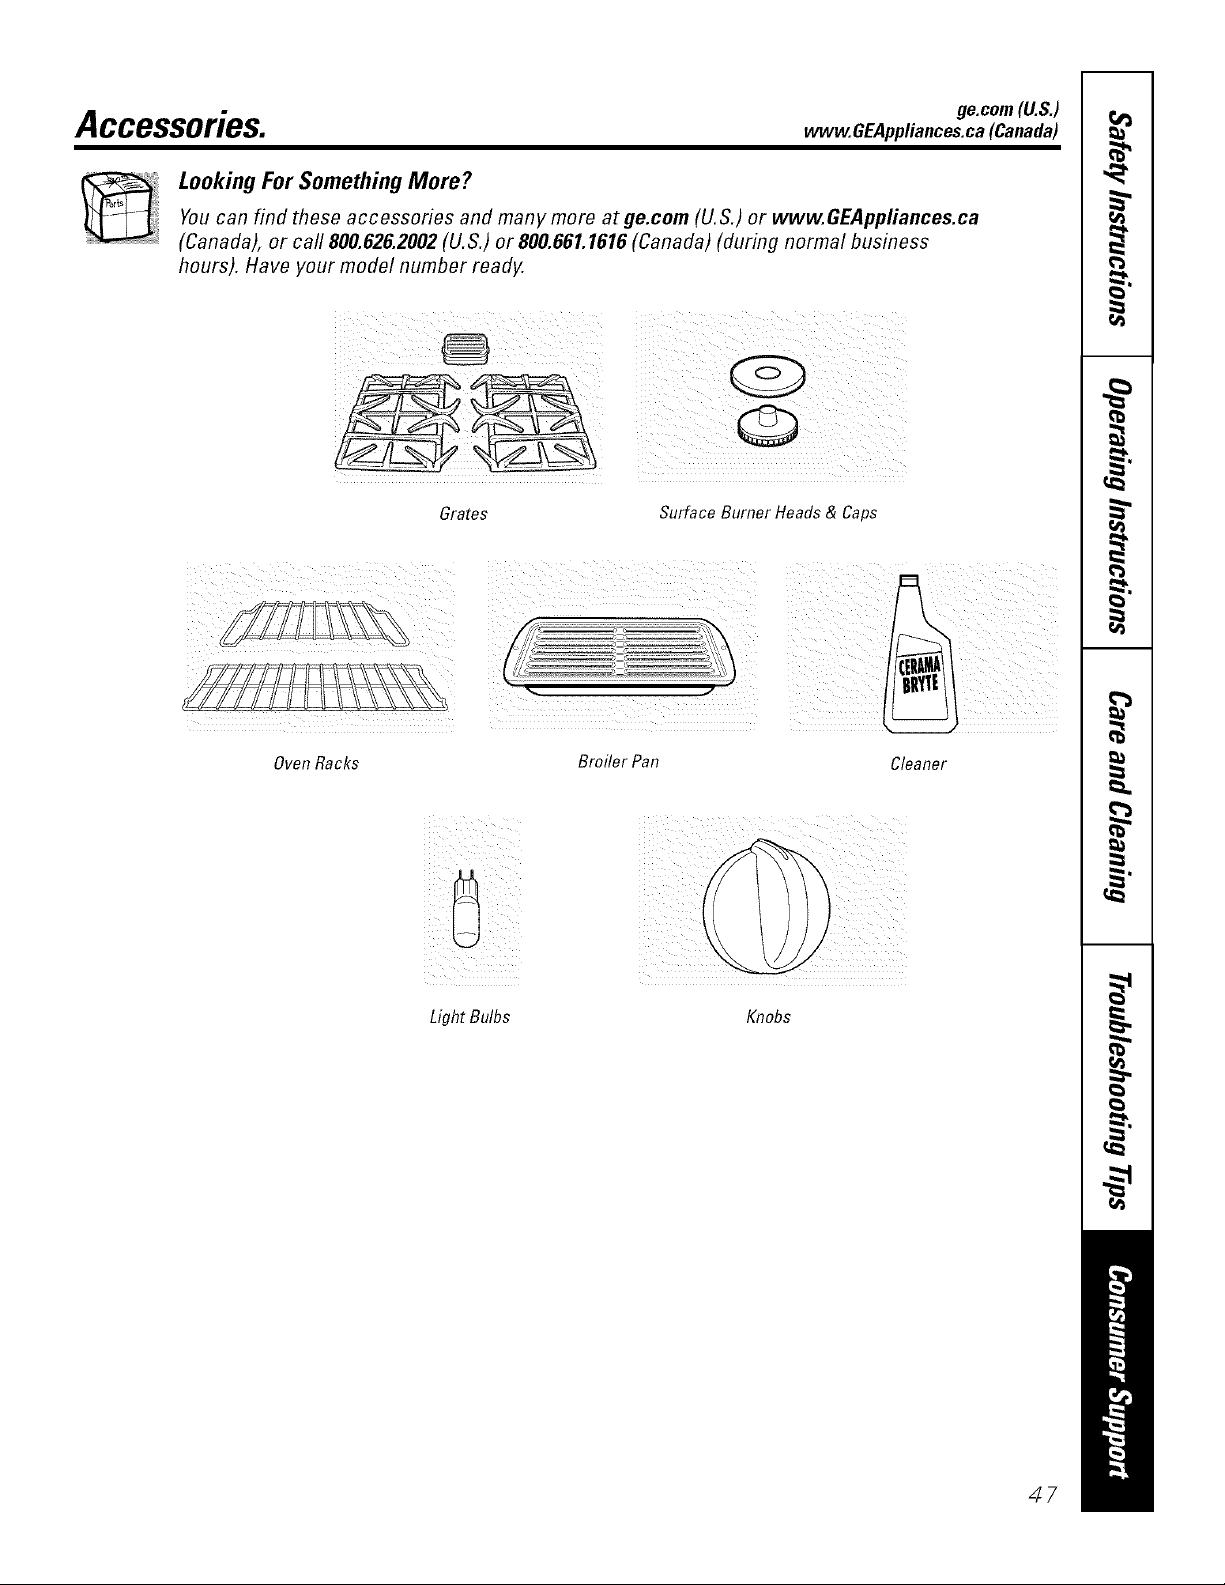
ge.com(U.S.)
Accessories. www.OEAppliances.ca (Canada)
Looking For Something More?
Youcan find these accessories and many more at ge.com (U.S.)or www.GEAppfiances.ca
(Canada), or call 800.626.2002 (U.S.)or 800.661.1616 (Canada) (during normal business
hours). Have your model number ready.
Grates Surface Burner Heads & Caps
Oven Racks
Broiler Pan
Cleaner
Light Bulbs Knobs
47
m
Notes.
P=
m
x:
m
I
r _
48
Notes.
==
w
==
w
€=
€=
49
GEGasRange Warranty.(Forc.stomersintheUnitedStates)
All warranty service provided by our Factory Service Centers,
or an authorized Customer Care® technician. To schedule service,
on-line, 24 hours a day, vis# us at ge.com, or carl 800.GE.CARES
(800.432.2737).Please have serial number and model number
available when calling forservice.
Stapleyourreceipt here.
Proof oftheoriginal
purchase dateisneeded to
obtainservice under the
warrantz
From the date of the
originalpurchase
GEWill Replace:
Anypatt of the range which tifils due to a defect in materials or workmanship. During this
limited one-year warranty, GE will also provide, free of charge, all labor and in-home service to
replace the defecti\'e part.
::Ji:_Service trips to your home to teach you how to use
the product.
iJi::Improper h_stallation, delivery or maintenance.
_: Failure of the product if it is abused, misused,
or used for other than the intended purpose or
used commercially.
::Ji::Dmnage to the glass cooktop caused by hardened
spills of sugary materials or melted plastic that
axe not clem_ed according to the directions in
the Owner's Manual.
::Ji:_Damage to the glass cooktop caused by use of cleaners
other than the recommended demfing creaJ_ts.
::Ji:_Replacement of house fuses or resetting of circuit
breakers.
_: Damage to the product caused by accident, fire, floods
or acts of God.
::Ji:_Incidental or consequential damage caused by possible
defects with this applimlce.
iJi:_Damage caused after delivery.
iJi:_Product not accessible to provide required service.
EXCLUSIONOFIMPLIED WARRANTIES--Your sole and exclusive remedy is productrepak asprovidedin thisLimited
Warranty.Any implied warranties, includiugtheimplied warranties of merchantability or fituessfor aparticular purpose,
are limitedto oneFear orthe shortestperiod allowed by law.
This warranty is extended to the original purchaser and any succeeding owner for products purchased for
home use within the USA. If the product islocated in an area where service bya GEAuthorized Servicer isnot
available, youmaybe responsible for a trip charge or youmaybe required tobring theproduct toan Authorized GE
Service location forservice. InAlaska, the warranty excludes the cost ofshipping or service calls to your home.
Some states do not allow the exclusion or limitation of incidental or consequential damages. This warranty
gives you specific legal rights, and you may also have other rights which vary from state to state. To know what
your legal rights are, consult your local or state consumer affairs office or your state's Attorney General.
Warrantor: GeneralElectric Company.Louisville,KY 40225
5O
GEGasRange Warranty.(Forc.stomorsinConodo)
Aft warranty service provided by our Factory Service Centres
or an authorized Customer Care® technician. For service,
carl 1.800.561.3344.Pleasehave serial number and model number
available when calling for service.
Stapleyourreceipt here.
Proofof theoriginal
purchase dateisneeded to
obtainservice under the
warrant_
Fromthe date ofthe
originalpurchase
Mabe Will Replace:
Anypattot the range which tifils due to a deii_ct in materials or workumnshii. ) During, this
limited one-year warranty, Mabe will also provide, free ofcharge,all labor and in-home
serxice to replace the defectixe part.
_: Service trips to your home to teach you how to use
the product.
!i/:Improper installation, delivery or maintenance.
::Ji::Failure of the product if it is abused, misused, or
used for other thaa_ the intended purpose or used
commerciaJl)_
_: Dmnage to the glass cooktop caused by hardened
spills of sugaxy materials or melted plastic that are not
cleaned according to the directions in the Owner's
Mmmal.
!i_:Dmnage to the glass cooktop caused by use of clem_ers
other than the recommended cleaning cretans.
!i_:Replacement of house fuses or resetting of circuit
breakers.
iJi::Dmnage to the product caused by accident, fire, floods
or acts of God.
_: h_cidentaJ or consequential dmnage caused by possible
defects with this appliance.
::Ji::Dmnage caused after delivery.
!i/:Product not accessible to provide required service.
EXCLUSIONOFIMPLIED WARRANTIES--Your sole and exclusive remedy is product repa# asprovided in this Limited
Warranty. Any implied warranties, including theimplied warranties of merchantabilily orfitnessfor a particular purpose,
are limitedto one yearor theshortest period allowed by law.
I WARRANTOR IS NOT RESPONSIBLE FOR CONSEQUENTIAI_ DAMA(;ES. I
V(ariantor: MABE CANADA IN(;. [
51
ConsumerSupport.
GEAppliancesWebsite ., the_.s.go.cam
Hme a question or need assistance _ith }our appliance? Tr} the (;E Appliances xAebsite 24 hotu_ a day,
an} da} of the }ear! For greater comenience and fhster serxice, you can now downlo _d Owne_ 's Manu _ls,
order parts or exen schedule service on-line. In Canada: www.Gl_pplia_ces.ca
ScheduleService i. the_.s.:ge.com
Expert GE iepair se_4ce is onl? one step awa? fi'om ?our dool: Get on-line and schedule ?our servire at _our
convenience 24 hom_ any da_ of the _ear! Or call 800.GE.CARES (800A32.2737) during mmnal business hem's.
In Canada, call 1.800.561.3344
RealLife DesignStudio ,, the_.s.:go.c0m
GE supports the/Jnixw_al Design concept--pmdurts, services and envixomnents that can be used by people of
all ages, sizes and capabilities. We recognize the need to design for a wide range of physical and memal abilities
and impairments. For details of GE's Universal Design applications, including ldtchen design ideas for people with
disabilities, check out our Website today. For the hearing impaired, please call 800.TDD.GEAC (800.833.4322).
In Canada, contact: Managei; Consm-aer Relations, Mabe Canada Inc.
Suite 310, 1Factorx Lane
Moncton, N.B. E1C 9M3
ExtendedWarranties
In the U.S.: fie.cam
Pro'chase a GE extended warran b and learn about special discounts that are available while }our warranr_ is still
in eftbct. _}m can pro'chase it on-line anytime, or call 800.626.2224 dining normal business hom_. (;E Consmner
Home Services will still be there after ?our _<u'rant} expires. In Canada, call 1.800.661.1616.
PartsandAccessories
In the U.S.: fie.cam
Individuals qualified to se_ice their own appliances can have parts or accessories sent directly to their homes
(VISA, MasterCard and Discover cards are accepted). Order on-line today, 24 hom_ e\ ery clay or by phone at
800.6262002 &,ring natural business heroN.
Instructionscontained in this manual cover procedures to he perfouned by anyuser. Other servicing/generally should he
referred toqualified service personnel. Caution mustfie exercised, since #npreper servicing may cause unsafe operation.
Customers in Canada should consult the yellow pages for the nearest Mabe service center; or rail 1.800.661.1616.
ContactUs
In the U.S.: go.cam
If yon are not satisfied with the service you receive fl'om GE, contact us on (cur Website with all the details
including your phone numbel; or write to: General Managel; Customer Relations
GE Appliances, Appliance Park
I_ouisville, KY40225
In Canada." www.GEAppliaJaces.ca, or _fite to: Directm; Consmner Relations, Mabe Canada Inc.
Suite 310, 1Factory Lane
Moncton, N.B. E1C 9M3
"I RegisterYourApplbnce i,, the Iu.s.: g_.com
Register your new appliance on-line-at your convenience! Tin, el} I)r°duct registration, will allo_ fiw enhanced
commtmication and p_ompt serxdce trader the tem, s of }our >4u'ranty, should the need arise. You ma_ a/so mail
l in the pre-printed registration card included in the l)acldng, material. In Canada: www.GFAppliaJaces.ca
Printed in flTe United States
wwvv.electromenagersge.ca
c/3
Instructions de sdcuritd ...... 2-7
Mode d' emploi
Auto-nettoyage ............ 25, 26
Batterie de cuisine ............. 9
Brfileurs de surface ......... 8, 9
Convexion ............... 18-22
Cuisiner et r6tir
axec la minuterie ............. 16
Cuisiner ou r6tir . ............ 11
Fermentation ............... 23
Fonction du Sabbath .......... 30
Fonctions sp_ciales ........ 27-29
Four . ................... 10-31
Grillei; guide pour griller ...... 14
Horloge et minuterie ......... 15
Lockout (verrouillage)
des contr61es ................ 15
R_chauffbr .................. 23
Sonde ...................... 1 7
Thermostat ................. 24
Entretien et nettoyage
Ampoules ................... 33
Assemblage du brfileur . ....... 32
Boutons ................... 32
t_vent ...................... 36
o
Grilles ...................... _,4
JGS 968
PGS 968
Grilles du brfileur
et grille centrale ............. 33
Panneau de contrSle ......... 36
Plancher de four . ........... 36
Porte ...................... 35
Porto du fbur retirable ........ 35
Ruban d'emballage ........... 32
Surfaces d'acier inoxvdable .... 36
Surface de cuisson de verre . 37, 38
Surfaces peintes ............. 36
Tiroir de rangement .......... 34
Conseils de ddpannage .... 39-43
Accessoires ................... 44
Soutien 8 la elientOle
Garantie ................... 47
Soutien ft la
clientele ...... Corn erture arri_re
Ecrivez ici lesnumeros de
modele et de serie :
N ° demodMe
N ° deserie
(]es num_ros se trouvent sur
l'6tiquette derribre la porte
d'ouverture du timr dans le
coin infiarieur gauche du
chfissis de cuisini_re.
49-80496 07-07 JR
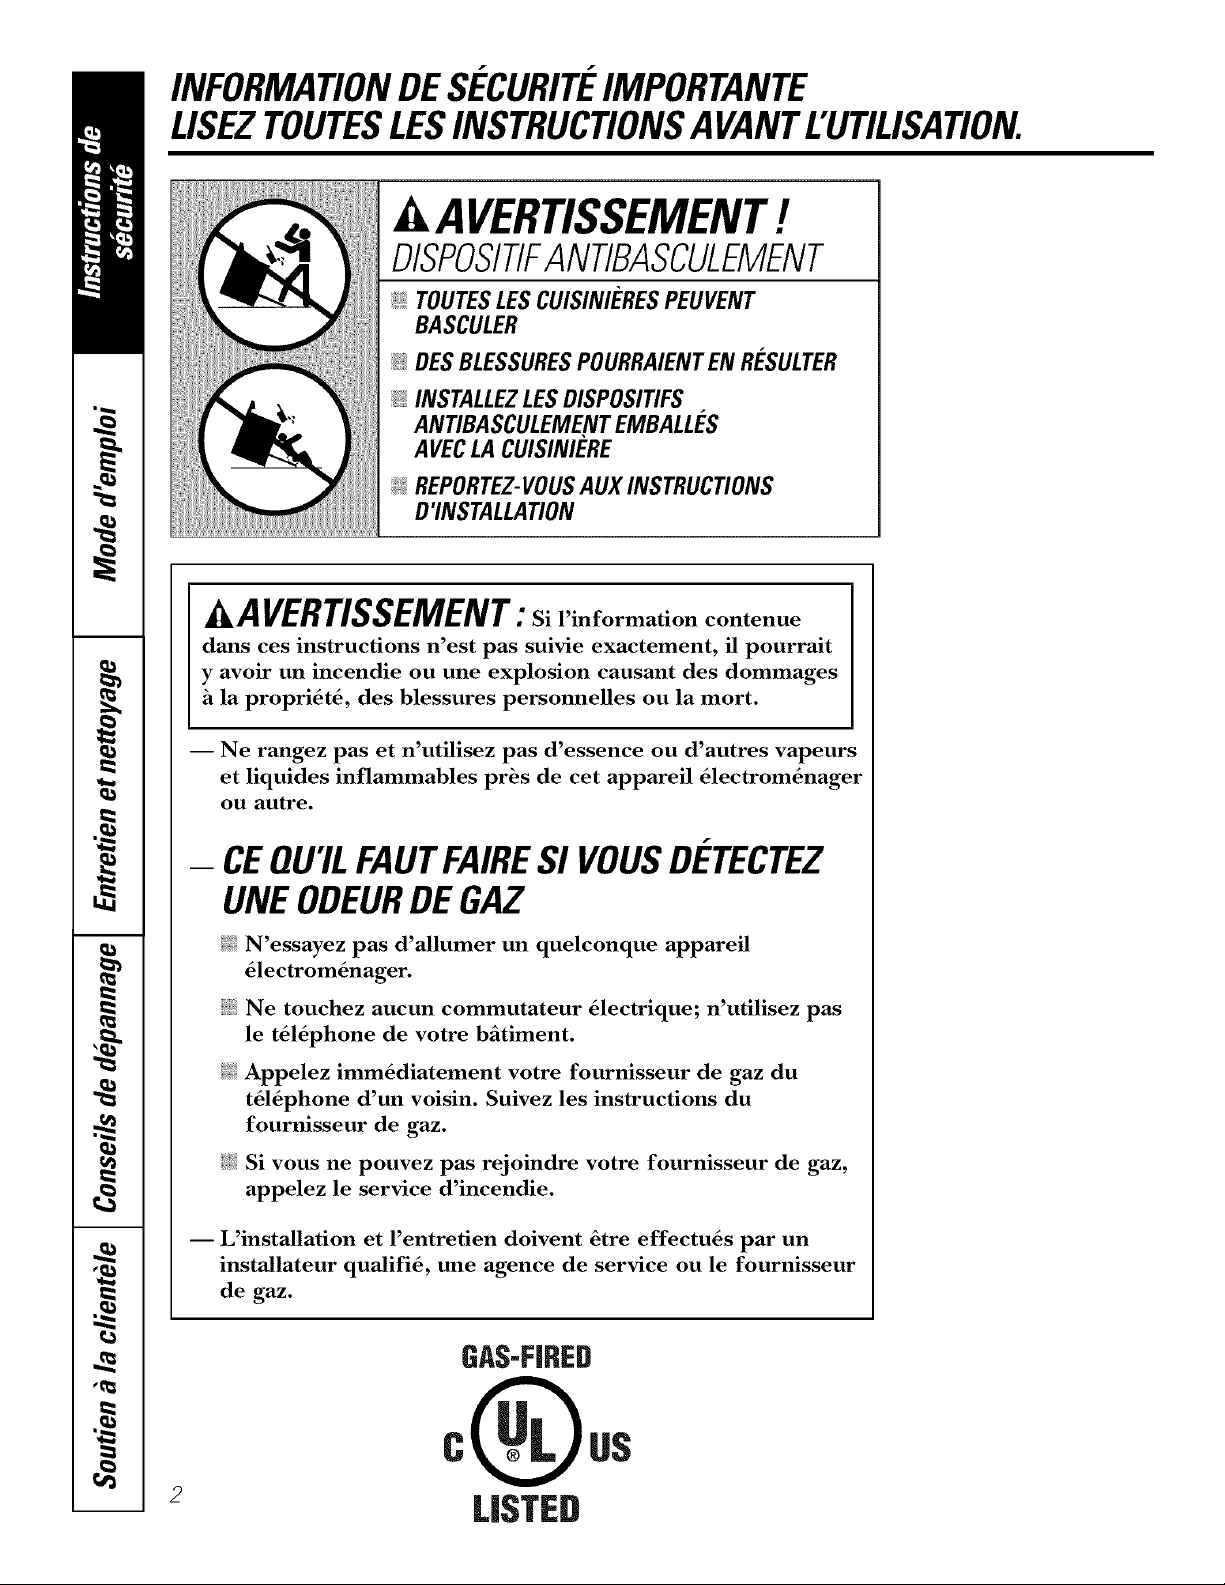
INFORMAtiONDESECURITEIMPORTANTE
LISEZTOUTESLESINSTRUCtiONSAVANTL'UtiLISATION.
AVERTISSEMENT!
DISPOSITIFANTIBASCULEMENT
@TOUTESLES CUISINIERESPEUVENT
BASCULER
_!_DES BLESSURESPOURRAIENTEN RESULTER
_ INSTALLEZLESDISPOSITIFS
ANTIBASCULEMENTEMBALLES
AVEC LA CUISINIERE
@ REPORTEZ-VOUSAUX INSTRUCTIONS
D'INSTALLATION
_AVERTISSEMENT:sil'informationcontenue
dans ces instructions n'est pas suivie exactement, il pourrait
y avoir un incendie ou une explosion causant des dommages
la propri6t6, des blessures personnelles ou la mort.
-- Ne rangez pas et n'utilisez pas d'essence ou d'autres vapeurs
et liquides inflammables prbs de cet appareil 61ectrom6nager
ou autre.
- CEQU'ILFAUTFAIRESIVOUSDETECTEZ
UNEODEURDEGAZ
N'essayez pas d'allumer un quelconque appareil
6lectrom6nager.
Ne touchez aucun commutateur 6lectrique; n'utilisez pas
le t616phone de votre bfitiment.
Appelez imm6diatement votre fournisseur de gaz du
t616phone d'un voisin. Suivez les instructions du
fournisseur de gaz.
Si vous ne pouvez pas rejoindre votre fournisseur de gaz,
appelez le service d'incendie.
-- L'installation et l'entretien doivent 6tre effectu6s par un
installateur qualifi6, une agence de service ou le fournisseur
de gaz.
2
GAS-FiRED
C_U$
LISTED
www.electromenagersge.ca
AVERTISSEMENT!
Pour votre s#curit#, vous devez suivre I'information contenue dans cemanuel pour r#duire les
risques d'incendie etd'explosion, de choc #lectrique ou pour #viter tout dommage materiel, des
blessures ou la mort.
DISPOSITIFANTIBASCULEMENT
Toutes/escuisinieres peuvent bascu/er et causer desb/essures.
Pour _viter tout basculement accidentel de la cuisini_re, fixez-la au mur ou au plancher en installant
le dispositif antibasculement fournL
Si le dispositif fourni avec la cuisini&e ne convient pas pour cette application, utilisezle dispositif
antibasculement universel WB2X7909.
Pour v#rifier si le dispositif est install# etengag# correctement, retirez le tiroir de rangement et
inspectez le pied de nivellement arri#re. Assurez-vous qu'il soit bien install# dansla fente.
Si _ous redrez la cuisini&re du tour pour quelque raison que ce soit, assurez;\ous que
le dispositif soit engag_ colTecmment lolsque xous la replacez au tour S'il ne l'est pas, i1
pourrait y ax_ir un risque que la cuisini&re bascule et elle poulxait alors x_us blesser ou
blesser un en£mt qui est assis, debout ou apptu_ sur une porte om>rm.
Veuillez _ous repormr fi l'in%mmfion S/li le disposifif anfibasculement dans ce manuel.
Sinon, la cuisiniOre pomxait basculer et causer des blessures.
AVISDESECURITEIMPORTANT
La Ioide la Califomie "Safe Drinking Water and Toxic Enforcement" exige que le Gouvemeur de
la Californie publie une liste dessubstances qui,de I'avis de I'Etat, peuvent causer desanomalies
cong#nitales ou autres problOmes de reproduction etexige aussi desentreprises qu'elles avisent les
clients des dangers associ#s _ I'exposition possible _ de telles substances.
Lesappareils au gazpeuvent causer une exposition mineure _ quatre de ces substances, sol
le benzOne, le monoxyde de carbone, le formald#hyde etla suie, r#sultant principalement d'une
combustion incomplOte descarburants de PL ou du gaznatureL Des brOleursajust#s correctement
(une flamme bleue plutSt que jaune) r#duiront la combustion incomplete. L'exposition _ ces
substances peut Otre r#duite par une a#ration grgce _ une fenOtre ouverte ou par I'utilisation
fun ventilateur ou d'une hotte.
L'isolant de fibre de verre des fours autonettoyants #met une tr#s petite quantit# de monoxyde de
carbone durant le cycle de nettoyage. L'exposition peut Otre r#duite en a#rant grgce _ une fen#tre
ouverte ou par I'utilisation d'un ventilateur ou d'une hotte.
3
INFORMAtiONDESECURITEIMPORTANTE
LISEZTOUTESLESINSTRUCTIONSAVANTL'UtiLISAtiON.
4
AVERTISSEMENT!
PRECAUTIONSDESECURITE
Lorsque vous utilisez un apparei161ectrique, vous devez toujours suivre desprecautions de base,
ycompris ce qui suit:
E_,:Ufilisez cet appareil seulement pour
l'usage auquel il est destin_ selon ce
manuel du pioplJetaiie.
_{:;Assurez_\_us que x_tre appareil soit bien
install_ et mis fi la terre par tm mchnicien
qualifi_, confonn_ment aux insuucdons
d'insmlladon foumies.
;fi:,iAxant d'eflOctuer tout service, coupez
le courant fi la cuisiniOre dans le tableau
de distribution r_sidentiel en retirant le
fltsible ou en coupant le di_oncteur
_{:;Demandez fi l'installateur de xous montrer
1emplacement du disjonctem ou du
fltsible. Marquez-le pour axoir une
r_f_rence thcile.
E:,INe laissez pas les enPants seuls--les en£mts
ne doivent pas &ue laiss_s seuls et sans
surveillance dans un endroit off un
appareil _lectrom_nager est utilis_. On ne
doitjamais leur pemmme de s'asseoir ou
de se tenir debout sur quelq ue partie q ue
ce soit de l'appareil.
_:; Demandez _ l'installamur de xous montrer
l'emplacement du robinet d'atTbt du gaz
de la cuisini_te et comment le fbnner au
besoin.
_{_Faims installer \_tre cuisini&re et faites-la
mettre fi la terre con_ectement par un
installamur qualifi_, confonn_ment attx
instructions d'installafion. Tout ztjusmment
et entretien doivent &tre efl_ctu_s
seulement par des insmllamurs de
cuisini&tes au gaz ou des mchniciens
de service qualifi_s.
E:,IPlacez la cuisini&re dans un endroit
l'_cart de la circulation dans la cuisine
et fi l'_cart des courants d'air pour _vimr
d'ax_ir une mauvaise citvuladon d'air
qT{_:Assurez_\_us que tout le materiel
d'emballage soit refir_ de la cuisini&re
avant de l'utiliser pour &'iter tout incendie
ou dommage caus_ par la flml_e si le
materiel d'emballage s'enflamme.
N Ne laissez pas les enPants seuls ou sans
supervision lorsqu'une cuisini&re est
chaude ou allum_e. Ils pourraient
_tre gTax_ment brfll_s.
E:,IN'essayez pas de r_parer ou de remplacer
une quelconque piece de xotre cuisini_re
fi moins que cela tie soit recommand6
sp_ciflquement dans ce manuel. Tout
autre entreden dolt &tre efl)ctu_ par
un technicien qualifi_.
E:,:Assurez_\_us que x_Ue cuisinibre soit
ajust_e conecmment par un mchnicien
de service qualifi_ ou pat un installamur
pour le type de gaz (naturel ou PI,) utilis_.
Voue cuisini&re peut &tre com_rtie pour
l'un ou l'autre type de gaz. Repormz_\_us
aux instructions d'installation emball_es
avec la cuisini&te.
E:,IBranchez xoue cuisini&re seulement
dans une prise murale de ]90 x_lts avec
raise fi la terre. Ne retirez pas la broche de
raise fi la terre ronde de la fiche. Six_us
n'&tes pas certain de la raise fi la terre du
syst_)me _lectrique rt_sidentiel, x_us &tes
responsable et dans l'obligation de faire
remplacer la prise qui n'est pas raise fi la
tene par une prise fi trois broches raise fi la
mn_e confonn6ment au (',ode nauonal de
l'_lecuicit_. N'utilisez pas de rallong> ax>c
cet appareil.
AVERTISSEMENT:
Cosajustements doivent Otre effectu6s
par un technicien de service qualifi6,
conform6ment auxinstructions du
fabricant et_ tous lescodes etexigences
de I'autorit6 responsable. Le non respect
de ces instructions peut mener &de graves
blessures ou _ des dommages mat6riels.
L'agence qualifi6e effectuant ce travail
assume la responsabilit6 de la conversion.
(;ardez les fihres de graisse et la hotte
propres pour maintenir une bonne
x_nfilafion et _viter les feux de graisse.
Enseignez aux enfimts fitie pasjouer axec
les commandes ou avec toute autre pi&ce
de la cuisini&re.
_7_:Gardez to/ljo/lI'S les ser\iettes, les linges
fixaisselle, les poig_,es et autre linge de
maison fi distance de xotre cuisini&re.
www.electromenagersge.ca
DESECURITE
!_;:Gardez toujouLs les ustensiles de bois et de
plastique et les aliments en boite fidistance de
votre CtllSlnlere.
!?:Gardez toujoms les rev&ements mumux
combustibles, les fideaux ou lestentures _5
distance de xotre cuisiniOre.
iJii:iNe nettovez pas la cuisini{ere avec des liquides
de nettoi'age inflammables ou volatiles, iJii:i
;_:Apr_s une utilisation prolong_e de la cuisini_,e,
le plancher peut devenir tr& chaud et de
nombreux re%tements de plancher poumlient
ne pas r_sister ;/ce type d'utilisation. N'installez iJii:i
jamais de cuisini{ere sur des carreaux de finyle
ou du linoDum qui pourvait ne pas r_sister
:'/ce type d'utilisation. Ne l'installezjamais _:
directement sur letapis de cuisine.
iJii:il_fitez d'_gmtigner la surfilce de cuisson vitr_e
avec des instruments tmnchants ou avec des
bagues et autres bijoux.
f_:Ne laissez peLsonne grimpei; se tenir debout
ou sesuspendre sur laporte du fbm; le tiroir
de mngement ou lasurfime de cuisson. Cela
potmait endommager la cuisini{ere et m&n ela
filire bascule*; provoquant de groves blessures.
A MISEENGARDE:/ , qui
pourraientattirerlesenfantsne doiventpas_tre
rangesclansiesarmoiresau-dessusdeiacuisinibre
ousuriedosseretd'unecuisinibre--iesenfantsqui
grimpentsurla cuisinibrepouratteindrelesarticles
pourraient_tregravementbiess_s.
A AVERTISSEMENT:
n'utilisez JAMAIS cet appareil pour
r6chauffbr ou chauffer la pi&ce. Ceci
pomxait mener _ un empoisonnement au
monoxvde de carbone et une surchauffb
de la surface de cuisson ou du fbur.
Pour votre s_curit_, n'utilisezjamais votre
appareil _lectrom_nager pour r&haufDr et
chaufDr la pi{ece.
iJii:iDe larges _gmtignures ou chocs sur les po**es
de verre peuvent casser ou filire 6claret la vitre.
!?:Ne netto)ez pas la cuisini{ere pendant qu'elle
fbnctionne.
iJii:iNe portezjamais de %tements amples ou
tolnbants loisque xous utilisez l'appareil.
Attention en xous _timnt pour attein&e les
a_*icles rang& dans les annoi_es ml-dessus de la
cuisini{ere. Un tissu inflammable potmait
s'enflammer au contact des flammes ou des
surfi_ces chaudes du fbur et pourvait provoquer
de graves blessures.
Ne mngez pas de mat&iaux inflammables dans
le fbm; le tiroir de mngement de la cuisini{ere
ou pr& d'une surfi_ce de cuisson.
Ne ,,'angez pas et n'utilisez pas de mat&imlx
combustibles, d'essence ou d'autres vapems
et liquides inflmnmables pr& de cet appareil
_lectrom6nager ni d'aucun mme.
Ne laissez pas la gvaisse de cuisson ou autres
mati{eresinflammables s'accumuler sur ou pr&
de la cuisini{ere.
N'utilisez pas d'eau sur les f;eux de gmisse.
Ne saisissezjmnais une casserole en flmnlne.
Eteignez les commandes, t_mignez un feu sur
un brfileur en surfiace en couw'ant enti{erement
la casserole avec un couvercle bien ajust_, une
plaque fi biscuit ou un plateau plat. Utilisez un
extincteur d'incendie fi mousse ou une poudre
chimique tout usage.
ia giaisse en flammes _5l'extOrieur d'une
casserole s'0teint en la couvi_ant de bicarbonate
de sodium, ou, si possible en utilisant un
extincteur d'incendie ,5mousse ou itpoud,e
chimique tout usage.
Les flammes dans le fbur peuvent _tre
_teintes enti_rement en feImant la po_*e du
four et en femmnt la commande ou en utilisant
un exdncteur d'incendie fi mousse ou it poudre
chimique tout usage.
Iaissez les grilles de brfileur et autres surfiaces
refioidir avant de les toucher ou de les laisser fi
un endroit offles enfimts peuvent les atteindre.
Ne bloquezjmnais les &ents (ouvertures d'air)
de la cuisinibre. Ils oflient une entree et une
sortie d'air n_cessaires pour que la cuisini{ere
fonctionne correctement axec la bonne
combustion. Les ouvertures d'air se trouvent
it l'arri_re de la surfiace de cuisson, dans le
haut et le bas de la po,le du fbur et au bas
de la cuisini_re sous le tiroir de vangement
ou le panneau coup de pied.
Ne soulevez pas la surfi/ce de cuisson. Soulever
la surfi/ce de cuisson peut endommager la
cuisini_re ou causer un mauvais
fbnctionnement.
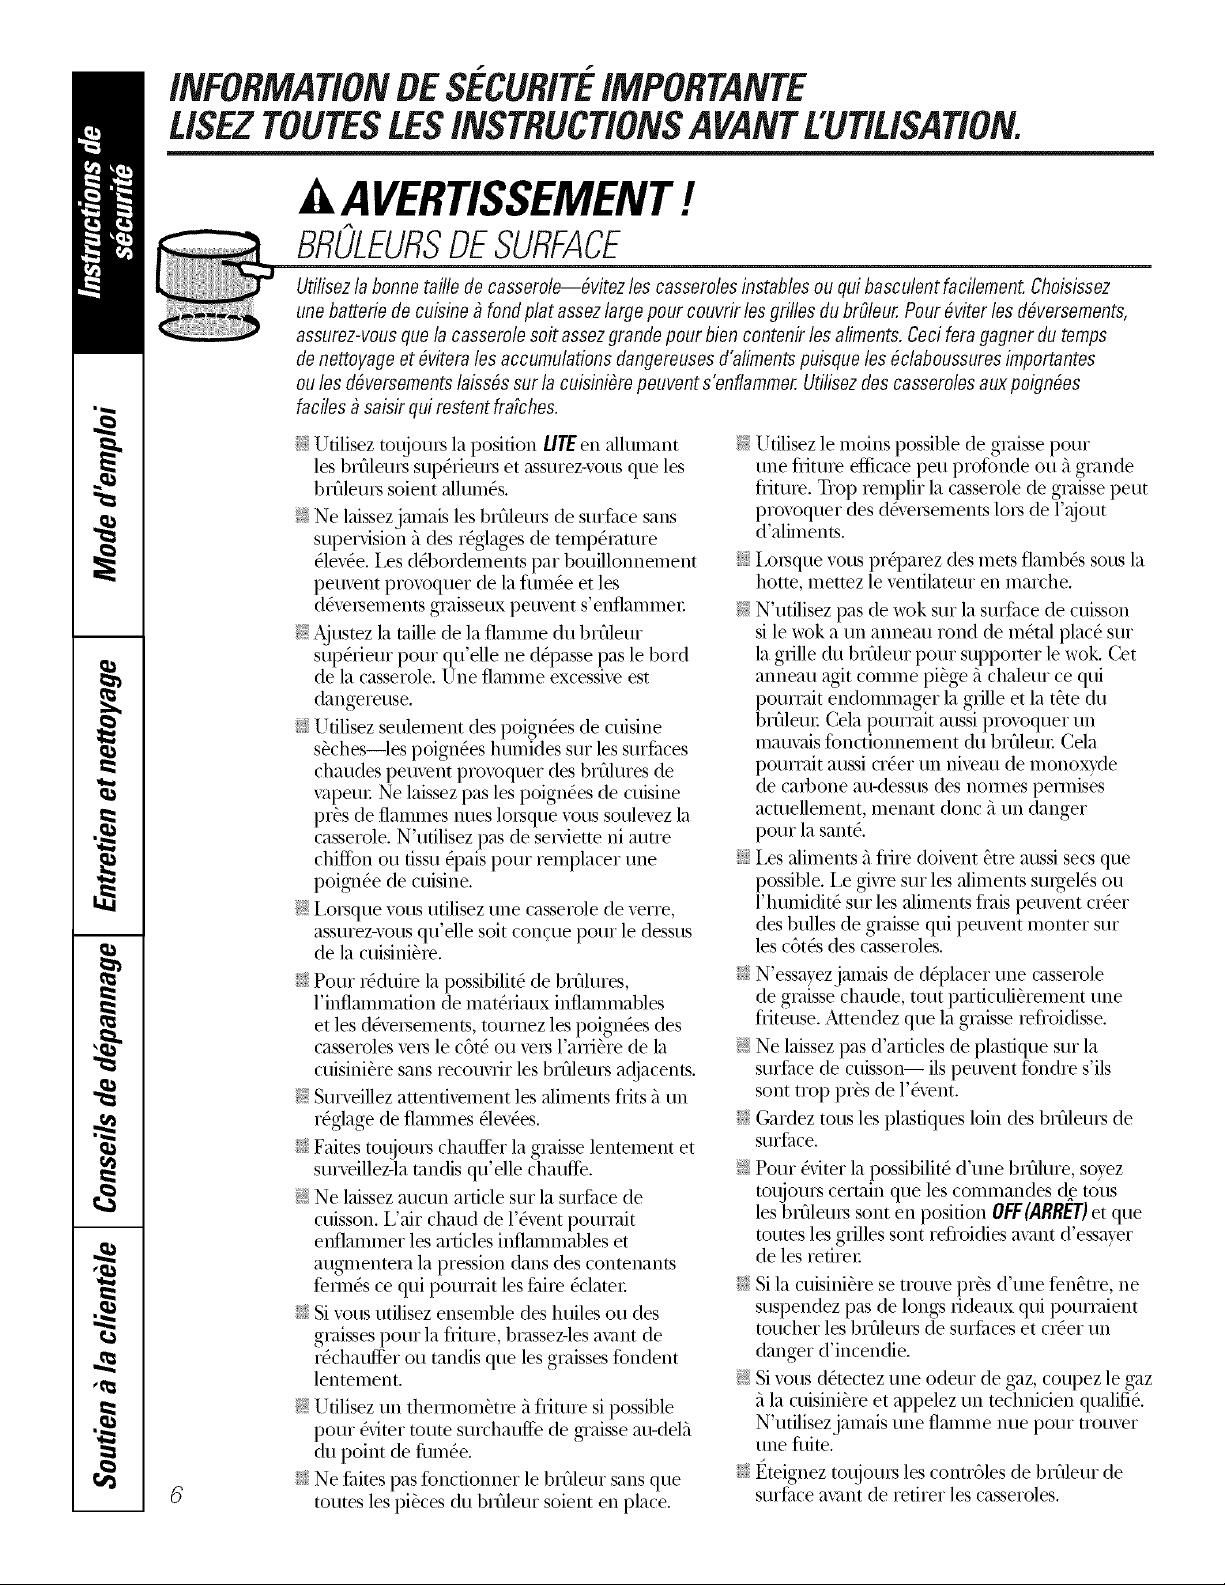
iNFORMAtiONDESECUR/TE:IMPORTANTE
LISEZTOUTESLESiNSTRUCTiONSAVANTL'Uti£1SAtiON.
A AVERTISSEMENT!
BROLEURSDESURFACE
Utilisezla bonnetaille de casserole--&itez les casserolesinstablesou quibasculent facilement.Choisissez
unebattefie de cuisine_ fond plat assezlargepour couvrirles grilles du brOleurPour _viterles d&ersements,
assurez-vousquela casserolesoit assezgrandepour bien contenir les aliments.Cecifera gagner du temps
denettoyageet&itera les accumulationsdangereusesd'alimentspuisqueles6claboussuresimportantes
oules d6versementslaiss6ssur la cuisini&e peuvents'enflammer Utilisezdes casserolesauxpoign6es
faciles _ saisir qui restentfra_ches.
iJi::i1Jtilisez toujou_s la position LITEen allumant
les b_01eu_s sup(_rietms et assu_ez-x_us que les
b_fileu_s soient allum(_s.
_: Ne laissezjmnais les b_filetms de su_[ilce sans
superxision _ des r_glages de temp&amre
(dev6e. I,es d(_bo_dements pa_ bouillonnement
peuvent p_ox_quer de la timbre et les
d&'e_sem ents g_'aisseux peuvent s'enflamme_.
_: Ajustez la mille de la flamme du b_01eu_
sup(_rieu, pou_ qu'elle ne d_passe pas le bo_d
de la casse_ole. Une flamme excessive est
dange_euse.
iJi::iUfilisez seulement des poign_es de cuisine
s_ches--les poign_es humides su_ les su_filces
chaudes peuvent p_oxoque_ des b_filu_esde
vapeur Ne laissez pas les poign_es de cuisine
p__s de flalnmes hues loL'sque vous soulevez la
casse_ole. N'utilisez pas de se_x'iette ni auue
chiffbn ou fissu _pais pou_ _elnplace_ une
poign(_e de cuisine.
_: i,o_sque vous utilisez une casse_ole de vetTe,
assu_ez-vous qu'elle soit cono]e pout le dessus
de la cuisiniO_e.
i_i::iPou_ __dui_e la possibilit_ de b_01u_es,
l'inflammation de mat(_riaux inflmnmables
et les d&e_sements, toumez les poign_es des
casse_oles ve_s le c6t_ ou ve_s l'a_i_e de la
cuisini_e sans _ecoux_i_ les brfileu*s adjacents.
_: Su_weillezattentivement les aliments flits _un
_('glage de flalnmes _lev('es.
i_i::iFaites toujouI's chauffb_ la g_'aisselentement et
su_veillez-la mndis qu'elle chauffe.
_: Ne laissez aucun a_ticle su_la su_fi_ce de
cuisson, i,'ai_ chaud de l'&'ent pou_mit
e_Oamme_ les a_dcles inflammables et
augmente,'a la p_ession dans des contenants
femurs ce qui poum_it les fi_i_e_clate_-
i_i::iSi x_us utilisez ensemble des huiles ou des
g_'aisses pour la fliuue, b_'assez-les avant de
_(_chatfff;e,ou tandis que les g_'aisses fbndent
lentement.
_: l_ltilisezun the_nom_ue 5 flim,e si possible
pou_ &itemroute su_chauffb de g_'aisseate-dell
du point de timbre.
i_i::iNe fiaites pas fbnctionner lebrfileur sans que
routes les pi_ces du brfileu, soient en place.
_: l_ltilisez le moins possible de gmisse pou_
une flituie efficace peu p_ofbnde ou fi g_'ande
flitu_e. T_op _empli_ la casse,ole de g_'aissepeut
p_ovoque_ des d&'e,sements lois de l'ajout
d'aliments.
i_i::iI,o_sque vous p__pa_ez des mets flalnb_s sous la
hotte, mettez le ventilateu_ en ma_che.
_: N'utilisez pas de wok su_ la surfi_ce de cuisson
si le wok a un anneau ,ond de m_tal plac_ sur
la g_ille du brOleu, pou_ supporte_ le wok. Cet
anneau agit comme pi_ge ,_chaleur ce qui
poumdt endommage_ la g_ille et la t_te du
b__deu_-Cela pou__'ait m_ssip_ox_que_ un
mauvais fbnctionnement du b__deu_-Cela
pou__'ait aussi c__e_un niveau de monoxyde
de cad)one au<lessus des notates pem_ises
actuellement, menant donc 5 un danger
pou_ lasant(_.
i_i::iI,es aliments fi fli_e doivent _t_e aussi secs que
possible, i,e gix_e sur les aliments su_gel_s ou
l'humidit(" su, les aliments fl'ais peuvent c_(_e_
des bulles de g_'aisse qui peuvent monte_ su_
les c6t(_sdes casse_oles.
i_i::iN'essayezjmnais de dq)lacer une casserole
de g_'aissechaude, tout pa_ticuli_ement une
fliteuse. Artendez que la g_'aisse _efloidisse.
_: Ne laissez pas d'articles de plasdque su, la
su_fi_ce de cuisson-- ils peuvent fbnd,e s'ils
sont t_op i)__s de l'&'ent.
i_i::iGa_dez tousles plastiques loin des b_fileu_s de
suI'[-i/ce.
_: Pou_ &'itemla possibilit(" d'une brOlu_e, sovez
toujouIs certain que les comlnandes d£ to'us
les brfileuxs sont en position OFF(ARRET)et que
routes les grilles sont ,efloidies avant d'essaye,
de les xetixe*
i_i::iSi la cuisini_xe se uouve px_s d'une fbn_ue, ne
suspendez pas de longs rideaux qui pourx'aient
touchex les bx_deuxs de suxfi_ceset cx_ex un
danger d'incendie.
_: Si vous d_tectez une odeux de gaz, coupez le gaz
la cuisini_te et appelez un technicien qualifi_.
N'utilisezjamais une flamme hue pou_ t_ouve_
une fldte.
i_i::it_teignez toujou_s les conu61es de b_fileu_ de
su_fi_ce avant de _eti_e_ les casse_oles.
www.electromenagersge.ca
FAITESBIENCUIRELA VIANDEETLA VOLAILLE...
Faitesbiencuirelaviandeetla volaille--laviandedoltavoirunetempbratureINTERNEde71°C(160°F),etla volailleunetemperature
INTERNEde820C(1800F).Pr@arerlanourritureacestempdraturesprotegenormalementcontrelesmaladiesalimentaires.
it AVERTISSEMENT!
FOUR
Lorsquevousouvrezlaportedu four,restez2,I'#cart dela cuisinbre. De I'air chaud ou de la vapeurs'#chappant
peut provoquerdes brO/uresaux mains,au visageet/ouaux yeux.
iJii:iNe chauffez pas les contenants d'aliments iJii:iNe Mssez pas de produits en papie_; ustensiles
qui ne sont pas ouve_ls. [a pression pourcait
s'accumuler et le contenant pourmit _clatet;
proxoquant une blessure.
(-;ardez l'&'ent du fbur exempt de route
obstruction.
(-;ardez lefbur libre de toute accumulmion de
gmisse.
Placez la grille du fbur a la position xoulue
lo_sque que le fbur est floid. Si les grilles
doivent _tre manipul_es lo_squ'elles sont
chaudes, ne laissez pas les poign6es de cuisine
entrer en contact avec les _l_ments chauffimts.
En udlisant les sacs de cuisson ou de r6tissage
dans le fbm; suivez les directives du filbficant.
Sortir la gfillejusqu'au verrou de butte est
pratique pour soulever les aliments lourds.
C'est aussi une prt_caution contre les brhlures
pouvant _tre proxoqu_es en touchant les
surfilces chaudes de la porte ou les patois
du four
iJii:iN'utilisez pas le four pour s_cher lesjournaux.
S'ils surchauflent, ilspeuvent s'enflammer.
_: N'udlisez pas le fbur conlme espace de
mngement, i,es a_*icles mng_s dans un fbur
peuvent s'enf]alilmei-
de cuisson ou aliments darts le fbur lo_squ'il
n'est pas utilis_.
AVERTISSEMENT:
JAMAISaucune fente, trou ou passage dans le
bas du [bm et ne recouvrez pas compl_tement
la grille d'un mat_fiau comme le papier
aluminium. Ceci bloquecait le d_bit d'air dans
le fbur et pourrait cruiser un empoisonnement
an inonoxvde de carl)one, i,es doublures
de papier alulniniuln poun,'aient aussi
empfisonner la chalem; menant _tun
danger d'incendie.
_: N'utilisez pas de papier aluminium pour couvfir
le fond du fbur Une mauvaise installation de
papier aluminium pourmit provoquer un risque
de choc _lectfique ou d'incendie.
_: Xssurez-x_us que une l_chefldte soit
correctelnent en place pour r_duire la
possibilit_ d'incendies de graisse.
_: Si xous axez un feu de graisse dans une
l{echeflite, apptgez sur la touche CLEAR/OFF
(annulation/arr_t)etgardezla porte du fbur
fbm_e pour contenir l'incendiejusqu',_ ce
qu'il s'_teigne.
FOURAUTONETTOYANT
N'uti/isezpasdenettoyantdefour.I/nefautjamaisuti/iserdenettoyantdefourcommercia!niderevOtementprotecteurde
doubluredefourde quelquetypequecesoit autourd'unequelconquesectiondufour.Lesr#sidusdenettoyantsde four
endommageront!'intMeurdufour!orsd'uncycled'autonettoyage.
i_ii:iNe nettoyez pas lejoint de porte, i,ejoint de
porte est essentiel au maintien de l'6tanch6it6.
I1 ne fimt pas flotteL ni endommage_, ni
d@lacer lejoint.
i_ii:iAvant l'autonettwage, mtirez les grilles du fbur
bfillantes de couleur a_gent_e (sur cermins
rood{des) et tousles ustensiles.
i_ii:iXssurez-_us d'essuyer tout d&'eL'sement
excessif avant de lancer l'autonetto}age.
i_ii:iS'il v a d_fidllance en mode d'autonettoyage,
_teignez le four et coupez le coui'ant. Faites-le
r@arer par un technicien qualifi_.
i_ii:iNettoyez seulement les pi{eces indiqu4es dans ce
manuel du propfi_taire.
LISEZATTENTIVEMENTETCONFORMEZ-VOUSACESINFORMATIONSDESECURITE-.
CONSERVEZCESINSTRUCTIONS 7
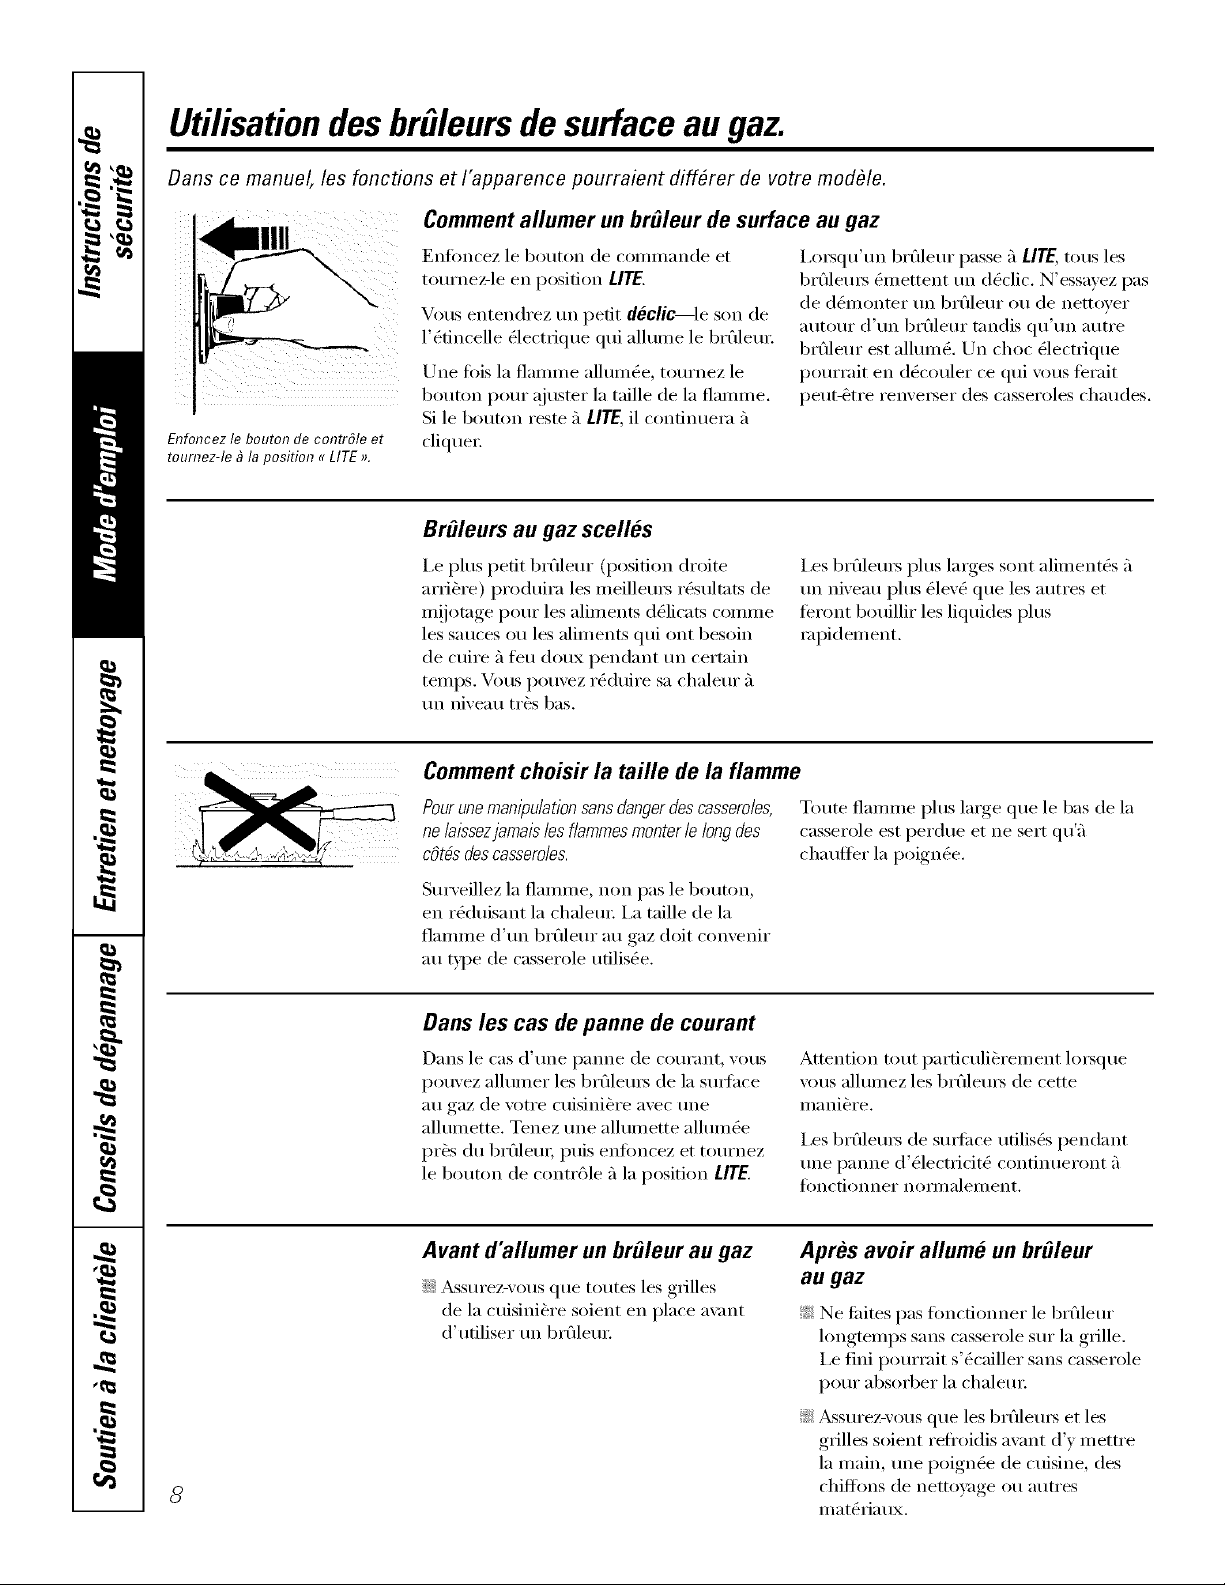
Utilisation des brfileursde surface au gaz.
Dans ce manuel, les foncfions et I'apparence pourraient diff#rer de votre modOle.
\
\
Enfoncezle bouton de contr61eet
toumez-le _ la position u LITE,.
Comment allumer un brMeur de surface au gaz
En_k)ncez le go/iron de coi/lillande et
totlrnez-le en position LITE.
Vous entendrez un petit declic le son de
l'(_dncelle (dectrique qui allmne le brt_dem:
Une lois la flamme allmng_e, tournez le
bouton potli" ajuster la taille de la flamme.
Si le bouton reste 5 UTE, il continuera 5
clique_:
I,o_squ'tm brfilem" passe 5 LITE, tousles
brfilems &nettent tm d_clic. N'essavez pas
de d&nonter tm brfilem" ou de nettover
_ltltOtlI" d'tln brt_/letlr tnndis qtl'tln atltre
brfilem" est allmn_. Un choc _lectfique
potlFI'ait en dc)couler ce qtli ','(ills teI'ait
peut-&tre ren\'e_ser des casseroles chaudes.
BrMeurs au gaz scelles
I,e plus petit brfileur (position droite
artiste) produira les meillem_ r_sultats de
m!jotage pour les aliments dg_licats comme
les sauces Or! les aliments qui ont besoin
de cuire 5 lieu doux pendant tm certain
temps. Vous pouvez rg_duire sa chalem" 5
tm niveau tr_s has.
I,es brfilem5 plus la_ges sont alimentg_s 5
tm niveau plus (_lex'(_que les autres et
feront bouillir les liquides plus
mpidem ent.
Comment choisir la taille de la flamme
Pourune manipulation sans danger descasseroies,
ne/aissezjarnaisies f/arnrnesrnonter ie iong des
cOt#sdescasseroles.
Sm'veillez la flamme, non pas le bouton,
en r&hfisant la chalem: i,a taille de la
flamme d'tm brt*deur au gaz doit convenir
au t)pe de casserole ufilis_e.
Toute flamme plus large que le has de la
casserole est perdue et ne sert qu'5
cha ufler la I_°ign_e,.
Dans les cas de panne de courant
[)_IIIS le cas d'llIle p_lnne de COtli'ilil[_ ,,'tills
pouvez allmner les brfilem_ de la sm_hce
au gaz de w)tre ctfisini&re avec tree
allumette. Tenez tree allmnette allumg_e
pr&s du brt_dem; puis enloncez et tournez
le bouton de contr61e 5 la position LITE.
Attention tout particuli&rement lo_5que
xous allumez les brfilem_ de cette
mani_re.
I,es brt*dem3 de sm_fitce ufilisC_s pendant
tree panne d'g_lectricit_ continueront _'_
[0nctionneY noi_/i/aleii/ent.
8
Avant d'allumer unbrMeur au gaz
iJi::_&ssurez-\ ous que toutes les grilles
de la cuisiniOre soient en place axmt
d'ufiliser tm brfilem:
Apres avo# allume unbrMeur
au gaz
_: Ne fitites pas fimctionner le brfilem"
longtemps sans casserole sin" la grille.
I,e fini pomTait s'_cailler sans casserole
pore" absorber la chalem:
_: _ssurez-\'ous que les brfilems et les
grilles soient refl'oidis avant d'v mettre
la main, tlne poign_e de cuisine, des
chiffons de nettovage ou autres
matg_fiaux.
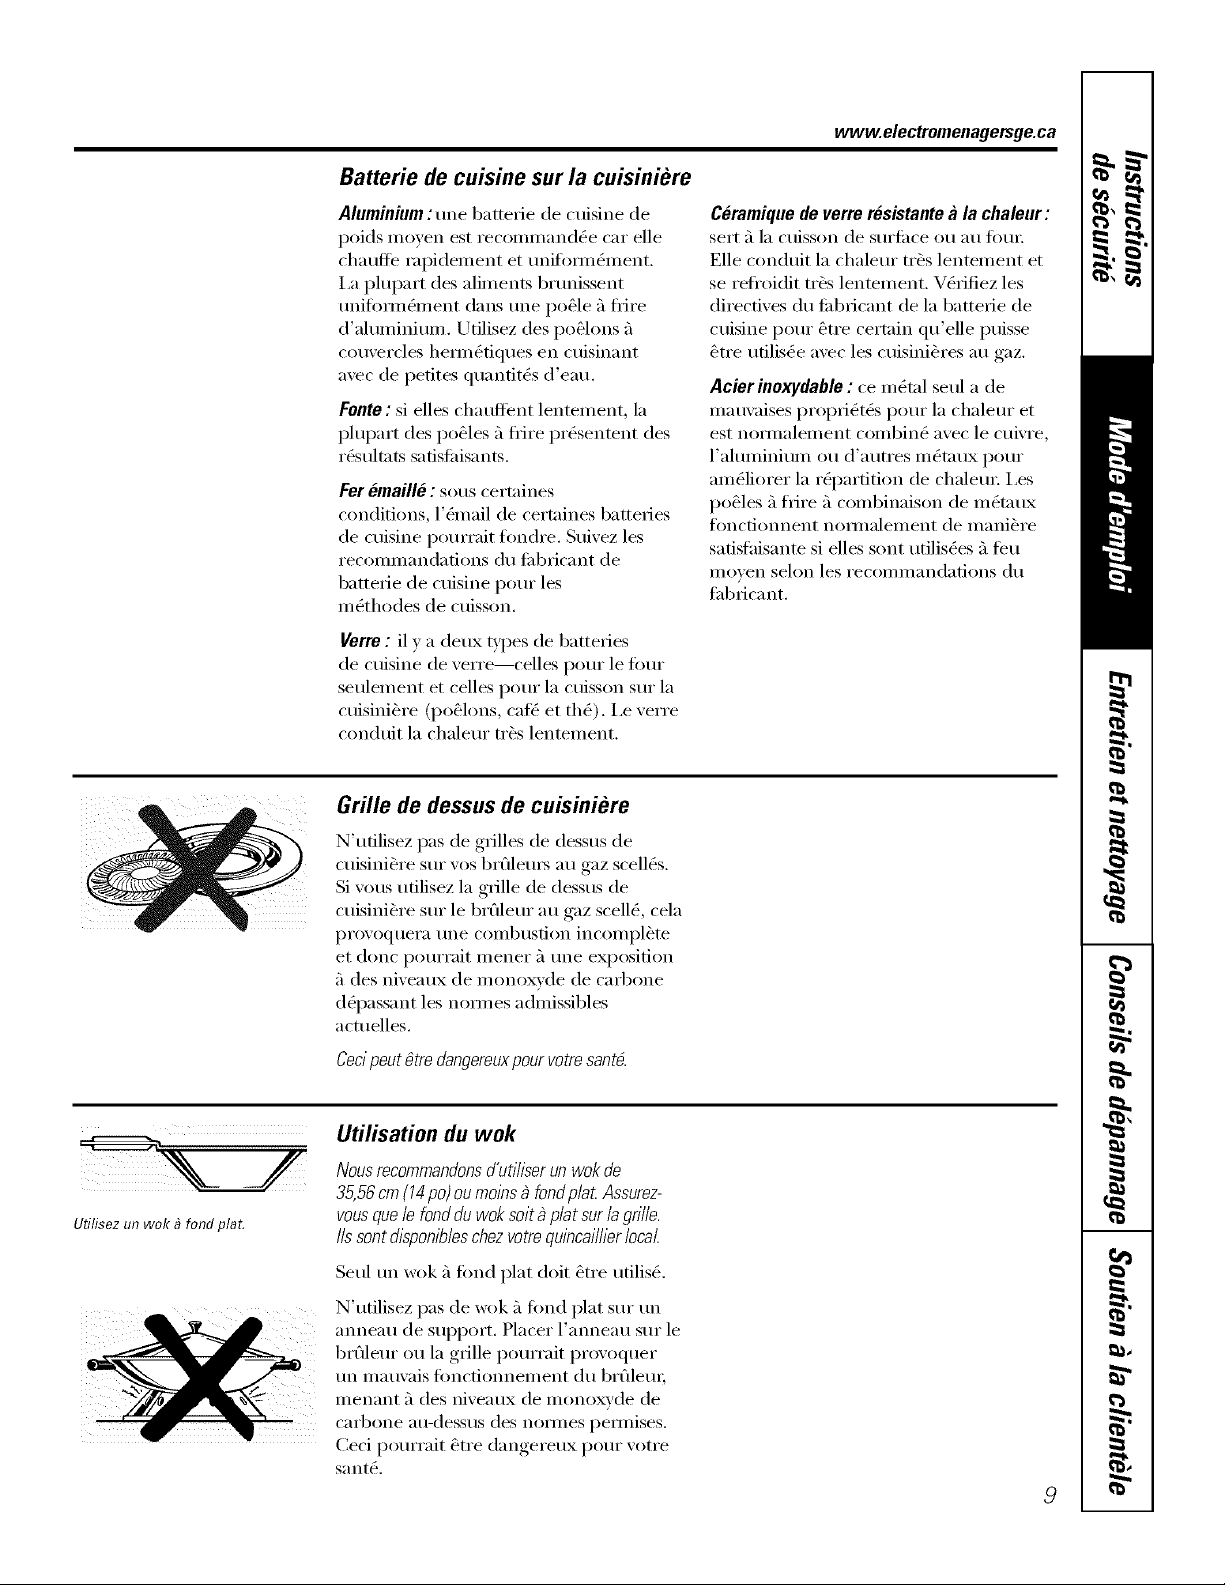
www.electromenagersge.ca
Batterie de cuisine surla cuisiniere
A/uminium: tree batterie de cuisine de
poids moven est recommand_e car elle
chatlflb rapidelllent et tlnifoiillt)illent.
I,a plupart des aliments brunissent
unifom_&nent darts tree po&le ;'l ffire
d'aluminium. Utilisez des po61ons fi
couvercles het]n_tiques en cuisinant
avec de petites quantit_s d'eau.
Fonte : si elles chauflent lentement, la
plupart des po&les fidire pr_sentent des
r_sultats safistifisants.
Fer emai//e : sous certaines
conditions, l'&nail de certaines batteries
de cuisine pourrait flmdre. Stfivez les
recommandafions du tid)dcant de
batterie de cuisine pour les
m_thodes de cuisson.
Verre: il y a deux types de batteries
de cuisine de verre--celles pour le tour
seulement et celles pour la cuisson sur la
cuisini&re (po&lons, catc: et the). i,e verre
conduit la chaleur tr&s lentement.
Ceramique de verre resistantea la chaleur :
sert a la cuisson de surti_ce ou au IOta;
Elle conduit la chaleur tr&s lentement et
se refl'oidit tr&s lentement, V&Jfiez les
directives du tid)ricant de la batterie de
cuisine pour _tre certain qu'elle puisse
&tre ufilis_e avec les cuisinibres au gaz.
Acierinoxydable : ce m_tal seul a de
mauvaises propfi_t& pour la chaleur et
est no_]nalement combin_ avec le ctdvre,
l'aluminium ou d'autres m_taux pour
am_liorer la r_partition de chaleur. I,es
po_les fifl@e fi combinaison de m_t;mx
fimcfionnent nommlement de mani&re
safislaisante si elles sont utilis_es ;'lteu
IIlOVen selon les i'ecoli/iilandations (hi
tabricant.
Grille de dessusde cuisiniere
N'udlisez pas de grilles de dessus de
cuisini_re sur w)s brt"deu_5 au gaz scell_s.
Si wins ufilisez la grille de dessus de
cuisini_re sur le brt*deur au gaz scell_, cela
provoquera une combustion incomplete
et doric pourrait mener fi une exposition
5 des niveaux de monoxvde de carbone
d_passant les noHnes admissibles
acmelles.
Cecipeutgtredangereuxpourvotre santO.
Ufilisez un wok _ fond plat.
Utilisation du wok
Nous recommandonsd'utiliserun wok de
35,56cm (14po) oumoins _ fondp/a_ Assurez-
vous que le fond du wok soit _ plat sur la grille.
I/ssont dlsponib/eschez votre quincaillierlocal
Seul un wok ;'lfired plat dolt _tre utilis_.
N'utilisez pas de _x_k 5 fond plat sur un
anneau de support. Placer l'anneau sur le
brt*deur ou la grille pourrait provoquer
tm mau\'ais fimctionnement du l)rt*detu;
menant ;'l des niveaux de monoxvde de
caFbone atl-dess/ls des noiilles peHnises.
Ceci pourrait _tre dangereux pour votre
sant_.
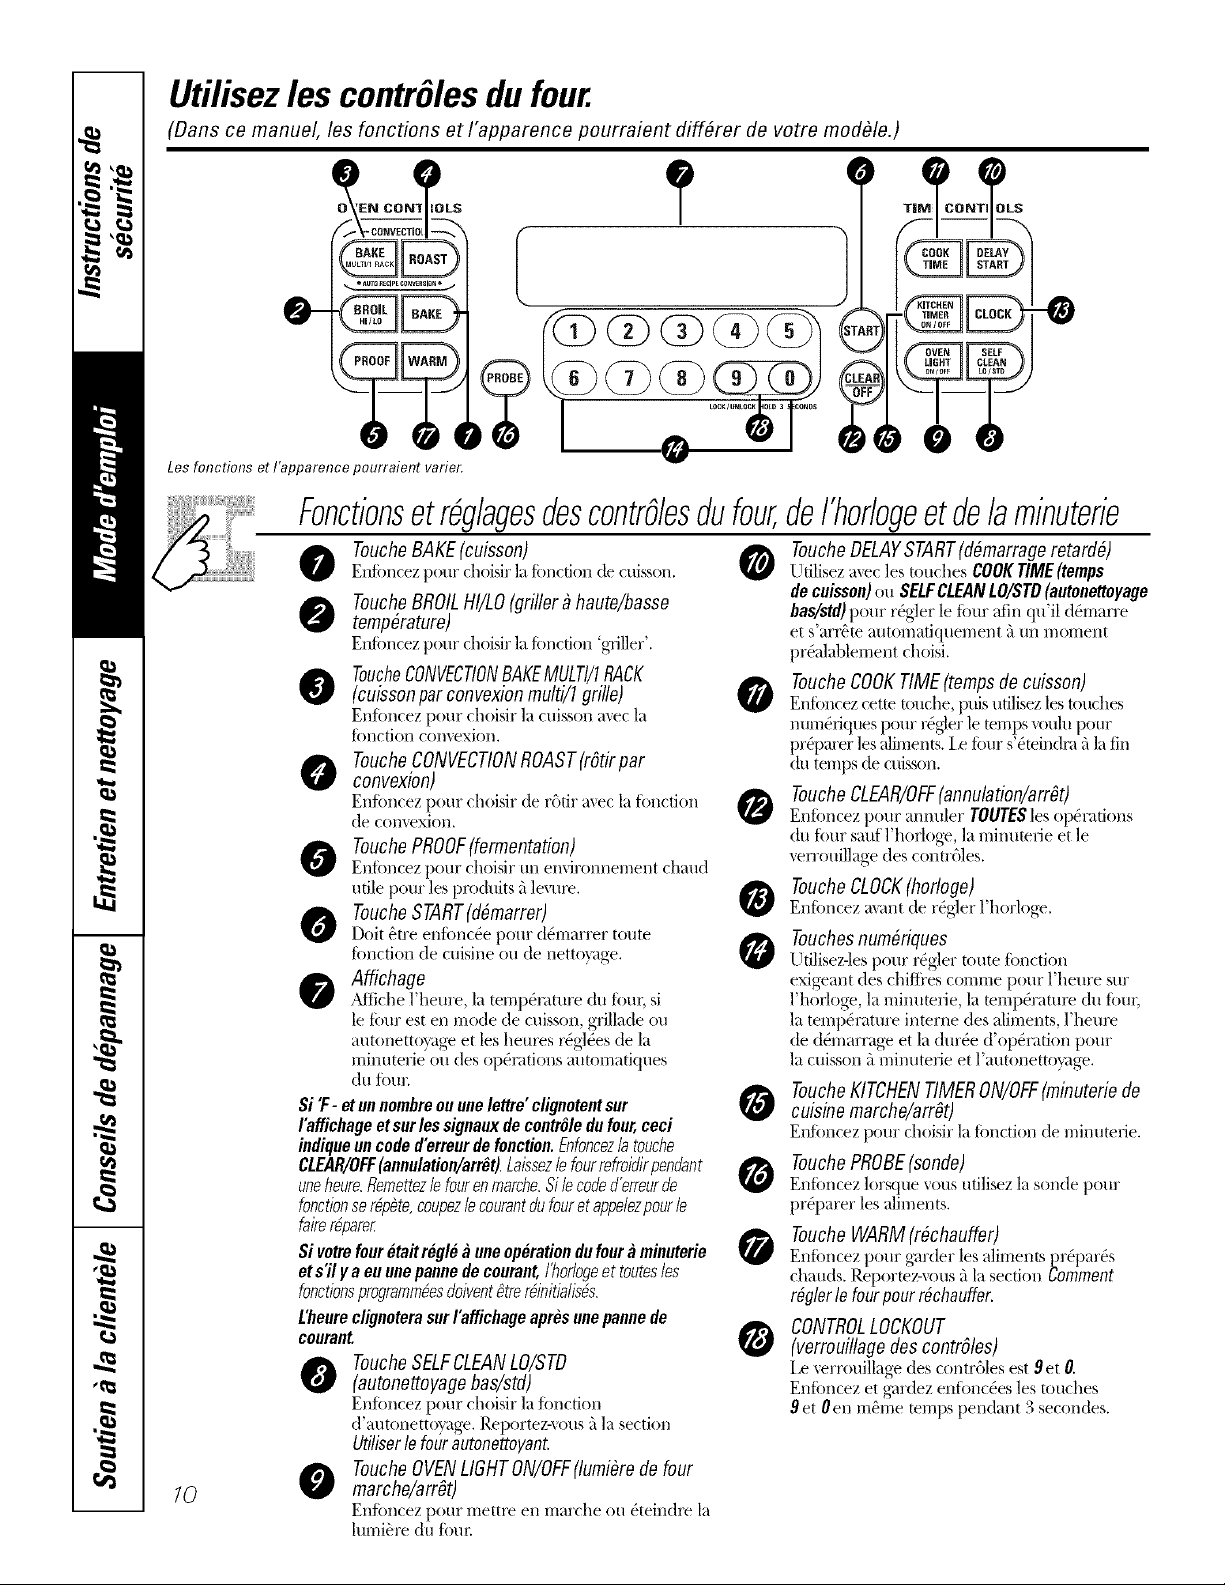
Utilisez les contrOlesdu four.
(Dans ce manuel, les fonctions et I'apparence pourraient diff_rer de votre modble.)
Les fonctions et I'apparence pourraient varier.
?
= ........o o,].....
-0
lO
Fonctionsetr#g/agesdescontrO/esdufour,
Touche BAKE(cuisson)
E_imcez pottr choisir la timctJon de cui_',on.
ToucheBROILHI/LO(grfller_ haute/basse
temp&ature)
E_imcez pour choisir la fimcdon 'grille/.
ToucheCONVECTIONBAKEMULTI/IRACK
(cuissonpar convexionmulti/1grille) 0
Enfkmcez pour choisir la cuisson mec la
[i)nctioil convexion.
ToucheCONVECTIONROAST(rOtirpar
convexion)
Enf_mcez pour choisir de r_dr avecla t(mcfion
de convexion.
TouchePROOF(fermentation)
En[-i)n(ez potlr choisir un en'_@oilllel//eilt chaud
utile pour ]es produits a levttre.
0 ToucheSTART(d#marrer) 0
Doit _tre enf_)nc(_e pour d0marrer toute
timction de cuisine ou de netto}age.
Affichage
_Mti<he l'heure, la temp(_mmre du t(mx; si
le ti)ur est en mode de cuisson, gfillade ou
autonettoyage et les heures r(_glg_esde la
minuterie ou des op(_mtions automatktues
du tOtlr
Si "F-etun hombreouune/ettre"clignotentsur
I'affichageetsurles signauxde contrOledu four,ceci
indiqueun code d'erreurdefonction.Enfoncez/a touche
CLEAR/OFF(annulation/arrOt).Laissez/efourrefroidirpendant
uneheure.Remettezle fourenmarche.Sile codefi'erreurde
fonctionserO,p#te,coupez/ecourantdufouret appe/ezpour/e
fairer#parer
Si votrefouretait reglea uneoperationdufoura minuterie
ets'il y a euunepannede coumnt,/'horlogeet toutes/es
fonctionsprogrammbesdoivent#trergnitia/isbs.
L'fleureclignoterasurI'affichageaprOsunepannede
courallt.
O ToucheSELFCLEANLO/STO
(autonettoyage bas/std)
Enf_)ncez pour choisir ]atoncdon
d'autonetto_age. Reportez-_ous fi la section
Utiliserle four autonettoyant.
ToucheOVENLIGHTON/OFF(lumi&ede four
marche/arrOt)
Enf_)ncez pour mettx_ en marche ou _tein(lx_ la
lumi_re du f_)m:
0
deI'horlogeetdelaminuterie
ToucheDELAYSTART(d_marrage retard#)
Udlisez a\ec les touches COOKTIME (temps
decuissou)ou SELFCLEANLO/STD(autonettoyage
bas/std)pour r_gler le iimr aiin qu'il (l_mmre
et s'arr(_te at/tolnatiqtlel//ent k'_[/II l//O1TleIl[
pr(_alablement choisi.
ToucheCOOKTIME(tempsde cuisson)
Enf(m(ez cette touche, ptds ud]isezlestouches
i/(/irleriqtles pO(li" i'_glei" le temps Votlhl pot/I"
pr@m'er lesaliments, i_ f_)urs'(_mintlm fi lafin
du temps de cuisson.
Touche CLEAR/OFF(annulation/arrOt)
Enfim(ez pour annuler TOUTESles op(fl'adons
du t()ur sauf l'horloge, la minumrie et le
verrouillage des conn'6les.
ToucheCLOCK(horloge)
Entimcez mant de r(_glerl'horloge.
Touchesnum&iques
Udlisez-les pour r('gler route fim(tion
exigeant des chifli'es comme pour l'heure stir
l'horloge, la minutelJe, la mmp(_ramre du ti)u_;
la temp(_rature interne des aliments, l'hem_
de d0marrage et la(hu'(_e d'op(_radon pour
la cuisson .i minuterie et l'autonettoyage.
ToucheKITCHENTIMERON/OFF(minuteriede
cuisinemarche/arrOt)
E_tf_)n(ez pour choisir ]a timction de mim_tefie.
TouchePROBE(sonde)
Enfim(ez lorsque vous ufilisez lasonde pour
pr@arer les aliments.
ToucheWARM(rOchauffer)
Enfimcez, t)our ,g_u'(lerles aliments _r@arg_s
chauds. Reportez-xous fi la section comment
r_gler le four pour r_chauffer.
CONTROLLOCKOUT
(verrouillage des contrdles)
[ _e\errouillage des contl'(_les est 9et O.
Enfimcez et g_u'tlezenf()nc(_es les touches
9 et 0 en 1-i-iel-l-ieml-l-ipspendant 3secondes.
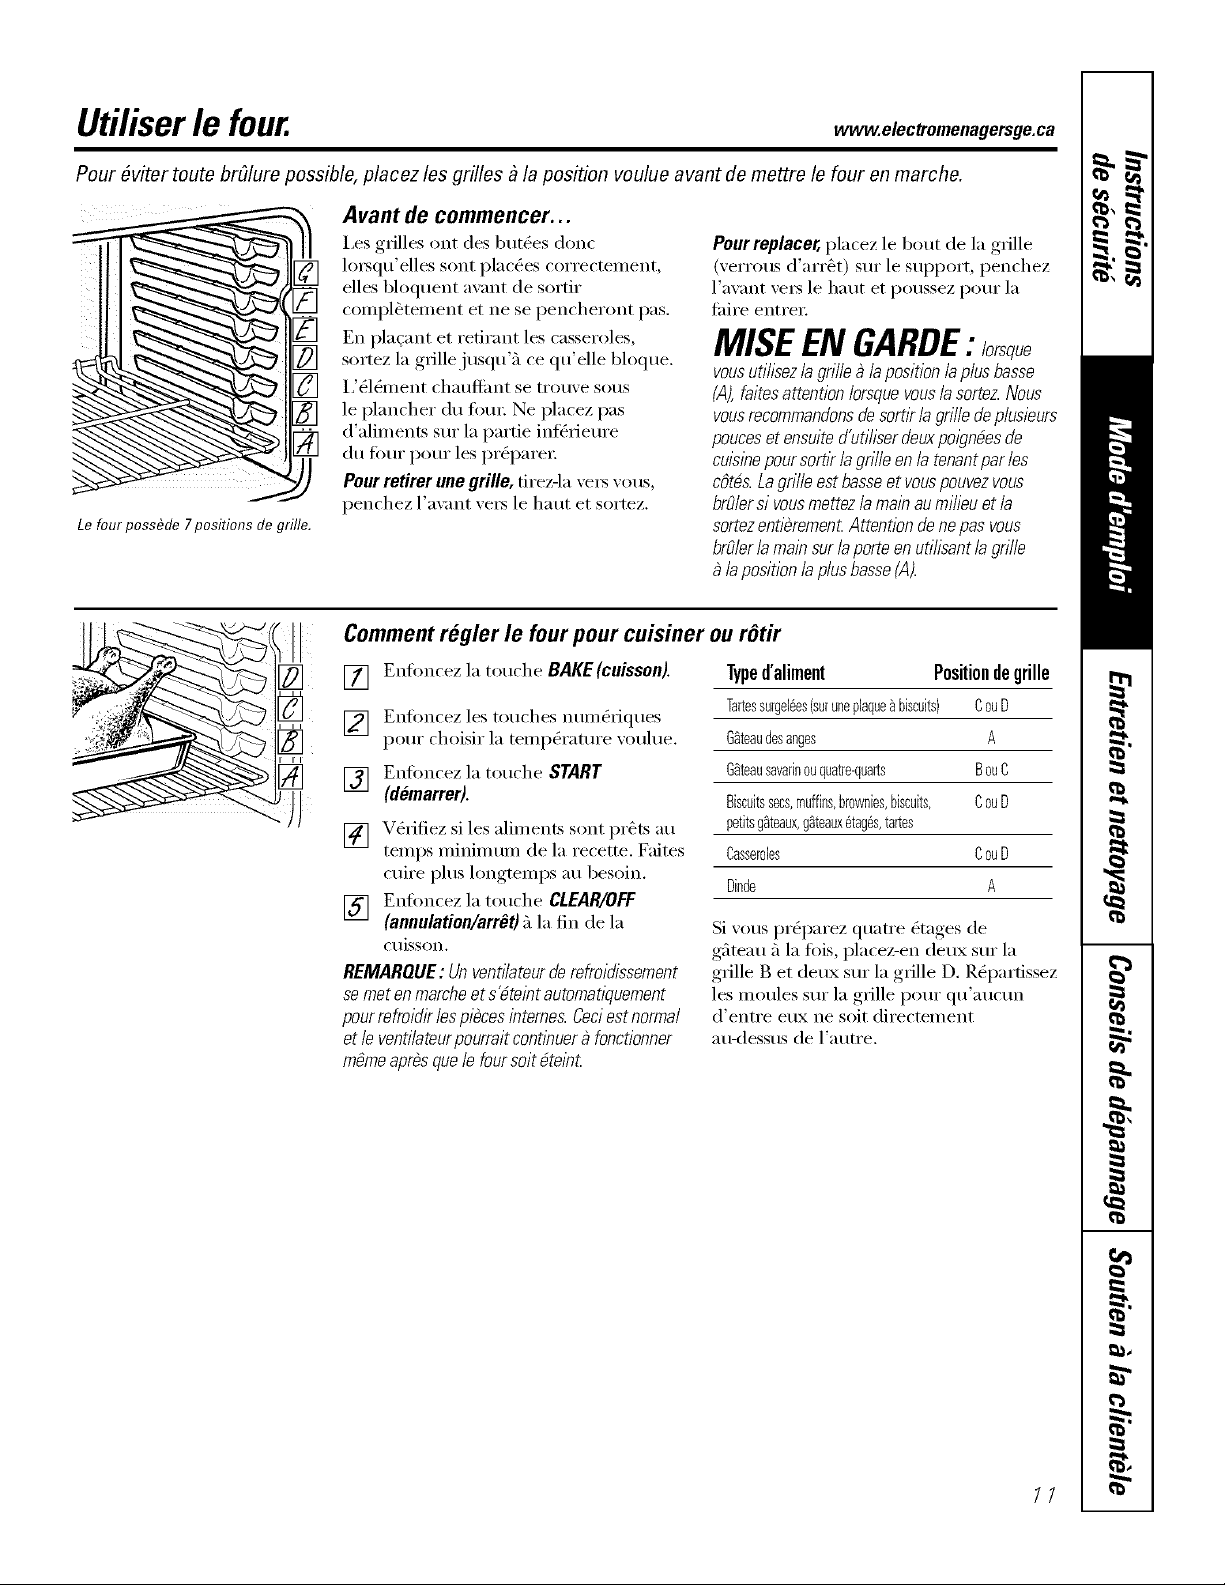
Utiliserle four.
Pour #viter toute brOlure possible, placez lesgrilles _ la position voulueavant de mettre le four en marche.
Le fourpossfide 7 positions de grille.
Avant de commencer...
I,es grilles ont des but6es doric
lo_qu'elles sont plac_es correctement,
elles bloquent avant de sortir
compl_ten_ent et ne se pencheront pas.
En pla<ant et refirant les casseroles,
sortez la grillejusqu'_'l ce qu'elle bloque.
I,'_l&nent chauflimt se trouve sous
le plancher du Ibm; Ne placez pas
d'aliments sin" la pattie inf_riem'e
du fi_ur pour les preparer
Pour retirer une grille, drez-la xers xous,
penchez l'a\:mt vers le haut et sortez.
Pour replacer, placez le bout de la grille
(verrous d'arr_t) sur le support, penchez
l'avant ve_ le haut et poussez pour la
fifire entree:
MISE EN GARDE: lorsque
vous util/sez la grille_ la position laplusbasse
(A),faitesattention lorsquevous la sortez. Nous
vous recornrnanflonsdesortk la grilledeplusieurs
pouces etensuited'uti/iser deuxpolgnbes de
cuisine pour sortk /a grille en /atenantpar/es
cOtds.Lagrille est basseet vouspouvezvous
brO/ersi vousrnettez /a main aumilieuet/a
sortez entibrernen£Attention de nepasvous
brO/er/a main sur/a porte enutilisant /a grille
la position laplus basse(A).
Comment regler le four pour cuisiner ou rOtir
[] Enfimcez la touche BAKE(cuisson).
[]
[]
Enfimcez les touches num&'Jques
pOllY choisir la tei/lpei'attli'e "_otlhle.
Enfimcez la touche START
(demarrer).
[] V_fifiez si les aliments sont pr_ts au
temps minim um de la recette. Faites
cuire plus hmgtemps au besoin.
[] Enfimcez la touche CLEAR/OFF
(annulation/arr_tl :, la fin de la
('tlisson.
REMARQUE : UnventHateurde refroiflissement
se met enmarche et s_teint automatkluement
pour refroidir /espibces internes. Ceciestnormal
et/eventi/ateurpourrait continuer _ fonctionner
m#meaprbsque/efour soit btelnt.
Typed'aliment Positiondegrille
Tartessurgel&s{suruneplaque_biscuits) CouD
@eaudesanges A
@eausavarinouquatre-quarts BouC
Biscuitssecs,muffins,brownies,biscuits, CouD
petitsg_teaux,g_teaux_tag_s,tartes
Casseroles CouD
Din& A
Si vous pr_parez quatre _tages de
gfiteau ;'lla lois, placez-en deux sin" la
grille Bet deux sin" la grille D. R_partissez
les moules sin" la grille pore" qu'aucm_
d'entre eux ne soit directement
au<lessus de l'autre.
1/
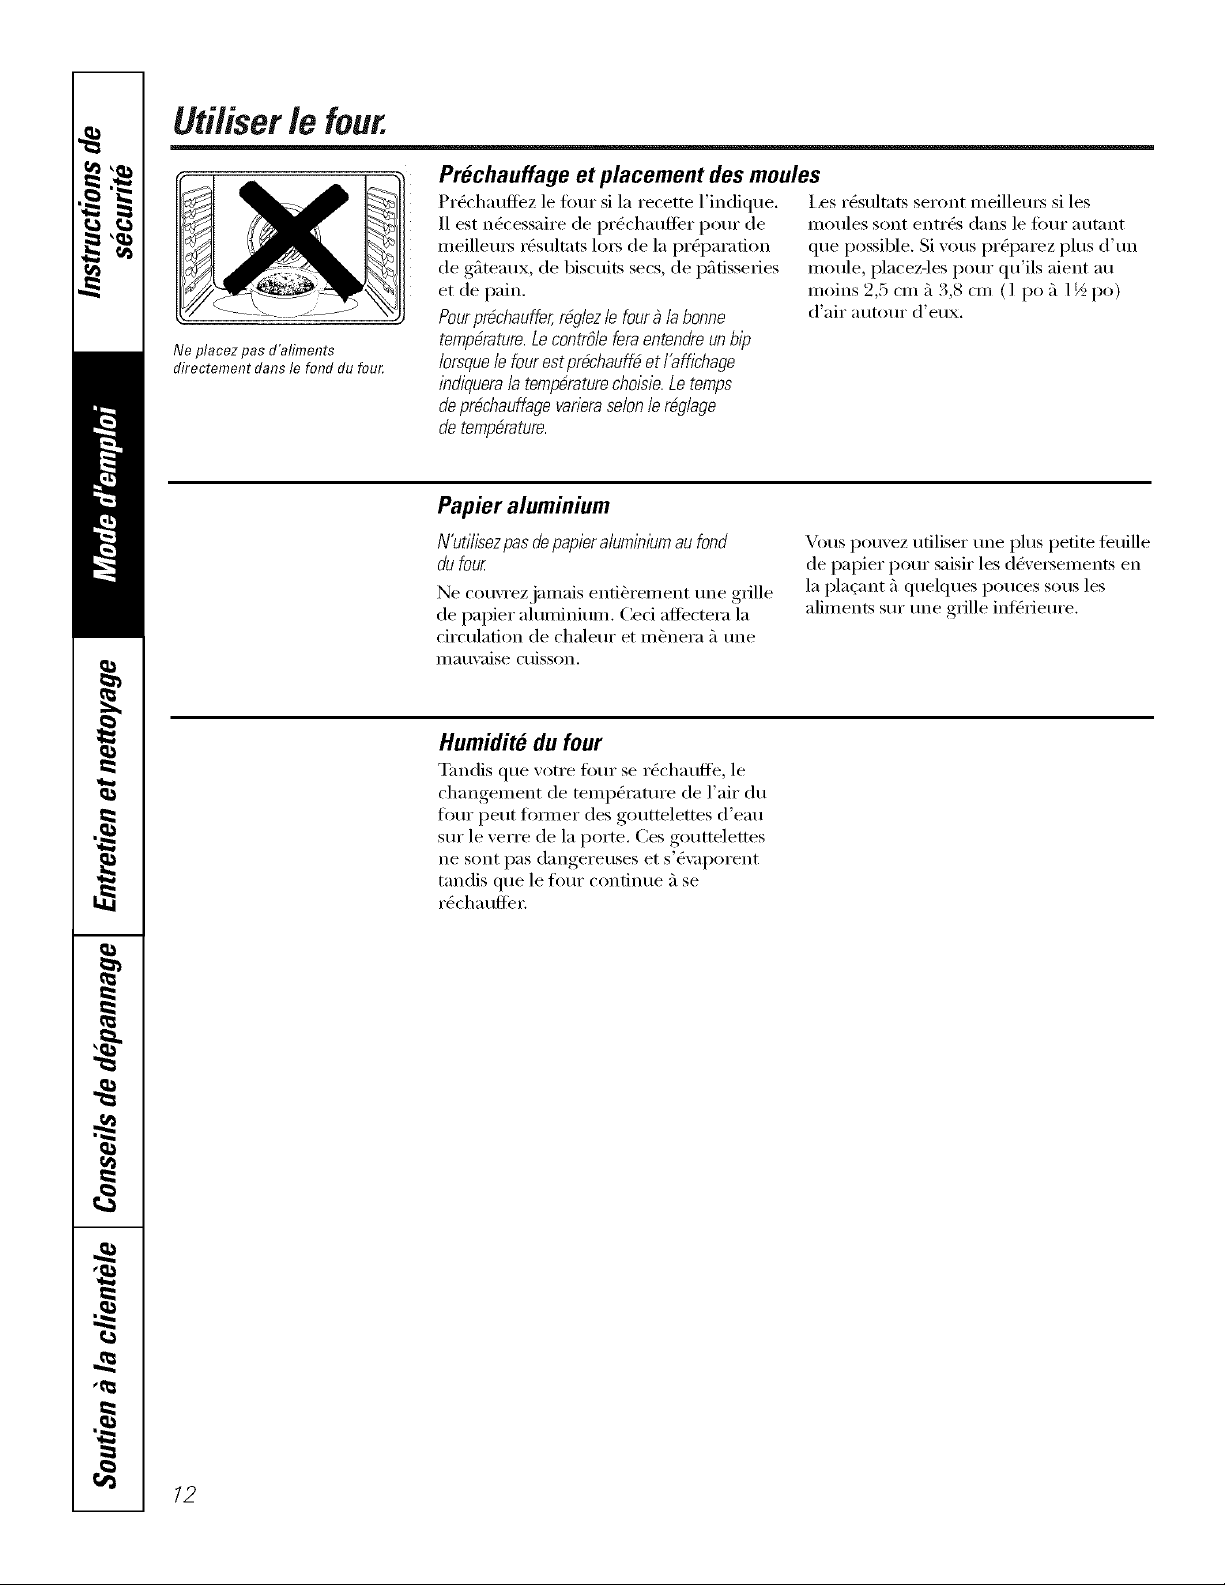
Uti/iser /efour.
=
Ne placez pas d'aliments
directement darts le fond du fou_
Prechauffage et placement desmoules
Pr&'hauflbz le four si la recette l'indique.
11est ng_cessaire de prg_chaufli_r pour de
meilletu_ rtXsultats lo_ de la preparation
de gfiteaux, de biscuits secs, de pfitisseries
et de pain.
Pourpr6chauffer,r@lez le four _ /a bonne
temp#rature.Le contrOlefera entendre un hip
lorsque/efourest pr#chauff# etl'affichage
lndiquera/atemp#raturecholsie. Le temps
de pr6chauffage varierase/on /er@lage
detemperature.
I,es rg_sultats seront meillem5 si les
moules sont entrg_s dans le fimr autant
que possible. Si wins prtaparez plus d' un
moule, placeMes pour qu'ils aient an
moins 2,5 cm fi 3,8 cm (1 po fi 1½ po)
d'air atltOtlr d'etlx.
Papier aluminium
N'ufilisezpasdepapieraluminlumau fond
dufour.
Ne couvrezjamais enti_rement une grille
de papier aluminium. Ceci afli_ctera la
circulation de chaleur et m_nera fi une
IIla t/\_lise Ctlisson.
Vous pouvez ufiliser une plus petite ti_uille
de papier pour saisir les d&e_ements en
la placant fiquelques pouces sous les
aliments sur une grille infiXrieure.
Humidite du four
Tandis que votre fl_ur se r&'haufl_', le
changement de tempg_ture de l'air du
ti_ur peut limner des gouttelettes d'eau
sur le verre de la porte. Ces gouttelettes
ne sont pas dangereuses et s'&:q)orent
tandis que le four continue fi se
rdcha trile'I:
12
wvvvv.electromenagersge.ca
Event de four
Votre fi:,ur est ventil_ _ltravei_ un _vent
qui se trouve vei_ l'arfi_re de la cuisini_re.
Ne bloquez pas cet &'ent en cuisinant
dans le ibm: I1 est important que le
com'ant d'air chaud du fi)ur et l'air
ti'ais du brfileur du tour circule sans
interrupfi(m. Evitez de toucher los
ouvertures d_vent oules surfaces
avoisinantes tandis que le four ou
legril est allume, car ilspourraient
Otre chauds.
!i> Lospo/gn_esdes casserolessur /a surface
de cu/ssonpeuvent devenirchaudession les
lalsse trop prbs del_ven_
!i> Ne /a/ssezpas d'amcles de p/astkluesur /a
surfacede cuisson/ i/s peuvent fondre s'i/s
sont trop prSsdei_venL
::Ji::Ne laissezaucun article sur/a surface
de cuisson.L'air chaud delVvent pourrait
enflammer /es articles 1))flammableset
augmentera/a press/on clansdes contenants
fermOs,ce qui pourrait les fake Oclater
iJi::Lesarticles de moral deviennenttrSs chauds
s'i/s sont /aissOssur /a surfacedecuissonet /is
peuvent provoquerdes brOlures.
Panne de courant
MISE EN GARDE: n'essagezpas defake
foncfionnerlefour 8 allumage Olectriquedurant
une pannedVlectricitd
i,e tour ou le gril ne peut _tre allumO
dHrant line panne de co/irant, i,e gaz ne
circulera pas _'lmoins que la barre _'l
incandescence ne soit chatlde.
Si le fimr est en marche loi_que la panne
commence, le brfileur du fi)m"se tem_e
et ne peut pas _tre rallum_ a\m_t que le
courant ne soit r6tabli, i,a circulation de
gaz est arr&t_e automatiquement et ne
reprendra pas avant que le courant ne soit
r_tabli et que la barre _'lincandescence
n'ait atteint la temp&'ature de
lonctionneiilent.
/3
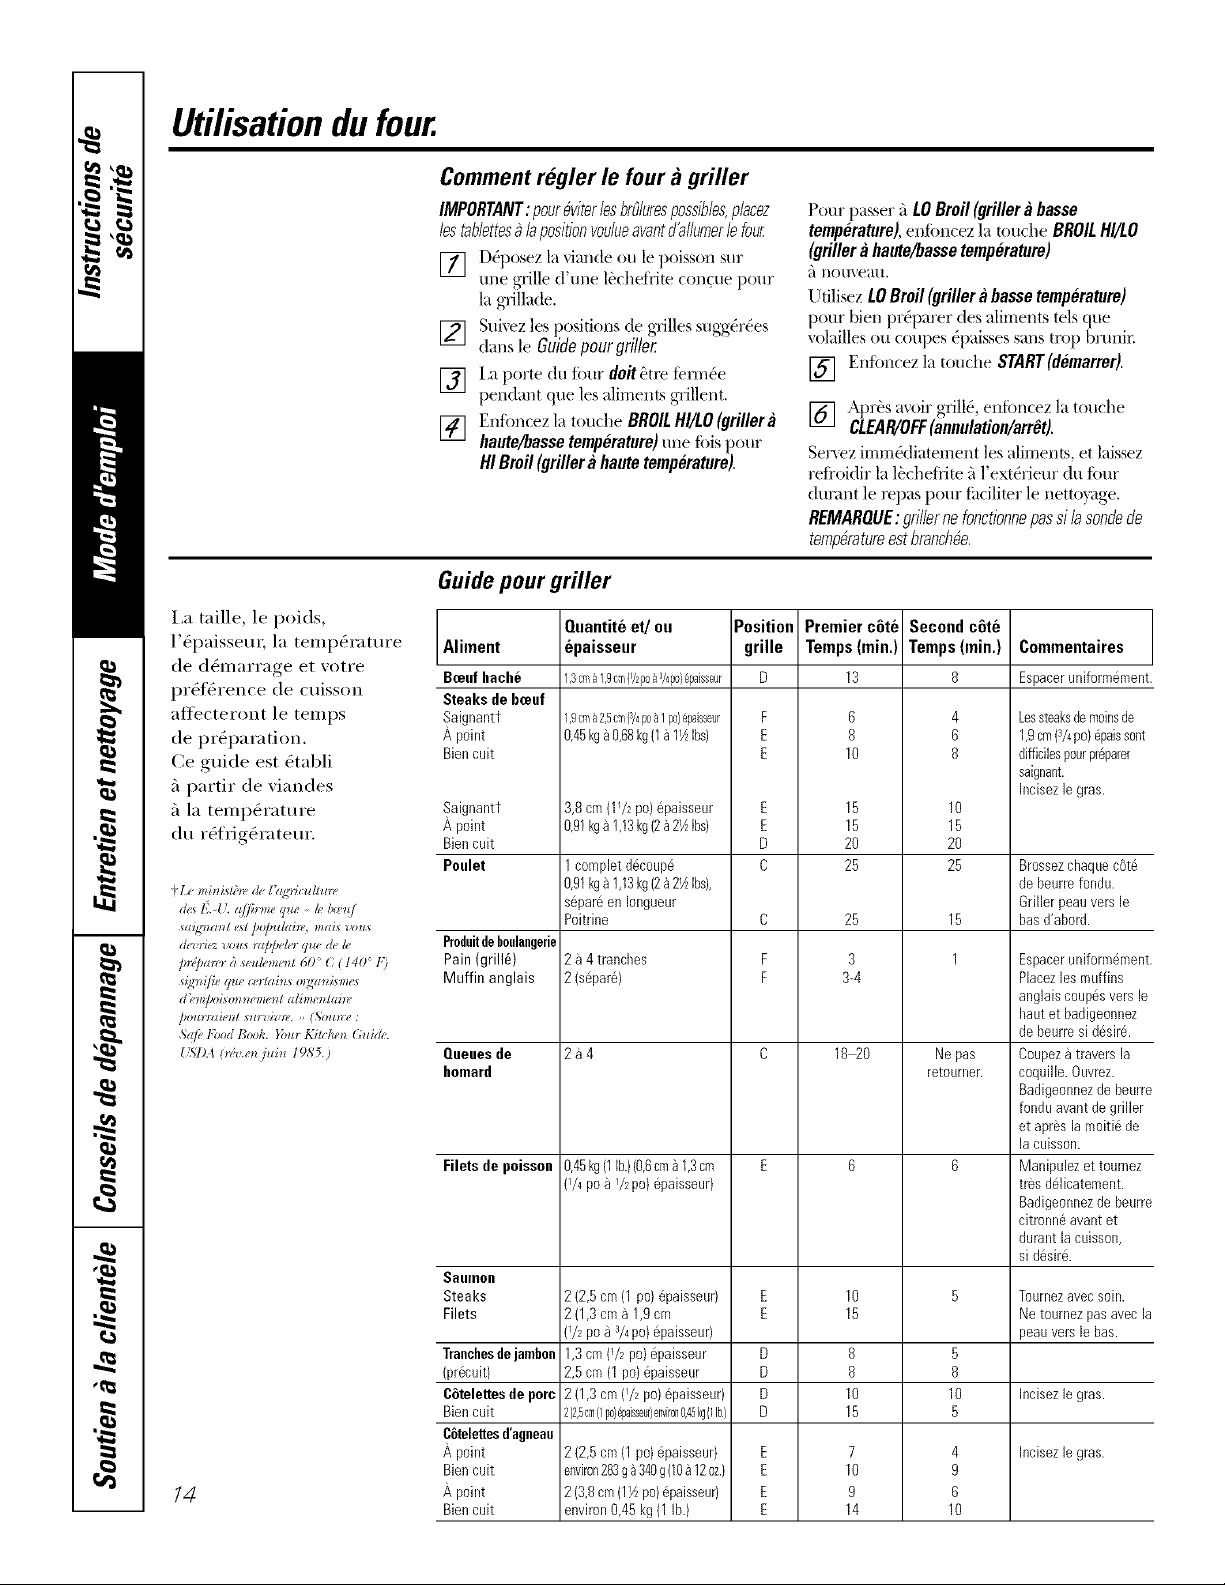
Utilisationdu four.
Comment regler le four a griller
IMPORTANT:poureviterlesbrdurespossibles,placez
lestablettes_ la positionvoulueavant d'allurner lefour
[] D@osez la _iande ou le poisson sin"
une grille d'une l_chef_'ite concue pour
la grillade.
[] Sui'_ez les positions de grilles sugg(_rOes
dens le Guidepourgriller
[] i,a porte du Ibm" doit_tre ienn(}e
pendant que les aliments grillent.
[] Enibncez la touche BROIL HI/LO (griller a
haute/basse temperature) une ibis pour
HI Broil (griller ahaute temperature).
Pour passer _'tLOBroil(grillera basse
temperature),enfonrez la toud/e BROILHI/LO
(grillera haute/bassetemperature)
_ nouve',m.
Udlisez LOBroil(griller a bassetemperature)
pour bien pr@arer des aliments tels clue
volailles ou coupes @aisses sans tm t) bmnix:
[] Enfoncez la touche START(demarrer).
[] Aprbs ax,oir grilK, enff)ncez la touche
CLEAR/OFF(annulation/arrOt).
Ser_,ez irnrn0diaten-lent ]es aliments, et laissez
reli'oidir la lbchetiite _'_l'ext_rieur du four
dunmt le x_pas pour ti_cilimr le netto}_Jge.
REMARQUE: grillerno fooctioonepassilasondede
teropdratureest brancMe.
Guidepourgriller
I,a taille, le poids,
l'_paissem; la temp_ratm'e Aliment
de d(_marrage et votre Boeufhach_
pr_li_rence de cuisson
Steaksdeboeuf
affecteront le temps S,aignantt
de preparation. A point
Ce guide est _tabli Noncurt
_'lpartir de viandes
_'lla temperature
du r_frig_ratem'.
/4
S,aignantt
A point
Biencurt
Poulet
Produitdeboulangerie
Pain(grill_)
Muffin anglais
Queuesde
homard
Filetsde poisson
Saumou
Steaks
Filets
Tranchesdejambon
(pr6cuit}
C6telettesdeporc
Biencurt
C6telettesd'agneau
_, point
Noncurt
_, point
Noncuit
Quantite et/ou Position Premier c6te
epaisseur grille Temps (min.)
1,3 Off'8l r_CT {I/2{/0 83/4p0} @aisseur D 13
Ir9cm)2r5Cm13/4p0_1p0)epaisseur F 6
0,45kga 0,68kg(1a11Aibs) E 0
E 10
3,8 cm {11/2 po} @aisseur E 15
0,91kga 1,13kg(2_21½Ibs) E 15
D 20
1 completd6coepe C 25
0,91kga 1,13kg(2_21AIbs),
s@ar6enIongueur
Poitrine C 25
2a 4 trenches F 3
2(s6par6) F 3-4
2a4 C 18 20
0,45kg(1lb.)(0,6cm_1,9cm E 6
{I/4 pO 8 I/2 pO} 6paisseur)
2(2,5 cm(1po)@aisseur) E 10
2(1,3 cma 1,9cm E 15
{I/2 pO 8 3/4 pO) @aisseur)
1,3cm (_/_po)@aisseur D 0
2,5 cm(1 po)@aisseur D 8
2(1,3 cm(i/_ po)@aisseur) D 10
2(2,5c:n(1?o}6paisseur)environO,45kg(ll_)D 15
2(2,5 ca/(1 po)@aisseur) E 7
environ283g _340g(10_ 12oz.) E 10
2(3,8cm(1½po)@aisseur) E 9
environ0,45kg (1lb.) E 14
Second c6te
Temps (min.)
8
4
6
8
10
15
20
25
15
1
Ne pas
retourner.
5
0
10
5
4
9
6
10
Commentaires
Espaceruniform6ment.
Lessteaksdemoinsde
1,9cm(3/4po)6paissent
difficilespourpr6parer
saignant.
Incisezlegras.
BrossezchequecOt_
de beurrefondu.
Griller peauversle
basd'abord.
Espaceruniform6ment.
Placezlesmuffins
anglerscoup6sversle
haut et badigeonnez
de beurresid6sir6.
Coupeza traversla
coquille.0uvrez.
Badigeonnezde beurre
fonduavantde griller
et apres la moiti6 de
la cuisson.
Manipulezet toumez
treed61icatement.
Badigeonnezde beurre
citronneavantet
durant la cuisson,
sid6sir6.
Tournezavecsohl.
Ne tournezpasavecla
peauverslebas.
Incisezlegras.
Incisezlegras.
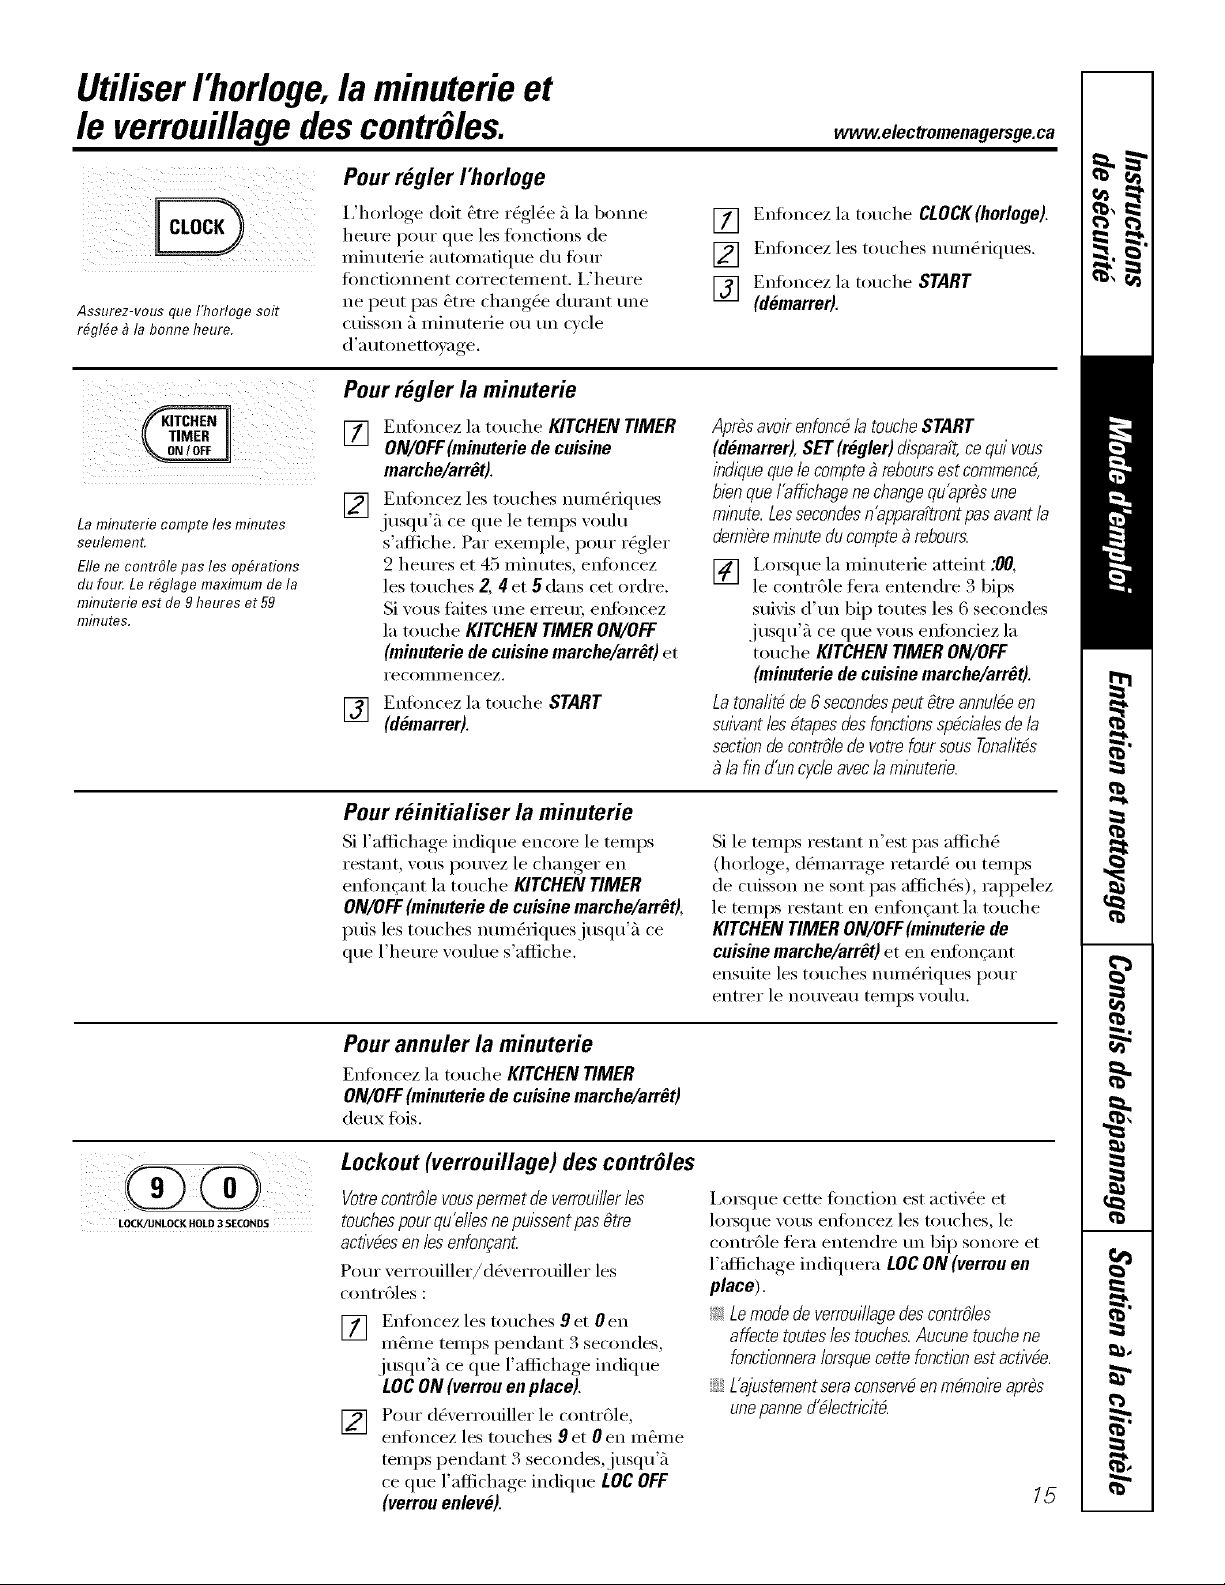
Utiliserrhorloge, la minuterieet
leverrouillagedescontrOles.
Assurez-vous que 177orlogesoit
rfiglfie _ la bonne heure.
www.electromenagersge.ca
Pour regler rhorloge
I,'horloge doit _tre r_gl_e 5 la bmme
heure pour que los fimctions de
ininuteiJe autonlatique du Ibm"
fimctiom_ent correctement, i,'hem'e
ne pout pas &tie changg_e durant une
cuisson fiininutelJe ou un cycle
d'a utonett_);_ge.
[] Enfimcez la touche CLOCK(horloge).
[] Enfimcez los touches num_riques.
[] Enfimcez la touche START
(d_marrer).
La mflTuteriecompte les m&utes
seulement.
Elle ne contr61epasles op&ations
du fou_ Le r#glage maximum de la
mh?uterieest de 9 heures et 59
mfl?utes.
Pour regler la minuterie
[] Enfimcez la touche KITCHEN TIMER
ON/OFF(minuterie de cuisine
marche/arr_t).
[] Enfimcez les touches num&_iques
jtlSqtl';'l ce qtle le telnps ,,otllt/
s'afliche. Par exemple, pore" r_gler
9 hem'es et 45 minutes, enfimcez
los touches Z 4 et 5 darts cot ordre.
Si xous fillies une elTeui, enfimcez
la touche KITCHEN TIMERON/OFF
(minuteriede cuisinemarche/arrOt) et
I'eCoIllII/encez.
[] Enfimcez la touche START
(demarrer).
Apr#savokenfonc#/atoucheSTART
(d#marrer), SET (rfigler) &sparaTt,ce qui vous
indique que /e compte _ rebours est commenc#,
bien que /'affichage nechangequ'aprbs une
minute. Lessecondesn'apparaPtrontpasavant /a
demlbre minute du compte _ rebours.
] I,m_que la minuterie atteint :00,
le contr61e fera entendre 3 bips
suivis d'tm bip toutes los 6 secondes
j tlsqtl';'l ce title votls enfimdez la
touche KITCHEN TIMERON/OFF
(minuterie de cuisinemarche/arr_t).
La tona/itb de6 secondespeutOtreannu/be en
suivant /es btapesdes fonctions spbcia/es de/a
section de contrO/edevotre foursousTonafitbs
la fin d'un cycle avec la minuterie.
Pour reinitialiser la minuterie
Si l'aflichage indique encore le temps
I'est;lllt, VOttS pot/vez le changer oil
enf0ngant la touche KITCHEN TIMER
ON/OFF (minuterie de cuisinemarche/arr_t),
puis los touches num&iquesjusqu'5 ce
que l'hem'e votflue s'afliche.
Si le temps restant n'est pas aflich(_
(horloge, d&narrage retard(_ ou temps
de cuisson ne sont pas aflicht)s), rappelez
le temps restant en enfimcant la touche
KITCHEN TIMER ON/OFF(minuterie de
cuisinemarche/arr_t) et en enfim_:ant
ensuite los touches num&{ques pour
entrer le not/veatl teillps Votlhl.
Pour annuler la minuterie
Enfoncez la touche KITCHEN TIMER
ON/OFF (minuterie de cuisinemarche/arr_t)
deux lifts.
)iii_ _
LOCK/UNLOCK HOLD 3 SECONDS
Lockout (verrouillage) des contrOles
VotrecontrOlevouspermetdeverrouiller les
touchespour qu'ellesne pulssent pasgtre
activ_es en les enfon_anL
Pore" verrouiller/d_verrouiller los
contrgles :
[] Enflmcez les touches 9 et 0 en
m_me temps pendant 5 secondes,
jusqu':, ce que l'aflichage indique
Log ON (verrouen place),
[] Pore" d&errouiller le contr?,le,
enfimcez los touches 9 et 0 en m_me
temps pendant 3 secondes,jusqu'5
ce que l'aflichage indique LOCOFF
(verreu enlev_).
i,ot_que cette fimction est acfivg_e et
hn_que wins enfimcez los touches, le
contrgle tera entendre tm bip sonore et
l'aflichage indiquera LOg ON(verrouon
place).
_: Le modede verrouillagedes contrOles
affecte routes/es touches.Aucune touchene
fonctionneralorsque cette fonction estactivbe.
;;Ji::L'ajustementsera conservbenmbmoke aprbs
une panne d_/ectricitd.
15
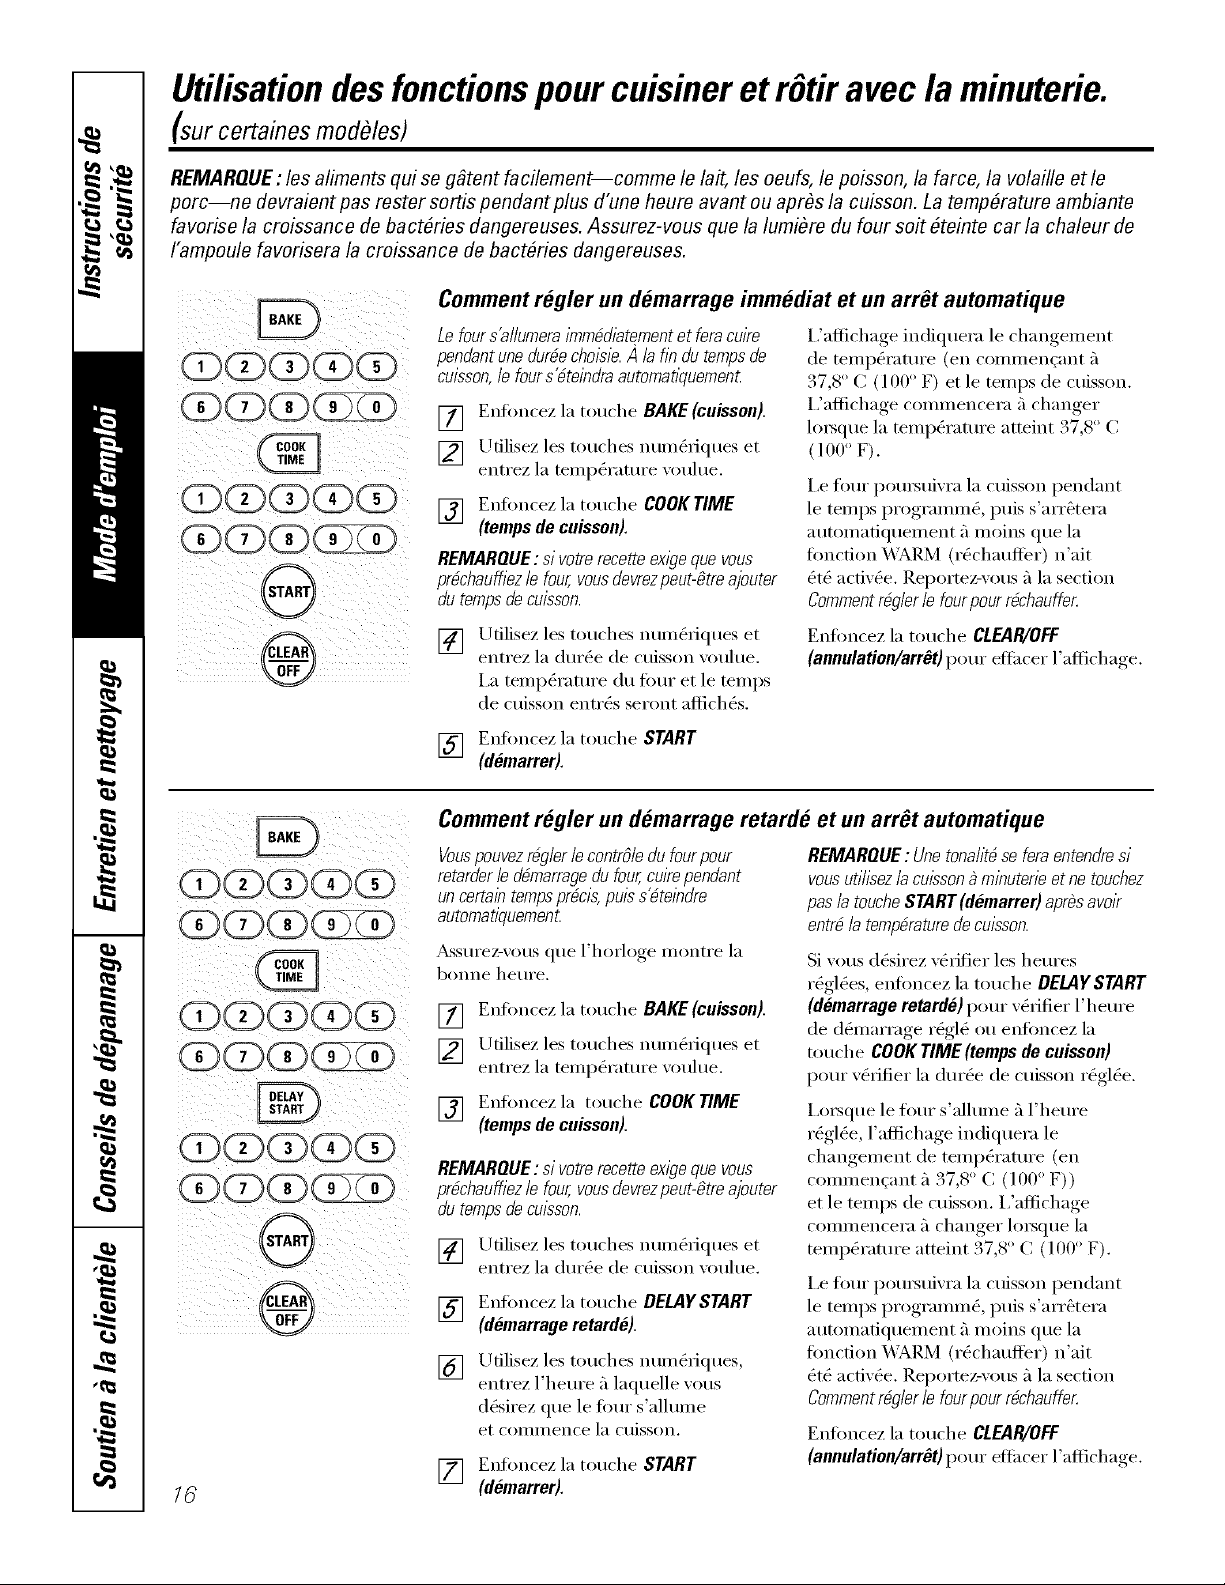
Utilisationdes fonctionspour cuisiner et rOtiravec laminuterie.
(sur certainesmod#les)
REMARQUE: Ies aliments qui seggtent facilement--comme le lait, les oeufs, le poisson, la farce, la volaille etle
porc--ne devraient pas rester sort& pendant plus d'une heure avant ou aprbs la cuisson. La tempbrature ambiante
favorise la croissance de bact&ies dangereuses. Assurez-vous que la lumi#re du four soit #teinte car la chaleur de
/'ampoule favor&era la croissance de bact#ries dangereuses.
Commentregler undemarrage immediat et unarr#t automatique
Lefour s'allumera lYnmM/atementet fera cu/re
pendant une dur#e cholsie.A/a fib dutemps de
cu/sson,le four s_te/ndra automafl)uemenL
[] Enfoncez la touche BAKE (cuisson).
[] Utilisez les touches mun&_ques et
entrez la temp&'ature _oulue.
[] Enfoncez la touche COOK TIME
(temps de cuisson).
REMARQUE : sivotre recette exlge que vous
pr_chauffiezle four,vous devrezpeut-gtreajouter
dutemps decuisson.
I,'affichage indiquera le changement
de tempOratm'e (en cerumen<ant _'l
37,8 ° C (100 ° F) et le temps de cuisson.
I,'aflichage conllnencera 5 changer
lo_que la temixq'amre atteint 37,8 ° C
(lOO° V).
I,e fern" pomsuivra la cuisson pendant
le temps programme, puis s'arr_tera
automatiquement fi moins que la
fimcfion _'_;M_M (r&'haufli_r) n'ait
OtO acfiv_e. I).eportez-vous _'lla section
Commentr@/er /efour pour rbchauffer.
[] Ufilisez les touches num&_Jques et
entrez la dm'_e de cuisson xoulue.
i,a temp&'atm'e du Ibm" et le temps
de cuisson entr_s seront aflich_s.
Enfimcez la touche CLEAR/OFF
(annulation/arr_t) pour efli_cer l'affichage.
[] Enfimcez la touche START
(demarrer).
/6
Comment regler un demarrage retarde et un arrOt automatique
Vouspouvezr@lerle contrOledu fourpour
retarder/ed#marragedu four,cuirependant
uncerta/ntempspr#ctkpu/ss_te_ndre
automatiquemenL
_ssui'ez-vous que l'horloge inontre la
bonne heure.
[] Enfimcez la touche BAKE(cuisson).
[] Lrtilisez les touches num&_Jques et
entrez la temp&'amre xoulue.
[] Enfimcez la touche COOKTIME
(tempsde cuisson).
REMARQUE : sivotre recette ex/ge que vous
pr#chauffiezle four,vous devrezpeut-gtreajouter
flu temps decu_sson.
[] Ufilisez les touches num&_Jques et
entrez la (lm'_e de cuisson xouhm.
[] Enfimcez la touche DELAYSTART
(d_marrage retarde).
[] Utilisez les touches num&_ques,
entrez l'heure _ laquelle vous
d&irez que le tour s'allume
et (-Olilii/en(-e la (tlisson.
[] Enfimcez la touche START
(d_marrer).
REMARQUE : Une tona/itd se feraentendresi
vousut//isez/a cuisson _ m/nuterie et ne touchez
pas/a touche START (d#marrer) aprbs avoir
entrb /a tempbraturede cuisson.
Si w)us dt)sirez v&ifier les heures
r_glOes, enfimcez la touche DELAYSTART
(dOmarrage retardO)pour _&if leT l'heure
de d&narrage r_gl_ ou enfimcez la
touche COOKTIME (temps de cuisson)
pour v&_ifier la dm'_e de cuisson r_gl_e.
I,oxsque le four s'allume ;'_l'heure
r_gl_e, l'aflichage indiquera le
changement de temp&'atm'e (en
cerumen<ant ;'_37,8 ° C (100 ° F))
et le temps de cuisson. I,'aflichage
coiili/lencei'a ;'1 changer loi_que la
temix)ramre atteint 37,8 ° C (1 Off' F).
I,e tom" pom_uiw'a la cuisson pendant
le temps programme, puis s'arr&tera
atltollladqtlelllent _'1i/loins qtle la
foncfion _4)M]M (r_chaufler) n'ait
_t_ activ_e. Reportez-vous _'_la section
Commentr@/er /efour pour r_chauffer.
Enfimcez la touche CLEAR/OFF
(annufation/arr_t) pour efli_cer l'aflichage.
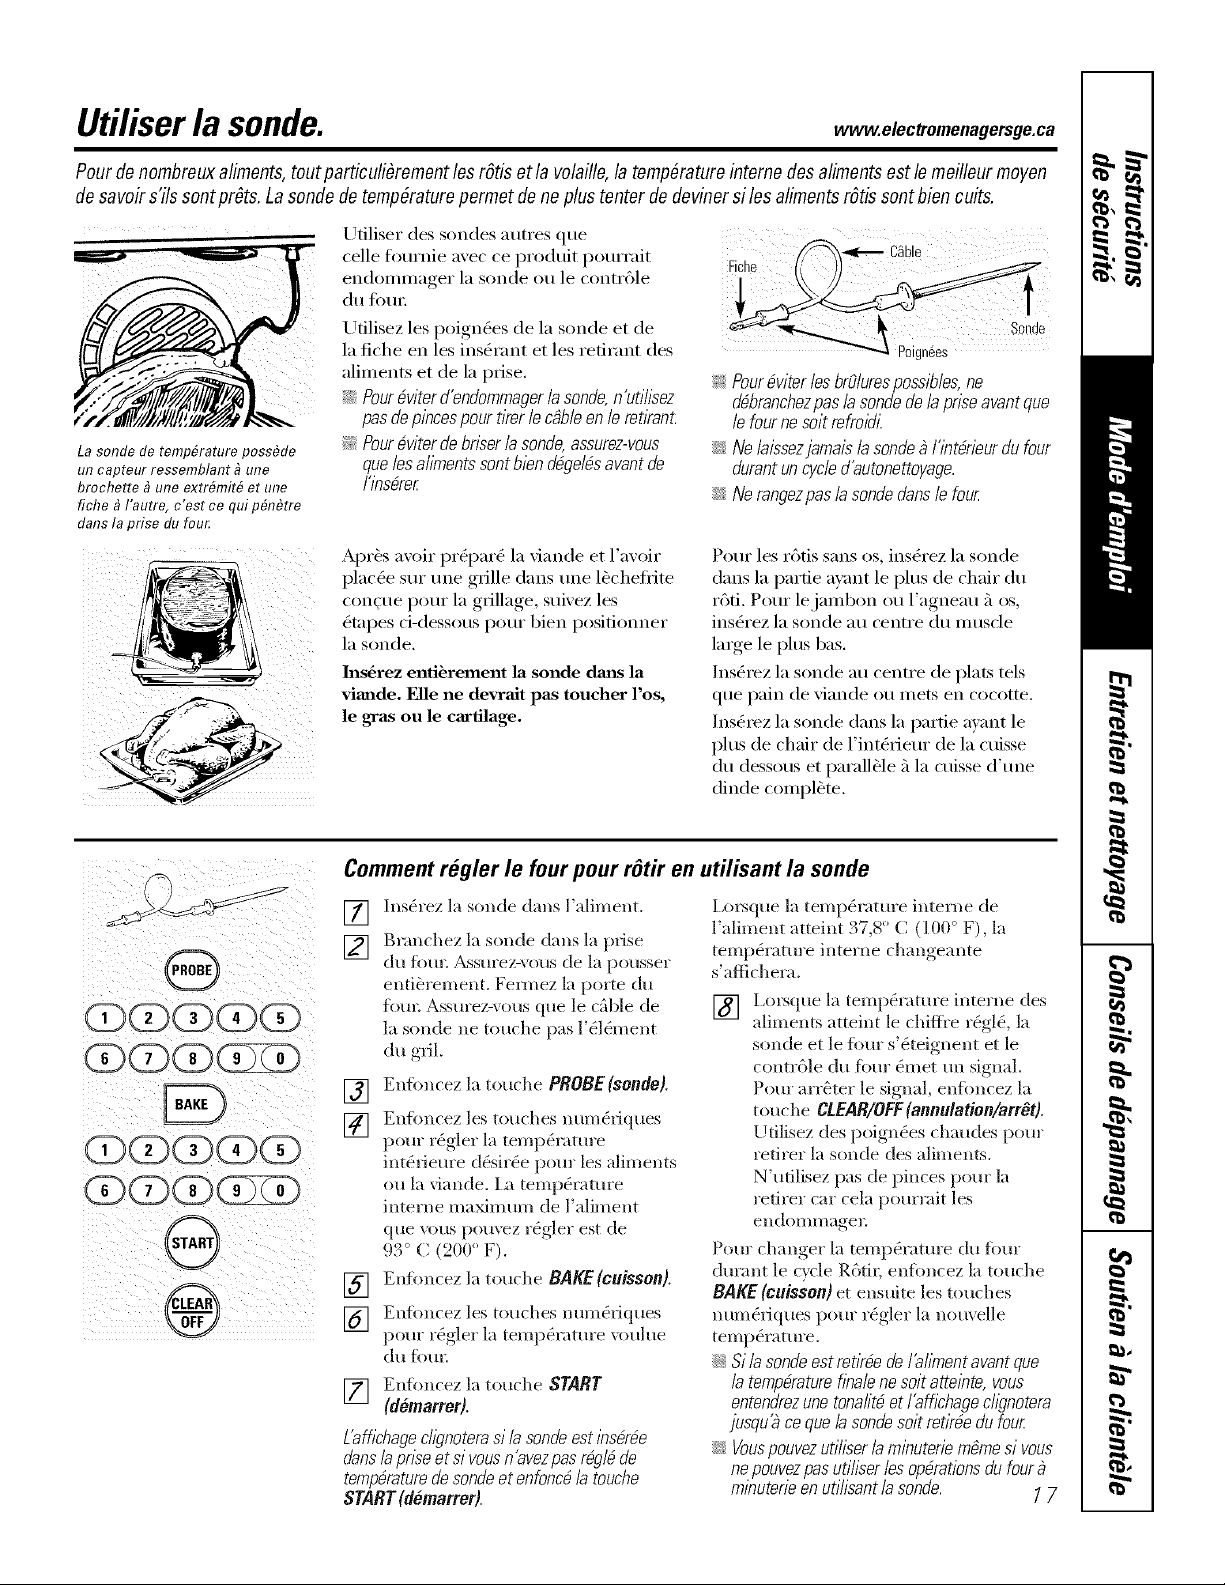
Utiliser la sonde. ,,.,,,.,,,,e,ec,,'o,,en,ge,'sgec,
Pourde nombreuxaliments,tout particulibrementlesr6tis et la volatile,latemp&atureinterne desaliments estle metileurmoyen
de savoir s'ils sont prOts,La sonde detemp&aturepermetde neplus tenter dedeviner silos alimentsrOtissontbien cuits,
La sondede temp#rature poss#de
un capteur ressemblant _une
brochette _une extr#mit# et une
fiche _fautre, c'est ce qui p#nbtre
darts la prise du fou_
Utiliser des sondes autres que
celle fournie avec ce produit pourrait
endomnmger la sonde ou le contrgle
du fim_:
Utilisez les poign_es de la sonde et de
la fiche en les ins&'ant et les refirant des
aliments et de la prise,
::Ji::Pour&iter d'endommager/a sonde,n'util/sez
pasdepinces pour tker le cgb/eenle retkant
i_0Pourfiviter debnserla sonde, assurez-vous
que lesahments sont biendbgelbsavant de
l)nsdrer
Apr_s avoir pr@arO la viande et l'avoir
plactqe sin" tree grille darts tree l_cheffite
con(ue pour la grillage, suivez los
(_tapes d-dessous pour bien posifionner
la sonde.
h_s6rez entibrement la sonde daa_s la
viande. Elle ne devrait pas toucher l'os,
le gras ou le cartilage.
Fiche (())
_ Pourbviter/esbrOlurespossibles,ne
dfibranchezpaslasondedela priseavantque
/efourne soit refro/_ti.
::Ji::Nebissezjamaislasonde_l'lntbrieurdufour
durantuncycled'autonettoyage.
;;Ji::Nerangezpas/asondedens/efour
Pore" les rgtis sans os, ins_rez la sonde
darts la pattie ayant le plus de chair du
rgfi. Pore" lejambon ou l'agneau 5 os,
ins_rez la sonde au centre du nlusde
lmge le plus bas.
Insg_ez la sonde au centre de plats tels
que pain de viande ou mets en cocotte.
Insg_rez la sonde darts la pattie a)m_t le
plus de chair de l'int&_iem" de la cuisse
du dessous et parall_le 5 la ctfisse d'tme
dinde complete.
Comment regler le four pour rOtir en utilisant la sonde
[]
@ []
[]
QGOOG
C
0
® []
[]
Insg_rez la sonde darts l'aliment.
Branchez la sonde clans la i:Mse
(hi [k)/ll; _sStll'ez-vo[lS de la potlSSel"
enti_rement. Fem_ez la po_e du
ibm: Assurez-_ ous que le cfible de
la sonde ne touche })as l'61&nent
du gril.
Enfimcez la touche PROBE(sonde).
Enfimcez les touches numgMques
pour rg_gler la tempg_ratm'e
intgMeure d_sirg_e pore" les aliments
on la viande. Ia tempga'amre
interne ma_mum de l'aliment
que "ares pouvez rg_gler est de
93 ° C (200 ° F).
Enfimcez la touche BAKE (cnisson).
Enfimcez les touches numg_riques
pour rg_gler la tempga'amre voulue
du tbm:
[] Enfimcez la touche START
(dOmarmr).
L'aff/2hagec//i?noterasi lasondeestbs#r#e
denslapriseet si vousn'avezpasr@l#de
temperaturede sondeet enfonc#/a touche
START(d#marmr).
I*)*_que la tempg_ratm'e interne de
l'aliment atteint 37,8° C (100 ° F), la
tempg_mture interne changeante
s'aflichem.
[] I,orsque la tempg_rature interne des
aliments atteint le chifli'e rg_gl(_, la
sonde et le ibm" s'_teignent et le
contr61e du Ibm" _met tm signal.
Pore" arrOter le signal, enfimcez la
touche CtEAB/OEF (annn,ation/arrOt).
Lltilisez des poigng_es chaudes pour
redrer la sonde des aliments.
N'utilisez pas de pinces pore" la
refirer car cela pourrait les
endolllI//ageE
Pour changer la tempga'amre du fimr
dm':mt le cycle Rgtit; enfimcez ]a touche
BAKE (_nisson) et ensuite los touches
num(Mques pour rg_gler la nouvelle
tempg_rature.
::_::Si /asondeestretkbedel'al/_nentavantque
la tempbraturef/balenesoitatteinte,vous
entendrezunetonalitbet l'aff/2hagecl/gnotera
jusqu'_ce queb sondesoitretkbedu four
::_i::Vouspouvezutiliserla minuteriemgmesivous
nepouvezpasutil/serlesopbrationsdufour
minuterie en utilisant /asonde. 1 7
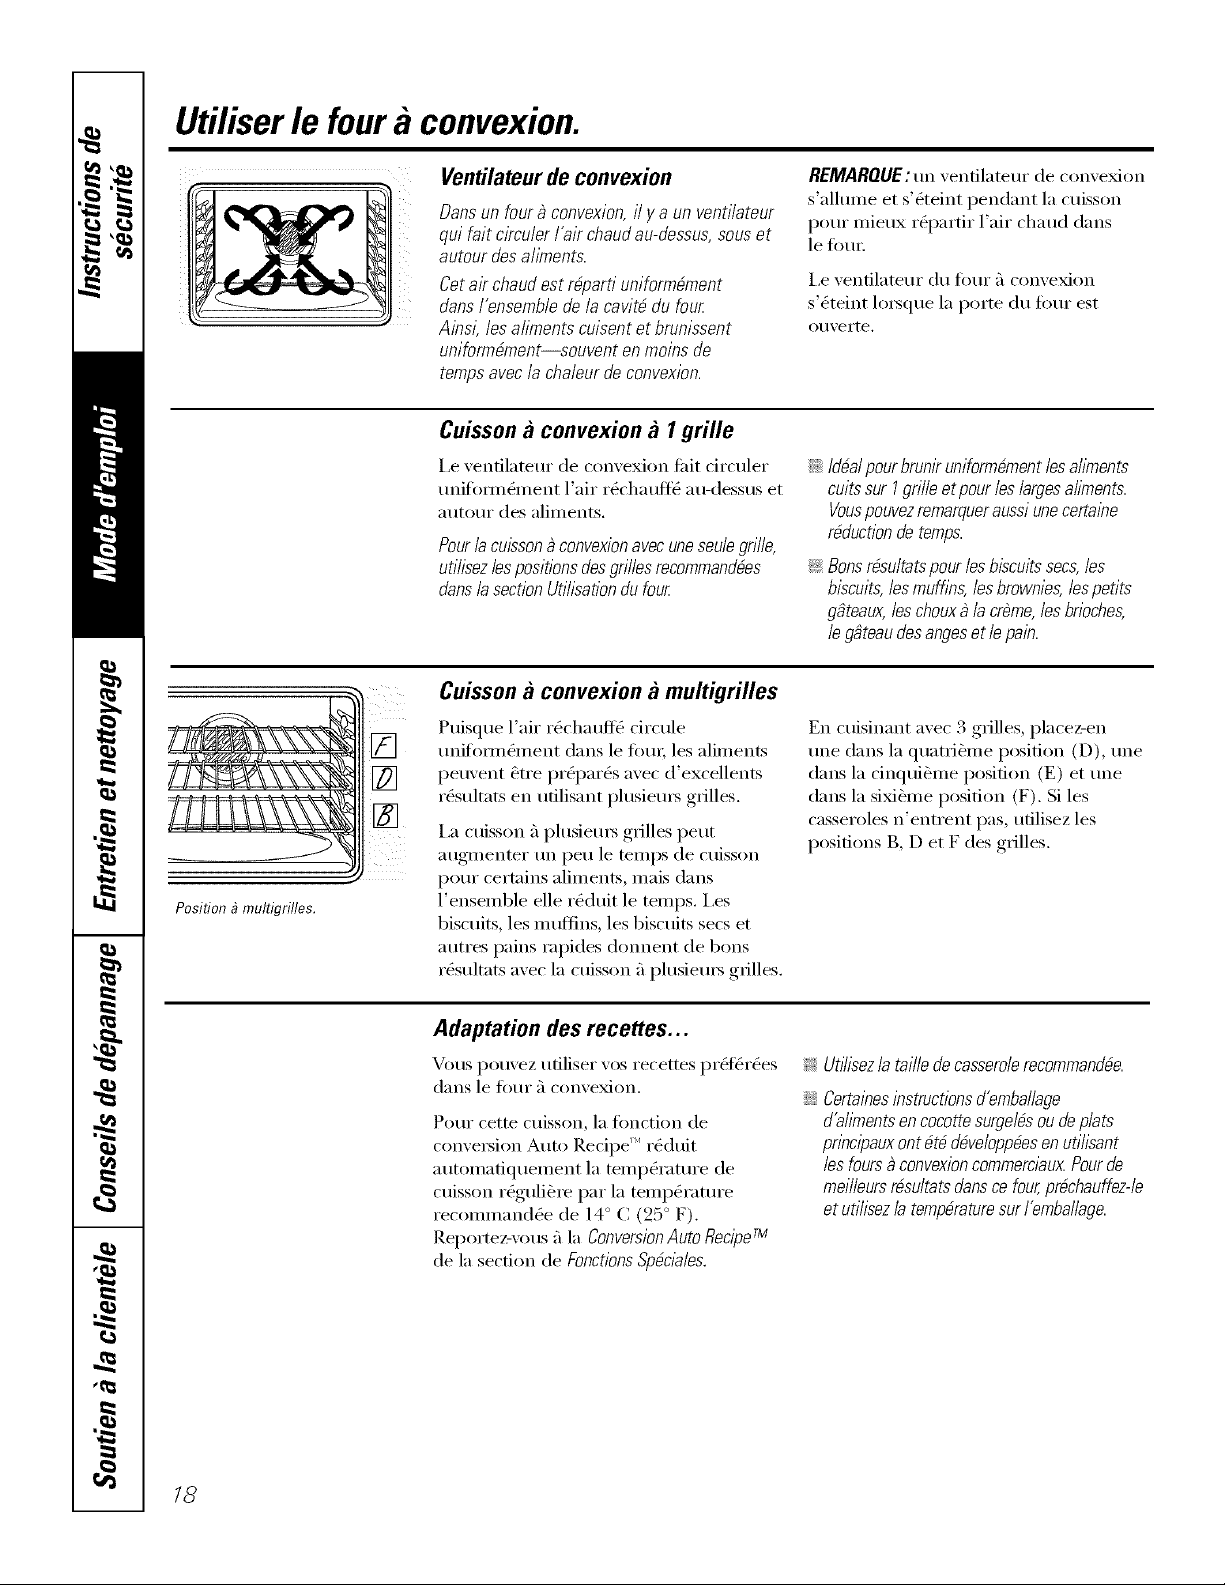
Utiliser le foura convexion.
Ventilateur de convexion
Dunsun four_ convexion, i/ g a un venti/ateur
qui fair circuler fair chaudau-dessus, souset
autour desahYnents.
Cet ak chaud estr_parfi uniform_ment
clans/'ensemble delacavit_ du four
Ainsl_ /es ailments cuisent et brunissent
uniform_ment--souvent en moins de
tempsavec/acha/eurde convexion.
REMARQUE: un venfilateur de conve_on
s'allume et s'_teint pendant la cuisson
pour mieux r@artir Fair chaud duns
le fim_;
I,e venfilateur du fi)ur 5 convexion
s'_teint hn_que la porte du fimr est
o/iverte.
Cuisson gl convexion gl I grille
i,e ventilateur de convexion fifit circuler
mfifimn&nent l'air r&'haufl_ au-dessus et
a/itO/li" des aliments.
Pour la caisson _ convexionavecunesoda grille,
ut/lisez lespositions des grillesrecommand_es
clans/a section Ut/hsafion dufour.
::Ji::Idealpourbruniruniform_mentlesahYnents
cultssurI grille etpourleslargesahYnents.
Vouspouvezremarqueraussiunecertalbe
rMuct/ondetemps.
_: Bonsr#sultatspourlesbiscuitssecs,les
biscuits,lesmufflbs,lesbrownies,lespefits
ggteaux,/eschoux_ /acr#me,/esbrioches,
/eggteaudesangeset /epain.
Position _multigrilles.
Cuisson gl convexion gl multigrilles
Puisque l'air r&'haufl_ circule
mfifimn&nent darts le ti)m; les aliments
peuvent 6tre prepares avec d'excellents
r6sultats en ufilisant plusietu_ grilles.
I,a cuisson 5 plusiem_ grilles peut
augmenter un peu le romps de cuisson
pour certains aliments, mais darts
l'ensemble elle r&luit le temps. I,es
biscuits, les muffins, les biscuits secs et
autres pains rapides donnent de boris
r_sultats avecla cuisson fiplusiem_ grilles.
En cuisinant avec 3 grilles, placez-en
une darts la quatri_me position (D), une
darts la cinqui&me position (E) et lille
darts la sixi_me position (F). Si les
casseroles n'entrent pas, utilisez les
positions B, D et F des grilles.
Adaptation desrecettes...
Vous pouvez utiliser vos recettes pr_f_r_es
darts le fi)ur 5 convexion.
Pour cette cuisson, la fimction de
conve_ion Auto Recipe'" r&luit
automatiquement la temperature de
cuisson r_guli_re par la temp&'amre
recommand_e de 14° C (25 ° F).
Reportez-vous 5 la ConversionAutoReciperM
de la section de FonctionsSp#c/ales.
_: UtHisezla ta/llede casserolerecommandOe.
::Ji::Certalbesinstructionsd'emballage
d'ah?nents en cocoaesurgelOsoude plats
pnbcipaux ont OtOd&eloppOes enufilisant
les fours _convexioncommerc_auxPourde
me///eursrOsultatsclanscefour,prOchauffez-le
etufilisez la tempOraturesurf emba/lage.
/8
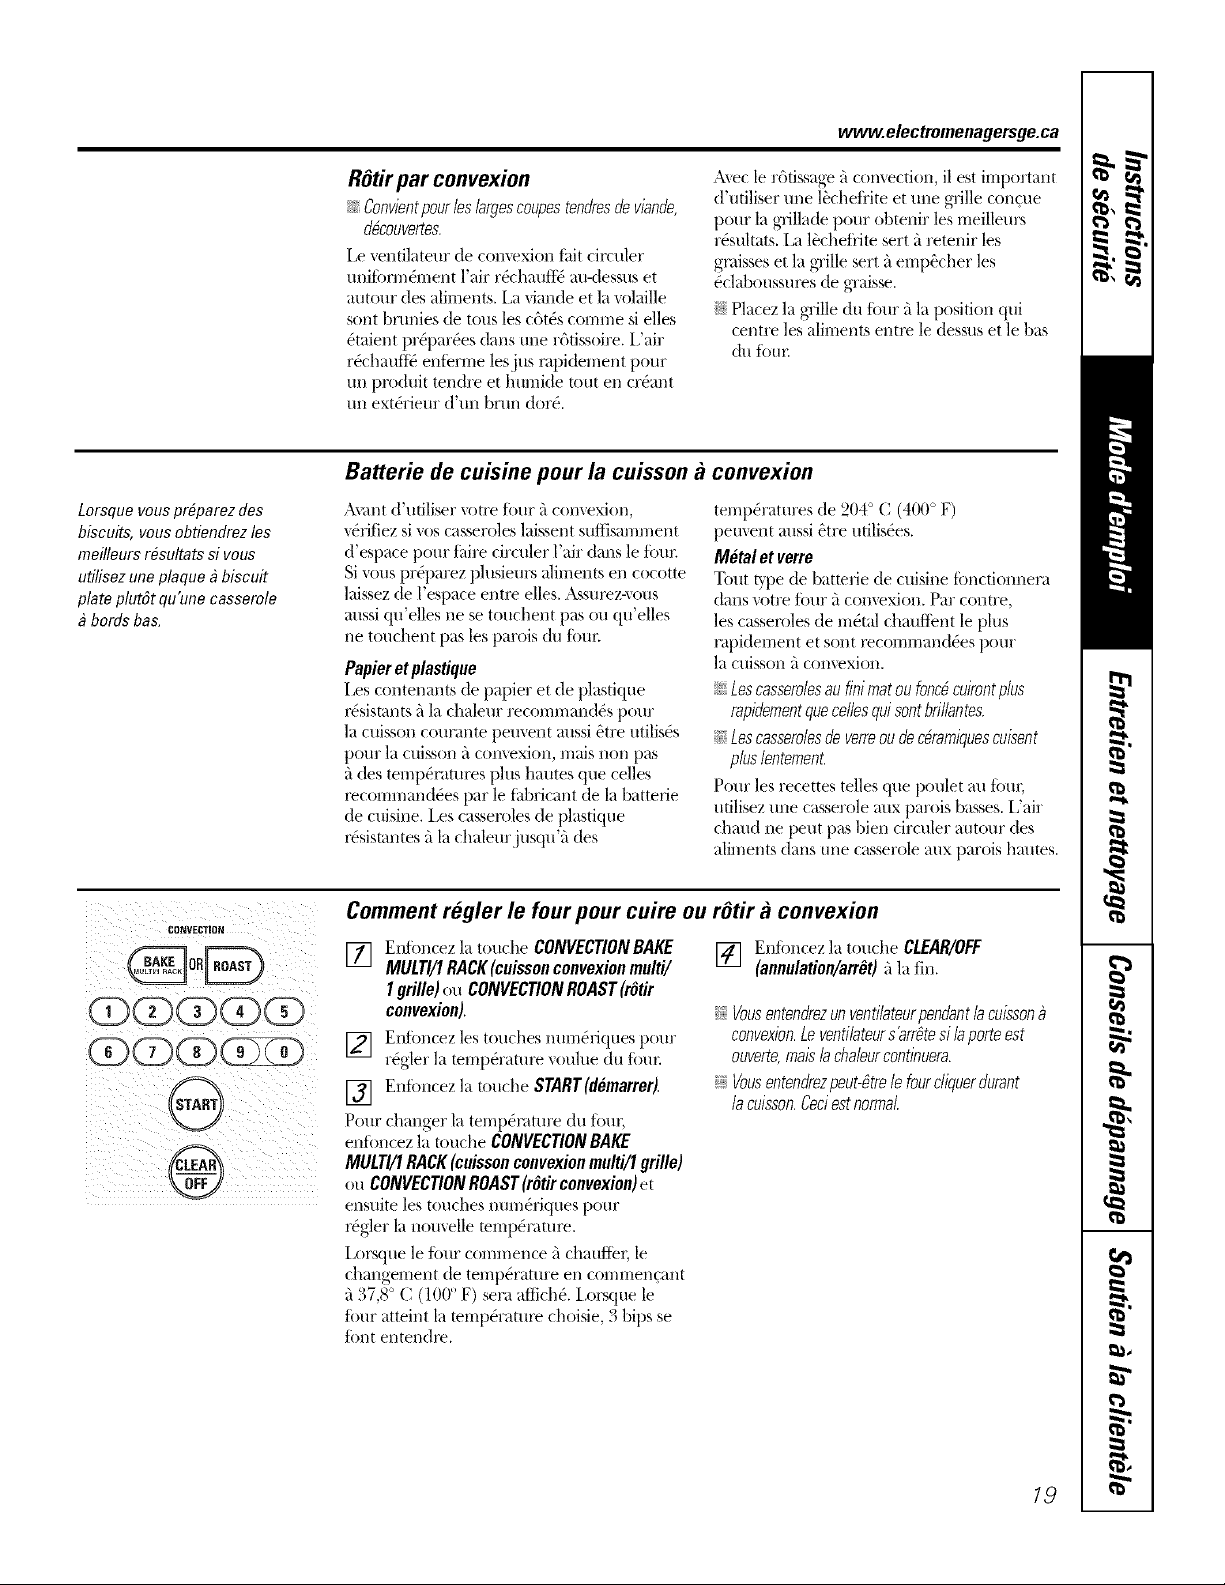
www.electromenagersge.ca
R6tir par convexion
_:Convientpourleslargescoupestendresde viande,
fl_couvertes.
I,e venfilateur de com'exion fhit circuler
ui_ifi)nn&rmnt l'air r&haufl_ au-desals et
autour des aliments. [,a viande et la volaille
sont brtmies de tous les c6t& corinne si elles
_taient pr@ar_es dans une r6tissoire, i,'air
r&haufl_ enterme lesjus mpidement pour
un produit tendre et humide tout el/crg_ant
tm extg_rieur d'tm brtm dor&
A_ec le r6fissage ,i convection, il est important
d' utiliser une lbcheli'ite et une grille coiEue
pour la grillade pour obtenir les meilleurs
r&ulmts. I,a l_cheliJte sert fi retenir les
gndsses et la grille sert ,iemp&her les
0claboussuleS de graisse.
ij?::Placez la gl'ille du four fi la position qui
centre les aliments entl_ ledessus et le bas
(hi ibm:
Lorsque vous pr@arez des
biscuits, vous obtiendrez les
meilleurs rOsultats si vous
utilisez une plaque _biscuit
plate plutOt qu'une casserole
bords bas.
Batterie de cuisine pourla cuisson gt
A\'ant d'utiliser \otre four a convexion,
v(_rifiez si vos casseroles laissent suflisamment
d'espace pour fidre circuler l'air dans le Ibm,
Si vous pr@arez plusieurs aliments el/cocotte
laissez de l'espace entre elles. Assurez-vous
aussi qu'elles ne se touchent pas ou qu'elles
ne touchent pas les parois du Ibm;
Papier etplastique
I,es contenants de papier et de plasfique
r&ismnts a la chaleur recommand& pour
la cuisson courante peuvent mlssi_tre utilis&
pour la cuisson ficoi]_,exion, l;qais non pas
fi des temp0ratures plus hautes que celles
l_command_es par le fhbricant de la batterie
de cuisine, i,es casseroles de plastique
r_sismntes fila chaleurj usqu'fi des
convexion
temp&'atures de 204 ° C (400 ° F)
peuvent aussi _tre udlis0es.
Metal etverre
Tout Type de batterie de cuisine ibnctkmnera
dans votre four a com'exion. Pal" corm'e,
les casseroles de m_tal chaul_ent le plus
rapidement et sont lvcommand_es pour
la cuisson fi convexion.
N tes casserolesau finimatou ranch,cuirontplus
rapiflementquereliesquisentbri//antes.
_:Lescasserolesdeverreoude c#ramiquescuisent
plus/entement.
Pour les recettes telles que poulet au ibm;
utilisez une casserole mix parois basses. I,'air
chaud Ile peut pas bien circuler autour des
aliments dans une casserole aux parois hmlms.
CONVECTION
@
Comment regler le four pour cuire ou rOtir gl convexion
[] E_bncezlatouche CONVECTIONBAKE
MULTI/IRACK(cuissouconvexiou multi/
I grille) ou CONVECTIONROAST(r6tir
couvexion).
[] EitIimcez les touches nm-n_riques pour
r_gler la temp&amre xoulue du fbUl:
[] Enfbncez la touche STARY(demarror).
Pour changer la temi)_mture du four,
enioncez la touche CONVECTIONBAKE
MULTI/IRACK(cuissoncouvexion multi/1grille)
ou CONVECTIONROAST(r6tirconvexiou) et
ensuite les touches mun_riques pour
r6gler la nouvelle Wmp&amre.
I,ol:sque lefour commence fi chauflel; le
challgel-l-|eilt de telnp0rattlre ei/coi//1-1-|eil(ai/t
fi 37,8°C (100" F) sera aflich_, i,orsque le
tour atteint la mmp&aml> choisie, 3bips se
Ibm entendl_.
[] Enfimcez la touche CLEAR/OFF
(aunulatiou/arrOt).ila fin.
_:Vousentendrezunventi/ateurpendantlacuisson
convexion.Leventilateurs'arr#tesi /aporteest
ouverte,ma/s/acha/eurcontinuera.
__ Vousentenflrezpeut-Otre/e fourcfiquerfiurant
la cuisson.Ceciestnormal
/9
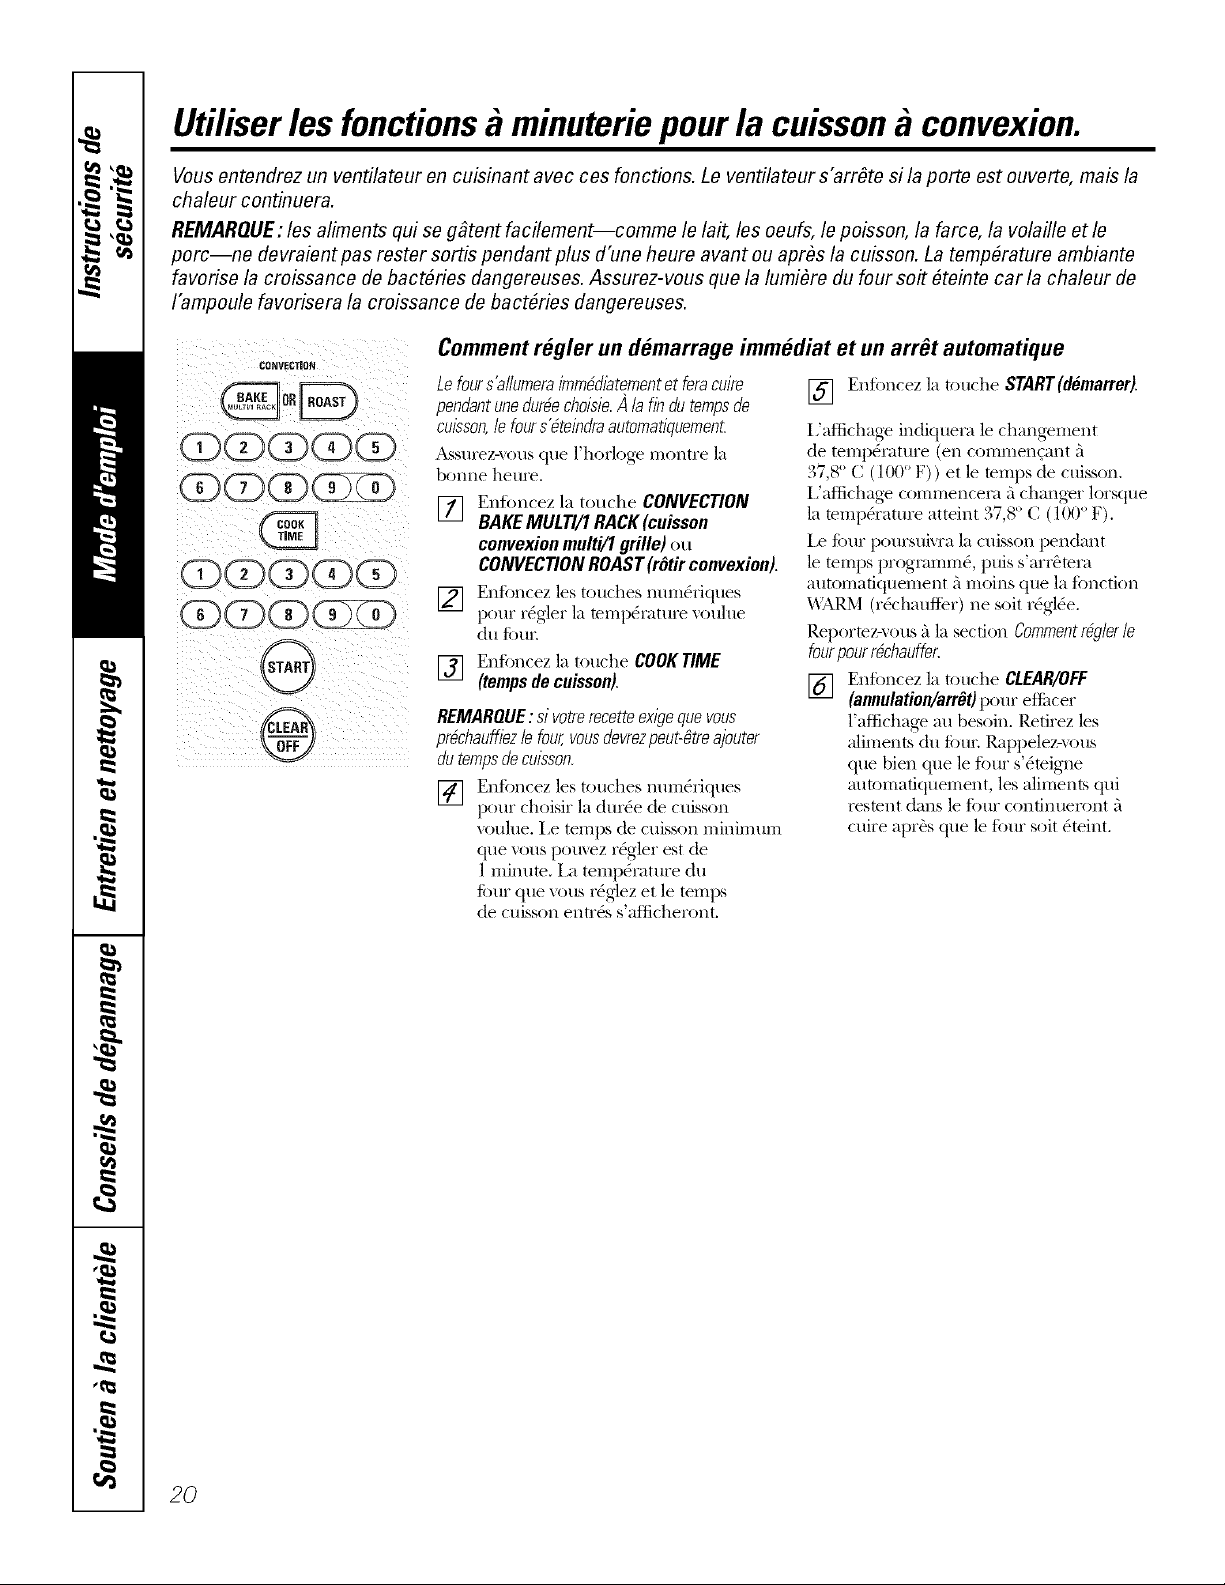
Utiliser les fonctionsa minuteriepour lacuissona convexion.
Vousentendrez un ventilateur en cuisinant avec ces fonctions. Le ventilateur s'arrOte sila porte est ouverte, mais la
chaleur continuera.
REMARQUE:les aliments qui seggtent facilement--comme le lait, les oeufs, le poisson, la farce, la volaille etle
porc--ne devraient pas rester sortis pendant plus d'une heure avant ou apr_s la cuisson. La temperature ambiante
favorise la croissance de bact#ries dangereuses. Assurez-vous que la lumi#re du foursoit #teinte car la chaleur de
I'ampoule favorisera la croissance de bact_ries dangereuses.
CQNVECllON
QC)G)(E)G
GO(E)O(E)
000
Comment regler undemarrage immediat et unarr_t automatique
Le fours'alfumeraimm_diatementet fera cuire
pendantunedur_echoisie.A/a fin du tempsde
cuisson,/e fours'_teindraautomatiquement.
Assurez-_ous que l'hork)ge montre la
boxme heure.
[] Enfimcez la touche CONVECTION
BAKEMULTI/1 RACK (cuisson
convexien multi/1 grille) ou
CONVECTIONROAST(rOtirconvexion).
[] Enfimcez les touches nmn(_riques
pour r(_gler la temp(}ratm'e voulue
dtl ti) tlI:
[] Entoncez la touche COOKTIME
(temps de cuisson).
[_,,. _ REMARQUE:sivotrerecetteexigeque vous
pr_chauffiez/e four,vousdevrezpeut-gtreajouter
k-fi_-),
"_ flu tempsde cuisson.
[] Enfoncez ]es touches num(Xriques
pour choisir la dur(Xe de cuisson
voulue. Le temps de cuisson minimum
que w_us pomez r(Xgler est de
1minute. [,a temperature du
Ibm" clue vous rtXglezet ]e temps
de cuJsson entr_s s'atticheront.
[] Enfimcez la touche START(demarrer).
i,'attichage inctiquem le changement
de temp(_ratm'e (en commencant 5
37,8° C (1 O0° F)) et le temps de cuisson.
i,'aNchag_ commencem _'lchangvr lorsque
la mmp(_ratm'e atteint 37,8° C (1O0° F).
i_ Ibm" poursuixra la cuisson pendant
le romps progmmm(_, puis s'arr0mia
automafiquement a moins que la toncfion
_7_RM (r(_chauflbr) ne soit r(Xgl(_e.
P.epormz-_ ous ala section Commentr@/er/e
fourpourrOchauffer.
[] Enfbncez la touche CLEAR/OFF
(annulation/arr_t)pour ei_i_cer
l'aftichage au besoin. Retirez les
aliments du ti)tlIL Rat)pelez-vous
que bien que le ti)ur s'(_migne
automadquement, les aliments qui
restent dens le ti)ur confinueront _'l
cuire apr(_s que le tbur soit (_teint.
2O
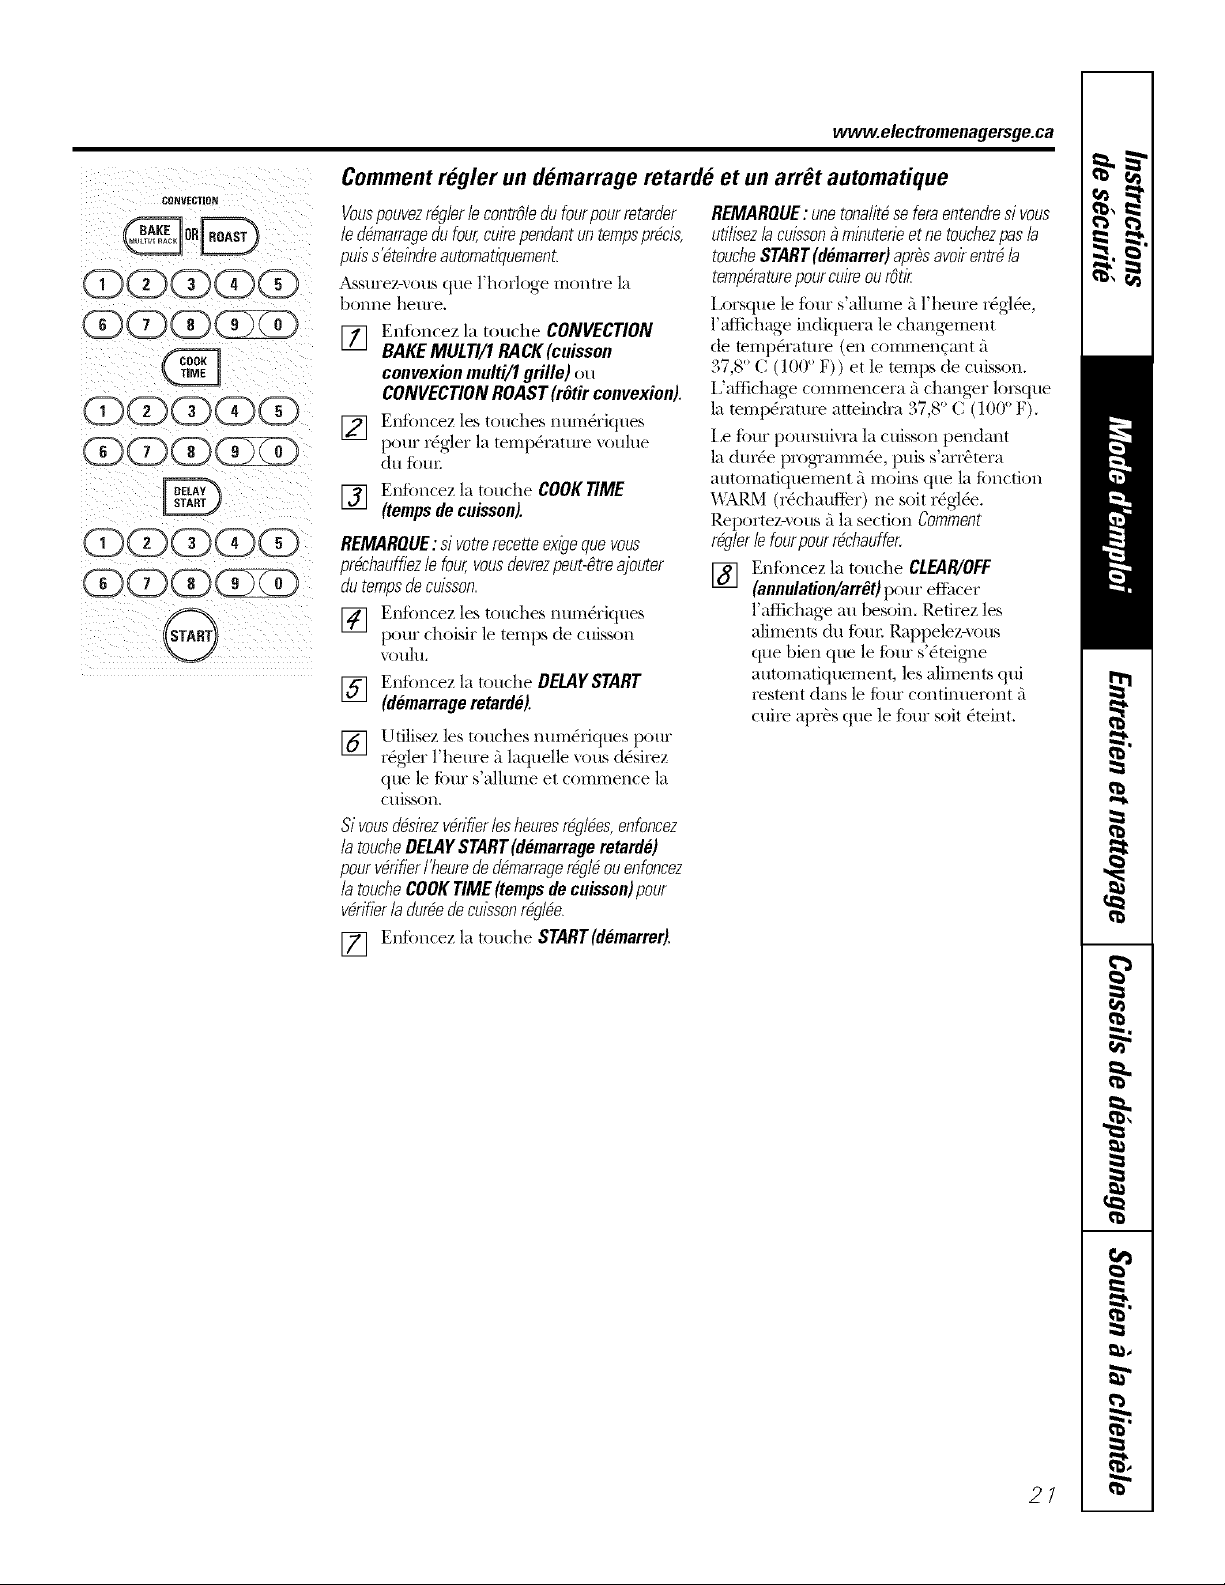
CONVECTION
(Z)dDG)
(D dD(Z)(Z)
G)dD(Z)(Z)G)
www.electromenagersge.ca
Comment regler undemarrage retarde et unarr_t automatique
Vouspouvezr@ler le contrdedu fourpourretarder
fe d6marragedufour,cuirependantun tempspr6cis,
puis s'6teindreautomatiquement.
Assurez-xous que l'horloge montre la
bom_e heure,
[] Enfimcez la touche CONVECTION
BAKE MULTI/1 RACK (cuisson
convexionmulti/1 grille) ou
CONVECTIONROAST(r6tir convexion).
[] Enfimcez les touches num&'klues
pour r_g4er la temp&'amre w)ulue
du fi)ux:
[] Entimcez la touche COOKT/ME
(tempsde cuisson).
REMARQUE:s/votrerece_teexigeque vous
pr6chauffiez/e four,vousdevrezpeut-gtreajouter
du tempsde cuisson.
[] Enfimcez les touches num&ktues
pour choisir le temps de cuisson
voHhl,
[] Enfimcez la touche DELAYSTART
(demarrage retarde).
[] Utilisez les touches num&'iques pour
r_gler l'heure _ laquelle xous d&irez
que le ti)ur s'allume et commence la
C(liSSOI1,
Si vousd_sirezv_rifierlesheuresr@l_es,enfoncez
fa toucheDELAYSTART(demarrageretarde)
pourv_rifierI'heurede fl_marrager@l_ou enfoncez
la touche COOKTIME(tempsde cuisson)pour
v_rifier la dur_ede cuissonr@l_e.
[] Enfimcez la touche START(demarrer).
REMARQUE: unetonalit6 se feraentendresivous
utifisezla cuisson_ minuterieetne touchezpas la
toucheSTART(demarrer)apr#savoirentr_la
temp6raturepourcuire ou rOtir
i,orsque le four s'allume fil'heure r_gl_e,
l'aflichage indktuera le chang_ment
de temp(_ratm'e (en commencant fi
37,8° C (100 ° F)) et le temps de cuisson.
i,'aftichage commencera _ changer lo_que
la temp(qamre atteindm 37,8 ° C (100 °F).
Le fi)ur pom_uivm la cuisson pendant
la dur6e programm_e, puis s'arrbtera
automatktuement fi moins que la fimctkm
_\ARM (r6chaufter) ne soit r(Xgl(_e.
Reportez-x ous _ la sectkm Commeet
r_glerle fourpour r_chauffec
[] Enfoncez la touche CLEAR/OFF
(annu/ation/arr6t)pour efli_cer
l'aftichage au besoin. Retirez les
aliments du ti)tli; Rappelez-xous
que bien que le fi)ur s'(_teig_le
automatktuement, les aliments qui
restent dans le fi)ur continueront fi
cuire apr(Xsque le Ibm" soit (_teint.
21
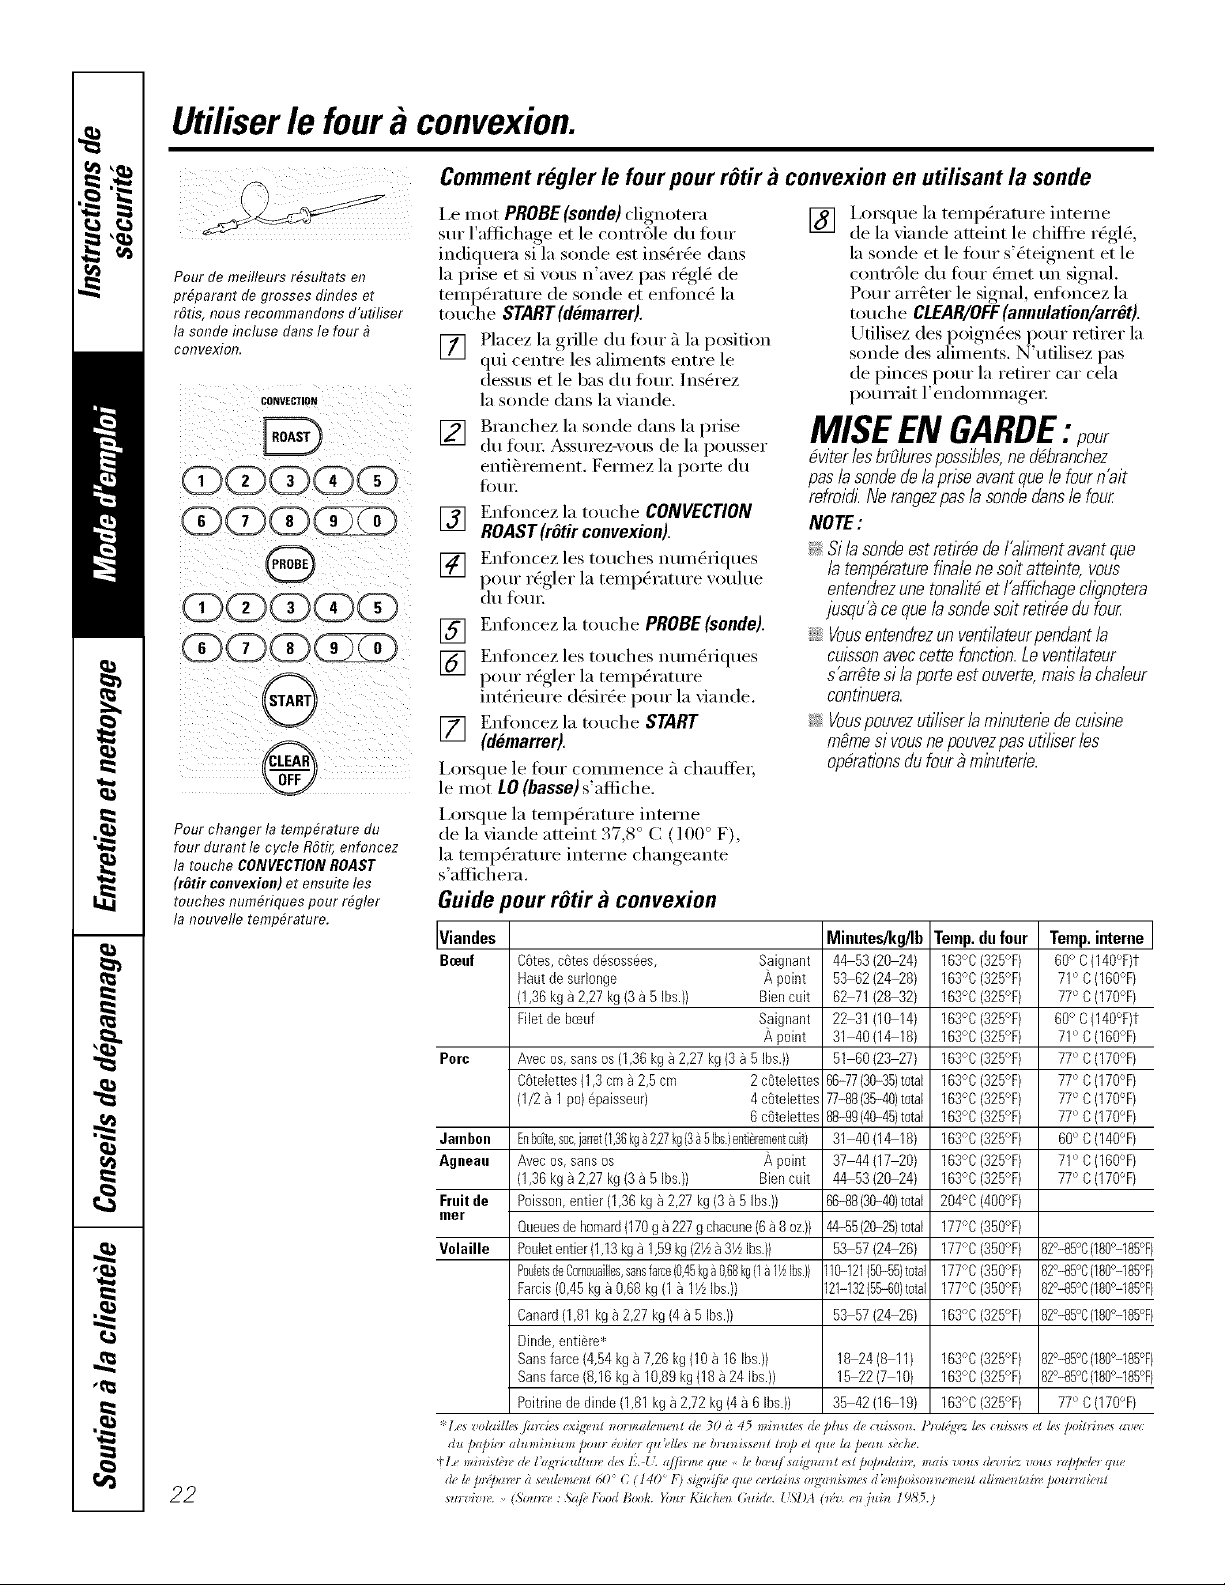
Utiliser le foura convexion.
)iiiiIiiii
Pour de meilleurs r#sultats en
pr#parant degrosses dindes et
r6tis, nous recommandons d'ufiliser
la sonde flTclusedonsle four
eolTvexioIT.
Pour changer la temp&ature du
four durant le cycle R6tir, enfoncez
la touche CONVECTIONROAST
(rfitir convexion) et ensuite los
touches num&iques pour r#gler
la nouvelle temp&ature.
22
Comment regler le fourpourrOtir gl convexion en utilisant la sonde
I,e mot PROBE(sonde)clignotera
sur l'at_ichage et le contr61e du fimr
indiquera si la sonde est ins_r_e darts
la prise et si w)us n'avez pas r_gl_ de
temperature de sonde et enfbnct) la
touche STARr(d6marrer).
[] Placez la grille du fimr ;'1la position
qui centre les aliments entre le
dessus et le bas du tour ]ns_rez
la sonde darts la viande.
[] Branchez la sonde darts la prise
du fou_: _&ssurez-\ous de la pousser
entibrement. Fem_ez la porte du
li)[li:
[] Enfoncez la touche CONVECTION
ROAST(r6tirconvexion).
[] Enfoncez les touches num_riques
pour ix)gler la telnpt)rature ",ouhle
(111 tOtlI:
Enfimcez la touche PROBE (sonde).
[]
[]
Enflmcez les touches num_rJques
pour r_gler la temp&'ature
intOrieure d_sir_e pour la viande.
[] Enfimcez la touche START
(dTmarrer).
I,o_que le four commence fi chauflb_;
le mot LO (basso) s'afliche.
I,o_que la temp(_rature interne
de la viande atteint 37,8 ° C (100 ° F),
la temp(_rature interne changeante
S '_l_icheI';l,
] I,o_5que la temp&'ature interne
de la xiande atteint le chitti'e r_gl_,
la sonde et le tour s'_teignent et le
contrgle du four &net un signal.
Pour arr_mr le signal, enlimcez la
touche CLEAR/OFF(annulation/arr_O.
Utilisez des poign_es pour retirer 1;i
sonde des aliments. N'utilisez pas
de pinces pour la retirer car cela
pourrait l'endommage_:
MISE EN GARDE: pour
bviterlosbrdurespossibles,nedbbranchez
paslasondedela priseavantquele fourn'ait
refroidi.Ne rangezpaslasondeclansle four
NOTE:
_: Si /asondeestretkbede/'a//_nentavantque
la tempbratureflbalenesoit atteinte,vous
entendrezunetonalitbet l'afflchagechgnotera
jusqu3 ceque/asondesoitretkbedufour
iJ6:Vousentendrezunventilateurpendantla
culssonaveccettefonction.Leventilateur
s'arr#tesi la porteestouverte,maisla chaleur
contlbuera.
_: Vouspouvezuti/iser/aminuteriede cuisine
m_mesivousnepouvez/)asutil/ser/es
opbrationsdufour_minuted&
Guide oour r_tir g_convexion
Viandes Minutes/kg/Ib Temp. du four Temp. interne
Boeuf C0tes,c0tes d6sossees, S,aignant 4_53 (20 24) 163°C(325°F) 6if" C{140°F)t
Haut de surlonge A point 53 62 (24_8) 163°C(325°F) 71° C(160°F)
(1,36 kga 2,27 kg(3a5 Ibs.}} Biencuit 62 71 (28 32) 163°C(325°F) 77° C(170°F}
Filetde b_euf S,aignant 22 31 (10 14) 163°C(325°F) 60° C(140°F}t
A point 31 40 (1_18) 163°C(325°F) 71° C(160°F}
Pore Avec 0%sansos (1,36kga2,27kg (3a 5 Ibs.)) 51 60 (23 27) 163°0(325°F) 77° C(170°F}
C0telettes(1,3cm a 2,5 cm 2 c6telettes66-77(30-35)total 163°C(325°F) 77° C(170°F)
(1/2a1 po) @aisseur) 4 c0telettes77-80(35-40)total 163°C(325°F) 77° C(170°F)
6c6telettes 88-90(40-45)total 163°C(325°F) 77° C(170°F}
Jambon Enb0iterSOOtjarret{1,36kga2,27kg(3a5Ibs.}eoti@reroentcult} 31 40 (1_18) 163°C(325°F) 60° C(140°F}
Agneau Avec os,sansos A point 37 44 (17 20) 163°C(325°F) 71° C(160OF)
(1,36 kga 2,27 kg(3a5 Ibs.)} Biencuit 44 53 (20 24) 163°C(325°F) 77° C(170°F)
Fruitde Poisson,entier (1,36kg a 2,27 kg(3a 5Ibs.}) 60-88(30-40)total 204°C(400°F)
met
Queuesde bernard(170g a 227gchacune(6a 8 oz.)} 44-55(20-25)total 177°C(350°F)
Volaille Pouletentier(1,13kga1,59kg(2½a 3½Ibs.)) 53 57 (2_26) 177°C(350°F) _2°45°0(180°-185°F)
PodetsdeCornouailles,sansfarce(O,45kga0,68kg(la11_lbs.))110-121(50-55)total177°C(350°F) _2°-85°6(180°-185°F)
Farcis(0,45kga 0,68 kg(1a11/zIbs.)} 121-132(55-60)total177°C(350°F) B2°45°C(18O°-185°F)
Canard(1,81kga 2,27 kg(4a 5Ibs.)) 53 57 (2_26) 163°C(325°F) 82°45°0(180°-185°F)
Dinde,entiere*
Sansfarce (4,54kg a 7,26 kg(10a16 Ibs.)) 18 24 (8 11) 163°C(325°F) 82°45°0(180°-185%)
Sansfarce (8,16kg a10,89kg (18a24 Ibs.)) 15 22 (7 10} 163°C(325°F) _2°45°0(180°-185°F)
Poitrinededinde(1,81kga 2,72kg (4a6 Ibs.)) 35 42 (16 19) 163°C(325°F) 77° C(170°F}
'_l._,*z olailh,sja*ri*,3 *,xi_,_/ _*ormah,me)_/ de 30 () 45 mi_*tm,s &, Olu* de c*_i*so_. l'mU;zo,z h,s (:uLs**sel h,*poll*h(,* a-o*,(
d*_ papi*,t ah_mD*i*zm po**) &iU'_qtz ),11,'*_e bl'tz_*isse)_/In)/_el q*te /a pea** s_)che.
41.e mi_L*U;n,d_,l)LWictdZtm, de*1['.{k aj/itvne q**e_ b b_*,,q sag'na_l e*t/)o/_*zlain,, mais vous d*_orDzvotzs **@pH_,tq*te
&"/e pr@aze_ (i se_ffemm l 60 C (140 F) sigv_ifleque __,_lgli_l,s(<gzz)_ism_,sd >mpoLso_eme_ l a/ime_Ulize flo_z_mi4 _ l
stz_ziz zv.,, (5otm_, : &tie l'bod B_x)h. D,t) Kilche_ (hzid+'. { '_lk_ (n;v. e_ j*ti_ 19,5'5.)
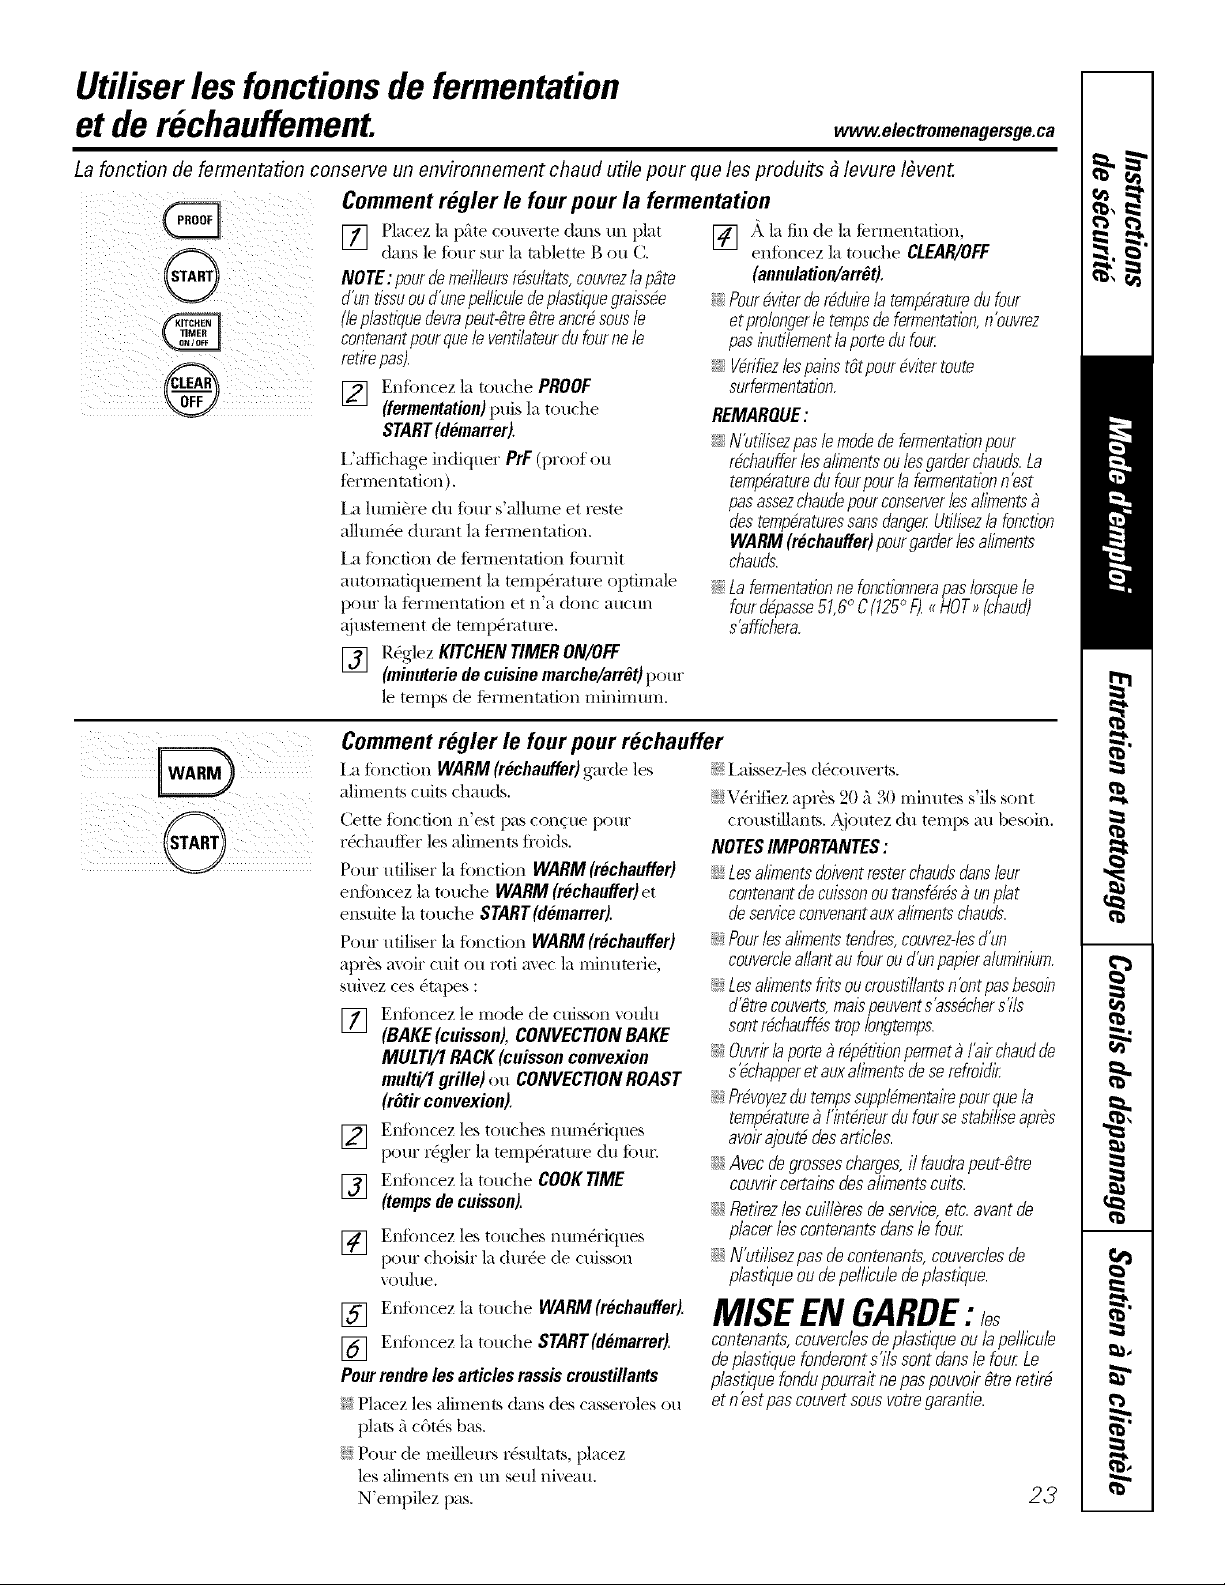
Utiliser les fonctionsdefermentation
et derechauffement.
www.electromenagersge.ca
La foncfion de fermentation conserve un environnement chaud utilepour que les produits _ levure I#vent.
Comment reEler le four pour la fermentation
@
®
[] Placez la })ritecouverte duns un plat
duns le ti)ur sur la tablette g ou C.
NOTE:pourde meilleursr6sultats,couvrezla Nte
d'untissuou d'unepe//icu/edep/astiquegraiss6e
(/ep/astiquedevrapeut-gtregtre ancr6sous/e
contenantpourque/eventi/ateurdufourne /e
retirepas).
[] Enfi)ncez la touche PROOF
(fermentation)puis la touche
START(d6marrer).
I:aftMmge indiquer PrF (proof ou
fermentation).
La lumi&'e du Ibm" s'allume et reste
allmn_e dumnt la fermentation.
i,a fimcfion de termentafion fi)urnit
atm)matktuement la temp&'amre optimale
pour la termentatkm et n'a donc aucun
ajustement de temp_ratm'e,
[] R_glez KITCHEN TIMER ON/0H:
(minuterie de cuisine marche/arr_t)pour
le temps de fermentation minimmn,
[] A la fin de la termentation,
entbncez la touche CLEAR/OFF
(mmulation/arrOt).
_i::Pour6viterde r6duirela temp6raturedu four
et prolonger/e tempsde fermentation,n'ouvrez
pas inutilement/aporte du four
i_7V6rifiezlespains tOtpour6viter route
surfermentation,
REMARQUE:
i;7N'utilisezpasle modedefermentationpour
r#chauffer/esalimentsou /esgarter chauds.La
temp6raturedufourpour/a fermentationn'est
/)asassezchaudepourconserver/esaliments
des temp#raturessansdangerUtilisez/a fonction
WARM(rechauffer)pourgarterles aliments
chauds.
i_7Lafermentationne fonctionnerapas Iorsque/e
four d@asse51,6° C(125° F)._HOT_ (chaud)
s'affichera.
Comment reeler le four pour rechauffer
i ;t fi)nction WARM(rechauffer)garde les
aliments ctilts chauds.
Cette timcfion n'est [)as concue pour
r_chaufler les aliments fl'oids.
Pour udliser la fimction WARM (rechuutler}
enJoncez la touche WARM (rechaufferJet
ensuite la touche SNRT(domarrer).
Pour utiliser la timction WARM (rechuu#er}
apr_s moir cult ou roti mec la minumrie,
suivez ces _tapes :
V_] Enfbncez le inode de cuisson voulu
iii
(BAKE (cuisson),CONVECTION BAKE
MULTI/1 RACK(cuissonconvexion
multi/1grille) ou CONVECTIONROAST
(r6tir convexion).
[] Enfimcez les touches nmn&'iques
pour r6g_er la temp&atm'e du Ibm;
V_] Enfi)ncez la touche COOKTIME
i ,.,, i
(tempsde cuisson).
[] Enfimcez les touches nmn&'iques
pour choisir la dm'6e de cuisson
Votlhle,
[] Enfi)ncez la touche WARM(rechauffer).
[] Enti)ncez la touche SNRT(demarrer).
Pourrendre los articles rassis croustillants
_i::Placez les aliments duns des casseroles ou
plats fi c6t_s bus.
N Pour de meillem_ r6sultats, placez
les aliments entm seul niveau.
N'empilez pus.
};!i.aissez-les d_co m'erts.
NV6rifiez aprbs 20 fi30 minutes s'ils sent
croustillants. Ajoutez du temps au besoin.
NOTESIMPORTANTES:
i;7Lesalimentsdoiventresterchaudsdansleur
contenantde cuissonoutransf6r6s_ un plat
de serviceconvenantaux alimentschauds.
_i::Pour/esailmentstendres,couvrez-/esd'un
couvercleallantaufourou fun papieraluminium.
_i::Lesalimentsfrits ou croustiflantsnbnt pasbesoin
d'gtre couverts,maispeuvents 'ass#chers'ils
sontrOchauff#stroplongtemps.
?i::Ouvrir/a porte_ r@6tition permet_ /'air chaudde
s'dchapperetauxalimentsde se refroidir
_i::PrOvoyezdutempssupplOmentairepour que la
temp6rature_ l'int6rieurdu four se stabiliseaprOs
avolrajout# desarticles.
::J_::Avec degrosses charges,i/ faudrapeut-gtre
couvrir certains des ahYnentscults.
::J_::Retkez /es cui//Oresde service, etc. avant de
placer los contenants clans/e four
::J_::N'utihsez pas decontenants,couverc/esde
p/astlwe ou depe/hcu/edep/astique.
MISE EN GARDE:les
contenants,couverclesde plastique ou la pellicule
de p/asflwe fonderonts'i/ssont clans/e four Le
p/astl?luefondupourrait ne pas pouvoir gtreretirb
etn'est pascouvertsousvotregarantie.
23
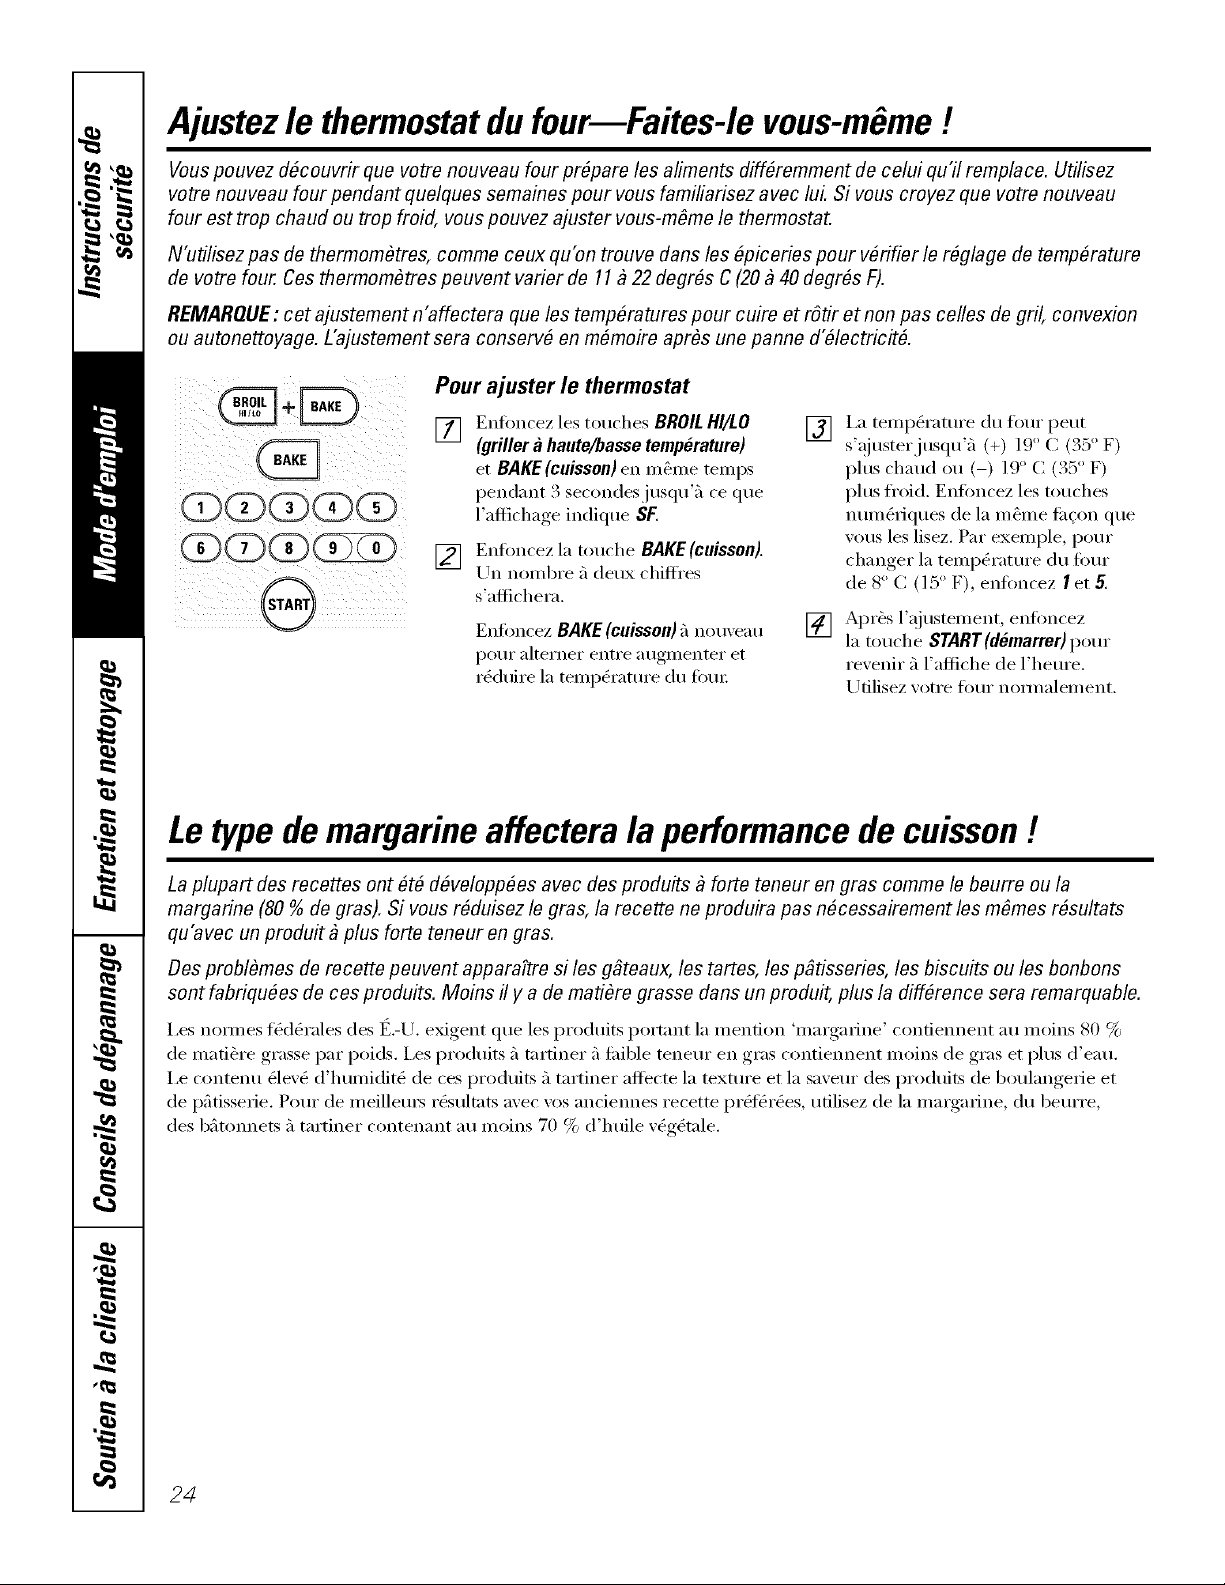
Ajustez lethermostatdu four--Faites-le vous-m me !
Vous pouvez d#couvrir que votre nouveau four pr#pare les aliments diff#remment de celui qu'il remplace. Utilisez
votre nouveau four pendant quelques semaines pour vous familiarisez avec lui.Si vous croyez que votre nouveau
four est trop chaud ou trop froid, vous pouvez ajuster vous-m#me le thermostat.
N'utilisez pas de thermom#tres, comme ceux qu'on trouve dans les#piceries pour v#rifier le r#glage de temp#rature
de votre four. Ces thermom#tres peuvent varier de 11_ 22 degr#s C (20 _ 40 degr#s F).
REMARQUE:cet ajustement n'affectera que les temp#ratures pour cuire etrOtiretnon pas celles de gril, convexion
ou autonettoyage. L'ajustement sera conserv# en re#moire apr#s une panne d_lectricit#.
÷,÷ Pour ajuster le thermostat
[] Enfkmcez les touches BROILHI/LO []
(grillera haute/bassetemperature)
et BAKE(cuisson)e£_m_me temps
pendant 3 secondes "usqu'_'l ce que
l'afl]chage indique SF.
Enfoncez la touche BAKE(cuisson).
Un hombre fi deux chifl_'es
s'afiichei'a.
Enfimcez BAKE(cuisson);i nou',eau
pour a[terner entre augmenter et
redllire la teillperatllre (111 f()/li;
[]
i,a tempOratm'e du fi)m" peut
s'_!iusterjusqu'fl (+) 19 _C (35 ° F)
plus chaud ou (-) 19° C (35 ° F)
plus fl'oid. Enfimcez les touches
nuint)riques de [a m_me tilcon que
vous les lisez. Par exemple, pore"
changer la tempt)rature du four
de 8 ° C (15 ° F), enfimcez Iet 5.
Apr_s l'ajustenlent, entoncez
la touche STARr(d_marrer)pore
re_enir ;'1l'afliche de l'hem'e.
Utilisez ",otre four nommlement.
Le type de margarine affecterala performancedecuisson!
La plupart desrecettes ont OtOdOveloppOes avec desproduits _ forte teneur on gras comme le beurre ou la
margarine (80 % de gras). Si vous rOduisez le gras, la recette ne produira pas nOcessairement les mOmes rOsultats
qu'avec un produ# &plus forte teneur en gras.
Des problOmes de recette peuvent apparaftre siles ggteaux, les tartes, lespgtisseries, les biscuits ou lesbonbons
sont fabriquOes de ces produits. Moins il ya de matiOre grasse darts un produit, plus la diffOrence sera remarquable.
I,es nom/es fta(lg_rales des t_.-/Lr. exigent que [es produits portnnt la mention 'margarine' confiennent au moins 80 %
de mati_re grasse par poids. I,es produits fi tnrtiner fifidble tenem" en gras contiem_ent moins de gras et plus d'eau.
I,e contenu Ole\'O d'humiditt: de ces produits 5 tartiner aflecte [a mxtm'e et la saveur des produits de bou[angerie et
de pfitisserie. Pour de meil[em_ rg_sultnts avec vos anciem_es recette pr&l_rg_es, ufilisez de [a margarine, du berate,
des bfitonnets fi tartiner contenant au moins 70 % d'huile v_g_tnle.
2d

Utiliser lefour autonettoyant. .elec ome,age,sge.ca
La porte du four doit Otreferm#e et tous les contr61es r#gl#s correctement pour que les cycles foncfionnent
correctement.
Essuyez toute accumulation de
salet# sur le fond du fou_
Avant un cycle de nettoyage
Nous i'ecoiilii/andons d'at_i'ei" votre
ctlisine avec Line ][eileti'e o/lvei'te o/i en
utilisant un ventilatem" ou la hotte din'ant
le premier cycle d'autonettoyage.
Retirez les grilles, 10chefl_ite, sonde,
toutes casseroles et tout papier
aluminium du Ibm:
I,es grilles brillantes de coulem" mgent<)e
(sur certains mod<)les) peuvent 6tre
nettoy<)es pendant l'autonettoyage,
mais lem" couleur fimcera, elles
perdront lem" brillant et deviendront
dm'es 5 fidre glisse_:
I,es saletg_s sin" le cadre a\m_t de
la cuisini_re et l'extg_rieur dujoint de la
porte doivent 6tre nettoyg_es 5 la main.
Nettovez ces endroits 5 l'eau chaude,
avec un tampon 5 r_curer de plasfique
ou rempli de savon ou des nettovants
tels que Soft Scrub ('_. Rincez bien 5 l'eau
propre et ass0chez.
Ne nettoyez pas lejoint, i,e mat&'Jau de
fibres de verre dujoint de la porte du
Ibm" ne rg_siste pas 5 l'abrasion. 11 est
essentiel que lejoint reste intact. Si
vous remarquez qu'il devient us(_ ou
s'efliloche, remplaceMe.
Essu}ez tout d_ve_5ement hmrd au fired
du fom:
_SS/li'ez-_,o/is qtle le COtlxerele de
l'ampoule du four est en place et que la
lumi&re est (_teinte.
IMPORTANT: la santo de certains oiseaux
est extr_mement sensible aux fim/_es
d_gag_es durant le cycle d'autonetto)_ge
de mute cuisini_re. D_placez les oiseaux
et mettez-les darts une piece bien a&'_e.
(D(D(Z)(D@
Comment regler & four pour le nettoyage
[]
Enfoncez la touche SELFCLEAN
LO/STD(autenettoyagebas/std)tree
Ibis pour tree dm'g_e de nettoxaoe,
de 4 heures ou deux Ibis pour
tree dm'g_e de 3 hem'es.
Une dm'g_e d'autonettoyage
de 3 heures est recommandg_e
lo_sque les d_ve_sements sont
petits et contenus. Une dur_e
d'autonettoyage de 4 heures
ou plus est recommandg_e
pore" tm fimr plus sale.
[] S'il flint une pg_riode autre que
3 hem'es ou 4 hem'es, utilisez les
touches numg_riques et entrez la
dm'g_e de nettoyage wmlue.
Vous pouvez changer la p&_iode 5 toute
autre entre 3 et 5 hem'es selon la salet6
du tk )tli:
[] Enfoncez la touche START
(demarrer).
i,oxsque le voyant LOCKED(verrouill_)
s'_teint, xous pourrez ouxrJr la porte.
I,e mot LOCKED(verrouill_) clignotera
et le contr61e du four signalera si vous
rSglez le cycle de nettoyer et si vous
oubliez de tFm_er la porte du IOta:
Pour arrbter un cycle de nettoyage,
ent0ncez la touche CLEAR/OFF
(annulation/arrOt). i,m_que le vo_m_t
LOCKED (verreuillO)s'_teint indi_]uant
que la tempg_ratm'e du tour est passg_e
sous la temp&'amre de verrouillage,
VO/IS pO/llTeZ O//VIJI" 1_1 porte.
i,a porte se verrouille automatiquement.
I,'aflichage indiquera le temps de
netto);_ge restant, ll ne sera pas possible
d'ouwir la porte du four avant que
la mmp(_ramre ne tonlbe sous la
temp&'ature de verrouillage et awmt que
le voyant LOCKED(verrouillO) ne s'g_teigne.
25
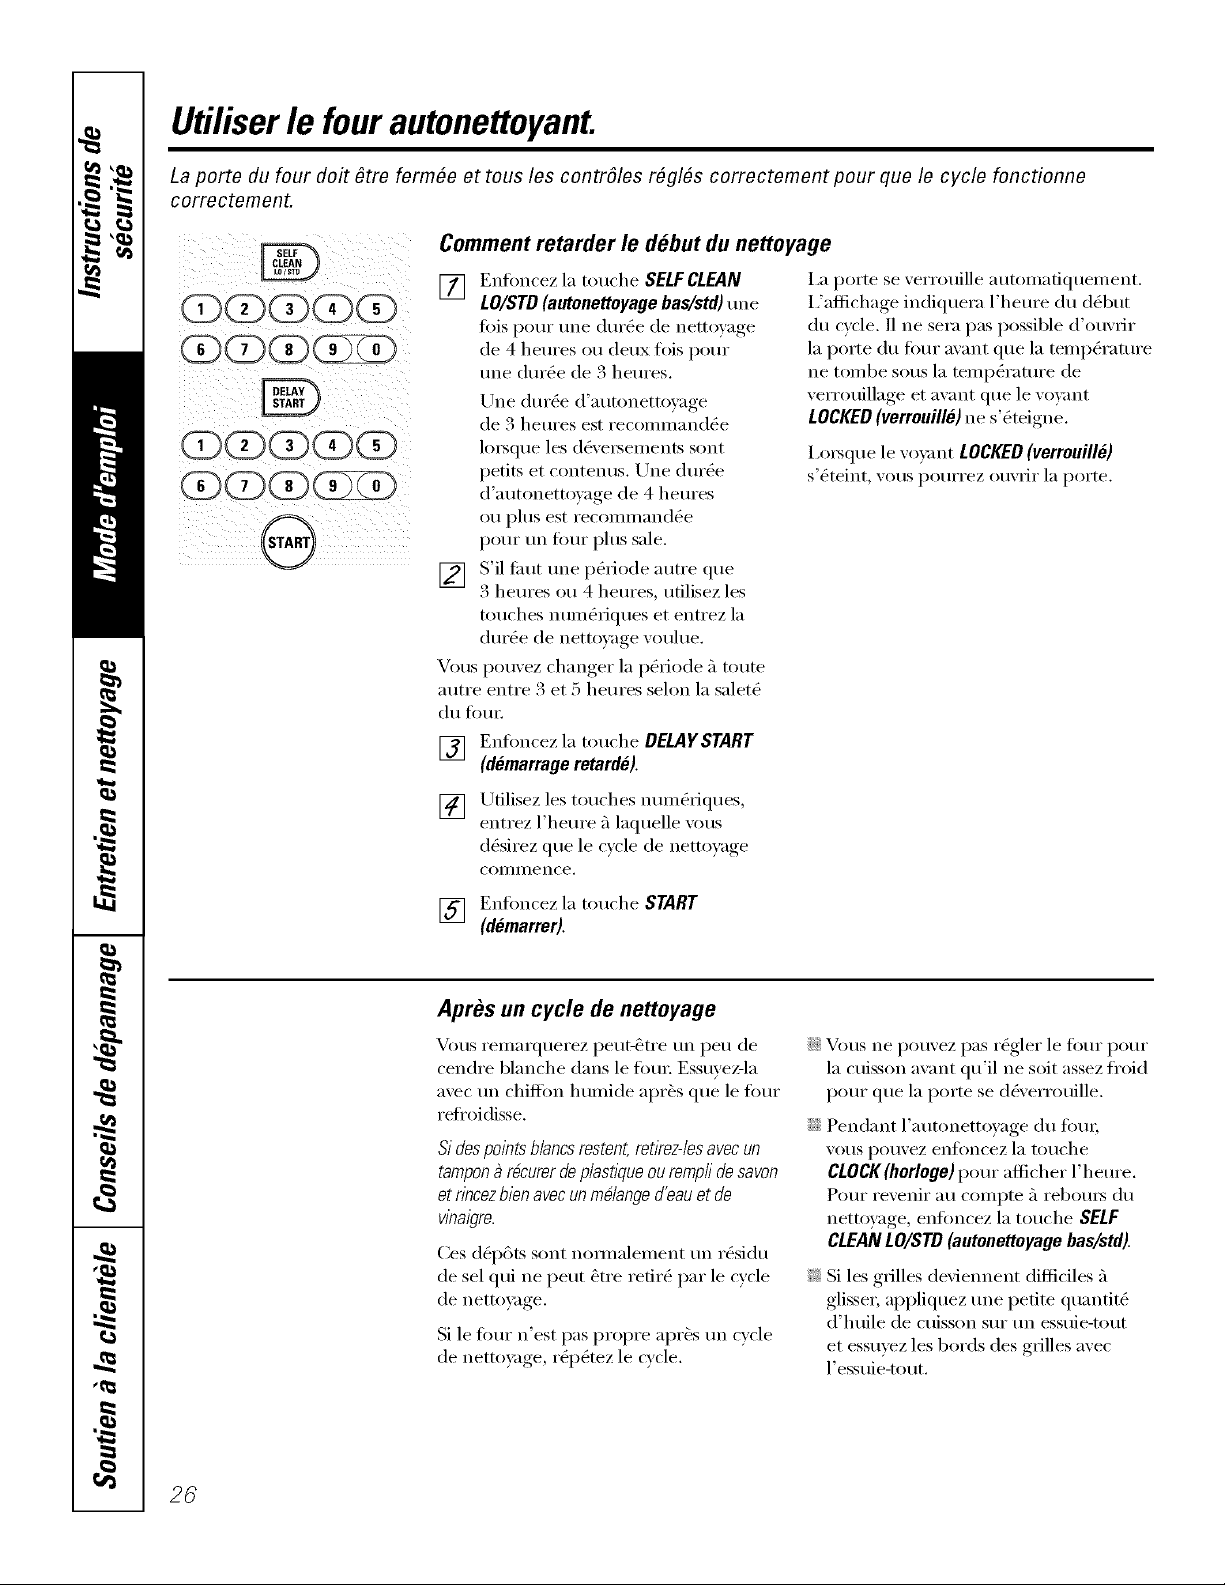
Utiliser lefour autonettoyant.
La porte du four doit Otreferm#e et tous les contrSles r#gl#s correctement pour que le cycle fonctionne
correctement.
C (ZXZ)< Z)
(3D(Z)(Z) C
Comment retarder le debutdunettoyage
[] Enfi)ncez la touche SELFCLEAN
LO/STD(aMonettoyagebas/std)une
lois pour tree dur_e de nettoyage
de 4 heures ou deux tiffs pour
une dur_e de 3 heures.
[,rile dur_e d'autonettoyage
de 3 hem'es est recommand_e
lo_s(lue les (16ve_sements sont
petits et contenus. Une durc)e
d'autonetto};lge de 4 hem'es
ou pltls est recommand_e
pour un fimr plus sale.
[] S'il faut tree p(_riode autre clue
3 hem'es ou 4 hem'es, utilisez les
touches nmn(_riqt_es et entrez 1;i
dm'_e de netto)_lge votflue.
Vous pouvez changer 1;i p(_riode _'1route
autre entre 3 et 5 heures selon 1;i salet(_
du Ibm:
i,a porte se verrouille autonlafiqueinent.
i)aflichage indiquera l'hem'e du d_but
du cycle, ll ne sera pas possible d'ouvrir
la porte du Ibm" avant clue la temperature
ne tombe sous la temp_ratm'e de
verrouillage et avant que le w_):mt
LOCKED (verrouille)ne s'(_teigne.
Ixn_que le w)vant LOCKED(verrouill_)
s'_teint, vous pomTez ouvrir 1;i porte.
[] Enfimcez la touche DELAYSTART
(demarrageretardS).
[] Utilisez les touches nmn(_riques,
entrez l'hem'e _'1laquelle xous
d_sirez que le c)cle de nettoxaoe,
coi//illence.
[] Enfi)ncez la touche START
(demarrer).
Apres uncycle de nettoyage
Vous remarquerez peut-_tre tm peu de
cendre blanche darts le Ibm: Essuvez-la
avec tm chiffon humide apr_s que le Ibm"
refi'oidisse.
Si des po/nts b/ancs restent, retkez-/es avec un
tampon_ r#curer de piasfl)ueou remplide savon
et nncez bien avec un m#/ange d'eau et de
Vl)?al_ro.
Ces dOp?)ts sont nommlement tm r(_sidu
de sel qtfi ne peut _tre refir(e par le cycle
de nettoyage.
Si le fimr n'est pas propre apr_s tm cycle
de nettoyage, r(_p(_mz le cycle.
::Ji::Vous ne pouvez pas rbgler le fi)ur pour
la cuisson avant qu'il ne soit assez fl'oid
pore" clue la porte se d_verrouille.
::_i::Pendant l'autonettoyage du Ibm;
VO/lS potl\'ez en][oncez la totlche
CLOCK(horloge)pour aflicher l'hem'e.
Pore" revenir au compte _'1reboms du
nettoyage, enfi)ncez 1;i touche SELF
CLEANLO/STD(autonettoyagebas/std).
_: Si les grilles deviemlent difliciles ;'1
glisser, appliquez tree petite quantitO
d'htfile de cuisson sin" tm esstfie-tout
et essuyez les bords des grilles avec
l'essuie-tout.
26
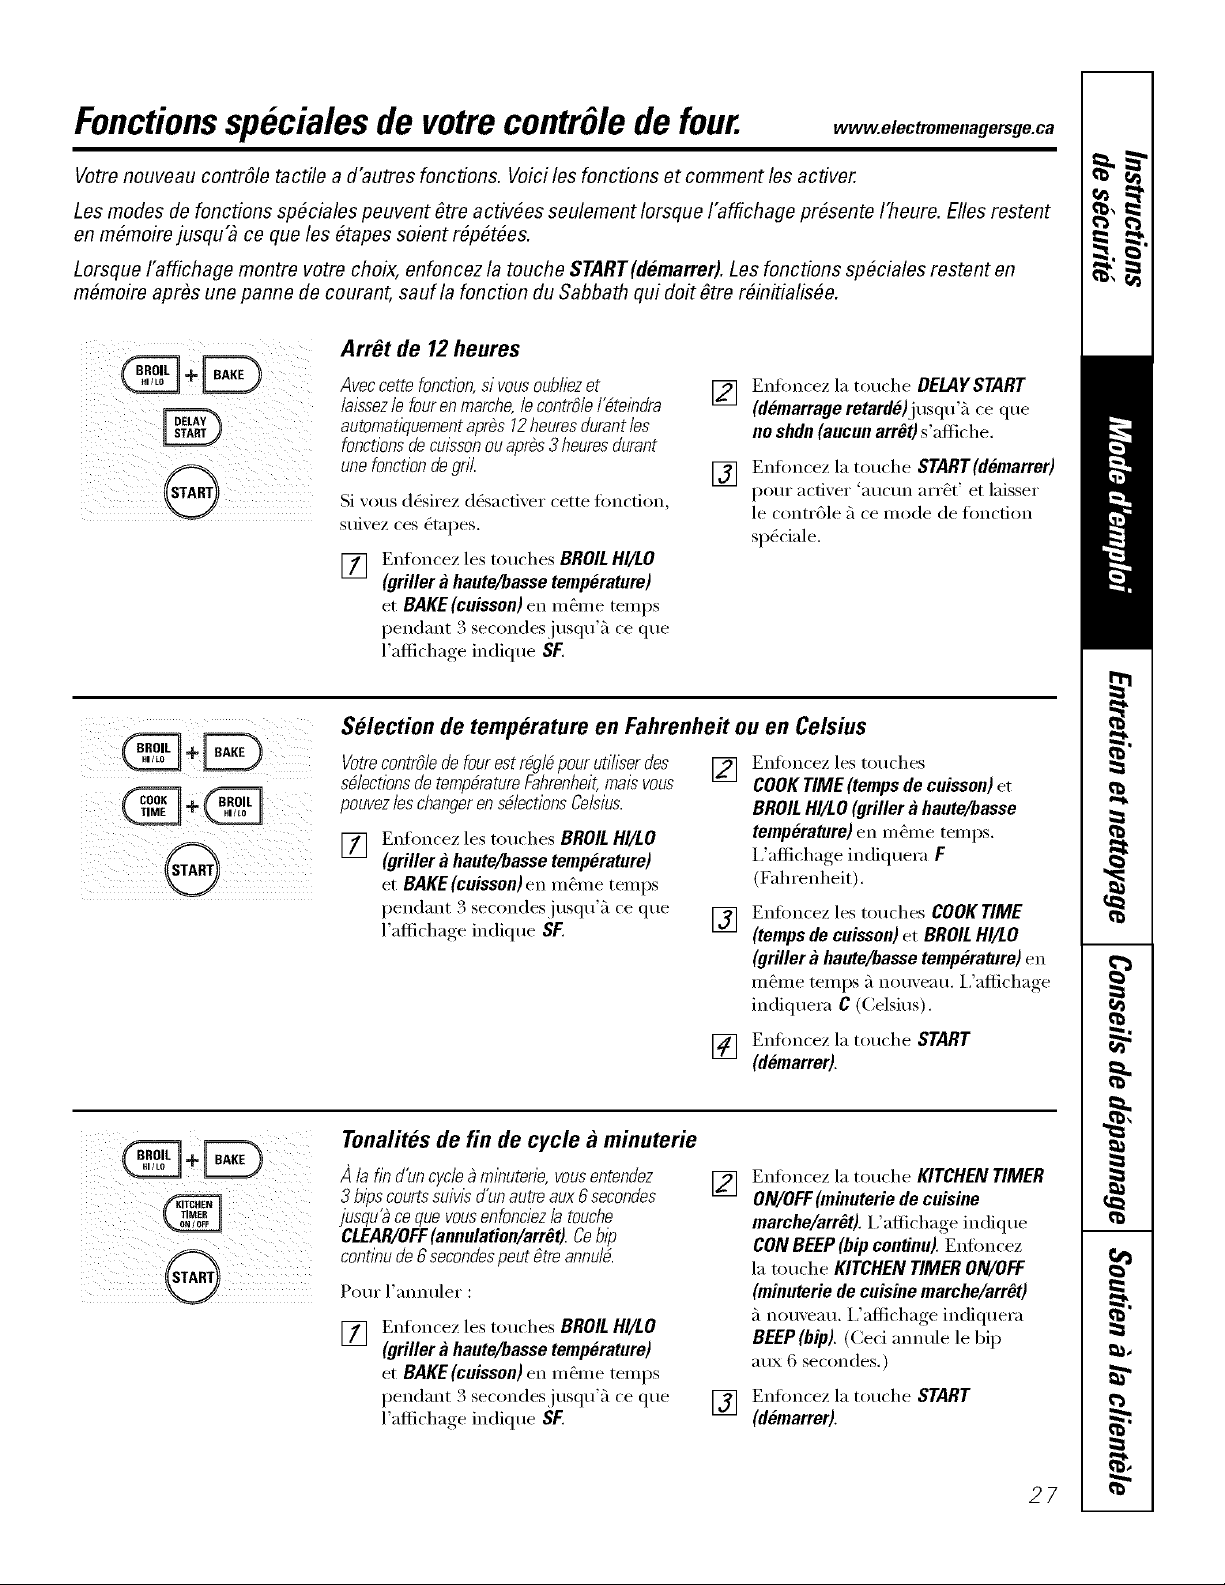
Fonctionssp#ciales de votrecontr61ede four. ,_v.elect,emenage,sge.ca
Votre nouveau contrSle tactile a d'autres fonctions. Voici les fonctions et comment les acfiver.
Lesmodes de foncfions sp#ciales peuvent #tre acfiv#es seulement lorsque I'affichage pr#sente I'heure. Elles restent
en m#moire jusqu3 ce que les #tapes soient r#p#t#es.
Lorsque I'affichage montre votre choix, enfoncez la touche START(d#marrer).Lesfonctions sp#ciales restent en
m#moire apr#s une panne de courant, sauf la fonction du Sabbath qui doitOtre r#initialis#e.
ArrOtde 12 heures
Avecce efonct,on,s,vousoubliezet[]
laissez/efourenmarche,/econtrO/e/_te/ndra
automatiquementap,s12heure__urantle_
fonctionsdeculssonouaprbs3heures&rant
unefonc_ion_egr,l []
Si vous d_sirez d_sacdver cette fimcdon,
sui',ez ces (_tapes.
[] Enfoncez les touches BROILHI/LO
(grillera haute/bassetemperature)
et BAKE(cuisson)en m_me temps
pendant 3 secondesjusqu'_'l ce que
l'aflicha_*e_indique SF.
Enfimcez la touche DELAYSTART
(demar,ageretarde),iusqu?_ceque
no shdn(aucuna,r_t)s'afliche.
Enfimcez la touche START(demarrer)
pore" acti',er 'mu'tm arr_t' et laisser
le contr61e ace mode de fimcfion
sp_ciale.
!! _i_i_ii!iliii@_ ii_iiiiii!i!(iIiii!_
Selection de temperature en Fahrenheit ouen Celsius
Votrecontr_le de fourest r@l# pourutillser des
sblecfions detempbratureFahrenheit,malsvous
pouvez les changer en sblecfions Celsius.
[] Enfimcez les touches BROILHI/LO
(griller ahaute/basse temperature)
et BAKE (cuisson) en m_me temps
pendant 3 secondesjusqu';'l ce que
l'aflichage indique SF.
[]
[]
Enfimcez les touches
COOKTIME(tempsde cuisson) et
BROILHI/LO(g,ille, a haute/basse
temp#rature) en m_me temps.
i,'aflichage indiquera F
(Fahrenheit).
Enfimcez les touches COOKTIME
(tempsde cuisson)et BROILHI/LO
(grillera haute/bassetemperature)en
m_me temps _'lnou',eau, i,'aflichage
indiquera C (Celsius).
[] Enfimcez la touche START
(demarrer).
i__(i_i__ill___I__i_ _i_i_i_i__iii_i_!_i____ii!i_ii_i_
Tonalites de fin de cycle gnminuterie
la fin d'uncycle_mlnuterie,vousentendez
3bipscourtssuiwsd'unautreaux6secondes
jusqu'_ce quevousenfonciezlatouche
CLEAR/OFF(annulation/arr_t).Cebip
cont/nude 6secondespeutOtreannulb.
Potlr l'anntller :
[] Enfoncez les touches BROIL HI/LO
(griller ahaute/basse temperature)
et BAKE (cuisson)en m_me temps
pendant 3 secondesjusqu'_'l ce que
l'aflichaoe_ indique SF.
[] Enfimcez la touche KITCHEN TIMER
ON/OFF(minuterie de cuisine
marche/arr_t), i,'aflk'hage indique
CON SEEP (bipcontinu). Enloncez
la touche KITCHEN TIMERON/OFF
(minuteriede cuisinema,che/arr_t)
_'lnouveau. I,'aflichage indiquera
BEEP(bip). (Ceci almule le bip
aux 6 secondes.)
[] Enfimcez la touche START
(d_marrer).
27
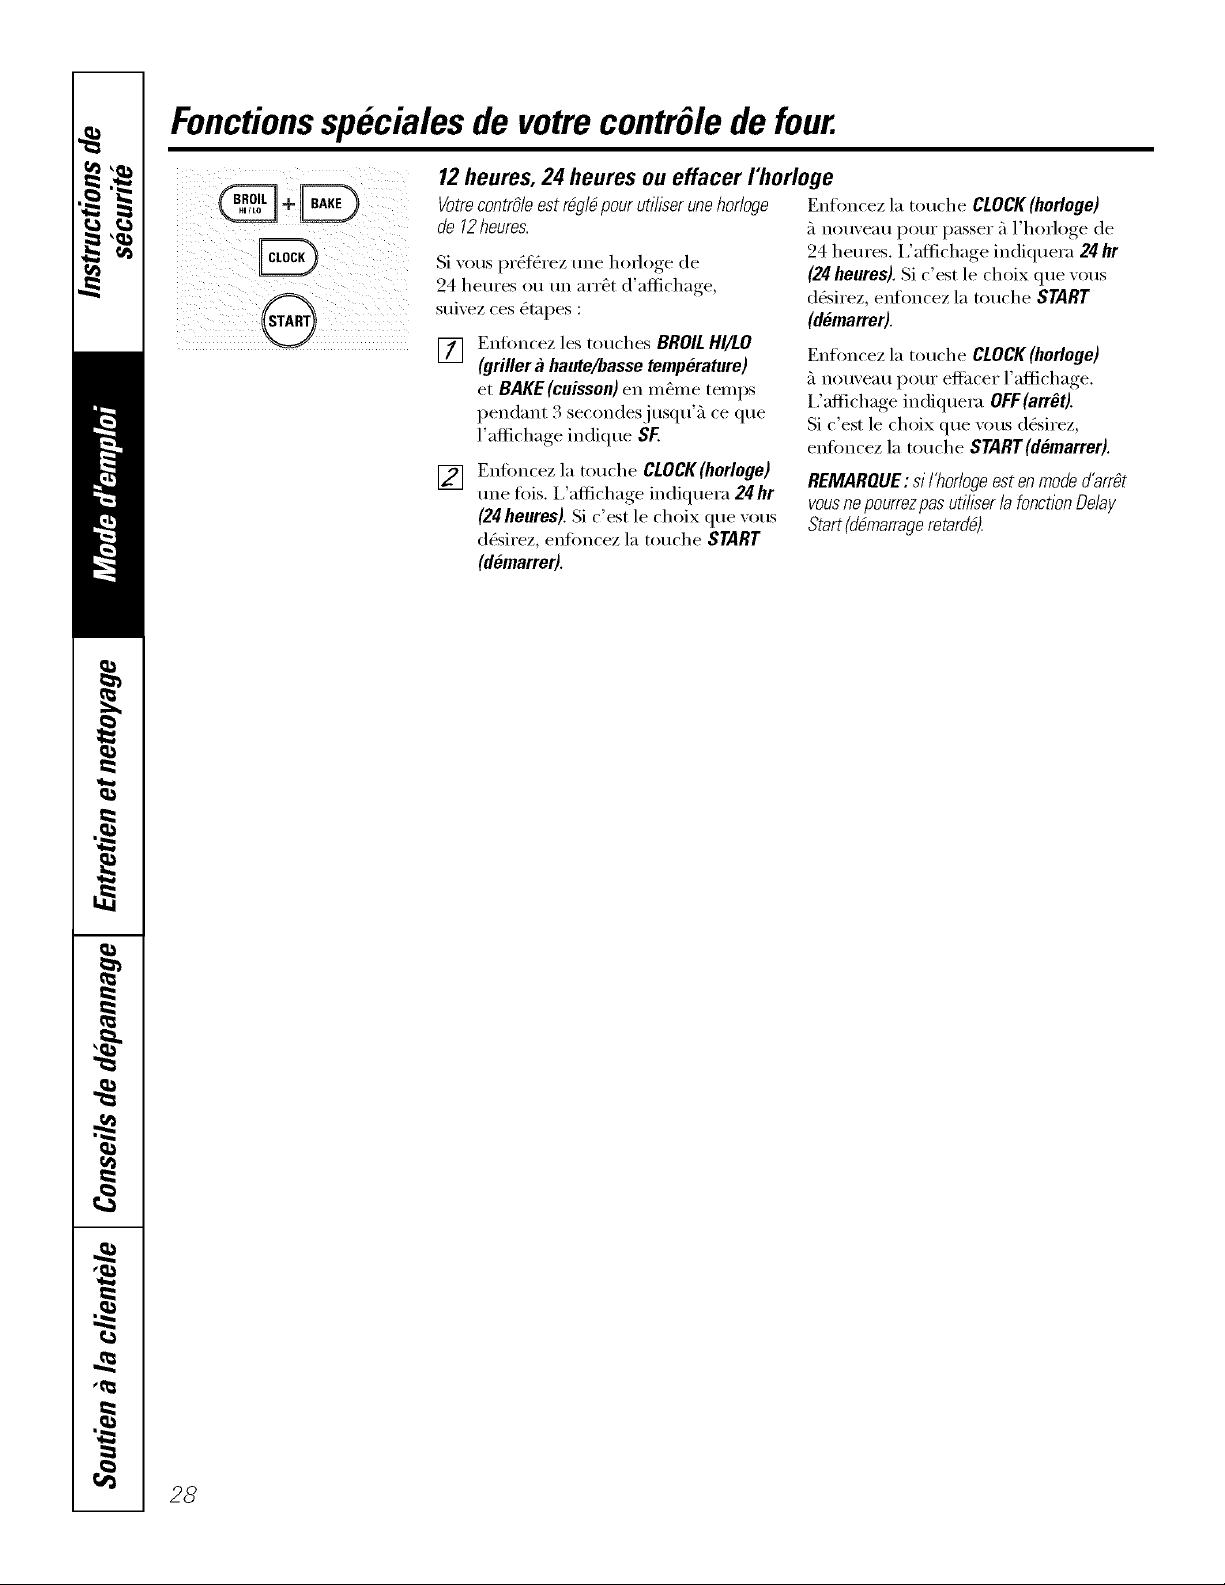
Fonctionsspeciales de votrecontr61ede four.
0
12 heures, 24 heures ou effacer I'horloge
VotrecontrOleestr@l_pour ufiliser unehofloge
de 12heures.
Si vous pr_t_rez une hofloge de
94 hem'es ou un arr_t d'aflichage,
sui_ez ces _tapes :
[] Enfimcez les touches BROILHI/LO
(grillera haute/basse temperature)
et BAKE (cuisson)en m_me temps
pendant 3 secondesjusqu'fi ce que
l'aflichage indique SF.
[]
Enfimcez la touche CLOCK(horloge)
une fi,is, i,'aflichage indiquera 24hr
(24heures). Si c'est le choix que xous
d&irez, enfimcez la touche START
(d6marrer).
Enflmcez la touche CLOCK(horloge)
fin(mveau pour passer fi l'horloge de
94 heures, i,'altichage indiquera 24hr
(24 heures). Si c'est le choix que vous
d_sirez, enfoncez la touche START
(demarrer).
Enflmcez la touche CLOCK(horloge)
finouveau pour efli_cer l'aflichage.
i,'aftichage indiquera OFF(arrOt).
Si c'est le choix que vous d_sirez,
enfimcez la touche START(demarrer).
REMARQUE : sil'hMogeesten mode d'arr_t
vousne pourrezpasufiliser/afoncfionDe/ay
Start(dbmarrageretardb).
28
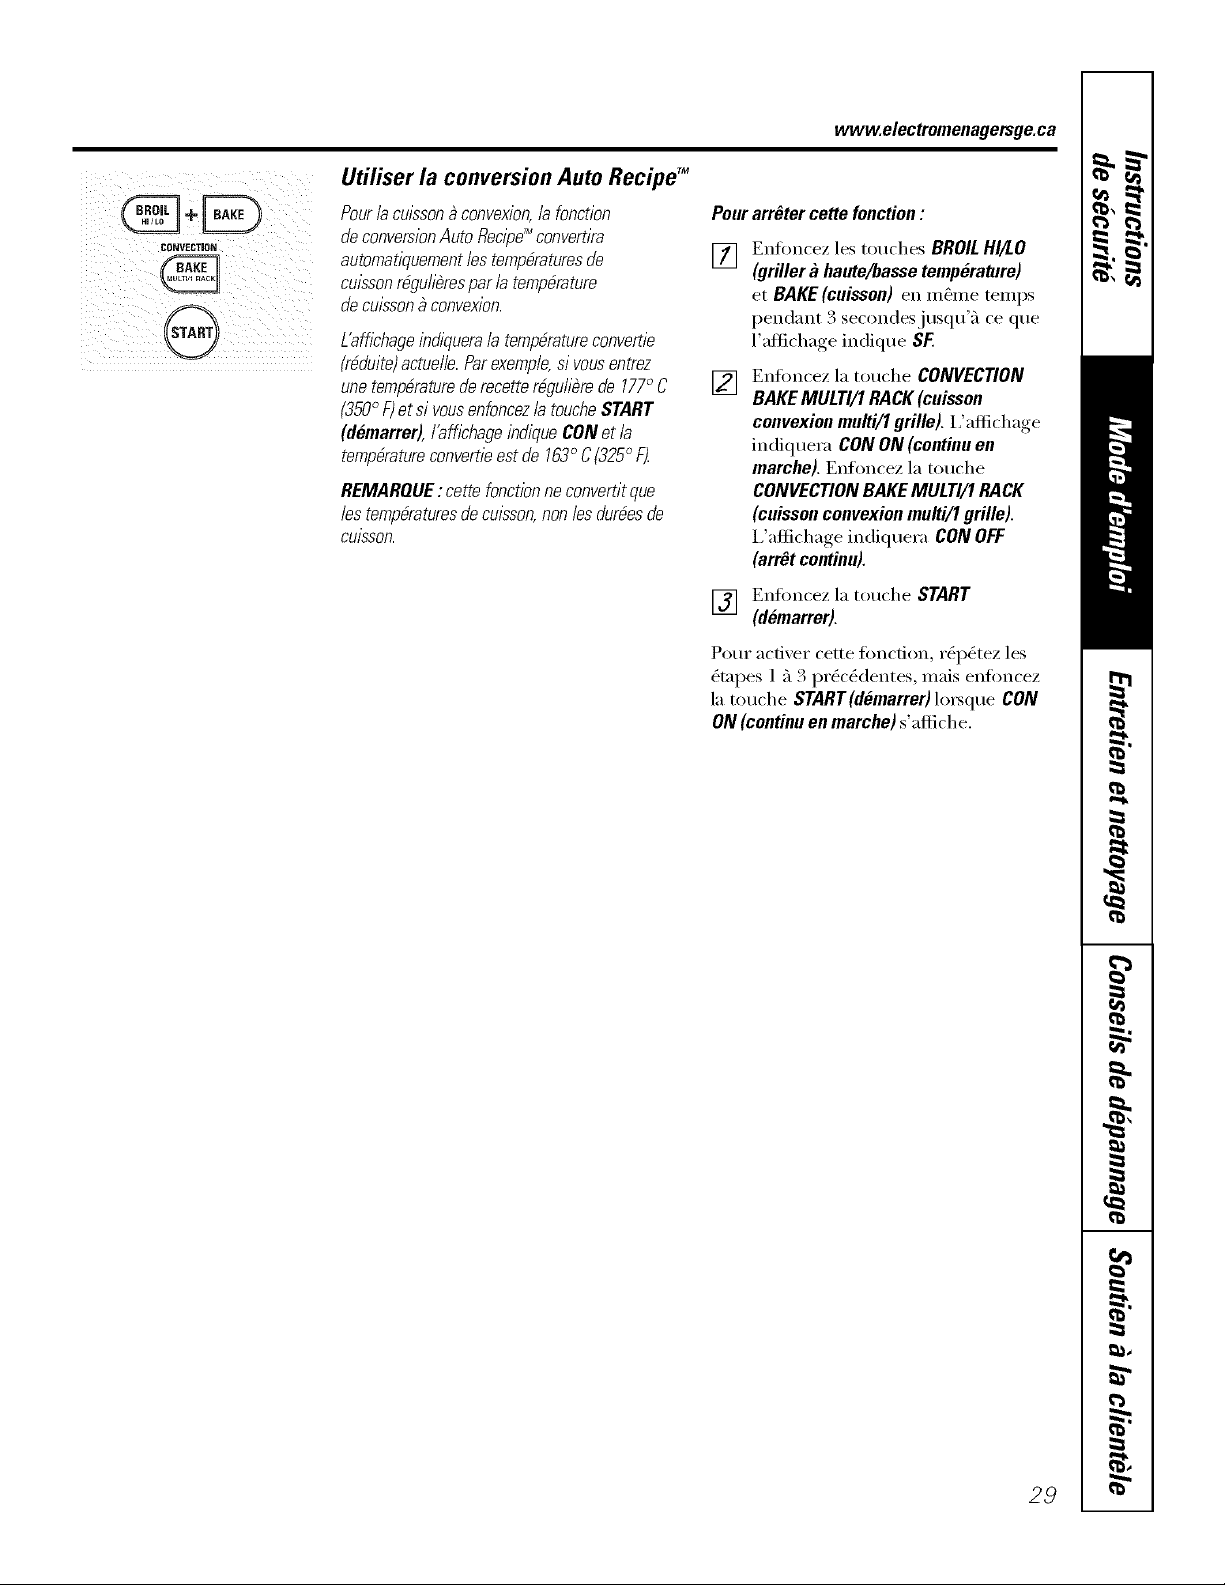
_+ ÷lb
CONVECTION
www.electromenagersge.ca
Utiliser la conversion Auto Recipe TM
Pour la cu/ssonDconvexion,lafonction
de conversionAutoRecipe_ convertira
automat/quement/es temperatures de
culssonr@uli#respar/a temperature
de cuissonD convexion.
L'afflchacje/nd/quera/a temp6ratureconverfie
(r#duite)actue//e.Par exemp/e,sivous entrez
une temp#raturede recette r@uli_re de 17T' C
(350° F)et si vousenfoncez/atouche START
(d_marrer), l'aff/chage indiqueCON et/a
temp#ratureconvertie est de 163<_C(325<_F_
REMARQUE : cette fonction neconvertit que
/es temperatures de culsson,non/es dur#esde
CUISSOR.
Pour arr_ter cettefonction :
[]
[]
Enfoncez les touches BROILHI/LO
(griller ahaute/basse temperature)
et BAKE (cuisson) en m_me temps
pendant 3 secondesjusqu';'l ce que
l'aflichage indique SF.
Enfk)ncez la touche CONVECTION
BAKE MULTI/1 RACK(cuisson
convexionmulti/1grille). I 'a_Mm_,e
indiquera CONON(continuen
marche). Enfoncez 1;i touche
CONVECTION BAKE MULTI/I RACK
(cuisson convexion multi/1grille).
I,'aflMmge indiquera CONOFF
(arr_t continu).
[] Enfm_cez la touche START
(d_marrer).
Pore" acfiver cette tOncfion, rOpt)tez les
Otnpes 1 ;'13 prOct)clentes, mais enfi)ncez
la touche START(demarrer)loI_(ÀueCON
ON (continu en marche) s'afliche.
29
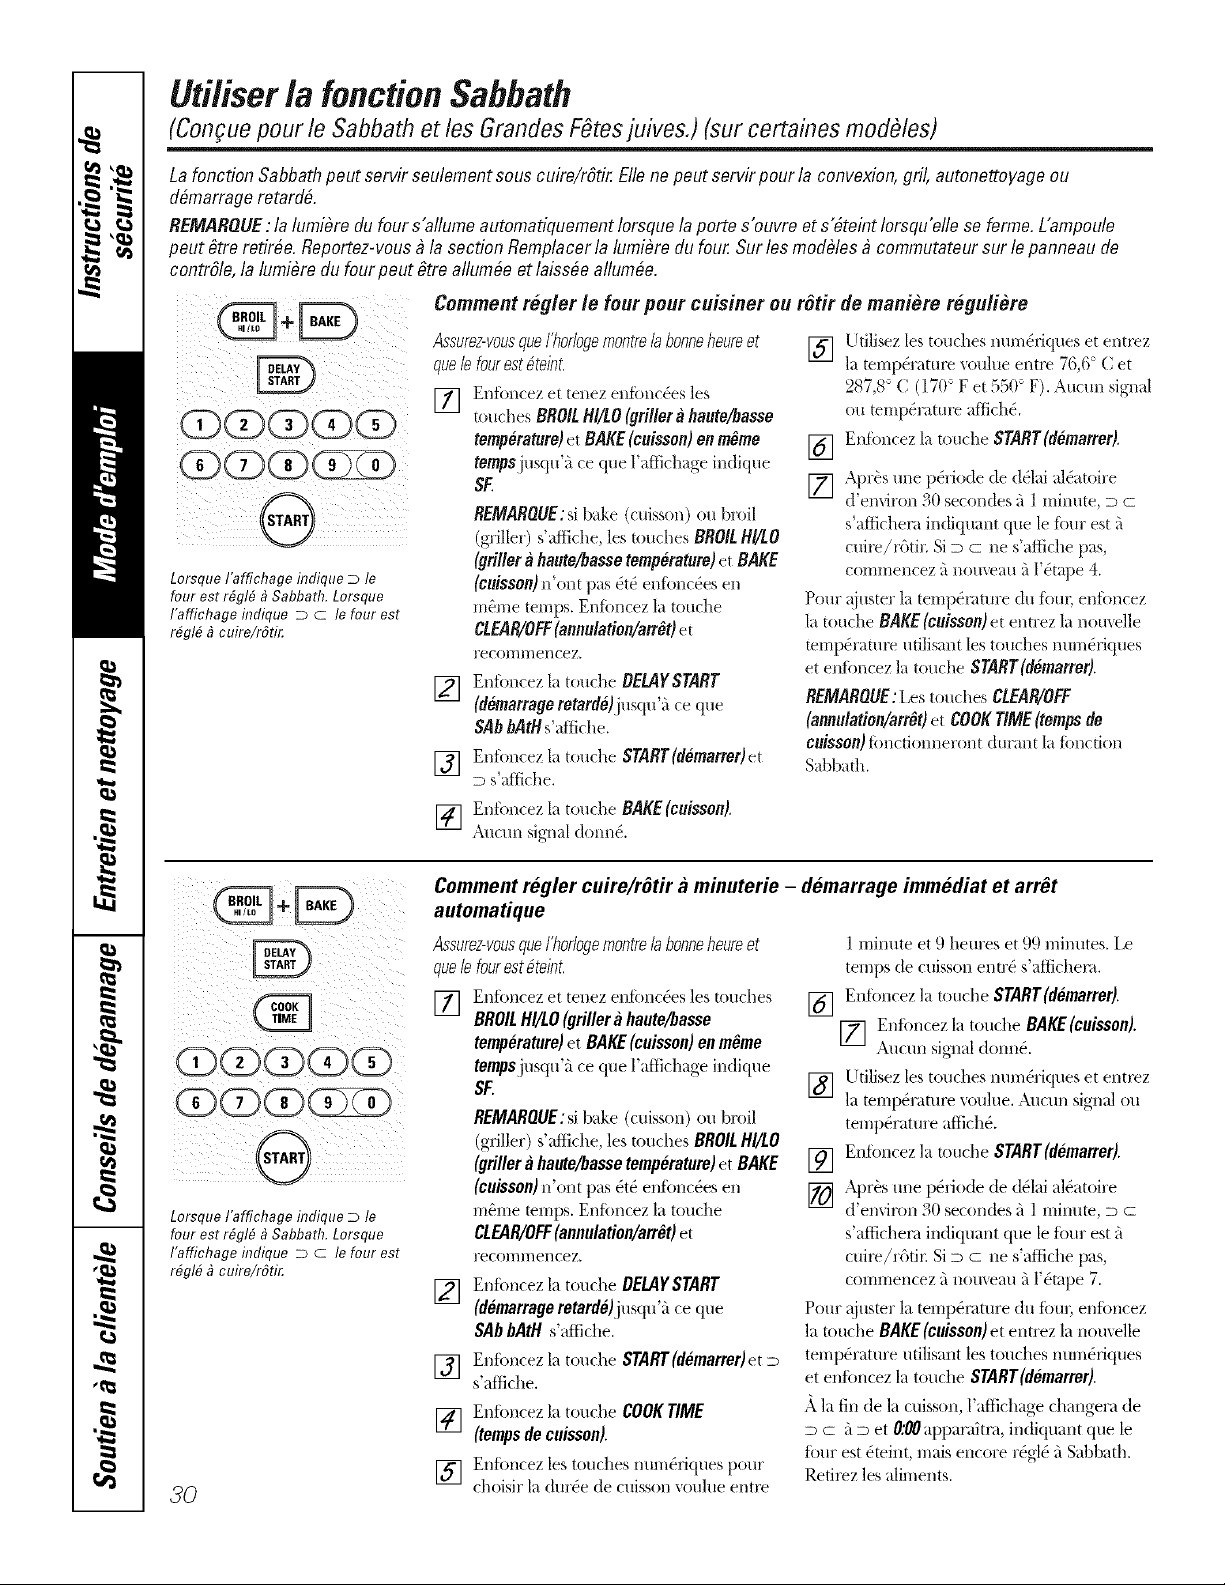
Uti/iser/a fonctionSabbath
(Con;ue pour le Sabbath et les Grandes FOtesjuives.) (sur certaines modules)
LafonctionSabbathpoutservirseulementsous cuire/rStirEllene peut servir pour/a convexion,gri/, autonettoyageou
d#rnarrageretard&
REMARQUE:la lumi#re du four s'aflumeautomatiquementIorsquelaportes'ouweets'#teint Iorsqu'eflese ferme,L'ampoule
poutgtre retir#e.Reportez-vous_ la section Remplacerla lumi#re du four Surlos modules_ commutateursurlepanneau de
contrgle, /a /umi#redu four peutgtre aflum#eet laiss#eaflum#e.
LorsqueIbffichage hTdiqueDle
fourest r@l# _ Sabbath. Lorsque
I'affichage hTdiqueD c le four est
r#gl# _ cuire/rSti_
Commentr#g/er le fourpour cuisiner ou rStirde maniere regu/i#re
Assurez-vousqueI'horlogernontrelabonneheureet []
que lefour est_teint
[]
Ent(mcez et tenez en_bnc(_es ]es
touches BROIL HI/tO (griller & haute_asse
temperature) et BAKE (cuisson) en m_me []
tempsjusqtf_ ce que 1_dtkhage indique
SF. []
REMARQUE:si bake (cuisson) ou broil
(griller) s'_fliche, les touches BROIL H{/LO
(griffer ahaute/flasse temp#rature) et BAKE
(c#isson) nont p_ls (_t(_en_bnc(_es en
m_me temps. Entbncez 1_ touche
CLEAR!OFF(annu/ation/arr_t) et
recoll/mencez.
[] Entkmcez la touche BELAYSTART
(demarrageretarde)jusqtf_'_ce qu e
SAbbAtHs'_dlkhe.
[] Entkmcezlatouche START(demarrer)et
D s';dSche.
[Idlisez les touches num(_rkp_es et entrez
la temp(_rature _oulue entre 76,6 ° C et
,81,8 (. (l 1( _i¢ et 550 ° F). A[Ic[ln signal
ou temp6ramre aflich6.
Enfbncez la touche START(d&narrer).
Apr_s une p_riode de d&d _fl£/toire
d'emiron 30 secondes _'l1 minute, _ c
s'aifichen_ indiquant qtle le ibm" est _'_
ctdrc/_Stir. Si _ cne s afliche pas,
coillillencez ;'1 notlvea[l _/l'&;_pe 4.
Pour @_ster la telnp_nlttn'e dtl fbui; ent(mcez
l_ltouche BAKE (cuJsso#)et emrez l_lnouvelle
temp_r_m_ ufilis_mt les touches ntm_ri(lues
et el_bncez la touche START (d&narrer).
REMARQUE: l,es touches CLEAR!OFF
(annu/ation/arrft) et COOKTIME (temps de
c#isson) fimcd(mneront durant li_fonction
S_fl)bath.
[] Entimcez la touche BAKE(c#isson).
Aucun sig_al d{mn_.
÷
÷
(Z)(D(Z)CD
(Z)CD(Z)(E
LorsqueI'affichage fl?dique_ le
fourest r#gl# _ Sabbath. Lorsque
I'affichage fl?dique _ _ le four est
rfiglfi _cuire/rati_
3O
Comment regler cuire/r6tir a minuterie - demarrage immediat et arr_t
automatique
Assurez-vousqueI'horlogernontreb bonneheureet
que /e fourest#teint
[] Entoncez et tenez entbnc(_es les touches []
BROILHI/tO(grillera haute/basse
temperature) et BAKE(cuissen) en m_me
tempsjusqu_ ce que l'aflkhage indique
[]
REMARQUE:si bake (cuisson) ou broil
(griller) s'aftiche, les tou(hes BROIL HI/tO
(griller ahaute/basse temperature) et BAKE
(cuisson)nont pas _t_ enfbnc_es en
mSme temps. Entoncez la touche
CLEAR/OFF(annulation/arr#t)et
i'eCOll/ll/ei/cez.
[] Entoncez la touche OELAYSTART
(demarrageretarde)jusqu'_ ce que
SAbbAtH s'afliche.
[_ Enioncez la touche START(demarrer)et
s aflkhe.
[] Entoncez la touche COOKTIME
(tempsde cuisson).
[] Enfoncez les touches ntnn_rlques pore"
choisir la dur_e de cuisson xoulue entre
[]
[]
1miimte et 9 heures et 99 minutes. I,e
temps de cuisson entr0 s'aflichem.
Entbncez la touche START(demarrer).
[] Enioncezla touche BAKE(cuisson).
Auctm signal dolm£
Udlisez les touches mu_,/_riques et emrez
la temp0ramre voulue. Xuctm signal ou
temperature aflich_.
Entbncez la touche START(demarrer).
Apr+s tree p(_dode de d(_lai al&ttoire
d'environ 30 secondes a 1miimte, D c
s'aflichen_ indiquant que le tbur est a
cuire/r6ti+: Si D cne s'afliche pas,
corm-nencez _'_nomeau a l'_mpe 7.
Pour ajusmr la temp(_mtt_re du Ibm; enfoncez
la touche BAKE(cuisson)et enn'ez la nouvelle
temperature utilisant les touches nmn_rlques
et enfbncez la touche SrARr(domarrer).
_ l_ fin de la cuisson, l'aflk'hage changera de
c a _ et 0".170apparaitm, indiquant que le
four est 0teint, mais encore r(_gt(_a Sabbath.
Reti_z les aliments.
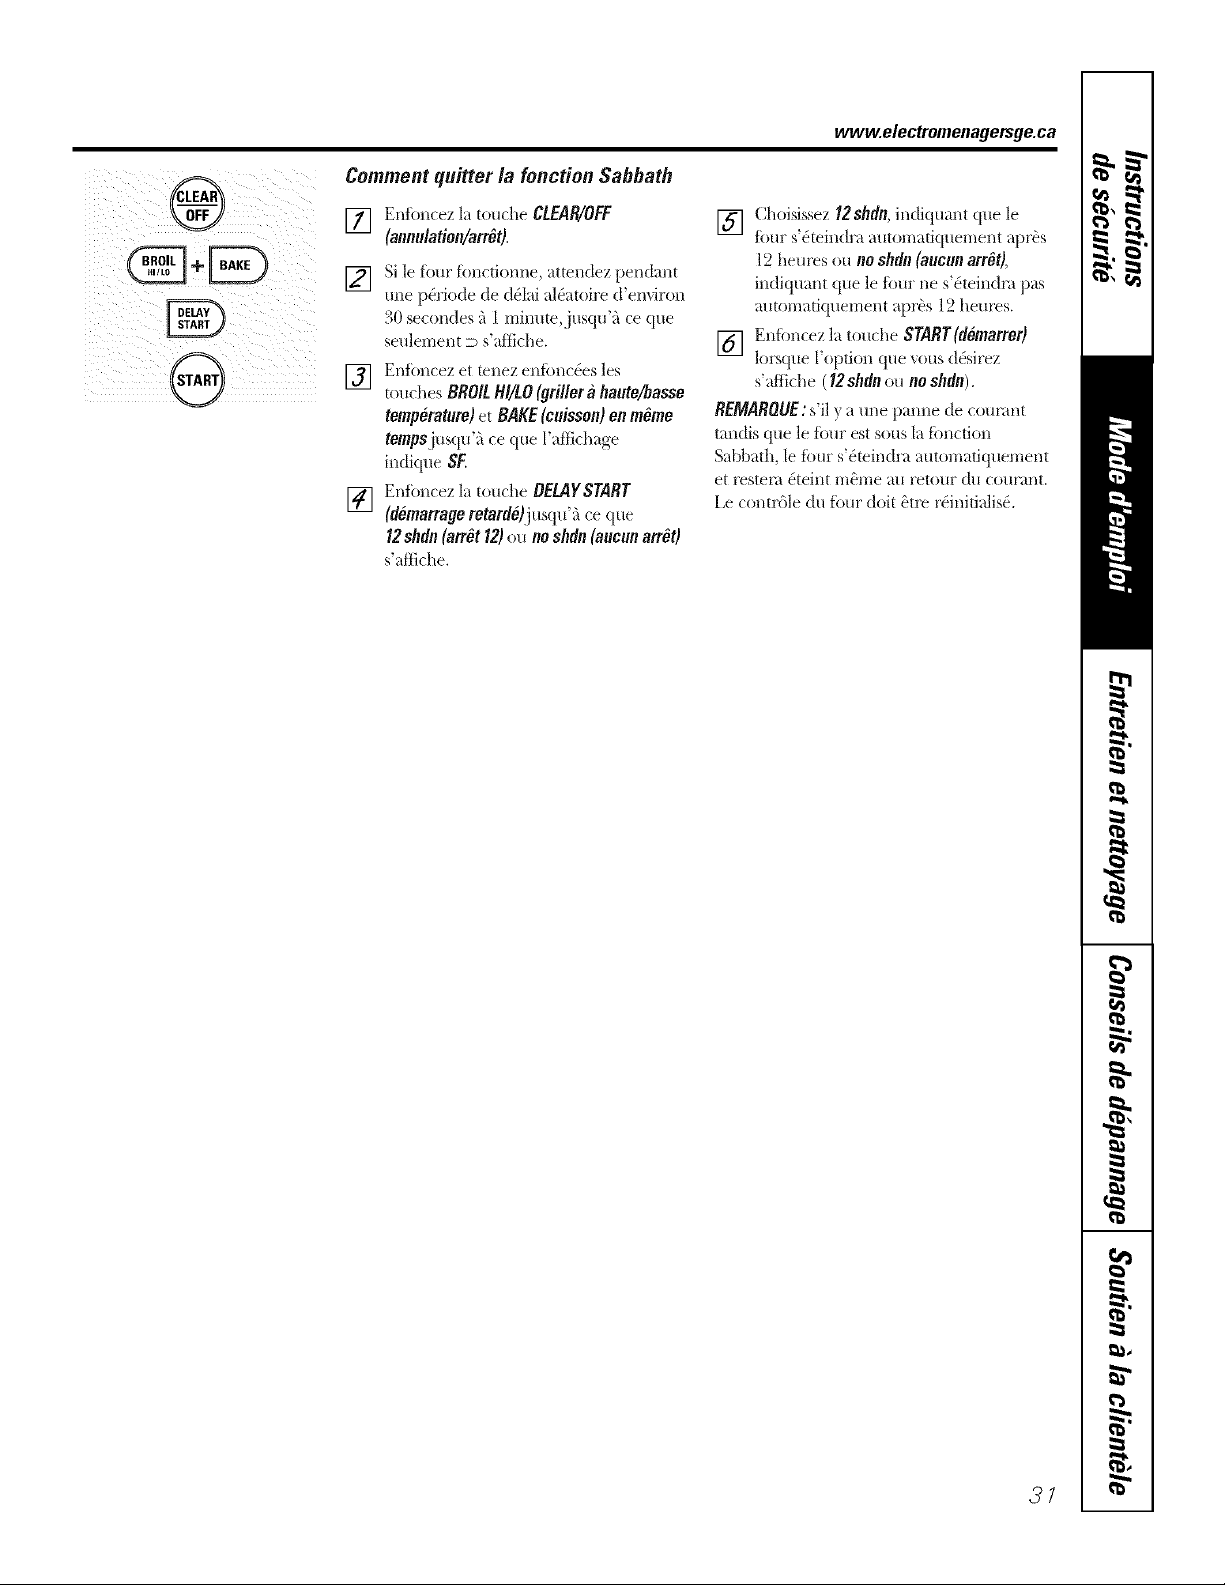
www.electromenagersge.ca
'(_,,
÷
0,
Commentquitter/a fonotion Sabbath
[] Enfoncez la touche CLEAR/OFF
(annulation/arr#tl.
] Si ]e ibur ibncfionne, attendez pendant
une p(_riode de d(_lai al£1toire d environ
30 secondes _'l1 minute, jusqu'_'l ce qtle
seulement D s _/fliche.
[] Enf_)ncez et tenez entbnc_es les
touches BROIL HI/tO {griiier a haute/basse
temp#rature) et BAKE{cuisson) enre#me
tempsjusquh ce que l'_litk-h_lge
indiqt_e SF.
[] Enf()n(ez la touche DELAYSTART
(d&narrage retard#ljusqtH_ ce que
12shdn (arr#t 121ou no shdn (aucunan#t)
s ;litiche.
[] Choisissez 12shdn,indiquant que le
four s'_tein(h'a automatiquement apr_s
12 hem_s ou noshdn(aucunart#t),
indiquant que le %m" ne s'(_tein(ln* i)_/s
m_tom_fl(lnement aprbs 12 heurcs.
[] Entoncez h touche START(d&narrer)
lorsque 1 option que _ous d_sirez
s _lfliche (12shdnou noshdn).
REMARQUE: sil ! a role p_mne de corn',rot
t_mdis que le tbur est sous Iiiii)ncfion
Sabbath, le ibm" s'(_mindra automatiquement
et t_stem Oteint ll/ell/e ml l'e[OIIY dtl COIlr}li/L
I_e contr61e du ibur doit 6t_ rOiniti_llis(_.
?l
Entretienet nettoyagedelacuisiniere.
Assurez-vous que tous les contr61essont #teints etque toutes les surfaces sont frafches avant de nettoyer toute
pattie de la cuisinibre.
Si votre cuisinibre est retir#e pour le nettoyage, I'entretien ou pour toute autre raison,
assurez-vous que le dispositif antibasculement est r#engag# correctement Iorsque
la cuisinibre est replac#e. Sinon,la cuisinibre pourrait basculer etil pourrait yavoir
des blessures.
Commentretirer la pellicule d'expedition de protectionet le ruban
d'emballage
Agrippez avec soin un coin de la
pellicule d'exp&lifion de protection
avec vos doigts et retirez-la lentement
de la sm'fi_ce de l'appareil. N'ufilisez
pas d'objet tranchant pore" l'enlever.
Retirez toute la pellicule a\_mt d'ufiliser
l'appareil pore" la premiere ti)is.
Pore" s'assm'er qu'il n'y ait pas de
dommages au fini du produit, le
meillem" moven de retirer l'adh(_sif du
ruban d'emballage du nouvel appareil
est d'appliquer du d&e_gent liquide
pore" laver la wfisselle. Appliquez avec
tm chiflim souple et laissez tremper
REMARQUE : l'adMsif doltgtreretir_ detoutes
les plbces. /l nepeut/'gtre s'i/ est culten place.
Boutons de contrOle
Lesboutons decontrO/eseretirentpourfacl/lter
/e nettoyage.
Avant de refirer les boutons pour le
nettoyage, xeuillez rioter q.ue les boutons
sont en p(,sifion OFF(ARRET).
En remplaqant les^boutons, vg_rifiez la
position OFF(ARRET)pour assurer le bon
placement.
I_vez les boutons darts de l'eau et du
sa;on ou du ;inaigre et de l'eau chaude,
mais ne laissez pas trempe_:
@ BouchondubrOleur
T_tedubrOleur
:lectrode_ BasedubrOleur
MISEEN GARDE: NE FAITESPAS
FONCTIONNERLE BRULEURSANS
QUETOUTESLESPIECESSOIENT
EN PLACE.
Assemblages de brfileurs
i,es asseml)lages de 1)rfilem's doivent _tre
laves r_guliOrement et, bien stir; aprbs
tout d&'ersem ent.
Etel)nez tousles contrOlesavantde retker les
p/bces dubrdeur
i,es grilles du brfilem', les t&es et les
bouchons du brt_deur se retirent pour
taciliter le netto)_ge.
[,'61ectrode de l'allumem" d'6tincelle est
eN)os_e au-del_'l de la sm'li_ce de la base
du brfilem- En netto_mt la sm'fi_ce de
cuisson, attention de ne pas prendre
l'_lectrode de l'allmner avec votre chiffon
de netto)_ge. Cela pomTait provoquer
des dommages fi l'alhm_em:
Pour _viter de coincer unchiffon sur
I'allumeur d_tincelle, laissez les totes du
brOleur en place en nettoyantla surface de
cuisson.
Attention de ne pas pousser les contr61es
de la sm_i_ce de cuisson en netto_m_t la
sm'filce. Un choc _lect_ique pomTait en
d_couler ce qui vous terait peut-&re
i'enveiBei" des casseroles chaudes.
I_wez les piOces du brt_dem" avec tm
nettovant non [lbI'}lSi[ tout tlsage et de
l'eau chaude. Faims tremper les saletbs
rebelles. Essuvez-les avec tm chiflim--ne
relnontez pas avec des pi_ces humides.
Pore" remonte_; replacez d'abord la tbte
du brfilem; puis le bouchon du brfilem"
et enfin la grille. _ssm'ez-vous que les
broches de la tbte soient bien plac(%s
darts les trous de la base du brt_dem -
32
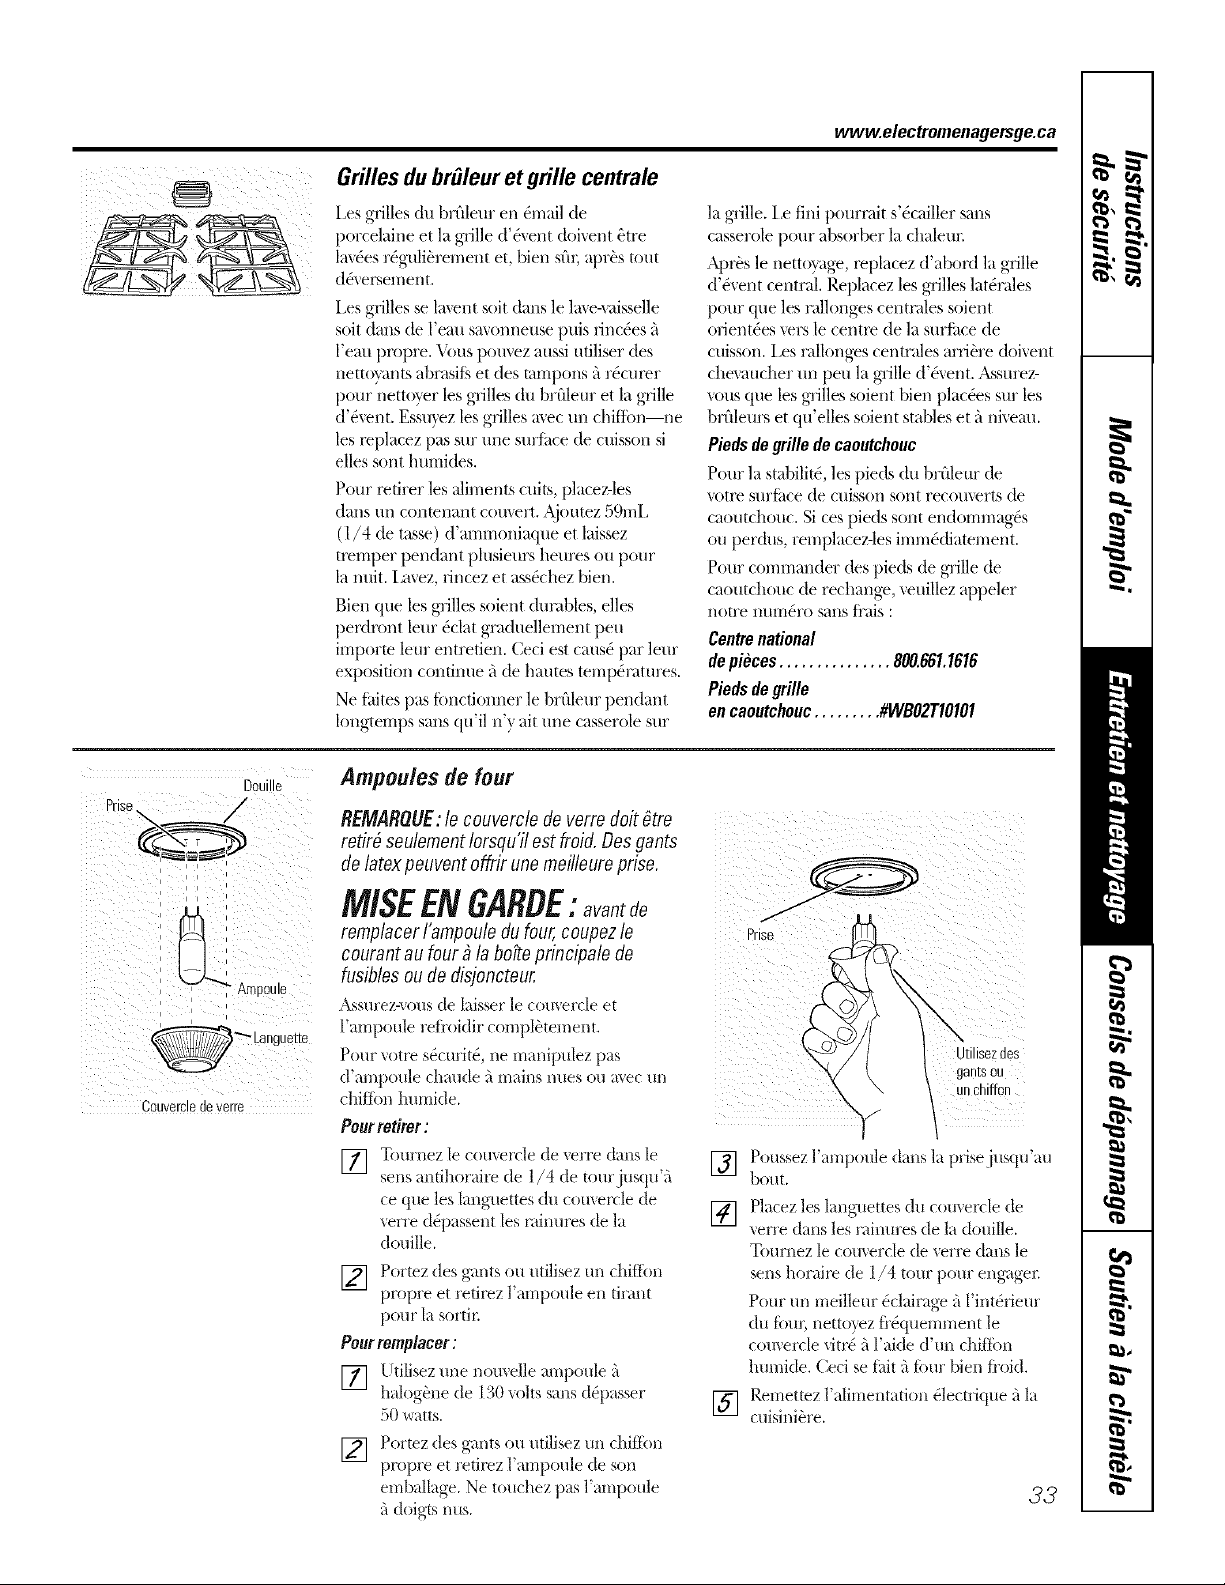
www.electromenagersge.ca
Grilles du br_leur et grille centrale
I,es grilles (Illbrfileur en &nail de
porcelaine et la grille d'&ent doi_ent _tre
lax_es r_g-uli_ren/ent et, bien sill, apr_s tout
d_. elNelx/ei/t.
i,es grilles se la\ent soit dans le lm e-vaisselle
soit dans de l'eau sa_,onneuse puis finches a
l'eau propre. Vous pouvez au,_siufiliser des
nettowtnts abrasiti, et des tampons fi r_culer
pour nett_ger les grilles du brfileur et la grille
d'&ent. Essuyez les grilles mec un chfftbn--ne
les replacez pas sur une sxn'_ce de cuisson si
dies vmt humides.
Pour l>firer les _fliments cuits, placez-les
dans un conmnant comert. Ajoutez 59mi,
(1/4 de tasse) d'ammoniaque et laissez
tl_mper pendant plusieul\S heures ou pour
la mtit. Im'ez, dncez et ass&hez Nen.
Bien que les grilles soient dun_bles, elles
peMront leur _clat graduellement peu
imporm leur entrefien. Ceci est caus_ par leur
exposition con)lime fi de hautes temperatures.
Ne fifites pas iimcfionner le brfileur pendant
longtemps sans qu'il n'y ait une casserole sur
la grille, i,e fini pourntit s'_cailler sails
casserole pour absorber la chaleur.
Apl+s le netto_age, mplacez d'aboM lagrille
d'Ovent central. Replacez les gTilleslat&ales
pour que les rallonges centndes soient
orient_es \ers le centl> de la surfltce de
cuisson, ies rallonges centrales arribre doivent
che_aucher un peu la grille d'&ent. Assurez-
vous que les grilles soient Nen plac_es sur les
brfileurs et qu'elles soient staNes et fi niveau.
Piedsdegrillede caoutchouc
Pour la stabilitY, les pieds du bl fileur de
VOtlP StlI'fi_ce de ctlisson soI/t recotlverts de
caoutchouc. Si ces pieds sent endommag_s
ou per&is, remplacez-les imm&fiatement.
Pour commander des pieds de grille de
caoutchouc de rechange, veuillez appeler
I/O[/'e IXXIllteI'Osails ti'ais :
Centrenational
depieces............... 800.881.1616
Piedsdegrille
encaoutchouc......... #WBO2T10101
Douille
Couvercledeverre
Ampou/es de four
REMARQUE: le couvercle de verredoitOtto
retir# seulement Iorsqu'il estfroid, Des gants
de latex peuvent offrir unemeilleure prise.
MISEBVGARBE:avast
remplacer/'ampouledu four, COtlpezle
courant au four #/a bo#e principale de
fusibles ou de disjoncteur.
Assurez-_ous de laisser le corn ercle et
l'ampoule refi'oidir compl_ten/ent.
Pour _(ttI_ s_curit_, ne manipulez pas
d'ampoule chaude fimains nues ou a\ec un
chiitbn humide.
Pourretirer:
[]
Tournez le comercle de xerre dans le
sens antihoraire de 1/4 de tourjusqtt'fi
ce que les languettes du couvercle de
xerre d@assem les minures de la
douille.
[] Portez des gants ou utilisez un chiflbn
propre et retirez l'ampoule en tirant
pour la sortii:
Pourrernplacer:
[] lYtilisez une nomelle ampoule fi
halog_ne de 13(1xr)lts sans d@asser
50 watts.
[] Portez des gants ou utilisez un chiffbn
propre et redrez l'ampoule de son
emballage. Ne totlchez pas l'ampoule
fi doigts nus.
Utilisezdes
gantsou
un chiffon
Poussez l'ampoule dans la prise jusqu'au
l)out.
[]
Placez les languettes du comercle de
verre dans les rainures de la douille.
Tournez le comercle de verre dans le
sens horaire de 1/4 tour pour eng_lgei:
Pour tin meilleur _clairage fi l'im&ieur
(Illibm; nettoyez fl'(_quemment le
comercle viii'c4fi l'aide d'un chiitim
humkte. Ceci se rid) fi ibm" bien fi'oid.
[] Re!r!e!tez l'alimentation +lectrique +_la
CtllSlnlel'e.
33
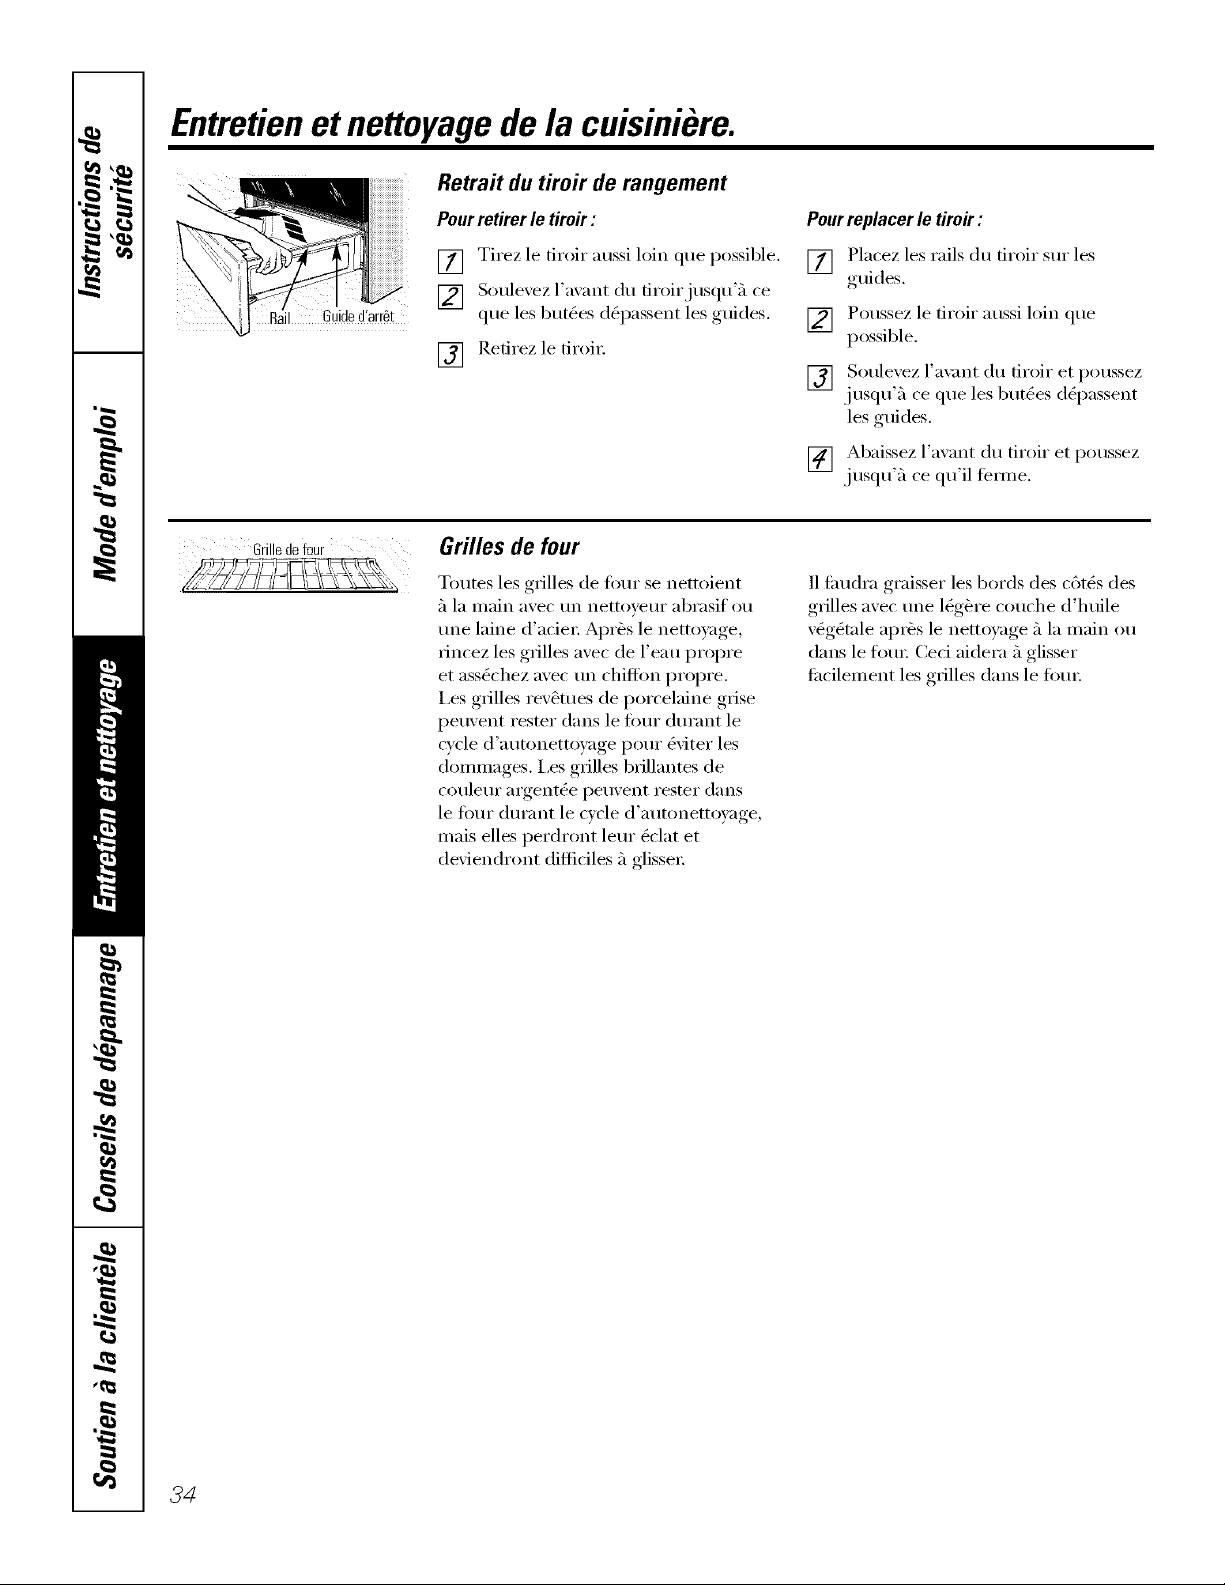
Entretienet nettoyagedelacuisiniere.
Retrait du tiroir de rangement
Pour retirer le tiroir :
[] Tirez le tiroir aussi loin que possible.
[] Soulexez l'axant du firoirjusqu'5 ce
que les but0es d0passent les guides.
[] Retirez le tiroi_:
Pourreplacerle tiroir:
[] Placez les rails du tiroir sur les
guides.
[] Poussez le tiroir aussi loin que
possible.
[] Soulevez l'a\m_t du tiroir et poussez
j usqu'5 ce que les butt)es d@assent
les guides.
[] Abaissez l'avant du tiroir et poussez
jusqu'5 ce qu'il fixture.
Grillede four Grilles de four
Tomes les grilles de fi_ur se nettoient
;'1 la IIl_lin _l\'ec tin nettoveur abrasif ou
une laine d'aciei: Apr_s le netto):lge,
rincez les grilles avec de l'eau propre
et ass_chez avec tm chiffon propre.
I,es grilles rev_tues de porcelaine grise
peuvent rester darts le fimr durant le
cycle d'autonettoyage pour _viter les
dommages. I,es grilles brillantes de
couleur mgent_e peuvent rester darts
le fi)ur din'ant le cycle d'autonettoyage,
mais elles perdront lem" (_clat et
deviendront diflidles 5 glisse_:
11fimdra graisser les bords des c6t6s des
grilles avec tree l_g_)re couche d'huile
v(_g(_tnle aprbs le nettoyage 5 la main ou
darts le IOta: Ceci aidera 5glisser
fi_cilement les grilles darts le IOta:
34z
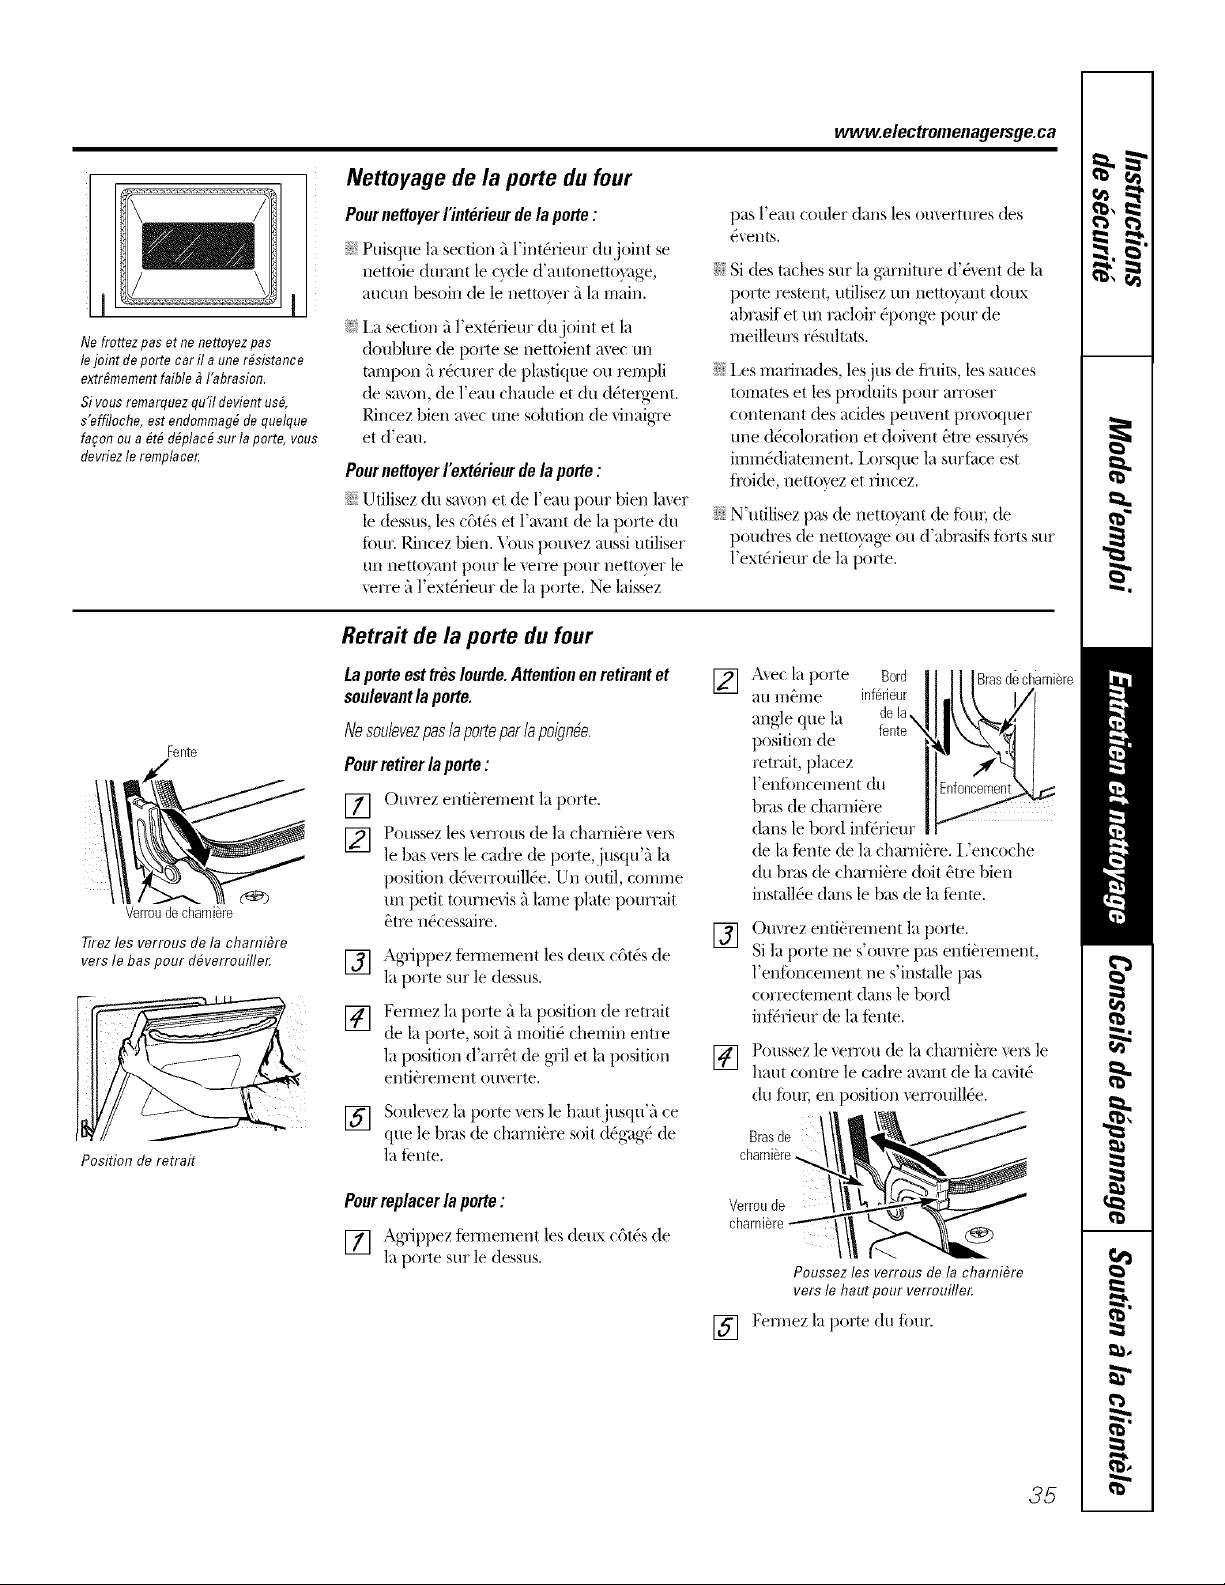
www.electromenagersge.ca
I I
Ne frortez pas et ne nertoyez pas
le joint de porte car il aone r#sistanc e
extr#mement faible _ fabrasion.
Sivous remarquez qu'it devient us#,
s'effiloche, estendommag# de quetque
fawn ou a#t# d#plac# sur la porte, vous
devriez te remptace_
j ettoyage de la porte dufour
PournettoyerI'interieurdela porte:
_t"Puisque la section a 1 int&lieur dujoint se
nettoie dilraltt leQcle d'autonetto)_Jge,
aucun besoin de le nettoxer _'Jlamain.
_}}i,a section _'Jl'ext&ieur dujoint et la
doublure de porte se nettoient avec un
tampon fir(_cm'er de plastique ou x_mpli
de smon, de l'eau chaude et (tit d(_texgent.
Rincez bien avec une solution de finaigre
et d'eil//.
PournettoyerI'ext#rieurdela porte:
_: Ufilisez du sm(m et de l'eau pour bien liner
le dessus, les c6t0s et l'mant de la porte du
tbur RJncez bien. Vous t)()tl\'ez aussi utiliser
un nettoy, mt pour le verre pour netto'_er le
\erre fi l'ext0rieur de la porto. Ne laissez
pas l'eatl COtller d_tItS les ouxertures des
ex,eltts.
iJi::Si des taches sur la g_mtiture d'(_vent de la
porte restent, utilisez tm netto_ant, doux
abrasif et un racloir 0[)onge, pour de
meilleurs r0sultats.
iJi::i,es marinades, lesjus de fl'uits, les sauces
tomates et les pro&tits pour an'oser
comemmt des acides peuvent provoquer
une d4colomtion et doivent _tm essuv4s
imm_diatement, i,orsque la surfi_ce e[st
fi'oide, netto_ez et rincez.
ij?::N'utilisez pas de netto}ant de fore; de
poudres de netto?age ou d'abrasits tbrts stir
l'ext0fieur de la porte.
Fente
d_b
Verroudecharni6re
77rezles verrous de la charnibre
versle baspour d#verrouillet
Position de retrait
Retra# de laporte dufour
Laporte esttres/ourde.Attentionenre#rantet
soulevant la porte,
Nesoulevez/)aslaporteparlapoign#a
Pourretirerla porte:
[] Otlvrez enti0renmntla porte.
Poussez les _.errous de la chami0re xet_
[] le bas xers le cadre de porte,jusqu'a la
position d0\errouill(_e. Un outil, contnte
un petit tournevis fi lame plate pourrait
_tt_ n0cessait_.
[]
[]
Agnppez tennement les deux c6t(_s de
la porte stir le dessus.
Fen-nez la porte a la position de retrait
de la porte, soit _')moiti0 chemin entre
la position d'arr_t de gTilet laposition
entibrement omerte.
[] Soulexez la porte xet_ le hautjusqu'fi ce
que le bras de chami0re soit d0gag0 de
la fente.
Pourreplacerla porte:
_Ol'l
[] • g- 'ppez femlement les deux c6t0s de
la porte stir le dessus.
] A_ec la porte B0rd decharniere
au m_me inf6rieur
aitgle title la
position de
remfit, placez
l'enfi>ncement du
bras de charnibte
darts le bord in[_rieur
de la tente de la chami&'e, i,'encoche
(lit bins de charnibre dolt _tre bien
install_e dam le bas de la Ienm.
[]
[]
Ouvrez emi0renmnt la porte.
Si la porte ne s'omre pas entiiwenmnt,
l'entbncement ne s'installe pas
correctement dans le bord
int_deur de la Iente.
Poussez le ven'ou de la chamibre vers le
haut contre le cadre axant de la caxit0
du Ibm; en position ven'ouill(_e.
Brasde
charni6re,
]
Verroude :
Poussezlos verrous de la charni&e
vers le haut pour verrouille_
[] Fennez la porte du four.
35
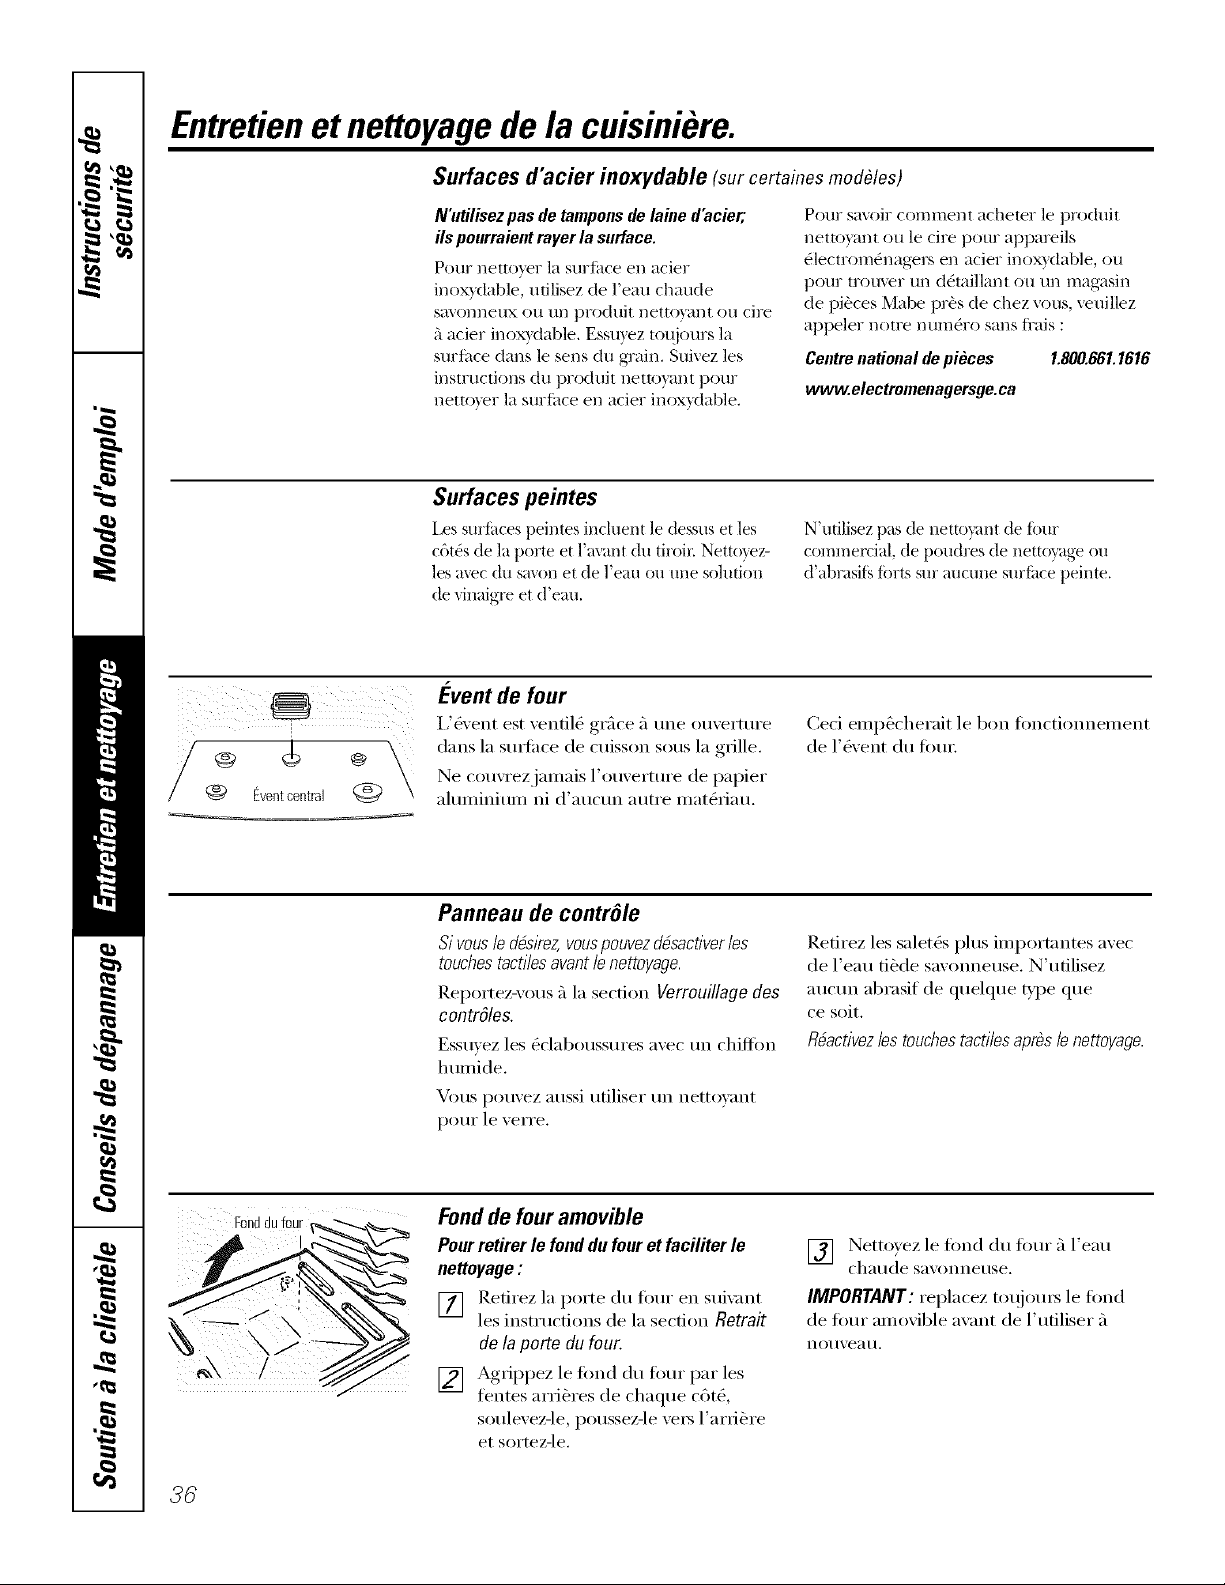
Entretienet nettoyagedelacuisiniere.
Surfaces d'acier inoxydable (surcertainesmod#les)
N'utilisez pas de tamponsde laine d'acier;
ils ponrraient rayer la surface.
PotlI" llettoveF la stlr_il('e ell a('ler
inoxydab]e, udIisez de ]'eat] chaude
sa\onneux ou tm prodtfit netto}mlt ou cite
_'lacier inoxvdable. Essuyez toujours la
surlilce dans le sens du gTain. Suivez les
instructions du prod nit netto}_mt pour
nettover la surlime en acier inoxvdable.
Petit sax_ir comment acheter le produit
netto\_mt ou le cite pour appareils
dlectromdnagers en acier inoxydable, ou
pour trouver tm ddmillant ou tm magasin
de pi_ces Mabe prbs de chez vous, \euillez
appeler notre ntm]dro sans fl'ais :
Centrenational de piOces 1.600.661.1616
www.electromenagersge.ca
Surfaces peintes
[,es surfi<es peintes incluent le dessus et les
c6t& de la porte et l'avant du tiroir Netto}ez-
les avec (hi s;:lvoilet de ]'eau Oil tlI/e sohl[iOIl
de vinaigle et d'eau.
N'utilisez pus de nettoyant de Ibm"
commercial, de})°udres ....de nettovage., ou
d'abrasifs forts sur aucune surface peinte.
! IIZII
Eventcentral @)
_'vent de four
I,'&'ent est \'emil<) grace _'lm_e ouvertm'e
duns la smtime de cuiss(m sons la grille.
Ne couwezjamais l'()uverture de papier
almninium ni d'auctm autre matOfiau.
Ceci emp6cherait le ben fimctionnement
de l'&ent du fim_:
Panneau de contr61e
Si vous le dbskez, vouspouvezdbsactiverles
touchestact/los event ie nettoyage.
RepoItez-\'otls _'1la section Verrouillagedes
contrOles.
Essuvez les &-laboussm'es avec tm chiffon
humide.
Vous pouvez aussi utiliser un nettovant
potlI"le verre.
Refirez les salet_s plus importantes avec
de l'eau tibde savonneuse. N'utilisez
;:ltlCtlnabrasif de quelque type que
ce soit.
Rbactivezlos touchestact#as aprbsie nettoyage.
Fonddufour
Fond de four amovible
Pour retirer lefond dufour et faciliter le
nettoyage:
[] Retirez la porte du Ibm" en sui\m_t
les instrucfi(ms de la section Retrait
do la porto du four.
[] Agfippez le fond du fi)m" par les
fentes artistes de chaque cgt_,
soulevez-le, poussez-le vets l'arfibre
et sortez-le,
[] Netto) ez le fired du fimr _'_l'eau
chaude sa'_Oililet/se.
IMPORTANT: replacez totliOt/I_ le fond
de tom" amoxible a_ant de l'utiliser fi
not/_, ea tl.
36
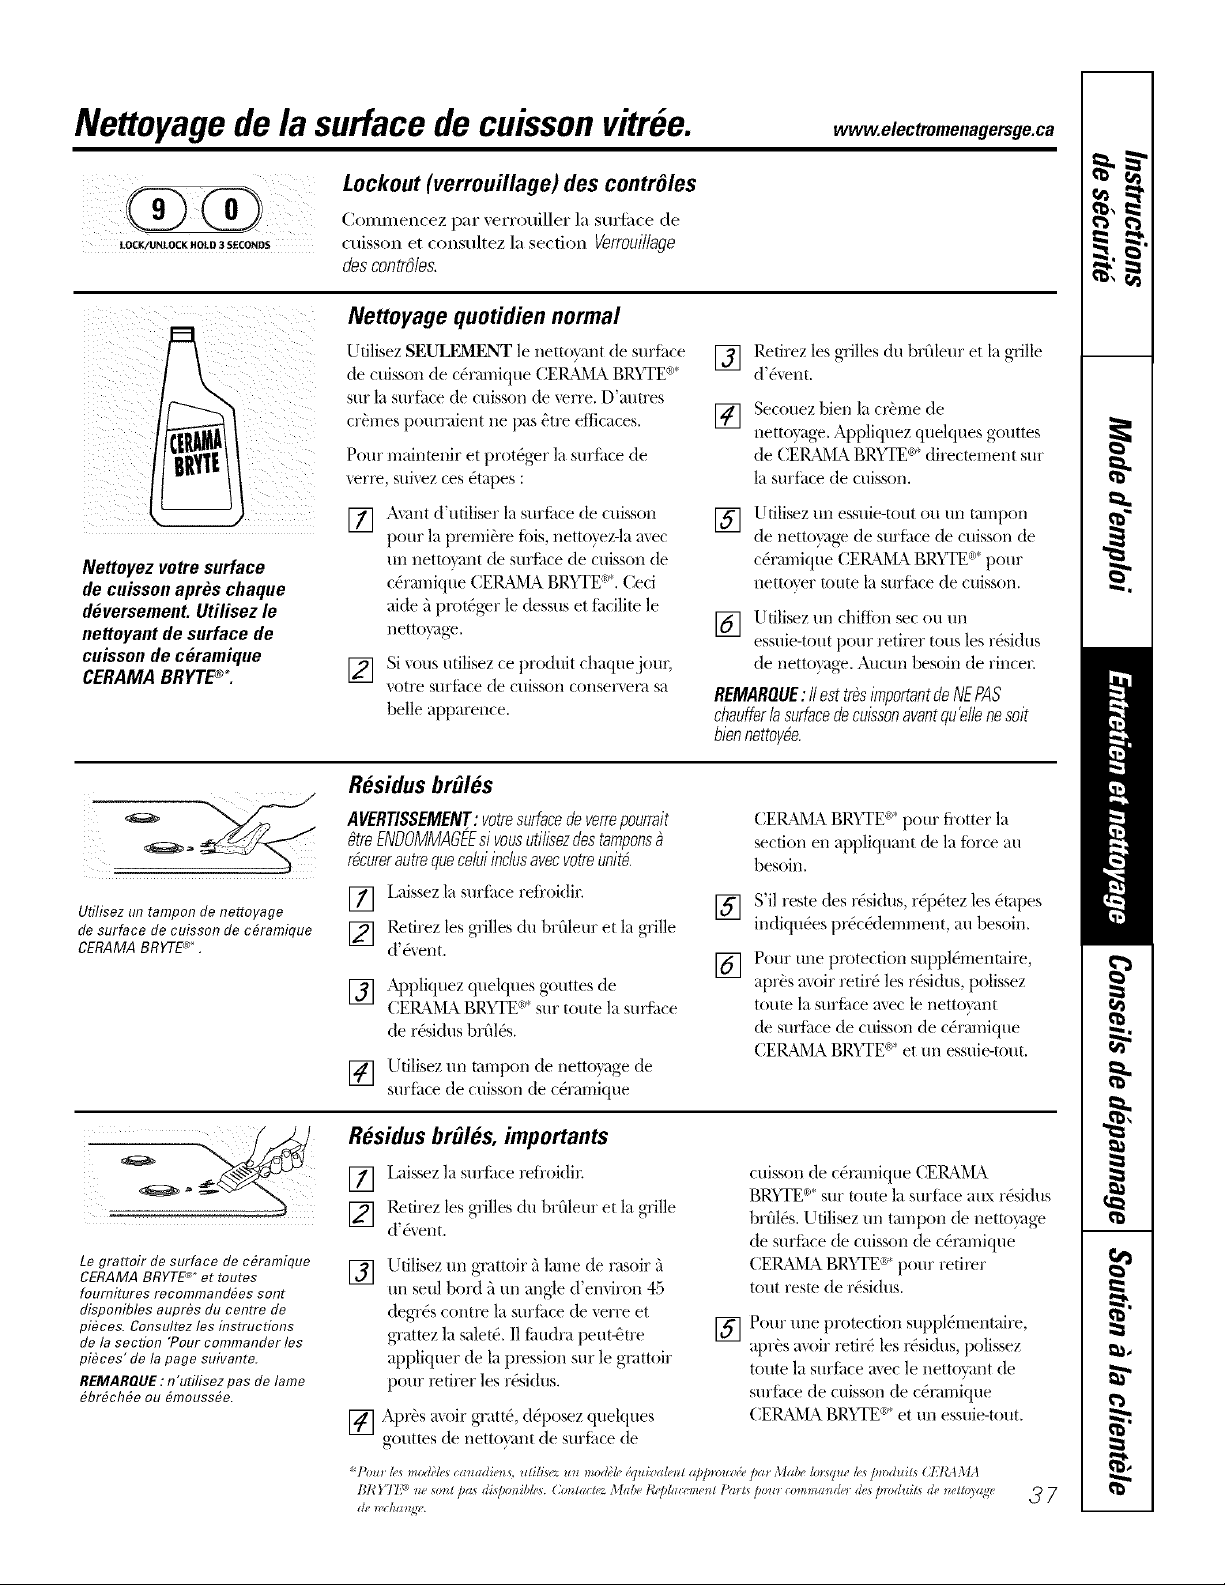
Nettoyagedelasurface decuissonvitree. , .e ec,ro e,agersge.ca
LOCK/UNLOCK HOLD 3 SECONDS
Lockout (verrouillage) des contrOles
(_ommencez par xerrouiller la siu_i_ce de
cuisson et consultez la section Verroul//age
des contrOles.
Nettoyez votre surface
de cuisson apr@schaque
deversement. Utilisez le
nettoyant de surface de
cuisson de c@ramique
CERAMA BRYTE®L
Nettoyage quotidien normal
Utilisez SEULI?MF2qT le netto_ant de surthce
de cuisson de c,_rm;qique CERA_L_ BR'tTE®*
stir la sm'fime de cuisson de \rerre. D'auu'es
cr_mes pourraient lie pas 0\re eflicaces.
Pour mainmnir et prot0ger la surfime de
verx>, suivez ces (_tapes :
[] A\ant d'utiliser la suriime de cuisson
pour la premiere Ibis, nettovez-la axec
un nettotmit de surf_lce de cuisson de
c(_rmnique (;EIL3t_L_ BR'tTE ®*.Ceci
aide a prot0ger le dessus et thcilite le
nettoyage.
[] Si xous utilisez ce produit chaquejoul;
votre Silr_-ilce de cIliSsoI/COI/seFxel_/sa
belle apparence.
[] Retirez les grilles du brfileur et lagrille
d'&ent.
[]
Secouez bien la crbme de
nettoyage. Appliquez quelques gouttes
de (;EP_dXL_ BR'tTE ®*direcmment sur
la surfitce de c//issoI/.
[]
Utilisez un essuie-tout ou un tmnpon
de netto}age de surfime de cuisson de
c(_rmnique (:EP,AIXL_BI),_TE®*pour
nettover toute la surfi_ce de cuisson.
[] tIdlisez un chifton sec (ill un
essuie-tout pour retirer tous lesr&idus
de nettoyage. Aucun besoin de rincer
REMARQUE:IIest tr_simportantdeAlEPAS
chauffer/asurfacedecuissonavantqu'diene soit
biennettoy_e.
Ufilisez un tampon de nettoyage
de surface de cuisson de c#,ramique
CERAMA BRYTE'*'.
Residus braids
AVERTISSEMENT: votresurfacedeverrepourrait
OtreENDOMMAGKsi vousutilisezflestampons
r#curerautrequeceluiindusavecvotreunit#.
[] I,aissez la surfime reti'oidir.
[] Retirez les grilles du brfileur et la grille
d' (}x/eliL
[] Appliquez quelques gouttes de
{;EP_I_L_ BR'tTE ®*sur route la surfi_ce
de r&idus brfil&.
[] Utilisez un tampon de nettoyage de
surfi_ce de cuisson de c{_ramique
{;EP_[X,£_ BRUTE®' pour fl'otter la
section eli appliquant de la ibrce au
besoin.
[] S'il reste des r&idus, r@(_tez les (_tapes
indiqu(4es l)r&&lenmmnt, au besoin.
[] Pour une protection suppl(_mentaire,
al)r_s moir retir(_les r&idus, polissez
toute la surfitce avec le nettotmit
de surthce de cuisson de c0ramique
CERAMA BP,'tTE®*et un essuie-tout.
Le grattoir de surface do c#ramique
CERAMA BRYTE _*et mutes
fournituros rocommand#es sort
disponibles aupr@s du centre de
pi@ees. Consultez les instructions
de la section "Pour commander les
pi#ces" de la page suivante.
REMARQUE : n'utilisez pas de lame
6br6ch6e ou 6mouss6e.
Residus braids, importants
[] I,aissez ]a surfive refroidix:
[] Retirez les grilles du brfileur et la grille
d'&'ent.
[] Utilisez un gmttoir a lame de rasoir _'_
tII/seul bord fi un angle d'em,iron 45
degT& contm la sm'fime de verre et
gratmz la sale\& I1 fimdra peut4tre
appliquer de la pl_ssion sur le gmttoir
pour l_drer les r&idus.
[] Apr0s a\oir gratt(4, d(_p/lsez quelques
gouttes de netto}ant de surfhce de
[]
cui_son de c4nunique (;EIL_IXL_
BR3TE _* sur route la surfi_ce aux r&idus
b_ fil4s. Utilisez un tampoII de iletto_lge
de surt:ace de cuisson de c4nmfique
(;ERA_L_ BR'tTE ®*pour reti_>r
tout resin de r&idus.
Pour une protection suppl0mentaire,
apr&s avoir retir0 les r&i(hls, polissez
toute la surJhce mec le nettowmt de
surfitce de cuisson de c(_nm-dque
CERA_/\ BR'tTE ®*et un essuie-tout.
*I'olo hs modbles (mladiens, ldilisez un modH*' (quivalen l a/.,]nvuv(e /m* Ma& lol:*que k,*]mxhl£* (;:EI_b_LI
BR YT1"_vne _(>ntDas (Fq?onibll!s. (2ro?tgZlteZM_zbe t¢r/dm:(me_ l l'a*t_ polo <:om,la_de_ gigsDmgUzits de _elto),a,gv
de _( ha,,gv.
37
Surfacede verre--possibilite de dommagespermanents.
Les deversementssucres (tels
que gelees, fudge, bonbons,
sirops)oulesplastiques fondus
peuventpiquer lasurface de
cuisson (non couverte pas la
garantie) a meins que vous ne
puissiez lesretirer tandisqu'ils
sent encore chauds.Attention
enretirant les substances
chaudes.
Assurez-vous d_tiliser un
gratteir a lame de raseir neufet
tranchant
N_tilisez pas de lame
_meuss_e eu _brechee.
Dommages de deversements sucres et de plastique fondu
[]
[]
Eteignez toutes les unit_s de surIhce
et avec des gants de cuisiniet; retirez
les casseroles chaudes et les grilles.
Portez des gants de cuisinier :
a. Utilisez tm grattoir 5 lame de
rasoir 5 tm seul bord (grattoir de
suI_hce de cuisson de c_ralnique
CEIL_IA BRYTE ') ) pore"
d(_placer le d_ve_ement ve_
tm endroit fl'ais sur le sm_hce.
[] Vous pou;ez laisser le restejusqu'5
ce que la sm-li_ce refi'oidisse.
[] N'utilisez pas les tmit_s de sm'ti_ce 5
nouveau a;ant d'a;oir retir_ tousles
r_sidus.
REMARQUE :s7/g a d@ des pl)Ores ouun
enfoncementde/a surfacedeverre,17faudra
rernplacer/everrede/a surface.Dans ce cas,
i/faudra une r@aration.
b. Retirez le d&,e_sement avec tm
essuie-tout.
Pour commander les pieces
Po/lr ('Oilli//[ln(lei" le nettovant de Stlll'il('e
de cuisson de c(_ramique CERAMA
BRYTE ') et le grattoir de suriilce de
cuisson, veuillez appeler notre numg_ro
sans fl'ais :
Centre national de pieces .... 800.661.1616
www.electromenagersge.ca
CERAMA BRYTE®nettoyant
de surface de cuisson
de ceramique* ............. # I/VXTOX300
CERAMA BRYTE_ grattoir
de surface de cuisson de
ceramique* ............... # WXTOX030£
Trousse.................... # WB64XSO£7
(latrousse inclutla cr_rneetle grattoir de
surfacedeculsson)
CERAMA BRYTE_ tampons
de netteyage de surface
de cuissondeceramique* . . . # WXTOX350
* l'ou_ les modbles (:_nadien_, ulili_ez iin mo&;le (qlli-_ alent ap/nz)uz _;(pa* Mabe lol:squ_ I__ /nz)dllilf (;l l_AMA
de _vdla_g_'.
38
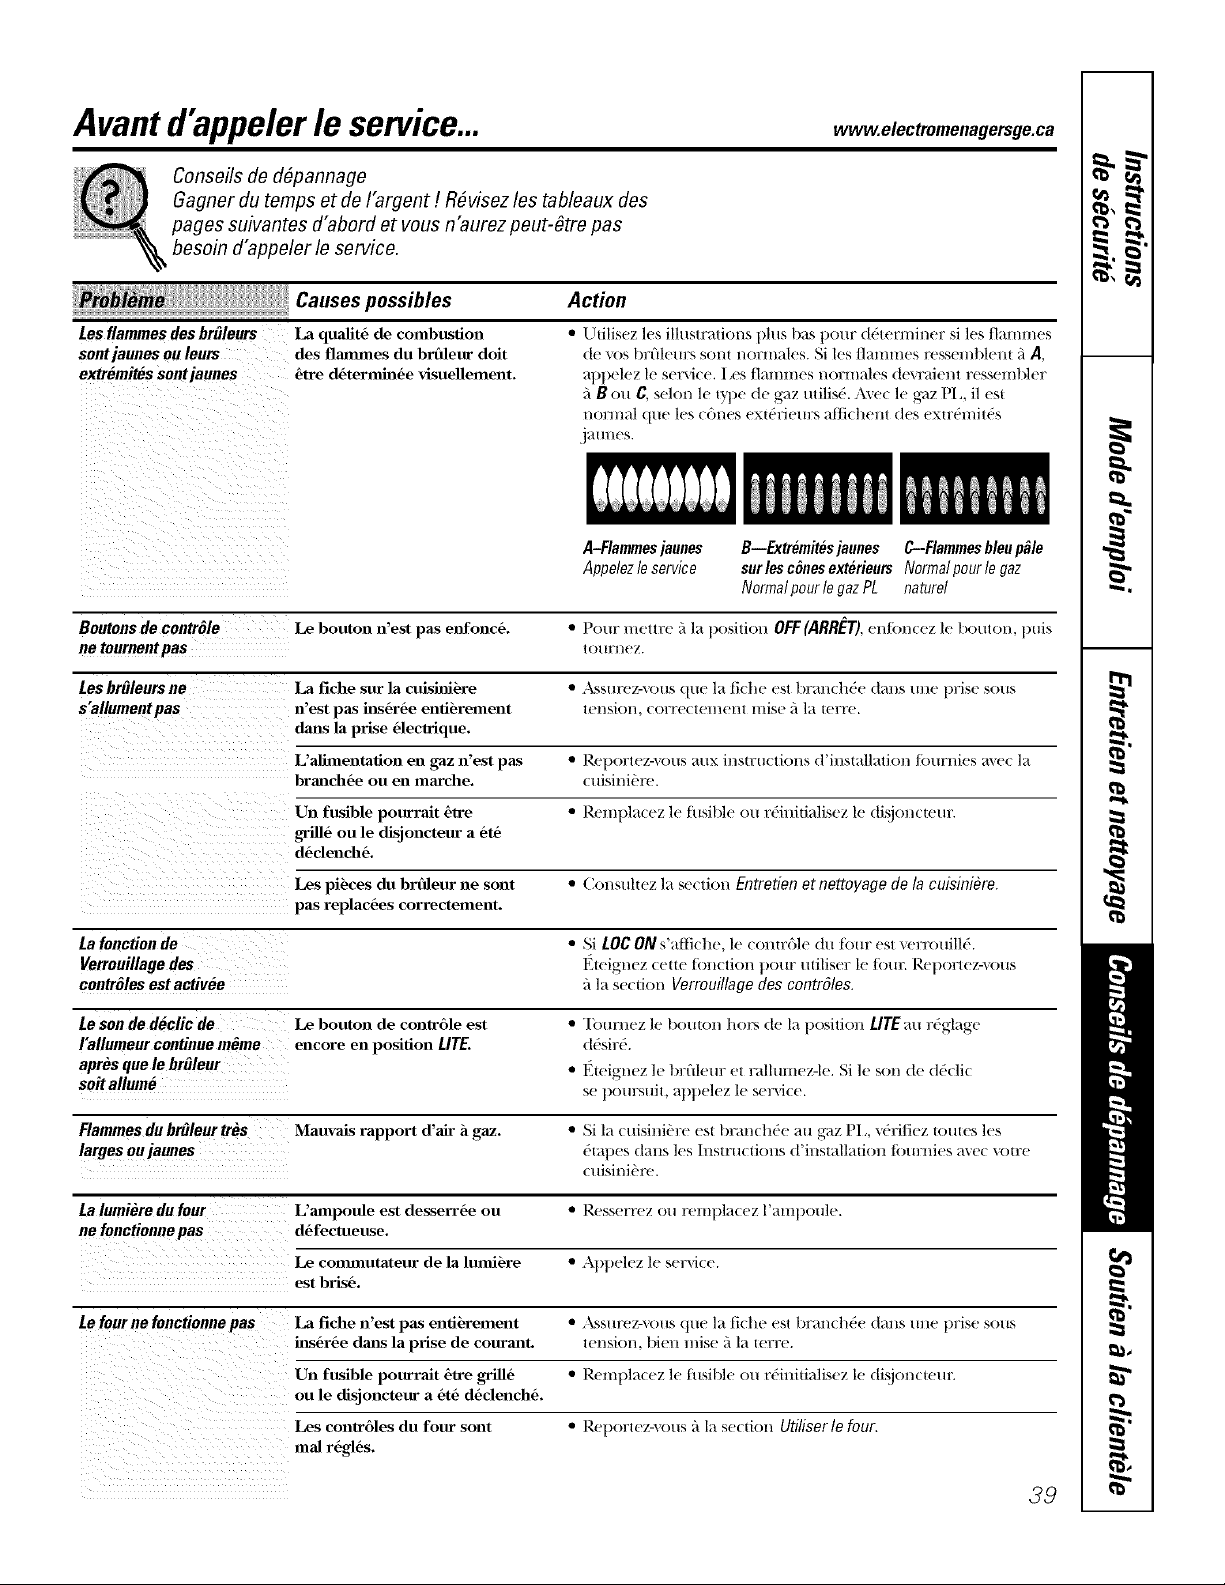
Avant d'appeler le service... .e,ect,ome,agersge.ca
Conseilsde d#pannage
Gagner du temps etde I'argent !R#visez les tableaux des
pages suivantes d'abord etvous n'aurez peut-#tre pas
besoin d'appeler le service.
Causes possibles
Lesf,ammes des br_leurs La qualit6 de combustion
sent jaunes ou leurs des flmmnes du brfileur doit
extremites sontjaunes _tre d6termh16e visuellement.
Action
• Llulisez les illustratious plus has pour (toerminer si les ttammes
(te _)s br_fleurs sore normales. Si les flammes ressemt)lent fiA,
al)l)elez le service. Ies flammes normales (tcvraient ressembler
_'_B ou C, selon le tyl)e (le gaz utilis4. A_('c le g_lz PI,, il est
n(mnal que les ctnes ext(qJem:s allichent des exu:('mit('s
j_tlll l(_S,
C-Flammes bleupMe
A-Flammesjaunes B--Extremites jaunes
Appolezle sorvice sur /es cSnesexterieurs Normal pour le gaz
Normal pourle gazPL naturel
Boutons de contrMe Le bouton n'est pas elffonct. " Pour m('iire _ la position OFF(ARRET). ('n/bnccz le boulon. |)uis
ne tournent pas lotlrl/eZ.
LesbrOleursne La fiche sur la cuishfitre " _\ssurez-xous quc la lithe csl brmzcl_de daus tree t)risc sous
s'a,/umentpes n'esl pas h_trte entii_rement lcl/siol/, correcl('m('nl//list fi 1_1|OFF('.
dmls la prise 61ectrlque.
L'alhnentation ell gaz n'est pas • R('|)orlez-_ous aux instruclious d'inst;dlalion JDurnics m('( la
branch6e ou en marche, cuisinibre.
Un fusible pourralt 6|re • P.emplac('z lc fusible ou rdinflialiscz le disjoncmur.
grill6 on le dlsjoncteur a 06
dtdench&
Les piL_es du brfileur ne sont • (_'OI/MII|('Z 1_1seclion Entrotion ot nottoyago do [a cuisiniOro.
pas replac6es correctement.
La fonction de • Si LOCON s'alt]chc, le (on|r51e (t/1 [bur esl _,('rrouill('.
Verrouillage des E|('ig|zez (e|w tbu(-tJon pour t||ilis('r 1(' lot|r. R('porlt'z-_ous
contr#les estactivee 5la scc|ion Vorrouillage dos contrSlos.
Le son de d_c,ic de Le bouton de conlrtle est "[buru('z 1('bou|(m ho_ (t(' la posidon LITE au r('glagc
I'allumeur continue melne encore en position UTE. ddsird.
aprOsque le brOleur • Etcig|zcz le tnTtleur et rallumez-|('. Si le son de dd(-li(
soitallume s(. t)om'sufl, apl)t'h'z 1(' scrvi( c.
F,ammes dubrOleurtr_s Mauvais rapport d'air h gaz. " Si la (t|isi|fitrc cst bra|u hdc au g_lz Pl,, \driJicz toutcs h's
larges oulaunes d|apes claus ]('s/uslru('|ioHs d'iusl;dla|ioH [()tzrl/ies axe(- ,,o|r('
(uisinibrc.
Lalumi_re du four L'mnpoule est desserrte ou • Ress('rr('z ou reml)la(ez 1'ampoule.
ne fonctionne pas d6fectueuse.
te €Olnlllntateor de la luntitre " At)])('l('z 1("S(T_(e.
est bris6.
Le four no fonctionne oas La fiche n'est pas enti6rement • ,\ssur(,z-vous qt|c la ti(h(' csl bnm(l_&' (trois tree t)risc sous
hlstrte dmls la prise de conrmlt, lcnsion. 1)ion raise fila |crrc.
Un fusible pourrait {'Ire grill6 • P,emplaccz lc fltsiMc ou r('initialiscz le disjonctcun
on le dlsjoncteur a 06 dtdencht.
Les conlrtles du four sont • b_.('porlcz-vous fila see|ion Utilisorlo four.
real rtglts.
39
Avant d'appeler le service...
Consefls de d#pannage
Lesalimentsne cuisent
ou ner_tissentpas
Action
• Ret)orwz-xous _'{la se(don Utiliser le four.
Causes possibles
Les conlrtles du four sont
nlal rt#ts.
La position de la clayette est • Reporwz-\ous _'_la se(tiOll Utiliser/e four.
hlcorrecte ou la clayette n'est pas
fi niveau.
On utillse la mauvalse taille • Rei)ort('z-\OtlS _|_/Se(tiOll UtiJiser [e four.
de casserole.
Le fllermostat du four • Rel)ortez-\ous _|a se( doll Ajuster le thermostatdu four-
doit _,Weajustt. Faites-le vous-mOme !.
Lesaliments ne grillent Les contrtles du four sont • •%surez-\ ou,_ (t'enlbn(er la lou(-he BROILHI/LO
pas correctement nlal rtglts. (griller dthaute/basse tempfrature ).
l_ mauvalse position de clayetie • Report('z-\ous au Guide pour grillet:
est udliste.
Batterle de cnishle ne convlent pas • Potlr o])t('llir (|e |)Ol)S r('.',tl|t_llb, ulili,_('z tm tlSlelL',ile
pour ,_en (te (-ui,qu(' (-out,'tt pour l;_gdllade.
La sonde est branch6e dans • l)('lmnl(-hez el relirez ]a sonde (Ill {[)tn'.
la prise du four.
_k certahls endroits, le courmlt • Pr('( haullbz F('l('meut (ill gril })('ll(l;ml 10 n/il/tlt('s.
(tension) peut 61re falble. • (;_illez ])('ndmlt t)ltls lougtemps ({ue la p('riode r('(omulm_d('e
(trois h" Guide pour grillet:
Latemp#raturedufourest Le fllermostat du four doit • Rep(n'tez-\(ms_(las(.(fiouAjusterlethermostatdufour-
trop chaude ou trop froide 6We ajustt. Faitesqe vous-m#me !.
Laportedufouresttordue La porte est hors de position. • Puis(lu('l_*l)orlcdelburs('relire, elh'sed('l)l;_Cel)m'R)isdm'mlt
l'iuslallafion. Relirez el repl;, ez la t)orle du tbm_ Re])orwz-\ ou._
_'(k,section Retrait de la porte dufour.
Le tiroirderangement _ support du droir arrli_re • Repl;. ez le droir. (](msuhez les in._m,(liOl,S de Retraitdu
est tordu repose sur le dessus du rail guide, tiroir de rangement dm is L_ _e(liou Entretien et nettoyage de la
cuisinifire.
Le tiroir derangement Le cordon peut obstruer le firoir • P.cpla(ez le liroir el le (or(ton. ('.(/1,silllt'z |e._ illslrll( li(/llS de
ne se [erme pas dmls la pattie hfftrleure arrii_re Retrait du tiroir de rangement dm is la se(lion Entretien et
de la cnlshli_re, nettoyage de la cuisinibre.
Le support du firoir arribre • kepl;, ez le droir. ('.onstdwz les i,L',m,(liol,Sde Retra]tdu
repose sur le dessus du rall guide, tiroir de rangement dm is la section Entretien et nettoyage de/a
cuisinifire.
40
www.electromenagersge.ca
L'horlogeet la minuterie
ne fonctionnentpas
Causes possibles
La fiche n'est pas hls6r6e
enfibrement dmls la prise
de courant.
Action
• A'_sun'z-vous de la Iidle soit brandl('e dm_s une prise sous
tension, l>ien raise _'_1_1terre.
Un fusible pourralt 6tre grill6 " Rempl_,cez lc hlsiblc ou rdiuitialiscz lc disjo,)ctcur.
on le disjoncteur a 6t6 d6dench6.
Les contrgles du four sont • ReporWz-_ous 5 In section Utilisorl'horlogo otla minutorio.
real rOgl6s.
Le fournes'autonettoiepas La temp6rature du four est trop • [,_dsscz l_ cuisini0rc rcJi'oidir ct rdgtez |cs comr6lcs.
61ev6e pour r6gler 5_l'autonettoyage.
Les contrNes du four sont • Reporlcz-_ous _'_la section Utilisor Io four autonottoyant.
real regl6s.
La sonde esl brmlch6e dans • Retircz la sonde du Ibm:
la prise du four.
Son decraquement ou Ced est le son de lnOtM • ("cst lJOrl//;d,
de petarade qtd chauffe et refroidit durmlt
la cuisson et le nettoyage.
Fumee excessive durant Salet6 excessive. • Eutbuccz l_ touche CLEAR/OFF(annulation/arr_t). ()u\rez
un cycle denettoyage h-sJbnOm's pour ('liminer la Jiml('e. Auendez que le _o>'mn
LOCKED(verrouille) s'dteiglle. Essuvez le sm'plus de s;det('
ct r('iuitialiscz lc ncttoy;tgc.
La porte du fourne s'ouvre La temp6rature du four est • [ ,aisscz |e timr rcJi'oidir sous |a lcl//])dl_llttrc de vcrrouillagc.
pasapr_s un cycle de trop 61ev6e.
nettoyage
Lefour n'estpas propre Les contr61es du four sont • ReporU'z-vous _'_l_ sec fion Utilisor Iofour autonottoyant.
apr_s un cycle denettoyage lnal r6gl6s.
Le four 6tait tri_s sale. • l_sSllV('z lotlt (l('ve/'sel//ellt il//])ort;ll/l ;l\_ll/t de |_l]Rer le (v(l(' de
I/Ctlo_';l_e. [ ,(% J_,)tlrs lr('s S;llCS doi\eut sotl_+cnl £'trc I/Cllox,('s _l
I/O{l_+e_l/| Ct pcl/(|;_l/t })]tlS |ongtc//l})s.
LOCKED(verrouille) Le cycle d'autonettoyage a 6t6 • Fcnuez la porte du tbur.
clignote _ I'afficheur ehoisi, mais la porte n'est pas
ferm6e.
to voyant LOCKEDest La porte du four est verrouill6e • Eutbuccz 1;_totlchc CLEAR/OFF(annulation/arr_t). l +;dsscz lc
allume Iorsque vousvoulez par la temp6rature 5_l'hlt6rieur J()tlr reti'oiditz
cuisiner du four n'est pas encore pass6e
sous la temp6rature de verrouillage.
a F--eL un hombre ou Vous avez tm code d'erreur • Eutbuccz 1_touche CLEAR/OFF(annulation/arr_t). Remcttcz tc
lettre _ clignotent _ de fonction. J()t_re__ marche.
I'afficheur
Si le code de foncfion se r6pbte. • Cout)ez le courm_t 5 la cuisiniOre t)en(Im_t au moius 30
secondes, lmis rel//etl('z le COtlt'_lnt. Si le co(t(' d'erre/ll7 de
Jonction se r@bte, ai)pelez le service.
47
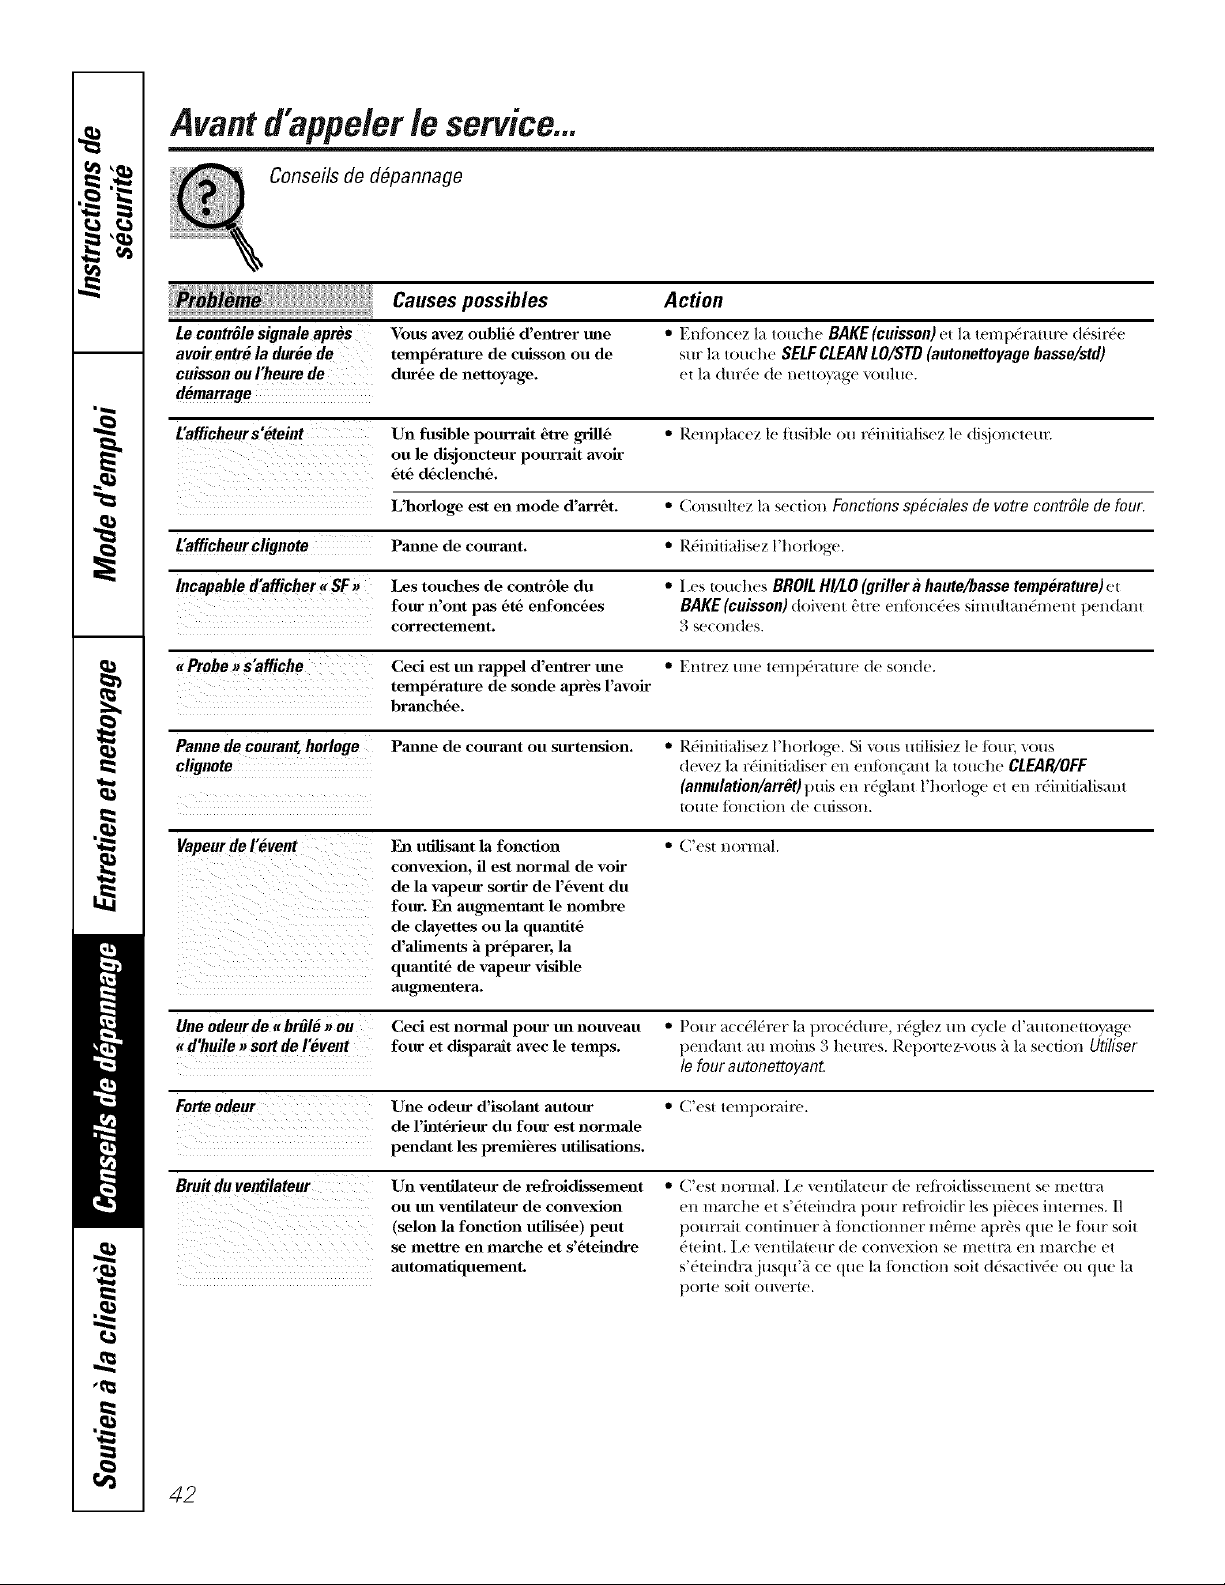
Avant d'appeler le service...
Conseilsde d#pannage
LecontMle signale apms
avoir entr_ la duree de
cuisson ou !'heure de
demarrage
Causes possibles
Vous avez oubli6 d'entrer tree
temp6rature de cuisson on de
dur6e de nettoyage.
Action
* Enfon(ez la tou(he BAKE(cuisson) et la temti'ramre d('sir('e
sur la touche SELF CLEAN LO/STD (autonettoyage basse/std)
et l_l(hu:('e (|e n('tto}_ge 'a)ulue.
L'afficheurs'eteint Un fusible pourrait Ore g_6 • Rempl_wez h' fusibk' ou r(quitialisez le di_iou(-leur.
on le disjoncteur pourrait avoir
06 d6cleneh6.
L'horloge est ell nlode d'arr_t. • Cousuhez 1_ .',('(don Fonctions sp#cia/es de votre contrSle de four.
Eafficheurclignote Pmme de courmlt. = R('iuili;di_ez l'horloge.
Incapable d'afficher _ SF _ Les touches de conlr6le du • [.es touches BROIL HI/LO (griller a haute/basse temperature) et
four n'ont pas 6t6 enfonc6es BAKE (cuisson) doiveul _'lre eu[bu(-('es silmlllm_('mel/t pen(trait
correctement. .3_e(-oudes.
aProbe, s'affiche Ceci est tm rappel d'entrer tree * EI/1FCZtill(' tempbrature de sonde.
temp6ratnre de sonde apr_s l'avoir
brauch6e.
Panne de courant, horloge Patme de courant ou surtension. * R(_iMli_di_ez )'horloge. Si \otis utilisiez ]e |but; \ ou_
clignote dewz la r6iuiti_diser eu euibu(-m_l l_ tou('be CLEAR/OFF
(annulation/arr_t)puis e, r('glam |'horloge et e, r('iuid_zlismzt
totlte |()ll(-liOll de ( t/isSOll.
Vapeur deI_vent _hl utilisallt la foncfion • ('.'est normal.
convex|on, ilest normal de voir
de la vapeur sorllr de l'6vent du
four. 1_)1au_nentant le hombre
de dayettes ou la quanllt6
d'aliments h pr6parer, la
qumltit6 de vapeur visible
au._nentera.
Une odeur de abr_16 _ ou Ced est normal pour tm nouveau • Pour _wc6l('rcr l_ proc('durc, r6glez tm c\vcle d'm_toucttoy_zge
_d'huile _ sort deI_vent four et disparalt avec le temps, pcudm/1 ml moles 3 beurc_. Reportcz-\ous i*1_ section Uti/iser
le four autonettoyant.
Forteodeur Une odeur d'isolam autour • C'('st tempot_dre,
de l'h_t6rieur du four est normale
pendant les prenlibres utilisatious.
Bruit duventilateur Un venlilateur de refroidlssement t C'est normal Lc veutilmeur (|e rcii'oi(|issem('l_t se metml
ou tm venfilateur de convex|on ell tam'the el F6wiud_ pour refi'oidir les pi_'ces imcrues. I1
(selon la foncfion utilis6e) peut pourr_dl (out|liner il |On(d(muer mbme _q)ri's que le/Our soil
se ulet_e ell l_Ial'che et s'6tehldre ('teil/1. Le Vellti|_ttetll" de (ol/_exiol/se lllettl_l ell //l_il'(|/e el
automafiquement, s'(qeindrajus(ltFfi (e que l_ |Ou(fion soit (|6s_wtiv('e ou que L_
})orle soit ()ll\e£te,
42
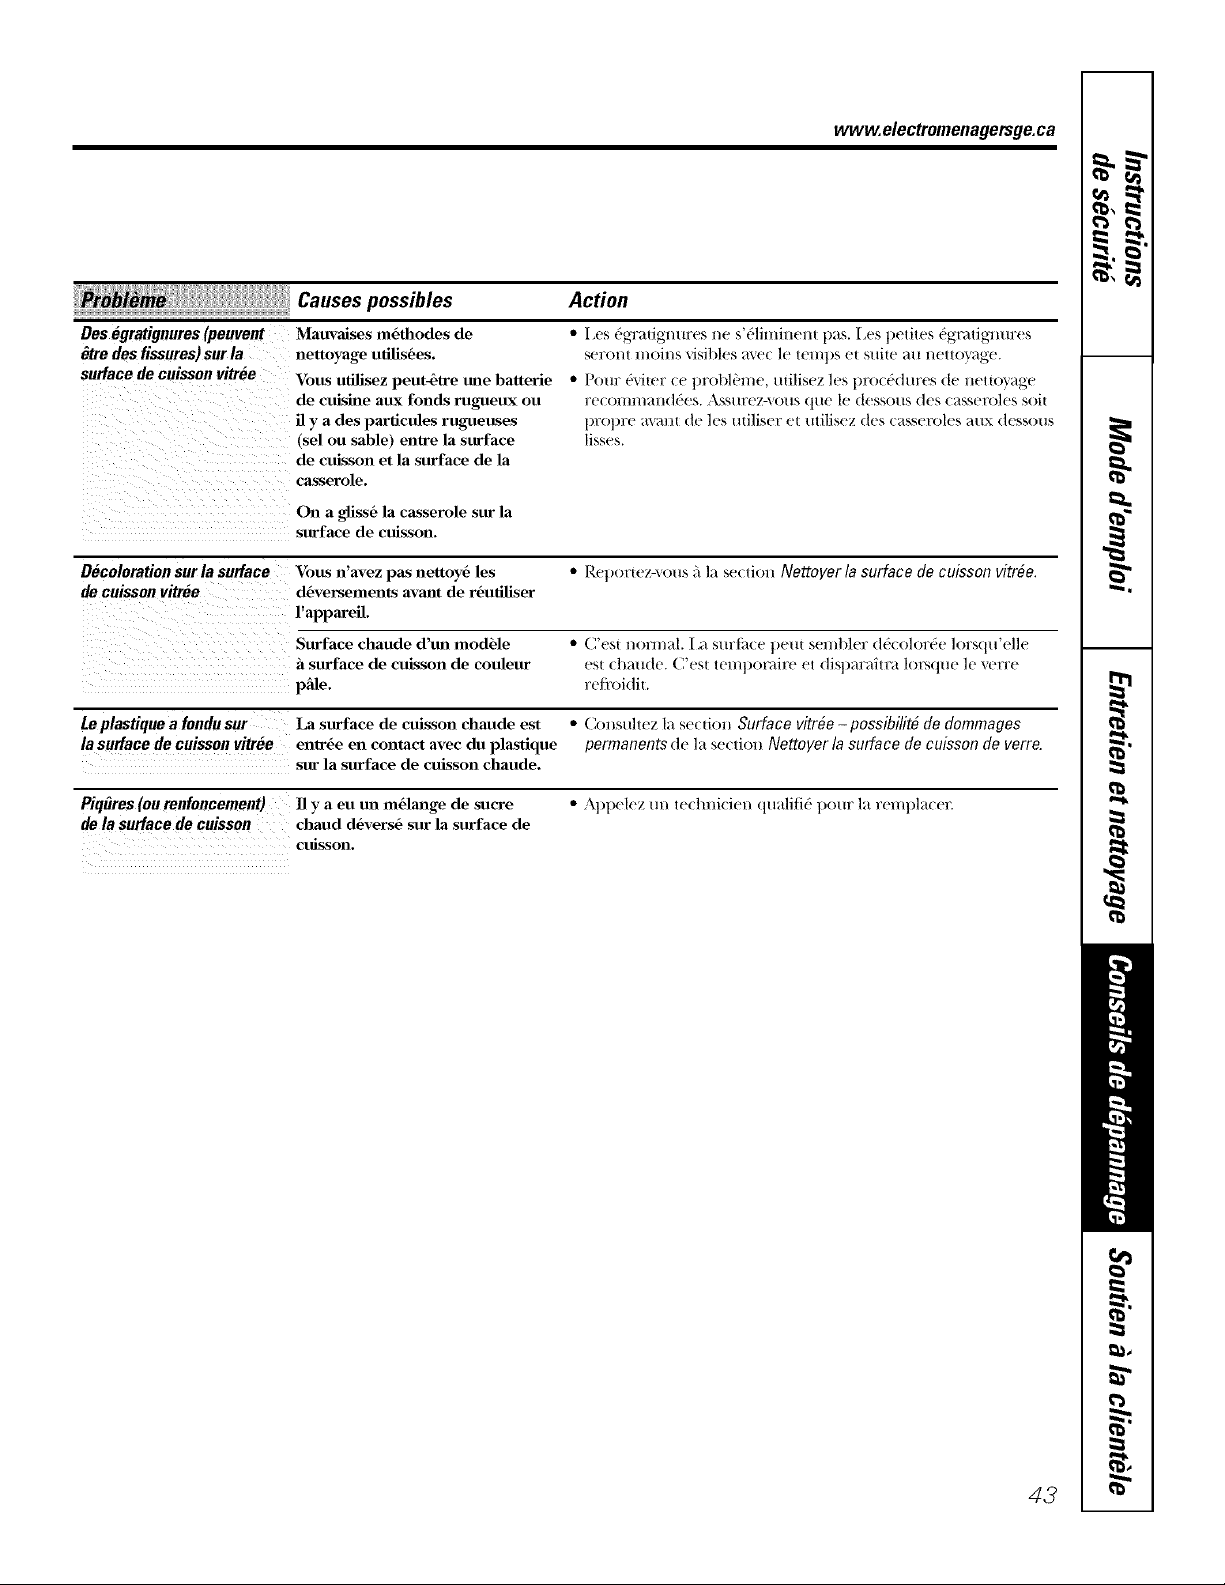
vvww.electromenagersge.ca
Causes possibles
Des#gratignures (peuvent
#tre des fissures)sur la
surface de ouisson vitree
Action
Mauvaises m6fllodes de
nettoyage ufilis6es.
Vous utilisez peut-_tre tree batterie
de cuishle aux fends ru,_etLx ou
il y a des particules rugueuses
(sel ou sable) euWe la surface
de cuisson et la surface de la
casserole.
• Ies dgTatiglmres ne s'(qiminent pas. I,es petites dgmdgmures
sel?oI/t l//Oil/s visibles a_vc le tel//ps eI SlliIe all I/etlo}_l_e.
• Pollr {wiIer ce proM,'me, utilisez les procOdures de llettoyage
YeCOllll//alld('es. _\Ss/lrez-\ OIlS q/le le (|esso/IS des cassel'oles soil
propre avmJ,t de les miliser et utilisez des casseroles aux dessous
lisses.
On a gliss6 la casserole sur la
surface de ctfissou.
Deceleration sur la surface Vous n'avez pas nettoy6 les " Rel)ortez-\ ous 5 la s,v(lioli Nettoyer/a surface de cuisson vitr#e.
de cuisson vitMe d6verselneuts avmlt de r6u(iliser
l'appareil.
Surface chaude d'ml modble * C'est uovm;d. La sm'tsce peut sembler ddcolorde lorsqu'elle
5_surface de cuisson de couleur est chaude. C'est lempondrc el diN)m'aflr;_ lorsque le _('rre
pfde. re/i'oidit.
Lep/astique a fondu sur La surface de cuisson chaude est • C(.lstdlez l_ scoriae Surface vitr6e - possibi/it6 de dommages
la surface de ouisson vitrOe eu(r6e eu contact avec du plastique permanents de la secdou Nettoyer la surface de cuisson de verre,
sur la surface de cuisson chaude.
PiqOres (ourenfoncement) ]] y a eu tm ln6lmlge de sucre * Appelez m) te(hui(-ieu qu_difid pour la rempla(er.
dela surface de cuisson chaud d6vers6 sur la surface de
cuissou.
43
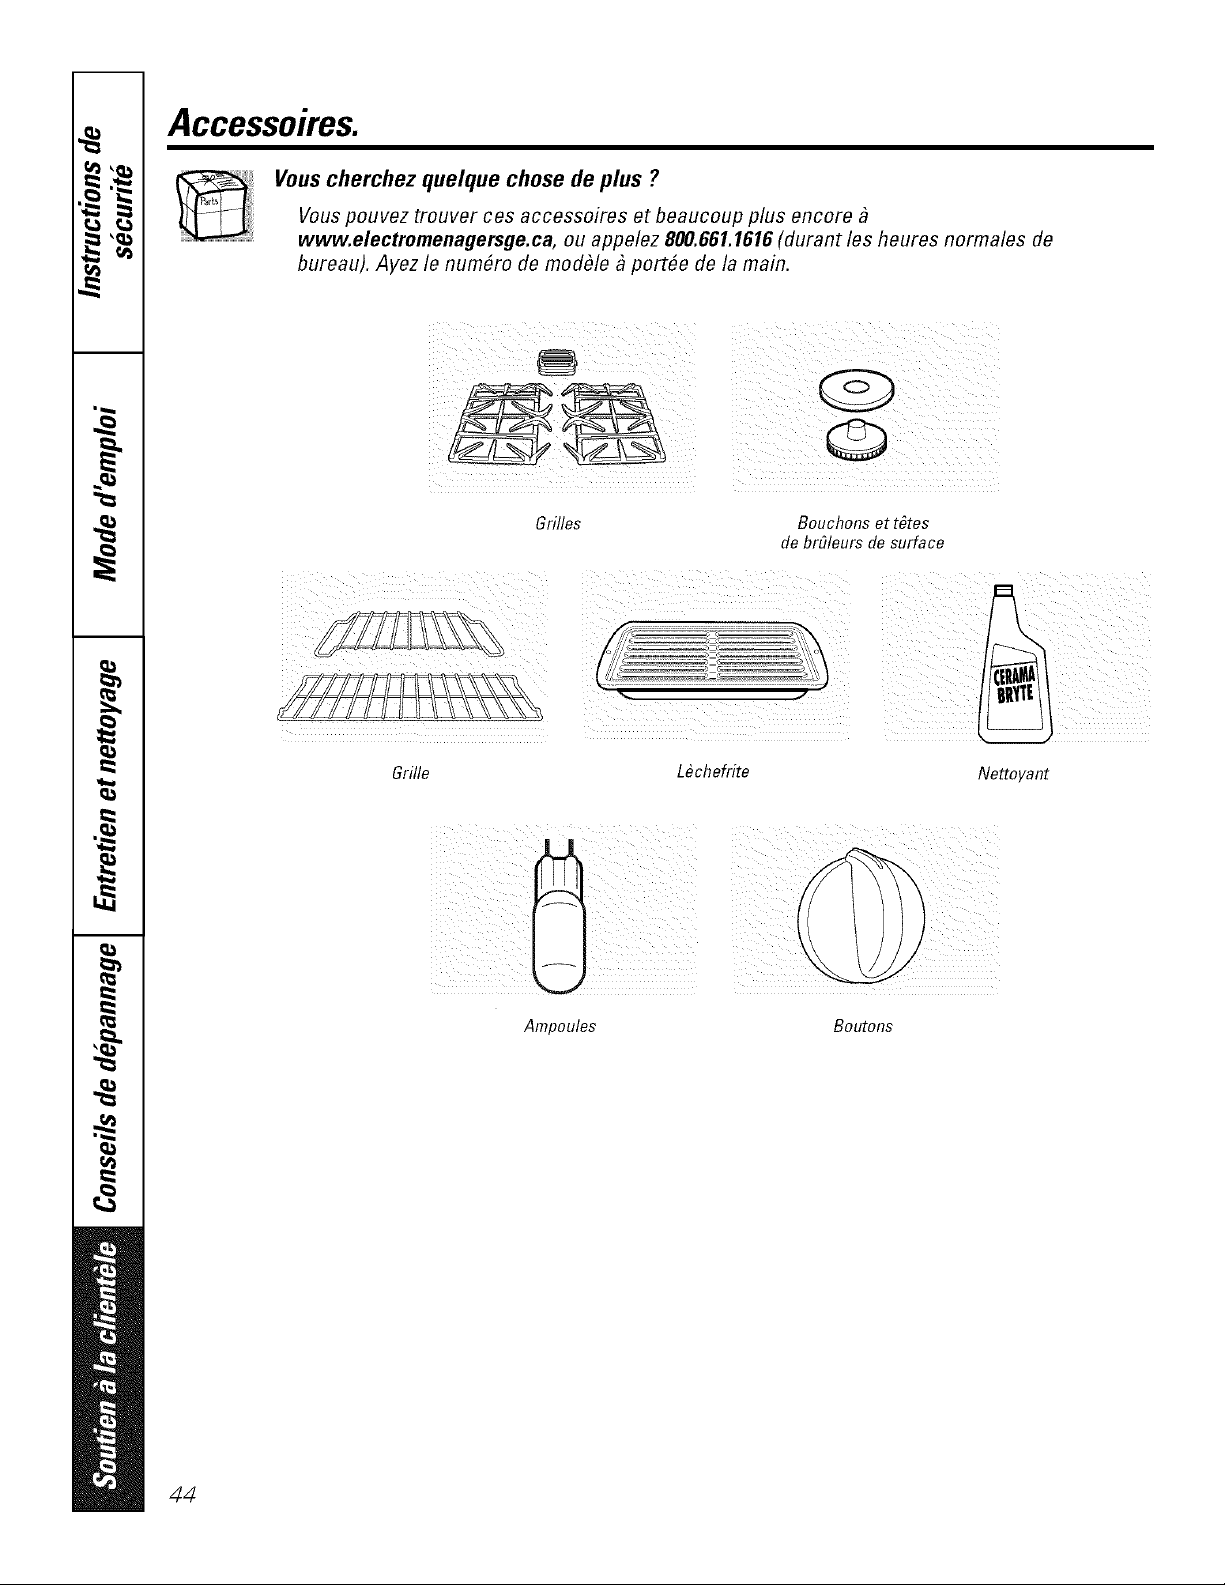
Accessoires.
_i Vous cherchez quelque chose de plus ?
Vouspouvez trouver ces accessoires et beaucoup plus encore
www.electromenagersge.ca, ou appelez 800.661.1616 (durant les heures normales de
bureau). Ayez le num#ro de module _ pottle de la main.
Grilles Bouchons et t#tes
de br£_leurs de surface
Grille
Lechefrite
Ne_oyant
Ampoules
Boutons
44
Notes. www.electromenagersge.ca
J
_w,_ _
_m
=g.
.M,
45
m
Notes.
_'_
q_
m
I
I
i
I
46
Garantie dela cuisiniere au gaz GE.
Tousles services sous garanfie sont foumis par nos centres
de service ou un technicien de service autoris# _ la clientele.
Pour le service, composez le 1.800.561.3344. Veuillez foumir le
num#ro de s#rie et le num#ro de module Iorsque vous appelez
pour obtenir le service.
Agrafez votre re_u ici. La preuve
de dated'achat original est
n#cessaire pour obtenir
I'entretien etlesr#parations
sous la garantie.
_: Maberemplacera:
De la date de
!'achat eriginal
Teute piece de la cuisink)re qui commit une d&fifillance suite 5 un d_flmt de mat_fiau
ou de tid)rication. Din'ant cette annee de garantie limit_e,Mabe fimrnira aussi, sans frais,
tousles services 5 la maison et tousles ti'ais de main d'oeuvre pour remplacer la piece
d6lbctueuse.
!i_:Les d6placements du service pour vous enseigner
comment ufiliser le produit.
!i::MauvaJse installation, livraison ou mah_tenm_ce.
::Ji::D6faillmlce du produit suite h m_ abus, mauvaise
utilisation ou ufilisation h des Fins autres que celles
pr6vues ou utilisation conunercia]e.
_: Dommages a la surface de cuisson de verre pax des
d6versements durcis de produits sucr6s ou du plastique
fondu non nettoy6s selon le mode d'emploi du mmmel
du propri6taJre.
!i?:Dommages _ la surface de cuisson de verre en utilismlt
des nettoymlts autres que les crbmes de nettoyage
recommmld6es.
!i_:Remplacement des fusJbles r6sidentielles ou
r6hfitiaJisation des dJsjoncteurs.
::Ji::Dommages au produit suite a ml accident, hlcendie,
hmndatious ou force majeure.
_: Dommages hldJrects ou cons6cutifs caus6s par des
d6fauts possibles de l'appareil.
::Ji::Dommages apr_s la livraJson.
_: Le service s'il est impossible d'avoir accbs au produit
pour ce faJre.
EXCLUSION DEGARANTIES IMPLICITES- Votreseul et unique recours est lareparation dupmduit selen
les dispositions decette Garantie limitee. Teutesles garanties implicites, incluant les garanties de
commercialite et d'adequation a un usage specifique, sent limitees a une annee ou a laperiede laplus
ceurte auterisee par la legislation.
I I,E GARANT N'EST PAS RESPONSABI,E DES DOMMAGES INDIRECTS. I
Garant : MABE CANADA IN(:. ]
d7
Soutiena la clientele.
'I Site Web appareils _lectrom_nagersGE www.electromenagersge.ca
Vous axez une question ou xous axez besoin d'aide pour xotre appareil (qectromg_nager? Conta('tez-nous
N" c
par lnternet au ,_lte www, eledromenagersge,ca 24 heures parjoui; tous lesjom_ de l'anng_e,
J
Servicede r_parations
Service de r_parations (;E est tout pros de vous.
Pour tifire r_parer xotre _lectrom_nager (;E, il sultit de nous t_l_phone_ au 1.800.561.3344.
1.800.561.3344
Studiode conceptionr#aliste
Sur demande, GE peut tournir une brochure sur l'am_nagement d'une cuisine pour les pei_onnes
5 mobilit0 rg_duite.
Ecrivez: Directeui; ]),elations avec les COI_SOlmnateuls, Mabe Canada Inc.
Bureau 310, 1 Factory im_e
Moncton, N.B. E 1C 9M3
Prolongationde garanfie www.electromenagersge.ca
Achetez un contrat d'entretien GE axant que xotre garantie n'expire et b(q_ficiez d'un rabais substantiel.
Ainsi le service apr_s-\ ente (;E sera totljotu_ l_'lapr_s expiration de la garantie.
Visitez notre site Web ou appelez-nous au 1.800.461.3636.
Pibceset accessoires
Ceux qui d_sirent r_parer eux-m&mes lem_ _lectrom_nagei_ peuvent recevoir pi(_ces et accessoires directement
_'lla nlaison (cartes VISA, Mastei(_ard et Discover accept_es).
tes directives stipulees dansle presentmanuel peuventOtre effectu_es par n'importe quelutilisateur, tes autres
reparations doivent generalement OtreeffectuOespar untechnicien qualifie. Soyez prudent, carline reparation
inadOquate peut affecter lefonctionnement sOcuritaire de rappareil.
Vous trouverez dans les pagesjaunes de votre annuaire le num(_ro du Centre de set\ice Mabe le plus proche.
Contactez-nous
Si vous n'_tes pas satistifit du service aprO>vente dont vous avez 1)(q_g_fici(_:
Premi&rement, conmmniquez avec les gens qui ont r_pai'_ votre appareil.
Ensuite, si vous n'&tes tot{joui3 pas satisfifit envovez tousles d&tails-imll_0ro de t&10phone COll_pi_is-au
Directeui; Relations avec les coi_SOlnnmteui_, Mabe Canada Inc.
Bureau 310, 1 gaCtOIT Im_e
Moncton, N.B. El(2 9M3
'1 Inscrivezvotre appareil _lectrom_nager www.electromenagersge.ca
Illscrivez votre appaxeil Olectmm_nager ell direct, aussit6t que possible. Cela am _liorera nos con/in unications
et notre serxice apr&s-\ ente. Vous pomez 0galenlent nous en;o}er par la poste le tblinulaire d'insclJptionjoint
j _'_xotre doc/li//entation.
Imprimfiaux Etats-Unis

