Loading ...
Loading ...
Loading ...
25
REPLACING THE OVEN LIGHT
Before any maintenance is started involving electrical parts of the appliance, it must be
disconnected from the power supply.
✓Let the oven cavity and the broil burner cool down;
✓Switch off the electrical supply;
✓Remove the protective cover;
✓Unscrew and replace the bulb with a new one suitable for high temperatures (300°C-
570°F) having the following specifications: 120V 60 Hz, 15W, E14;
✓Refit the protective cover.
NOTE: Oven bulb replacement is not covered by your guarantee.
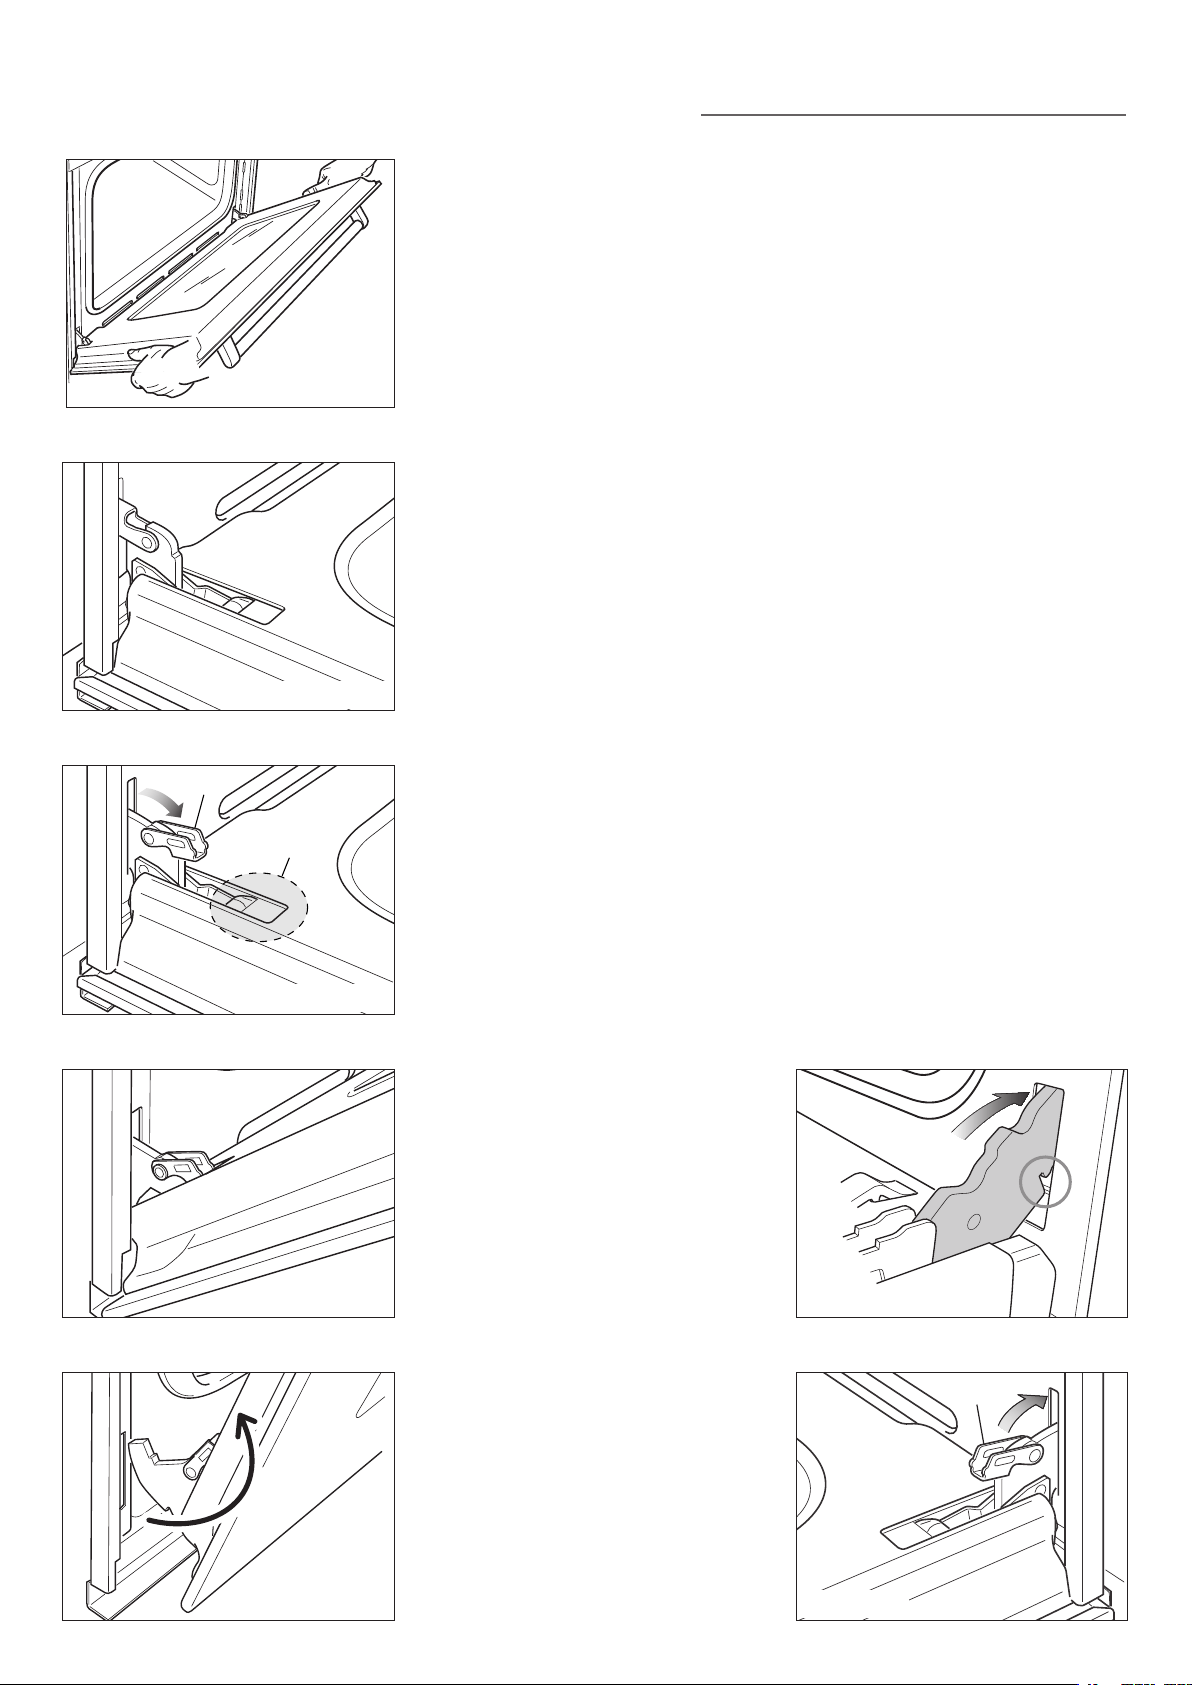
REMOVING THE OVEN DOOR
The oven door can easily be removed as follows:
– Open the door to the full extent (fig. 5.14a).
– Open the lever “A” completely on the left and right hinges (fig. 5.14b).
– Hold the door as shown in fig. 5.14.
– Gently close the door (fig. 5.14) until left and right hinge levers “A” are hooked to part
“B” of the door (fig. 5.14b)
– Withdraw the hinge hooks from their location following arrow “C” (fig. 5.14d).
– Rest the door on a soft surface.
– To replace the door, repeat the above steps in reverse order.
REFITTING THE OVEN DOOR
– Hold the door firmly (fig. 5.14).
– Insert the hinge tongues into the slots, making sure that the groove drops into place
as shown in the fig. 5.15a.
– Open the door to its full extent.
– Fully close the levers “A” on the left and right hinges, as shown in the figure 5.15b.
– Close the door and check that it is properly in place.
Fig. 5.14
Fig. 5.14a
B
A
Fig. 5.14b
C
A
Fig. 5.14d
Fig. 5.15b
Fig. 5.14c
Fig. 5.15a
Loading ...
Loading ...
Loading ...