Loading ...
Loading ...
Loading ...
USING THE STEPPER
The stepper features precision resistance cylinder s for long life and trouble-free operation; due _tothe
nature of resistance cylinders, it is recommended that the floor underneath the stepper be covered in
case of slight oil leakage. WARNING: The resistance cylinders become very hot during use. Allow
the cylinders to cool before touching them.
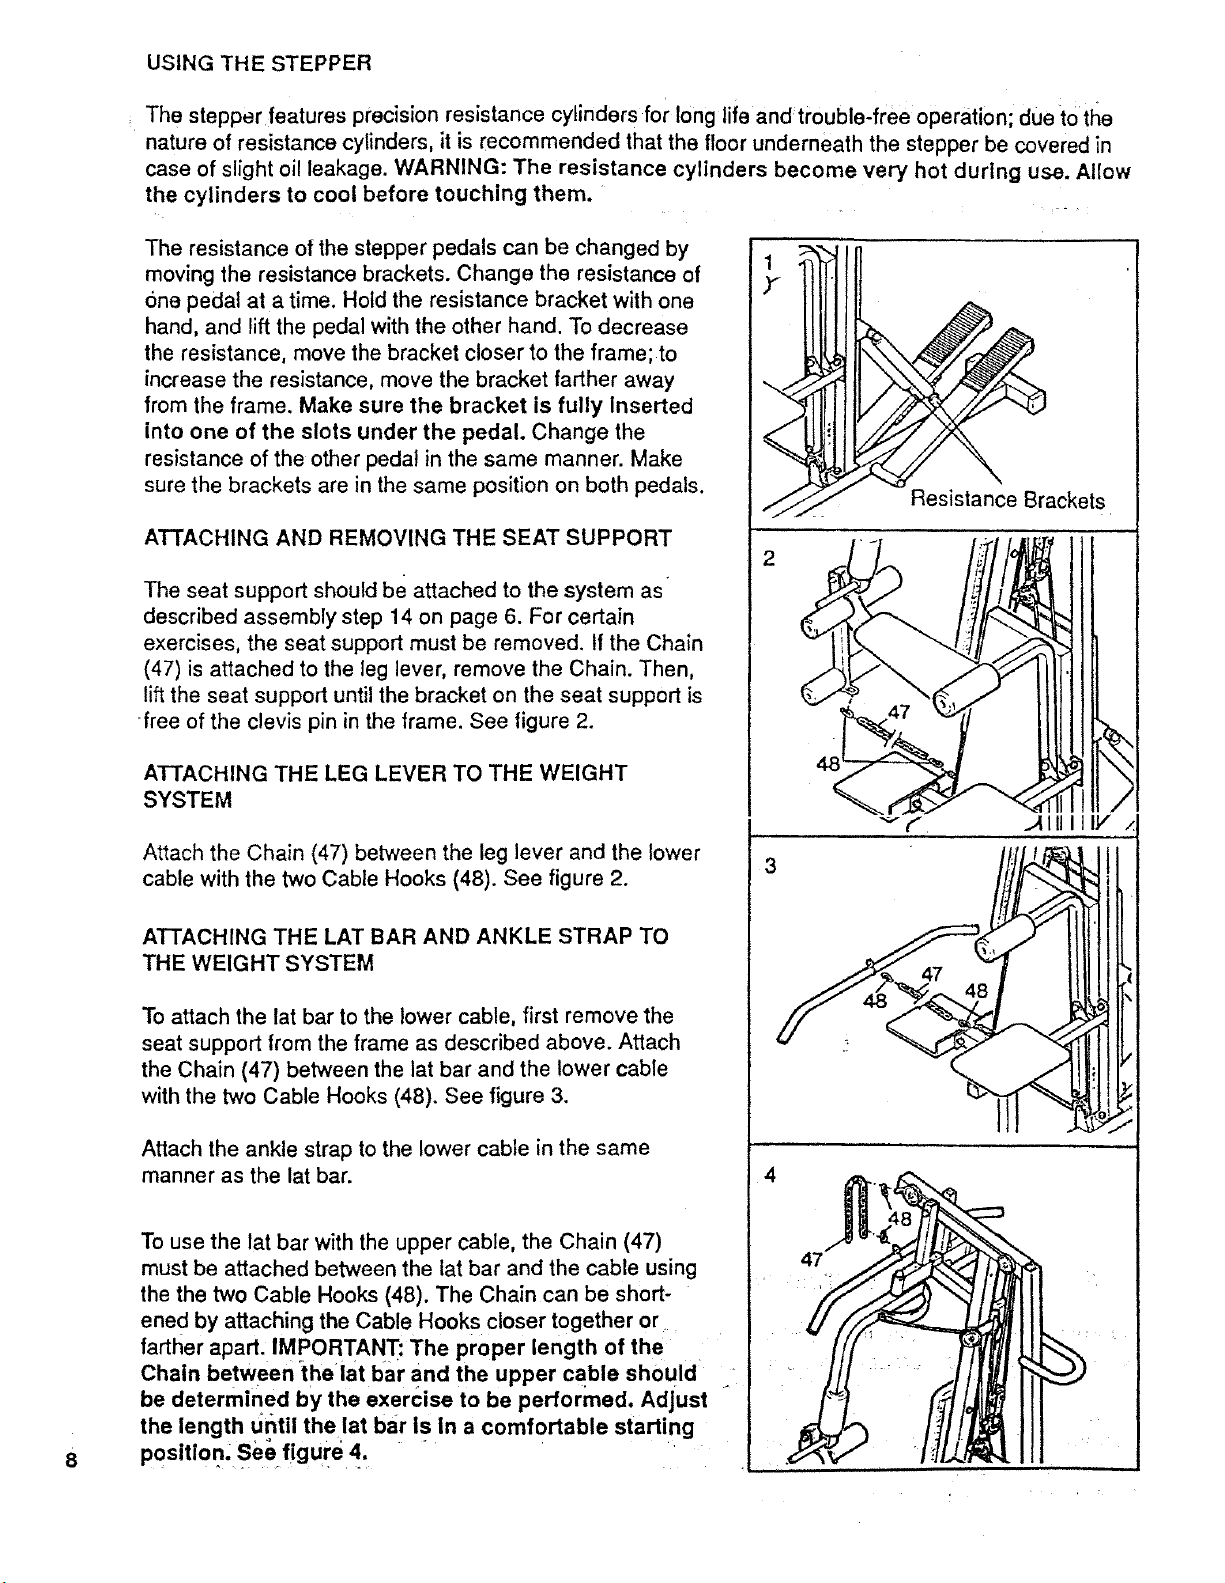
The resistance of the stepper pedals can be changed by
moving the resistance brackets. Change the resistance of
one pedal at a time. Hold the resistance bracket with one
hand, and lift the pedal with the other hand. To decrease
the resistance, move the bracket closer to the frame; to
increase the resistance, move the bracket farther away
from the frame. Make sure the bracket is fully Inserted
into one of the slots under the pedal. Change the
resistance of the other pedal in the same manner. Make
sure the brackets are in the same position on both pedals.
ATTACHING AND REMOVING THE SEAT SUPPORT
The seat support should be attached to the system as
described assembly step 14 on page 6. For certain
exercises, the seat support must be removed. If the Chain
(47) is attached to the leg lever, remove the Chain. Then,
lift the seat support until the bracket on the seat support is
flee of the clevis pin in the frame. See figure 2.
ATTACHING THE LEG LEVER TO THE WEIGHT
SYSTEM
Attach the Chain (47) between the leg lever and the lower
cable with the two Cable Hooks (48). See figure 2.
ATTACHING THE LAT BAR AND ANKLE STRAP TO
THE WEIGHT SYSTEM
To attach the lat bar to the lower cable, first remove the
seat support from the frame as described above. Attach
the Chain (47) between the lat bar and the lower cable
with the two Cable Hooks (48). See figure 3.
Attach the ankle strap to the lower cable in the same
manner as the lat bar.
To use the lat bar with the upper cable, the Chain (47)
must be attached between the lat bar and the cable using
the the two Cable Hooks (48). The Chain can be short-
ened by attaching the Cable Hooks closer together or
farther apart. IMPORTANT: The proper length of the
Chain between °theiat bar and the upper cable should
be determined by the exercise to be performed. Adjust
the length dr_til the lat bar is in a comfortable starting
posit on.Se .figure4'
Resistance Brackets
Loading ...
Loading ...
Loading ...