Loading ...
Loading ...
Loading ...
6 31-5000496 Rev. 2
Installation Instructions
Installation Preparation
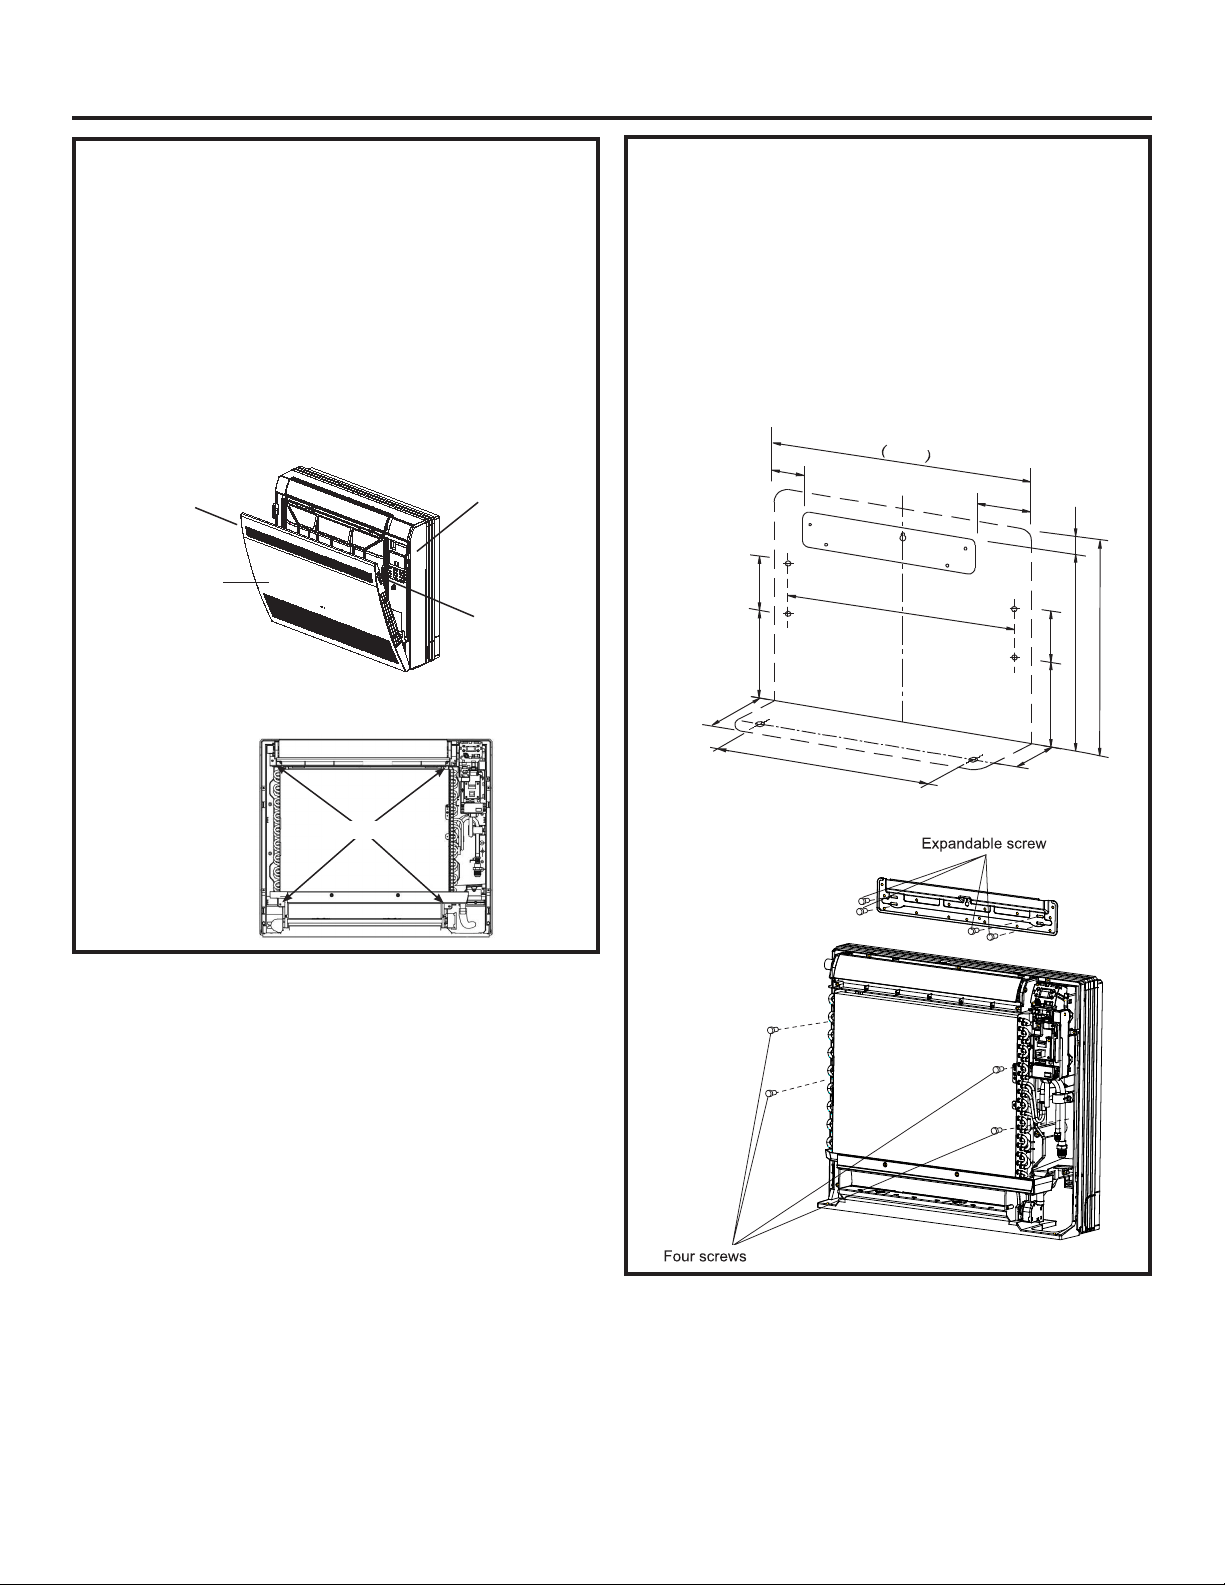
Step 2. Remove the Front Casing
1. Push down the filter cover locking tabs located at the
upper right and left sides of the filter cover to release.
2. Pull the filter cover towards you to remove it.
3. Locate and remove the 4 casing screws as shown in
the figure below.
4. The front casing will be free to remove. From the
bottom of the front panel, pull up and away from the
chassis and unhinge from the top to remove.
Filter Cover
Locking Tab
Locking Tab
Front Casing
Casing Screws
Console Installation
Step 3. Mounting Bracket (Low Wall Mount
Only)
If the unit is to wall mounted, the wall mount bracket is
required.
1. Affix the wall bracket to the wall, ensuring it is
horizontally level and vertically plumb.
2. Securely fasten the wall bracket to the wall using the
four supplied screws.
2.52
27.56
( Unit : in.)
5.28
25.16
24.80
5.91
9.92
8.66
6.30
8.98
5.71
22.60
(23.62)
1.02
Loading ...
Loading ...
Loading ...