Loading ...
Loading ...
Loading ...
Page:
8
User Manual:
Installation Instructions
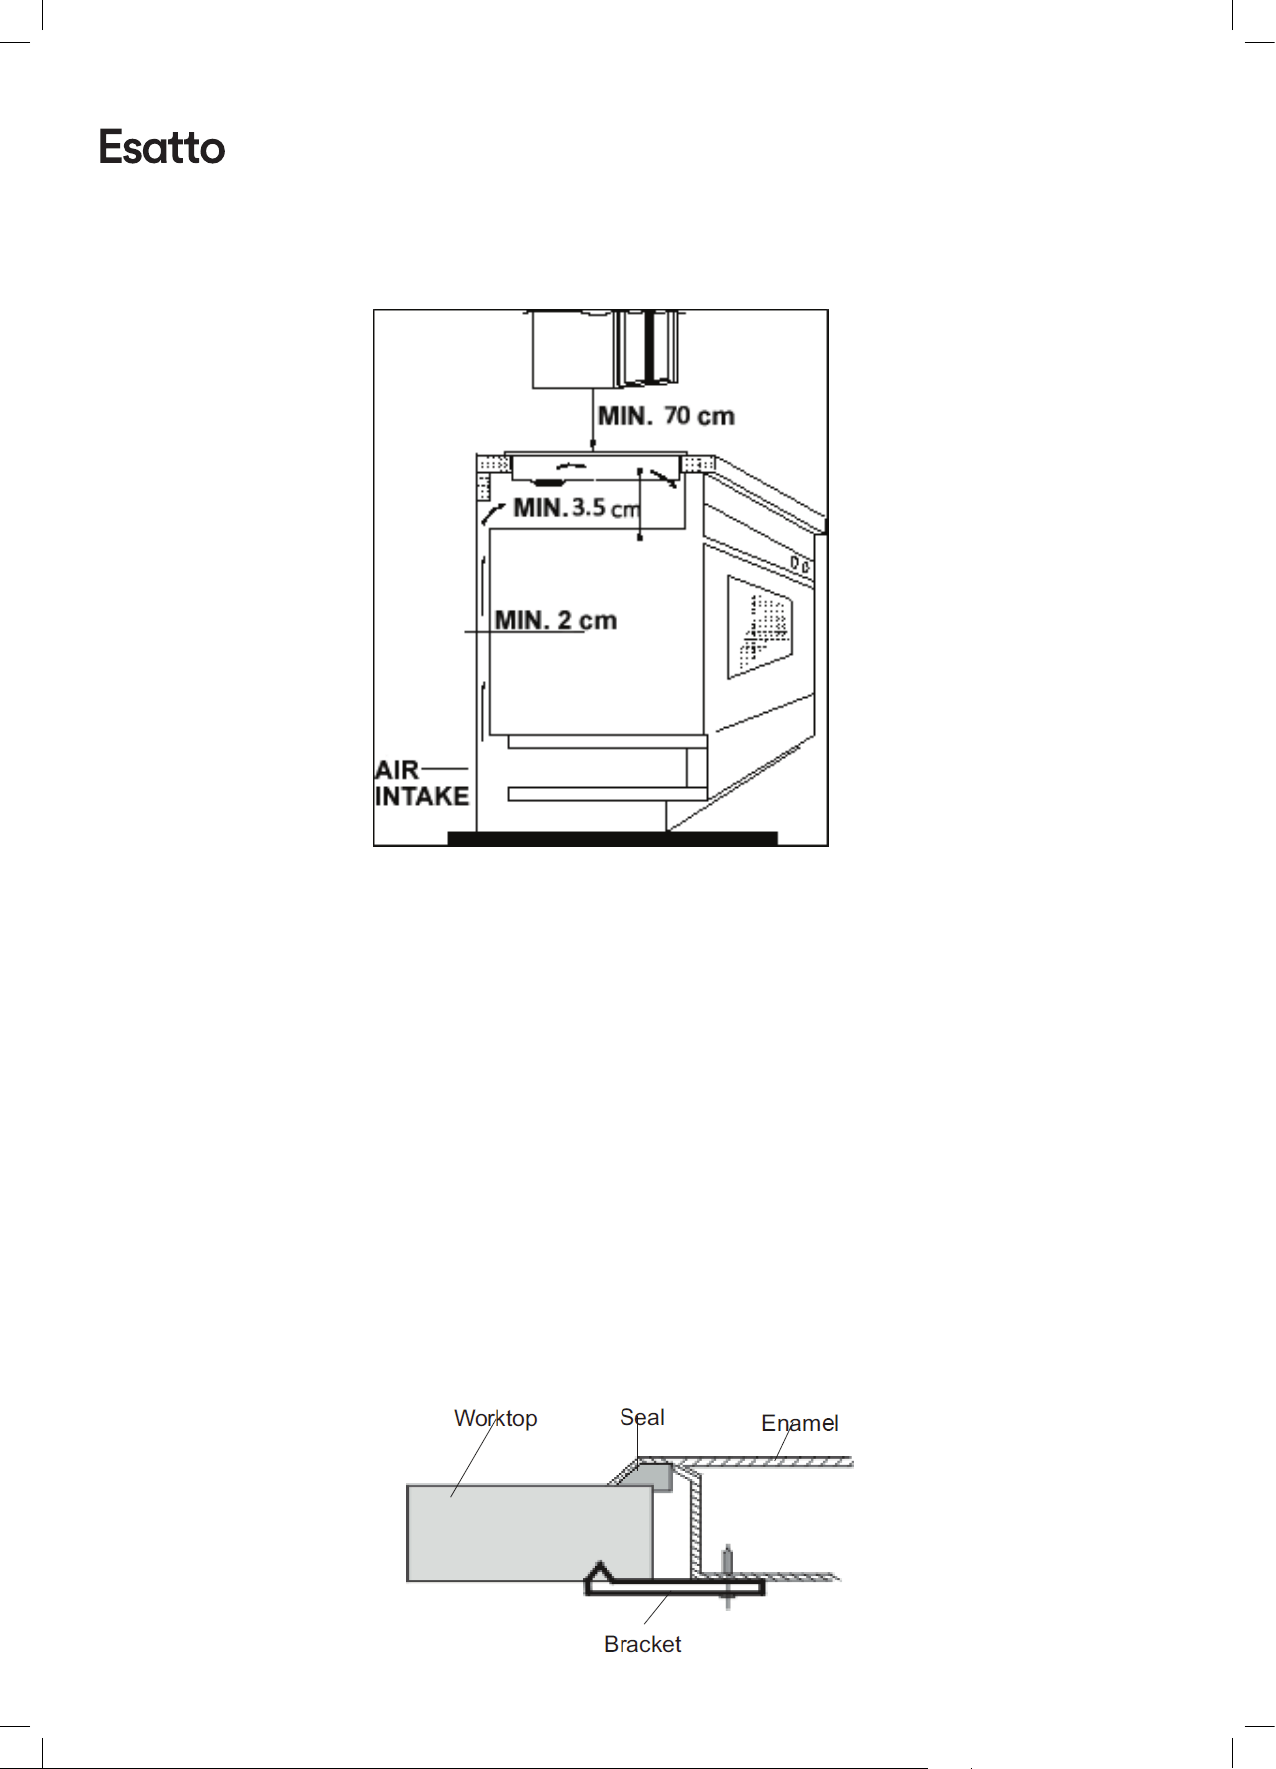
IMPORTANT! You must observe the ventilation requirements shown in the drawing below.
IMPORTANT! There are ventilation holes around the outside of the cooktop. You must ensure that these
holes are not blocked by the benchtop, when you put the cooktop into position.
→ Your Esatto cooktop comes tted with the sealing strip already attached to the underside
of the cooktop. This should not be removed as it will prevent liquid or spillages from
penetrating the underside of the cooktop.
→ Carefully turn the cooktop upside down and place it on a cushioned mat.
→ Fit the supplied brackets to each of the four corners of the cooktop underside. Place
a bracket on to each corner, ensuring that the outer hole lines up with the hole on the
corner of the cooktop.
→ Fasten the bracket to the corner using the screws supplied. Place the long screws
supplied into the outer xing holes of the bracket.
IMPORTANT! Do not use a silicon sealant to seal the appliance against the aperture. This will make it
dicult to remove the cooktop from the aperture in the future, particularly if it needs to
be serviced.
→ Carefully lower the cooktop into the cut-out.
→ When the cooktop is correctly positioned, tighten the long screws to x the cooktop
securely.
Loading ...
Loading ...
Loading ...