Loading ...
Loading ...
Loading ...
LEVELING
After installing, plug the refrigerator's power cord into a
3-prong grounded outlet and push the refrigerator into the
_nal position.
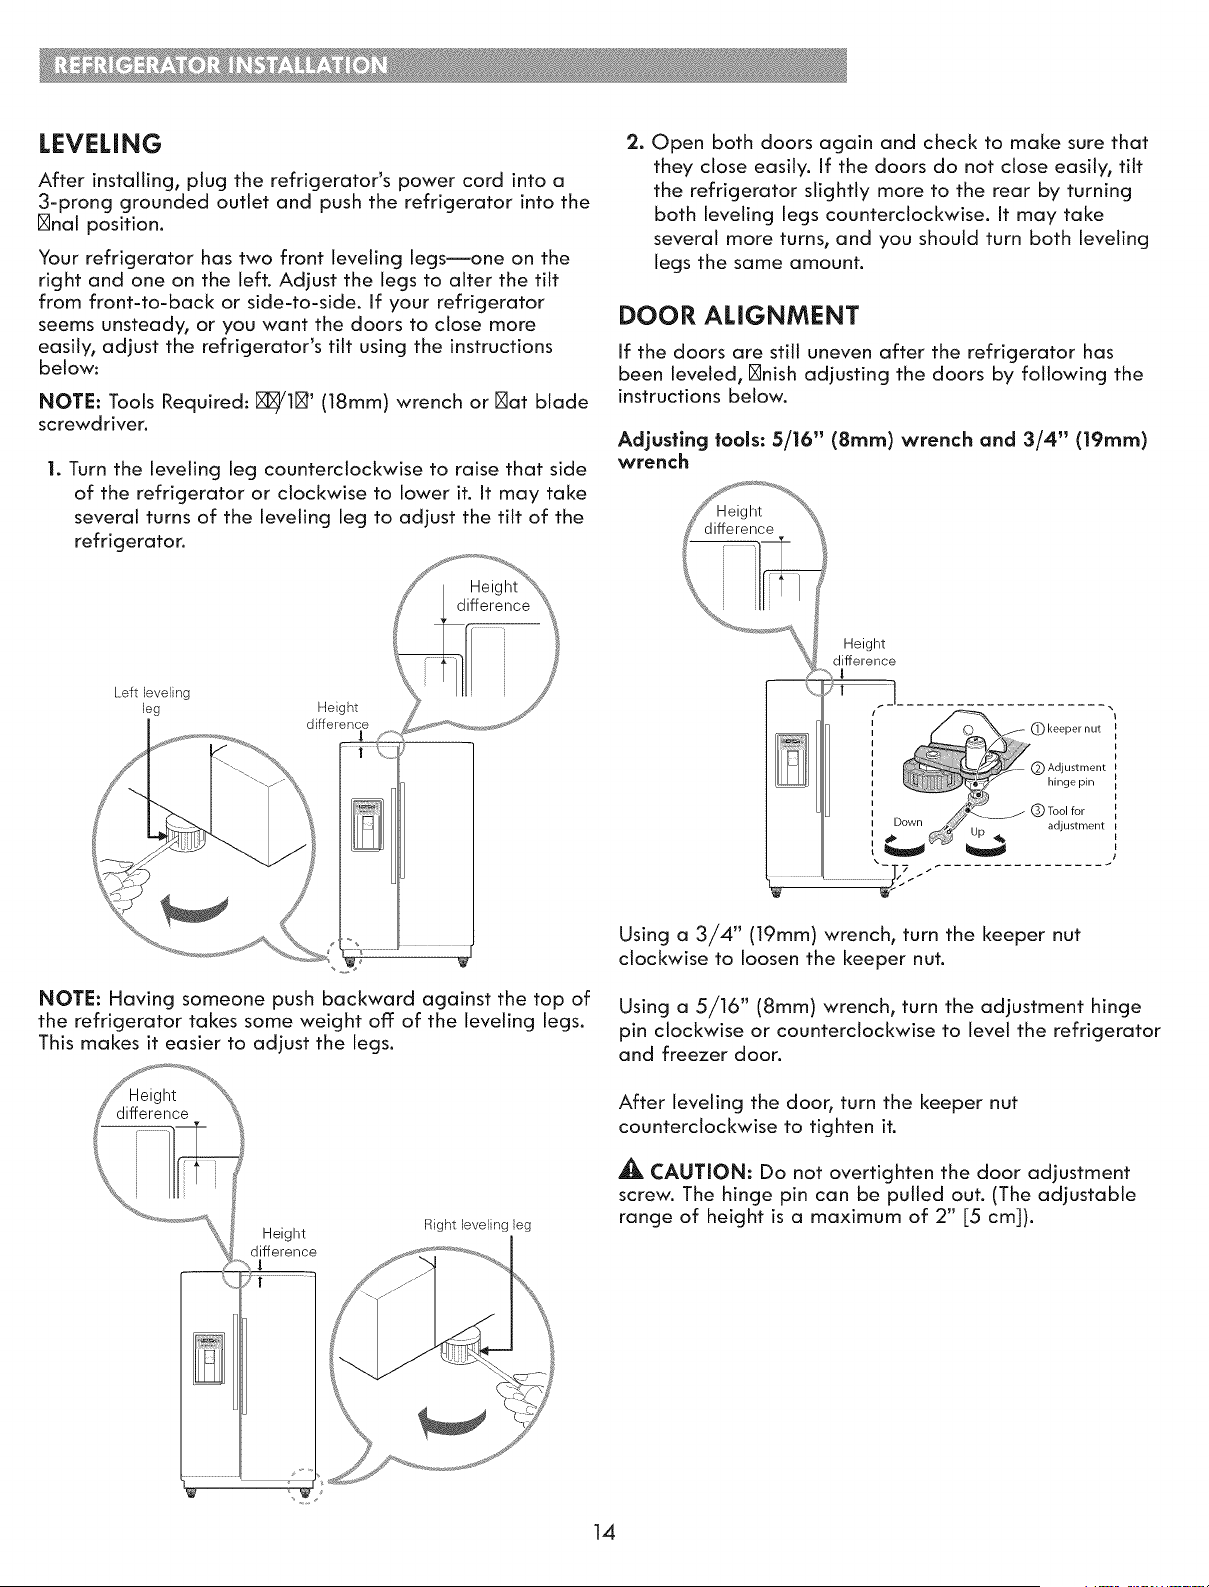
Your refrigerator has two front leveling legs--one on the
right and one on the left. Adjust the legs to alter the tilt
from front-to-back or side-to-side. If your refrigerator
seems unsteady, or you want the doors to close more
easily, adjust the refrigerator's tilt using the instructions
below:
NOTE: Tools Required: [_11_' (18mm) wrench or [_at blade
screwdriver.
1. Turn the leveling leg counterclockwise to raise that side
of the refrigerator or clockwise to lower it. It may take
several turns of the leveling leg to adjust the tilt of the
refrigerator.
2. Open both doors again and check to make sure that
they close easily. If the doors do not close easily, tilt
the refrigerator slightly more to the rear by turning
both leveling legs counterclockwise. It may take
several more turns, and you should turn both leveling
legs the same amount.
DOOR ALIGNMENT
If the doors are still uneven after the refrigerator has
been leveled, [_nish adjusting the doors by following the
instructions below.
Adjusting tools: 5/16" (Smm) wrench and 3/4" (19ram)
wrench
Left leveling
leg
Height
difference
NOTE: Having someone push backward against the top of
the refrigerator takes some weight off of the leveling legs.
This makes it easier to adjust the legs.
Height
difference
Right leveling leg
Height
difference
1
Down
C) keeper nut
(_ Adjustment
hinge pin
(_) Tool for
i_ adjustment
Using a 3/4" (19mm) wrench, turn the keeper nut
cJockwise to loosen the keeper nut.
Using a 5/16" (8mm) wrench, turn the adjustment hinge
pin clockwise or counterclockwise to level the refrigerator
and freezer door.
After leveling the door, turn the keeper nut
countercJockwise to tighten it.
_, CAUTION: Do not overtighten the door adjustment
screw. The hinge pin can be pulled out. (The adjustable
range of height is a maximum of 2" [5 cm]).
14
Loading ...
Loading ...
Loading ...