Loading ...
Loading ...
Loading ...
Assembly Section: Pages 8 - 11
To avoid installation difficulties, do not run the garage door opener until instructed to do so.
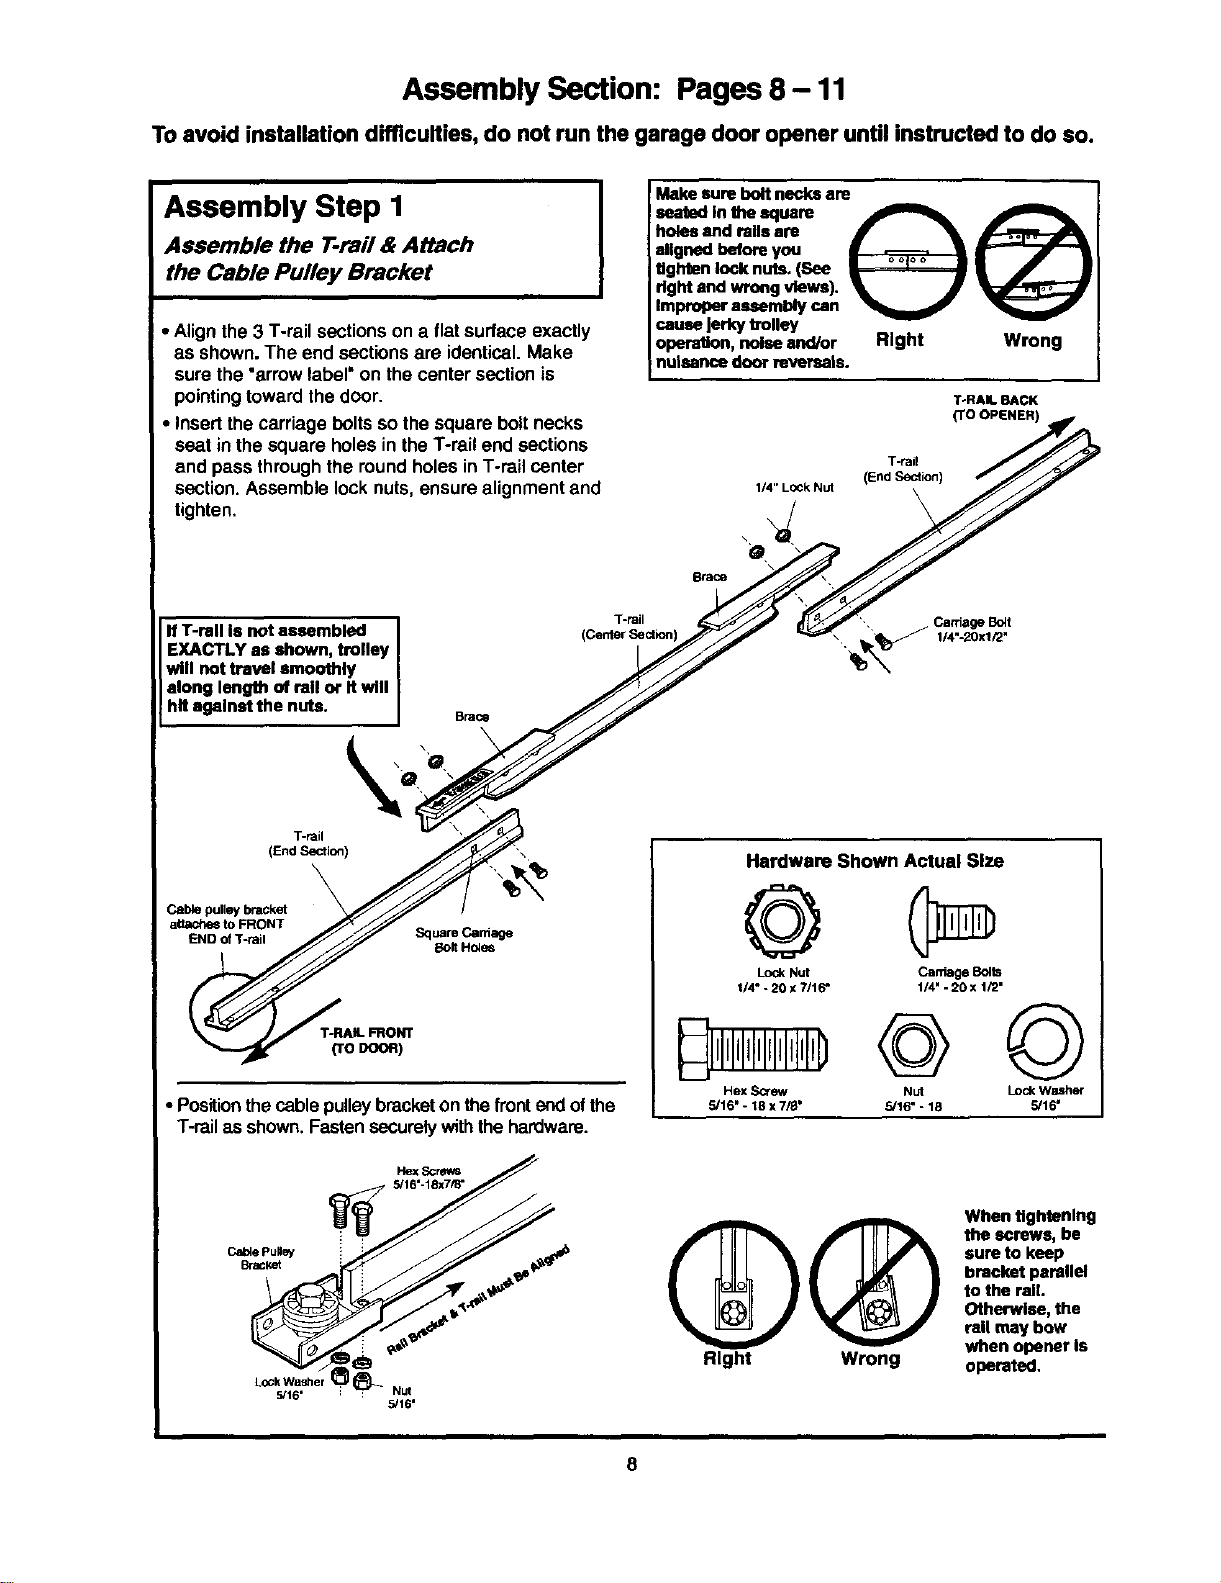
Assembly Step I
Assemble the T-rail & Attach
the Cable Pulley Bracket
• Alignthe 3 T-rail sectionson a flatsurface exactly
as shown. The end sectionsare identical.Make
sure the "arrowlabel=on thecentersectionis
pointingtowardthedoor.
• Insertthe carriage boltssothe square boltnecks
seat in thesquare holes inthe T-rail end sections
and passthroughthe roundholesin T-rail center
section.Assemble lock nuts,ensure alignmentand
tighten,
Makesureboltnecksare
inthe square
holesandrails are
alignedbeforeyou
tighten locknuts.(See
rightand wrongviews). _ J
Improperassemblycan
cause Jerkytrolley
opera.n, noiseand/or Right
nulsencedoorreversals.
T-rail
1/4" LOCkNut (End Section)
\
Wrong
T-RAIL BACK
(TO OPENER)
O
Brace
IfT-ragIsnotassembled I
EXACTLYas shown,trolley I
willnottravel smoothly
along length of railor Itwill
hit againstthe nuts. I
T-rail
(CenterSection]
-, Carriage Bclt
, _ 1/4"-20xl/2"
T-rail
(End Section)
Cable pulley bracket
aUa¢_4_ to FRONT
END of T-rail Square Carnage
Bolt Hctss
T-RAIL FRONT
(TODOOR)
• Positionthecable pulleybracketon thefrontend ofthe
T-railas shown.Fastensecurelywiththehardware.
Hardware Shown Actual Size
©
LockNut
1/4"- 20 x 7116"
Hex ,3cr_
5/16" - 18 x 7/8"
Carriage Bolts
1/4" -20 x 1/2"
@©
5/16" - 18 5/16"
HexScm_s
5/16'-18x7/8"
L°Ck_lW6a,sher _-Nut
5/16'
@@
Right Wrong
When tightenlng
the screws, be
sure to keep
bracket parallel
to the rail.
Otherwise, the
rail may bow
when opener Is
operated,
8
Loading ...
Loading ...
Loading ...