Loading ...
Loading ...
Loading ...

–
8
–
− The torch connector(3.1) is a screw fit onto port (5).
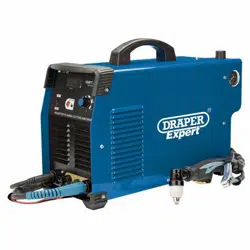
5 – Stock No.70058 shown.
FIG.
6.5 TORCH ASSEMBLY – FIG.6
Warning! Under no circumstances must the plasma
nozzle be removed or any other work be carried out on
the torch with the machine switched on. Ignoring this
precaution could lead to serious burns or contact with
high DC voltages.
If the machine has just been used for cutting, allow the
cooling air to stop before switching the machine off for
torch servicing.
The torch should be kept free of slag at all times to
ensure the free passage of air.
To assemble / dismantle the torch:
− Invert the torch so the tip points upwards.
− Unscrew and remove the shield cup.
− Remove the tip, swirl baffle and electrode.
− Ensure the torch head thread is upper most.
− Fit electrode into end of torch head.
− Fit swirl baffle onto electrode, ensure is it seated fully
onto the electrode.
− Fit tip onto the swirl baffle.
− Fit shield cup and screw on.
− The tip and electrode need replacing when worn.
− Indication of wear are a loss off cutting capacity or
that the cut is no longer 90°.
− When inspecting the tip look for erosion of the hole in
the centre of the tip or a build up of metal residue.
− When inspecting the electrode look for erosion in
centre of the electrode.
6 – Image is representative only.
FIG.
7. OPERATION
7.1 BASIC OPERATIONAL
PROCEDURES
− Check all safety instructions have been observed.
− Check correct air supply is connected.
− Drain any water from bowl on the filter regulator (if
fitted).
− Set machine to required current range according to
the thickness of metal to be cut.
Warning! DO NOT change the current range while
cutting.
Caution! DO NOT attempt to cut material beyond the
range specified, as this will damage the torch.
− Check the torch consumables are in good condition.
− Check torch and earth lead connections are tight.
− Connect return lead to the work piece, using an area
free of rust and paint, for a good contact.
− Connect to mains supply and switch on. The power
LED will illuminate.
− Adjust air pressure to the required setting.
− Set the cutting current via the current control, an
indication of the setting will be shown on the LED
amperage display.
− Adjust the post gas control, if cutting at a high current
setting or making a long cut set the control near
maximum, this will give a longer cool time for the
torch.
− Place the torch at the edge of the work piece with the
centre of the tip slightly beyond the edge. Press the
torch trigger. The air will flow after a short delay the
arc will ignite. The torch should be moved steadily
along the work piece at a rate slow enough for the
metal to be cut right through in one pass. If the cut
penetration is incomplete, then the torch could be
damaged. (While the air is flowing, check it is still at
the correct pressure setting.)
− When the cut is complete, release the torch trigger
button. The arc will immediately extinguish, but air
will continue to flow for a short time. DO NOT turn
the machine off until this cooling air has stopped
flowing as this is necessary to prevent damage to the
torch.
Piercing:
When piercing, the torch head should be angled back so
as to allow the molten material to escape to one side.
The normal angle of cut can be resumed once the metal
has been pierced.
Caution! Piercing will reduce the life of the torch.
Note: For details of our full range of accessories and
consumables, please visit drapertools.com
(6.1)
(7)
(3.1)
(5)
(6.2)
Loading ...
Loading ...
Loading ...
